QuickBooks Desktop For WHMCS
From ModulesGarden Wiki
(Difference between revisions)
|
|
| Line 395: |
Line 395: |
| | |} | | |} |
| | {| | | {| |
| − | |style="padding: 0px 0px 30px 15px;"|2. It may happen that taxes are counted incorrectly for invoices with multiple items where part of the items is taxed and some are not. Please be careful! | + | |style="padding: 0px 0px 30px 15px;"|2. |
| | |} | | |} |
Revision as of 13:45, 11 February 2016
| QuickBooks Desktop For WHMCS module allows you to ......
|
| ✔ Supports WHMCS V5 and V6
|
Installation
This tutorial will show you how to successfully install and configure QuickBooks Desktop For WHMCS.
We will guide you step by step through the whole installation and configuration process.
|
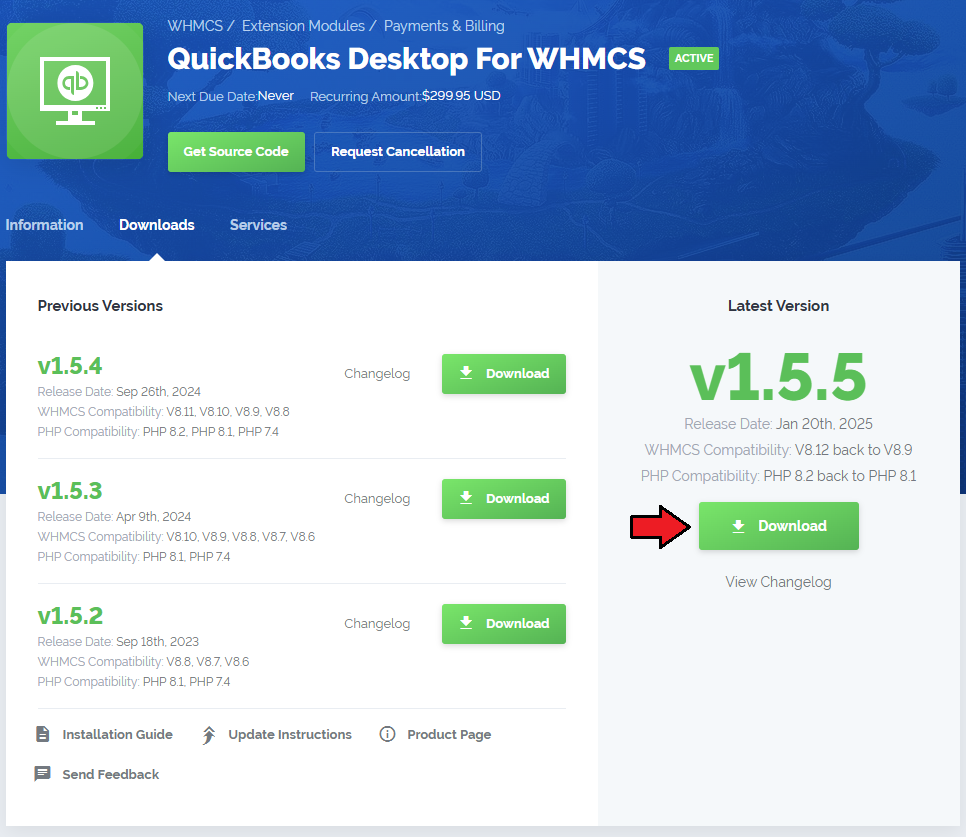
| 1. Log in to your client area and download QuickBooks Desktop For WHMCS.
|
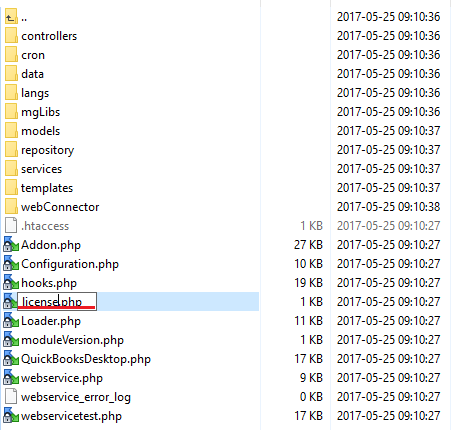
2. Upload and extract the module into the main WHMCS directory.
Files in your WHMCS directory should look like on the following screen.
|
3. When you install QuickBooks Desktop for the first time you have to rename 'license_RENAME.php' file.
File is located in 'modules/addons/QuickBooks_Desktop/license_RENAME.php'. Rename it from 'license_RENAME.php' to 'license.php'.
|
4. In order to configure your license key, you have to edit the previously renamed 'license.php' file.
Enter your license key between quotation marks as presented on the following screen. You can find your license key in your client area → 'My Products'.
|
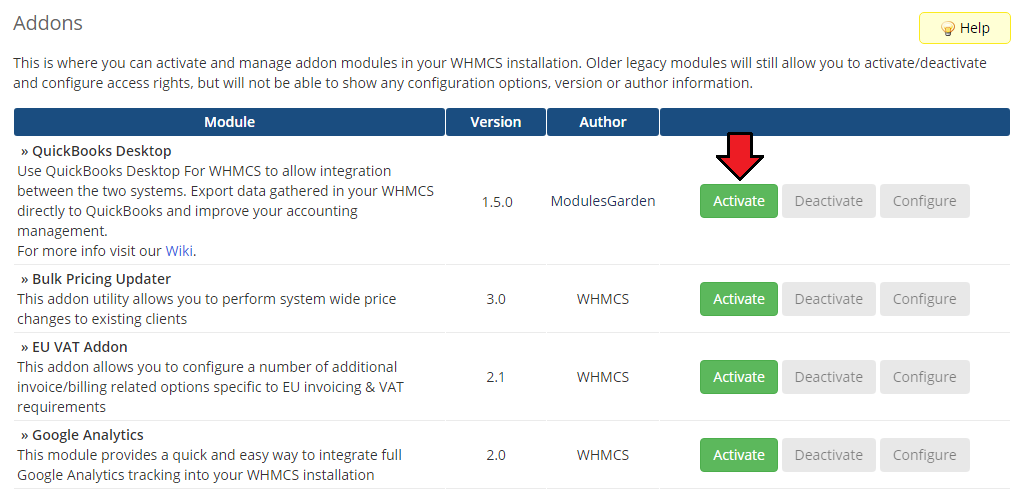
5. Now you have to activate the module in your WHMCS system.
Log in to your WHMCS admin area. Go to 'Setup' → 'Addon Modules' . Afterwards, find 'QuickBooks Desktop' and press 'Activate' button.
|
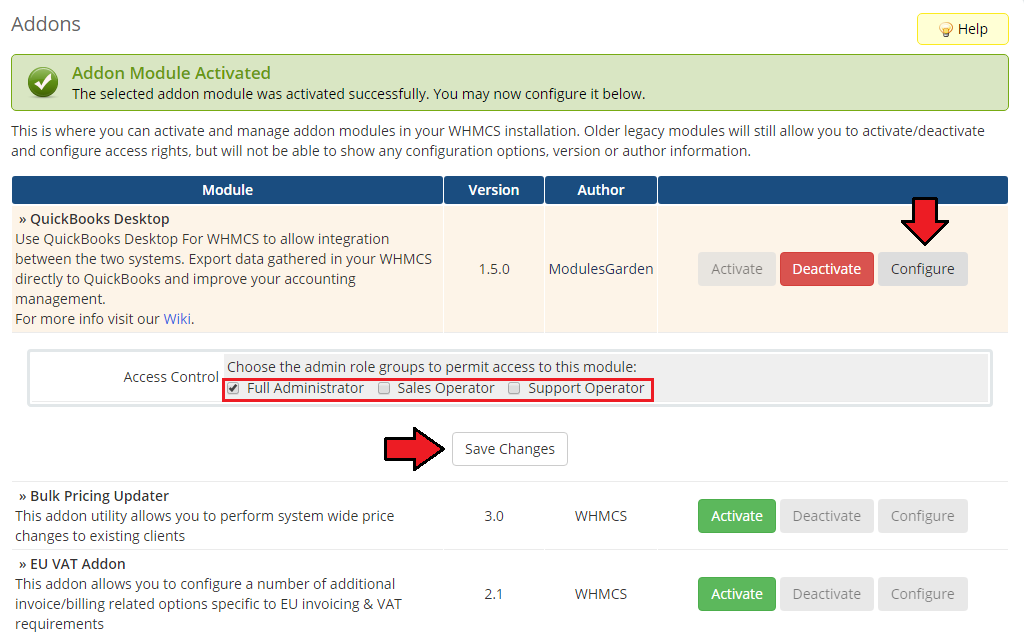
6. In the next step you need to permit access to this module.
To do so, click on 'Configure' button, check required group of administrators and press 'Save Changes'.
|
7. You have just successfully installed QuickBooks Desktop For WHMCS!
You can access your module under 'Addons' → 'QuickBooks Desktop'.
|
Configuration and Management
QuickBooks Desktop For WHMCS is a module which allows you to export any data on clients, invoices and payments directly to QuickBooks.
Warning! In order to properly use QuickBooks For WHMCS, it is required to have OAuth PHP Class installed!
Make sure OAuth PHP Class is installed in your system, only then you can proceed to the proper configuration of QuickBooks For WHMCS.
|
API Keys
Before you proceed to proper configuration of the module, you will need to generate some data directly in QuickBooks.
Please follow the steps:
1. Log in to: https://developer.intuit.com/
- Use your QuickBooks account details to sign in.
|
| 2. Once you are logged in, find 'My Apps' tab, press it and then 'Create a new app.'
|
| 4. Then mark 'Accounting ' and 'Create app.'
|
| 5. Once a new app has been created, you will be moved to its 'Development' section, but we need you to choose 'Production.'
|
6. If your account data is properly filled in, you will have to complete any information on the application and 'Save Changes.'
However, if your account data are not complete, you will have to fill them out firstly!
|
7. Now, you are finally in the right place. In 'Keys' section, there are:
- App Token
- OAuth Consumer Key
- OAuth Consumer Secret
These keys are very important, you will need them in the very next step of the module configuration. Please keep them!
|
Configuration
| In order to configure your module properly, proceed to 'Addons' → 'QuickBooks' → 'Configuration.'
|
1. Start with API configuration, since this part is the very basic and absolutely necessary to proceed to any further steps.
Currently your 'Connection Status' is 'Not Connected.' In order to connect to QuickBooks press 'Change' button marked on the screen below:
|
A box will appear where you will have to type in all the previously generated data.
It will allow the module to authenticate your identity in QuickBooks system and let connect your WHMCS with it.
These are your QuickBooks keys that you have generated in the previous step:
- Token
- Consumer Key
- Consumer Secret Key
- Sandbox - if you have used 'Production' to generate 'Token' and 'Keys,' unmark this checkbox!
- Debug Mode - select to follow logs in 'Module Log' section
Save changes firstly and only then a button 'Connect to QuickBooks' appears, press it to connect to QuicBooks.
|
If entered data are correct, you will be redirected to QuickBooks where you will have to agree to authenticate the connection.
Only then connection status in your module will change to 'Connected,' and data on your company will be automatically downloaded from QuickBooks and filled out here.
From now on will be able to use your QuickBooks For WHMCS.
|
You have to do this step once only!
It will not be required from you to enter token and consumer keys again even if the module has been deactivated in the meantime. Connection with QuickBooks will remain successful.
|
2. Multi-Currency configuration.
If connection with QuickBooks has been properly setup, currency details will be visible.
- View Home Currency
- MultiCurrency status
The above data are synchronized with your QuickBooks account.
|
3. Cron configuration - set up cron jobs.
The first one should be run regularly, every one hour interval is recommended. It is responsible for synchronization with QuickBooks of any updates done in WHMCS.
The second cron job is run only once. It exports all clients, invoices and transactions to QuickBooks once our module is activated in your WHMCS.
|
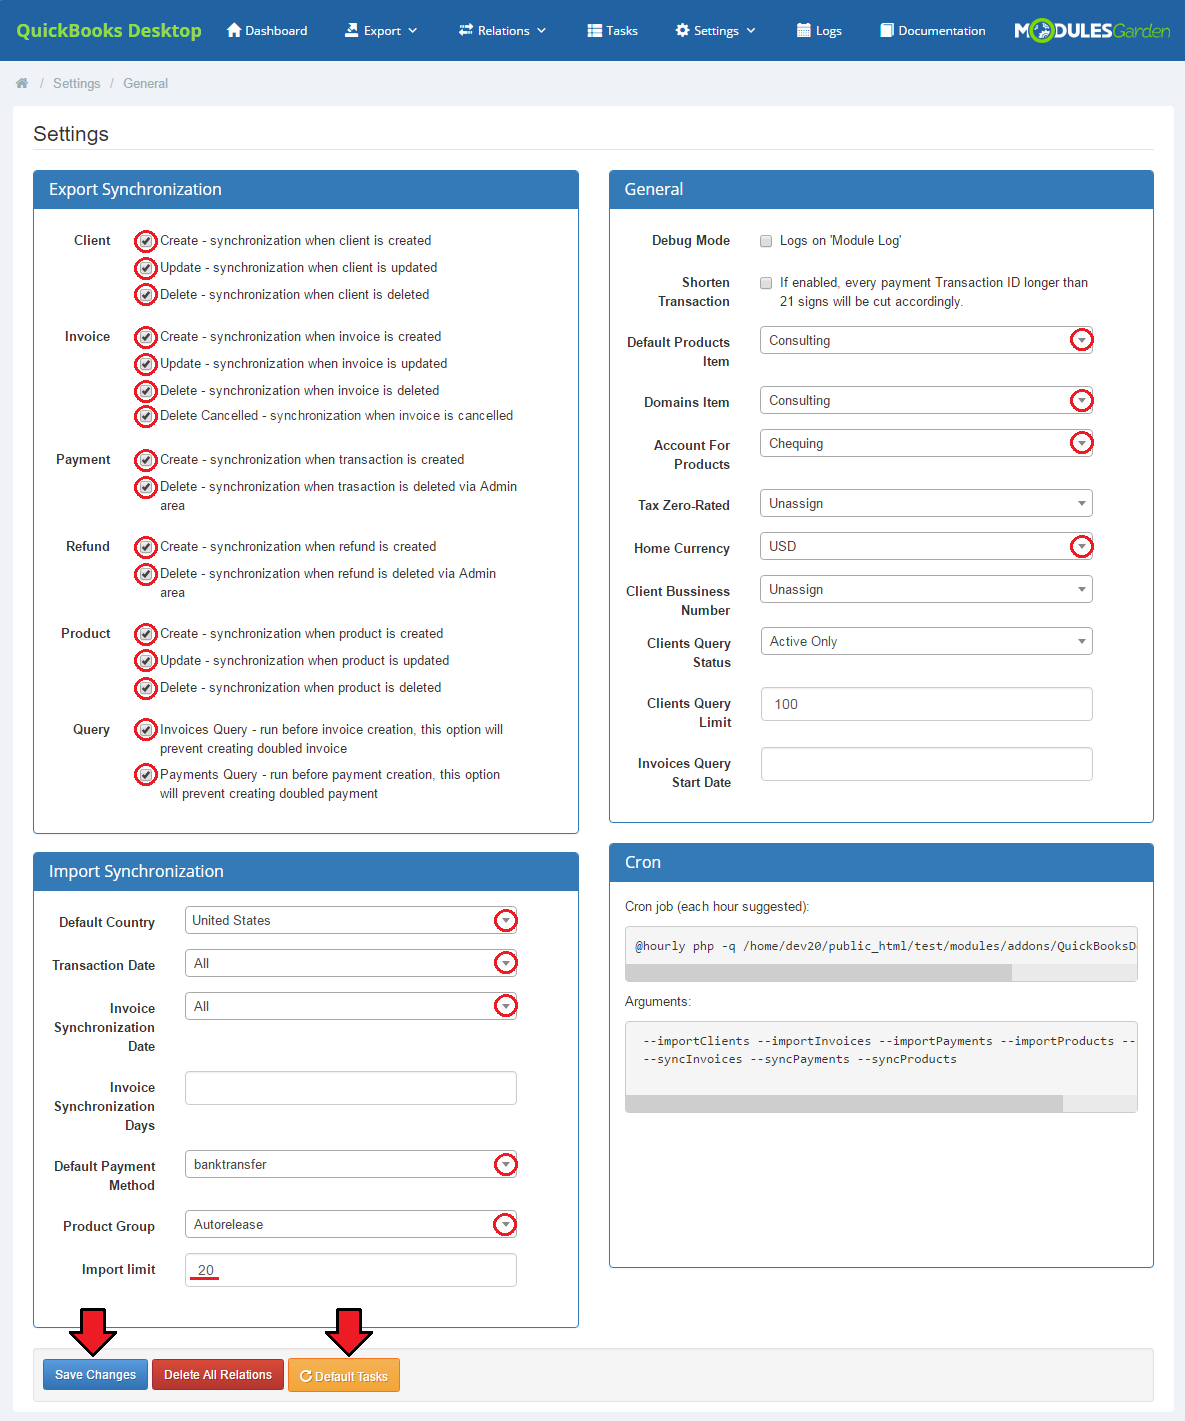
4. Synchronization Settings - decide which of the possible synchronization options you want to enable.
Tick the ones you are interested in.
|
There are:
Clients synchronization:
- Create - done on client's creation
- Update - takes place when client account has been updated
Invoices synchronization:
- Create - done on invoice creation
- Update - takes place when an invoice has been updated or altered
- Delete - takes place when an invoice has been deleted
Payments synchronization:
- Create - done when a transaction has been completed
- Delete - takes place when a transaction has been deleted by an admin
Refunds synchronization:
- Create - done when a refund has been completed
- Delete - takes place when a refund has been deleted by an admin
- Please note that both payments and refunds are handled together and in dashboard are summarized as one point called 'Payments'
|
Apart from choosing required synchronization options, you have to decide here, which items from QuickBooks, 'Products ' and 'Domains' will be associated with.
Note: Default Product will be used only when tehre is no relation set for the selected product in 'Relation: Product' section.
Choose other options from the dropdown menu to set up.
- Tax Zero-Rated - used whent charged item is not taxed
- Tax Type:
- Exclusive - tax is added to the price
- Inclusive 0 - price includes the tax
- Out of scope of GTS
- Client Display Name Format - use available tag fields to adjust the displayed name view.
- Shorten the Transaction ID - select this option to cut every payment Transaction ID that is longer than 21 characters.
Press Save Changes button.
|
Management
At this section we will show you the possibilities of QuickBooks For WHMCS.
Once it has been properly connected with QuickBooks and all the configuration is now ready, we can move on to 'Export' section.
|
Export
Our module allows several ways to export any data gathered in your WHMCS.
Read the below points to learn what data can be synchronized with QuickBooks and what are the possible means of such synchronizations.
|
Clients
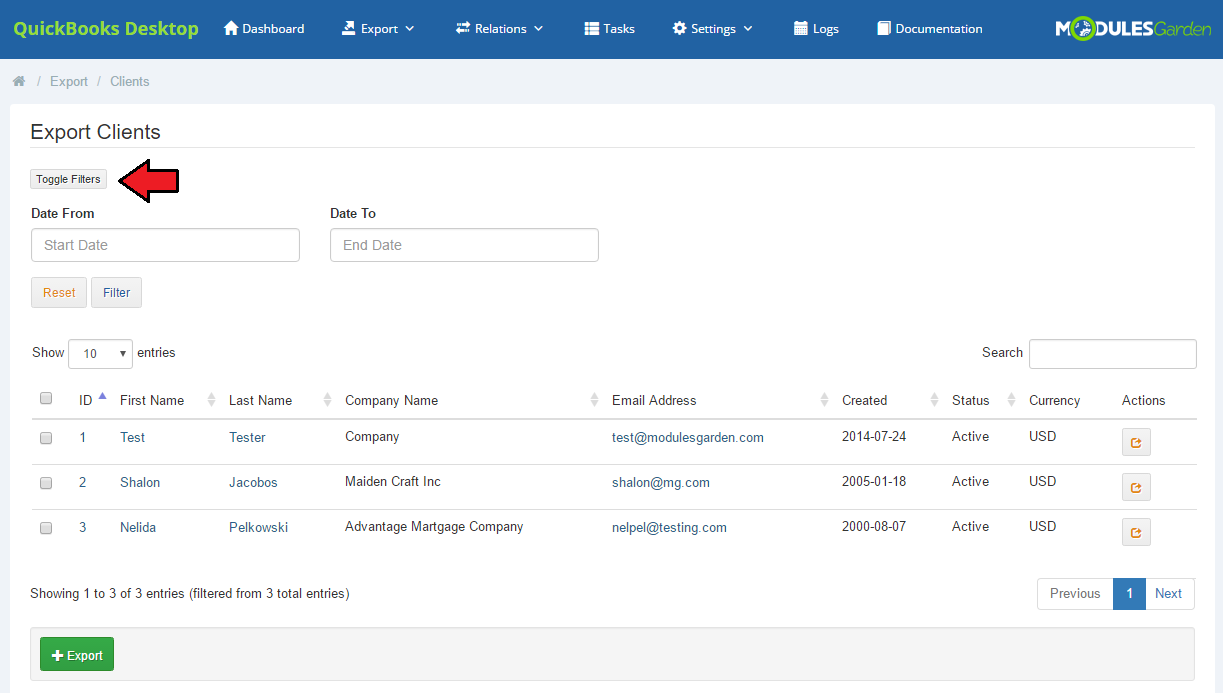
The first option offered by our module is the export of clients from WHMCS to QuickBooks, proceed to 'Export' → 'Clients.' If you are using QuickBooks For WHMCS for the first time,
you will see here a list of all clients who exist in your WHMCS and have not been synchronized with QuickBooks yet.
Use filter to find clients with their account created on the specified in the filter period of time.
|
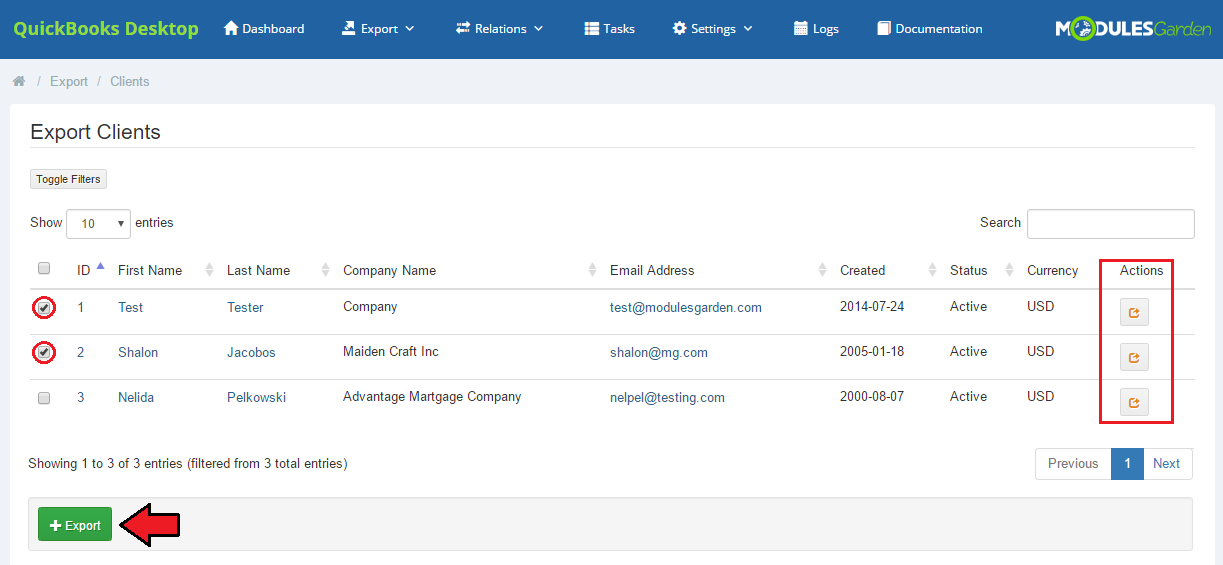
Now, you can manually export all of the clients available on the list or choose only some of them.
Check boxes next to the clients you are going to export and press 'Export' button as marked on the screen.
If you want to export only one client you can do it by pressing 'Export' button located in 'Action' column next to the name of the client.
|
If a client has already been exported from WHMCS to QuickBooks, they will no longer be visible on the list.
All clients newly added to WHMCS will be automatically synchronized with QuickBooks unless otherwise stated in 'Synchronization Settings.'
|
Invoices
The other choice is the export of invoices.
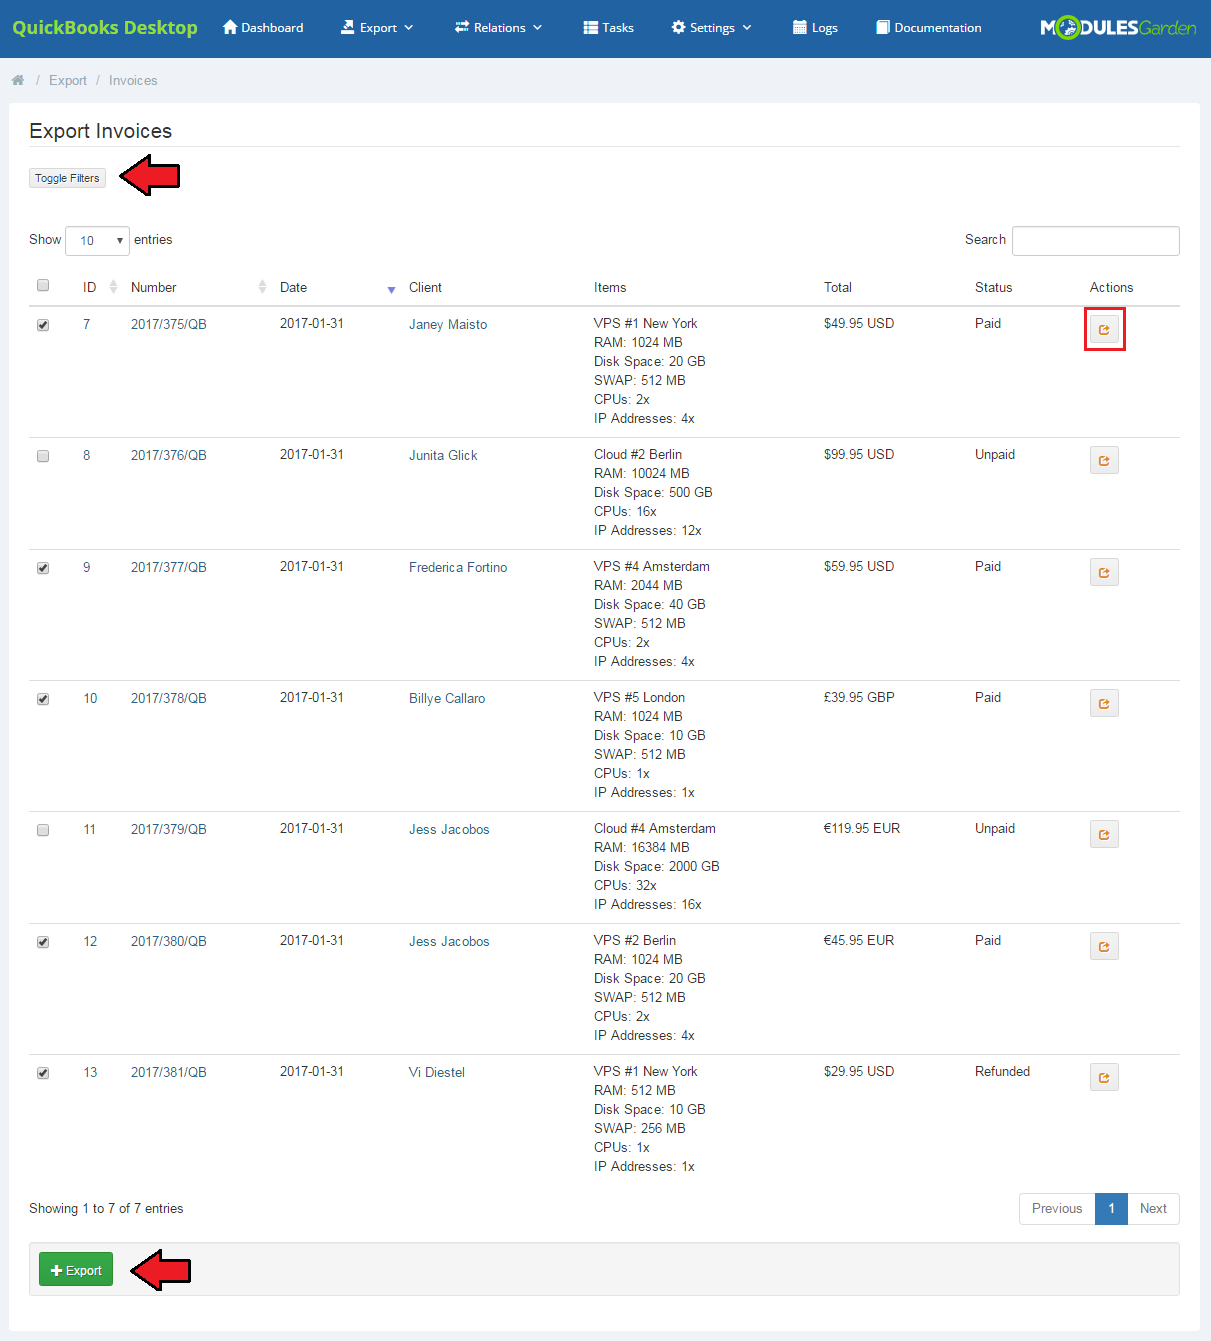
Proceed to 'Export' → 'Invoices' and you will find a list of all invoices existing in our WHMCS that have not been synchronized with QuickBooks yet.
In details you will find information on the invoice:
- ID
- date when it was created
- client assigned to the invoice
- items on the invoice
- its status
- a total sum.
|
Just like in case of clients:
- press 'Toggle Filters' to use filter to find invoices from specified period if time
- perform mass export of all checked invoices
- export individual invoices to QuickBooks.
- Use buttons marked on the screen to perform the above enumerated actions.
|
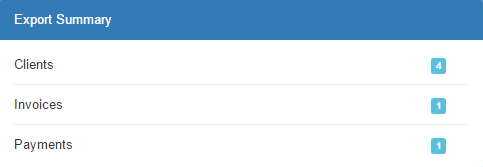
| Once you have exported some of the invoices you will see their number along with the number of any transactions connected with them in 'Summary' table on the dashboard.
|
Keep in mind that all newly added (after the first usage of QuickBooks For WHMCS) invoices and transactions are automatically synchronized and exported to QuickBooks
unless otherwise stated in 'Synchronization Settings.'
|
Relation
It is possible to manually declare relations between WHMCS clients, products as well as invoices and corresponding to them QuickBooks elements.
This feature is especially helpful when you need to avoid confusion and misunderstandings.
Please note that this is an extra option, which gives the possibility to manually configure relations.
|
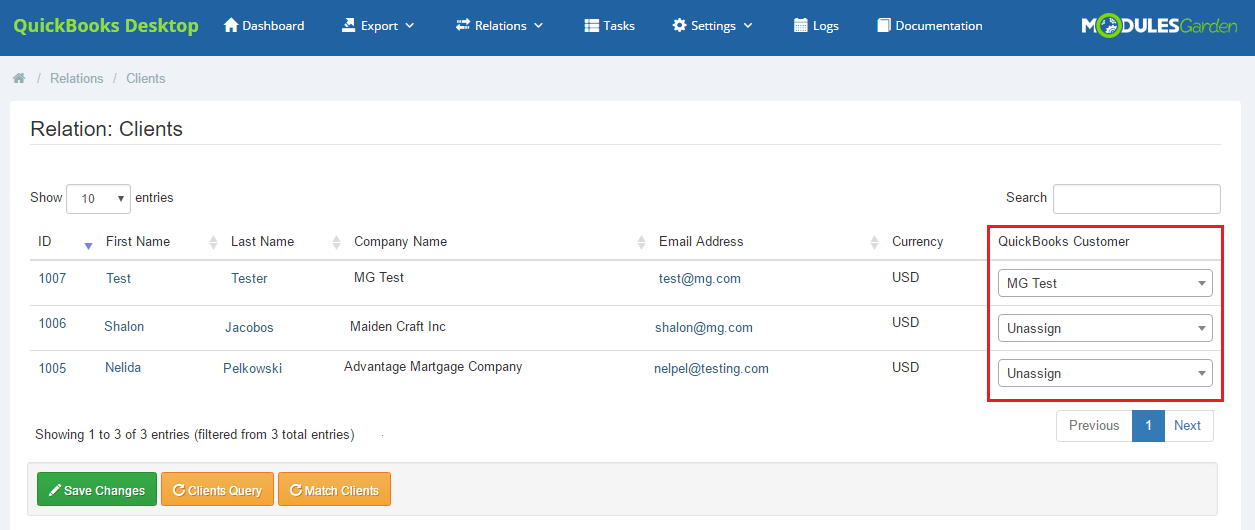
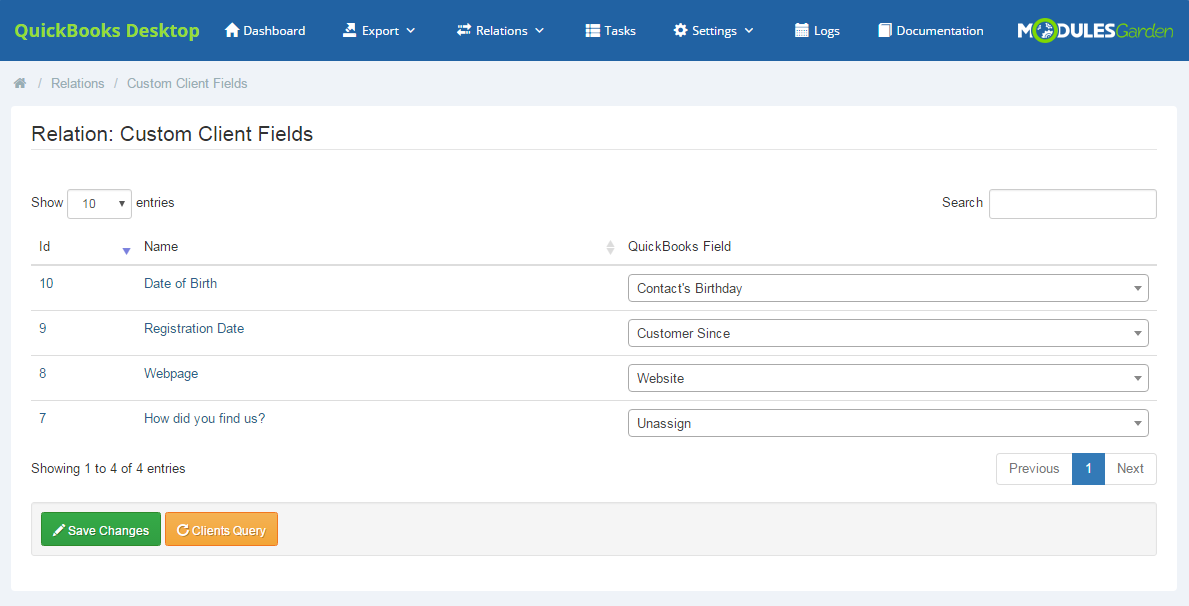
Relation: Clients
The first possible relations to be declared are relations between WHMCS clients and QuickBooks customers.
Proceed to 'Relation' → 'Clients,' you will find there a list of all clients, with their email addresses, that exist in WHMCS,
those who have not been exported to QuickBooks yet as well as those already exported.
This functionality is especially helpful when one of your clients has more than one account in WHMCS, but you do not want to double accounts in QuickBooks.
Then you can simply assign such client to an already existing customer in QuickBooks.
|
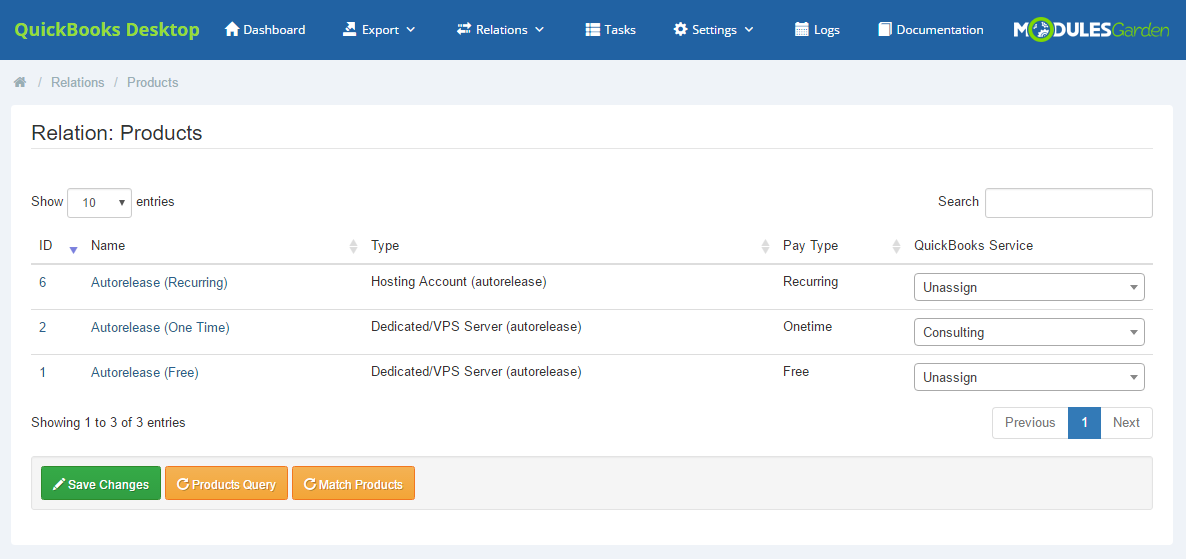
Relation: Products
Products relations can be declared manually and for each product separately along with those declared in 'Configuration' → 'Synchronization Settings.' '
Proceed to 'Relation' → 'Products,' you will find there a list of all products with their type and payment standard.
In the last column there is a dropdown menu with all QuickBooks items that can be assigned to exported products.
|
| If you need, you can add new products to QuickBooks' items list, just press 'New Product' button marked on the screen below.
|
Give the new item a name, additionally you can describe it shortly, state its price/rate and choose account.
Once you save changes, new item will be visible on the QuickBooks item dropdown menu. You can now use it to assign WHMCS products to it.
|
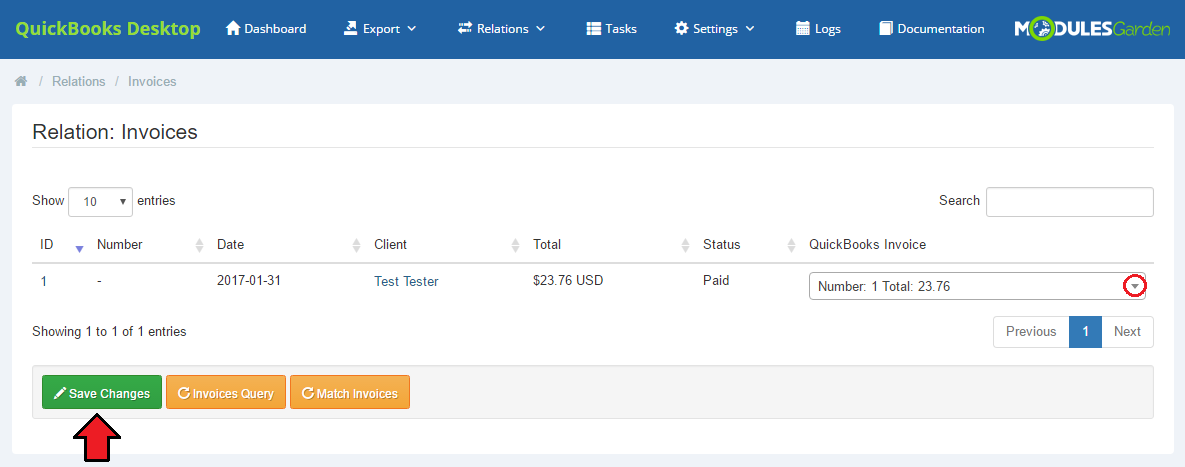
Relation: Invoices
In 'Relation' → 'Invoices' directory, you will find a list of all WHMCS invoices with their ID, date of creation, assigned client, total sum on it and status.
It is possible to assign such WHMCS invoice to another invoice already exported to QuickBooks. Just choose such from dropdown menu and save changes.
Transactions between the two invoices will be synchronized then.
|
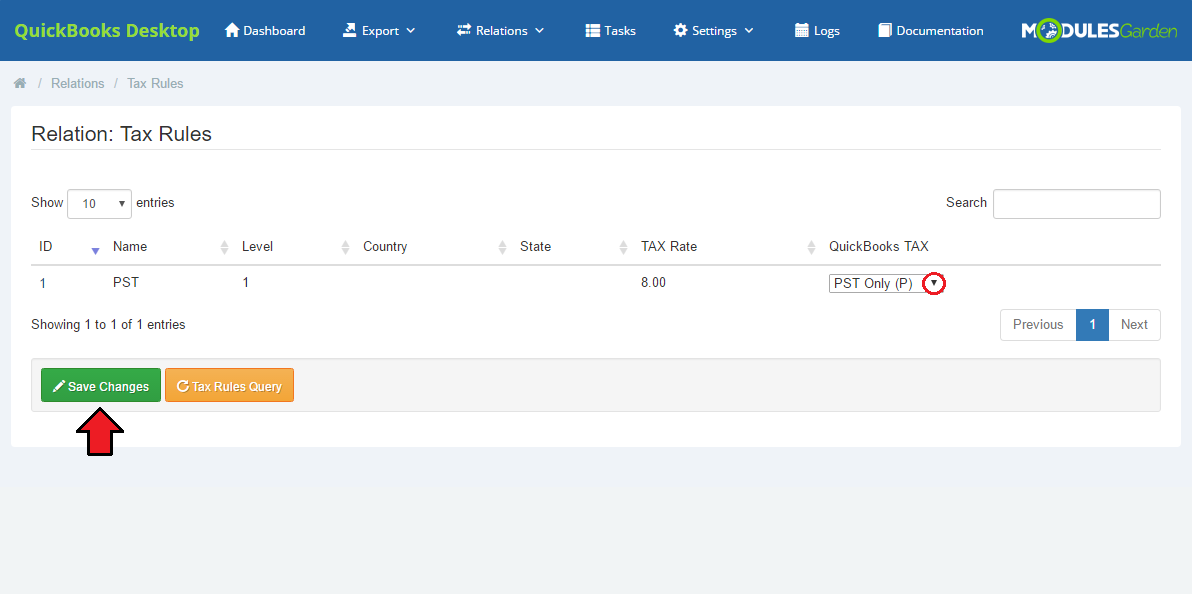
Relation: Tax Rules
In 'Relation' → 'Tax Rules' directory, you will find a list of defined taxes rules.
Assign each rule to a specific QuickBooks tax. Select one from a dropdown menu and save changes.
|
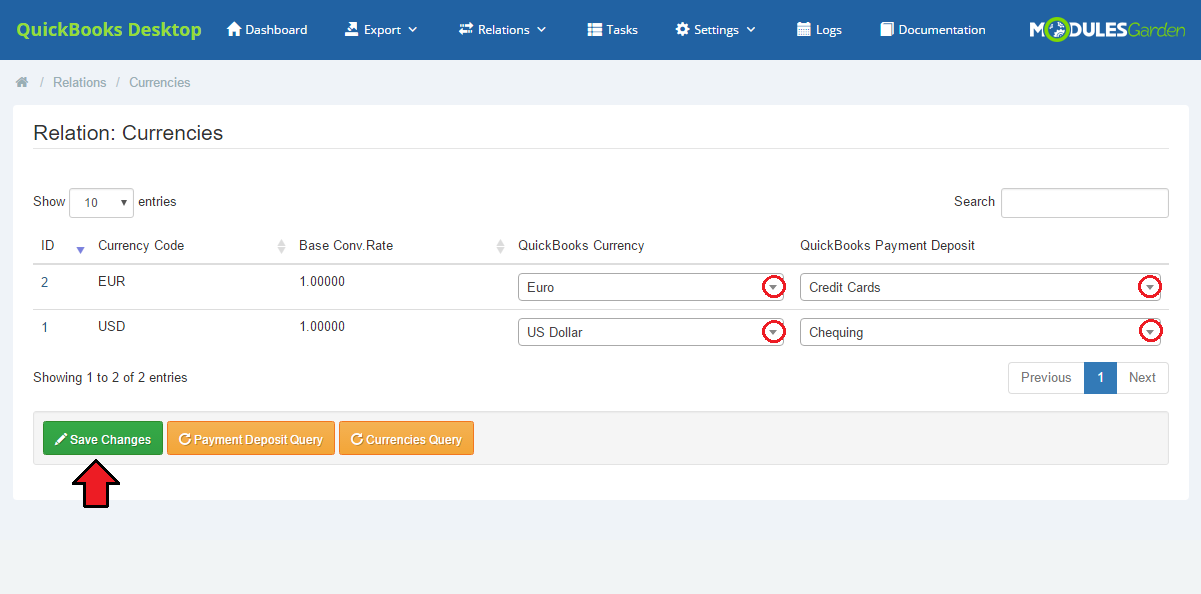
Relation: Payment Deposits
In 'Relation' → 'Payment Deposits', there is a list of available currencies with their base converting rate.
Assign QuickBooks payment Deposits to a single currency.
|
Cron Jobs
Properly set up cron job with a recommended interval is responsible for synchronization of any updates done on invoices or clients' accounts.
All changes will be immediately visible in QuickBooks, after cron job has run, without any additional actions taken manually from QuickBooks For WHMCS.
|
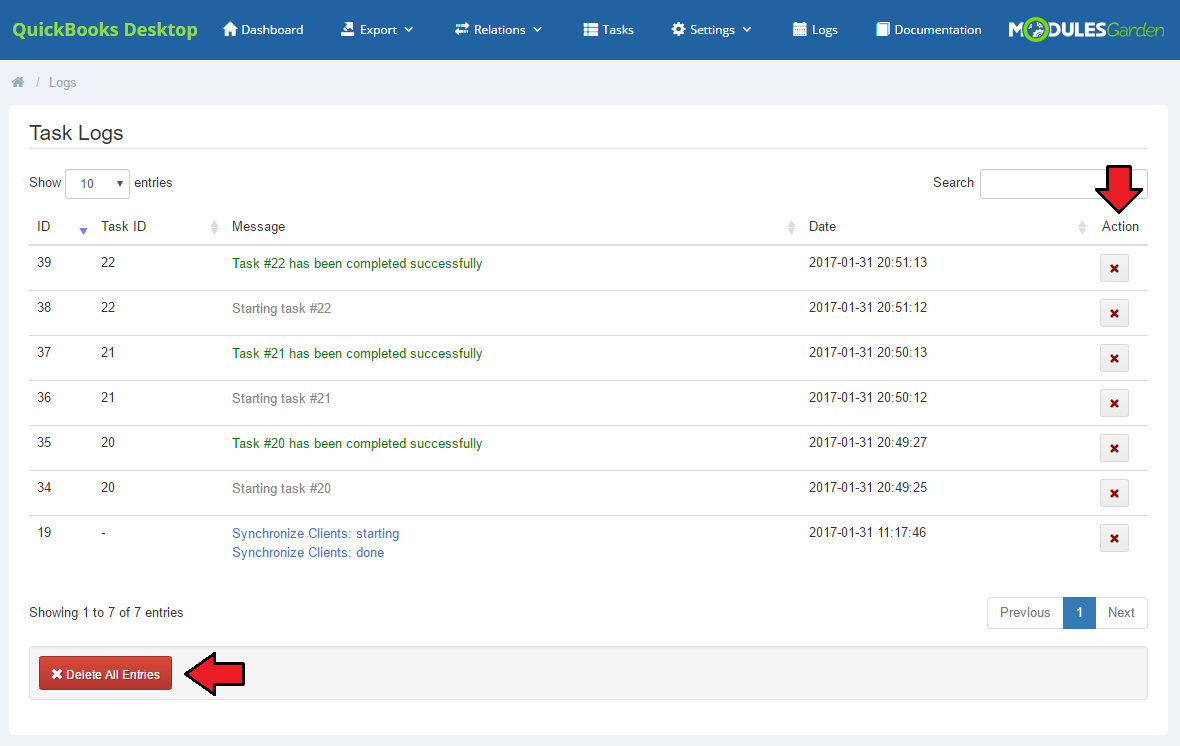
Logs
In 'Logs' tab there are enumerated ALL actions on clients, invoices and transactions.
No matter if they were taken manually in the module, if they were taken automatically or by a cron job.
Find there a list of all entries with precisely described details and an exact date of the action.
|
| Clear all the entries or delete only some of them. Use buttons marked on the screen above.
|
Dashboard
'Dashboard' includes two useful and user-friendly tables.
The first one, 'Summary' contains data on the number of exported clients, invoices and payments together with refunds.
The number includes exports done in all possible manners.
The second table contains information on crons. You may read when the last cron was run and what time period it covered.
|
Documentation
| The very last tab 'Documentation' once clicked will redirect you to the article you are currently reading!
|
Tips
1. Status of the invoice in QuickBooks may differ from the one visible in WHMCS.
- It will be marked as paid only if it is associated with payments on exactly the same amount.
- If there was no such real payment, the invoice will be marked as 'Unpaid.'
|
Common Problems
| 1. When you have problems with connection, check whether your SELinux or firewall does not block ports.
|
