GoDaddy Domain Registrar For WHMCS
Contents |
About GoDaddy Domain Registrar For WHMCS
| GoDaddy Domain Registrar For WHMCS is a domain registrar module that enables automation of domains provisioning in your WHMCS system with Wild West Domains. Your customers will be able to manage their domains and DNS records directly in your WHMCS client area. |
- Module Features:
| ✔ Supports 299 Different TLDs & gTLDs |
| ✔ Register Domain With The Cheapest TLD Type Automatically |
| ✔ Auto Renew Script - Enable/Disable Auto Renewal For All Domains |
| ✔ Synchronize Domain Expiration Date And Status |
| ✔ Synchronize Domain Transfer Status |
- Admin Area Features:
| ✔ Register/Transfer/Renew/Cancel Domain |
| ✔ Update Nameservers |
| ✔ Update Contact Details |
| ✔ Get EPP Code |
| ✔ Toggle ID Protection |
| ✔ Toggle GoDaddy Auto Renewal |
| ✔ Access Shopper ID and Password |
| ✔ Reset Shopper Password |
| ✔ Define TLD Type For Each Domain |
| ✔ View Domain Logs |
| ✔ Check Current GoDaddy Account Balance Through Widget |
- Client Area Features:
| ✔ Log In To Control Panel |
| ✔ Access Shopper ID and Password |
| ✔ Enable/Disable Domain Auto Renewal |
| ✔ Manage Nameservers |
| ✔ Lock/Unlock Registrar |
| ✔ Update Contact Details |
| ✔ Manage DNS Records |
| ✔ Reset Shopper Password |
- General Info:
| ✔ DomainSync - Synchronizes Domain Expiration Date |
| ✔ Supports WHMCS Templates Five and Six |
| ✔ Supports WHMCS V5 and V6 |
Installation
| In this brief tutorial we will show you how to successfully install and set up GoDaddy Domain Registrar For WHMCS. We will guide you step by step through the whole installation process. |
| 1. In the beginning make sure that you are the GoDaddy Wild West Domains API Reseller and your API User account is active. |
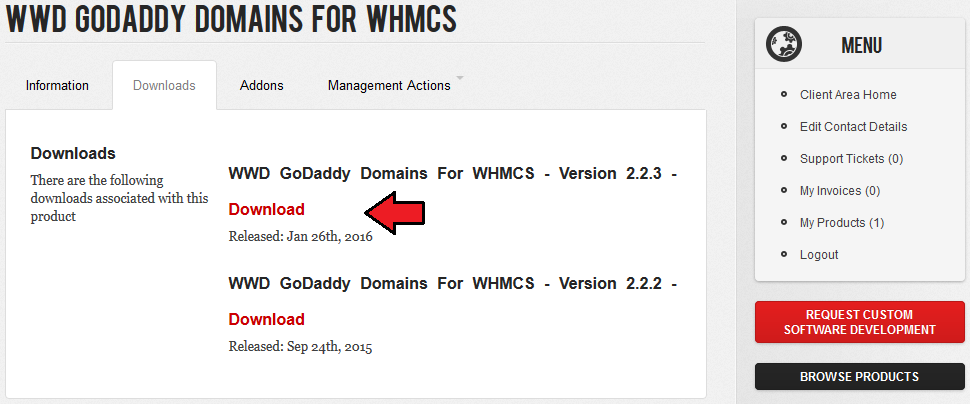
| 2. Log in to your client area and download GoDaddy Domain Registrar For WHMCS. |
|
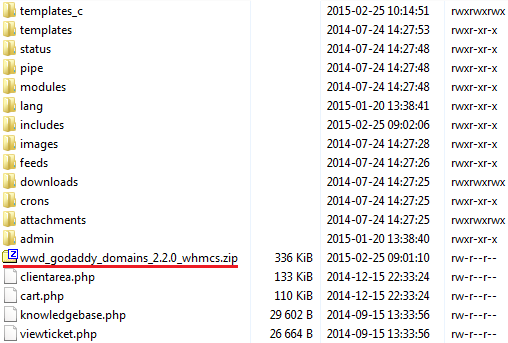
| 3. Upload and extract the module into the main WHMCS directory. Files in your WHMCS directory should look like this. |
|
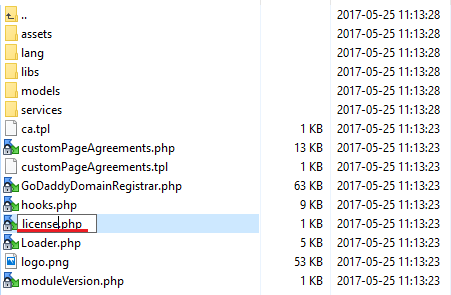
| 4. When you install GoDaddy Domain Registrar for the first time you have to rename 'license_RENAME.php' file. File is located in 'modules/registrars/WWDGoDaddy/license_RENAME.php' . Rename it from 'license_RENAME.php' to 'license.php' . |
|
| 5. In order to configure your license key you have to edit a previously renamed 'license.php' file. Enter your license key between quotation marks as presented on the following screen. You can find your license key in your client area → 'My Products'. |

|
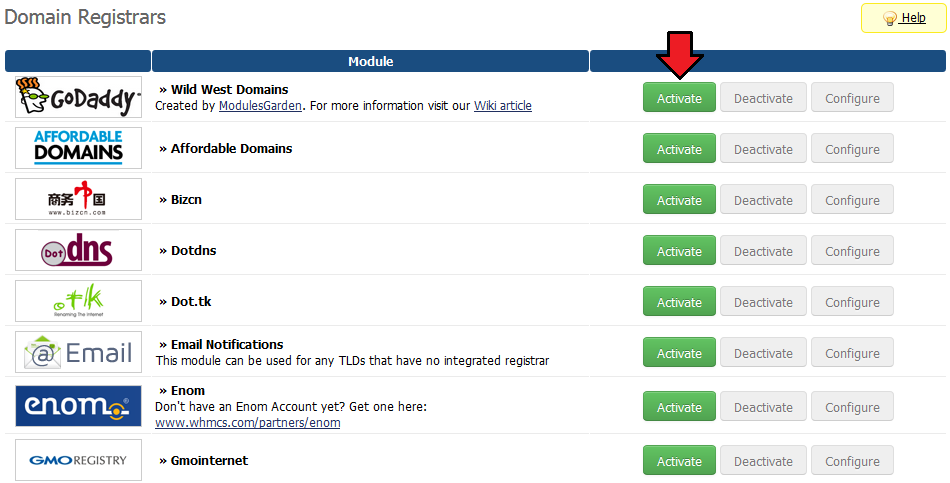
| 6. Now, log in to your WHMCS and proceed to 'Setup' → 'Products/Services' → 'Domain Registrars' → 'Registrar Settings' . Find 'Wild West Domains' and press 'Activate' next to it. |
|
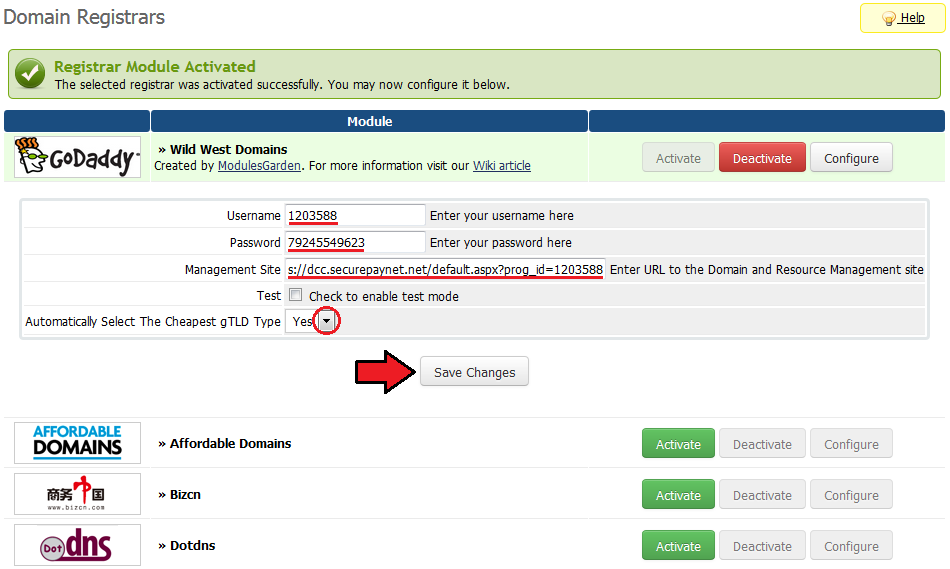
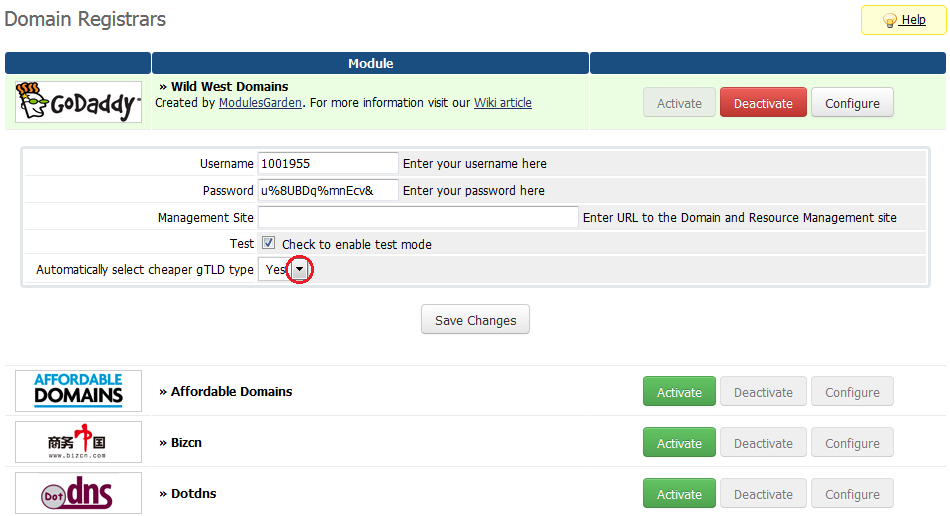
| 7. Afterwards, press 'Configure' and enter your live API 'Username' , 'Password' and 'Management Site' (prog ID). We recommend leaving 'Automatically Select The Cheapest gTLD Type' dropdown with Yes selected. |
|
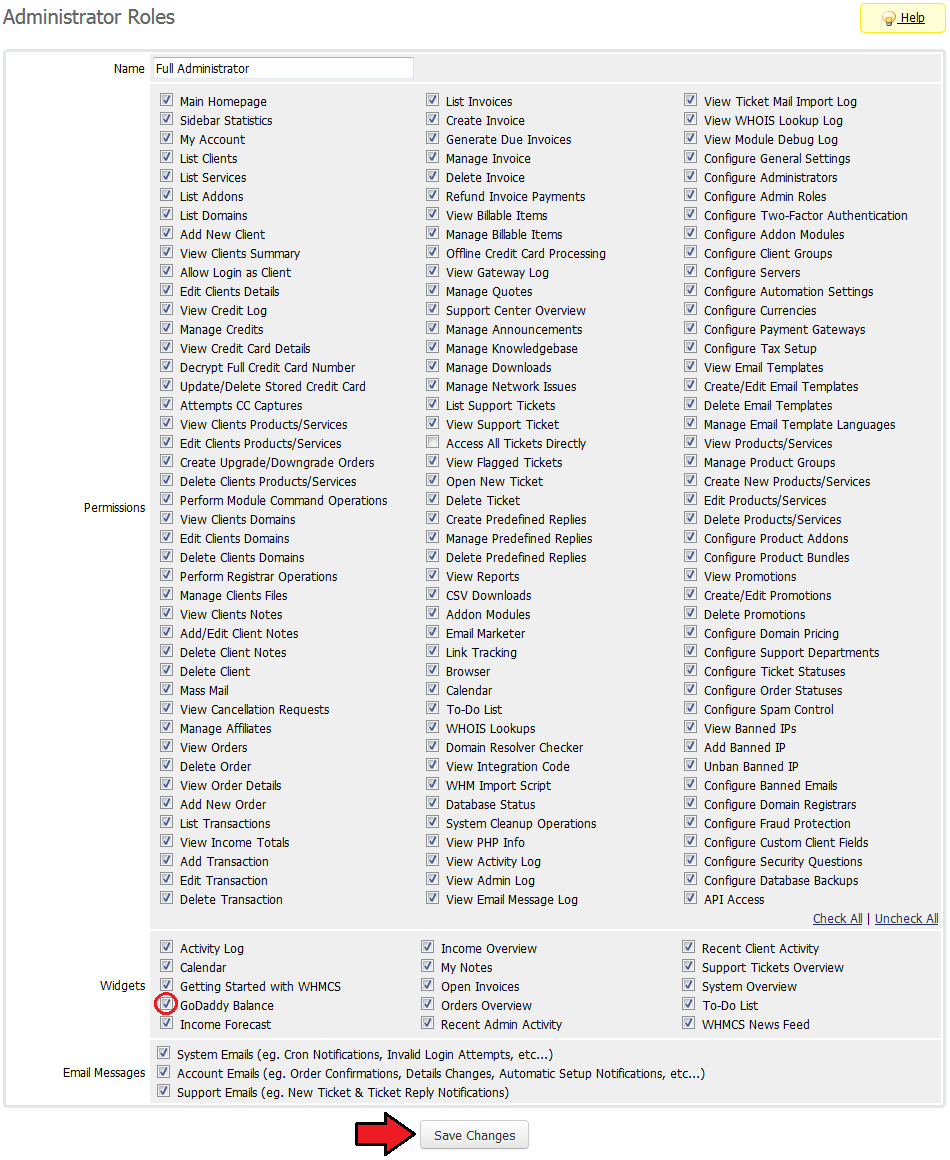
| 8. The last step is enabling WWD GoDaddy account balance widget. Go to 'Setup' → 'Staff Management' → 'Administrator Roles' and edit administrator role, whom you wish to enable the widget for. |
|
Accreditation Test
| 1. Log in to http://resellerextranet.com/ and set up details of the live API. They will be used as soon as you pass accreditation test. |
| 2. Set up details to http://x.co/apilogin. |
| 3. Log in to http://x.co/apilogin and set up WWD OTE API access details. Previously prepared access details can be found in 'Account Access' under 'Reseller Settings' section. |
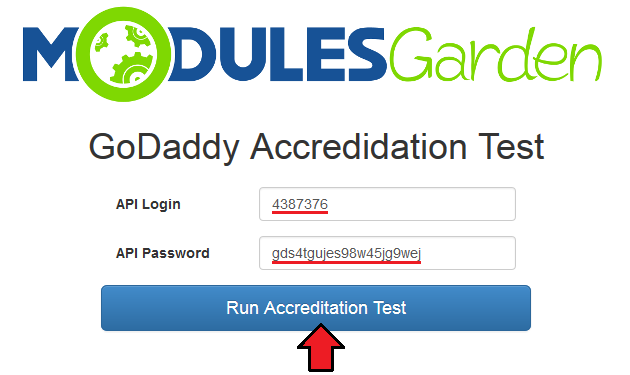
| 4. Run accreditation script from a web browser. Script can be accessed under your_whmcs/GoDaddy. Replace 'your_whmcs' part with your actual WHMCS URL. |
|
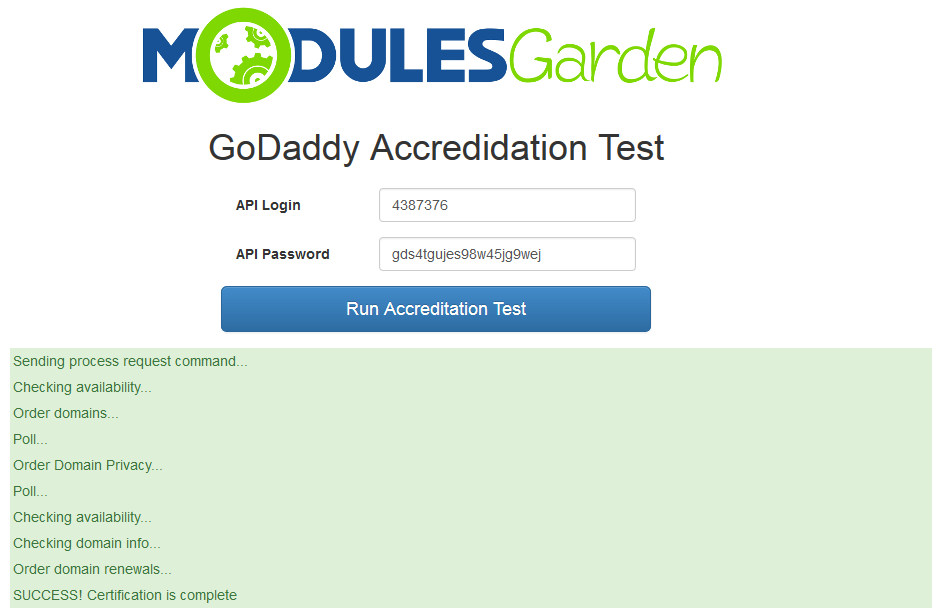
| 5. You should receive success status, otherwise look for solution in Common Problems section or contact our Support Team. Note: Run the script again if test returns the following line: attribute=resourceid, value=domain:946137 is invalid. |
|
| Our Support Team can help you to successfully pass the accreditation. Just simply ask us for assistance or during ordering the package please choose Accreditation Help Service as an addon to your module. |
Configuration and Management
| WWD GoDaddy allows you to offer GoDaddy TLDs through the WHMCS system to your customers. In this short guide we will present you the possibilities of our module. |
Management of TLDs
| Adding a new TLD is quite simple. To add it, go to 'Setup' → 'Products/Services' → 'Domain Pricing' . Enter your TLD and choose 'WWDGoDaddy' from 'Auto Registration' dropdown menu as shown on the screen below. |

|
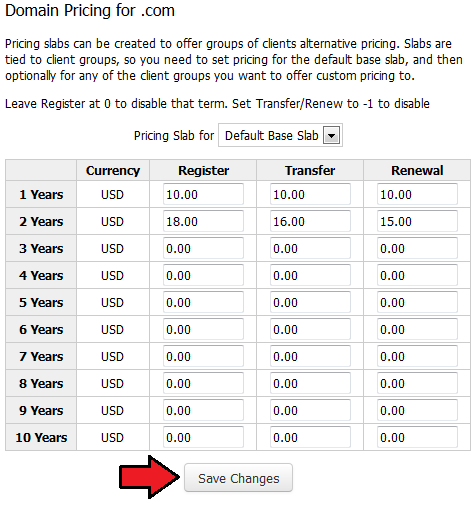
| As you can see 'Open Pricing' field has appeared. Click on it and set up your pricing. |

|
| In a newly opened window you can set your prices. Remember to save the changes. |
|
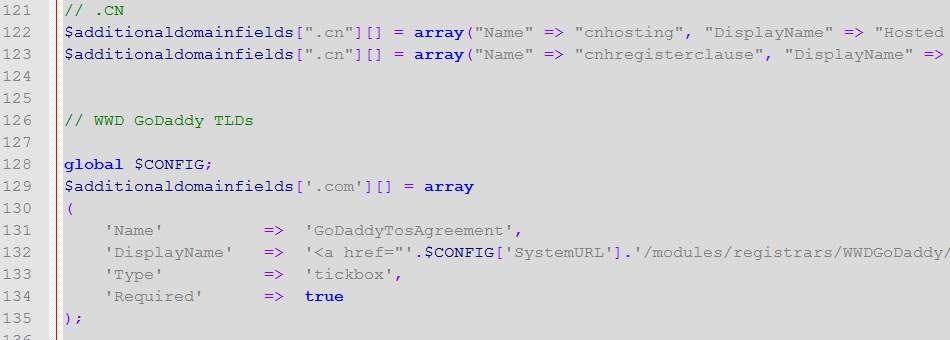
| All that remains is adding a new entry to file 'additionaldomainfields.php' , it is located in 'your_whmcs/includes/additionaldomainfields.php' . Add this code at the end of the file: $additionaldomainfields[ 'your_tld' ][] = array ( 'Name' => 'GoDaddyTosAgreement', 'DisplayName' => '<a href="'.$CONFIG['SystemURL'].'/modules/registrars/WWDGoDaddy/tos.php">Customer Service Agreement</a>', 'Type' => 'tickbox', 'Required' => true ); Where 'your_tld' is a previously added TLD with dot as a prefix. global $CONFIG; |
|
| That's all! Simple isn't it? If you would like to set up pricing for more TLDs simply repeat steps shown in 'Management of TLDs' as many times as you need. |
Ordering
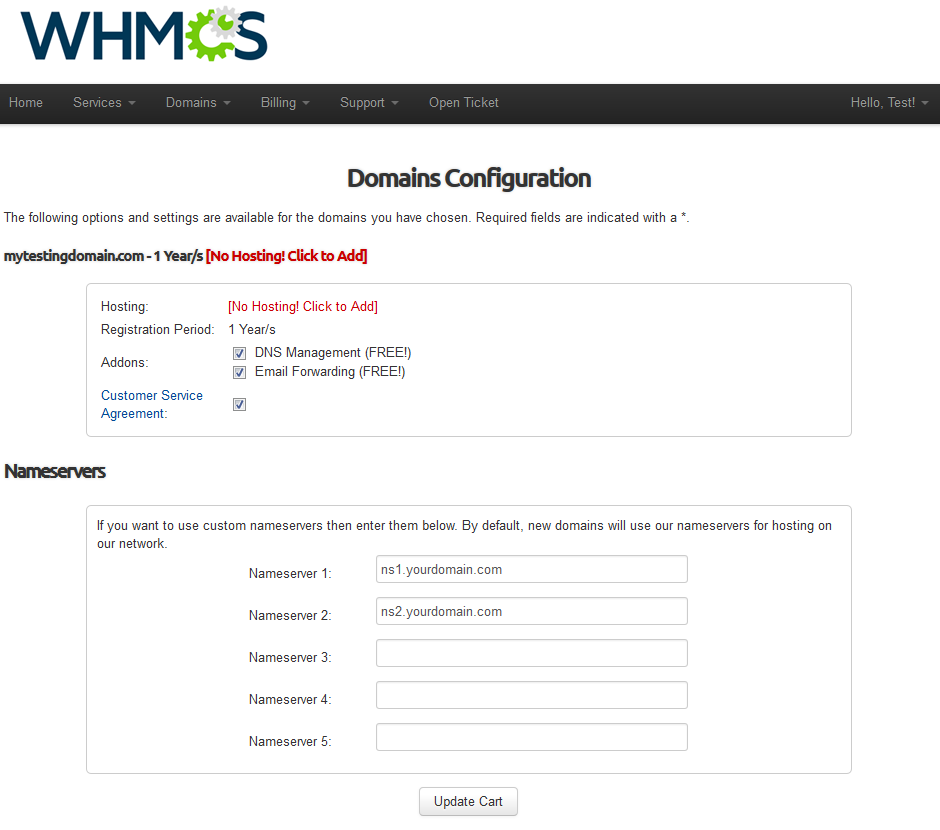
| Ordering WWD GoDaddy domains goes alike ordering other domains. The only difference is 'Customer Service Agreement' which needs to be accepted in order to complete an order. |
|
Management of Domain
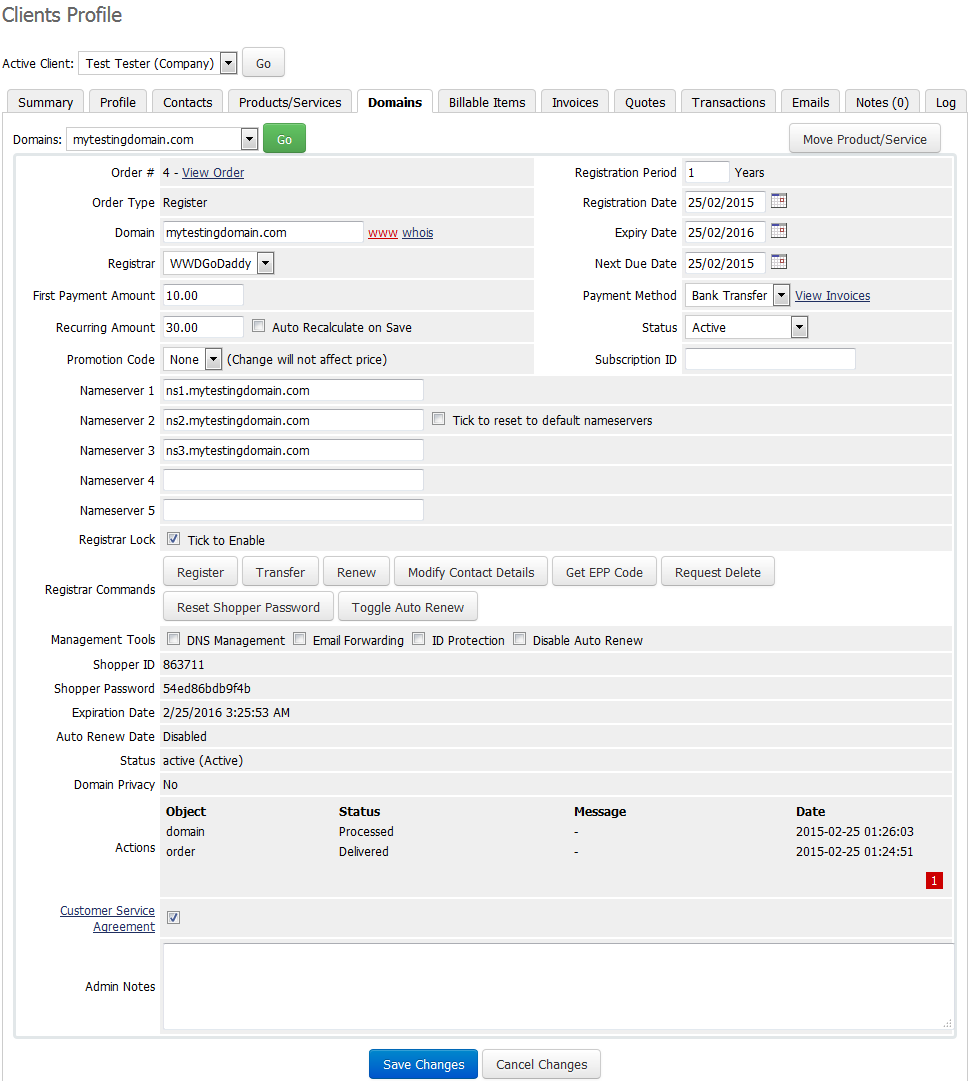
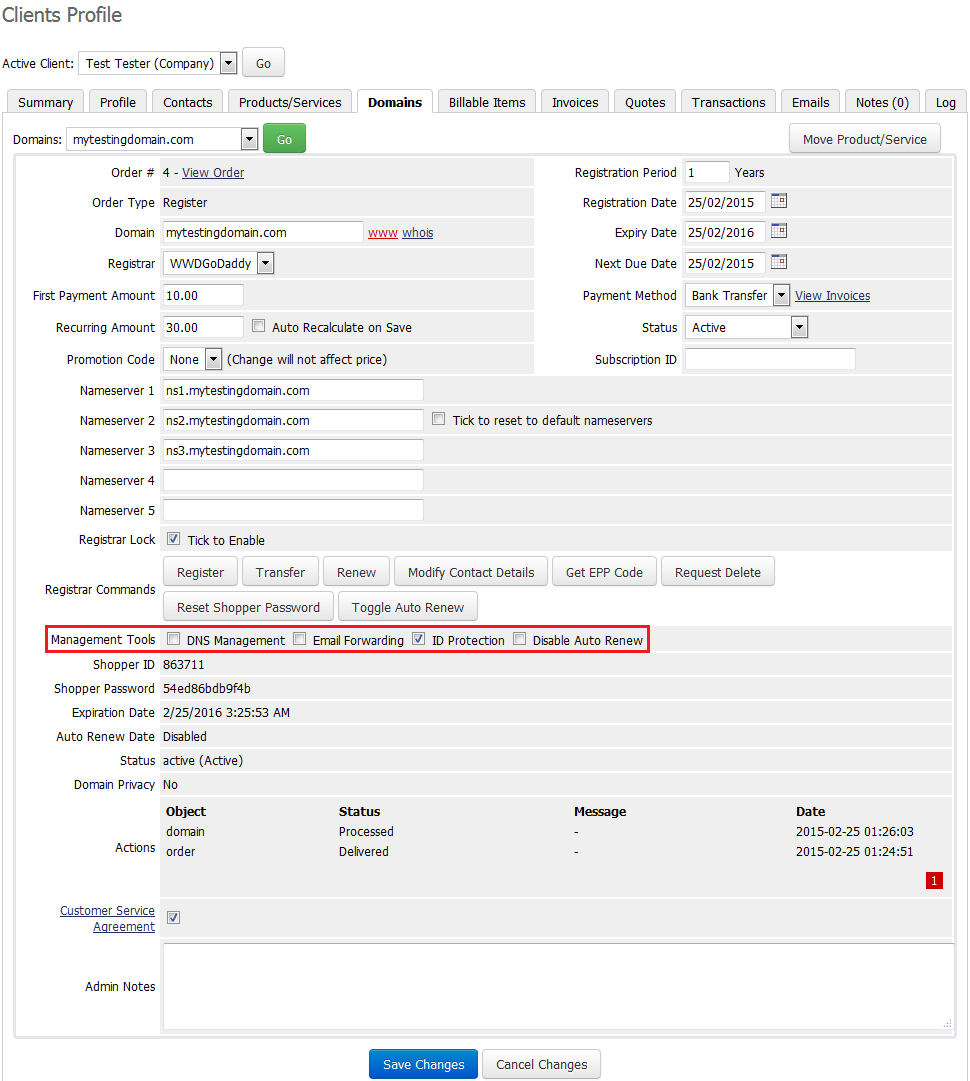
| In the admin area you can manage all the aspects of the domain. Starting with register, transfer and renew functionalities, through management of nameservers and contact details to requesting EPP code and password reset. |
|
| Additionally, you can enable/disable features such as dns management, email forwarding, id protection and auto renew (on WWD GoDaddy side). Important: Enabling ID protection results in additional charge from your WWD GoDaddy balance. |
|
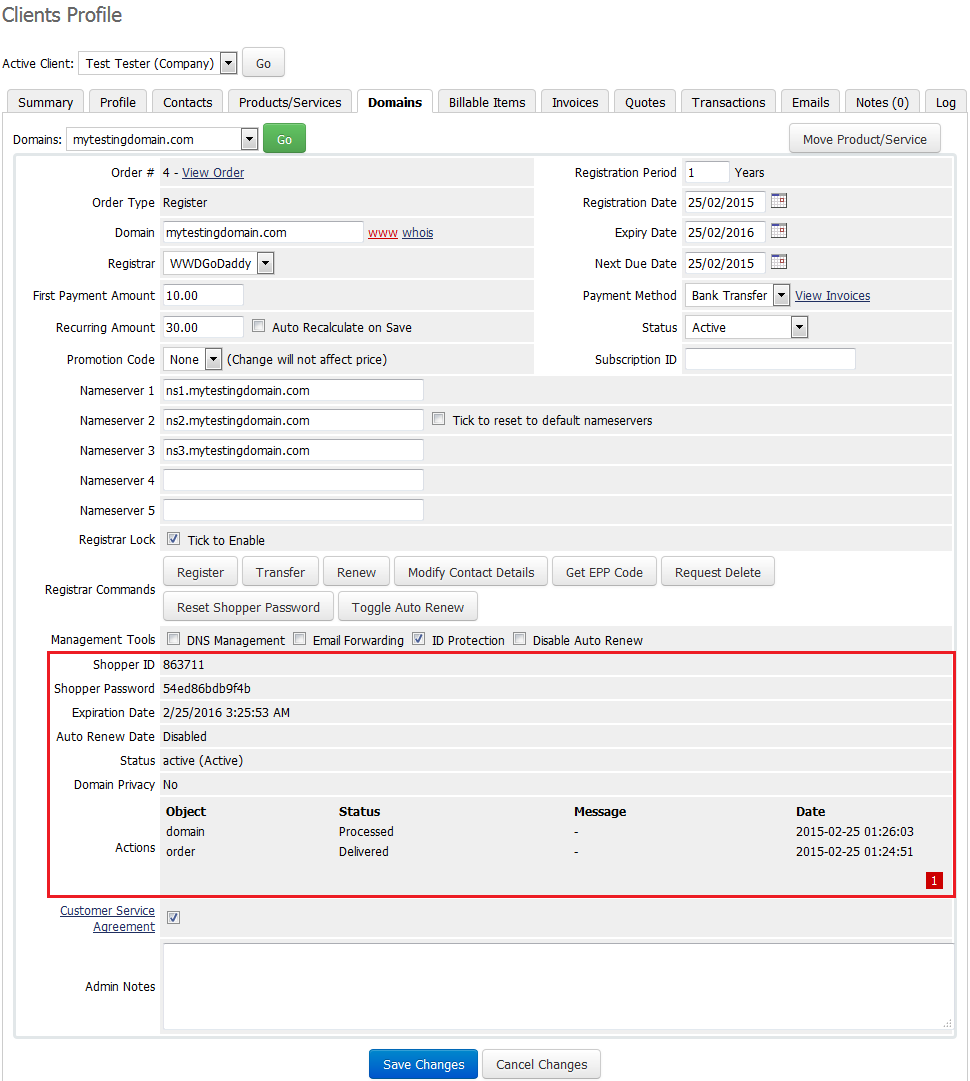
| Detailed information about the domain can be found below along with action logs. |
|
GoDaddy Balance Widget
| Owing to GoDaddy Balance widget you can easily check your GoDaddy account balance through your WHMCS admin area. |

|
Client Area
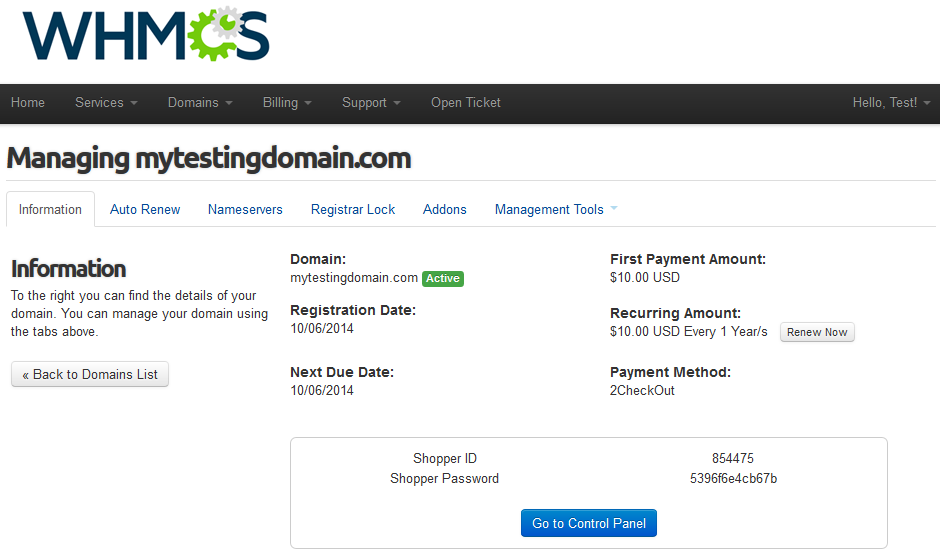
| Your customers can perform various actions on their WWD GoDaddy domain from the client area. Clients can view basic information related to domains and renew domains through pressing 'Renew Now' button. |
|
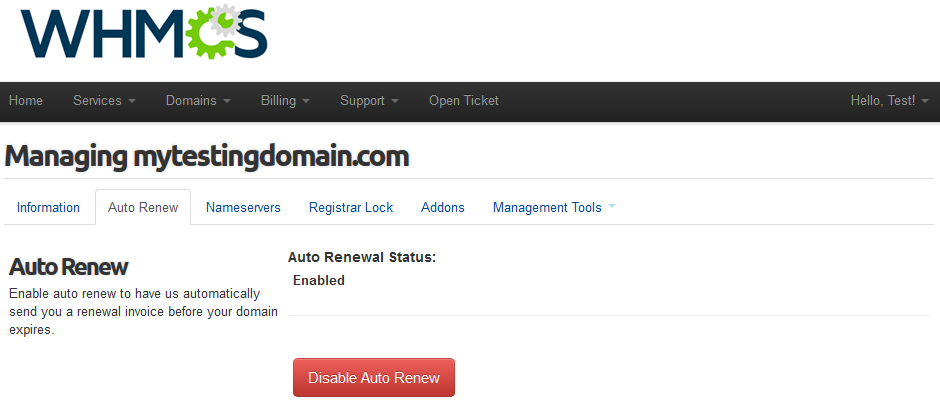
| At 'Auto Renew' tab clients can enable/disable auto renewal by pressing 'Enable Auto Renew' / 'Disable Auto Renew' button. |
|
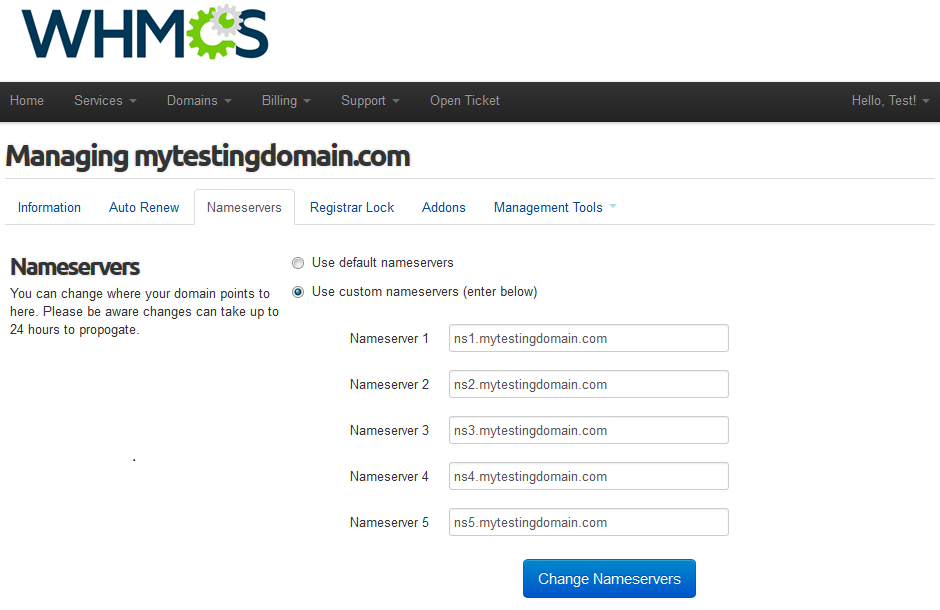
| 'Nameservers' tab allows clients to change nameservers used by their domains. |
|
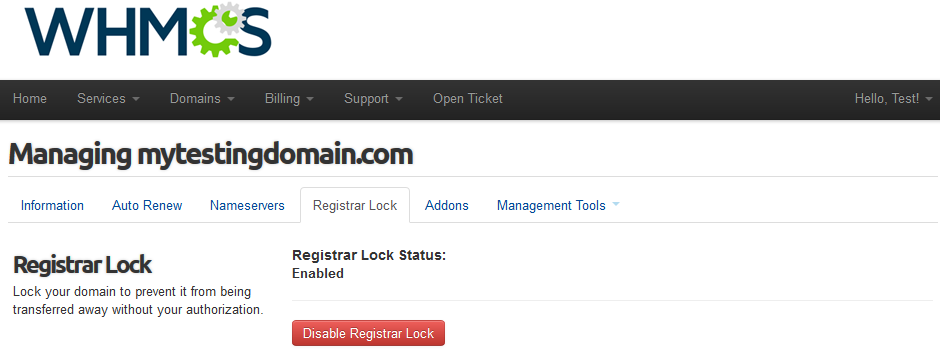
| Your customers can also lock/unlock their domains at 'Registrar Lock' tab to prevent them from being transferred. |
|
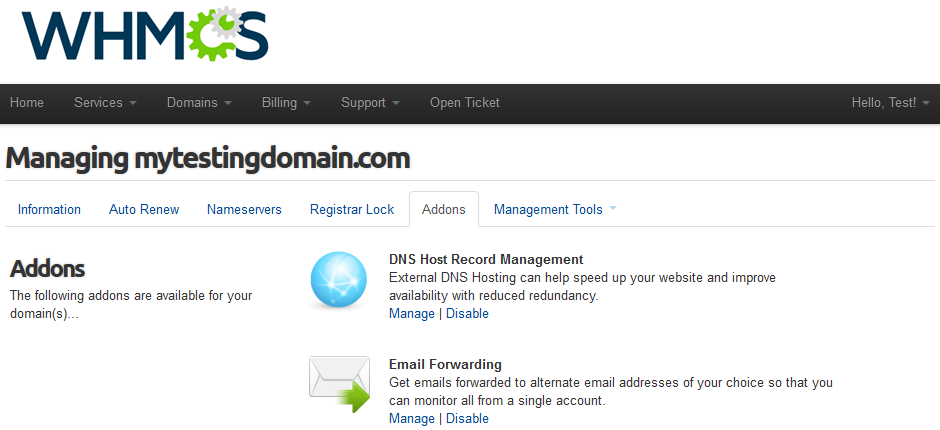
| 'Addons' tab allows your clients to view and manage addons purchased along with domain. |
|
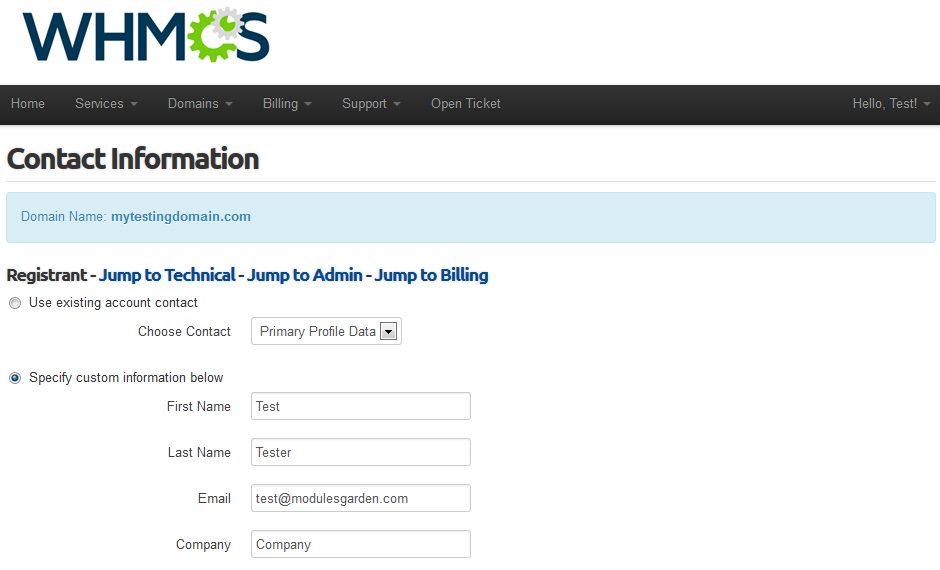
| Under 'Management Tools' → 'Contact Information' your clients can also view and modify contact information. |
|
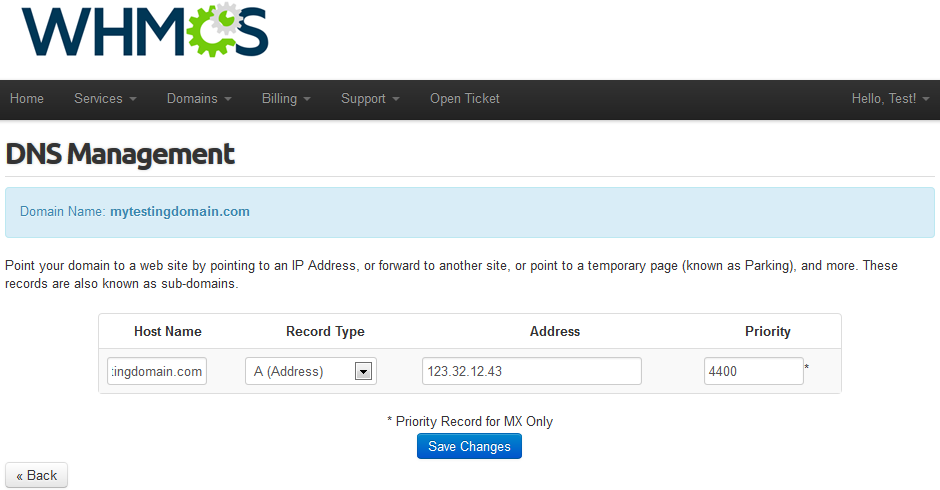
| In order to manage domain DNS records, your clients have to go to 'Management Tools' → 'Get EPP Code' |
|
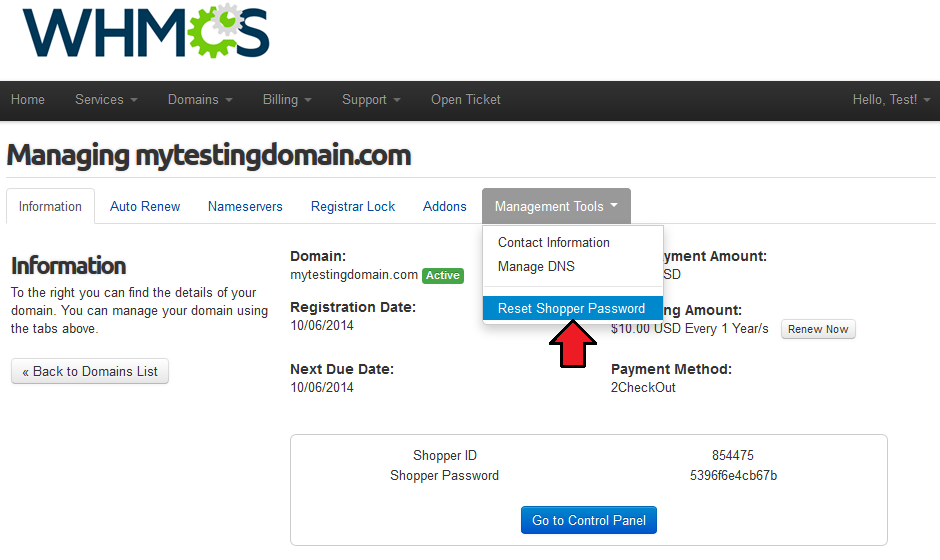
| Your clients can reset their GoDaddy account password as well. It can be done in 'Management Tools' → 'Reset Shopper Password' section. |
|
gTLD Support
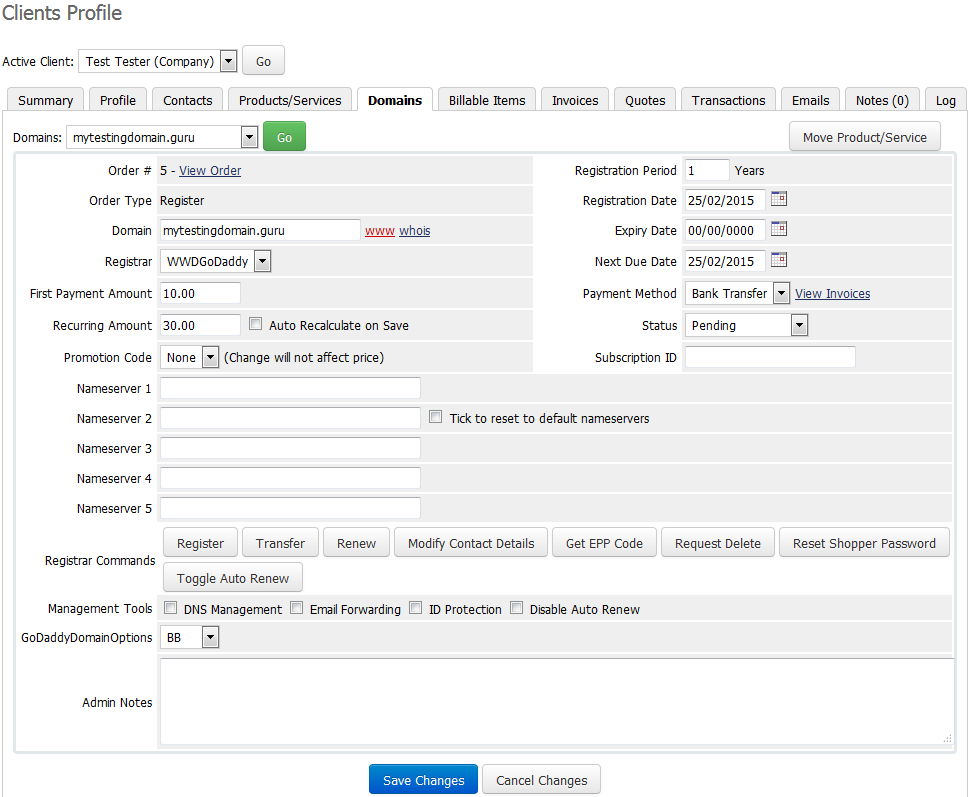
| Our module allows you to register gTLD domains. The most of gTLD domains can be registered with a few different types of TLD. By default, you can choose Yes in 'Automatically Select The Cheapest gTLD Type' dropdown, consequently for each of the TLDs, the cheapest type will be used. |
|
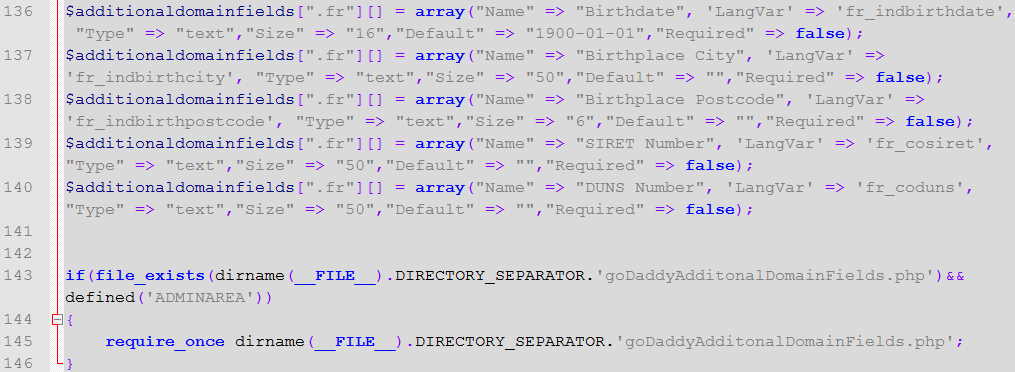
| The second way allows you to define the type of TLD. To benefit from it, add the code shown below at the end of 'additionaldomainfields.php' file located in 'your_whmcs/includes/' . if(file_exists(dirname(__FILE__).DIRECTORY_SEPARATOR.'goDaddyAdditonalDomainFields.php')&& defined('ADMINAREA'))
{
require_once dirname(__FILE__).DIRECTORY_SEPARATOR.'goDaddyAdditonalDomainFields.php';
}
Important: Remember to set 'Automatically Select The Cheapest gTLD Type' option to No, otherwise any changes to the type will be overwritten. |
|
| The final effect is shown on the following screen. |
|
Mass Autorenew Management
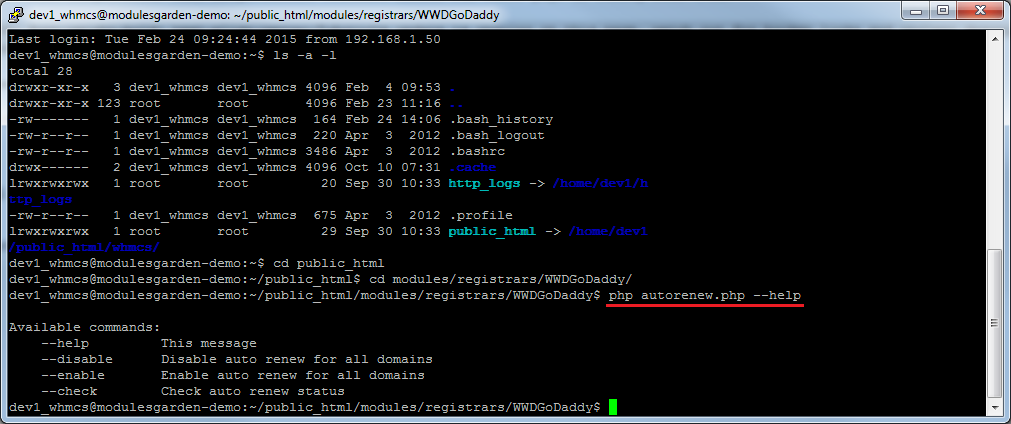
| It may happen that you will need to enable/disable/view autorenew of all your domains. To do so, connect with server used by your WHMCS via SSH. cd /your_whmcs/modules/registrars/WWDGoDaddy Now, you can view the list of possible actions, this can be done by using command: php autorenew.php --help |
|
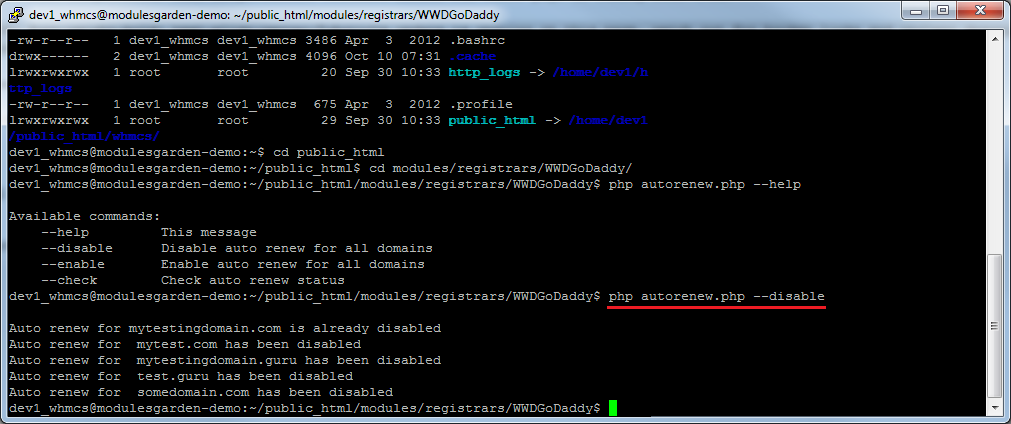
| Let's analyze the disable command usage. All you have to do is replace 'help' with 'disable' : php autorenew.php --disable You can command 'enable' and 'view' in the same way. |
|
Tips
| 1. To use the test mode, simply enter your OTE Manager Account details and tick 'Check to enable test mode' . |
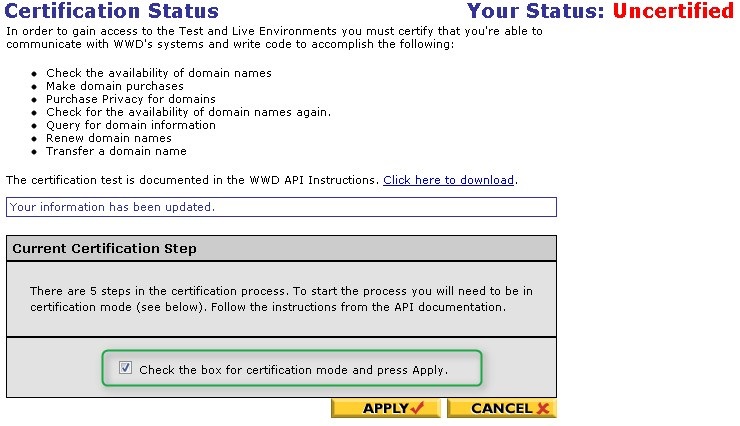
| 2. When you want to run accreditation test script, in your WWD OTE account you need to start your certification process as shown on the screen below. |
|
Common Problems
| 1. When you have problems with connection, check whether your SELinux or firewall does not block ports. |
| 2. If while performing the Accreditation Check you receive an error 'Login credentials failed.' then please verify your registrar module details provided in step 4th. Make sure that these are valid details to your active GoDaddy API User account. |
| 3. Error: 'Field GoDaddyTosAgreement does not exists. See our wiki for more information.' . Cause: WHMCS cannot find entry for TLD you try to register at the 'additionaldomainfields.php' . |
| 4. If one of the TLDs you have configured is unavailable, please make sure you have set up pricing in a default currency. |
| 5. If you encounter any problem with the module, make sure you have installed SOAP library on your server. |