Emoji Picker For WHMCS
Contents |
About Emoji Picker For WHMCS
| Emoji Picker For WHMCS xxxxxxxxxxxxxxxxxxxxxxxx
xxxxxxxxxxxxxxxxxxxxxx |
- Client Area Features:
| ✔ xxxxxxxxxxxxxxx |
| ✔ xxxxxxxxxxxx |
| ✔ xxxxxxxxxxxxxx |
| ✔ xxxxxxxxxxxxxxx |
| ✔ xxxxxxxxxxxxxxx |
- Admin Area Features:
| ✔ xxxxxxxxxxxxxxx |
| ✔ xxxxxxxxxxxxxxx |
| ✔ xxxxxxxxxxxxxxx |
| ✔ xxxxxxxxxxxxxxx |
| ✔ xxxxxxxxxxxxxxx |
| ✔ xxxxxxxxxxxxxxx |
- Integration Features:
| ✔ xxxxxxxxxxxxxxx |
| ✔ xxxxxxxxxxxxxxx |
| ✔ xxxxxxxxxxxxxxx |
| ✔ xxxxxxxxxxxxxxx |
- General Info:
| ✔ Emoji Artworks Provided By EmojiOne |
| ✔ Custom Templates Support |
| ✔ Multi-Language Support |
| ✔ Supports PHP 5.6 Up To PHP 7.2 |
| ✔ Supports WHMCS Template Six |
| ✔ Supports WHMCS V7 |
Installation and Configuration
| This tutorial will show you how to successfully install and configure Emoji Picker For WHMCS. We will guide you step by step through the whole installation and configuration process. |
Installation
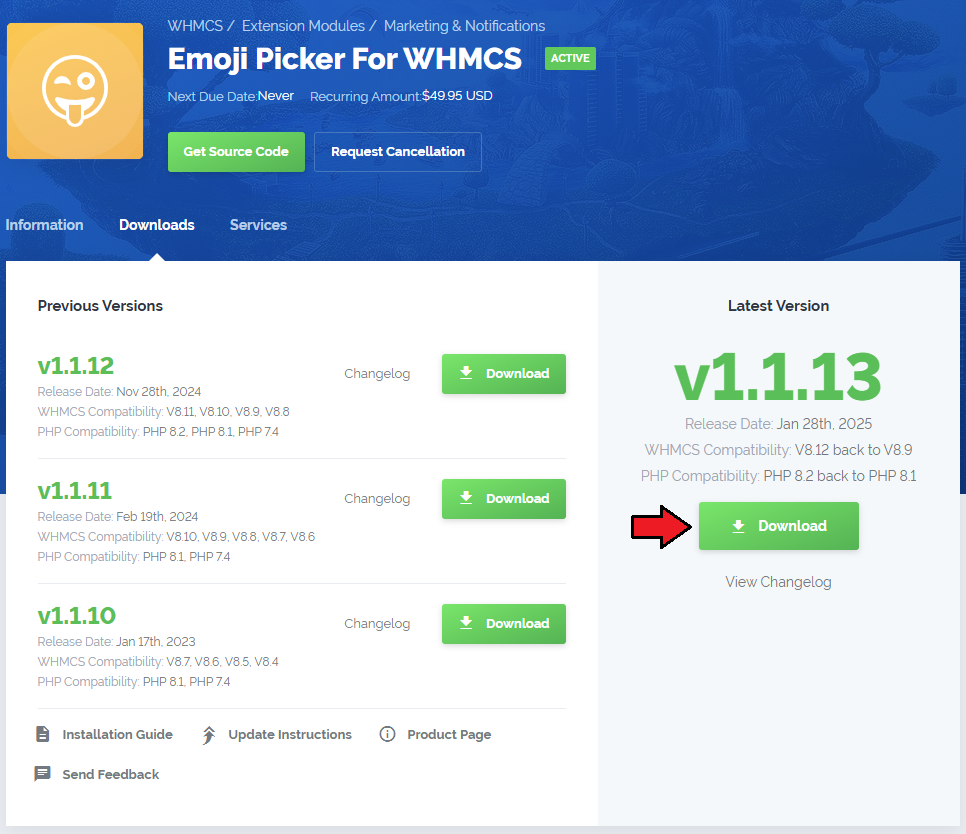
| 1. Log in to our client area and download the module. |
|
| 2. In the downloaded file you will find two packages that support different PHP versions. As presented on the screen below, the first one is dedicated to PHP 5.6 up to PHP 7.0, while the second one is aimed at PHP 7.1 up to PHP 7.2. It does not apply to open source versions. Note: You can check the current PHP version in your WHMCS. To do so, proceed to 'Utilities' › 'System' › 'PHP Info'. |

|
| 3. Extract the downloaded file and choose the one with the right PHP version. Upload and extract the PHP file into the main WHMCS directory. The content of PHP version files should look like this. |
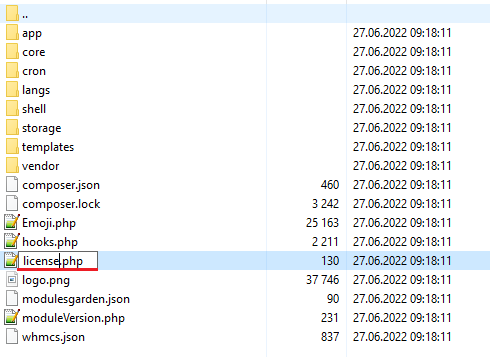
| 4. When you install Emoji Picker For WHMCS for the first time you have to rename 'license_RENAME.php' file. File is located in 'yourWHMCS/modules/addons/Emoji/license_RENAME.php'. Rename it from 'license_RENAME.php' to 'license.php'. |
|
| 5. In order to configure your license key, you have to edit the previously renamed 'license.php' file. Enter your license key between quotation marks as presented on the following screen. You can find your license key in our client area → 'My Products'. |

|
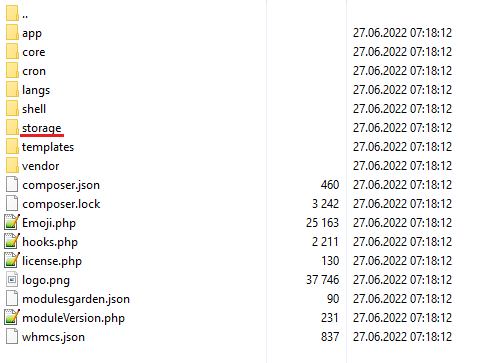
| 6. Now, set up the 'storage' folder as recursively writable. This folder is available at 'yourWHMCS/modules/addons/Emoji/' . |
|
Activation
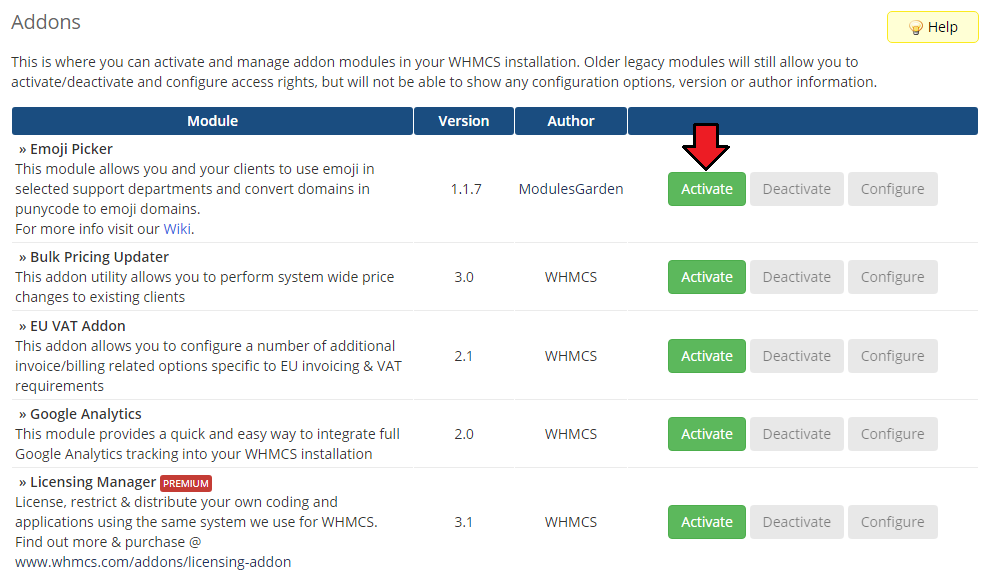
| 7. Now, you have to activate the module in your WHMCS system. Log in to your WHMCS admin area and proceed to 'Setup' → 'Addon Modules'. |
|
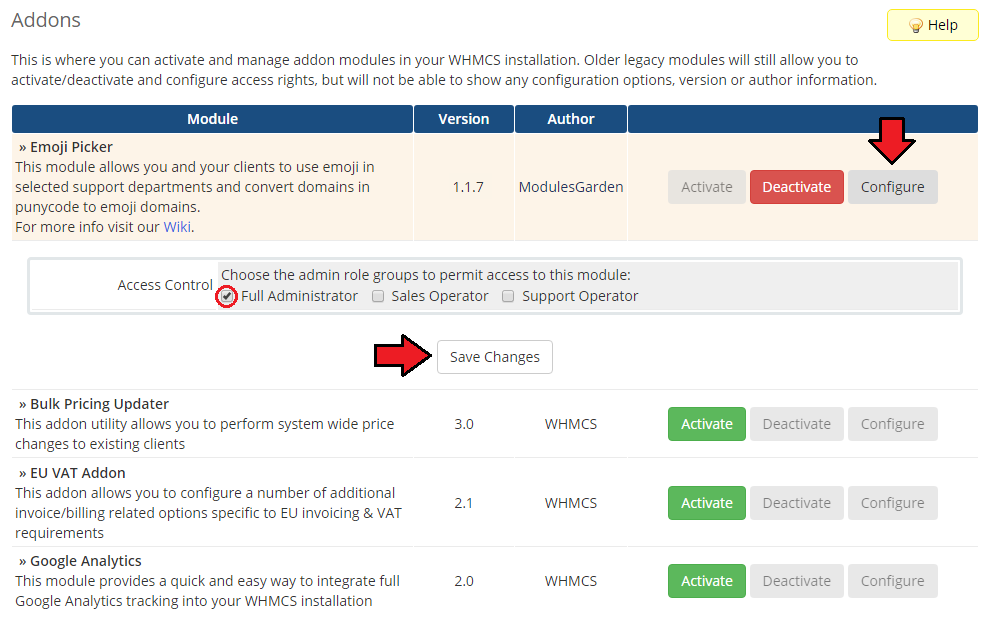
| 8. In the next step you need to permit access to this module. To do so, click on the 'Configure' button and tick the checkboxes to assign desired admin roles. |
|
| 9. You have just successfully installed Emoji Picker For WHMCS! |
Configuration
| Now you have to configure your newly installed module. |
Settings
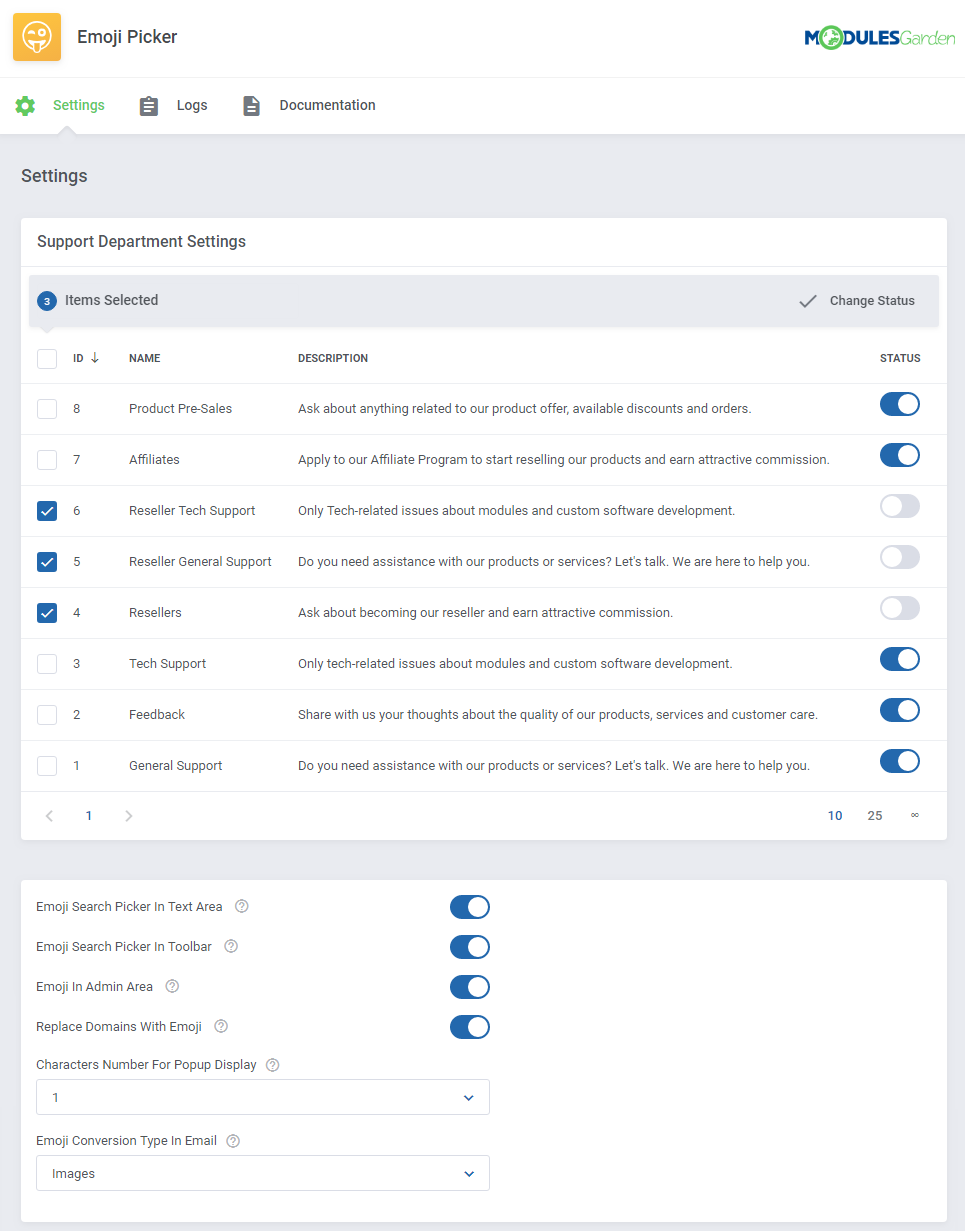
Proceed to 'Addons' → 'Emoji' → 'Settings', here you have to configure the following:
|
|
Logs
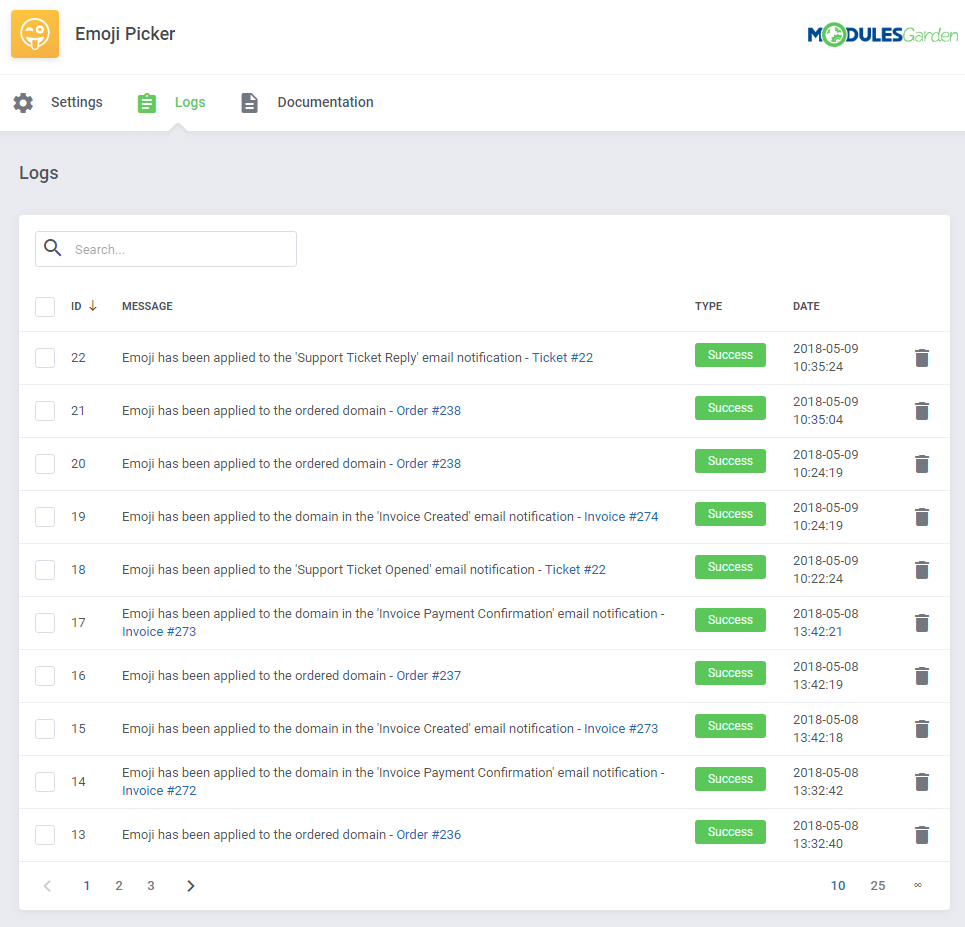
| In logs you can view for which orders of domains, invoices or email massages the emojis have been applied |
|
Management
| Once Emoji Picker For WHMCS is installed and configured, you can use them in tickets as well as view them on domains list insted in punnycode format. |
Support Tickets
Client Area
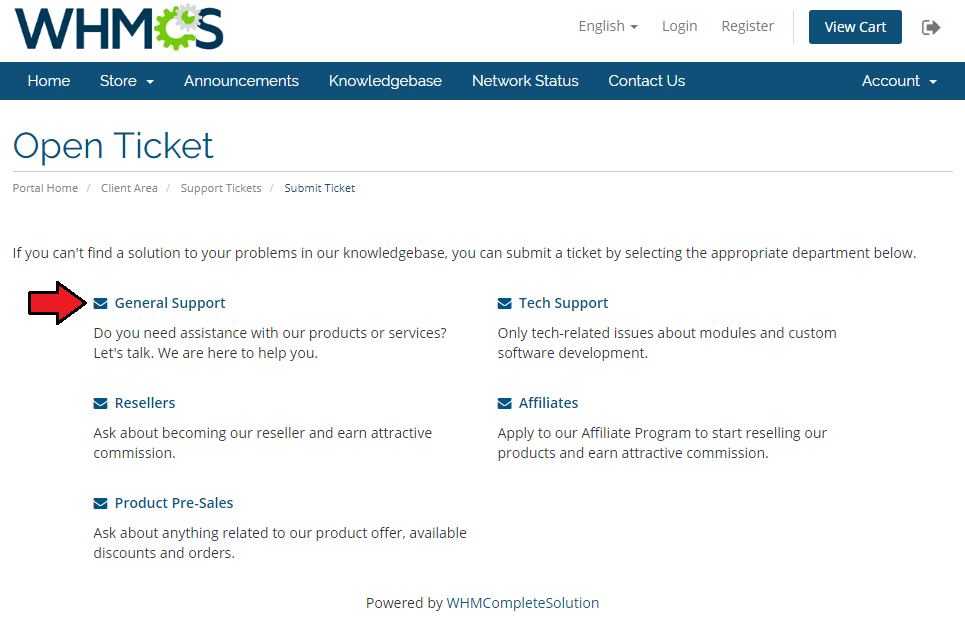
| Once you are in client area, you can open a ticket in one of your departments where you enabled emoji support. |
|
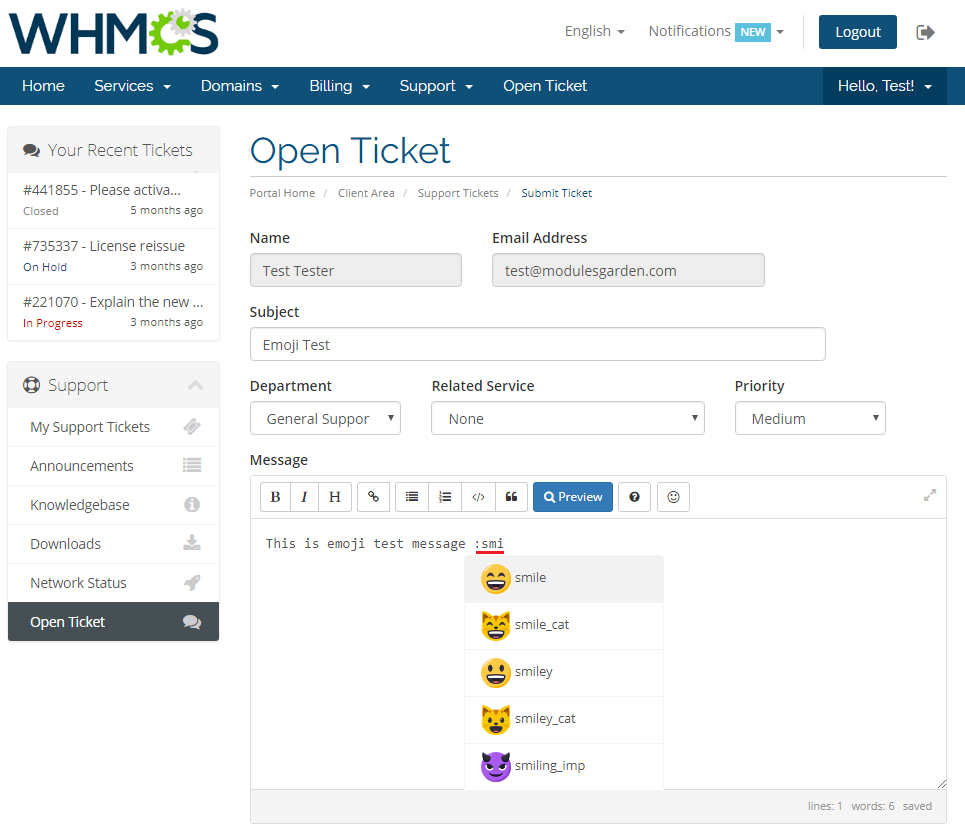
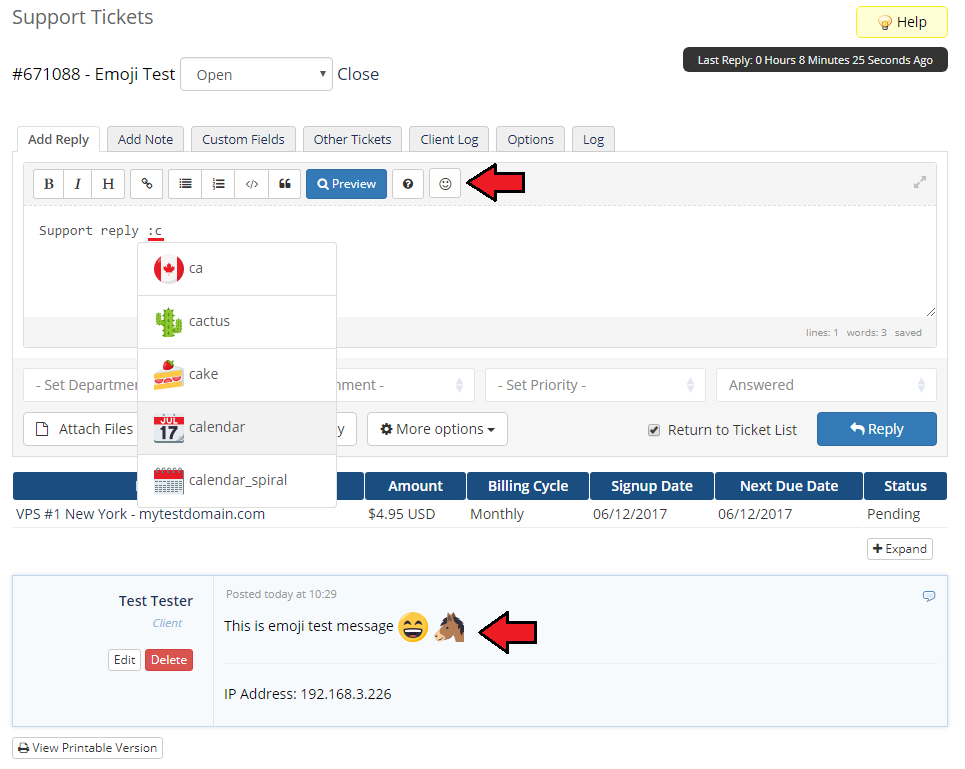
| When you start composing a message you can insert emoji by presing : (colon). This will start showning the list of available emojis. Continue typing the name to search for available emoji. When ready, click on the chosen emoji to insert it or finish its name using : (colon) again. |
|
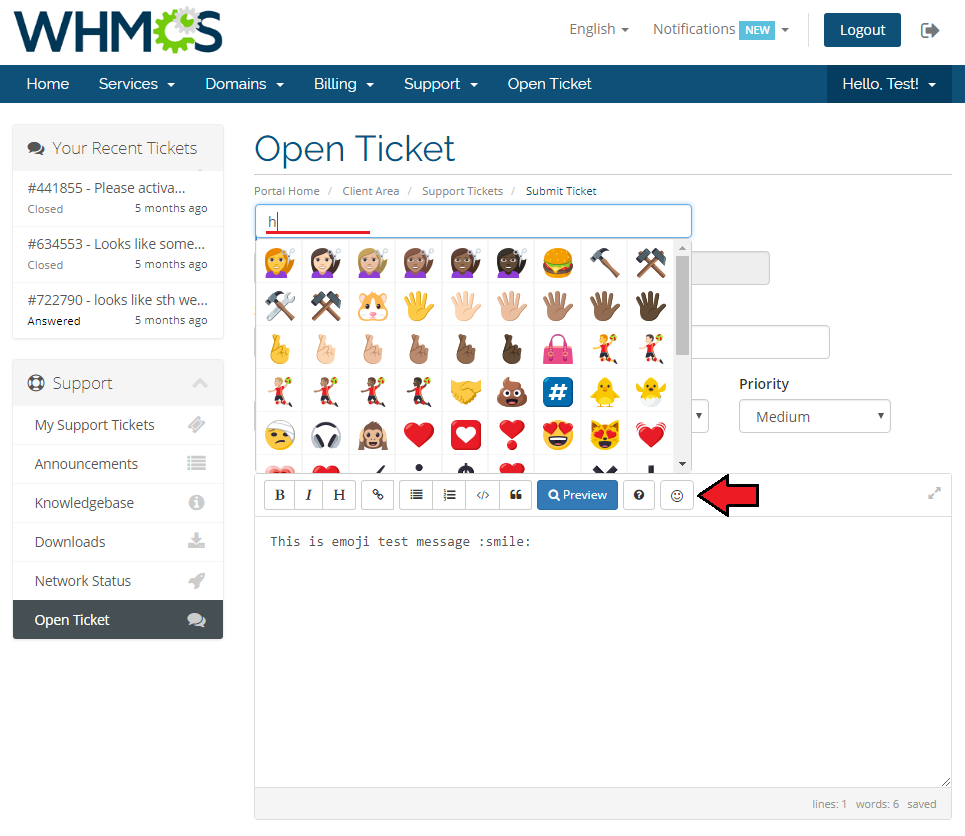
| You can also view, browse and search through all available symbols by clicking on emoji picker. |
|
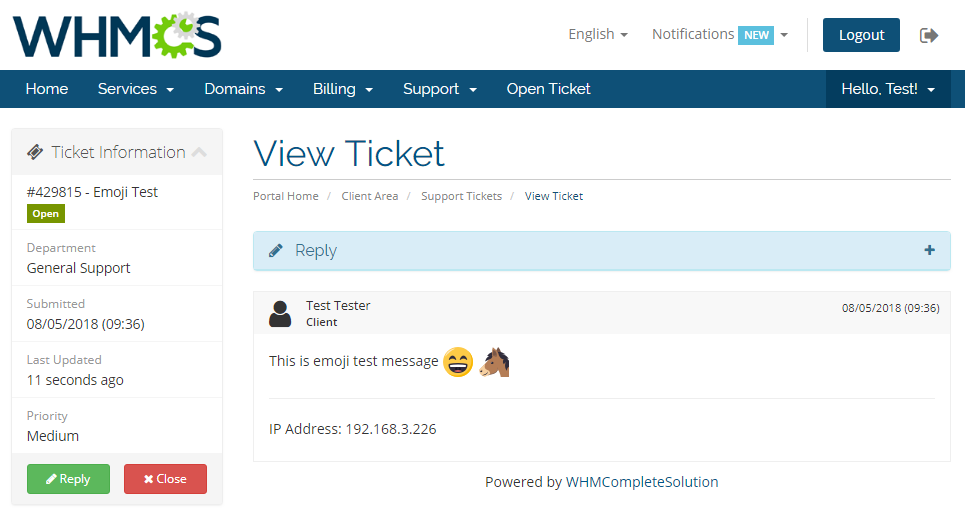
| When the composed massage is send the inserted emoji codes will be replaced to emoji artorks. |
|
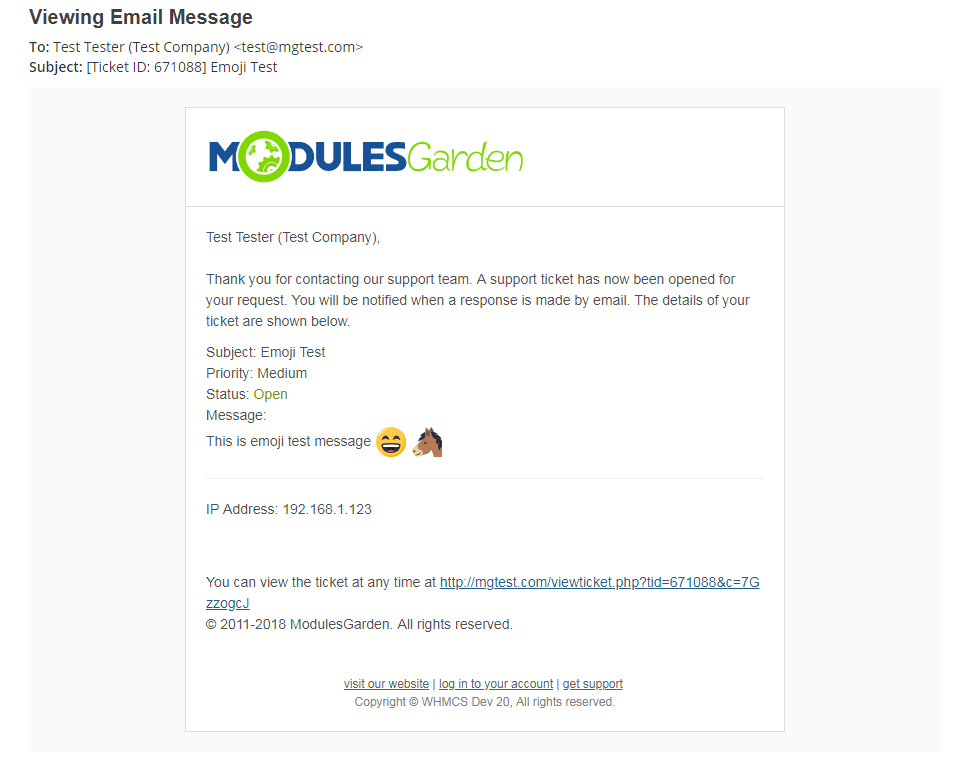
| This also includes the tickets notifications emails. |
|
Admin Area
| If you enabled the XXX option in the addon settings, your support administrators can use emojis in their tickets replys as well. |
|
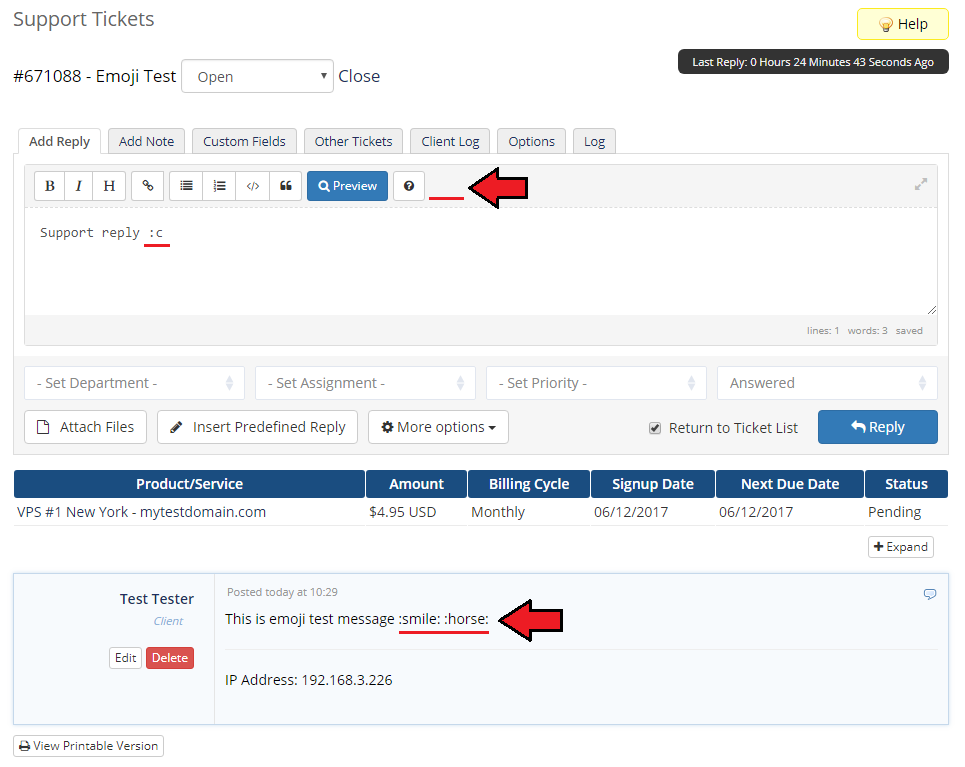
| Otherwise, your support administrators will not be able to enter emojis freely, as well as will not see them as artorks in already sent messages. |
|
Domains
| XXXXXXXXXXXXXXXXXXXXXXXXXXXXXXXXXXXXXXXXXX |
| File:EM15.png |
| XXXXXXXXXXXXXXXXXXXXXXXXXXXXXXXXXXXXXXXXXX |
| File:EMD16.png |
| XXXXXXXXXXXXXXXXXXXXXXXXXXXXXXXXXXXXXXXXXX |
| File:EMD16.png |
Tips
| 1. The module supports only the WHMCS built-in ticket system. Separate ticketing systems such as Zendesk, Kayako or Freshdesk are not supported. |
| 2. If you are planing to sell emoji domains, it is recommended that the 'Allow IDN Domains' option is enabled in your WHMCS general settings. |
Update Instructions
| Essential guidance through the process of updating the module is offered here. Keep in mind there is a quick and easy option in our client area that will let you upgrade the license of your module to an open source version at any time - and at a lower price! |
Common Problems
| 1. When you have problems with connection, check whether your SELinux or firewall does not block ports. |