SolusVM 2 VPS & Cloud For WHMCS
Contents |
About SolusVM 2 VPS & Cloud For WHMCS
| SolusVM 2 VPS & Cloud For WHMCS opis cały do odświeżenia od zera, |
- Admin Area Features:
| ✔ Create/Suspend/Unsuspend/Terminate Server |
| ✔ Create User Account |
| ✔ Change Package - Supports Configurable Options |
| ✔ Change Password Of Account |
| ✔ Boot/Reboot/Shutdown Server |
| ✔ Toggle TUN/TAP And PAE |
| ✔ Reconfigure Network |
| ✔ Rebuild Server |
| ✔ Change Password: Root, Client, SSH Console, VNC Console |
| ✔ Mount/Unmount ISO |
| ✔ Change Boot Order |
| ✔ View Server Status |
| ✔ View Graphs: Traffic, Load, Memory |
| ✔ Change IP Addresses |
| ✔ Define Product Resource: |
| ✔ Dynamically - Using Configurable Options |
| ✔ Statically - Using 'Module Settings' Fields |
| ✔ Configure Client Area Features Per Product |
| ✔ Define OS Templates Available For Rebuild |
| ✔ Allow To Rebuild Server On Purchased OS Only |
| ✔ Set Rebuild Limit |
| ✔ Select Kernels For Rescue Mode |
| ✔ Configure Friendly Names For OS Templates And Nodes |
| ✔ Create New SolusVM User For Each VPS Ordered By Client |
| ✔ Toggle Root Password Storing In System Database |
| ✔ Toggle Root Password Change After Server Creation |
| ✔ View Decoded Server Password |
| ✔ Run API Connection Test |
- Client Area Features:
| ✔ View Server Details And Status |
| ✔ Boot/Reboot/Shutdown/Rebuild/Delete Server |
| ✔ Access SSH Console - OpenVZ And Xen Only |
| ✔ Access VNC Console - KVM And Xen HVM Only |
| ✔ Access NoVNC HTML5 Console - KVM And Xen HVM Only |
| ✔ Access HTML5 Serial Console - OpenVZ And Xen Only |
| ✔ Log In To Control Panel |
| ✔ Toggle TUN/TAP And PAE |
| ✔ Toggle PXE (Preboot Execution Environment) |
| ✔ Toggle Rescue Mode With Chosen Kernel |
| ✔ Reconfigure Network |
| ✔ Change Passwords: Root, Client, SSH Console And VNC Console |
| ✔ Change Hostname |
| ✔ Change IP Addresses |
| ✔ Mount/Unmount ISO |
| ✔ Change Boot Order |
| ✔ View Graphs: Traffic, Load, Memory |
| ✔ Send Email Templates After Creation Of Server Based On Its Type |
| ✔ Choose Server Resources While Ordering And Upgrade/Downgrade Them Freely |
| ✔ Choose SolusVM Username When Ordering New Product |
- Configurable Options:
| ✔ Operating System |
| ✔ Memory |
| ✔ Disk Space |
| ✔ Secondary Disk Size |
| ✔ Bandwidth |
| ✔ CPU |
| ✔ Extra IPv4 Address |
| ✔ Control Panel |
| ✔ Location |
| ✔ ISO Image |
| ✔ Network Speed |
| ✔ Rebuild Limit |
- General Info:
| ✔ Supports OpenVZ, Xen And KVM Virtualization |
| ✔ Integrated With DNS Manager For WHMCS - Supports PowerDNS |
| ✔ Integrated With Advanced Billing For WHMCS - Actual Server Resource Usage Billing |
| ✔ Integrated With IP Manager For WHMCS - Complete Management of IP Pools |
| ✔ Integrated With Server Allocator For WHMCS - Automatic Assignment Of Most Suitable Servers To Products |
| ✔ Multi-Language Support |
| ✔ Supports SolusVM 1.0 (Compatibility With SolusVM 2 Coming Soon) |
| ✔ Supports PHP 8.1 Back To PHP 7.4 |
| ✔ Supports WHMCS Themes "Six" And "Twenty-One" |
| ✔ Supports WHMCS V8.8 Back To WHMCS V8.8 |
| ✔ Requires ionCube Loader V12 Or Later |
| ✔ Easy Module Upgrade To Open Source Version |
Installation and Configuration
| In this tutorial we will show you how to successfully install SolusVM 2 VPS & Cloud For WHMCS. We will guide you step by step through the whole installation and configuration process. |
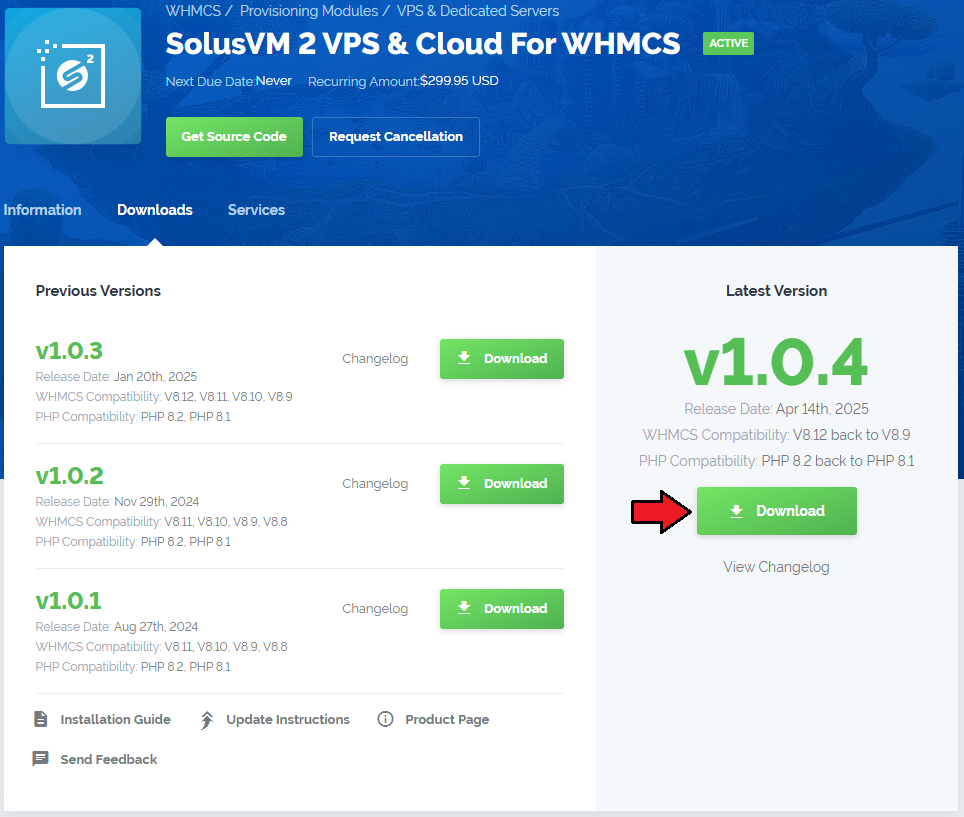
| 1. Log in to our client area and download the module. |
|
| 3. Extract the package and upload its content into the main WHMCS directory. The content of the package to upload should look like this. |
| 4. When you install SolusVM 2 VPS & Cloud For WHMCS for the first time you have to rename 'license_RENAME.php' file. File is located in 'modules/servers/solusvm2/license_RENAME.php'. Rename it from 'license_RENAME.php' to 'license.php'. |

|
| 5. In order to configure your license key, you have to edit a previously renamed 'license.php' file. Enter your license key between quotation marks as presented on the following screen. You can find your license key in our client area → 'My Products'. |
|
Configuration of Server
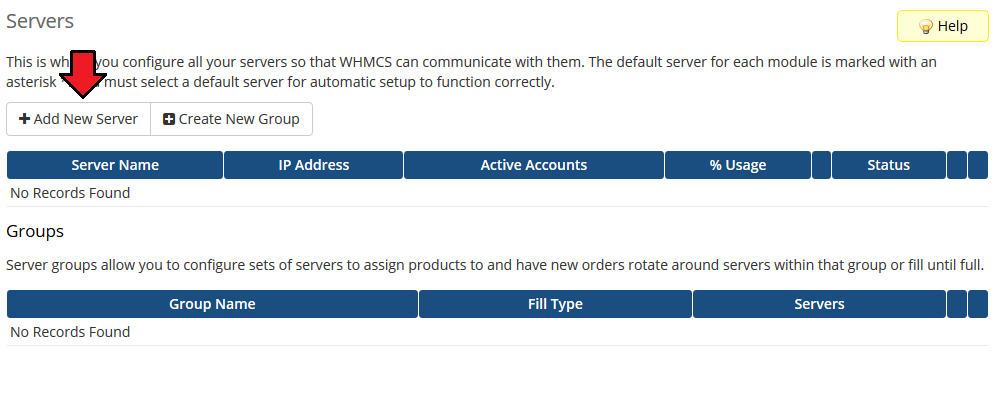
| 8. Now, log in to your WHMCS admin area and proceed to 'System Settings' → 'Servers'. Afterwards, press 'Add New Server'. |
|
| 9. Enter your server name and IP address. Choose 'SolusvmExtendedVPS' from a dropdown menu and provide:
Check if your server use SSL connection and optionally provide a custom port (by defualt the '5656' is used). |

|
| 10. After configuring your server correctly, you are going to see the following screen. Test your connection and API key through pressing 'Test Connection'. |
|
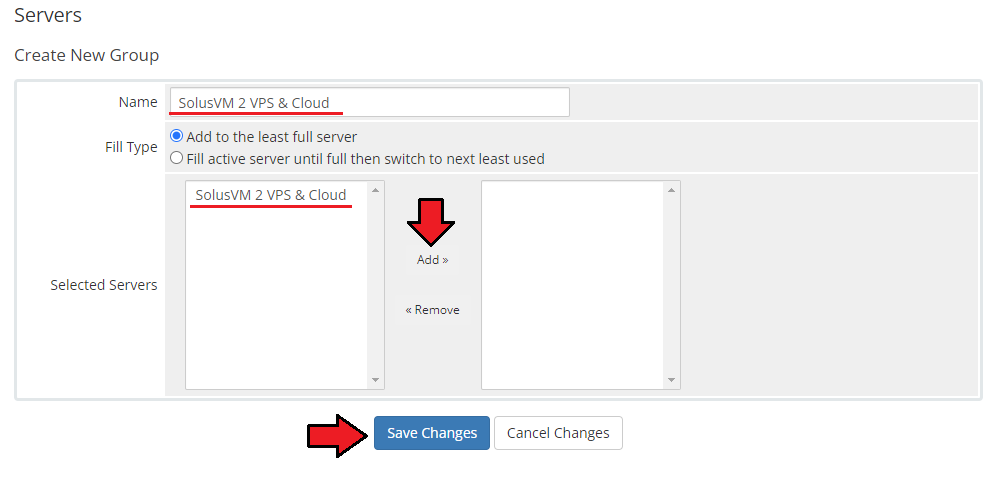
| 11. Fill in name, choose a previously created server and press 'Add'. Confirm by clicking on 'Save Changes'. |
|
Configuration of Product
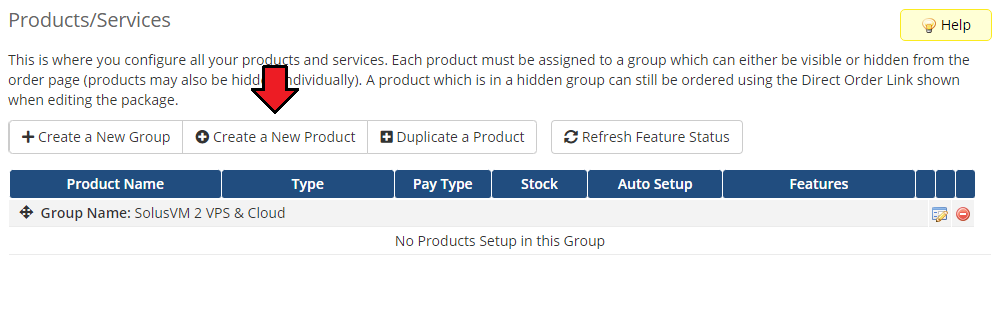
| 12. In order to create and configure product, go to 'System Settings' → 'Products/Services'. Afterwards, click on 'Create a New Group'. |
|
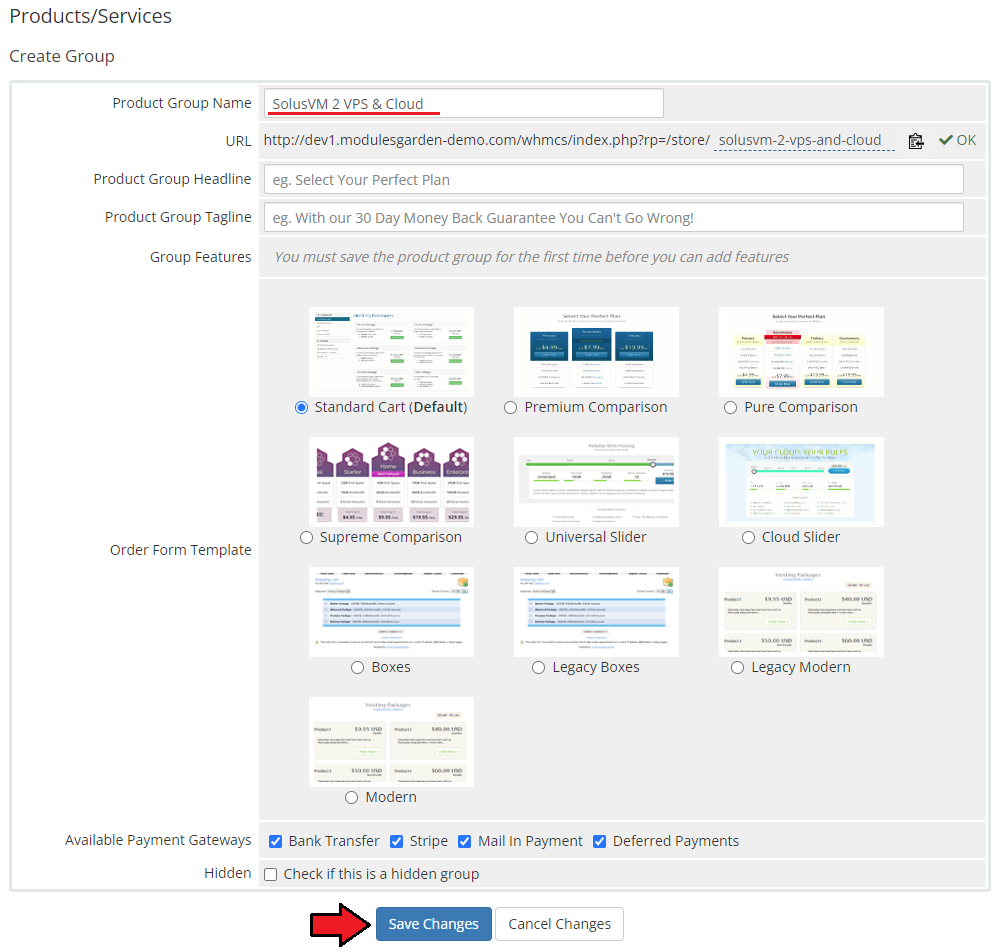
| 13. Fill in a product group name and press 'Save Changes'. |
| File:SVM12.png |
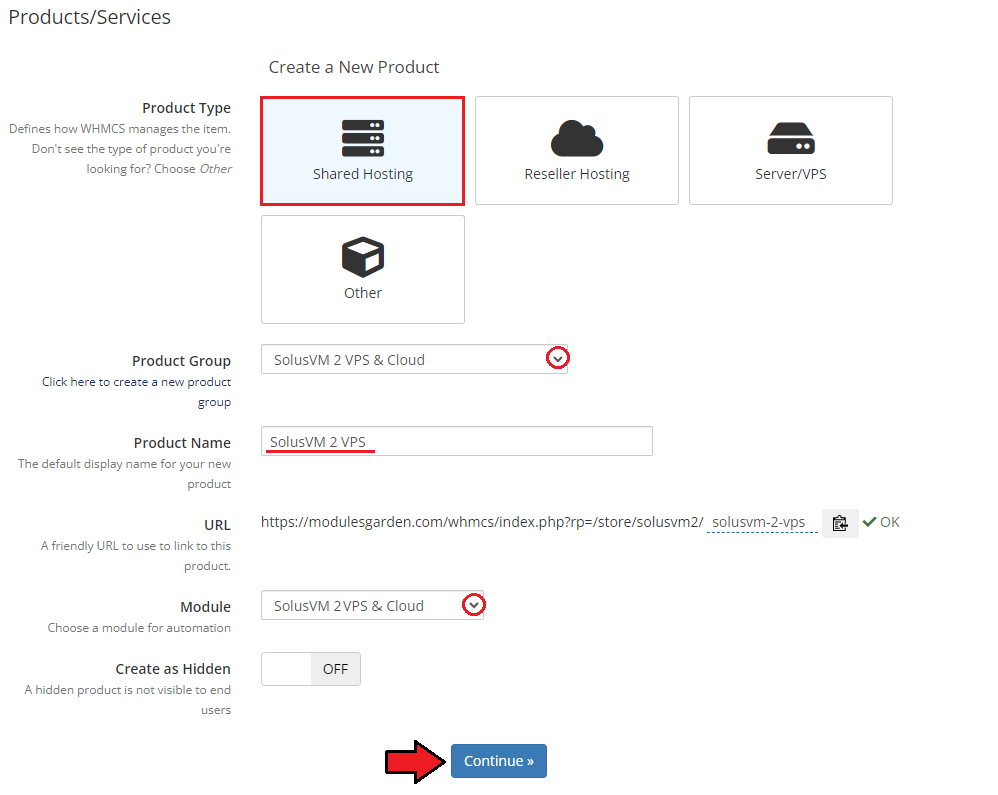
| 14. When you have a product group, you can create your product and assign it to SolusVM Extended VPS. To create a product click on 'Create a New Product'. |
|
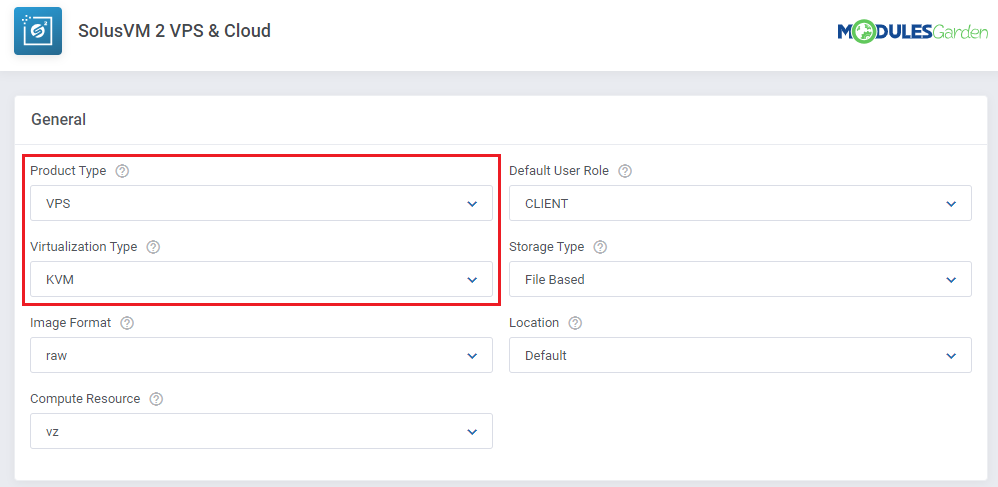
| 15. Afterwards, choose your product type and product group from dropdown menus, fill in your product name and press 'Continue'. |
|
| 16. Now, go to 'Module Settings' section, choose both 'SolusvmExtendedVPS' and a previously created server group from dropdown menus. Afterwards, press 'Save Changes'. |
|
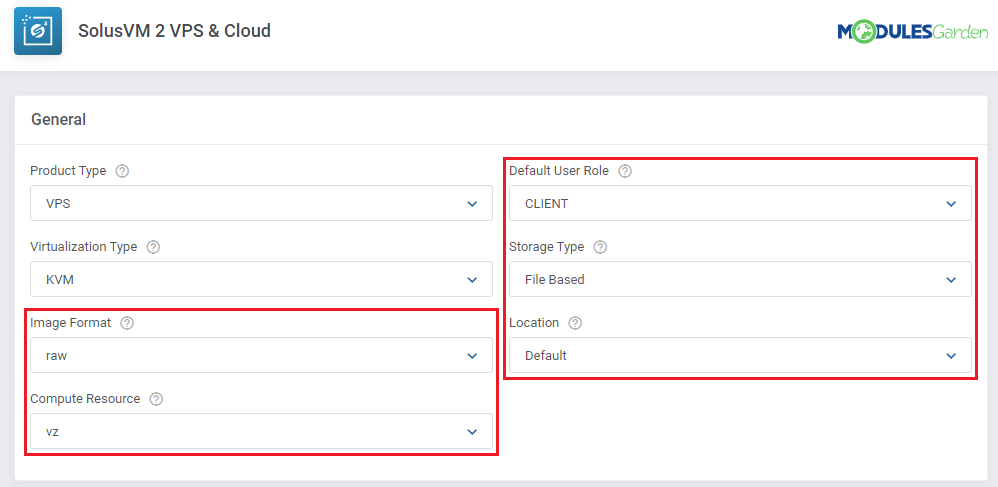
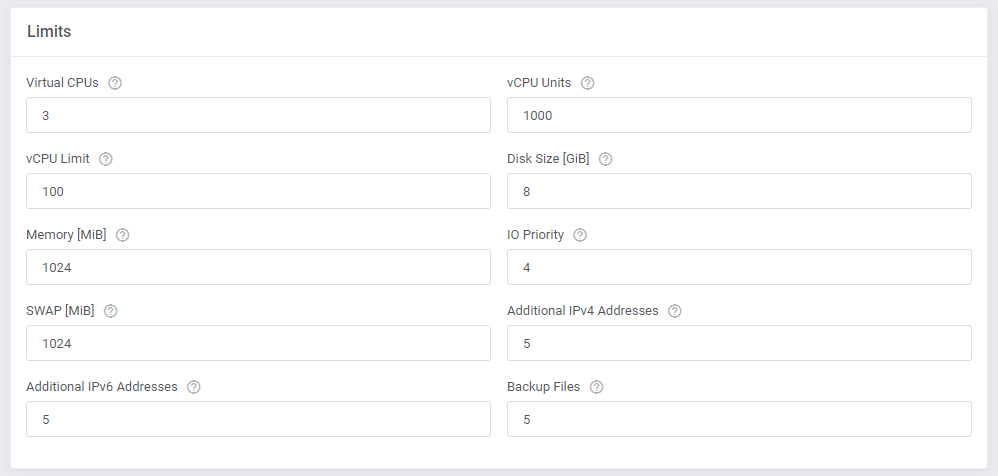
| 17. Start configuration of a product with 'Product Configuration' section. Select desired 'Virtualization Type' and press 'Save Changes' in order to load the virtualization. |
|
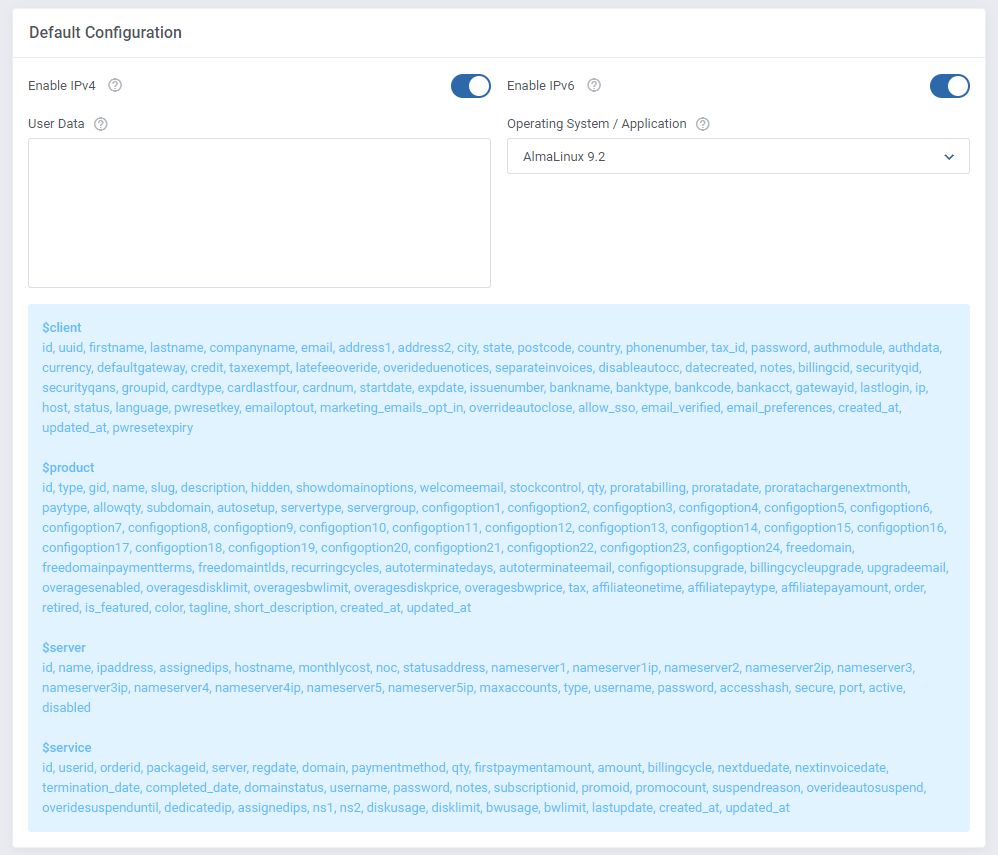
| 18. Now, choose 'Default Node', 'Plan', 'Default Operating System', 'Number of IPs' and 'Default Node Group'. Note: default data will be used if no configurable options are generated! |
|
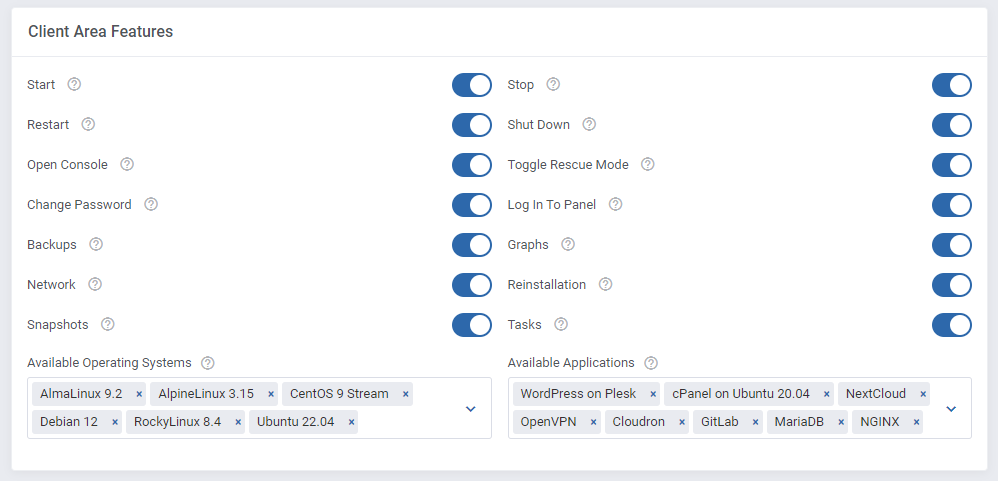
| 19. Define features available in the client area through marking/unmarking them under 'Client Area Features' section. Important: Keep in mind that the root password is generated automatically for KVM virtualization upon its creation and reset. |
|
| 20. At the very bottom you may change available nodes names to any friendly name. |
| File:SVM2 19.png |
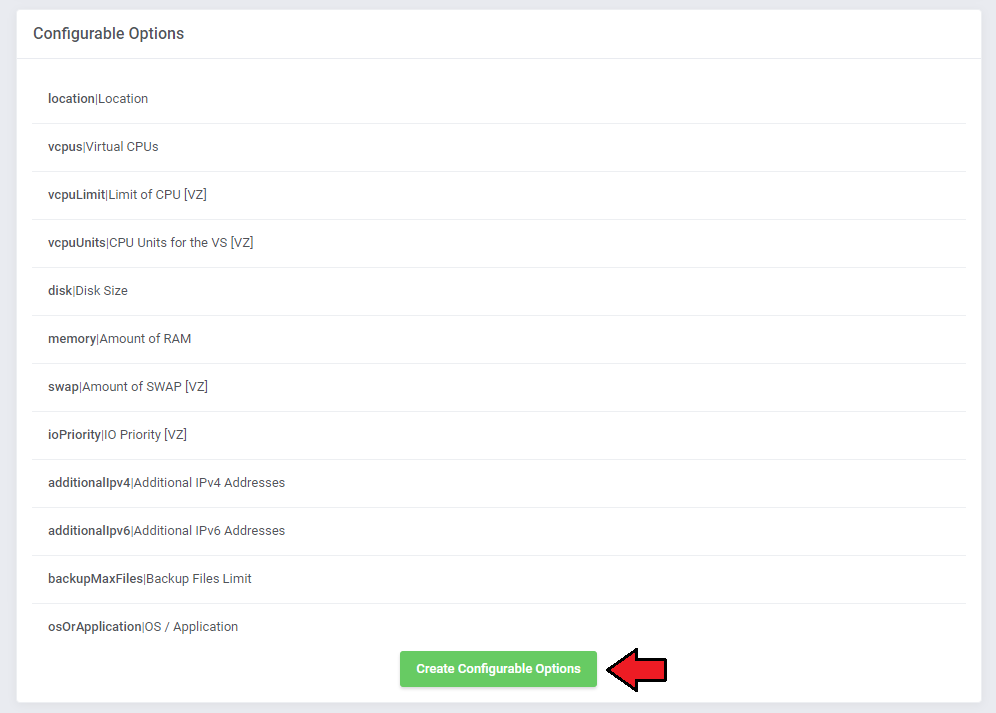
| 21. The final step is generating default configurable options. To do so, press 'Generate Default' near 'Configurable Options' as shown on the screen below. |
|
| You have just finished the installation and configuration of the module! |
Managemnt
| You have just correctly created and customized a new product. Go to 'Addons' → 'SolusVM 2' in your WHMCS. |

|
Addon Configuration
Servers
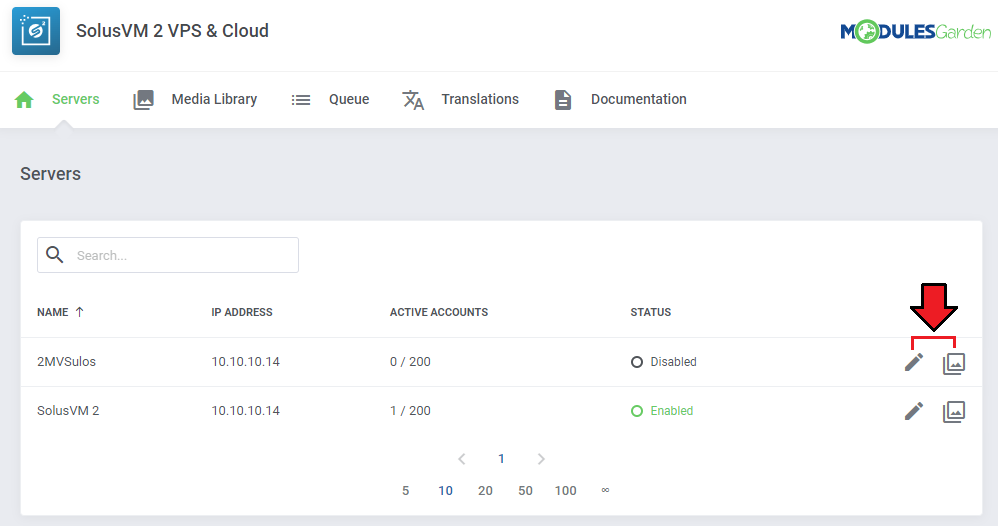
| 'Servers' section contains a list of your configured servers, you may quickly edit them directly from this site, simply press the edit icon. |

|
| In the next step, press the marked icon to see a list of .... |

|
| fgargregergreg |
Library
| 'Librtary' section .... |

|
Queue
Translations
Logs
Admin Area
| Module allows |
| File:SVM21.png |
Client Area - Ordering Proccess
Importing Existing VPS
| In this section, you can find short instruction on how to connect one of your clients to your already existing VPS in Solus panel. Take the following steps to make sure that the process will be carried out properly. 1. Firstly, manually create an order for your customer in WHMCS. Choose a client and in the summary, view click on the ' Add New Order' button. Next, select a 'Product/Service' and press 'Submit Order' .
The above-mentioned information has to be consistent with the data from your Solus panel. Now, complete these fields as presented below. |
| File:SVM38.png |
| 3. If the completed data is correct, after refreshing the page, you will see the attached VPS from Solus. Important! Remember to manually add other missing parameters of the VPS such as domains, credentials, IP Addresses, configurable options, SSH Key, billing cycle, etc. so they match the parameters of the attached VPS from Solus. |
Client Area - Managemnt
Console
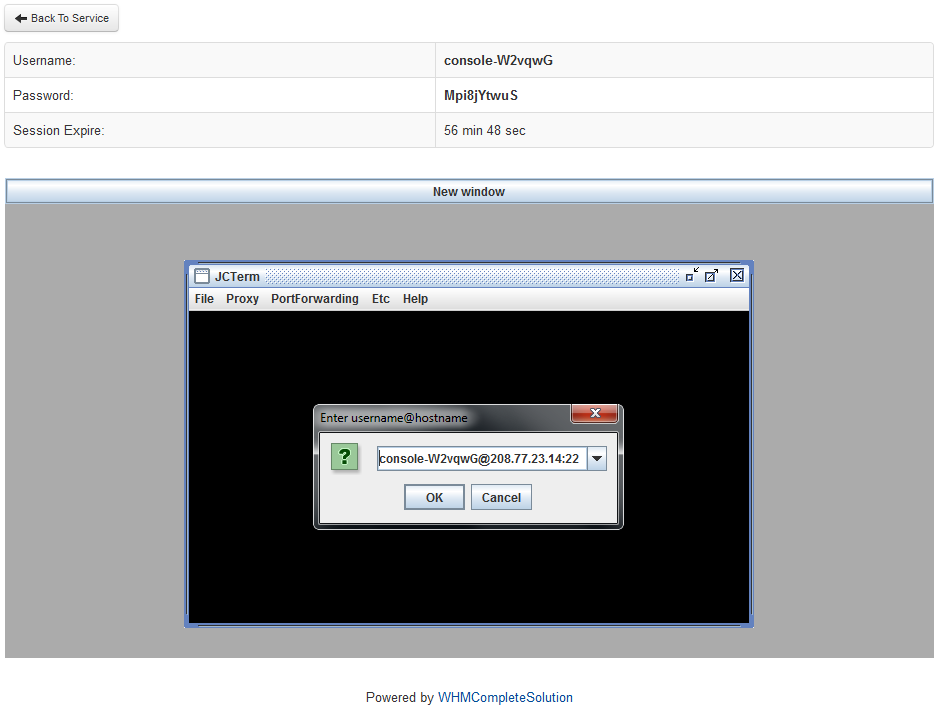
| comsole |
|
Backups
| Rebuild feature allows you to change OS template from available OS templates list. To rebuild your server click on 'Rebuild' button, choose template and confirm by pressing 'Rebuild' button. |
| File:SVM24.png |
Graphs
| Move to 'Graphs' section. You will find there visualizations of your current 'Network Traffic', 'Load Average' and 'Memory Usage'. Tracking your VPS usage you avoid sudden and unexpected overload. |
| File:SVM21 2.png |
Network
| One of the options available is Rescue Mode that may be turned on/off by the client. It allows to boot the server directly into the rescue mode. Press to enable this functionality. |
| File:SVM21 3.png |
Reinstall
Snapshots
Tasks
Tips
| 1. Do wymyślenia jeden tip |
Update Instructions
| An essential guidance through the process of updating the module is offered here. Ensure successful completion of the module update by carefully following each step, thereby preventing data loss or any unforeseen issues. |
Upgrade Guide
| Seeking a solution that offers greater flexibility, customization tailored to your precise needs, and unrestricted availability? There is an option that not only proves to be cost-effective in the long run but also includes prioritized support services, making it a truly valuable investment. Opt for the Open Source version of your SolusVM Extended VPS For WHMCS module to unlock these benefits. Follow a comprehensive guide covering the transition process, the advantages it brings, and step-by-step instructions on what to do next after the order has been successfully finalized. |
Common Problems
| 1. When you have problems with connection, check whether your SELinux or firewall does not block ports. |