Hosting Quota Notifications 1.X For WHMCS
Contents |
About Zendesk Extended For Magento 2
| Zendesk Extended For Magento 2 enables the remote use of Zendesk tools upon the integration built between Magento and Zendesk. With this extension, all operations on Zendesk tickets or even the creation of Zendesk accounts can be performed within your eCommerce platform. |
- Customer Panel Features:
| ✔ Open New Ticket |
| ✔ Add Several Attachments To Each Ticket Message |
| ✔ Add Reply To Tickets |
| ✔ View Tickets |
| ✔ View Tickets Statistics |
- Admin Panel Features:
| ✔ View Full Tickets List |
| ✔ Open Ticket Directly From Extension |
| ✔ Manage Tickets - Reply, Add Notes, Modify Settings, View Logs |
| ✔ Delete Single Or Multiple Tickets |
| ✔ Display All Selected Customer Tickets On Their Page |
| ✔ Create Zendesk End-User Accounts For Your Clients Automatically |
| ✔ View Full Users List |
| ✔ Add New Admin User Account |
| ✔ Use Default Or Custom Admin Account |
| ✔ Define Custom Signature For Each Admin |
| ✔ Toggle Possibility To Add Attachments To Tickets |
| ✔ Export Tickets Overview - CSV And XML |
| ✔ Define Cache Lifetime - With Ability To Disable Cache |
- General Info:
| ✔ Supports Multiple Attachments In Single Ticket Message |
| ✔ Supports Ticket Tags |
| ✔ Connection Test And Admin Validation |
| ✔ Multi-Language Support |
| ✔ Supports PHP 5.6 Up To PHP 7 |
| ✔ Supports Magento 2.1 And Later |
Installation
| This tutorial will show you how to successfully install Zendesk Extended For Magento 2. We will guide you step by step through the whole installation and configuration process. |
Installation
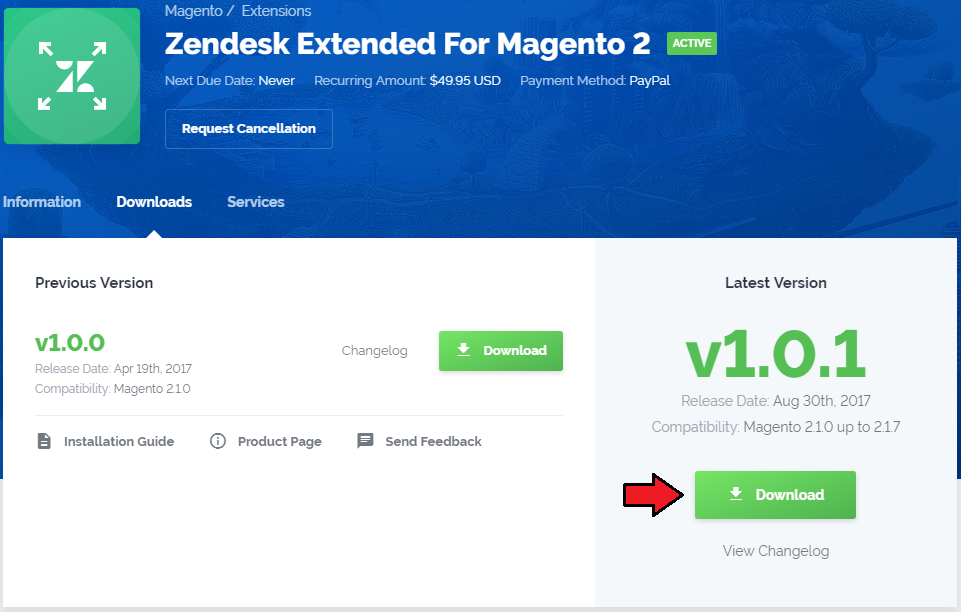
| 1. Log in to your client area and download Zendesk Extended For Magento 2. |
|
| 2. Upload and extract the extension into the main Magento directory. Extracted files in your Magento directory should look like this: |

|
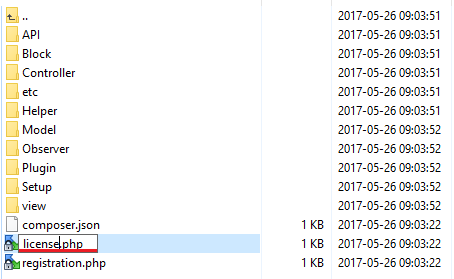
| 3. When you install Zendesk Extended For Magento 2 for the first time you have to rename 'license_RENAME.php' file. File is located in '/app/code/Modulesgarden/Zendesk/license_RENAME.php' . Rename it from 'license_RENAME.php' to 'license.php' . |
|
| 4. In order to configure your license key, you have to edit a previously renamed 'license.php' file. Enter your license key between quotation marks as presented on the following screen. You can find your license key at your client area → 'My Products' . |

|
Configuration
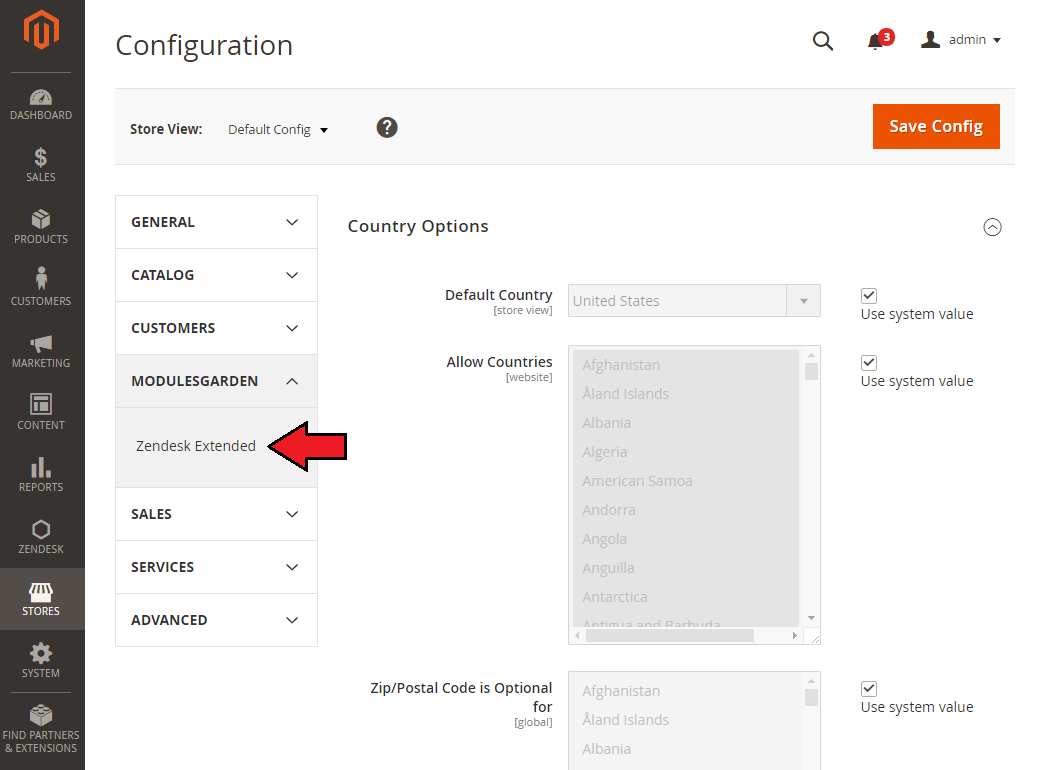
| 5. Now, log in to Magento and go to 'Store' → 'Configuration' . Afterwards, press 'Zendesk Extended' under 'ModulesGarden' section. |
|
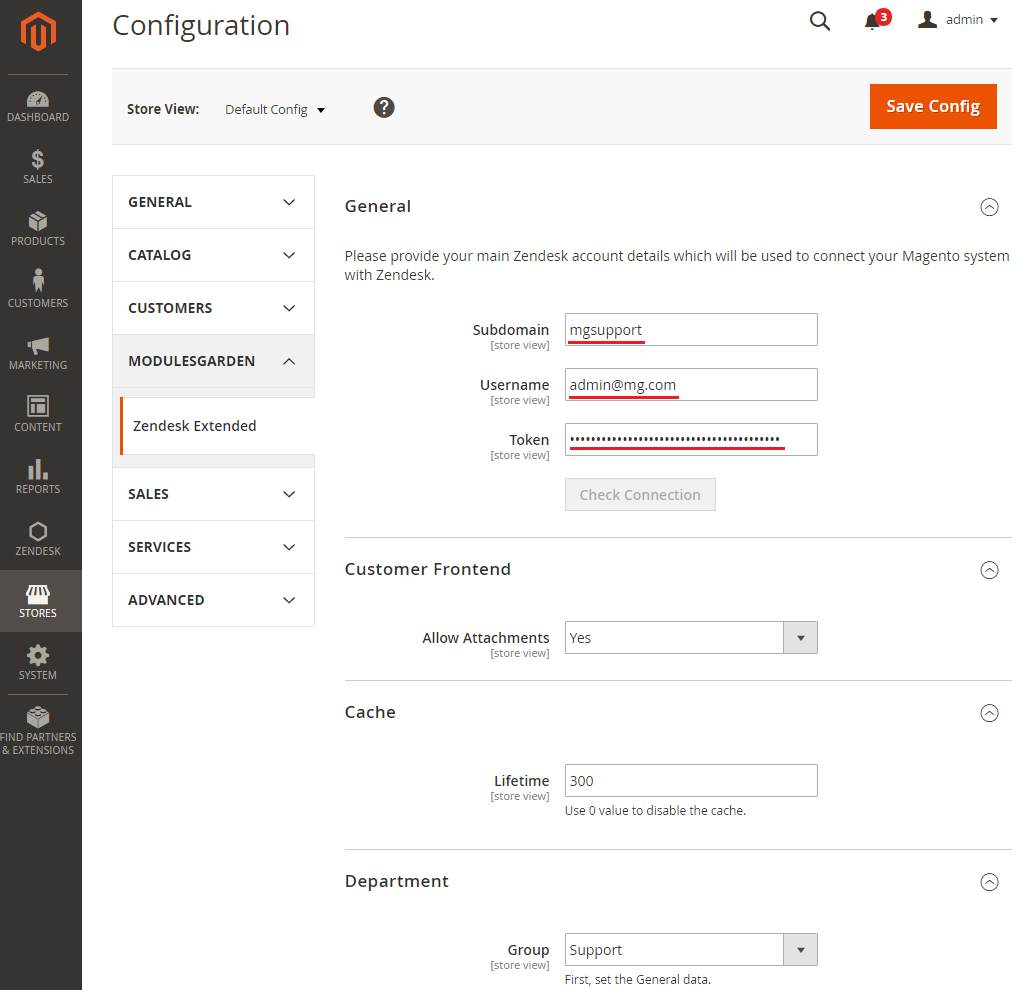
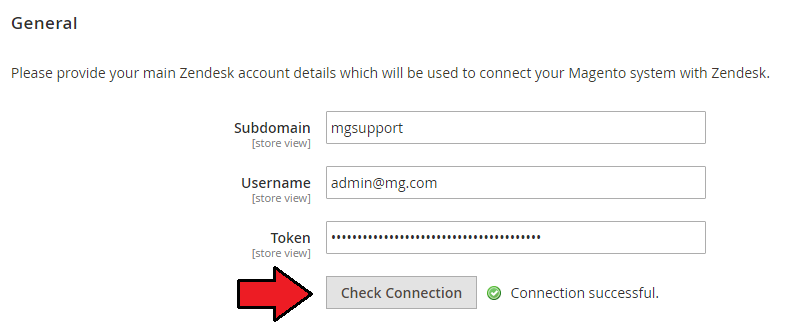
| 6. In 'General' section fill in 'Subdomain' , 'Username' and 'Token' fields with your connection details. Next, press 'Save Config' . Note: 'Subdomain' is a subdomain used by your Zendesk server. |
|
| 7. You can also check whether the connection details provided by you are correct, press 'Check Connection' after saving configuration to do so. |
|
| 8. You have just successfully installed Zendesk Extended For Magento 2! |
Configuration and Management
| Zendesk Extended For Magento 2 will help you gain profits from the usage of Zendesk support platform in your own Magento system. |
Configuration
| Let's start by showing you other configuration possibilities of our extension. |
General
|
In the 'General' section you can set up access details to your Zendesk server. |
Customer Frontend
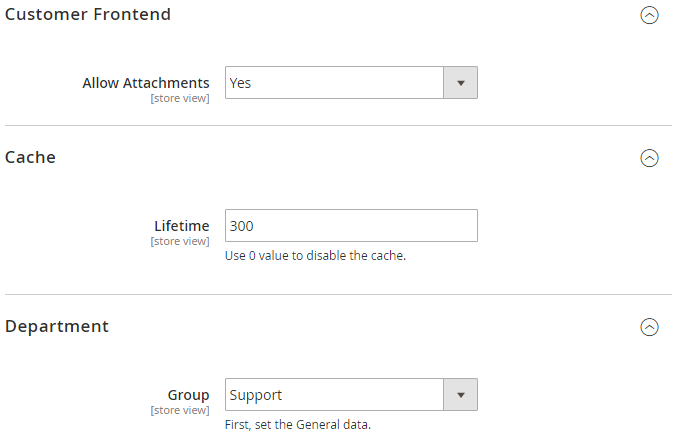
| 'Customer Frontend' lets you enable/disable attachments to the tickets, as well as define the default sort order of tickets in the customer panel. |
Cache
| 'Lifetime' variable in the 'Cache' section allows you to define how often changes should be synchronized with Zendesk server. Any changes made in your Magento result in clearing cache and performing a new synchronization. |
Department
| 'Department' - choose a default group (agents) in Zendesk that tickets will be passed to. |
|
| Finally, click the 'Save Config' button for the second time for the changes to take effect. |
Settings - Zendesk Account Per Admin
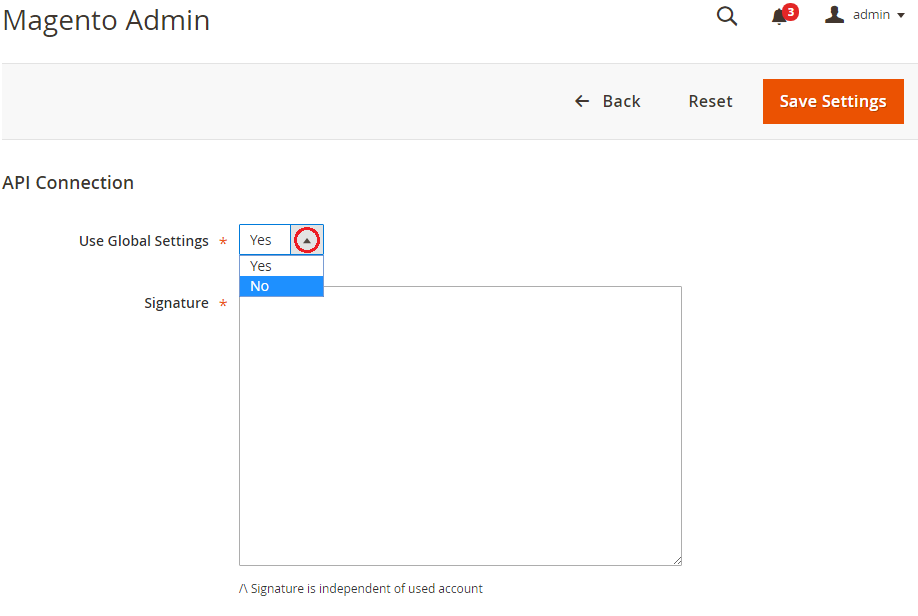
| Our extension allows your staff to use multiple accounts on a Zendesk server. To set up an account for currently logged in admin, proceed to 'Zendesk' → 'Settings' . |
|
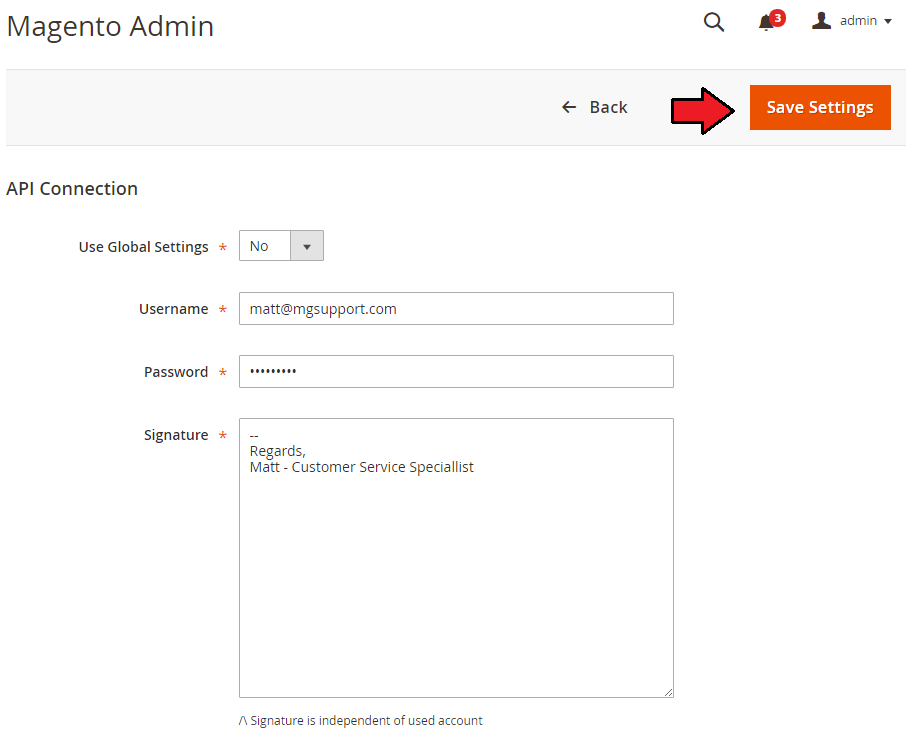
| New fields shows up, fill them in with access details to your Zendesk user admin account. Additionally, using 'Signatures' text area you can define a signature added to your replies. |
|
Users
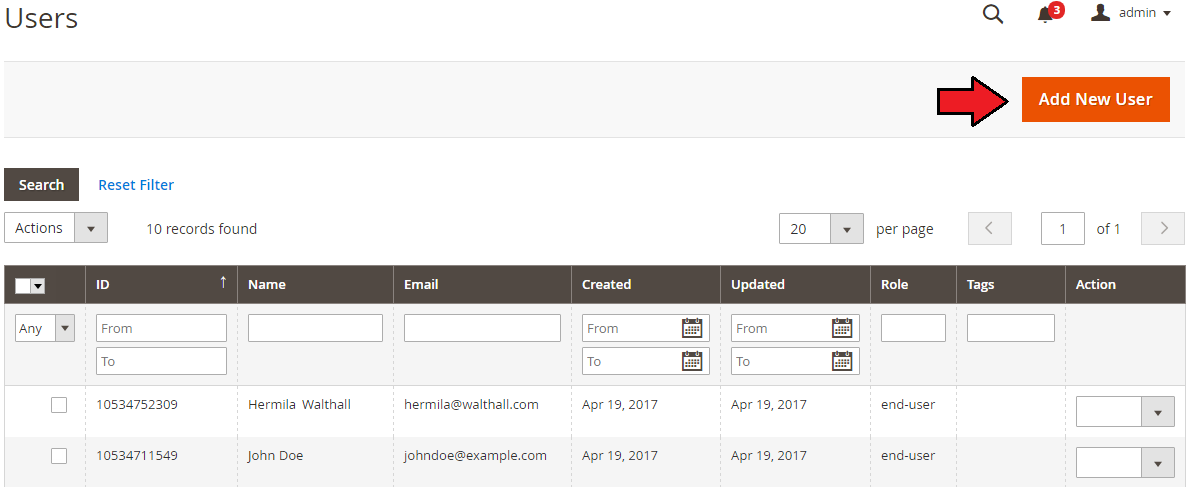
| 'Users' page allows you to view the list of users, which contains both admins and end users. As you can see on the following screen, you can find information about each of your users and even search specific ones using filters. |

|
| You can easily proceed to the tickets of a specific user. Simply, press the name as shown below. |

|
Add A New User
| In order to add a new user, press 'Add User' button. |
|
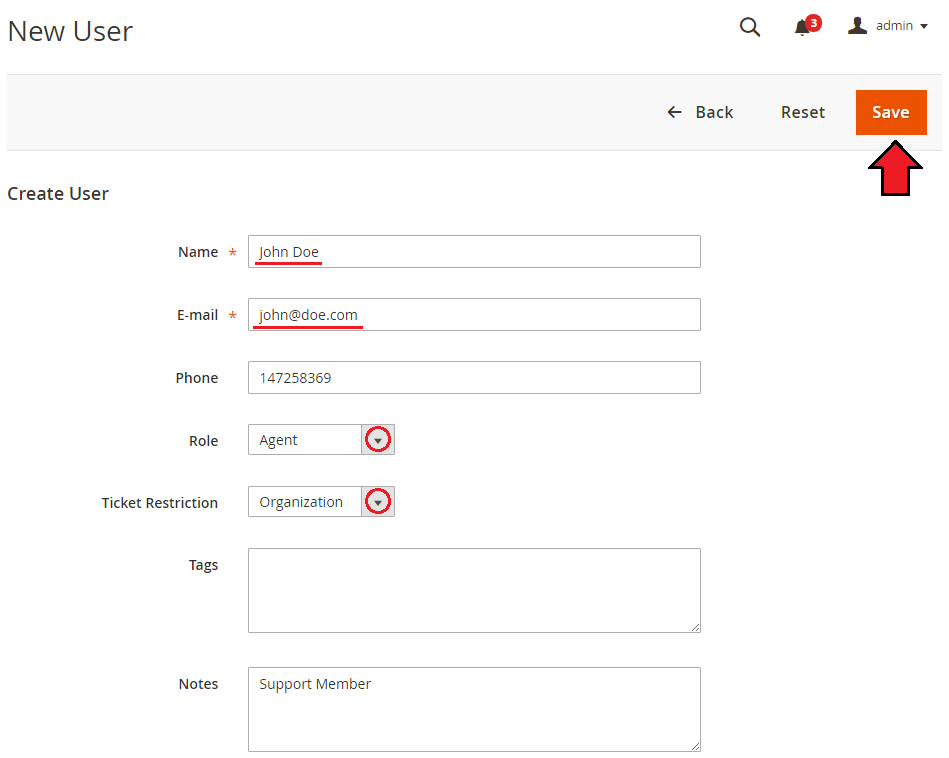
| Next, fill in user details and decide what type of account it should be. You can even add tags and notes to the account, press 'Save' to confirm creation of the account. |
|
Tickets
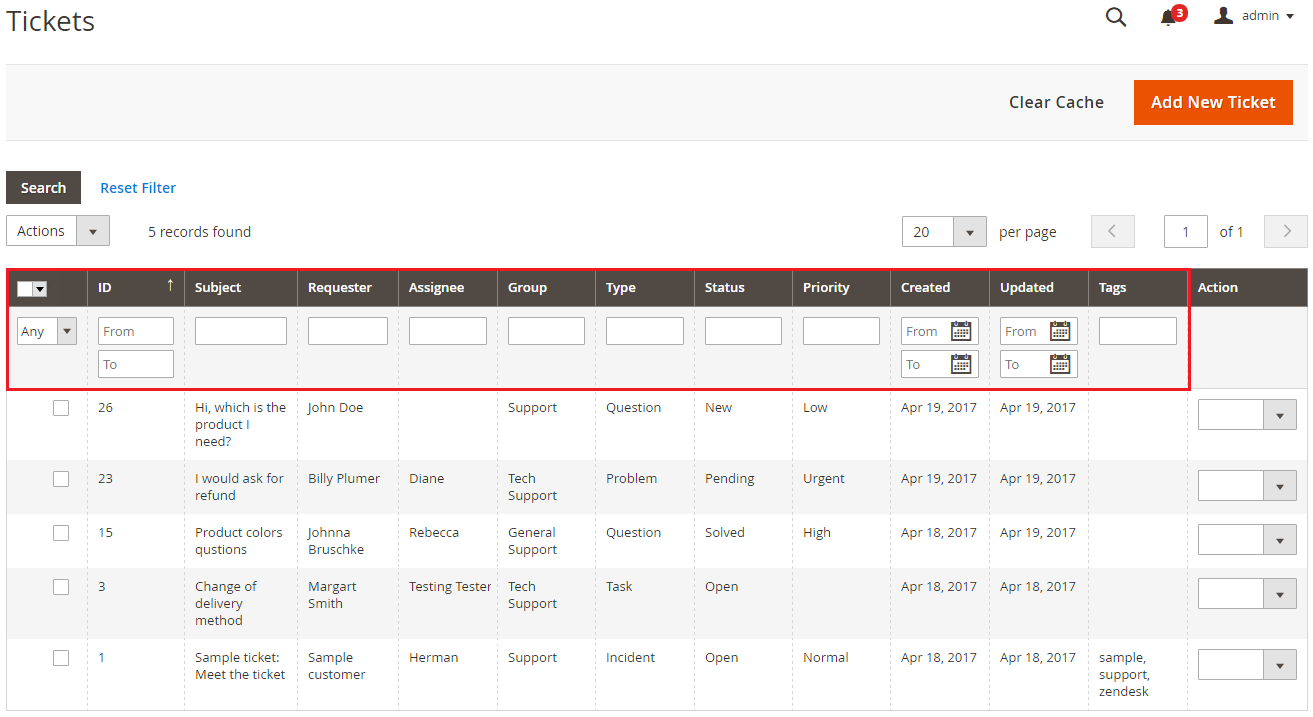
| Tickets and their details can be viewed at the 'Tickets' page of our extension. You can search for a specific ticket using filters. |
|
Ticket Overview
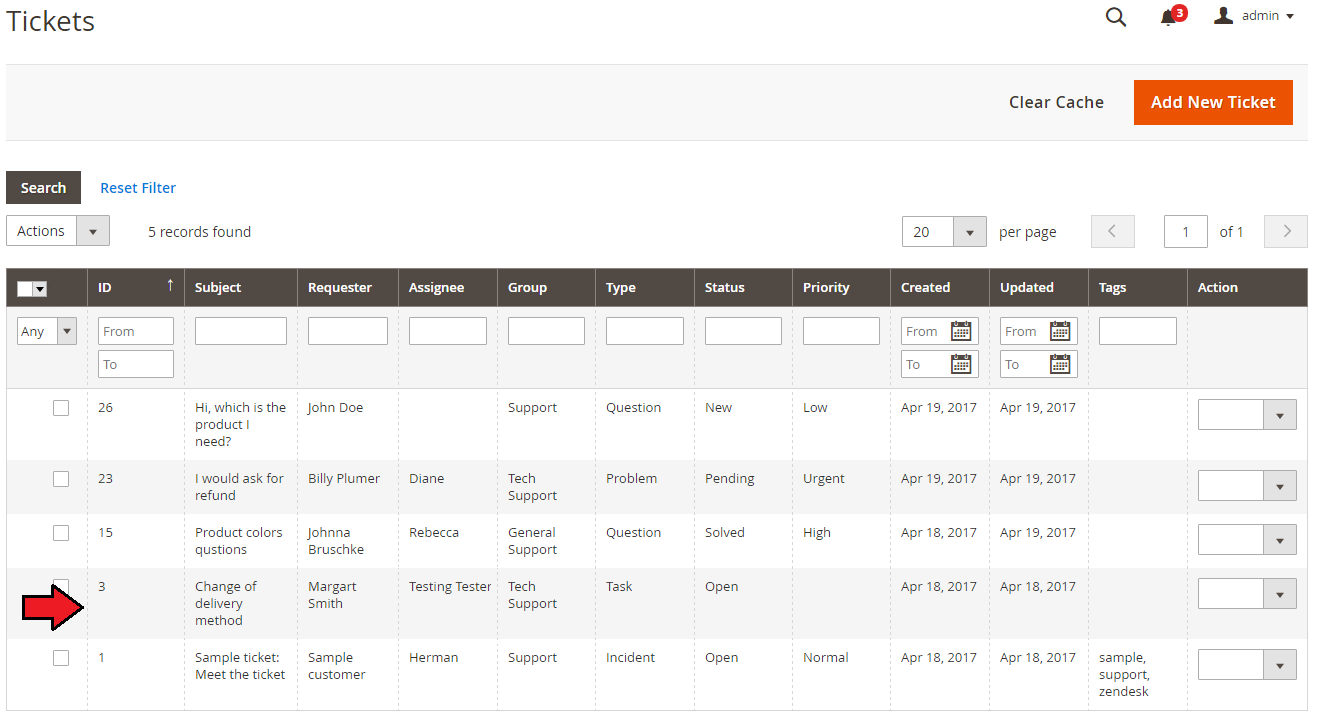
| In order to view a specific ticket, find it on the list of tickets and click on it. |
|
| You will be moved to the ticket page. As you can see, here you can view a full conversation and add a new reply. |

|
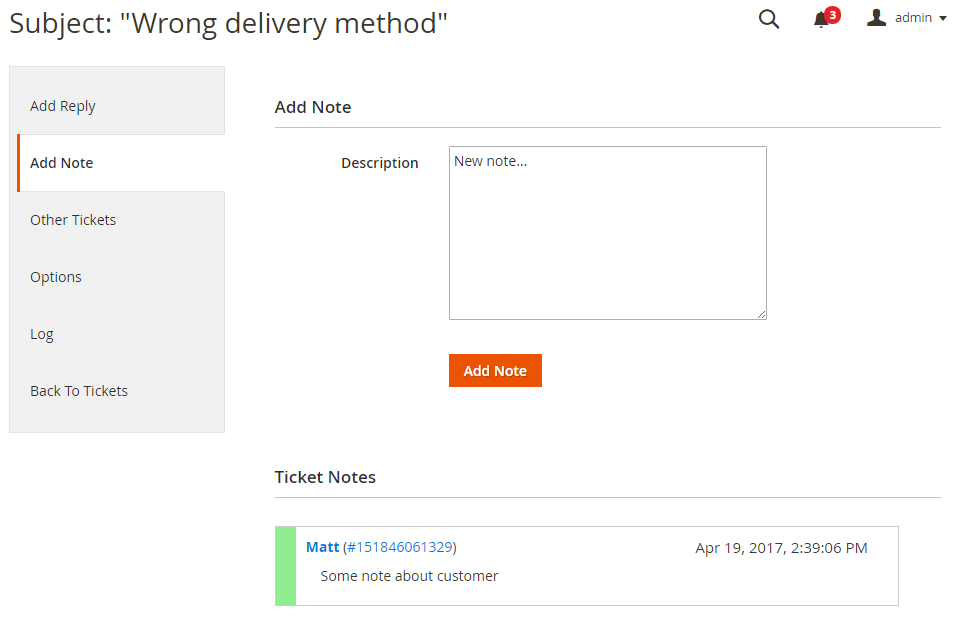
| At 'Add Note' page you can view previously created notes and add a new one. |
|
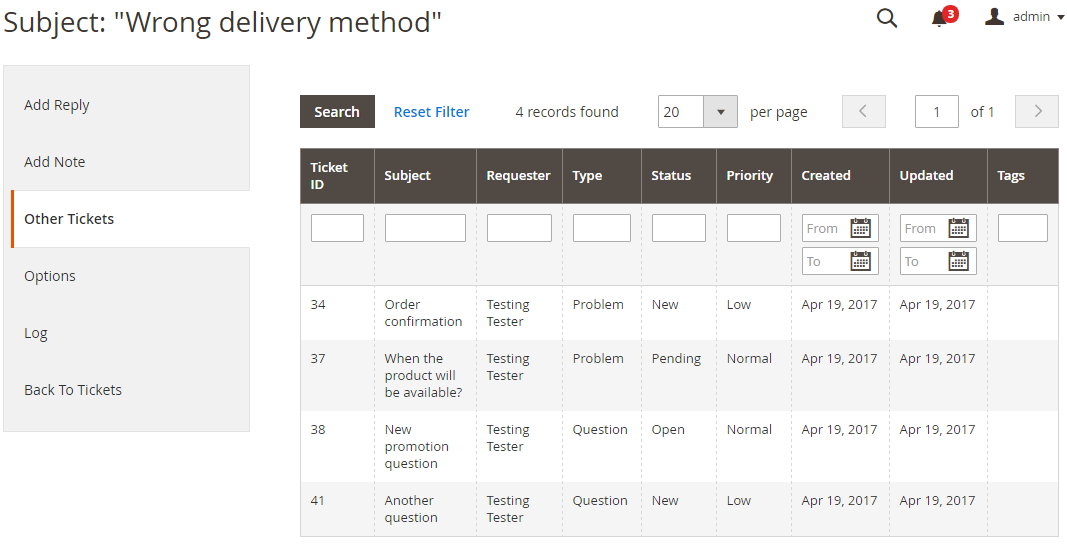
| To view the other tickets of the client, proceed to 'Other Tickets' page. |
|
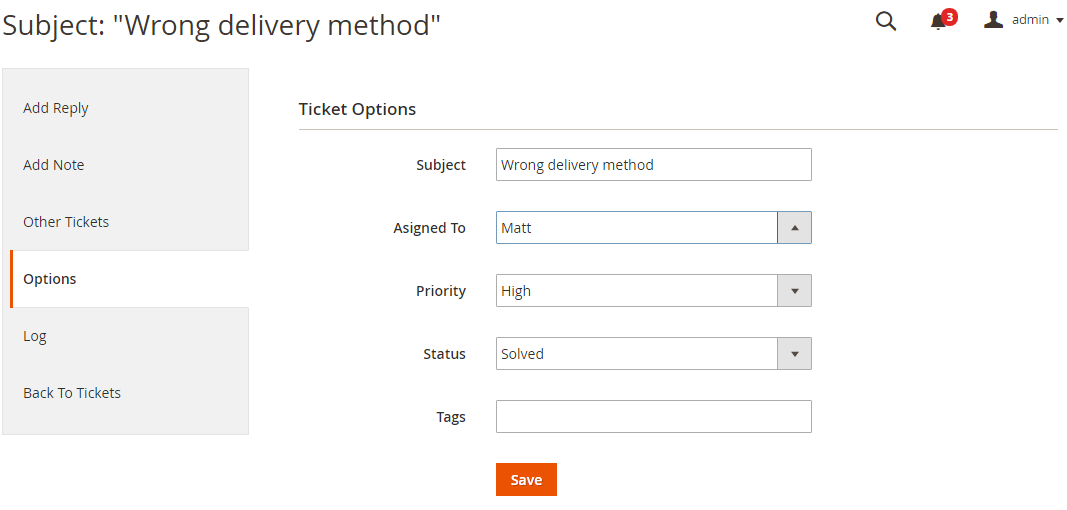
| You can even change ticket's details at 'Options' page. Here you are able to switch ticket's department, subject, priority and status. You can even add a tag to the ticket. |
|
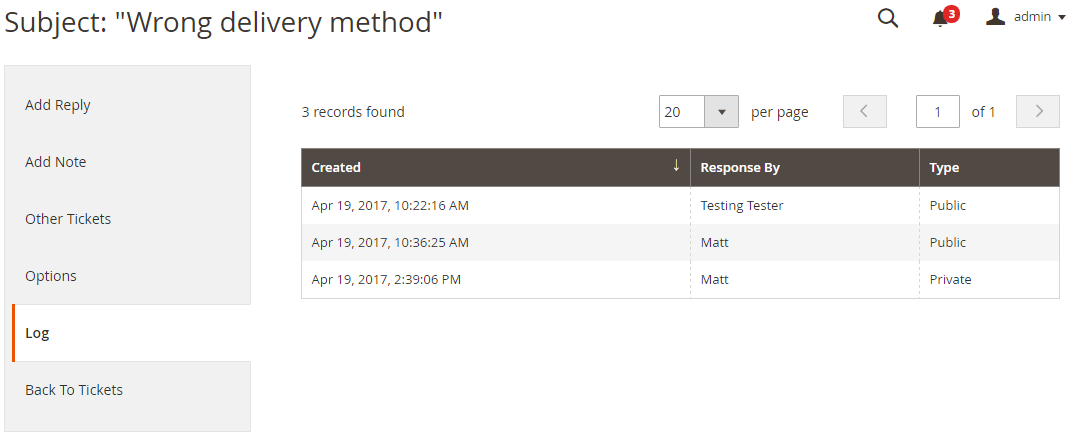
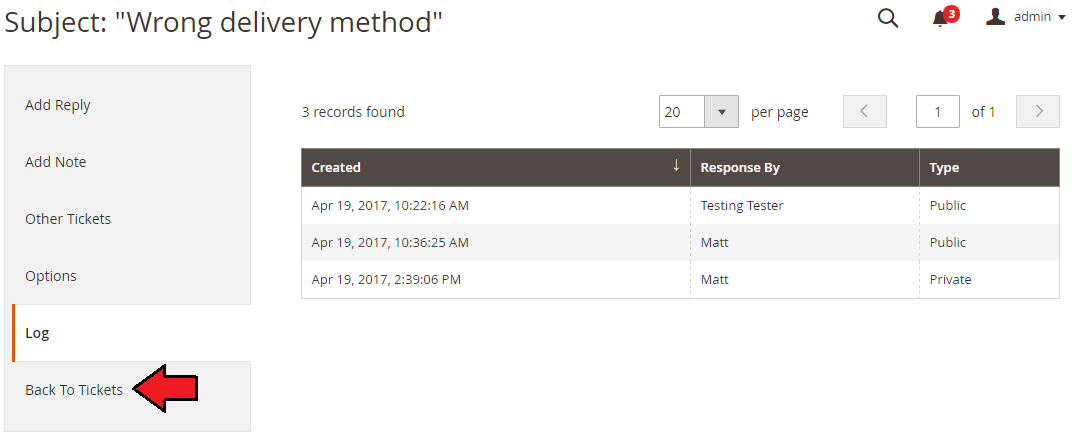
| All replies are logged, to view the full log, move to the 'Log' tab. |
|
| In order to go back to the list of tickets, press 'Back To Tickets' . |
|
Front-End - Client Area
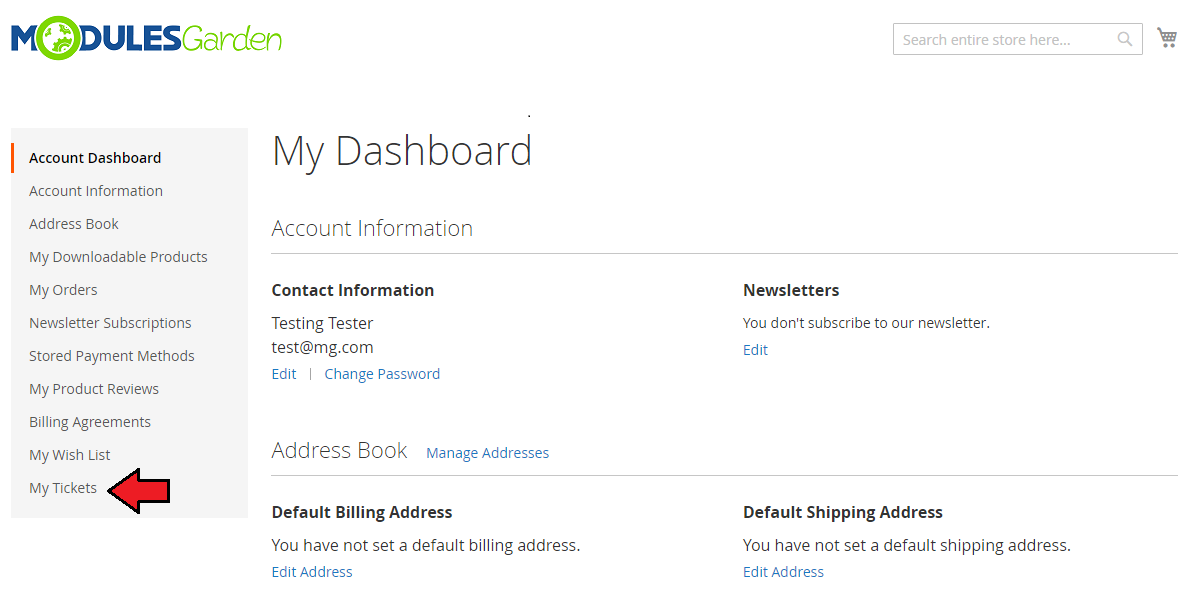
| Your customers can profit from the integration with Zendesk right away! Let's log into a client's account and press 'My Tickets' in order to proceed to the ticket dashboard. |
|
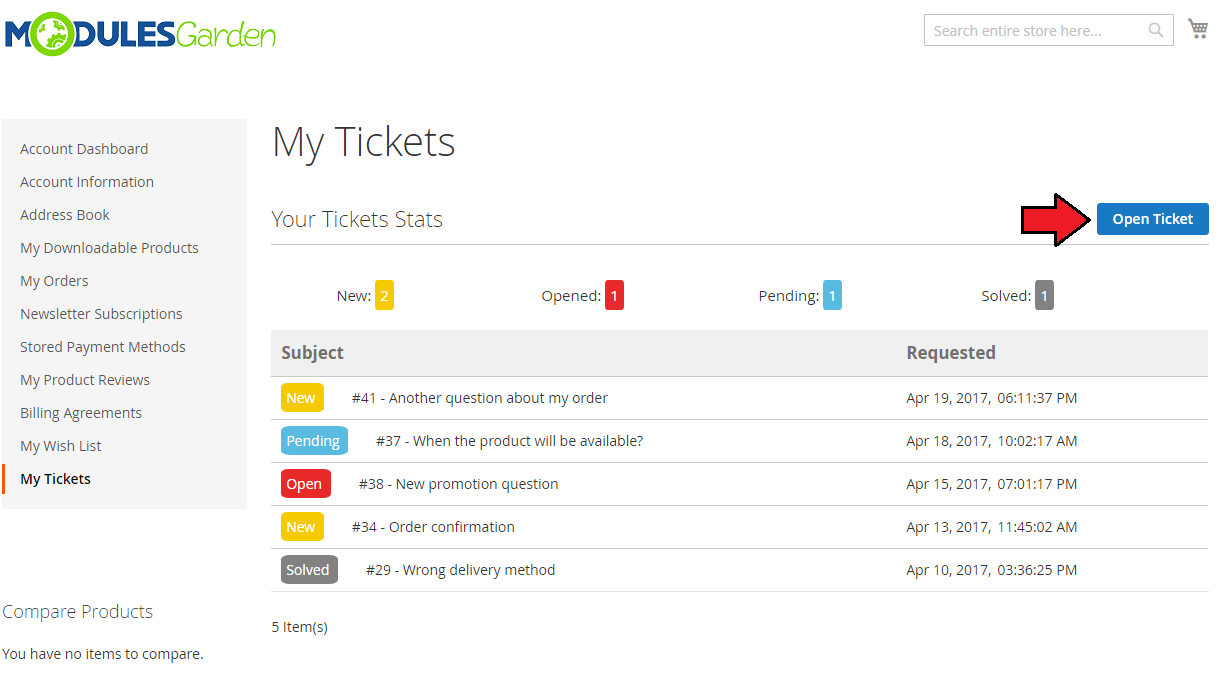
| As you can see on the following screen, here you can access the list of previously created tickets and ticket's statistics. Now, open a new ticket through pressing 'Open Ticket' . |
|
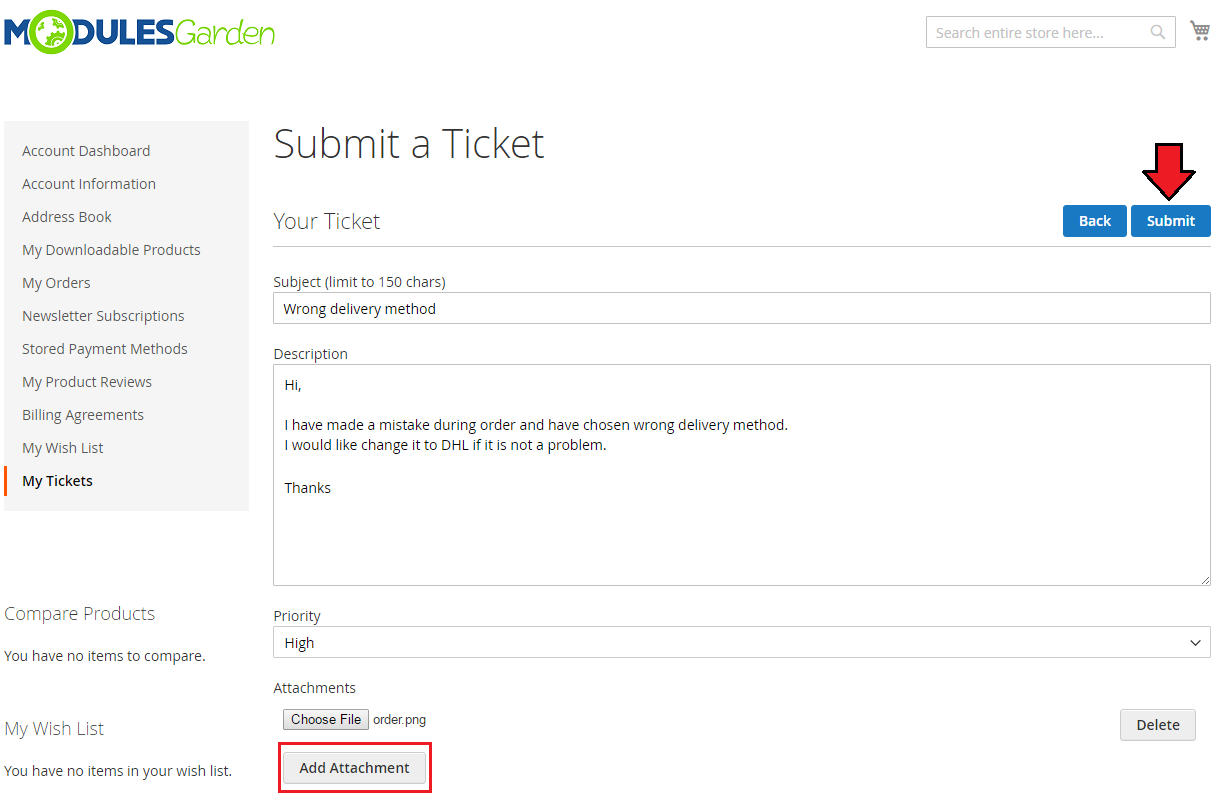
| Fill in ticket's subject, its message, type of the ticket and its priority. Optionally, you can add an attachment (if admin allows it). Send the ticket through pressing 'Submit' . |
|
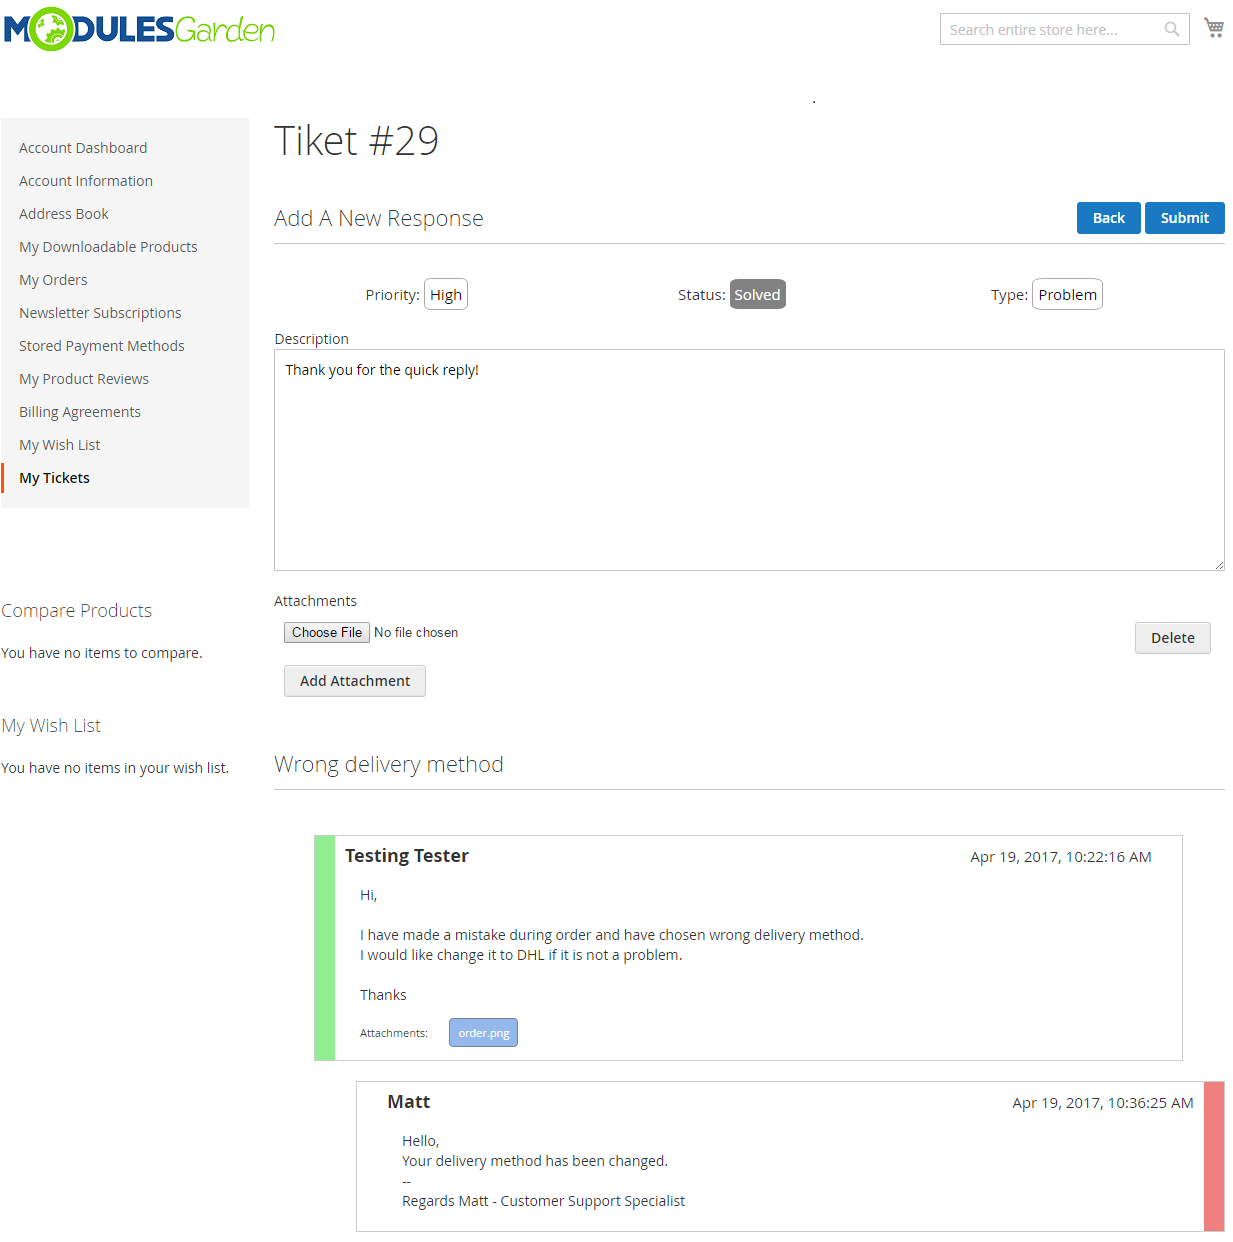
| Now, let's take a look at the ticket itself, where some conversation with administration was already made. Note: If you attach an image file, pressing on it will result in opening it in a new tab of your browser. |
|
Tips
| 1. Attachments are saved in the 'your_magento\pub' , therefore make sure you set it as writeable. |
| 2. If you use one Zendesk server with multiple Magento platforms, your clients' tickets will be available throughout all the platforms. |
Common Problems
| 1. When you have problems with connection, check whether your SELinux or firewall does not block ports. |
| 2. Error 'The page you requested was not found, and we have a fine guess why.' encountered while choosing 'Shipping method' condition. Reason: This is related to Magento bug with missing DHL configuration variables. |
| 3. In case of any problems with the extension, that were not mentioned in this article, proceed to Common Problems With Magento Extensions article. |