Portainer Docker Containers For WHMCS
Contents |
About Portainer Docker Containers For WHMCS
| Portainer Docker Containers For WHMCS is a module that connects your WHMCS system with Portainer, allowing you to sell and manage Docker containers just like traditional hosting products. It automates the deployment process, so containers are created, configured, and assigned to clients instantly upon purchase. |
- Addon Module Features:
| ✔ ffffff |
| ✔ fffffffffff |
| ✔ f |
| ✔ Set Failure Count To Trigger Notification |
- Client Area:
| ✔ Create Monitoring Checks For Allowed Services Within Specified Limits: |
| ✔ Set Server Monitoring Check Limit |
- General Info:
| ✔ Multi-Language Support With Custom Translations Tool |
| ✔ Supports PHP 8.4 Back To PHP 8.1 |
| ✔ Supports WHMCS V8.13 Back To WHMCS V8.10 |
| ✔ Requires ionCube Loader V14 Or Later |
| ✔ Easy Module Upgrade To Open Source Version |
Installation And Confiuration
| This tutorial will show you how to successfully install and configure Portainer Docker Containers For WHMCS. We will guide you step by step through the whole installation and configuration process. |
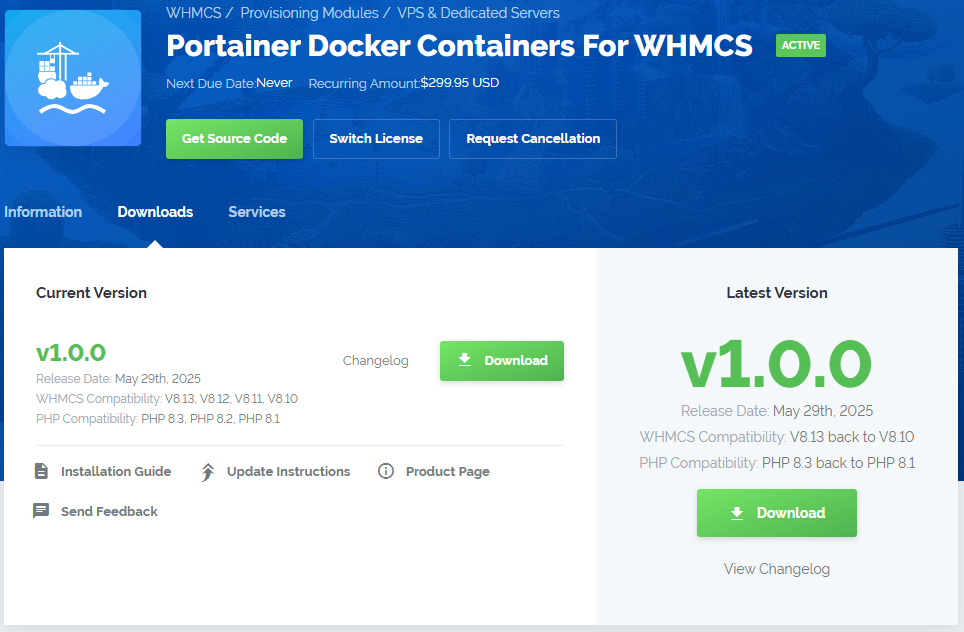
| 1. Log in to our client area and download the module. |
|
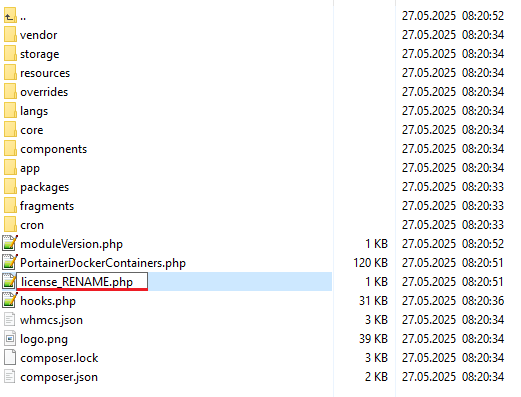
| 2. Extract the package and upload its content into the main WHMCS directory. The content of the package to upload should look like this. |

|
| 3. When you install Portainer Docker Containers For WHMCS for the first time you have to rename 'license_RENAME.php' file. The file is located in 'modules/addons/PortainerDockerContainers/license_RENAME.php'. Rename it from 'license_RENAME.php' to 'license.php'. |
|
| 4. In order to configure your license key, you have to edit the previously renamed 'license.php' file. Enter your license key between quotation marks as presented on the following screen. You can find your license key in our client area → 'My Products'. |

|
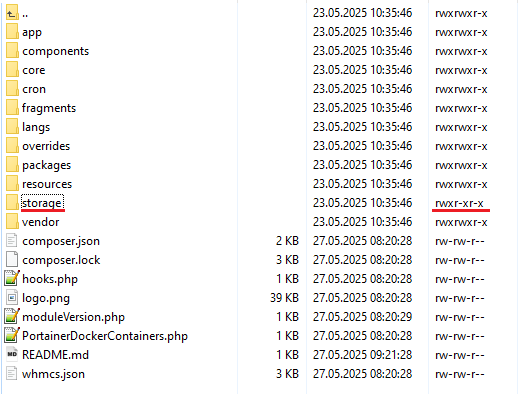
| 5. Now, set up the 'storage' folder as recursively writable. This folder is available at '/yourWHMCS/modules/addons/PortainerDockerContainers/'. |
|
Addon Activation
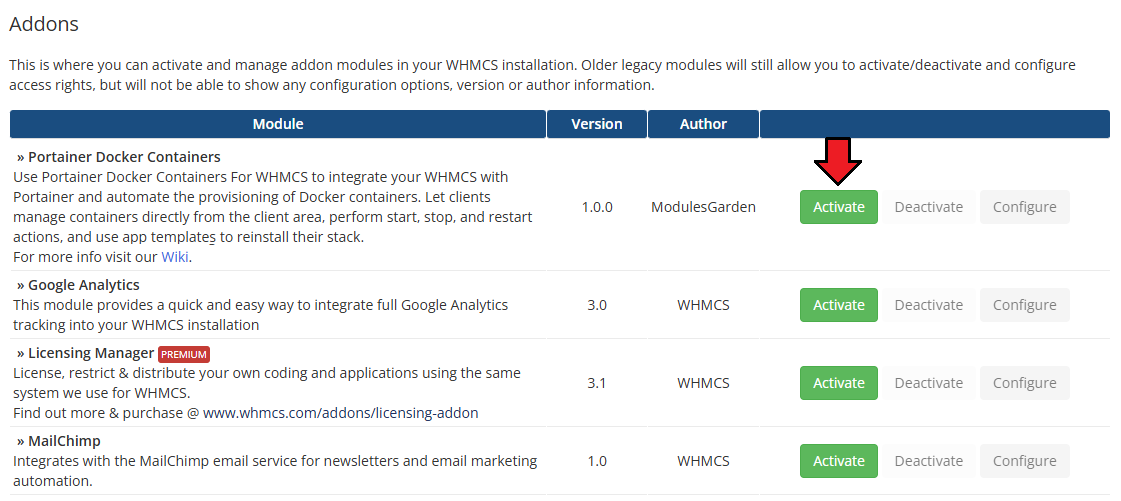
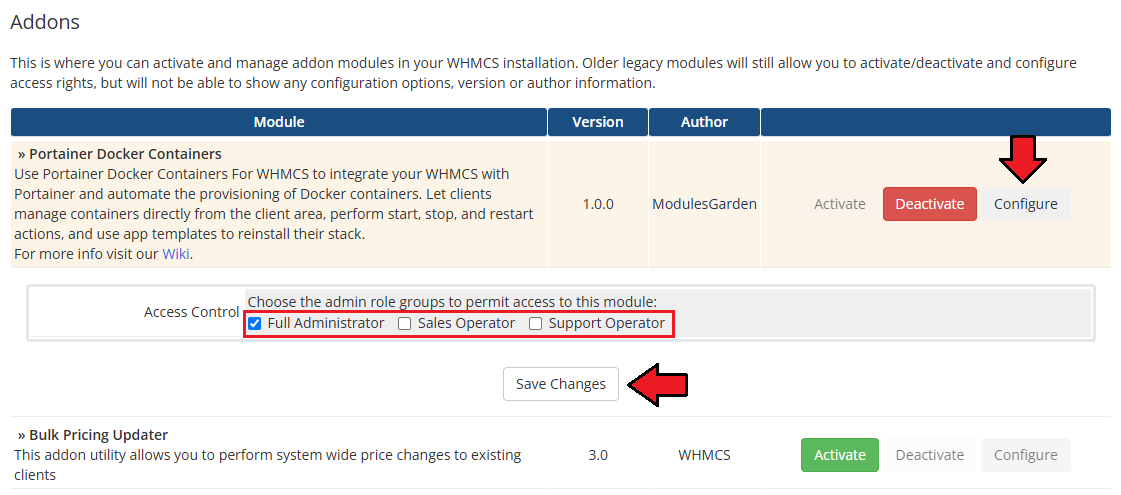
| 5. Now you have to activate the module in your WHMCS system. Log in to your WHMCS admin area. Go to 'System Settings' → 'Addon Modules'. Afterwards, find 'Portainer Docker Containers' and press the 'Activate' button. |
|
| 6. In the next step, you need to permit access to this module. To do so, click on the 'Configure' button, tick 'Full Administrator' and press 'Save Changes'. |
|
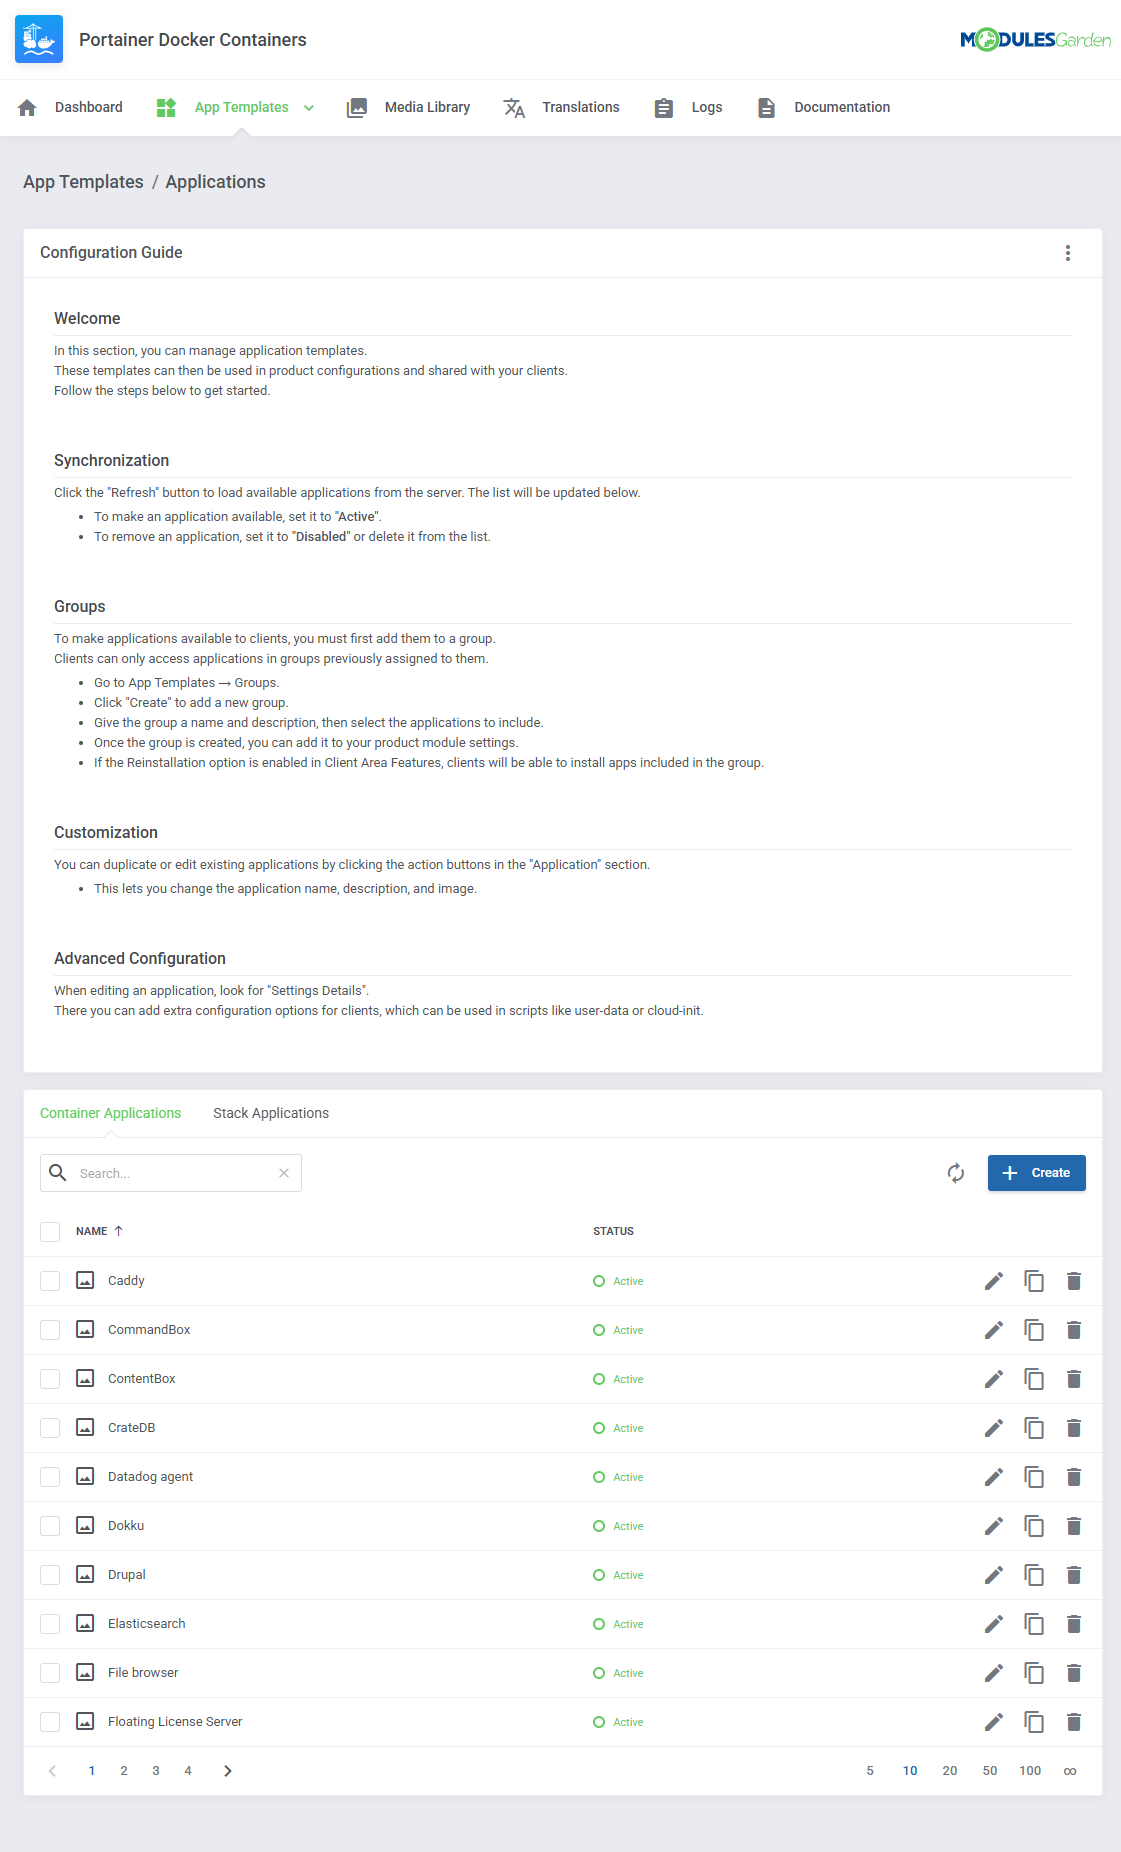
| 8. You have just successfully installed Portainer Docker Containers For WHMCS! You can access your module under 'Addons' → 'Portainer Docker Containers'. |
|
Configuration of Server
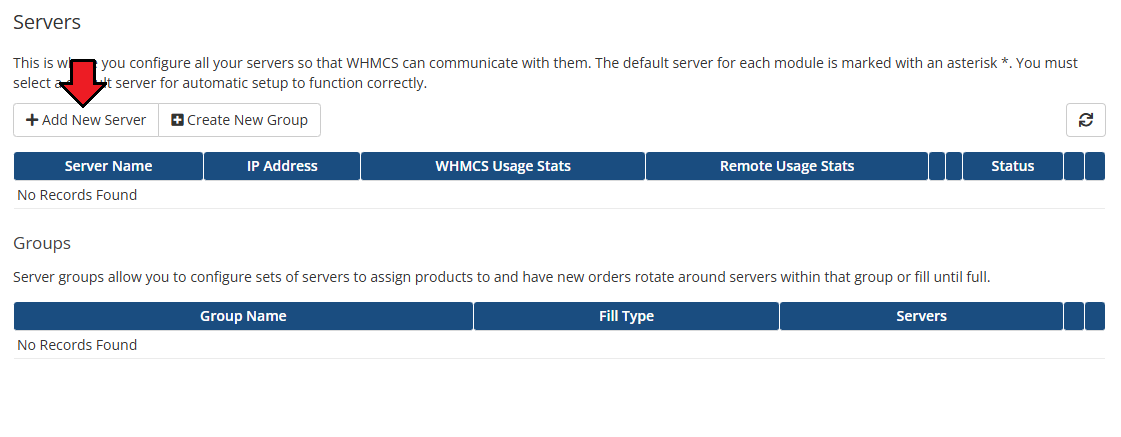
| 12. Now, log in to your WHMCS and proceed to 'System Settings' → 'Servers' and press 'Add New Server'. |
|
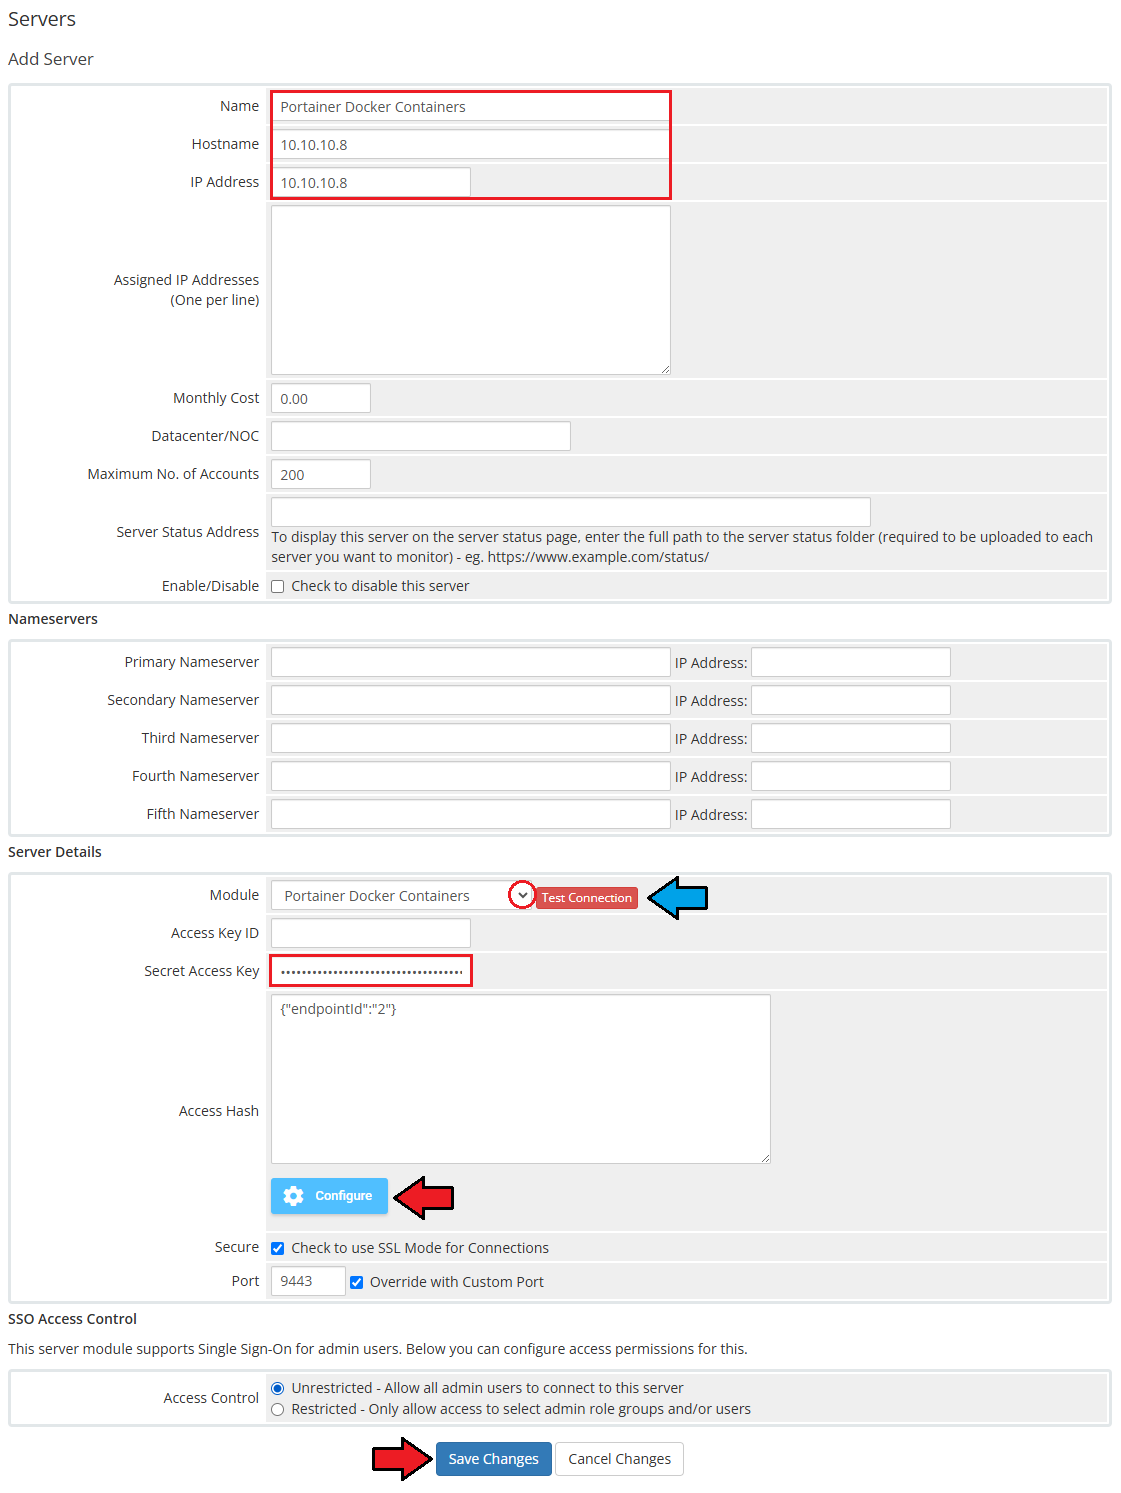
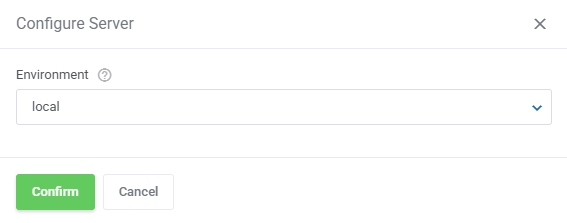
| 13. Fill in the Name, provide the Hostname or IP Address in both fields at the top (filling in both Hostname and IP Address fields is required to proceed). In the Server Details section:
|
|
|
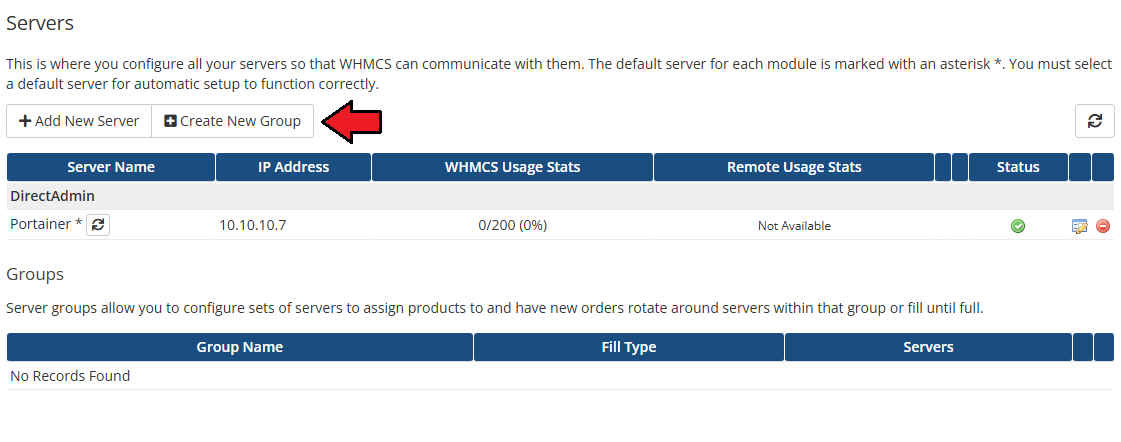
| 14. It is time to create a server group. To do so, click on 'Create Server Group'. |
|
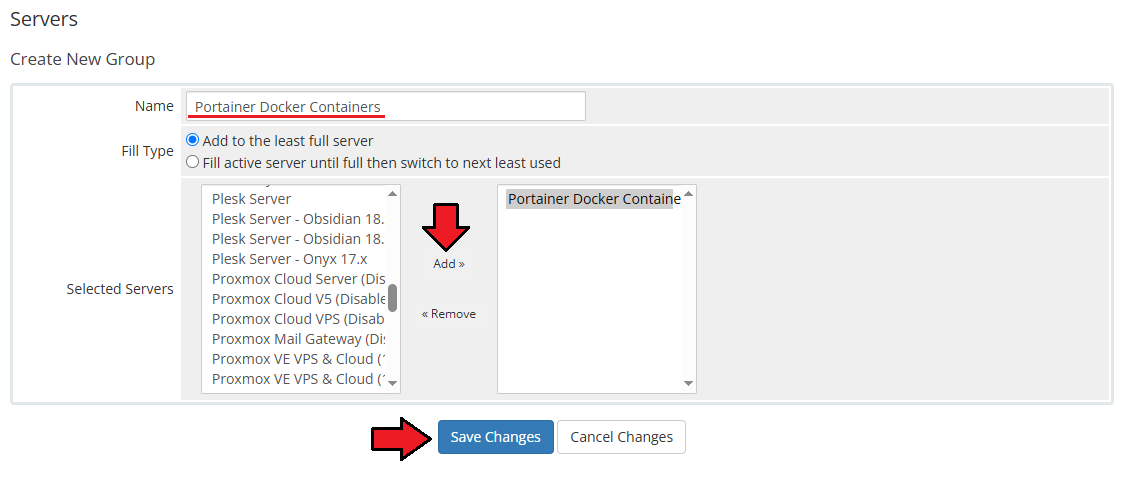
| 15. Enter a name, click on your previously created server, press 'Add' and afterward 'Save Changes'. |
|
Configuration of Product
| 16. In order to create and configure a product, go to 'System Settings' → 'Products/Services'. Click on 'Create a New Group' . |

|
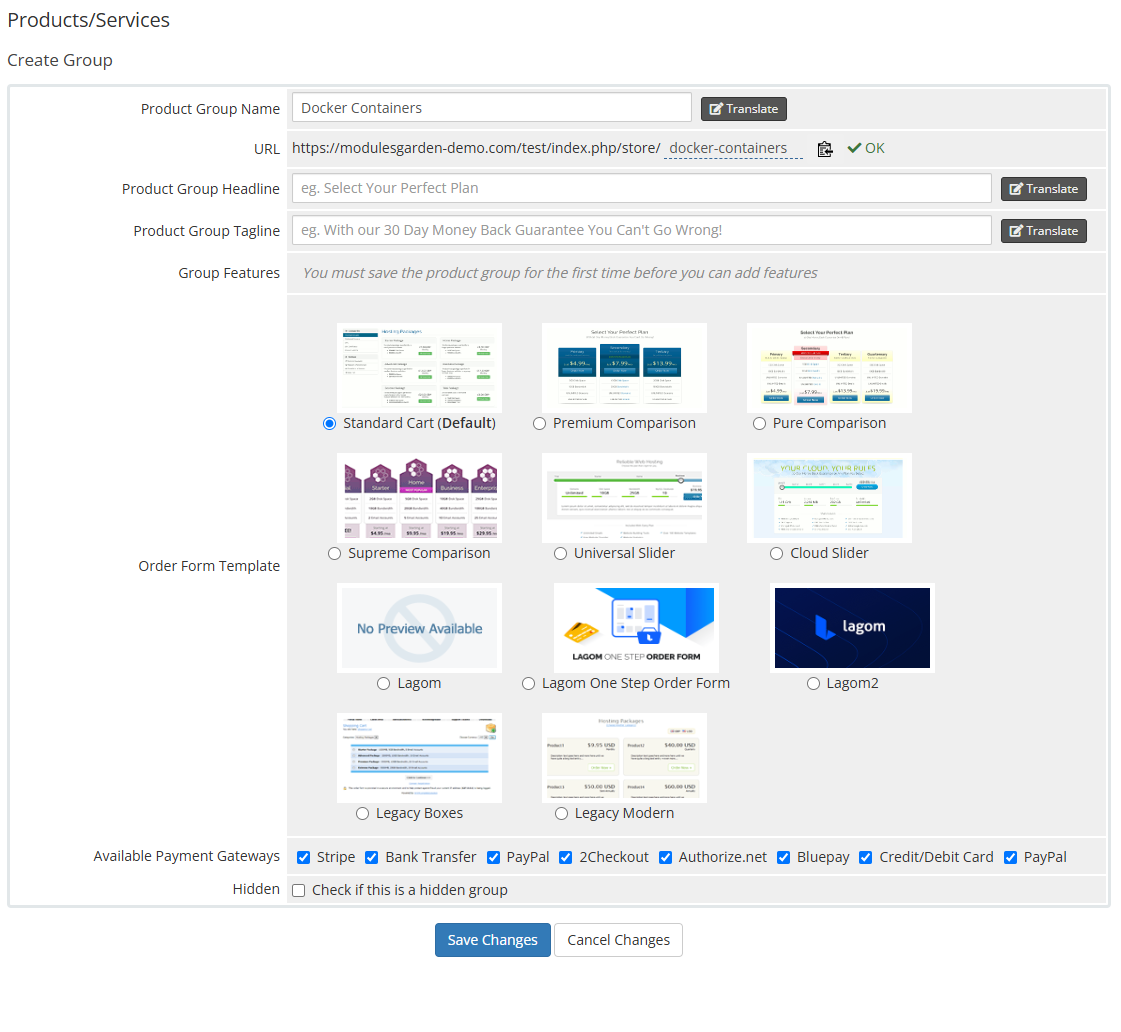
| 17. Enter a product group name and press 'Save Changes'. |
|
| 18. When you have a product group, you can create your product. To create a product click on 'Create a New Product' . |

|
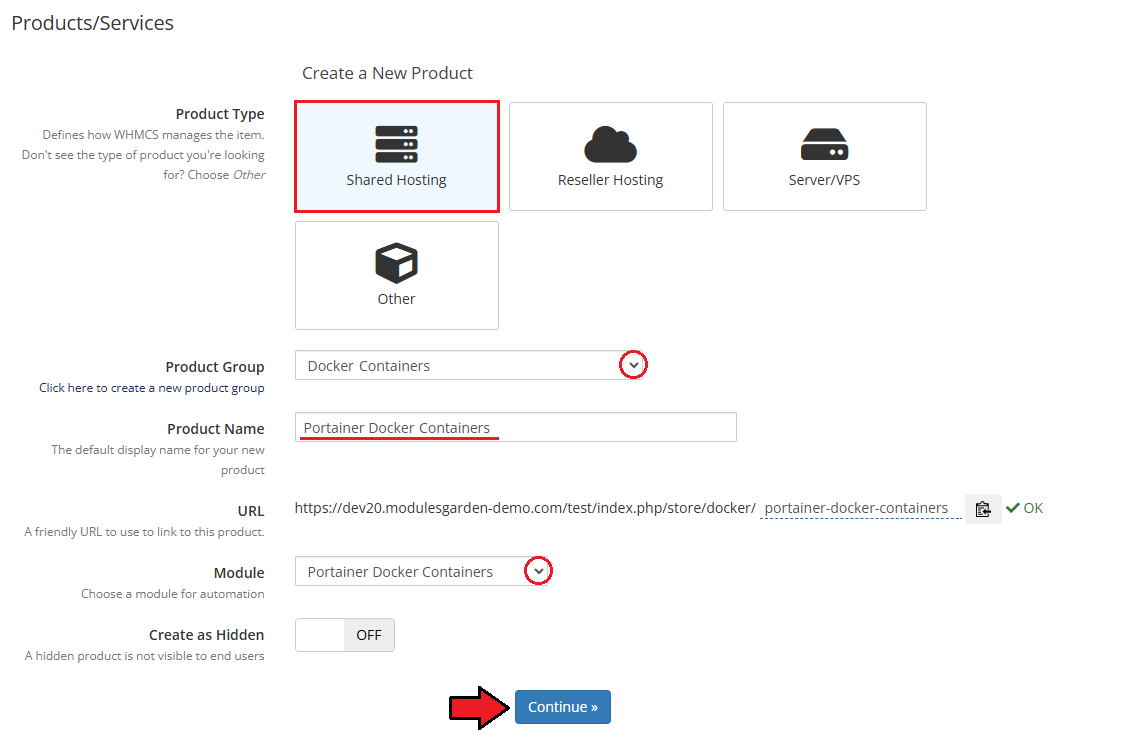
| 19. Afterward, choose your product group, module and type from the dropdown menus, enter your product name and press 'Continue'. 'Product Type' should be set to 'Shared Hosting'. |
|
App Templates
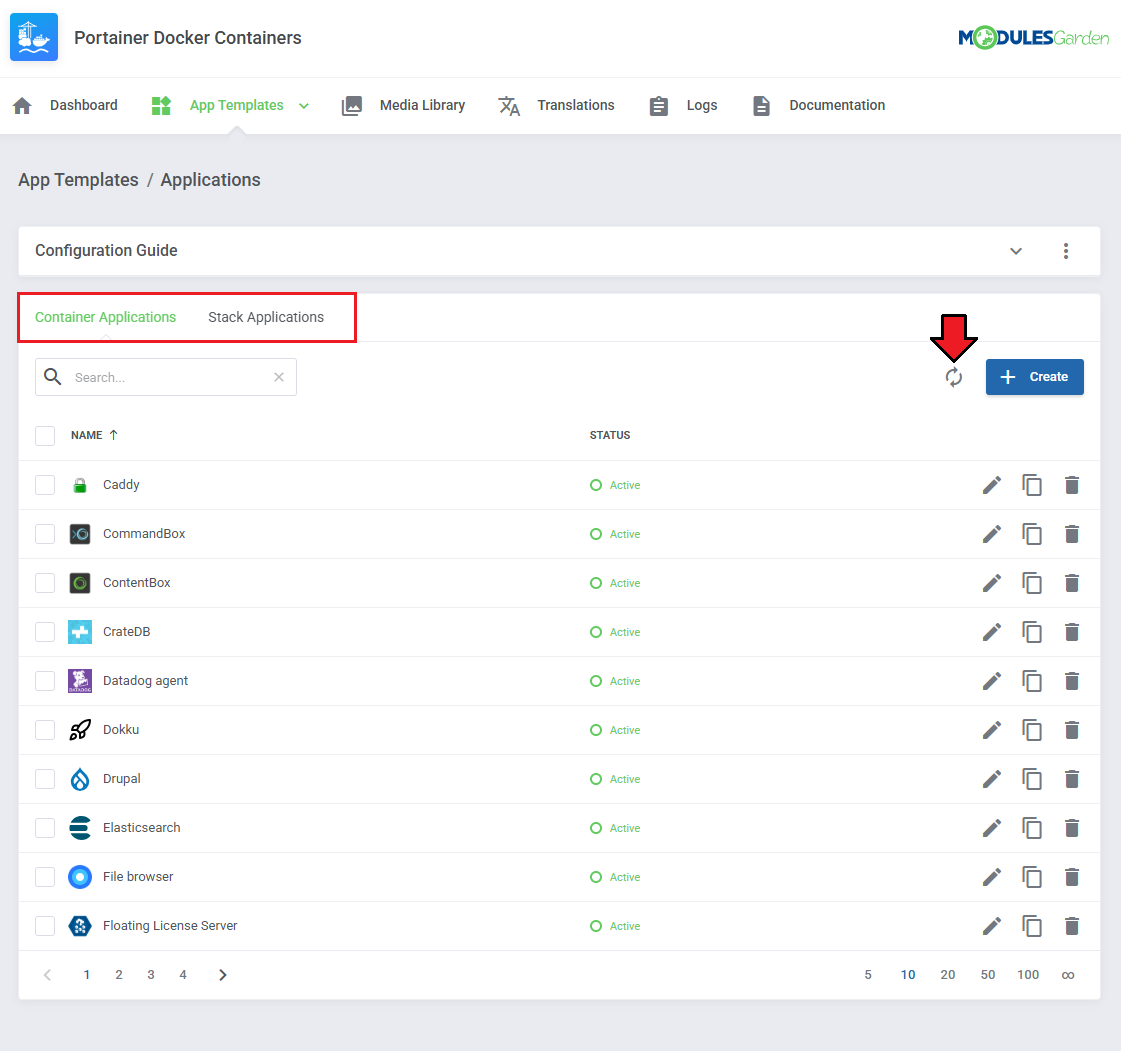
| Before continuing to the product's settings, you must ensure you have at least one application or group of applications ready to use. Proceed to the addon module → App Templates section and follow below instruction to create a ready application that will be installed by default on the server. The App Templates section allows you to manage Docker-based applications that clients can deploy to their containers or stacks directly from the client area. |
Applications
This section allows you to load available templates from your connected Portainer environment and manage them within WHMCS.
|
|
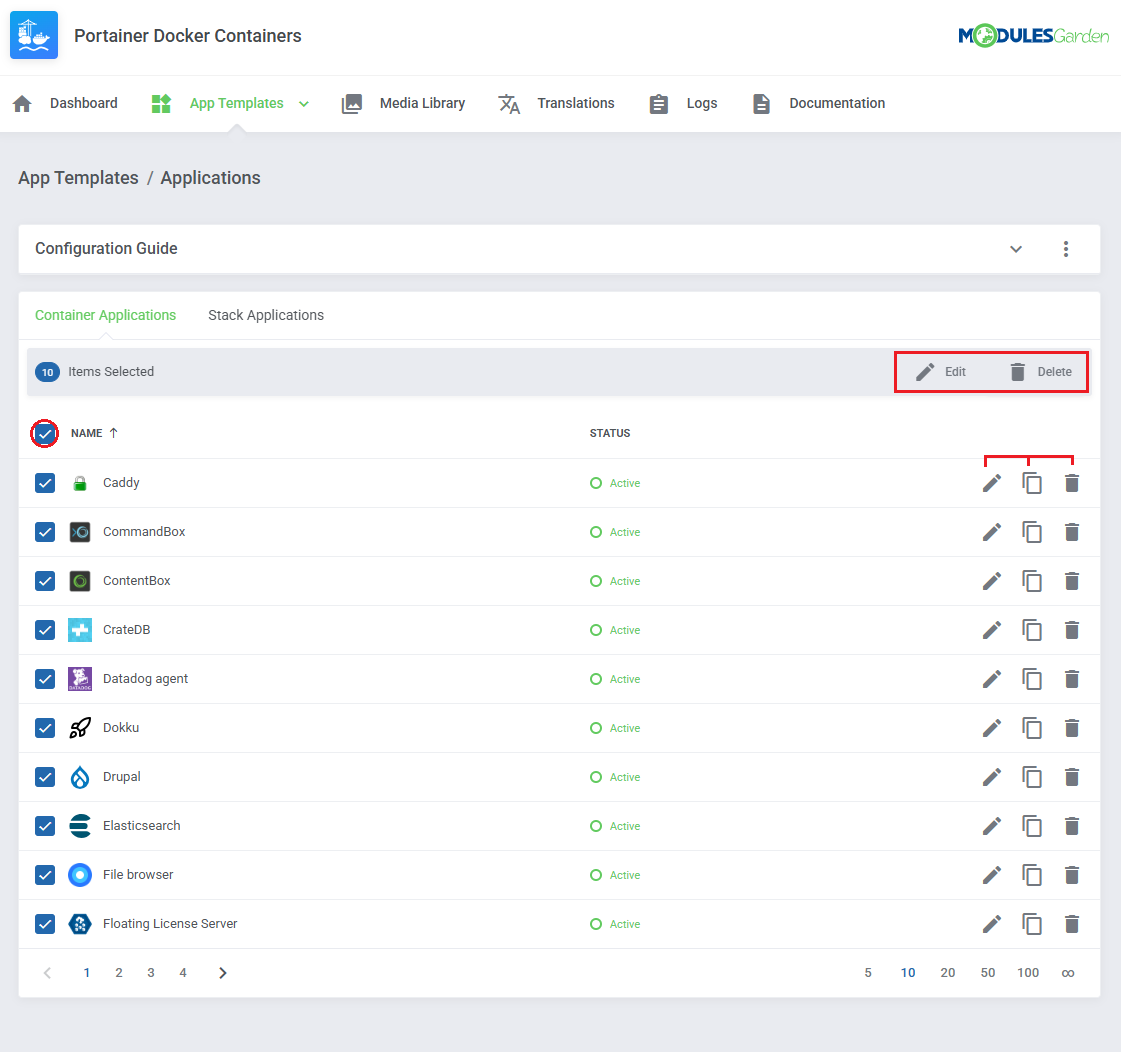
| Once templates are imported, you can use action buttons to edit, duplicate, or delete them. Mass actions are also available for bulk management. |
|
Groups
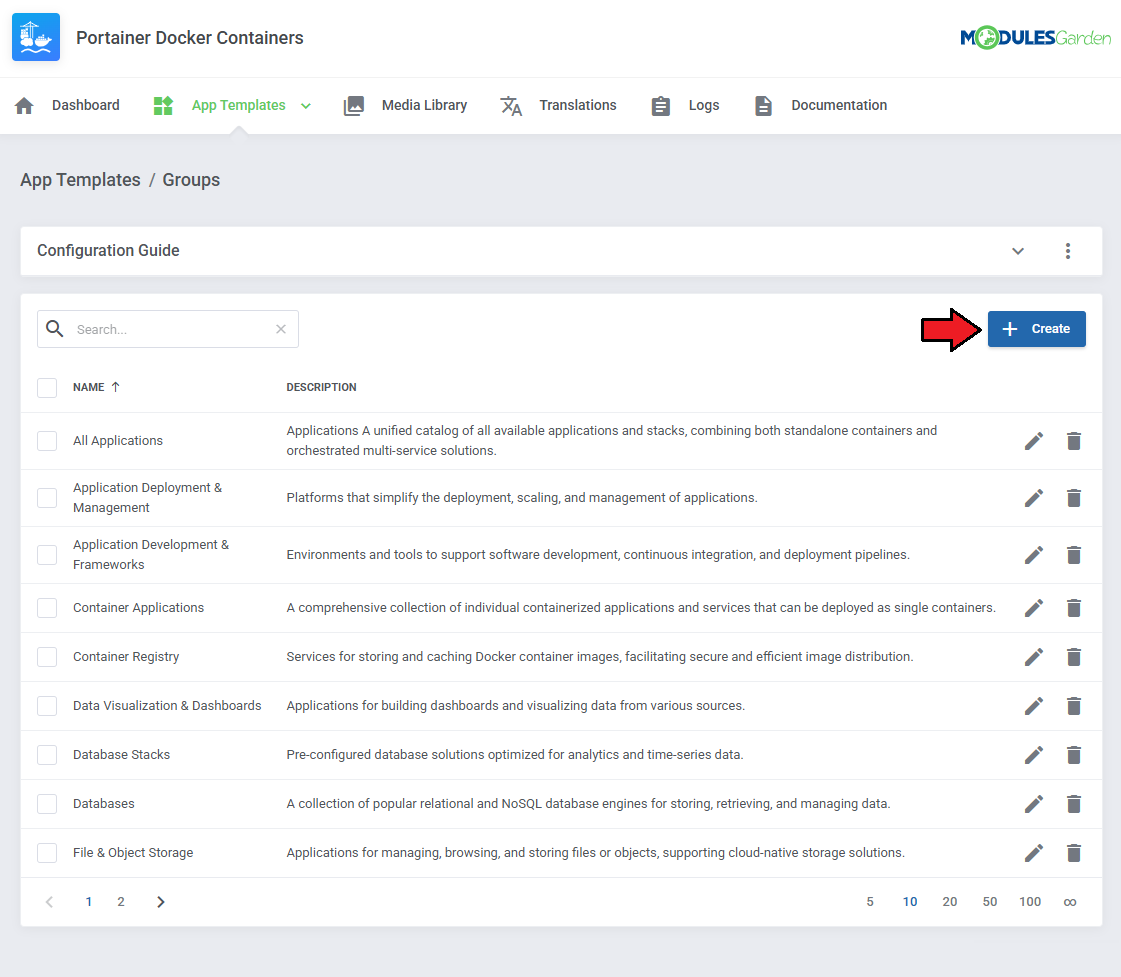
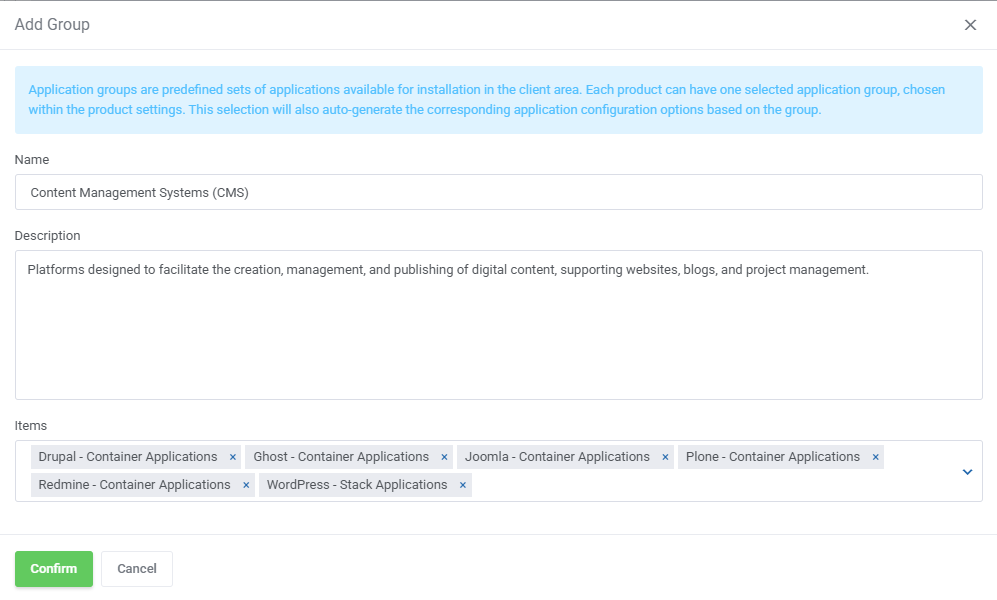
| With the templates ready, all that is left is to gather them into groups and include said groups into products. Navigate to 'App Templates' → 'Groups' and click on the 'Create' button. |
|
Read the information, then provide the group with:
|
|
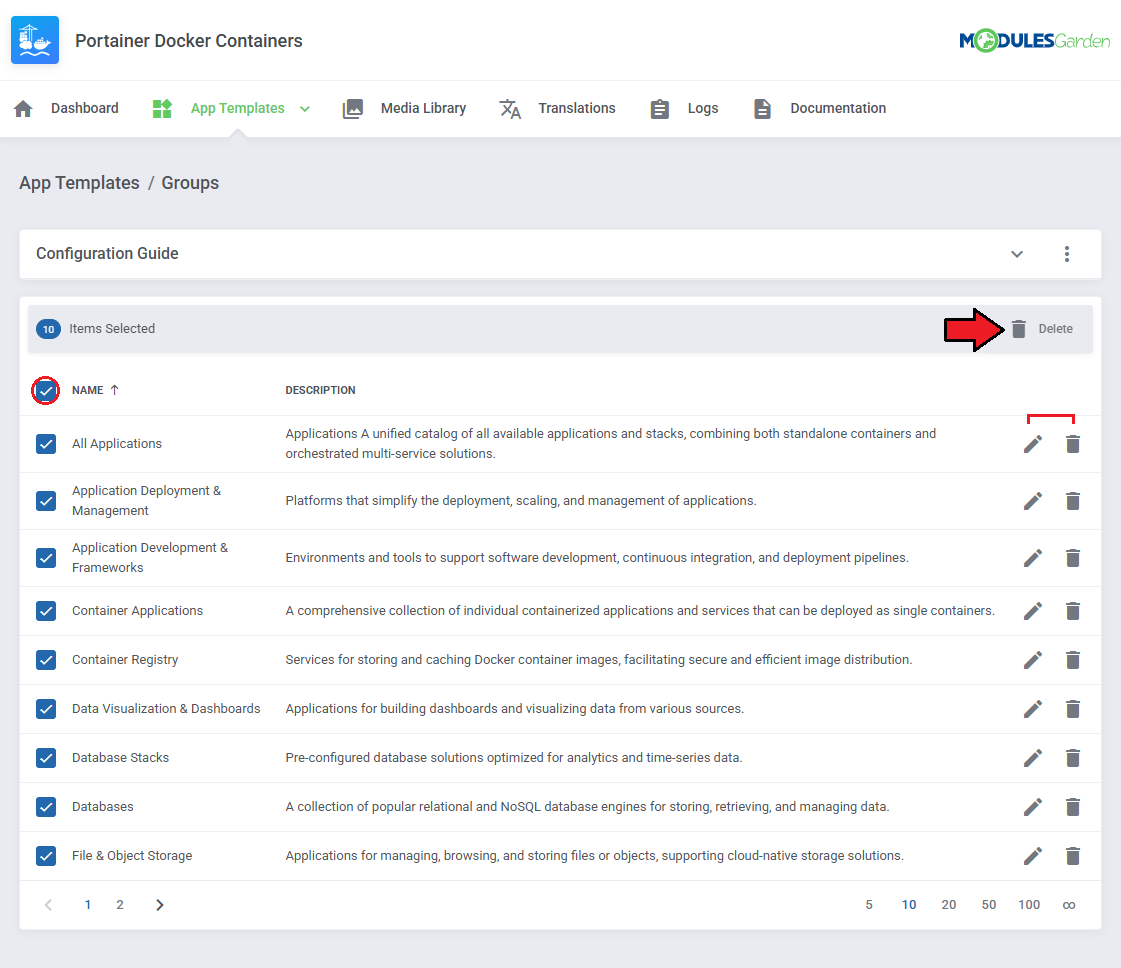
| You can use the action button and the mass action function to edit and delete template groups. |
|
| Your basic configuration of App Templates is now ready. For more advanced configuration, manual creation guides please refer to App Templates Advanced Configuration section in this documentation. For now, go back to your product's module settings and complete the configuration there. |
Module Settings
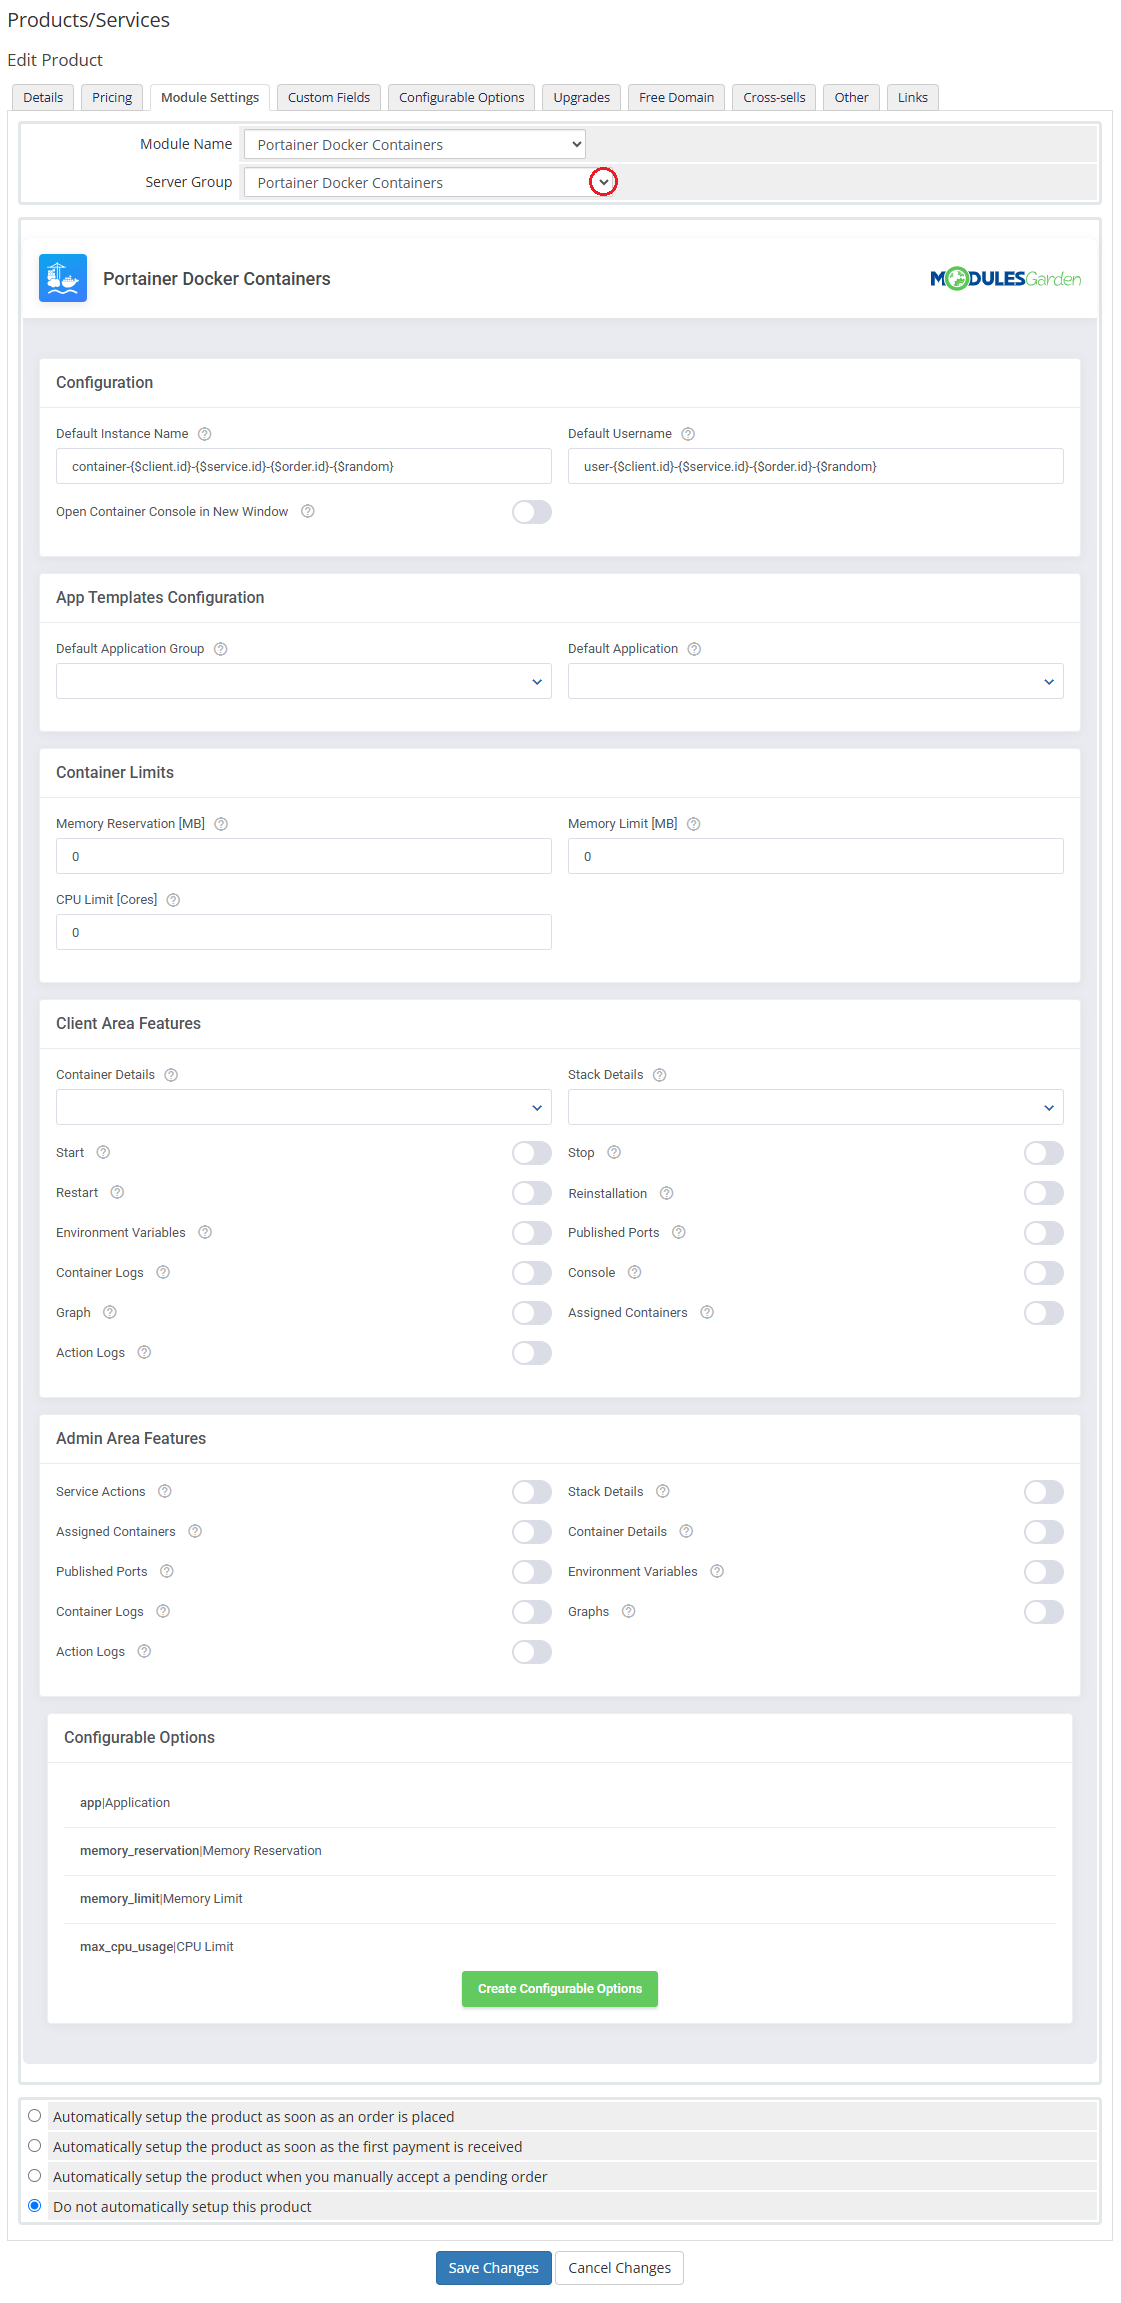
| 20. Now, go to the 'Module Settings' section, choose your previously created server group from the dropdown menu. The module should automatically save and reload settings. If not, click on 'Save Changes' manually. |
|
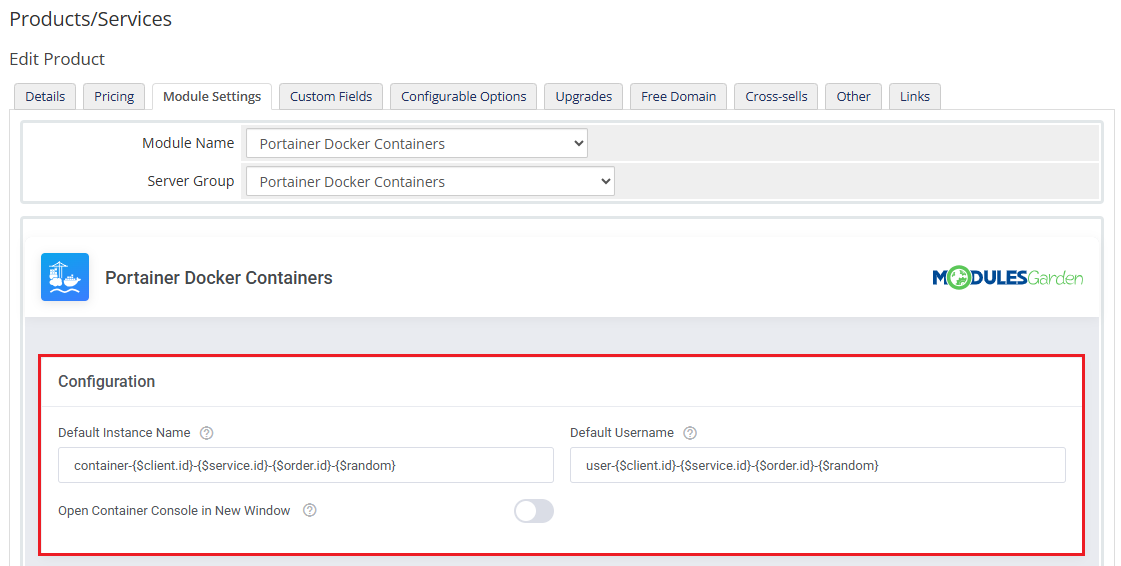
21. Proceed to 'Configuration' section and adjust the following:
|
|
| 22. Proceed with 'App Template Configuration'.
App Templates Configuration - To create instances based on stack or container applications, you must first configure the App Templates in the module's addon (see step befor).
|
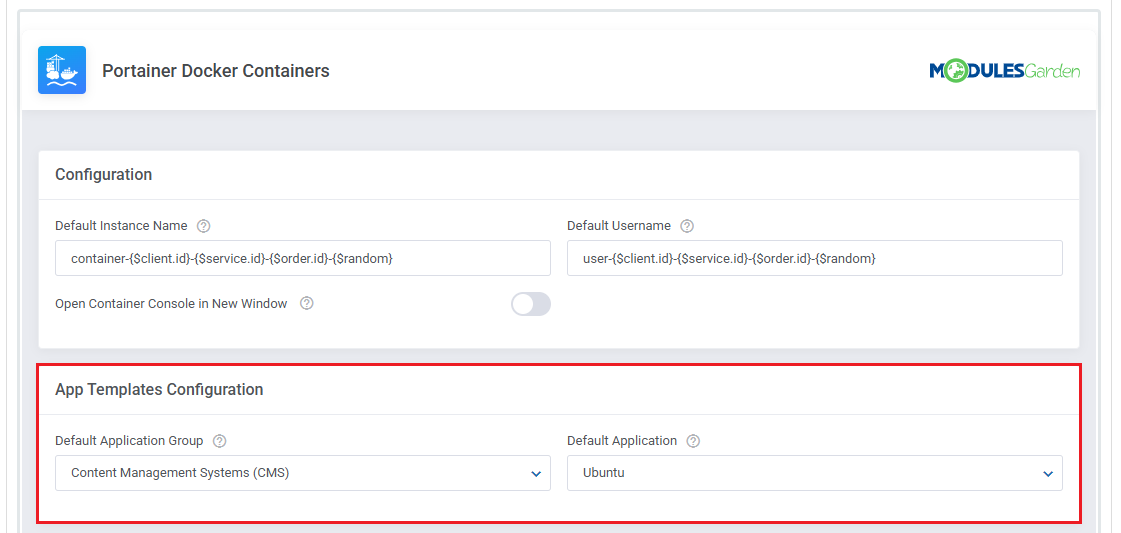
|
23. Set up 'Container Limits':
Alternatively, you can use configurable options to allow clients to define these limits at checkout. |

|
24. Next, select the features that will be available in the client area:
|
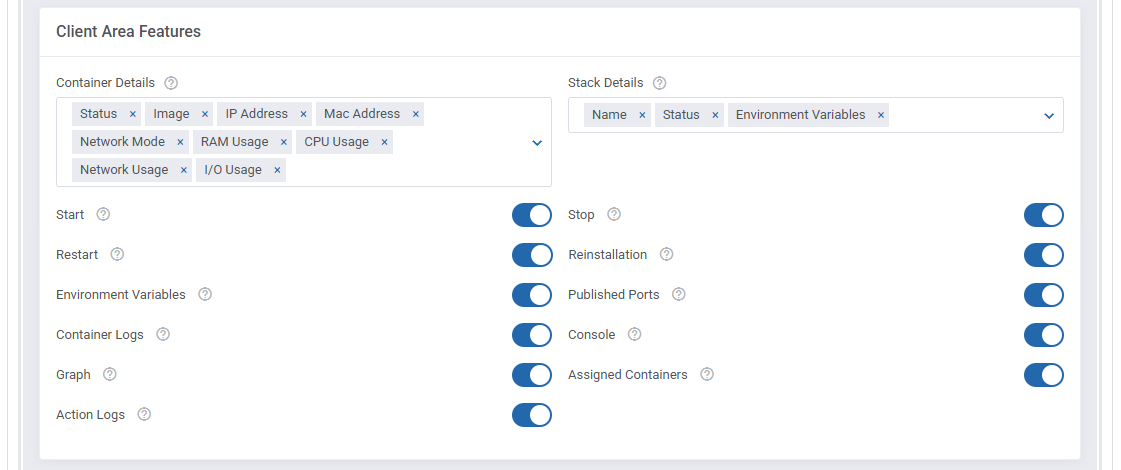
|
| 25. Select the features that will be available in the admin area. These options define what information and controls admins will see within the WHMCS service management page:
|

|
| 25. At the end of the configuration process, you can decide whether to generate configurable options for the product. Configurable options allow clients to customize container parameters individually during the order process. If no configurable options are defined, the fixed values set in the product configuration will be used instead. Available Configurable Options:
|

|
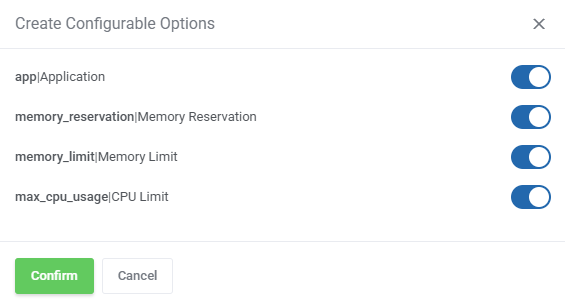
|
| Your product configuration is now complete. Do not forget to save the changes once ready. Before adding it to your offer, make sure to set appropriate pricing. Create as many products as needed, each with different applications or feature sets, to tailor your offer perfectly. |
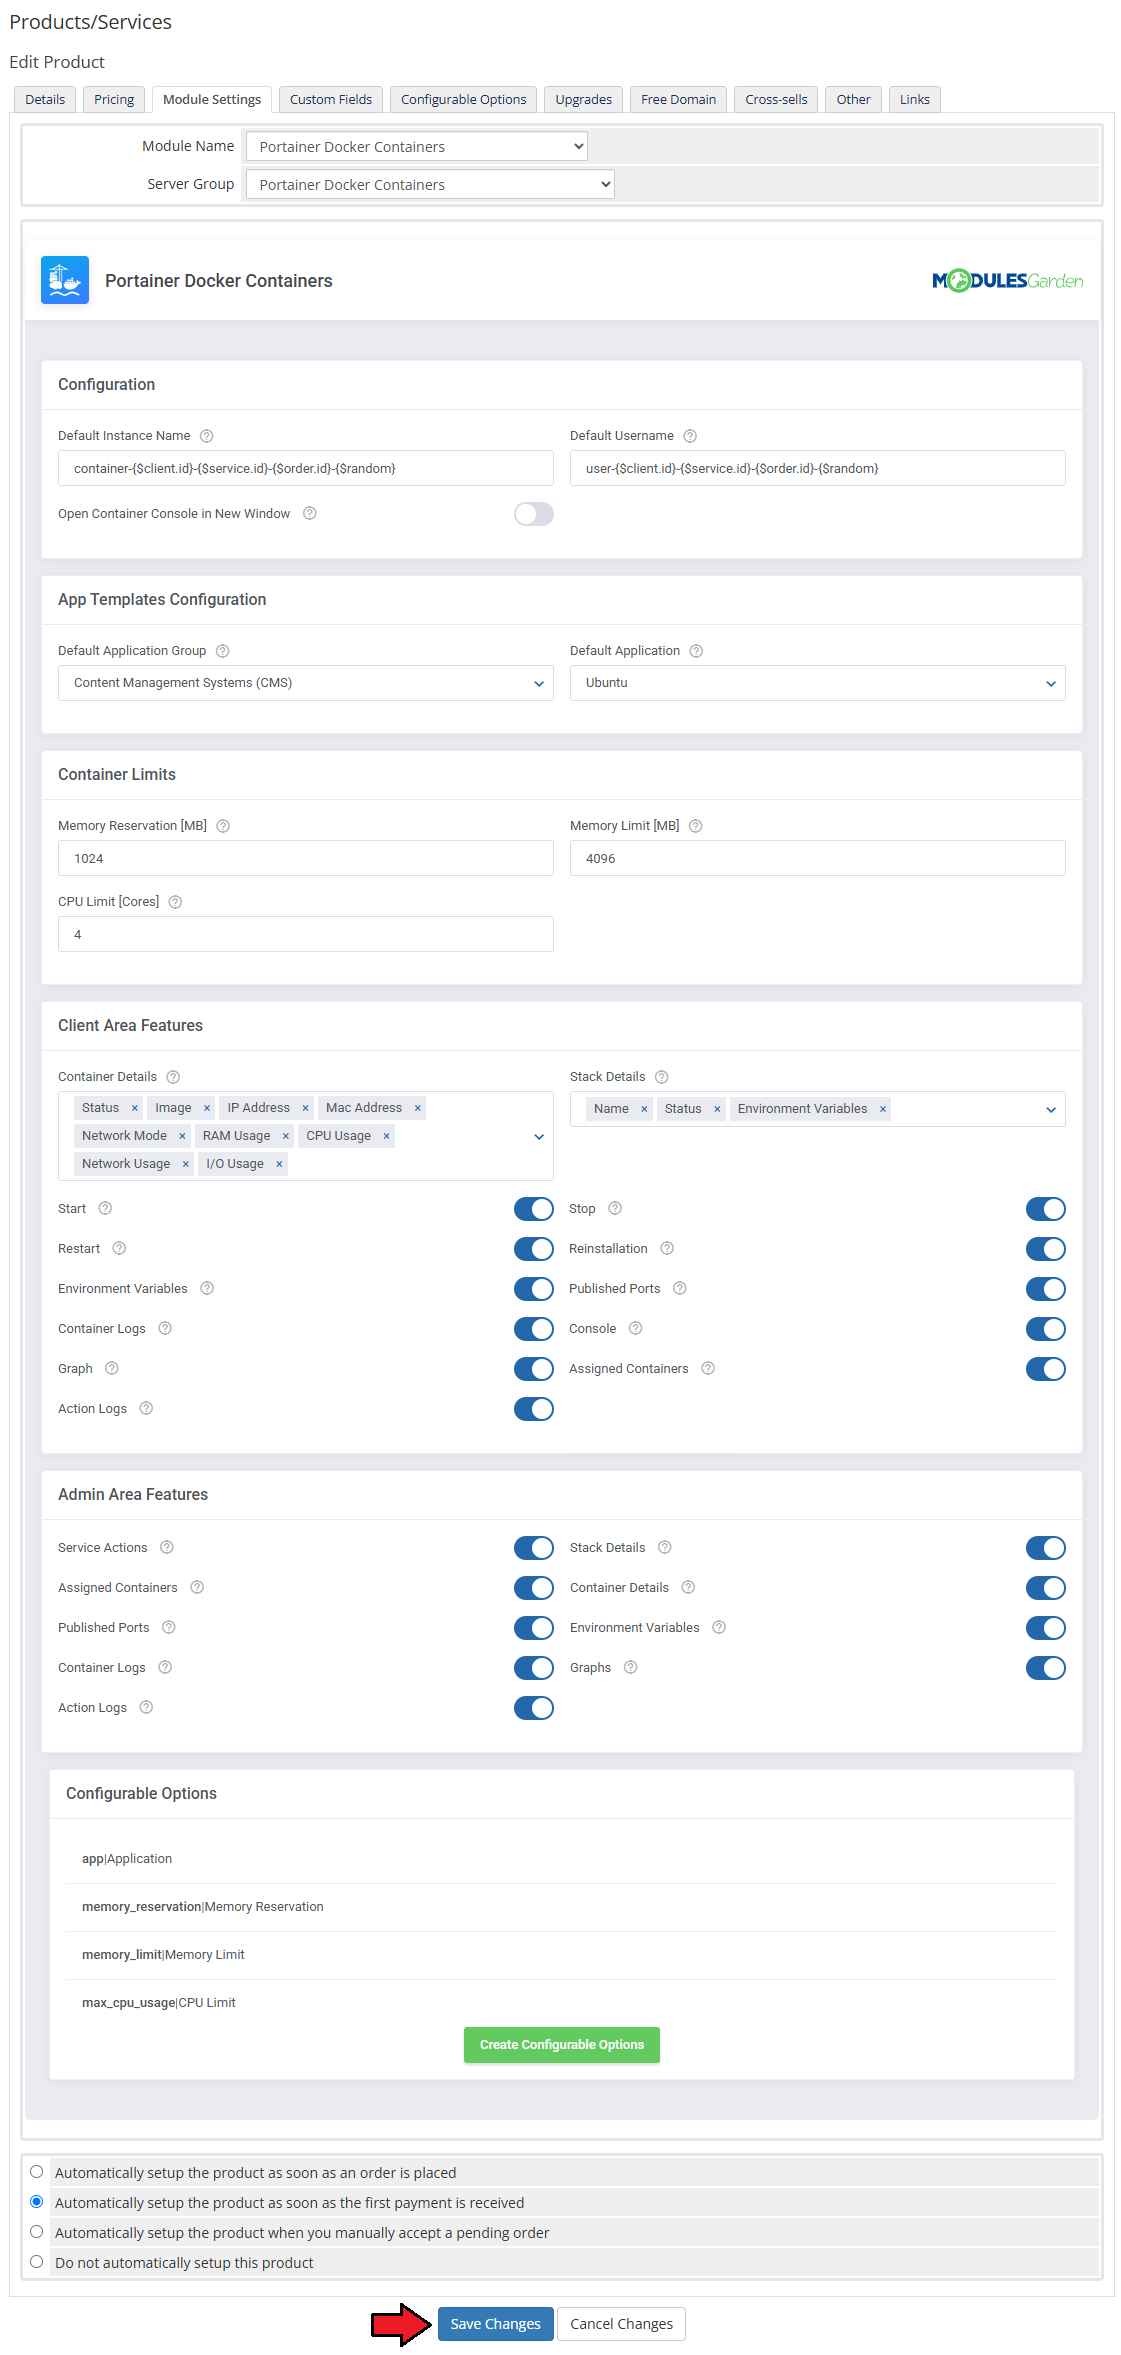
|
Management
| Portainer Docker Containers For WHMCS allows your clients to manage and monitor their Docker containers directly from the WHMCS client area. In this short guide, you'll learn about the module's key features and how to configure them for both client and admin use. |
Module Addon
| The module addon is the central place for all administrative setup and management.
Here, you can register products supported by the module, manage Docker templates, and access various utilities such as the media library, translation manager, and module logs. |
App Templates Advanced Configuration
| Please see the App Templates for basic configuration, here you will find instructions for advanced users on how to manually manage existing container and stack application templates or create your custom ones. Admins can manually edit applications, define their runtime behavior, set default values, and customize input fields in the "Setting Details" section. |
Traefik Labels in Container Applications
| Portainer Docker Containers For WHMCS supports the Traefik reverse proxy to automatically expose deployed containers and stacks via domain-based routing. This is achieved using dynamic Docker labels set in the application templates or docker-compose.yml files.
|
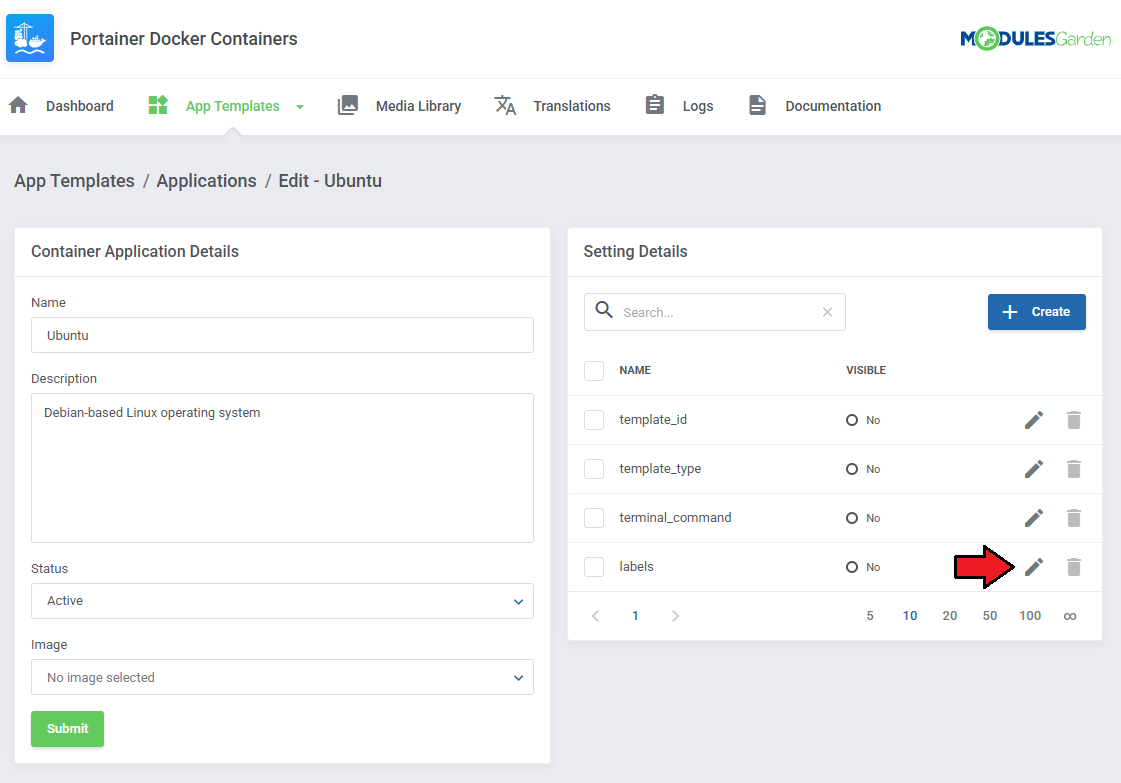
| To configure Traefik for a container-based application, go to the App Templates → Applications tab in the addon module, edit your container application, and navigate to the Setting Details section. |
|
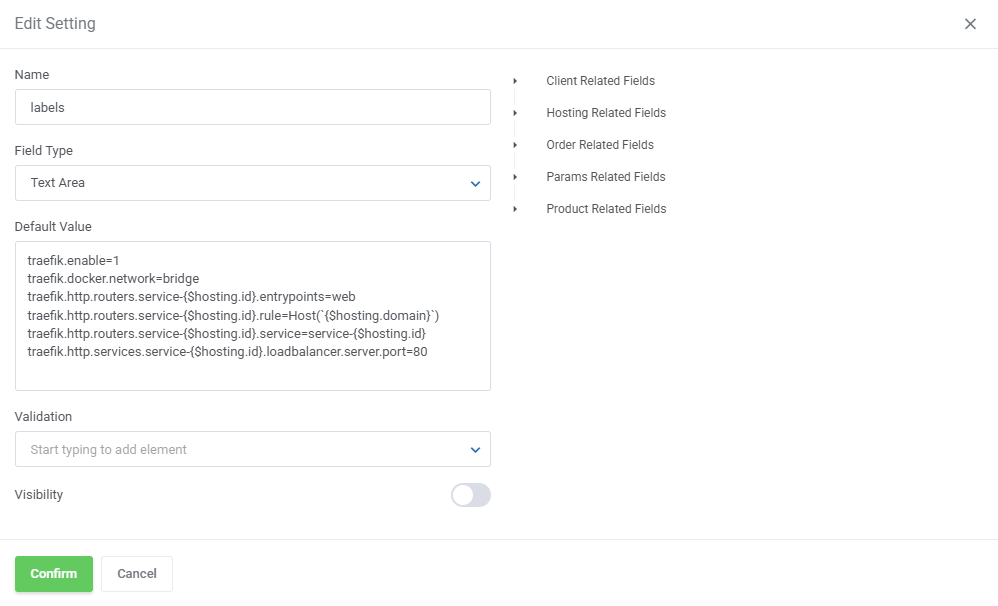
Add the following labels as individual settings. You can use Smarty variables like {$hosting.id} or {$hosting.domain} for dynamic route generation:
traefik.enable=1
traefik.docker.network=bridge
traefik.http.routers.service-{$hosting.id}.entrypoints=web
traefik.http.routers.service-{$hosting.id}.rule=Host(`{$hosting.domain}`)
traefik.http.routers.service-{$hosting.id}.service=service-{$hosting.id}
traefik.http.services.service-{$hosting.id}.loadbalancer.server.port=80
The application will be deployed with these labels automatically. The placeholder variables will be parsed at runtime, ensuring correct values for each service. Important: Make sure that both the Traefik container and the newly created service are attached to the same Docker network (e.g., |
|
Traefik with Stack Applications
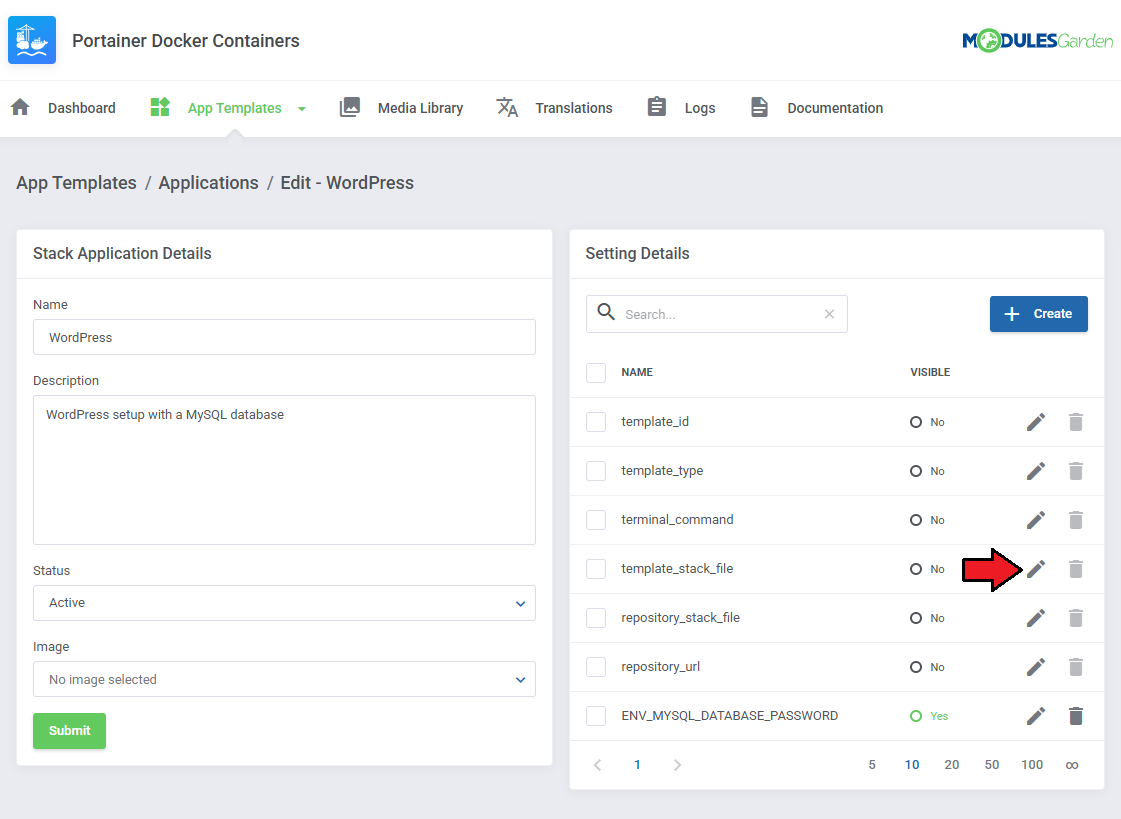
Stack-based applications can also be configured with Traefik by modifying the template_stack_file field in the App Template form.
|
|
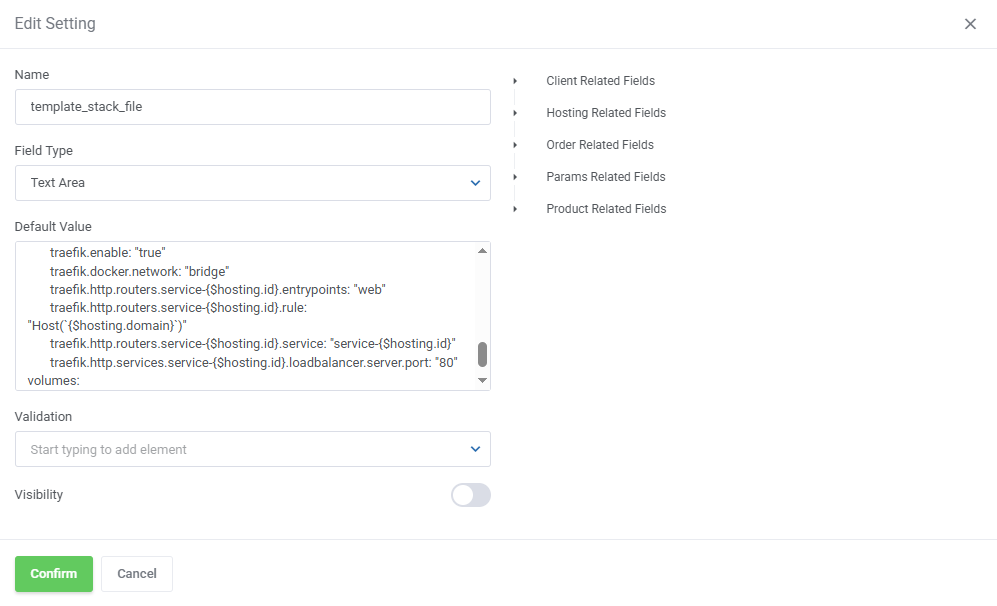
You must supply a full and valid docker-compose.yml script with the required Traefik labels.
Below is an example that exposes a WordPress stack through Traefik:
version: '2'

services:
   db:
     image: mysql:5.7
     volumes:
       - db_data:/var/lib/mysql
     restart: always
     network_mode: bridge
     environment:
       {literal}MYSQL_ROOT_PASSWORD: strongpassword{/literal}
       MYSQL_DATABASE: wordpress
       MYSQL_USER: wordpress
       MYSQL_PASSWORD: wordpress
     ports:
       - "3306:3306"

   wordpress:
     image: wordpress:latest
     network_mode: bridge
     ports:
       - "8{$hosting.id}:80"
     restart: always
     environment:
       WORDPRESS_DB_HOST: 10.10.10.8:3306
       WORDPRESS_DB_USER: wordpress
       WORDPRESS_DB_PASSWORD: wordpress
     labels:
       traefik.enable: "true"
       traefik.docker.network: "bridge"
       traefik.http.routers.service-{$hosting.id}.entrypoints: "web"
       traefik.http.routers.service-{$hosting.id}.rule: "Host(`{$hosting.domain}`)"
       traefik.http.routers.service-{$hosting.id}.service: "service-{$hosting.id}"
       traefik.http.services.service-{$hosting.id}.loadbalancer.server.port: "80"

volumes:
    db_data:
|
|
Media Library
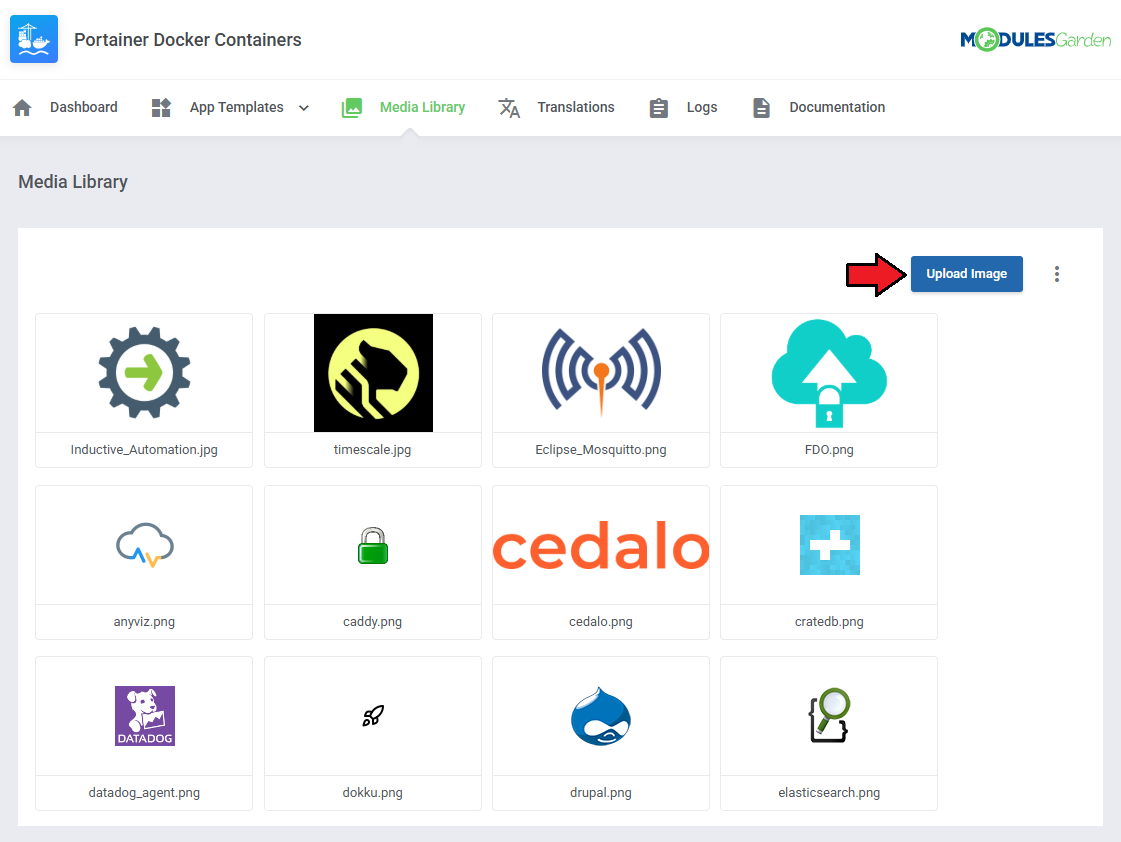
| The media library allows you to upload images for use elsewhere in the module by admins and clients. To upload a new picture, click on the 'Upload Image' button. |
|
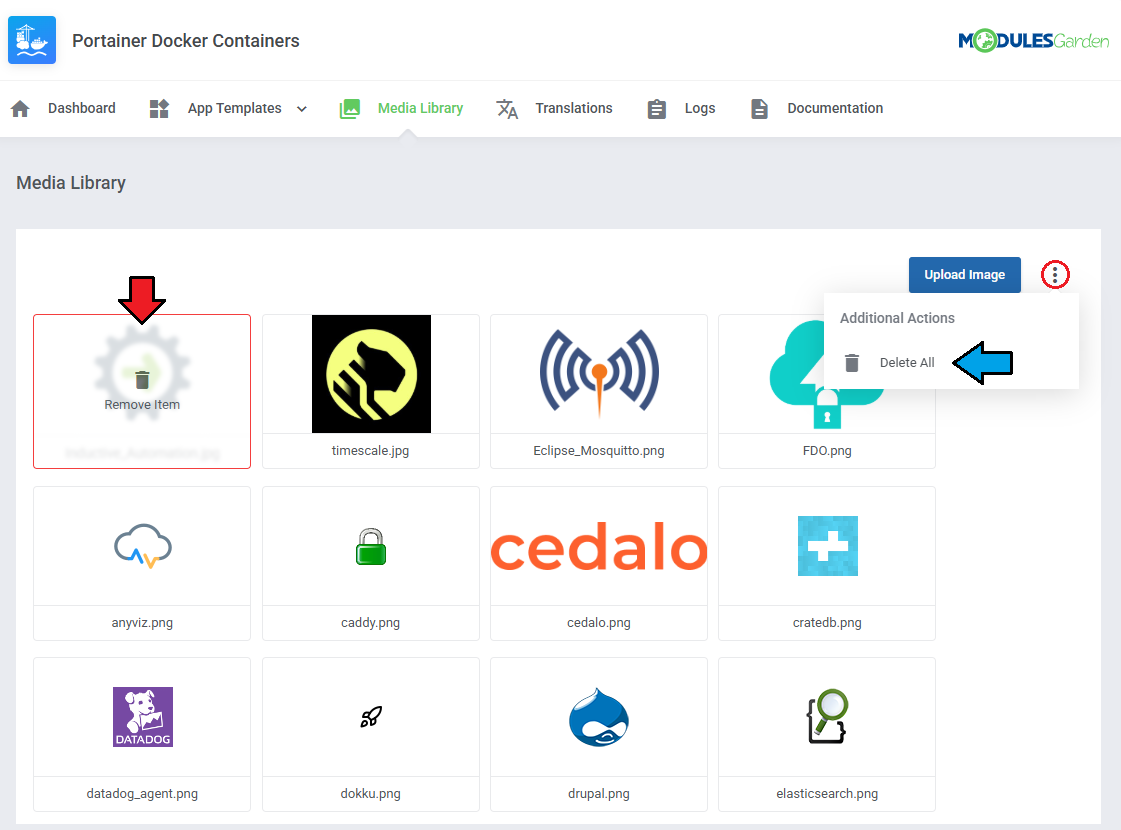
| You can delete images one by one by clicking on them. To delete all images at once, use the additional action button. |
|
Translations
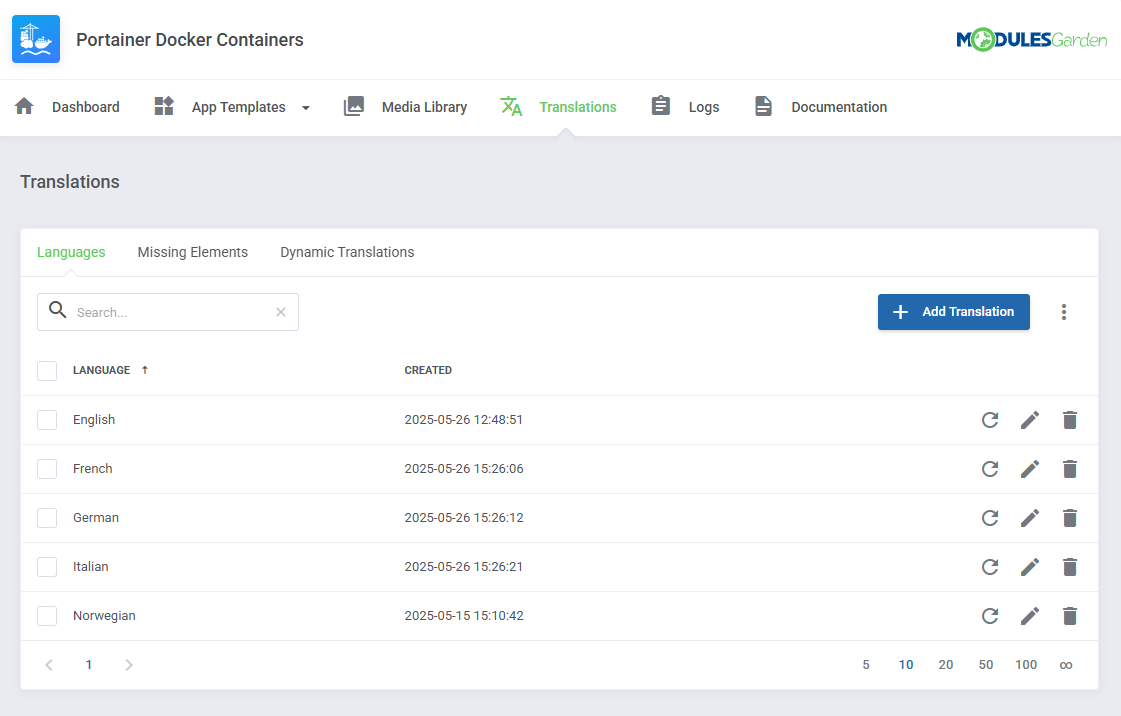
| Customizing language files is now extremely easy with the "Translations" tool that is now available directly in the addon. Its user-friendly design makes managing various language file tweaks a smooth and efficient process. Prepare translations for the original English files with this handy built-in tool. For specific instructions on how to use this tool please refer to its dedicated article, you will find it here. |
|
Logs
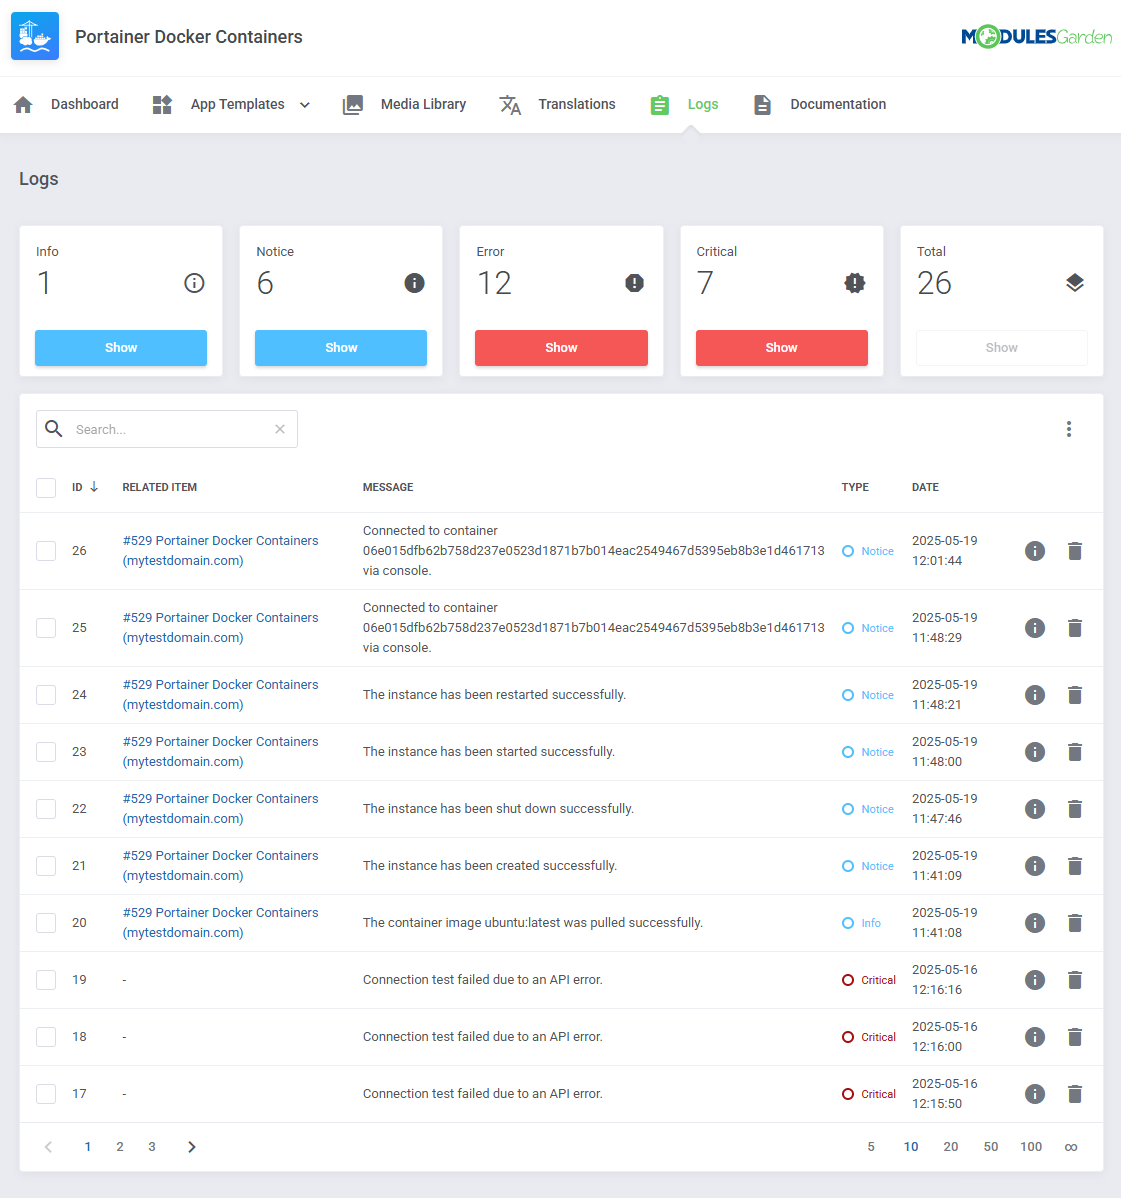
| The 'Logs' tab is where the module logs are stored. You can filter the module logs by type with the 'Show' buttons:
All information on Logs can be found in the dedicated Logs article. |
|
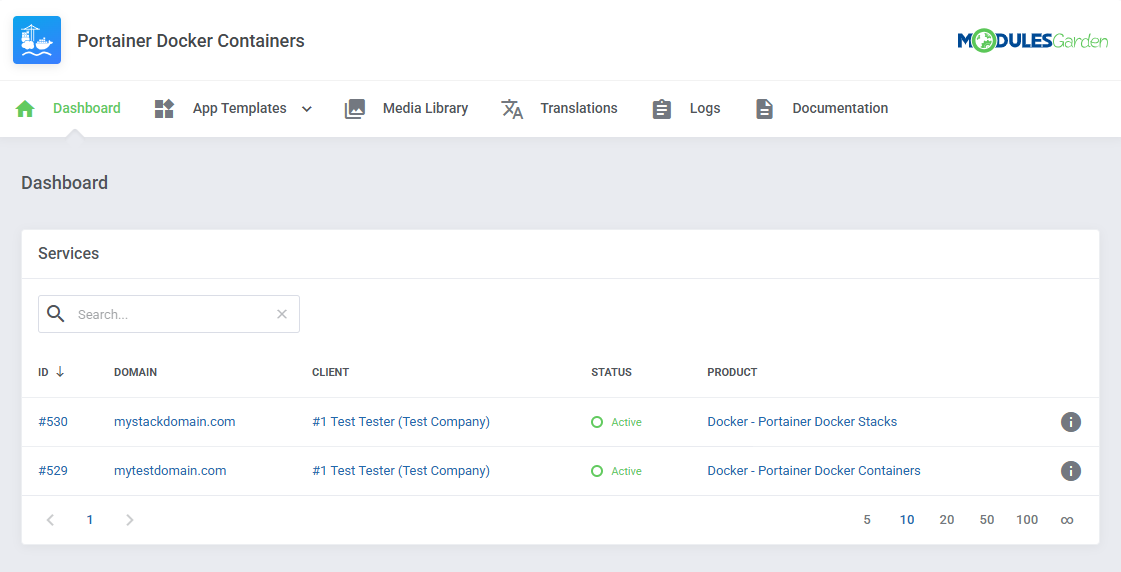
Dashboard
| The 'Dashboard' provides information and statistics related to the functions of the module.
Press "i" to see service details. |
|
Ordering
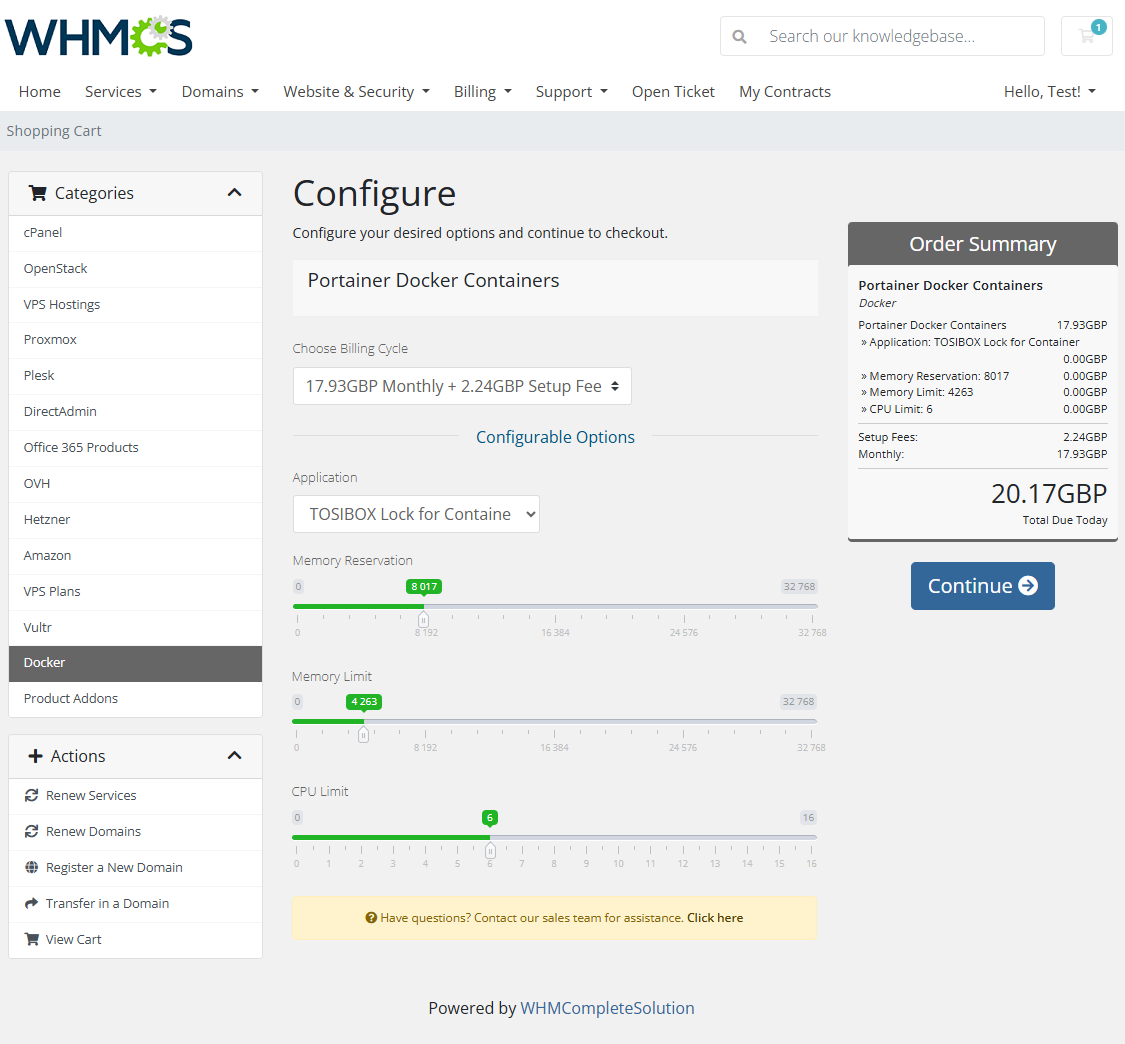
| Oredr page summary |
|
Admin Area
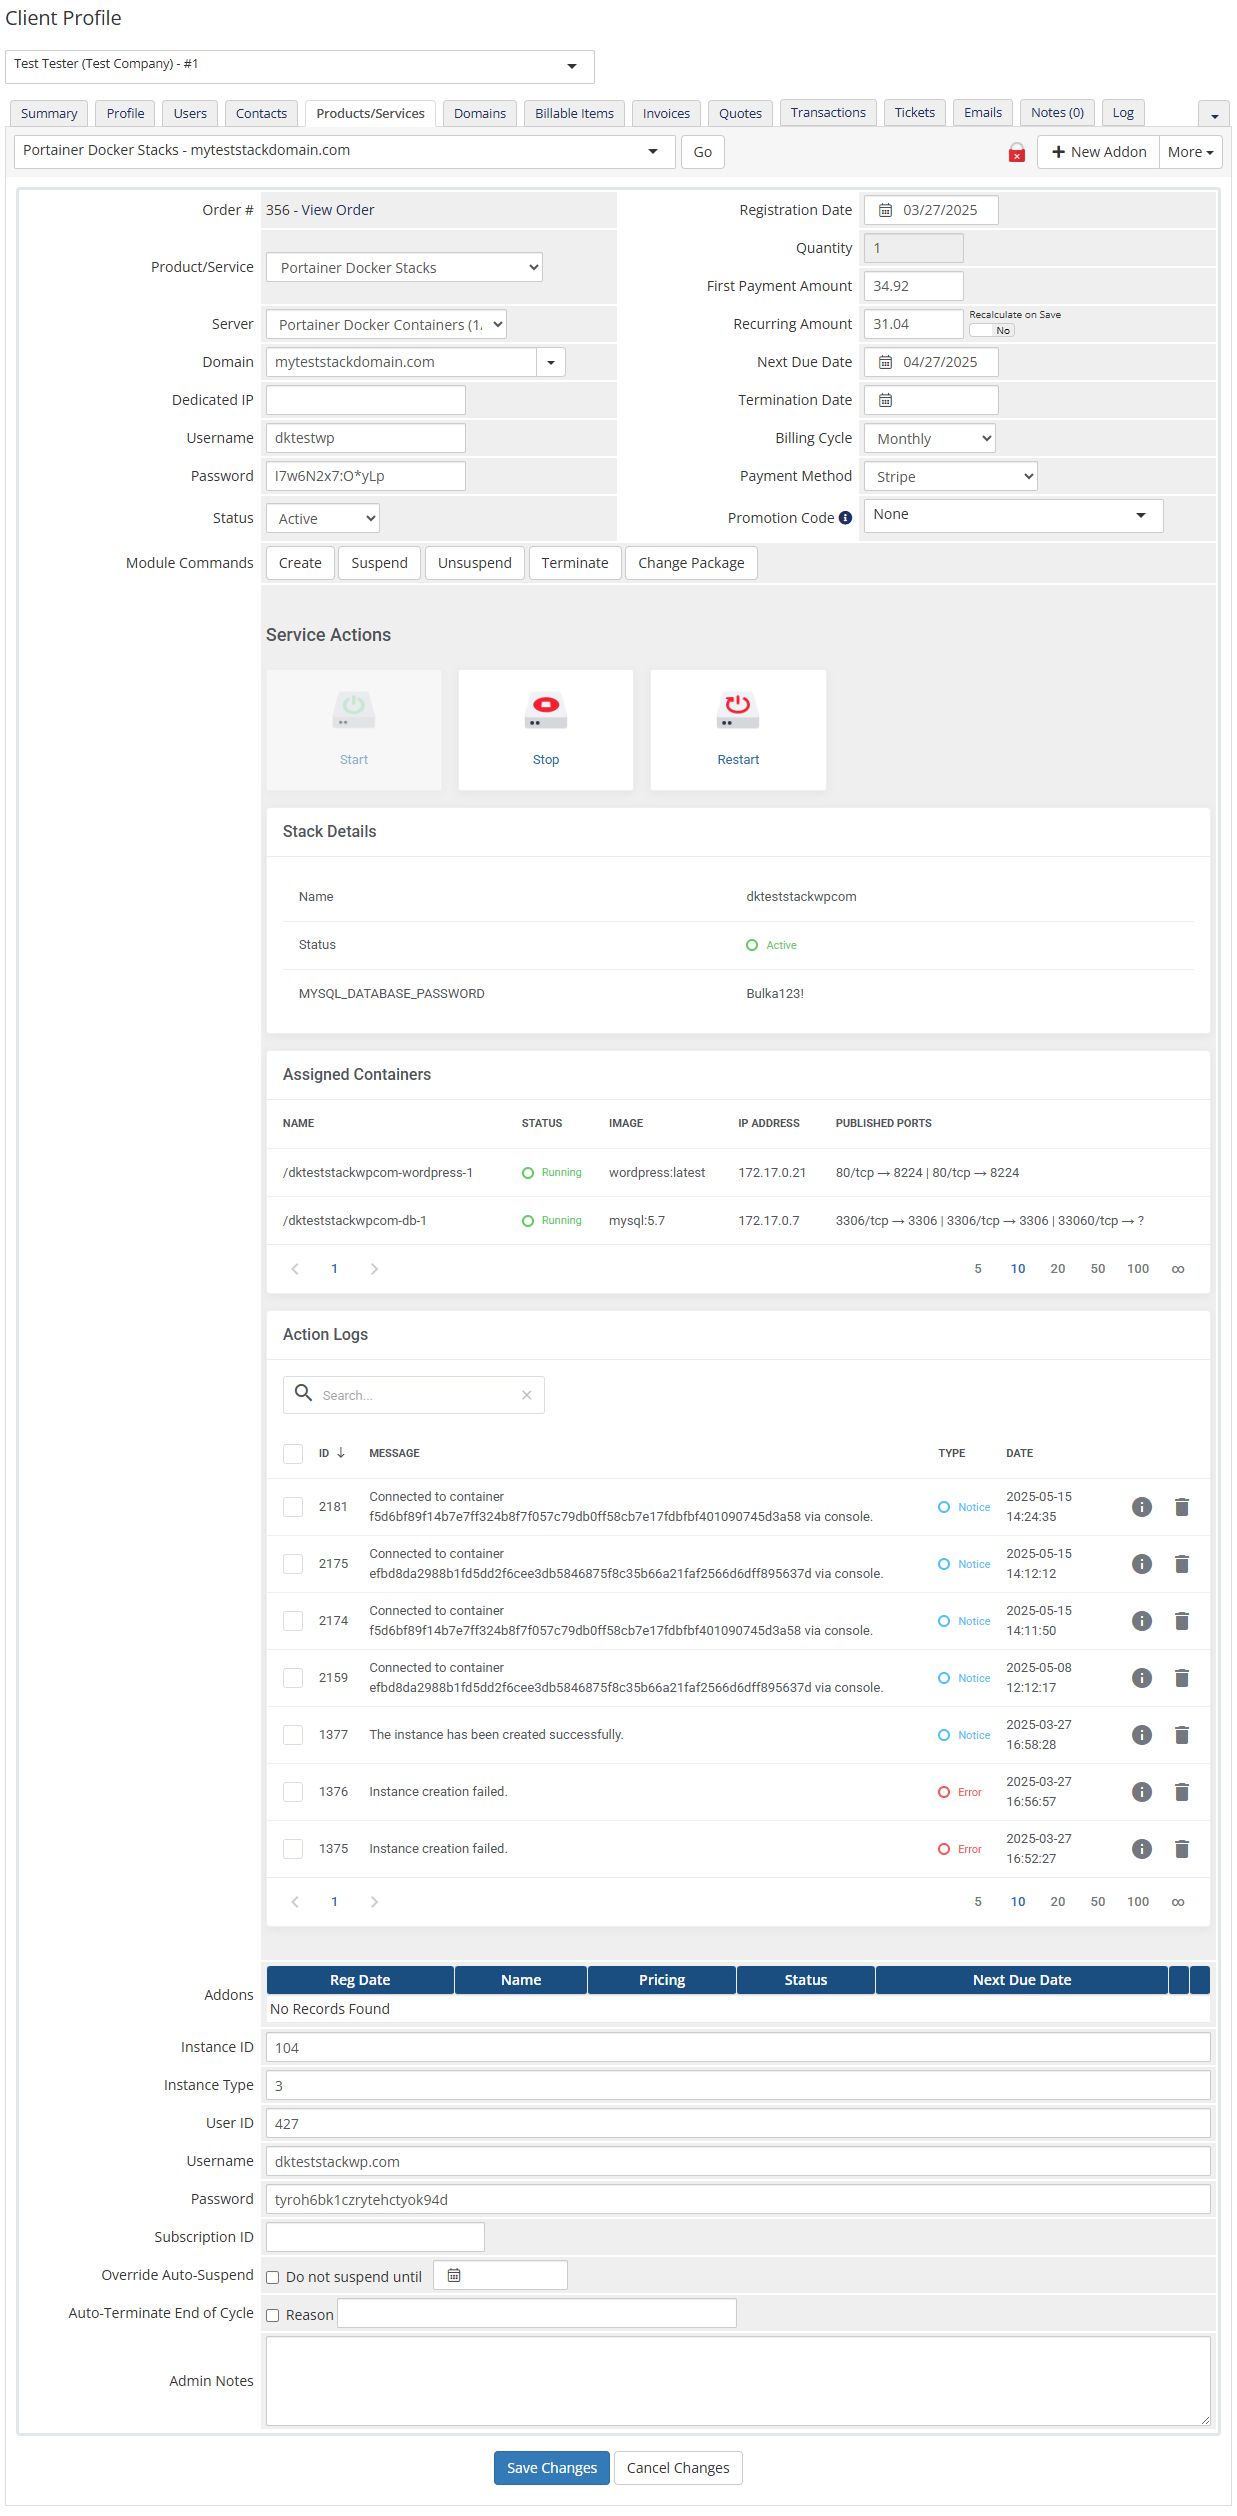
| Admin Area product page view.
Stack View |
|
| Container-based product type |

|
Client Area
| With Portainer Docker Containers For WHMCS, clients can fully manage their Docker containers and stacks directly from the WHMCS client area. They can view service information, monitor performance, execute key actions, and deploy applications, all without needing direct access to Portainer. Service Actions: Clients can quickly start, stop, or restart their containers/stacks?? using dedicated control buttons. |
Stack View
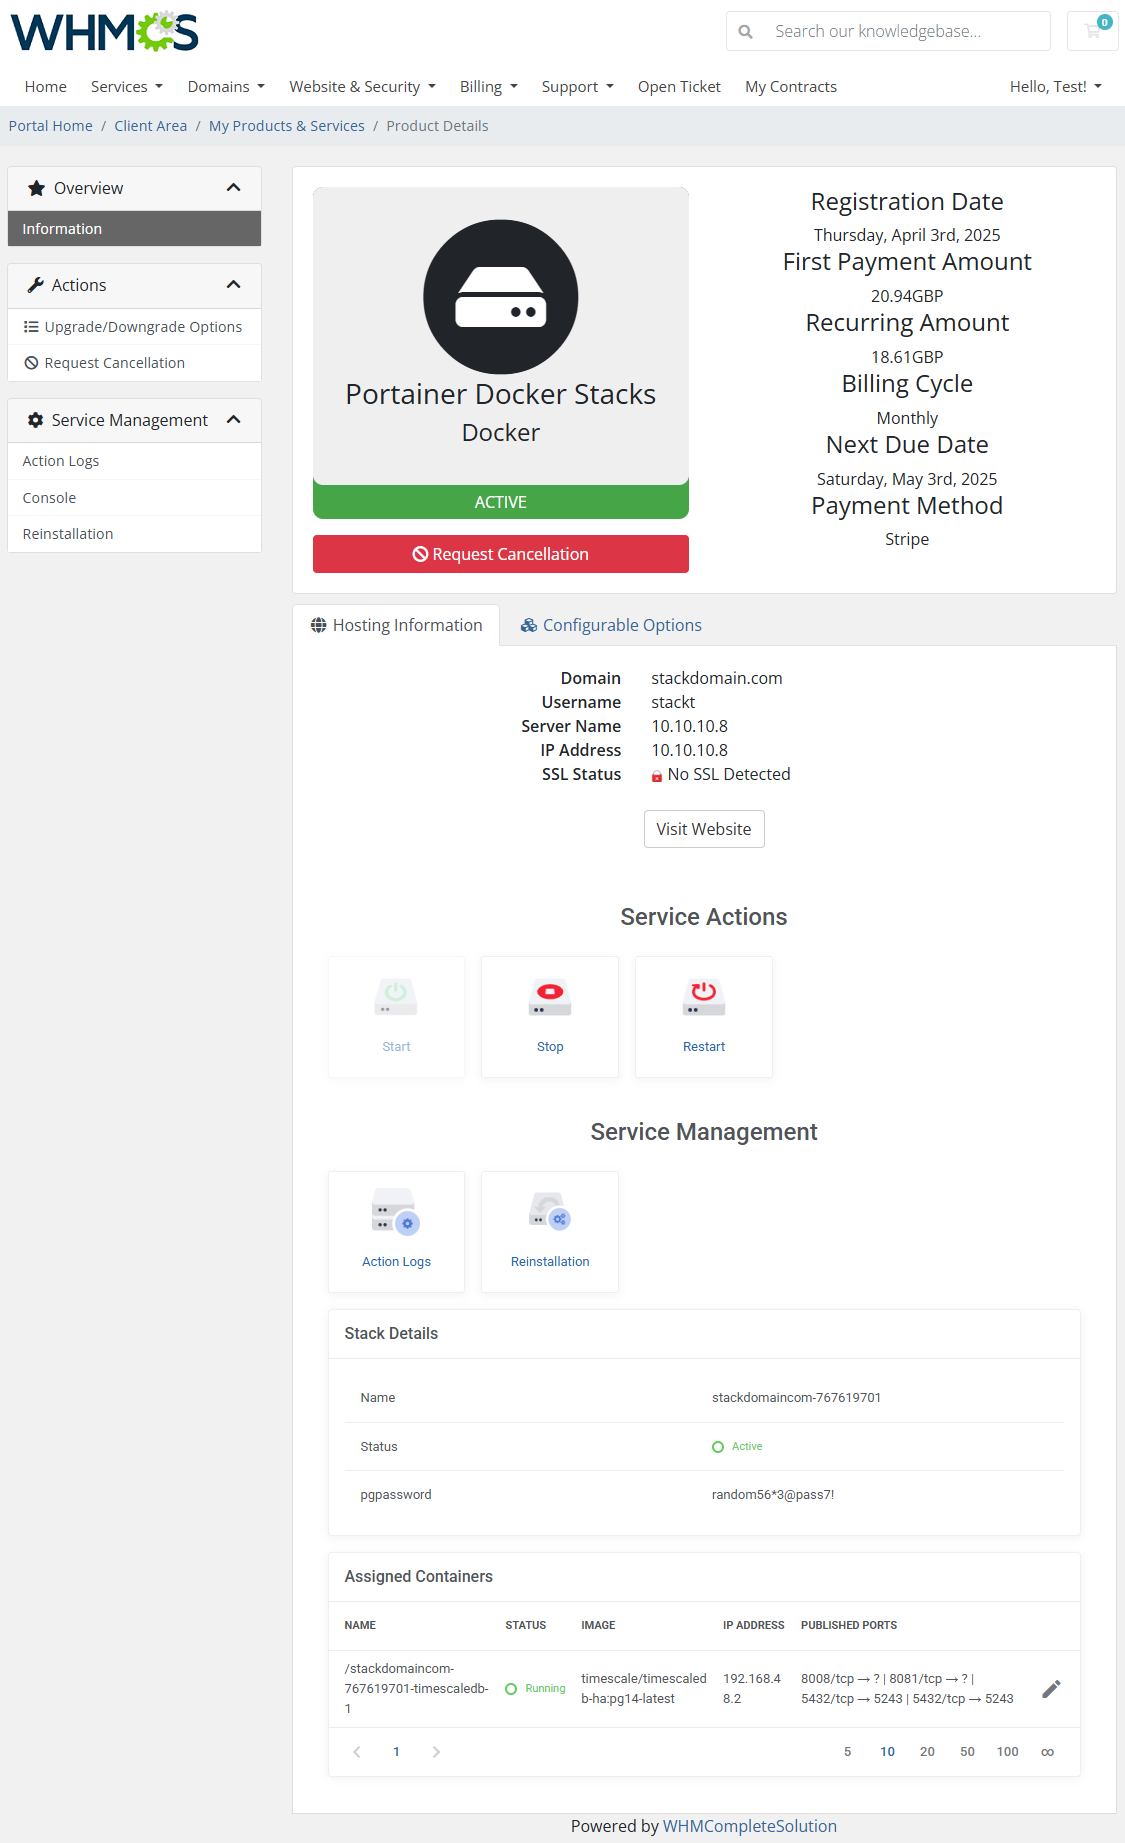
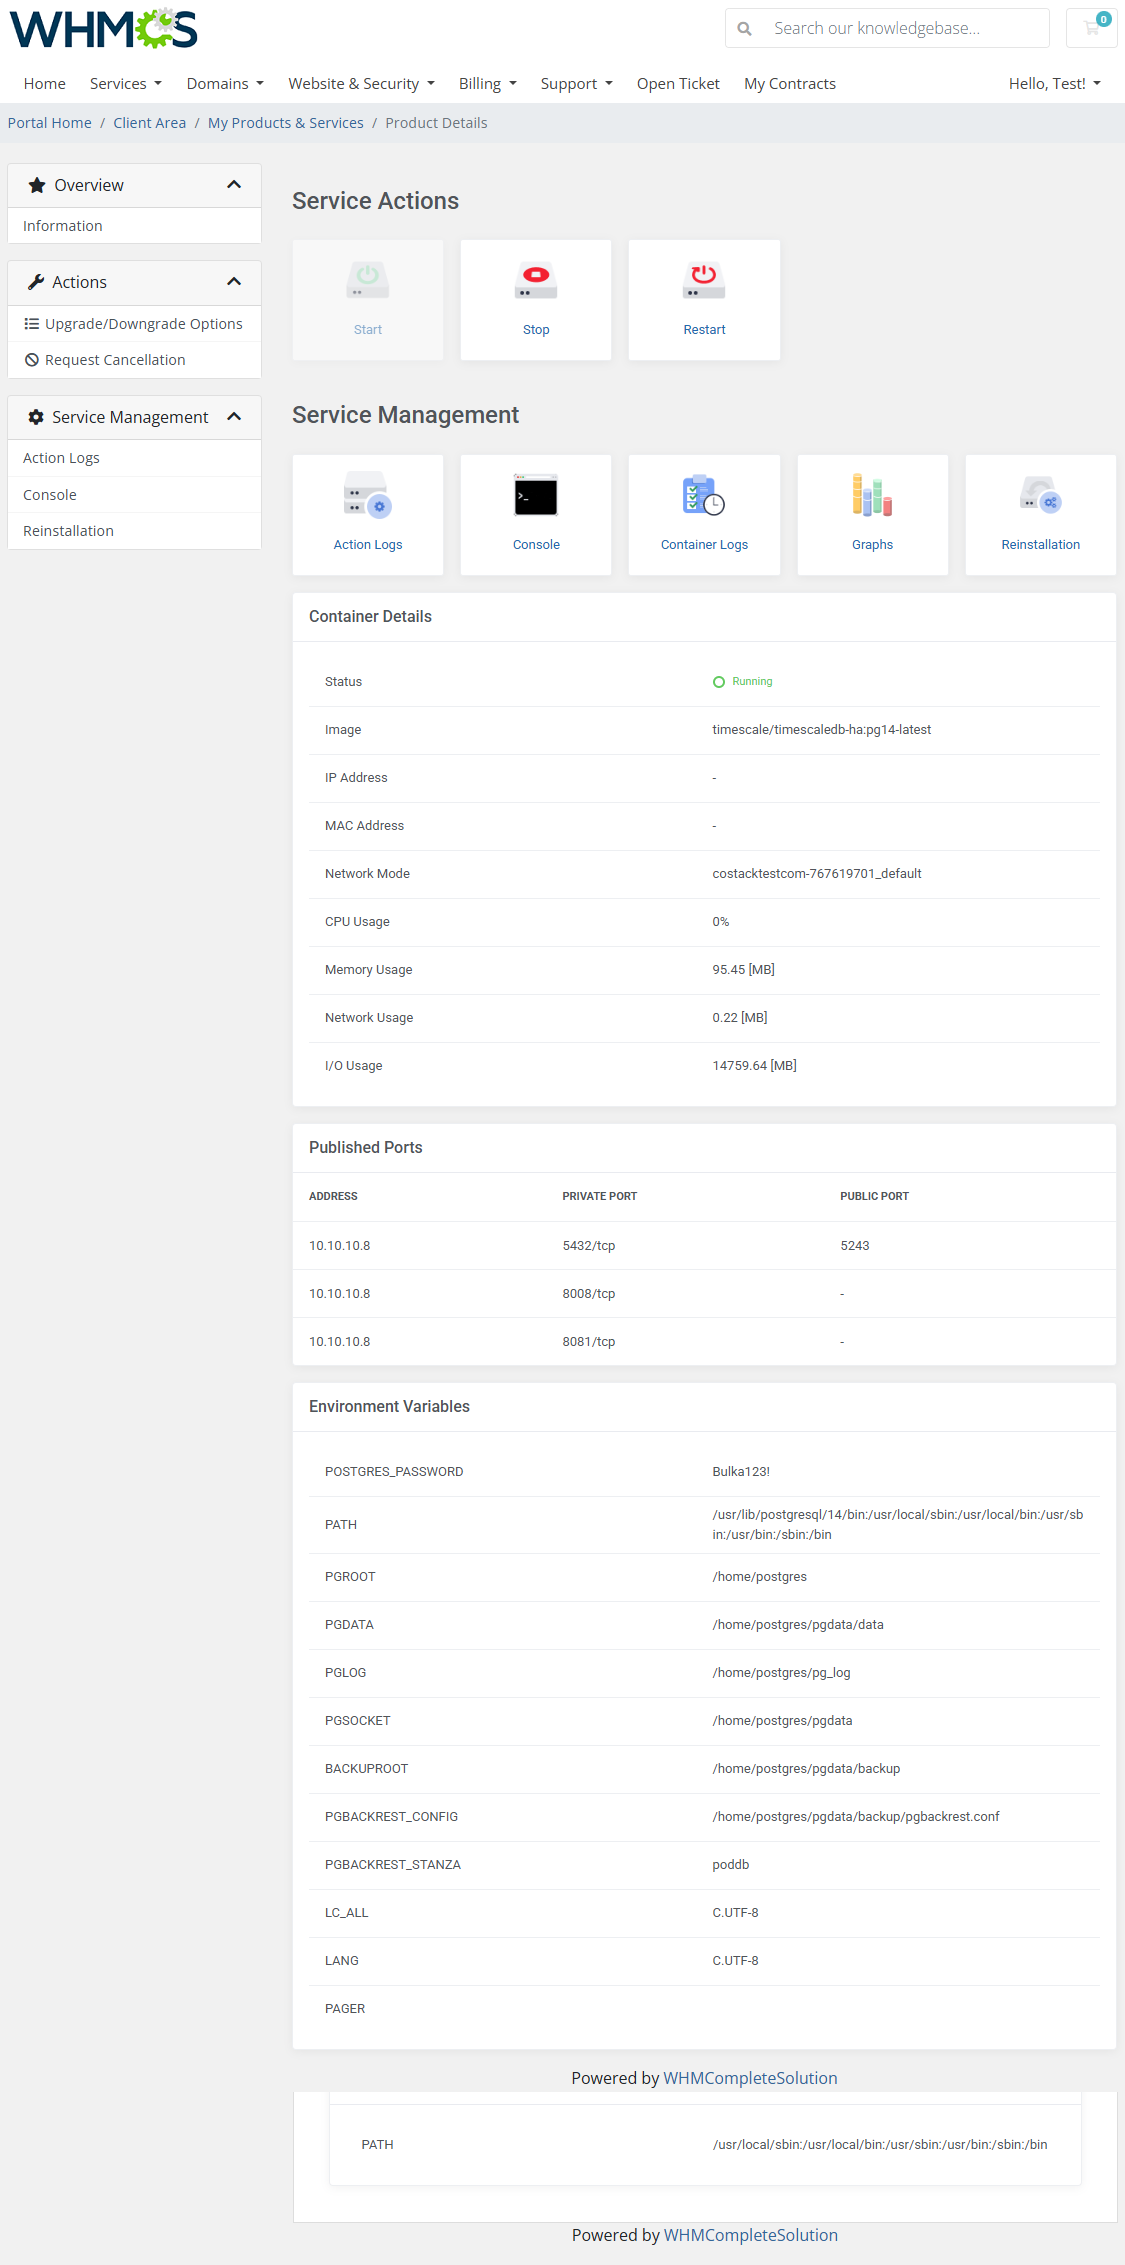
| Below, you can see what the product might look like for the client "Stack" type with assigned Containers.
Table with Stack Details with any essential stack information, including name, current status, and exposed environment variables.
Table with Assigned Containers that includes a list of all containers associated with the client’s stack. |
|
| "Assigned Container" to Stack view.
Clicking on a container from the stack view opens a dedicated detail panel with full technical insight. Environment Variables |
|
Container View
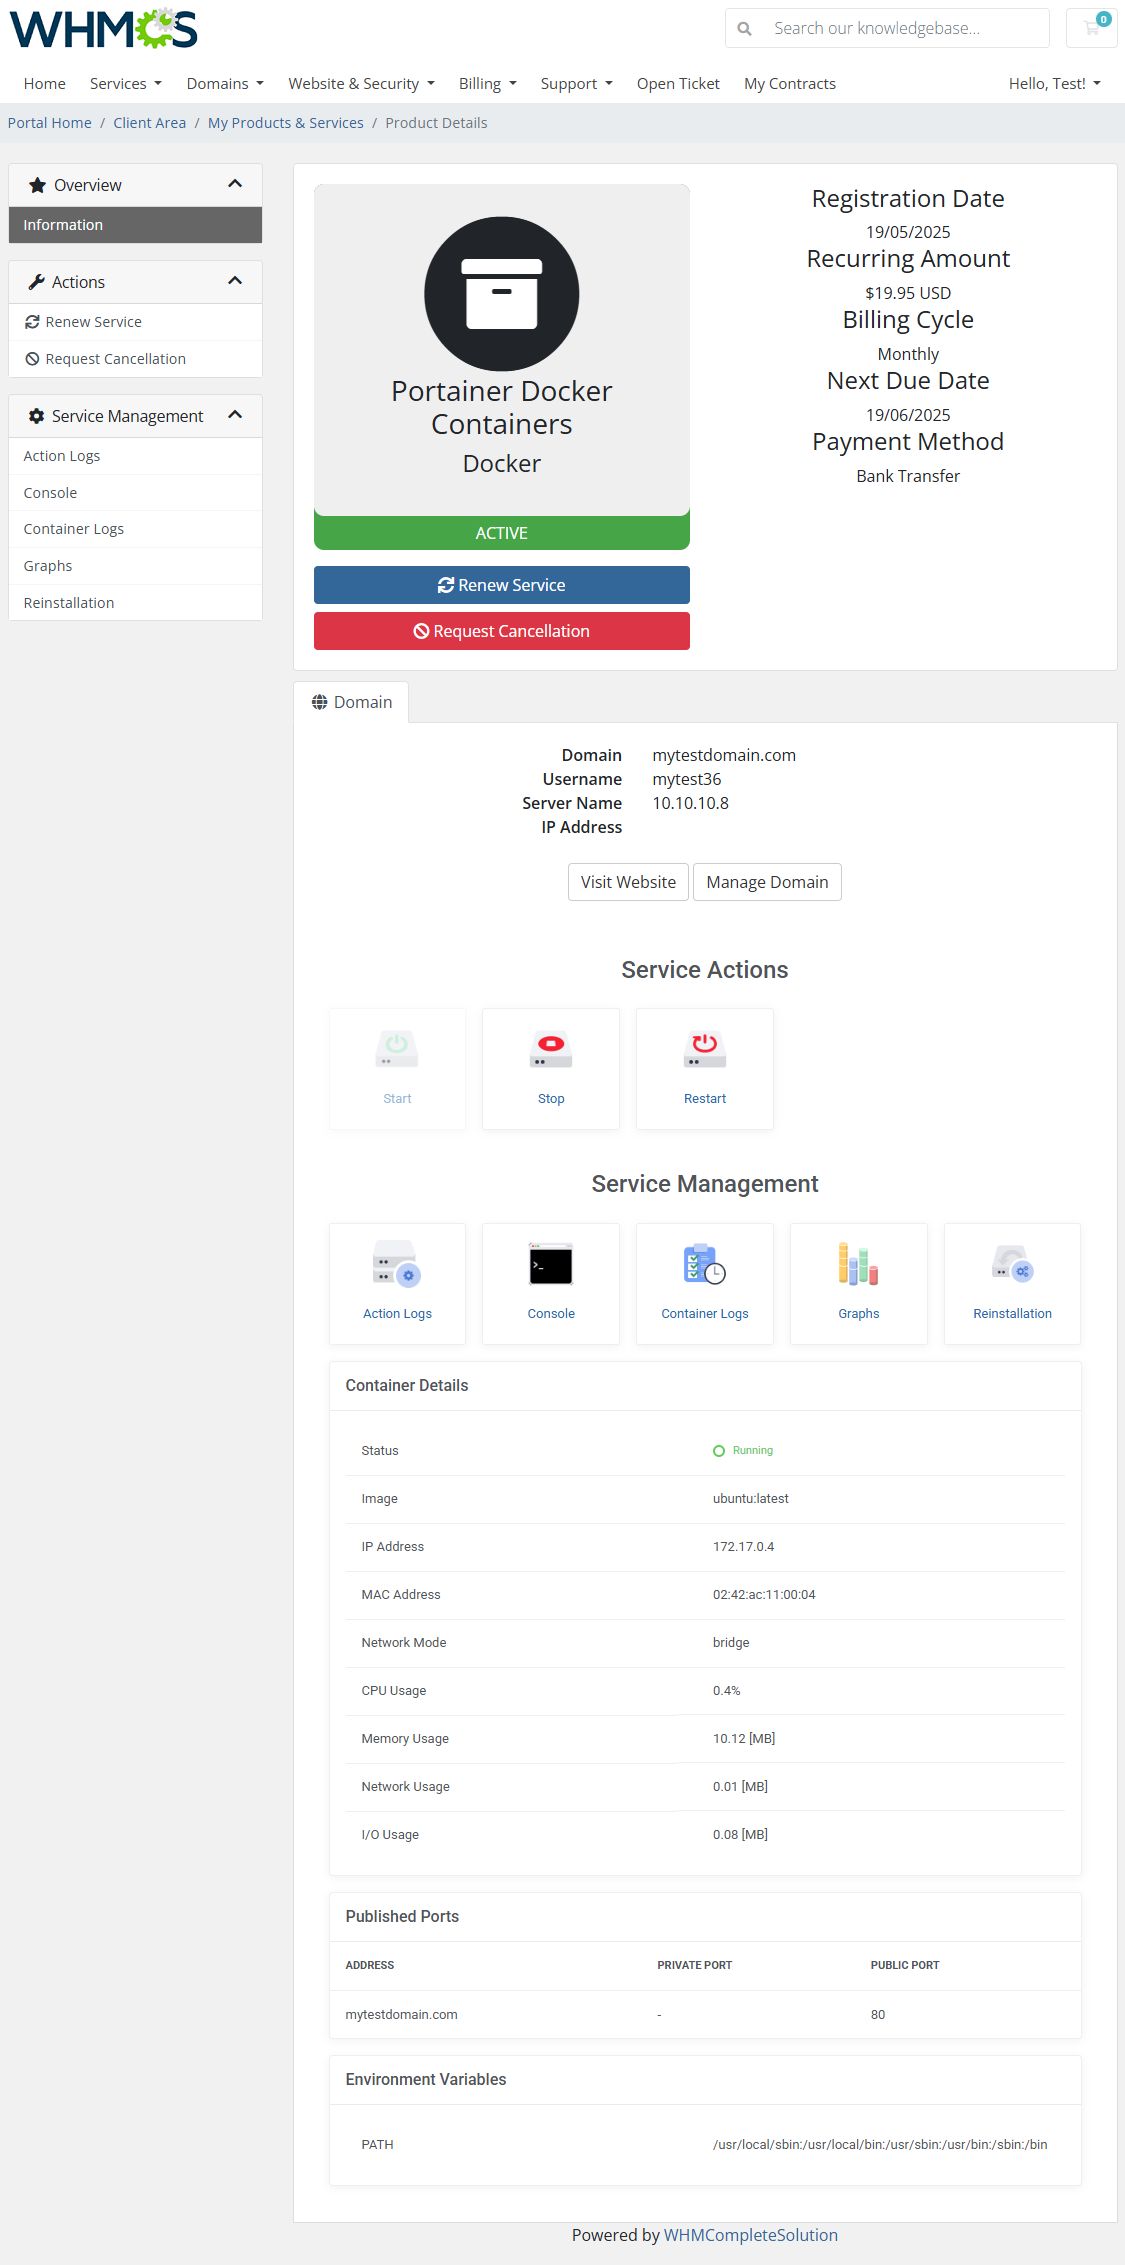
| Here is the "Container" product type view:
Incldes everthing taht is described above. |
|
Action Logs
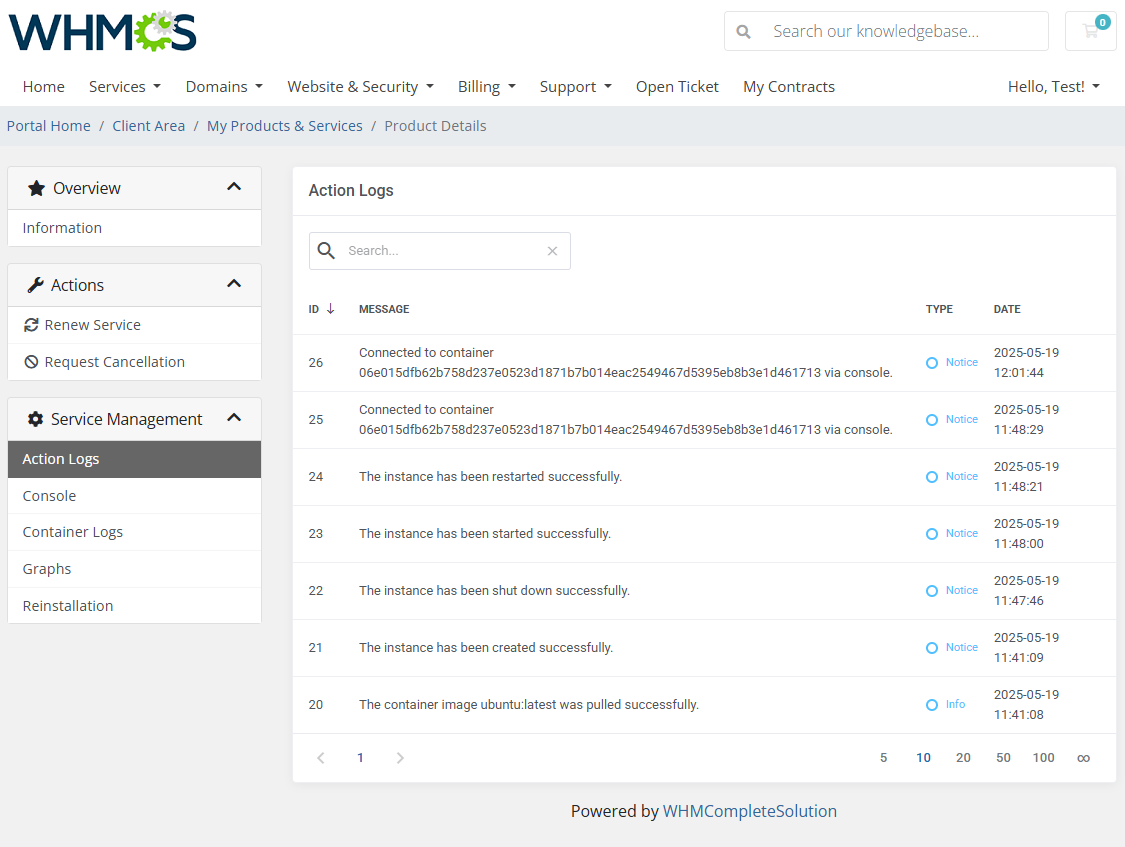
| The Action Logs section tracks all actions performed on the container or stack, such as starting, stopping, reinstallation, and template deployments. This history helps clients verify activity and troubleshoot potential issues. |
|
Console
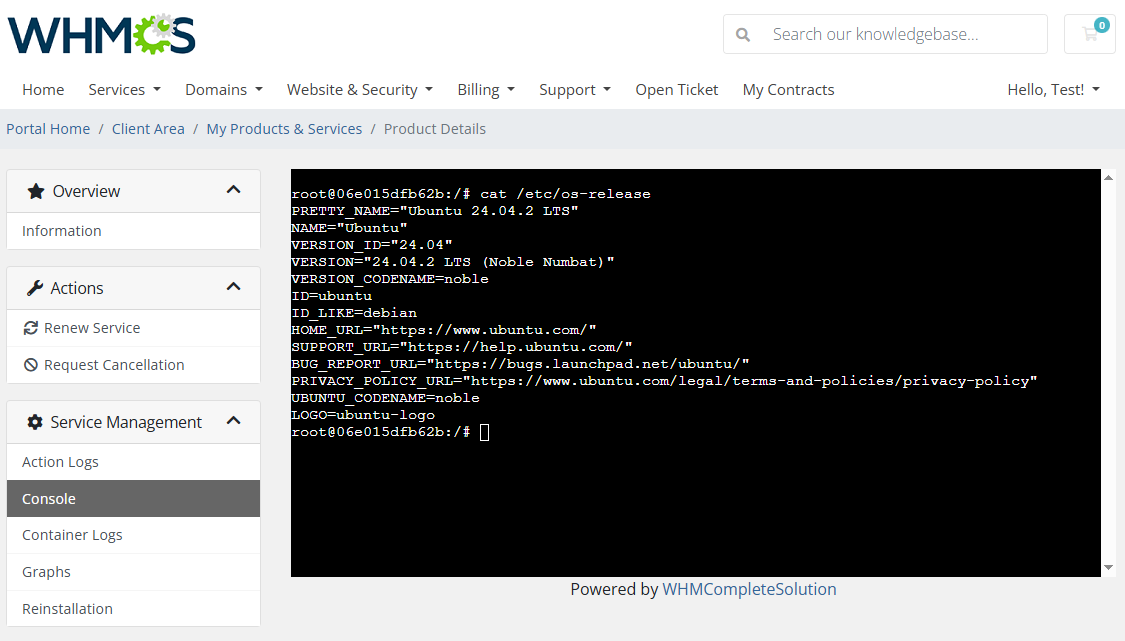
| Web-based terminal access for direct container management. Opened directly in the WHMCS client area or in a seaprate tab. |
|
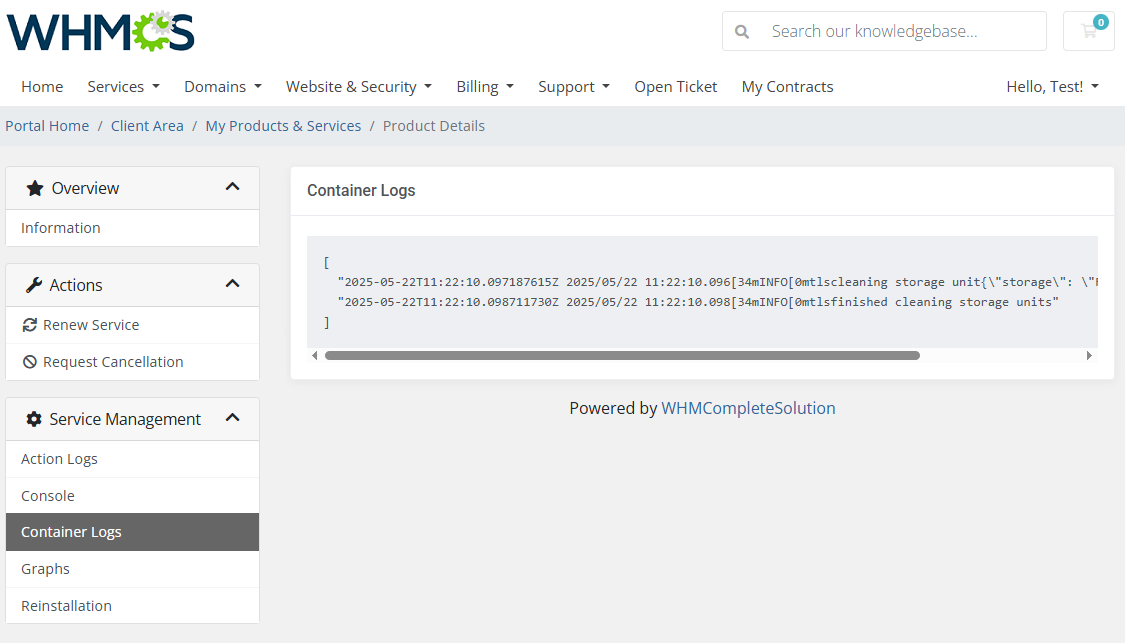
Contaiener Logs
| Live log output of the container’s stdout and stderr. |
|
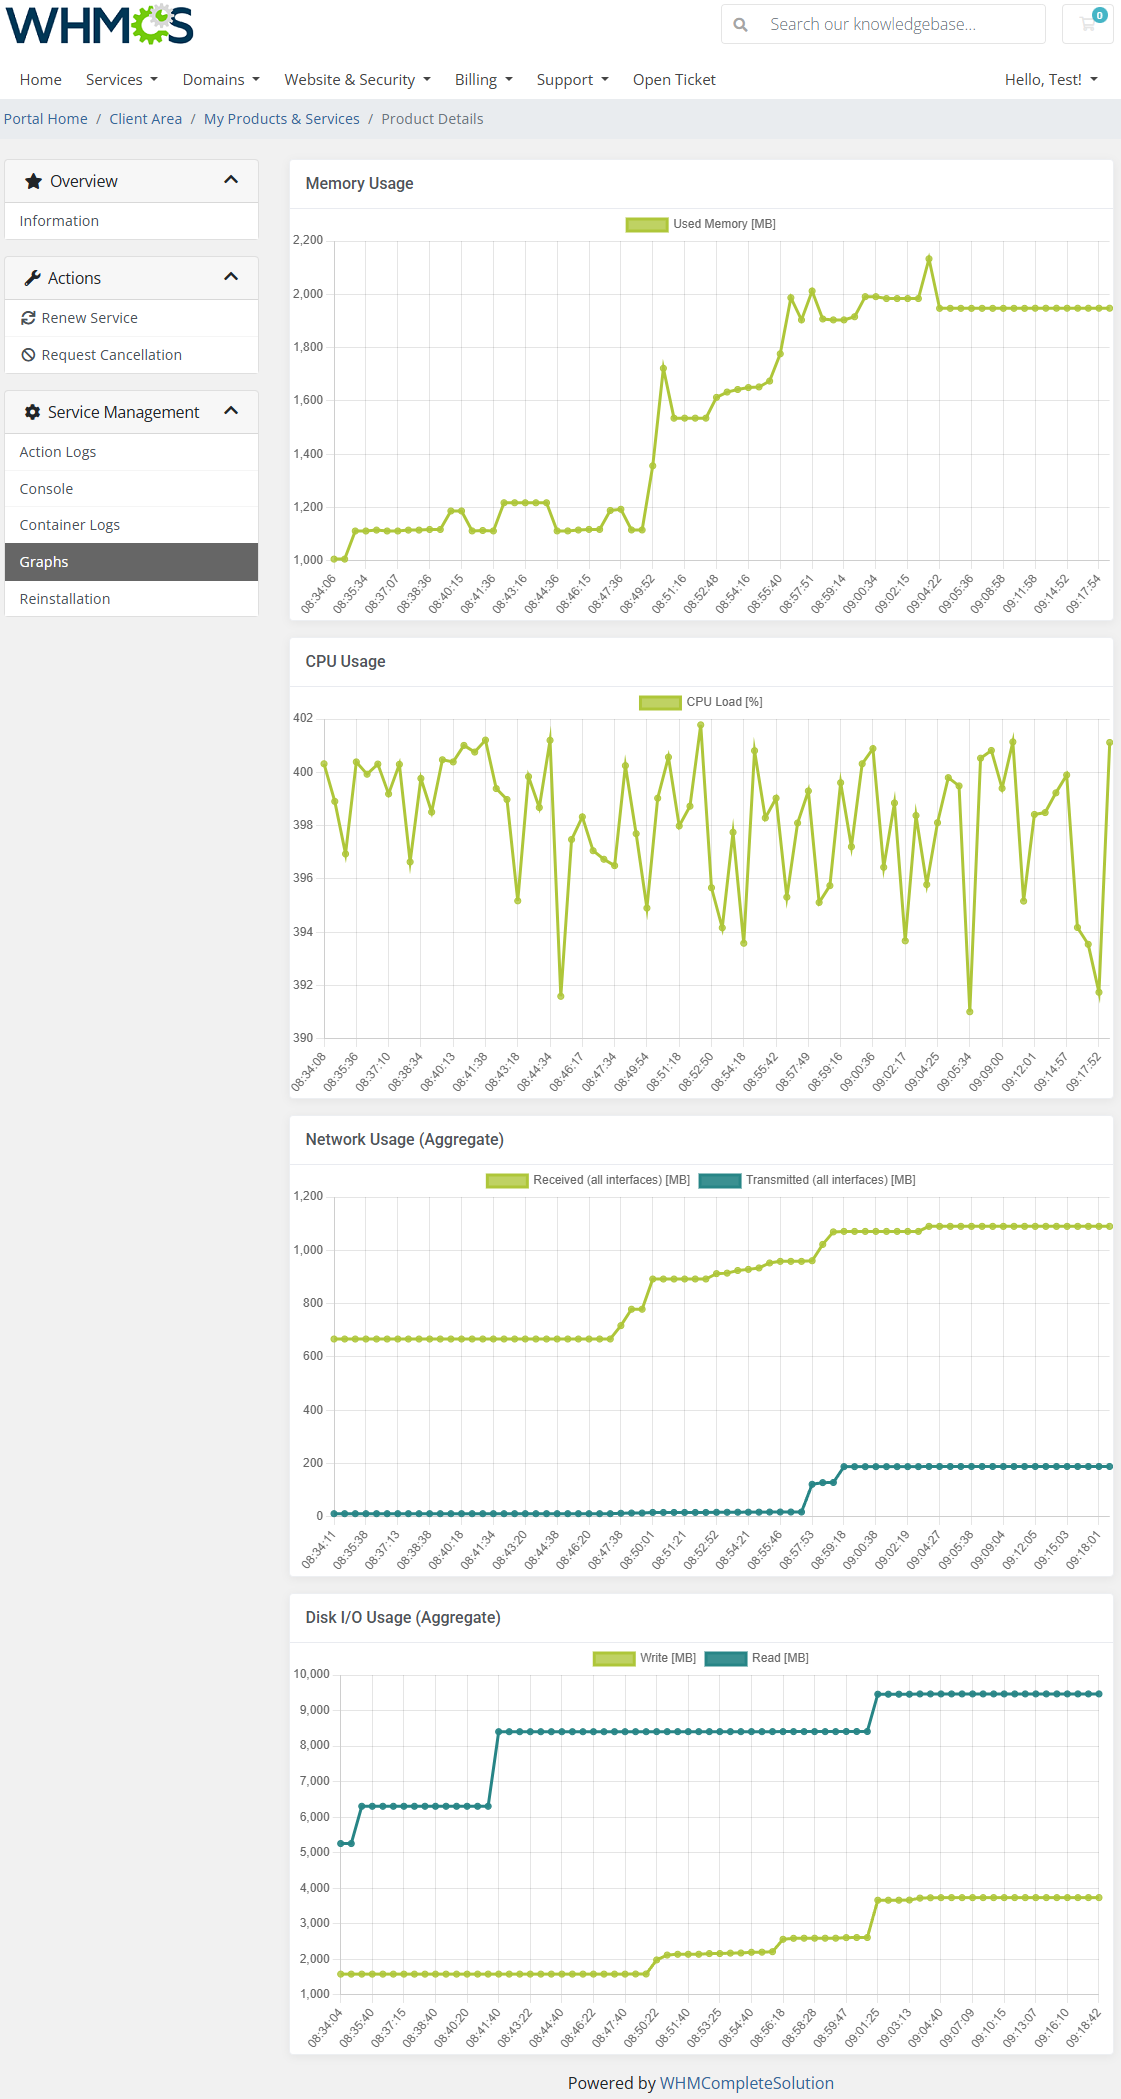
Graphs
| Real-time resource graphs including CPU, memory, network, and I/O statistics |
|
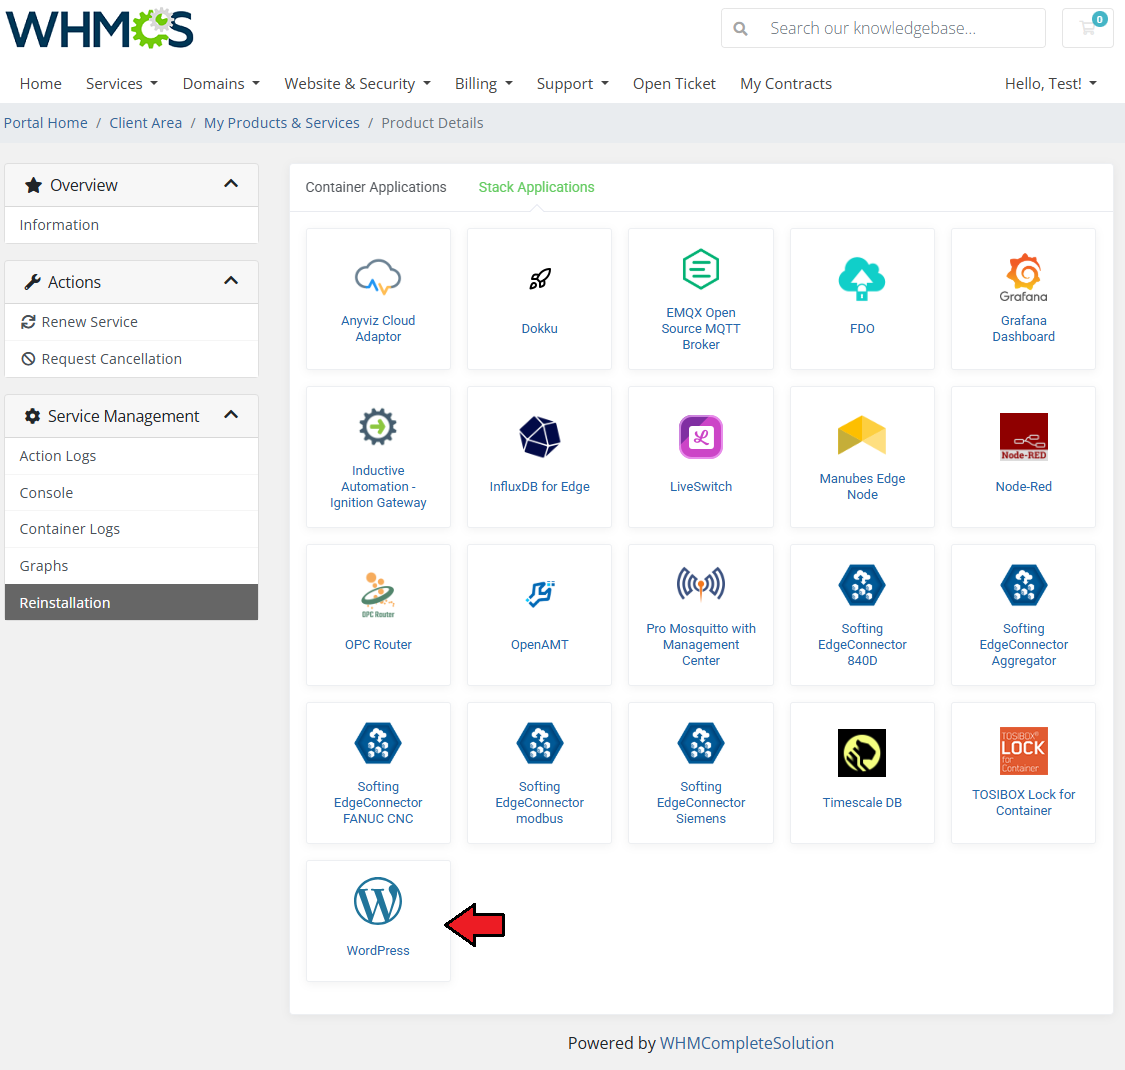
Reinstallation
|
The App Templates section allows clients to reinstall their container or stack using a predefined application template. |
|
|
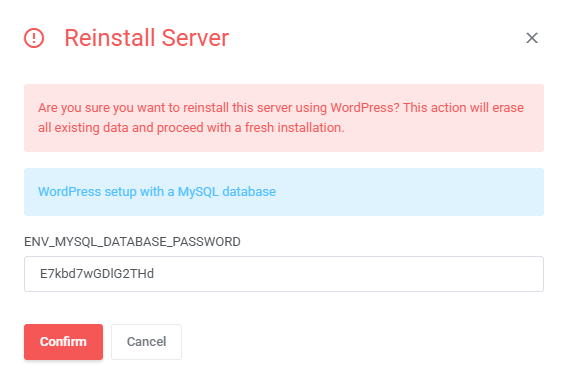
Fill in required fields if thgere are any, in some cases ther might be more, in some none, jsut confirm the action if you are sure you wish to proceed. |
|
Tips
| 1. If you |
Update Instructions
| An essential guidance through the process of updating the module is offered here. Ensure successful completion of the module update by carefully following each step, thereby preventing data loss or any unforeseen issues. |
Upgrade Guide
| Seeking a solution that offers greater flexibility, customization tailored to your precise needs, and unrestricted availability? There is an option that not only proves to be cost-effective in the long run but also includes prioritized support services, making it a truly valuable investment. Opt for the Open Source version of your Server Monitoring For WHMCS module to unlock these benefits. Follow a comprehensive guide covering the transition process, the advantages it brings, and step-by-step instructions on what to do next after the order has been successfully finalized. |
Common Problems
| 1. When you have problems with connection, check whether your SELinux or firewall does not block ports. |