Google Analytics For WHMCS integrates your WHMCS data into Google Analytics, providing deep insights into customer behavior and engagement.
Access a wide range of client activities, from shopping cart actions to account interactions and support ticket changes, all within your Google Analytics account.
Use this powerful module to unlock actionable insights!
|
| ✔ Track WHMCS User Actions With Google Analytics Integration:
|
| ✔ View Dashboard Statistics:
|
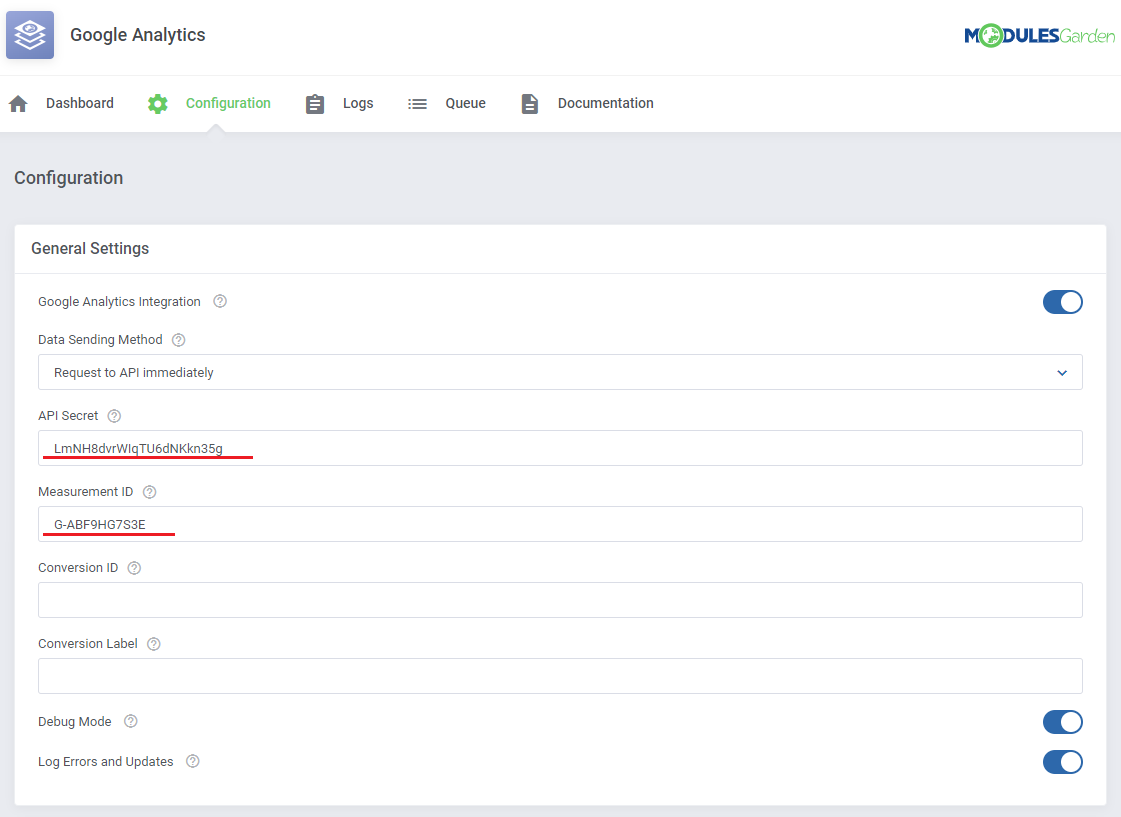
| ✔ Configure Google Analytics Integration:
|
| ✔ Choose Data Sending Method:
|
| ✔ Requests To API Immediately
|
| ✔ Add Requests To Cron Queue
|
| ✔ Provide Conversion ID And Conversion Label
|
| ✔ Log Errors And Information
|
| ✔ Enable Google Tag Manager Integration
|
| ✔ Select Client Properties Send To Google Analytics
|
| ✔ View And Manage Queue Tasks
|
| ✔ Supports Google Analytics 4
|
| ✔ Supports PHP 8.1 Back To PHP 7.4
|
| ✔ Supports WHMCS V8.10 Back To WHMCS V8.8
|
| ✔ Requires ionCube Loader V12 Or Later
|
Installation
This tutorial will show you how to successfully install and authenticate Google Analytics For WHMCS.
We will guide you step by step through the whole installation and authentication process.
|
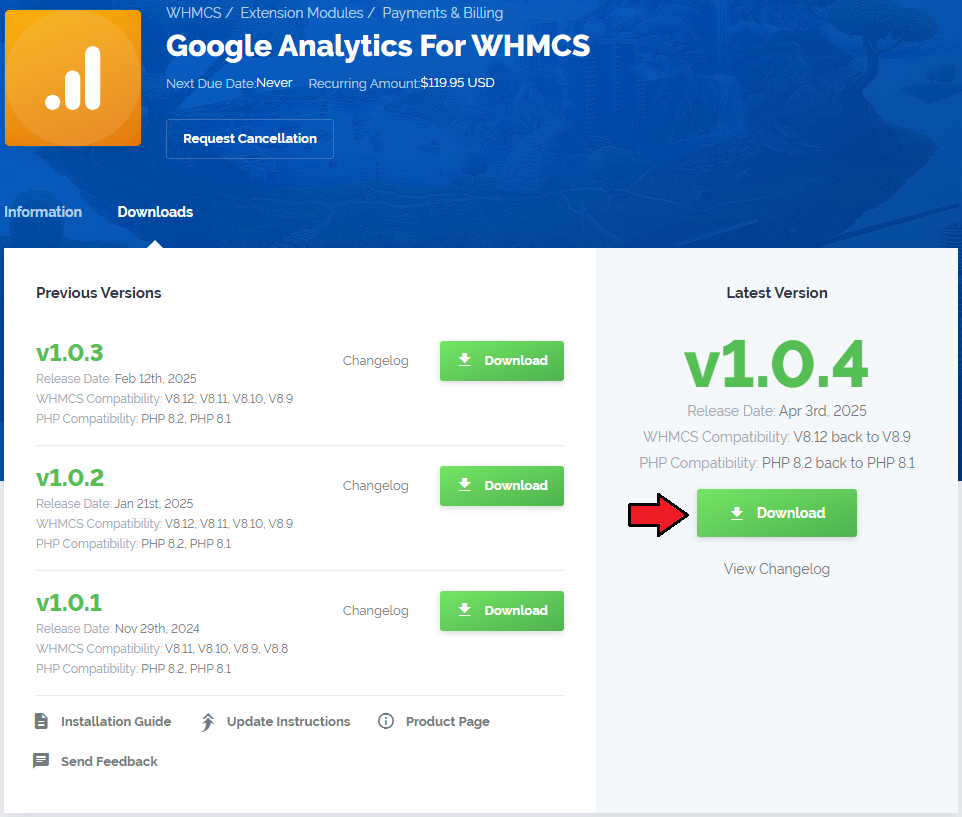
| 1. Log in to our client area and download the module.
|
2. In the downloaded file you might find one or two packages that support different PHP versions.
In the most recent versions of the module, you will find only one package that supports PHP 7.2 and later.
|
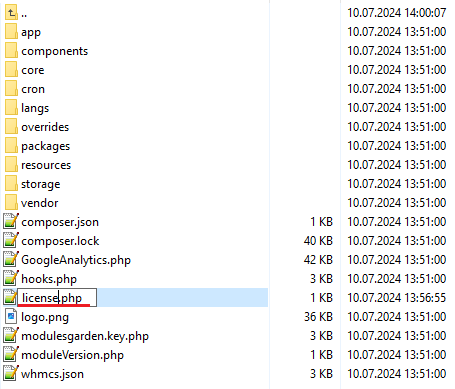
3. Extract the package and upload its content into the main WHMCS directory.
The content of the package to upload should look like this.
|
4. When you install Google Analytics For WHMCS for the first time, you have to rename the 'license_RENAME.php' file.
The file is located in 'modules/addons/googleanalytics/license_RENAME.php'. Rename it from 'license_RENAME.php' to 'license.php'.
|
5. In order to configure your license key you have to edit the previously renamed 'license.php' file.
Enter your license key between the quotation marks as presented on the following screen. You can find your license key in our client area → 'My Products'.
|
6. Optionally, add a cron job as shown below (5-minute intervals are recommended).
php -q /your_whmcs/modules/addons/GoogleAnalytics/cron/cron.php queue
This cron makes sure data is sent automatically when using the 'Add Requests to Cron Queue' Data Sending Method.
Do not forget to replace 'your_whmcs' with your WHMCS root location. The cron can also be executed every single minute to perform the action more often.
|
Credentials and API Configuration
| 7. After you have logged in, create a new project.
|
8. To proceed, go to 'Google APIs' under the 'Overview' tab.
Find 'Google Apps Reseller API' among the applications.
|
| 9. Now, you have to enable 'Google Apps Reseller API' as shown on the following screen.
|
| 10. Next, search for the 'Admin SDK' the same way you did it in step 9.
|
| 11. Enable 'Admin SDK' API.
|
12. Finally, open the 'Explore and enable API' section, the API & Services page should open. Go to 'OAuth consent screen' under the 'Credentials' section.
Afterward, enter the mail address and application name that will be visible during your requests.
Here is a list of scopes required by the module to work properly:
- admin.directory.user
- apps.order
- apps.order.readonly
- userinfo.profile
Save changes through pressing the 'Save' button.
|
| 13. Then, switch to the 'Credentials' tab and add new credentials .
|
14. After you have done that, tick 'Web application'.
Next, enter your website URL into the 'Authorized JavaScript origins' field and correct path to 'oauth_callback.php' into the 'Authorized redirect URI' field.
Confirm changes by pressing 'Create'.
|
| 15. Well done! Now that you have filled in all the necessary details, you can proceed to authenticate Google Apps.
|
Dashboard
Let us check your new product on the product page in admin area. It should look like on the screen below.
|
Logs
Let us check your new product on the product page in admin area. It should look like on the screen below.
|
Queue
Let us check your new product on the product page in admin area. It should look like on the screen below.
|
Tips
1. The module requires a G Suite Reseller account. To check the current status of your Google Reseller account, navigate to the following site: Google Cloud Partner Portal.
There, you can verify the status and request partner authorization if necessary.
|
http://git.mglocal/whmcs-products/google-analytics/-/issues/21
Update Instructions
An essential guidance through the process of updating the module is offered here.
Ensure successful completion of the module update by carefully following each step, thereby preventing data loss or any unforeseen issues.
Additionally, you will find a current list of supplementary actions necessary for a smooth update process there.
|
Upgrade Guide
Seeking a solution that offers greater flexibility, customization tailored to your precise needs, and unrestricted availability?
There is an option that not only proves to be cost-effective in the long run but also includes prioritized support services, making it a truly valuable investment.
Opt for the Open Source version of your Google Workspace For WHMCS module to unlock these benefits.
Simply click on either the Get Source Code or Upgrade To Lifetime button found on the product's page in our client area to complete the one-step upgrade process, with a dedicated discount already applied.
Follow a comprehensive guide covering the transition process, the advantages it brings, and step-by-step instructions on what to do next after the order has been successfully finalized.
|
Common Problems
| 1. When you have problems with connection, check whether your SELinux or firewall does not block ports.
|
