Zimbra Email For WHMCS
Contents |
About Zimbra Email For WHMCS
| Zimbra Email For WHMCS is a module which allows your customers to manage email accounts of your domain directly in WHMCS. Your clients will be able to conveniently manage mailboxes, aliases and quickly access their webmails. |
- Admin Area Features:
| ✔ Create Account |
| ✔ Terminate Account |
| ✔ Change Package |
| ✔ Change Password |
| ✔ Log In To Webmail |
| ✔ Use COS / Custom Settings |
| ✔ Generate Default Configurable Options |
- Client Area Functionality:
| ✔ Manage Accounts |
| ✔ Manage Aliases |
| ✔ Manage Distribution Lists |
| ✔ Change Package |
| ✔ Change Password |
| ✔ Log In To Webmail |
- Configurable Options:
| ✔ Accounts Limits |
| ✔ Account Size |
| ✔ Aliases Limit |
| ✔ Distribution List Limit |
| ✔ COS |
- General Info:
| ✔ Configurable Options Support |
| ✔ Integrated With Advanced Billing For WHMCS - Server Resource Usage Billing (read more) |
| ✔ Multi-Language Support |
| ✔ Supports Zimbra 8.5.0 and Later |
| ✔ Supports PHP 5.6 Up To PHP 7 |
| ✔ Supports WHMCS Templates Five and Six |
| ✔ Supports WHMCS V6 and V7 |
Installation and Configuration
| This tutorial will show you how to successfully install and configure Zimbra Email For WHMCS. We will guide you step by step through the whole installation process. |
Installation
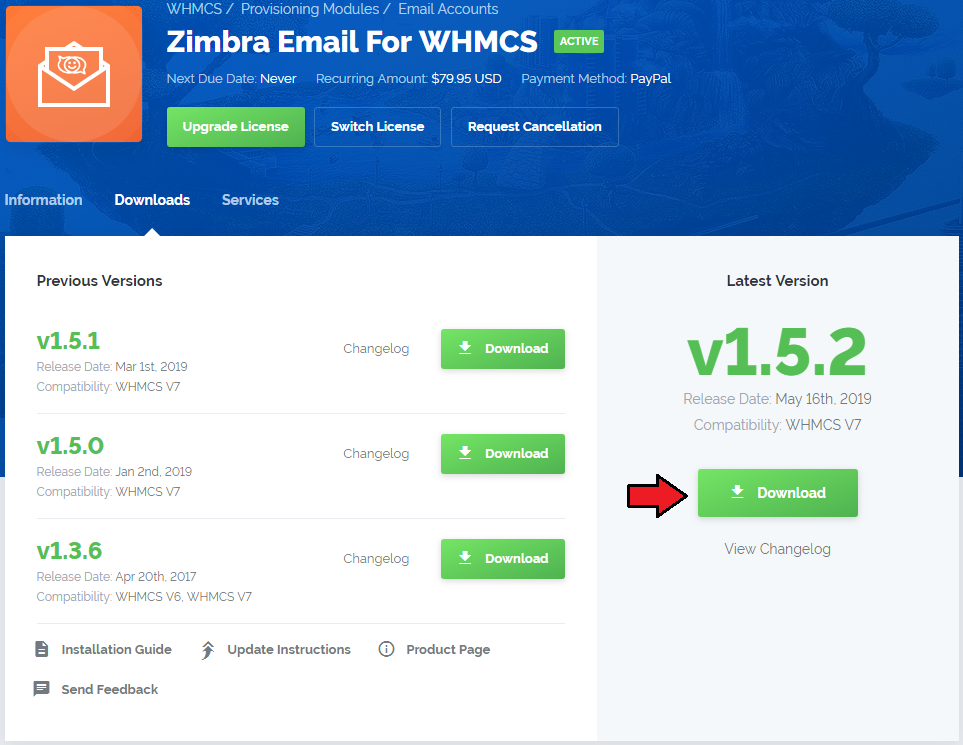
| 1. Log in to your client area and download Zimbra Email For WHMCS. |
|
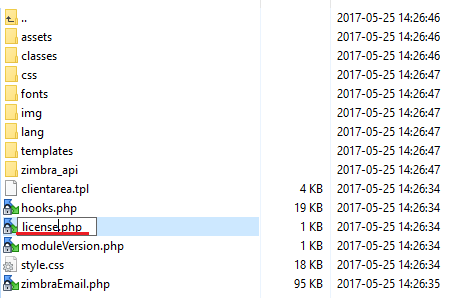
| 2. Upload and extract the module into the main WHMCS directory. Files in your WHMCS directory should look like these. |

|
| 3. When you install Zimbra Email for the first time you have to rename 'license_RENAME.php' file. File is located in 'modules/servers/zimbraEmail/license_RENAME.php'. Rename it from 'license_RENAME.php' to 'license.php'. |
|
| 4. In order to configure your license key you have to edit a previously renamed 'license.php' file. Enter your license key between quotation marks as presented on the following screen. You can find your license key in your client area → 'My Products'. |

|
Server Configuration
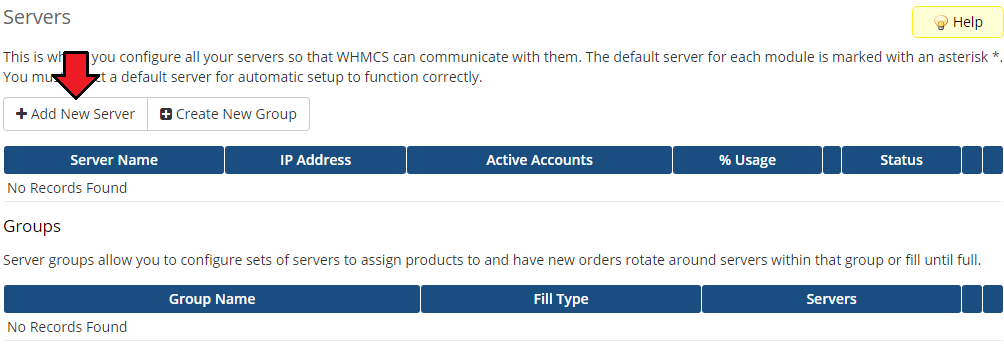
| 5. Now let's configure a new product. Log in to your WHMCS, press 'Setup' → 'Products/Services' → 'Servers'. Afterwards press 'Add New Server'. |
|
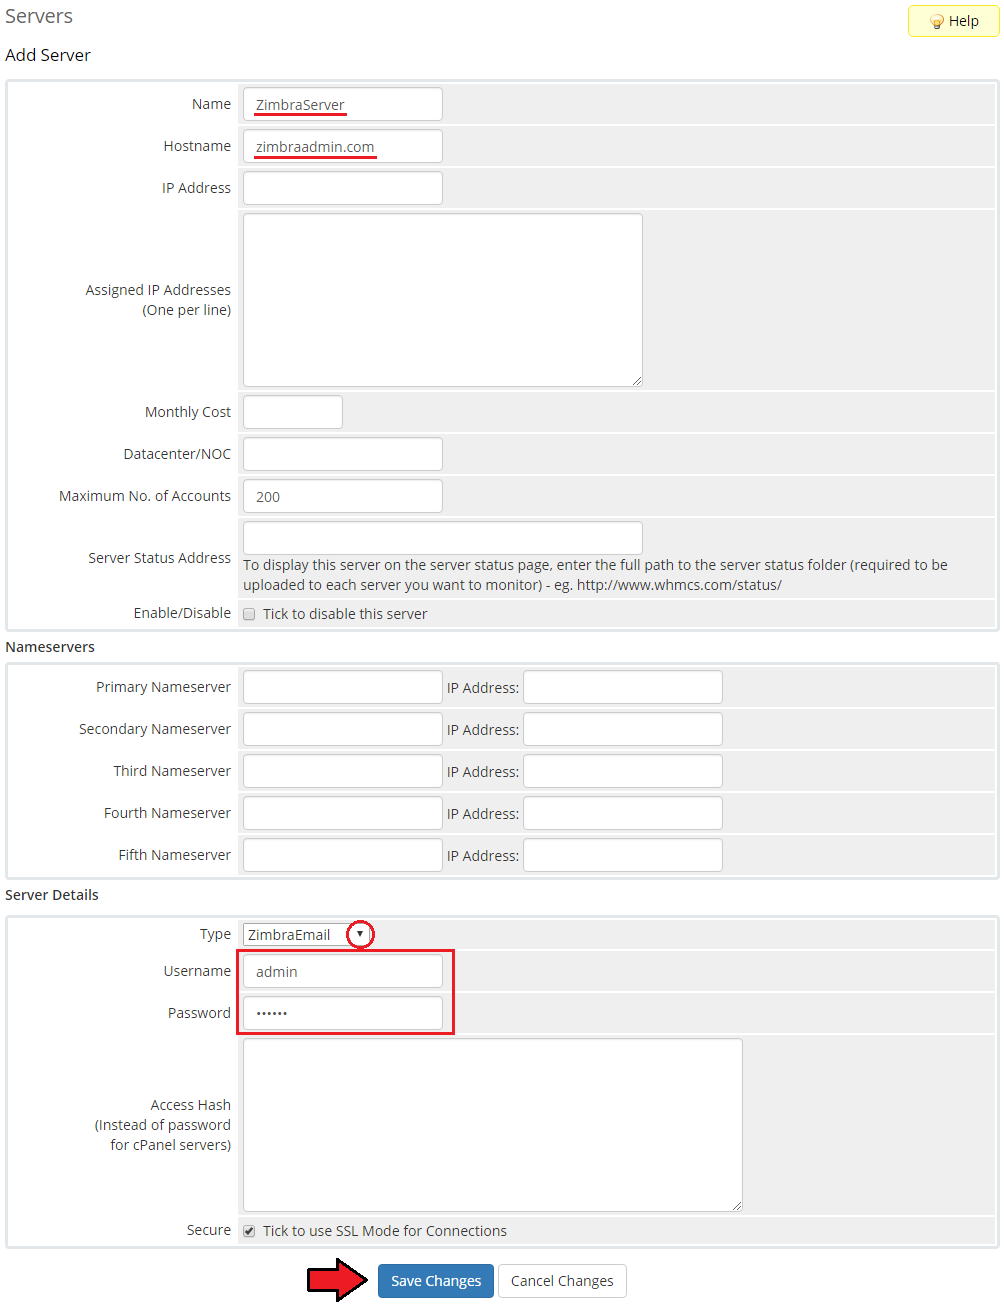
| 6. Next, enter your server name and Zimbra server hostname. Type in your username and password used to log in to Zimbra server. Choose 'ZimbraEmail' from a dropdown menu and press 'Save Changes'. |
|
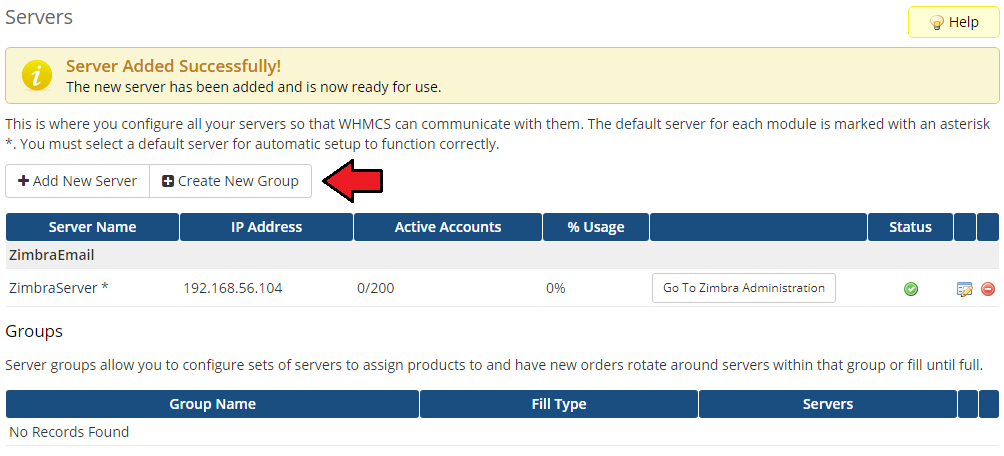
| 7. After you configure your server correctly, you will see a following screen. Now you need to create a new group for your server. For that purpose press 'Create New Group'. |
|
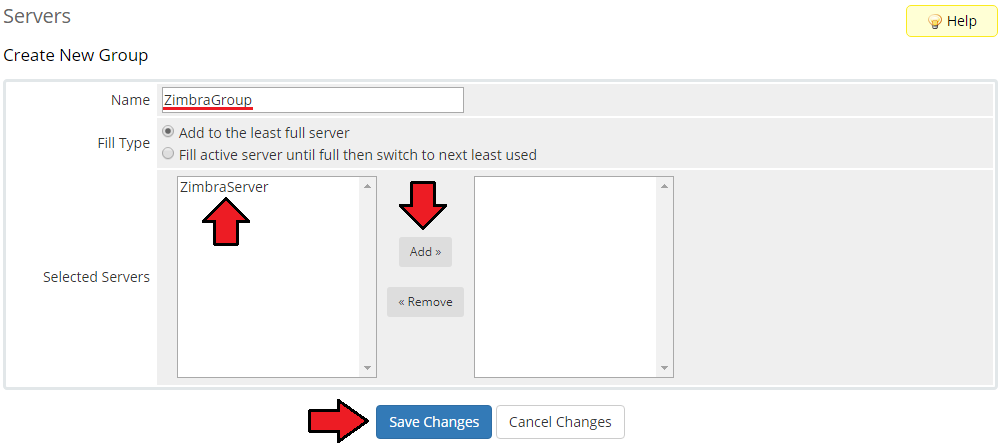
| 8. Enter name, click on your previously created server, press 'Add' then 'Save Changes'. |
|
Product Configuration
| 9. In order to create and configure product, click on 'Setup' → 'Products/Services' → 'Products/Services'. If you do not have a product group, click on 'Create a New Group'. If you do, simply move to step 11. |

|
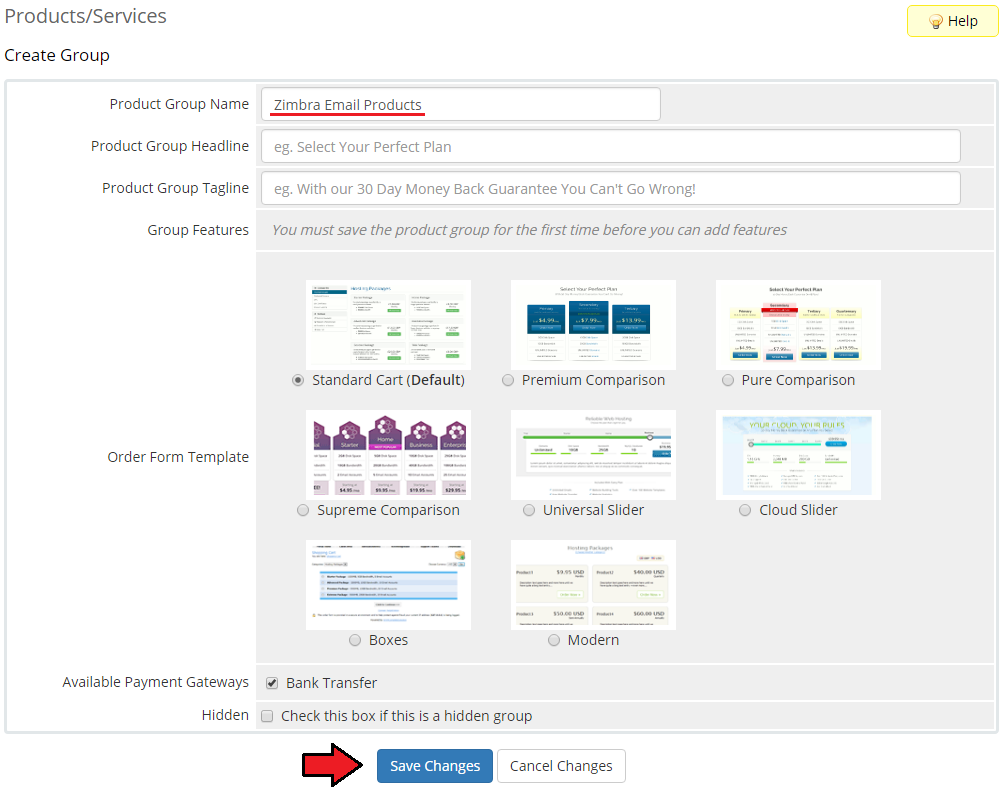
| 10. Enter product group name and press 'Create Group'. |
|
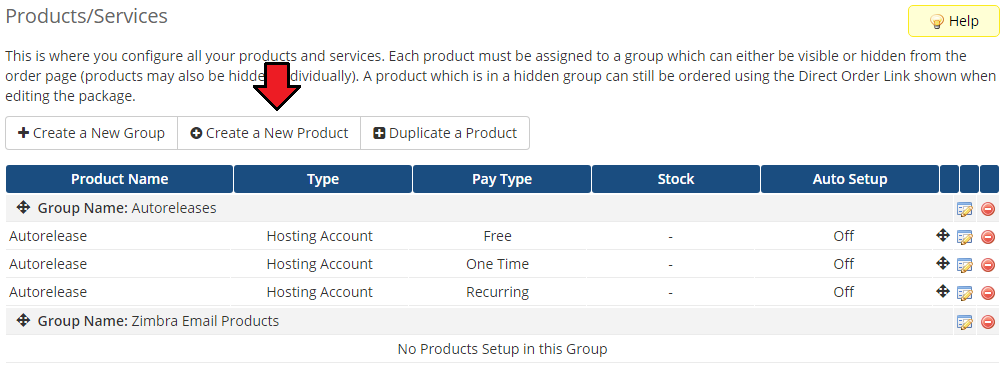
| 11. When you have a product group, you can create your product and assign it to Zimbra Email. If you already have a product, go to step 13. To create a product click on 'Create a New Product'. |
|
| 12. Afterwards, choose your product type and product group from dropdown menus, enter your product name and press 'Continue'. |

|
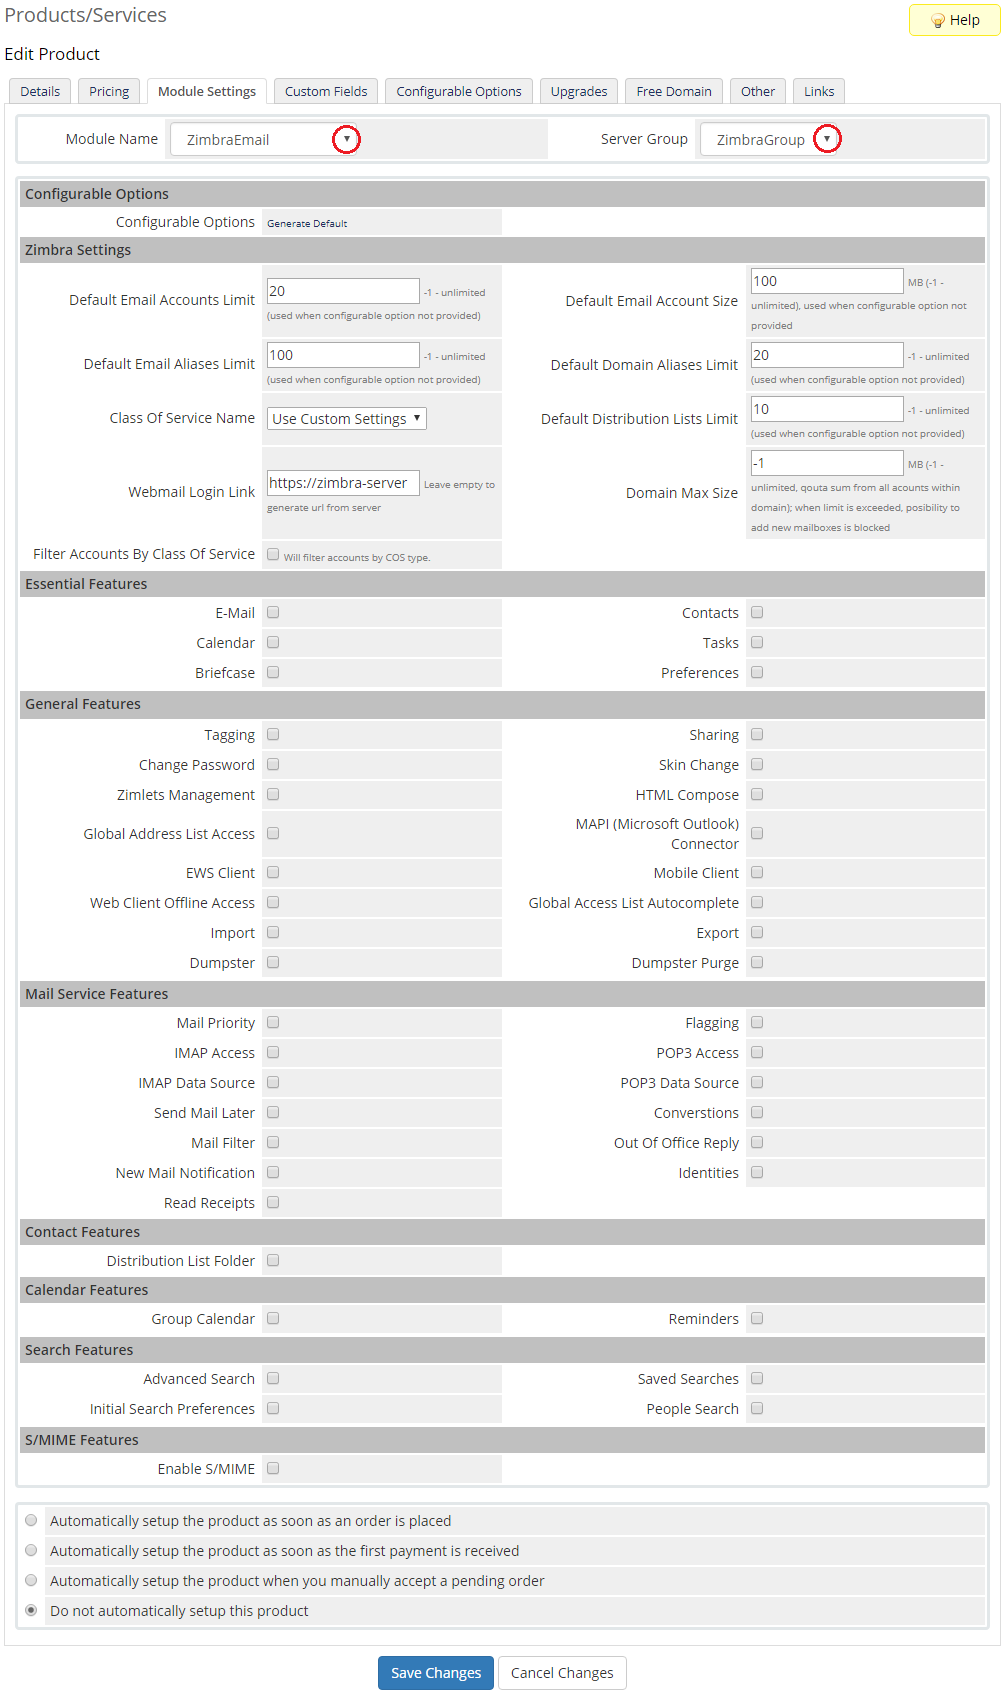
| 13. Now, go to 'Module Settings' section, choose both 'ZimbraEmail' and your previously created server group from dropdown menus. |
|
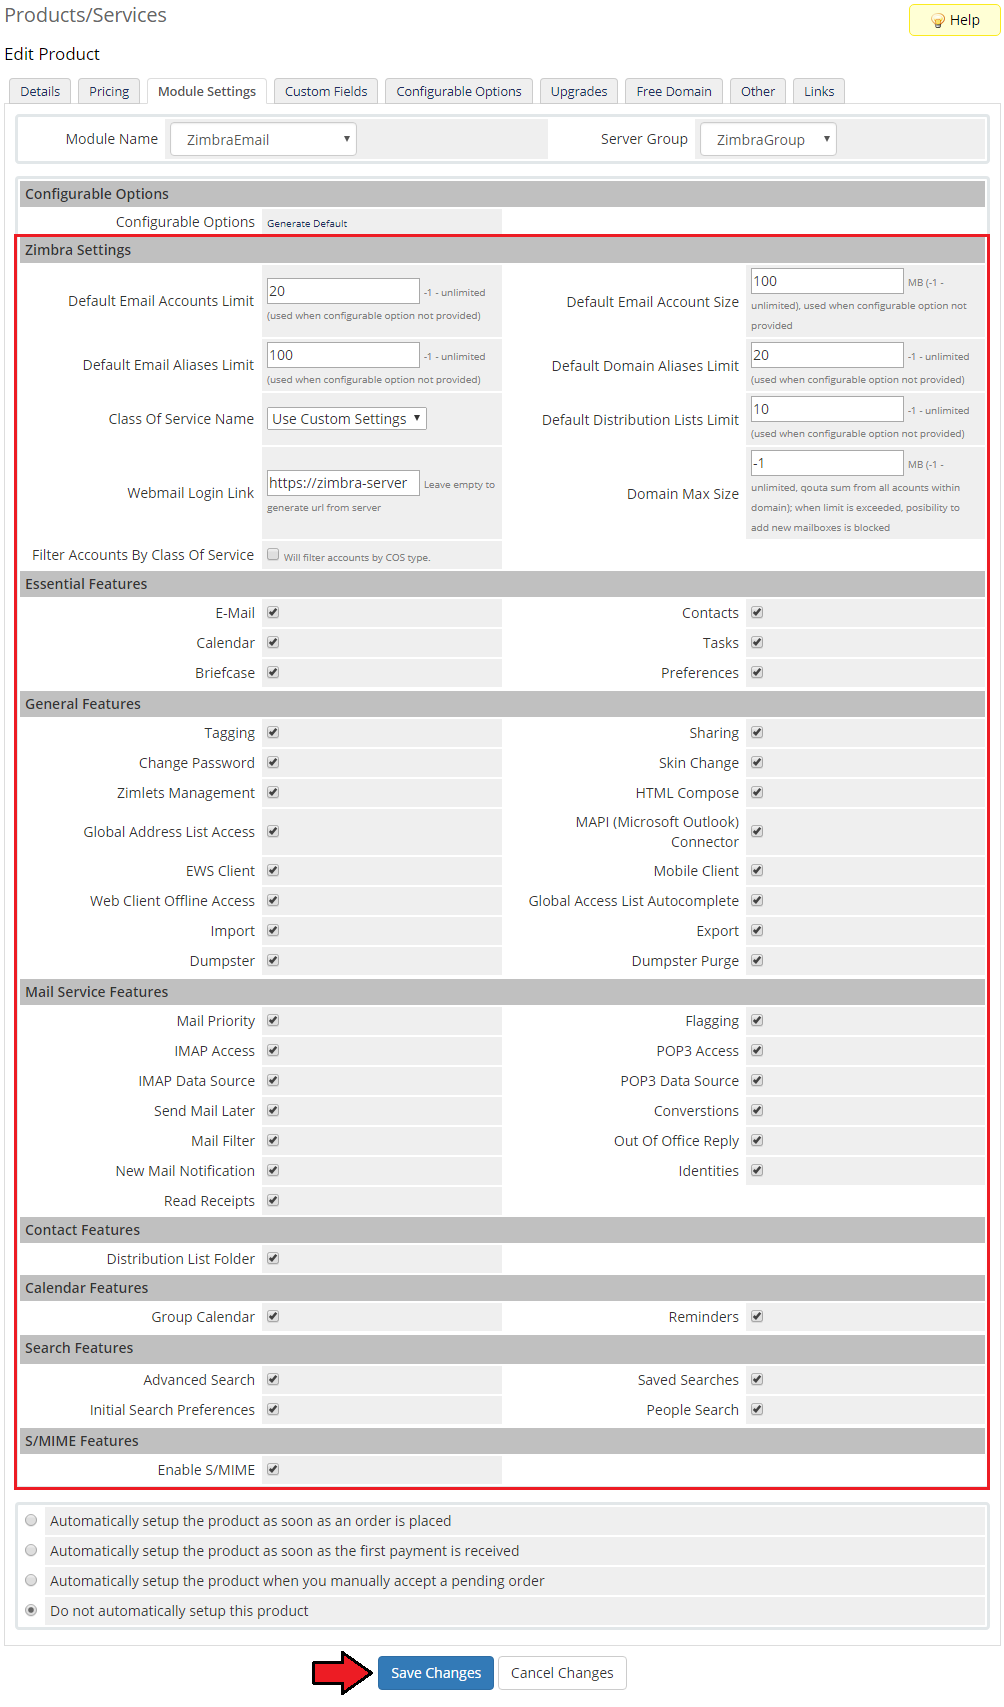
| 14. Afterwards, define settings of the module and press 'Save Changes'. Note 1: If you choose 'Use Custom Settings' from 'COS Name' dropdown menu, you can define your own set of user permissions using sections below. |
|
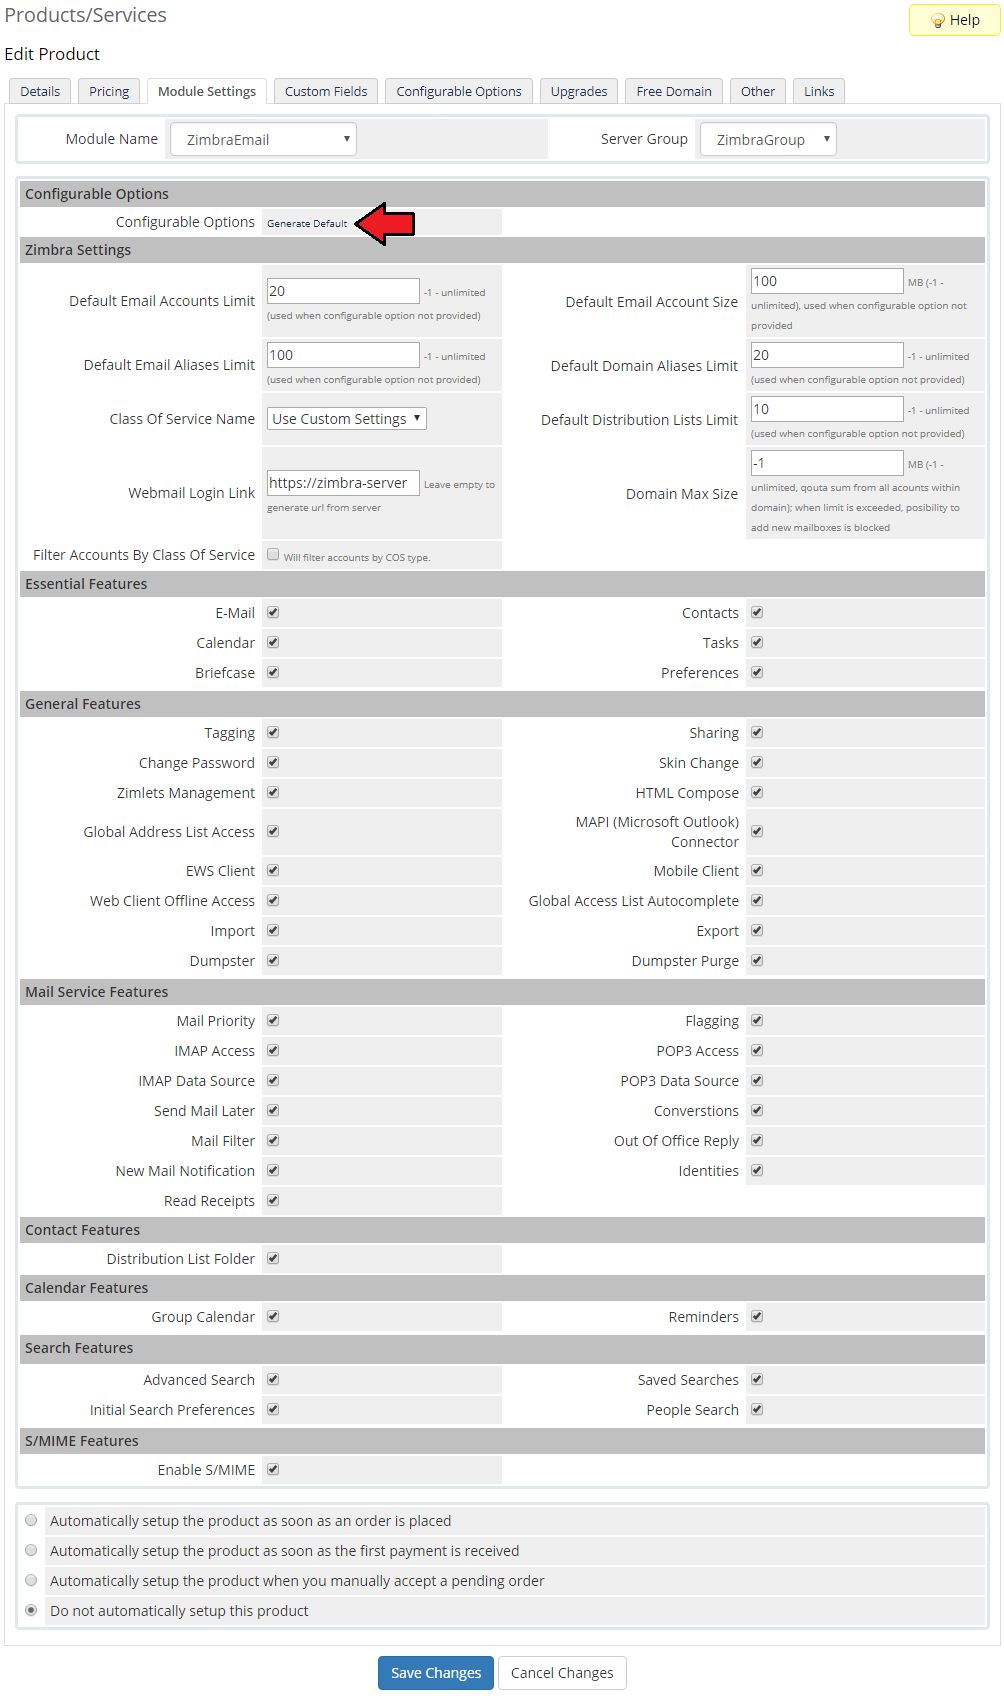
| 15. Additionally, you can replace modules static limit with dynamic one in form of configurable options. Press 'Generate Default' near 'Configurable Options' to generate default set of them. |
|
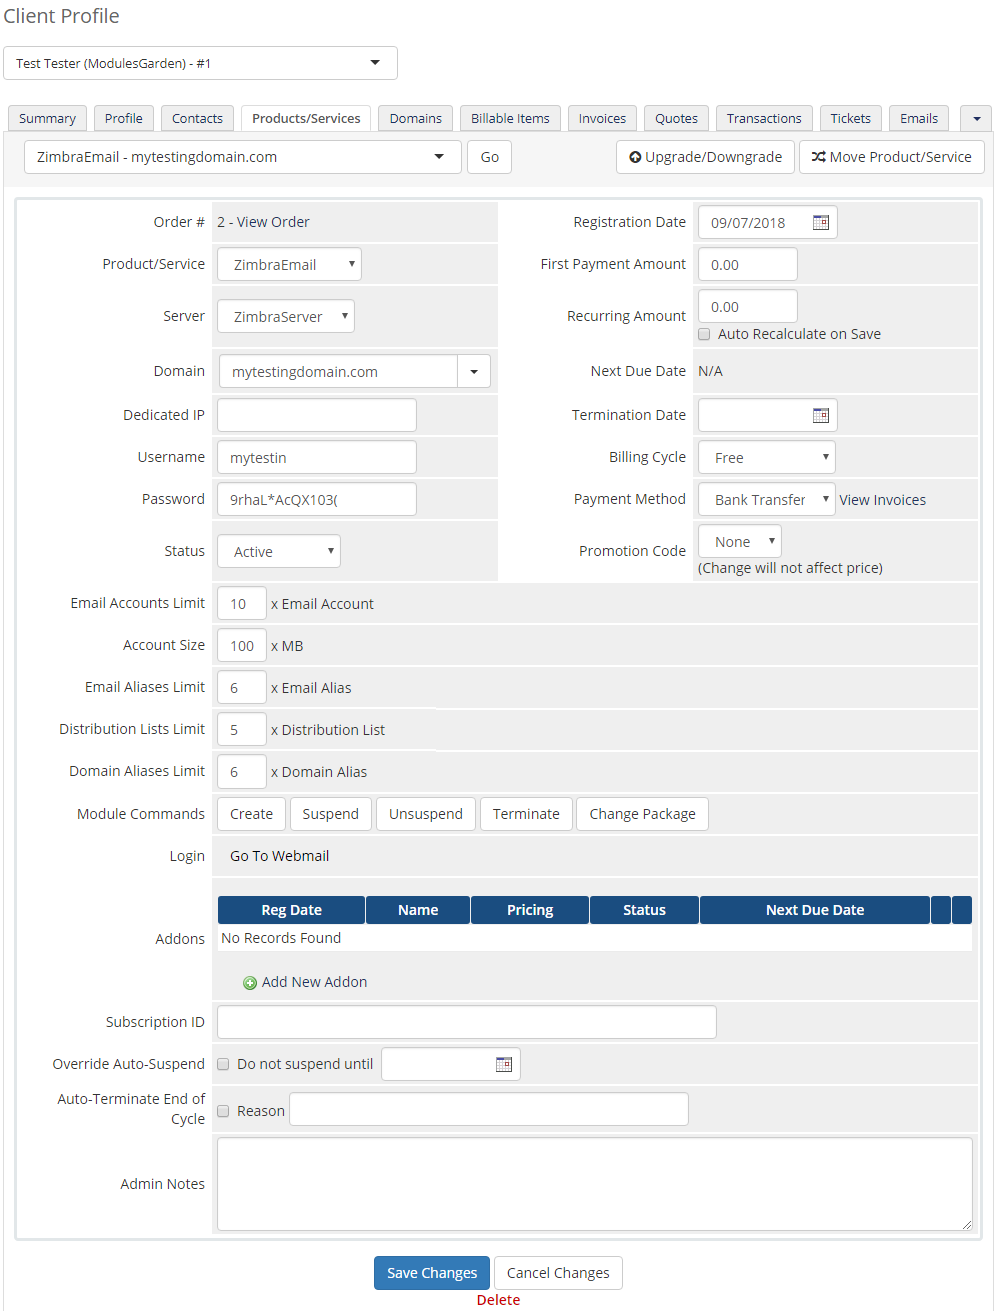
| This is how a properly created and configured product should look like from the administrator site. |
|
Management
| Let's customize your Zimbra Email For WHMCS and see what features it has in offer. |
Admin Area
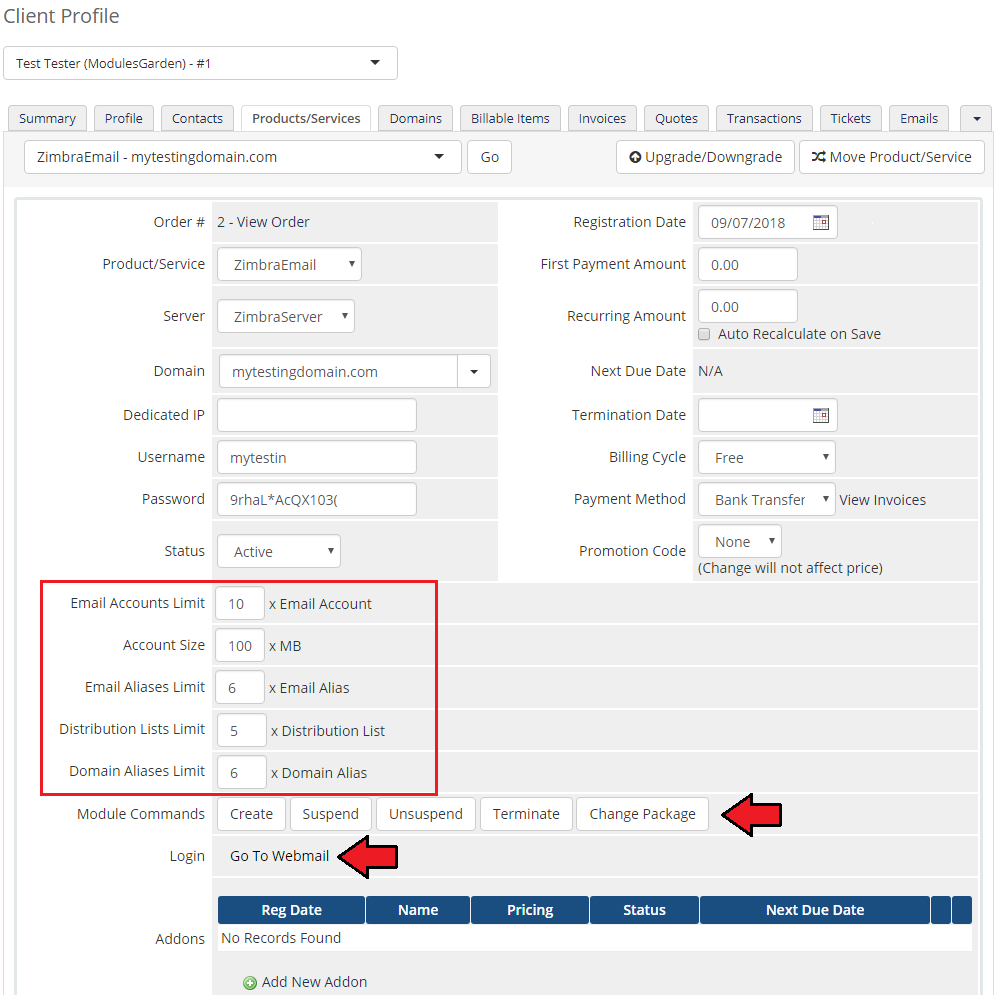
Zimbra Email product management site:
|
|
Client Area
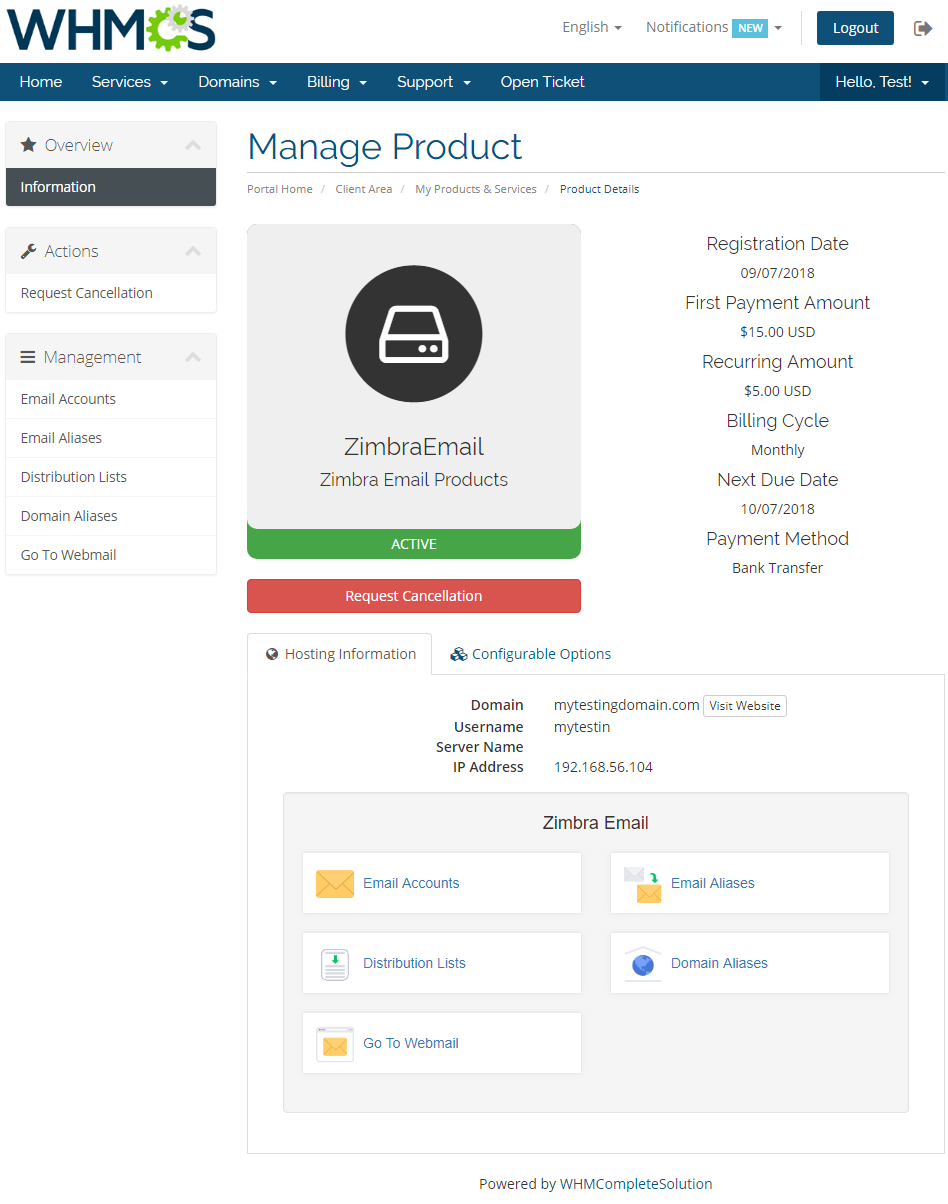
| Zimbra Email allows your customers to manage their zimbra email accounts from your WHMCS client area. This is how it looks like in the client area. |
|
Accounts
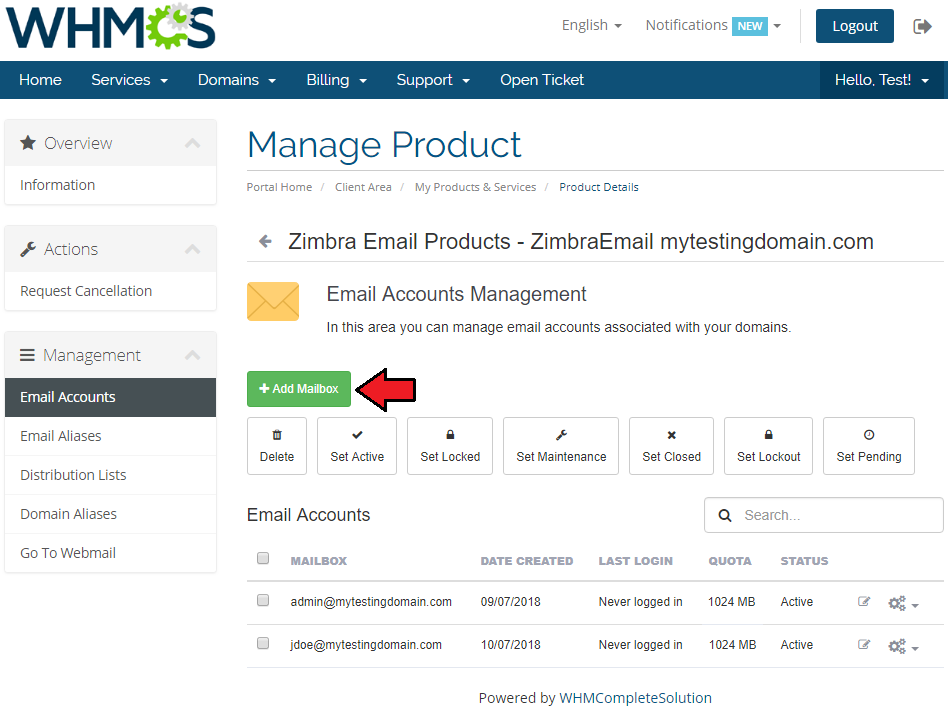
| Accounts page enables you to manage existing accounts, edit and create new ones within defined limits. |
|
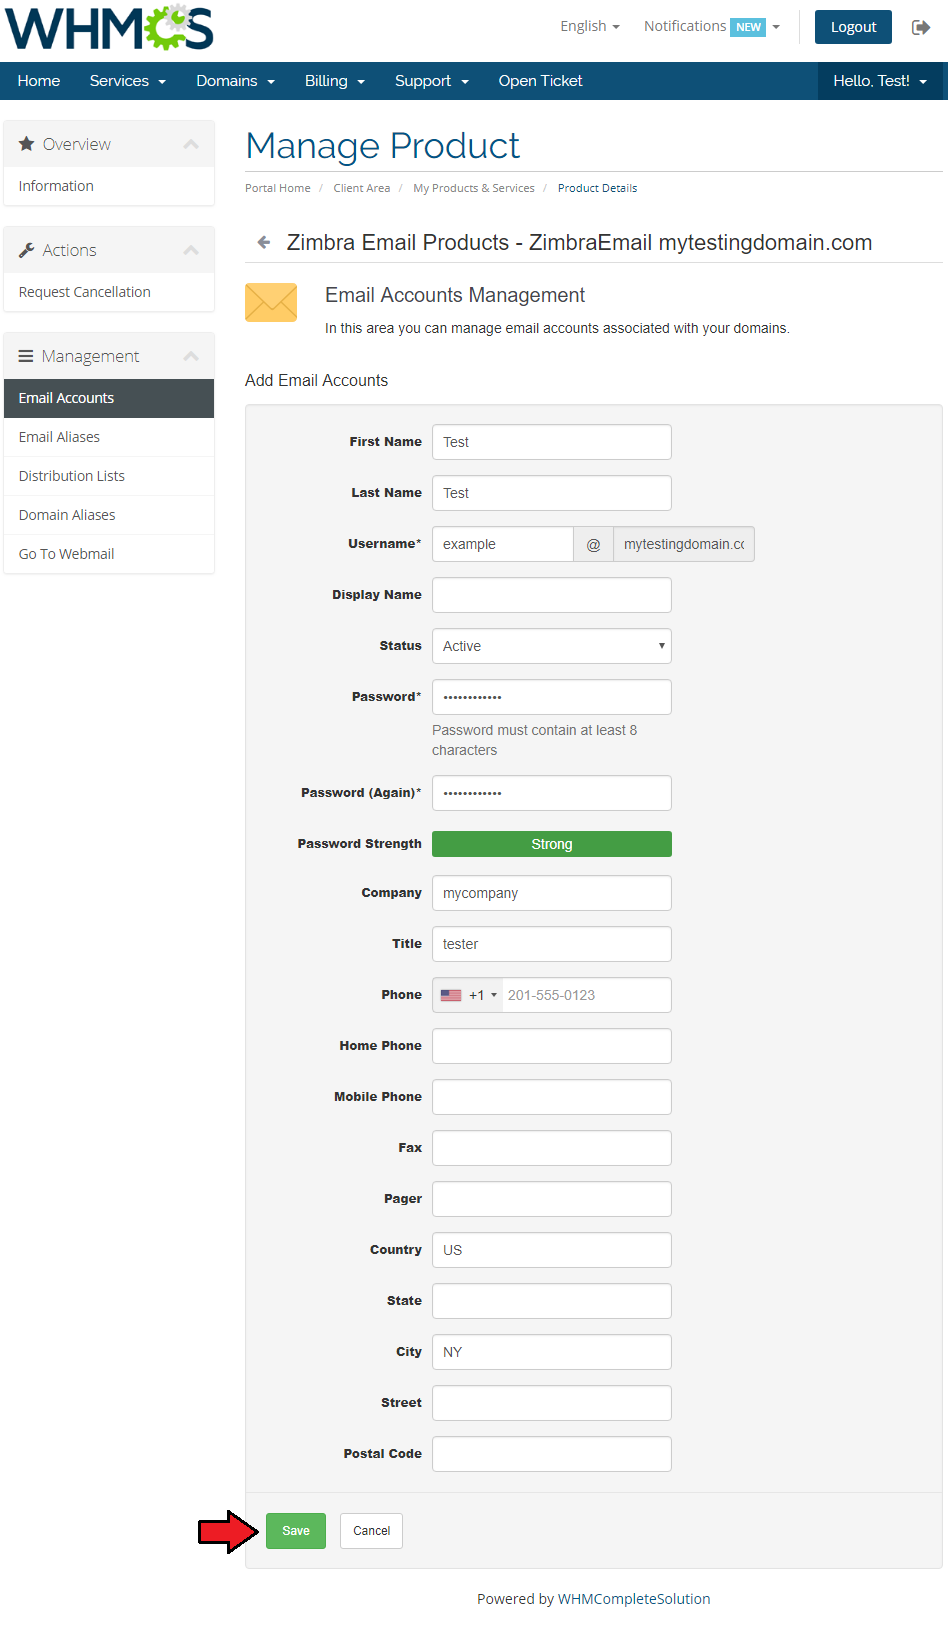
| Press add to create a new account. As you can see on the screen below, you can define details of account owner. |
|
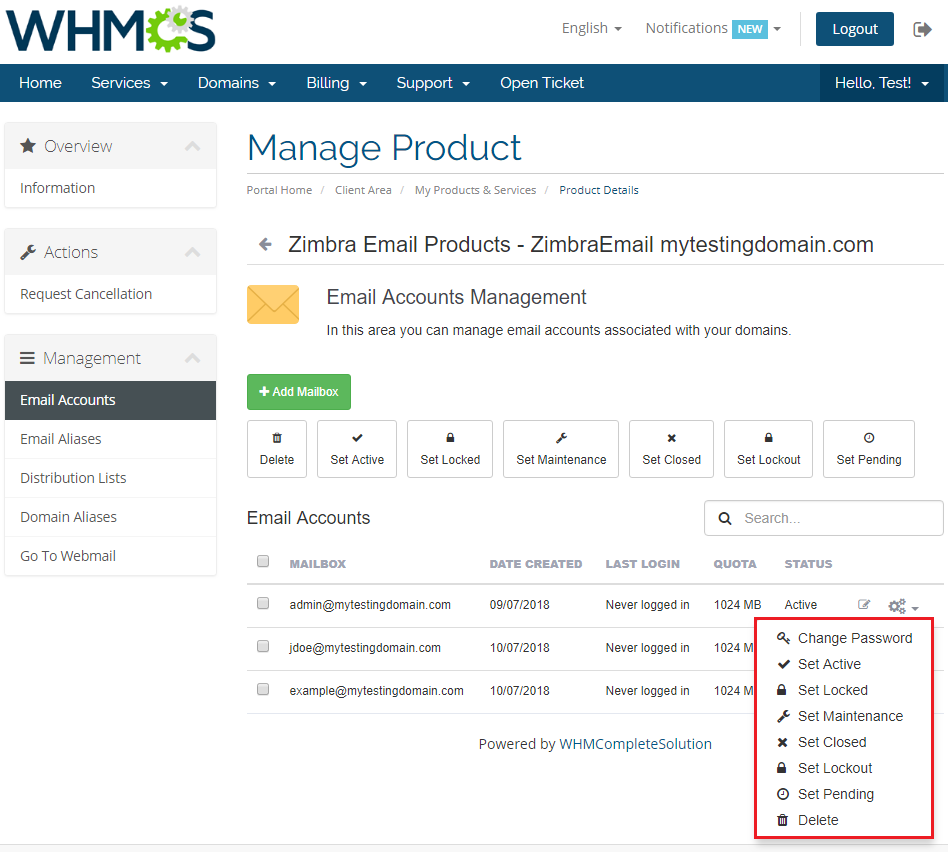
| You can order various operations on a single account through dropdown menu. Alternatively, you can mark multiple accounts and issue any command using buttons above. |
|
Aliases
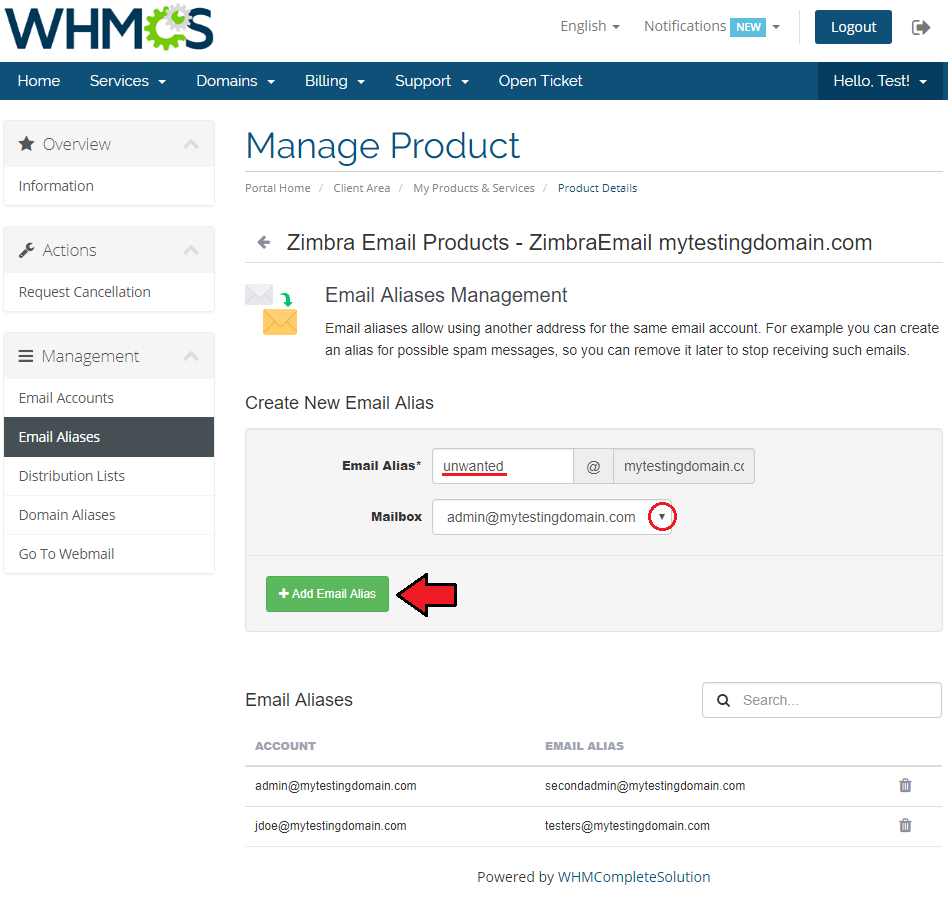
| Aliases enable you to use additional address for the same e-mail account. |
|
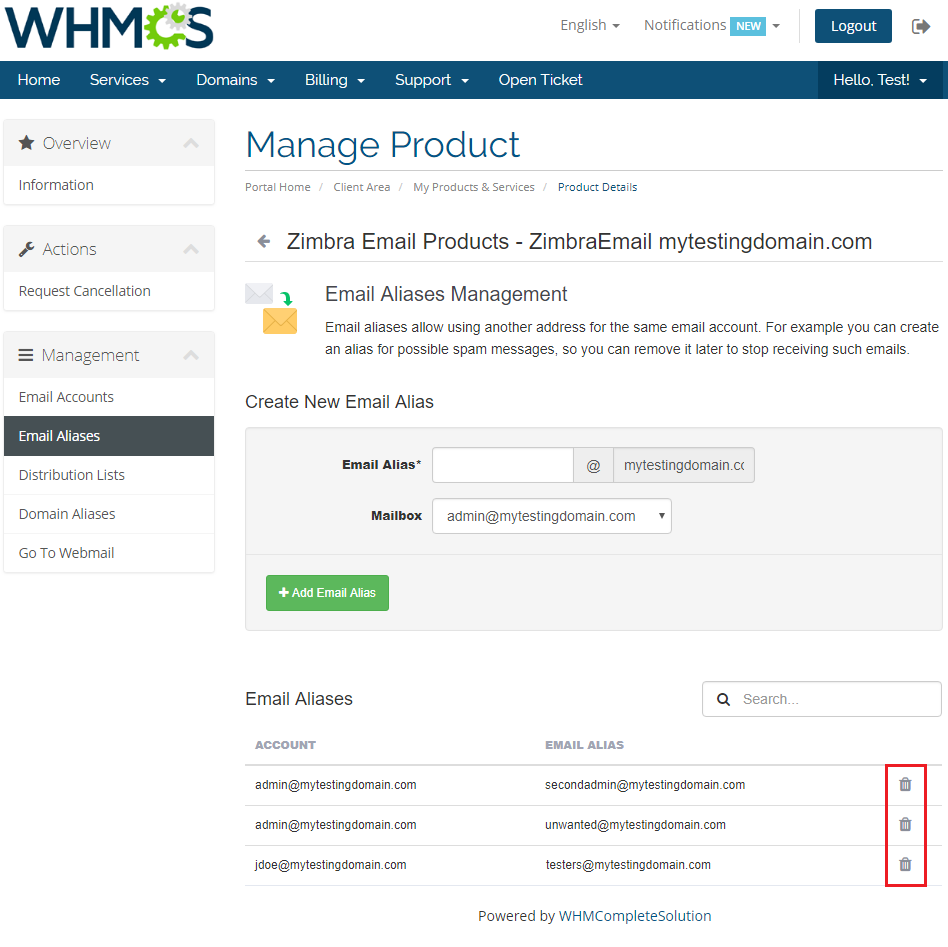
| Any alias can be quickly removed through pressing an adequate icon. |
|
Distribution Lists
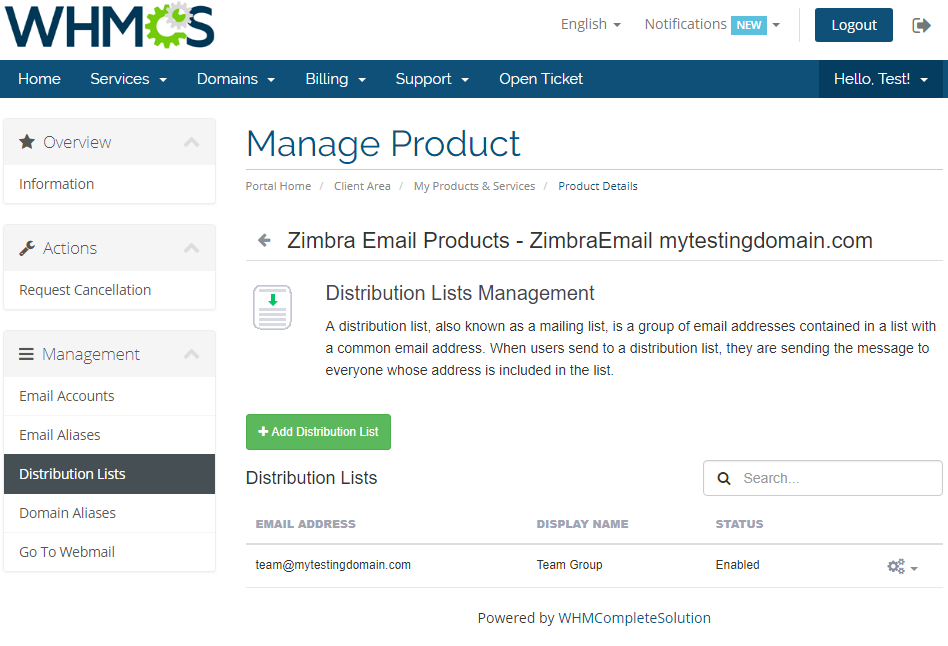
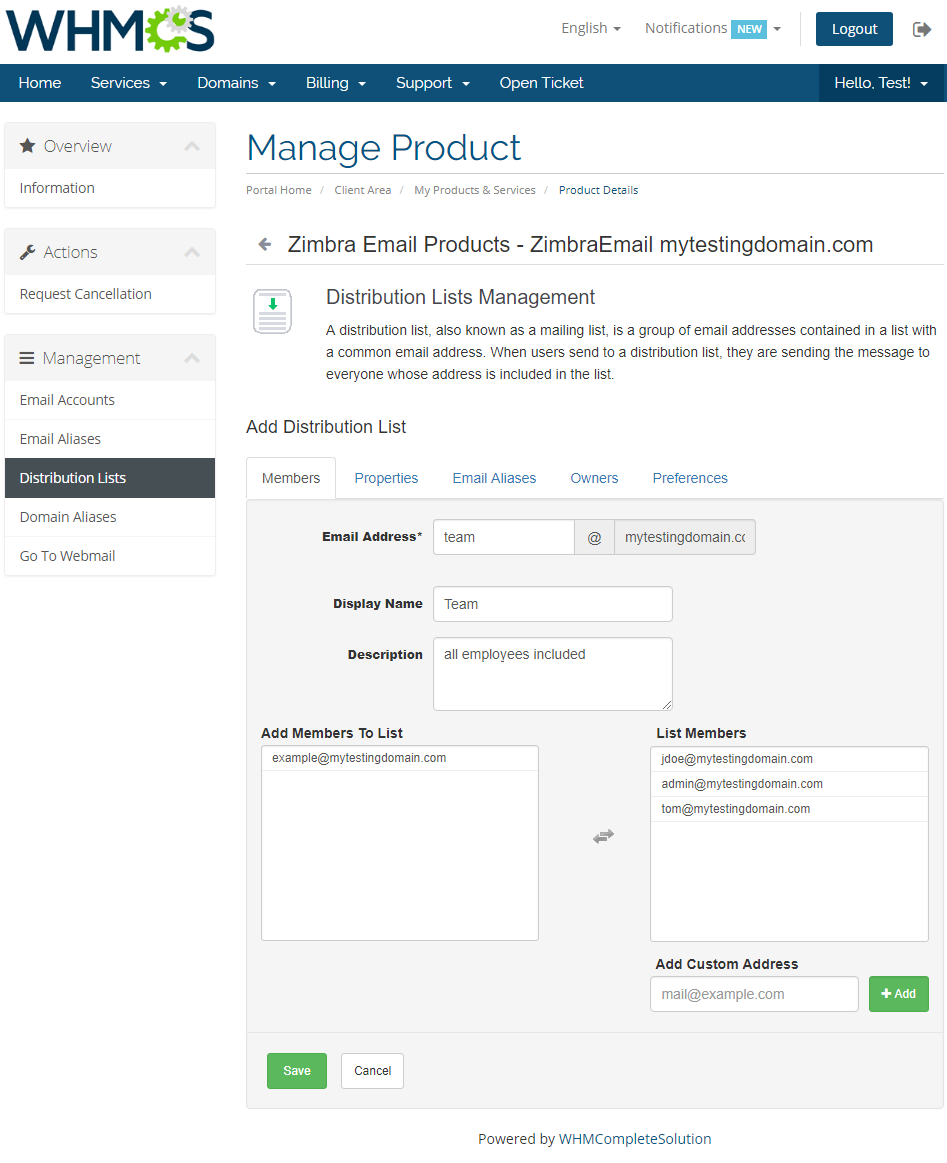
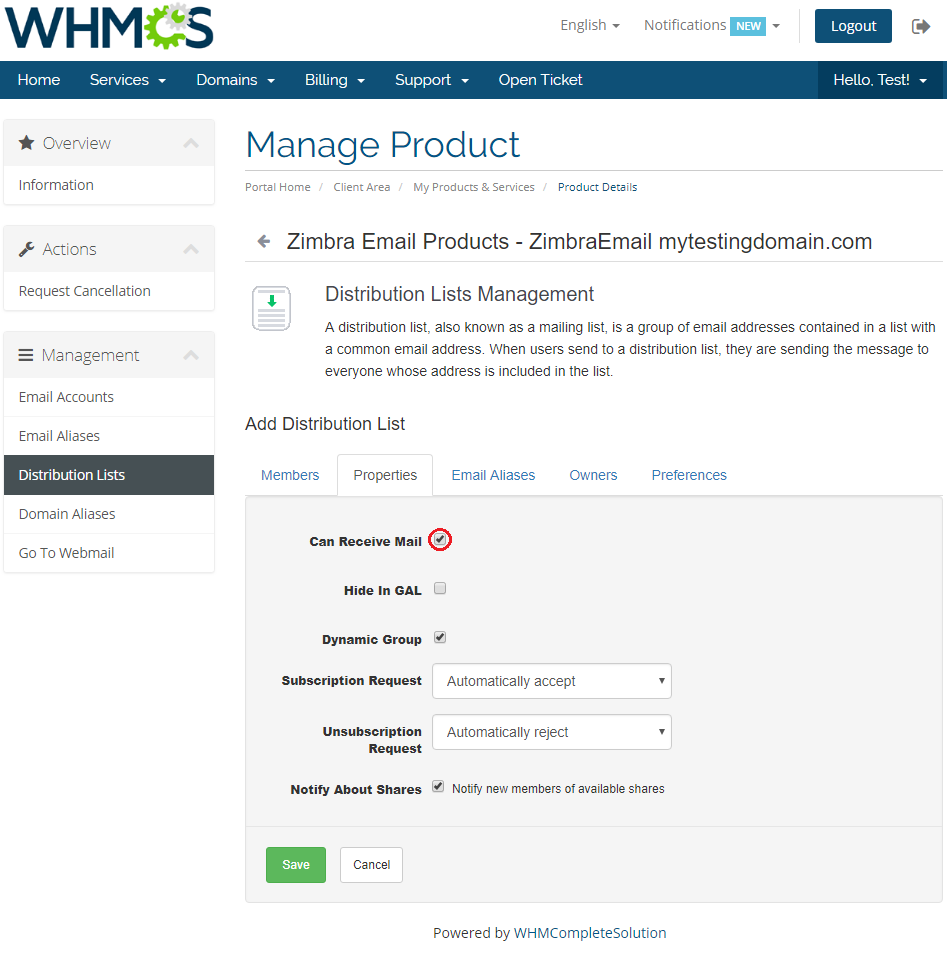
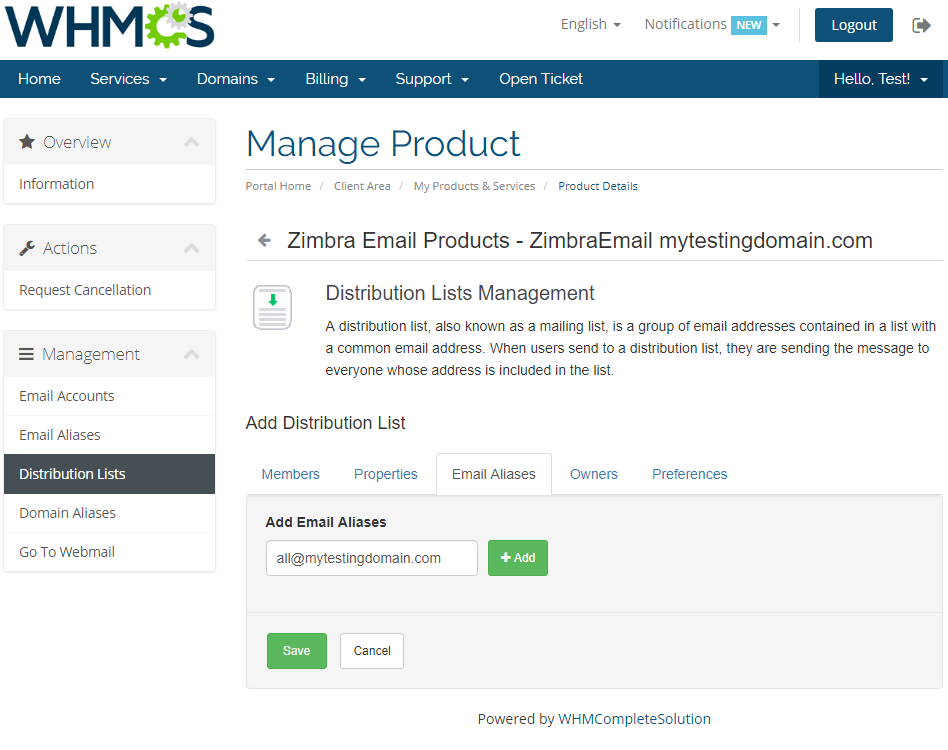
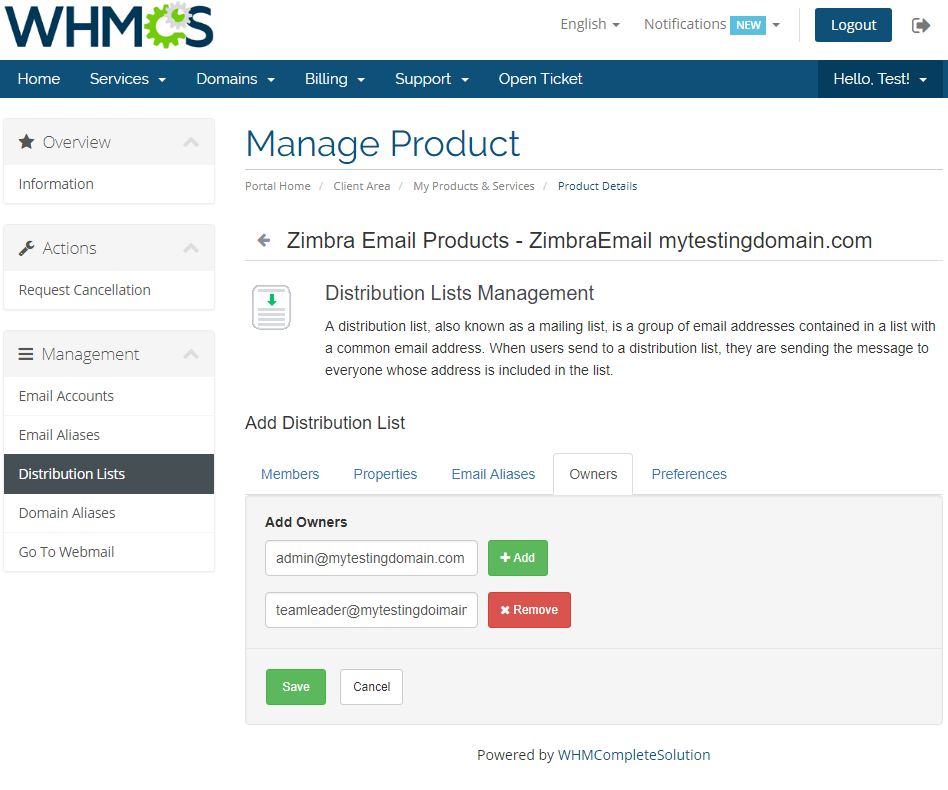
| Distribution lists enable you to create and manage them without the necessity to log into Zimbra panel. |
|
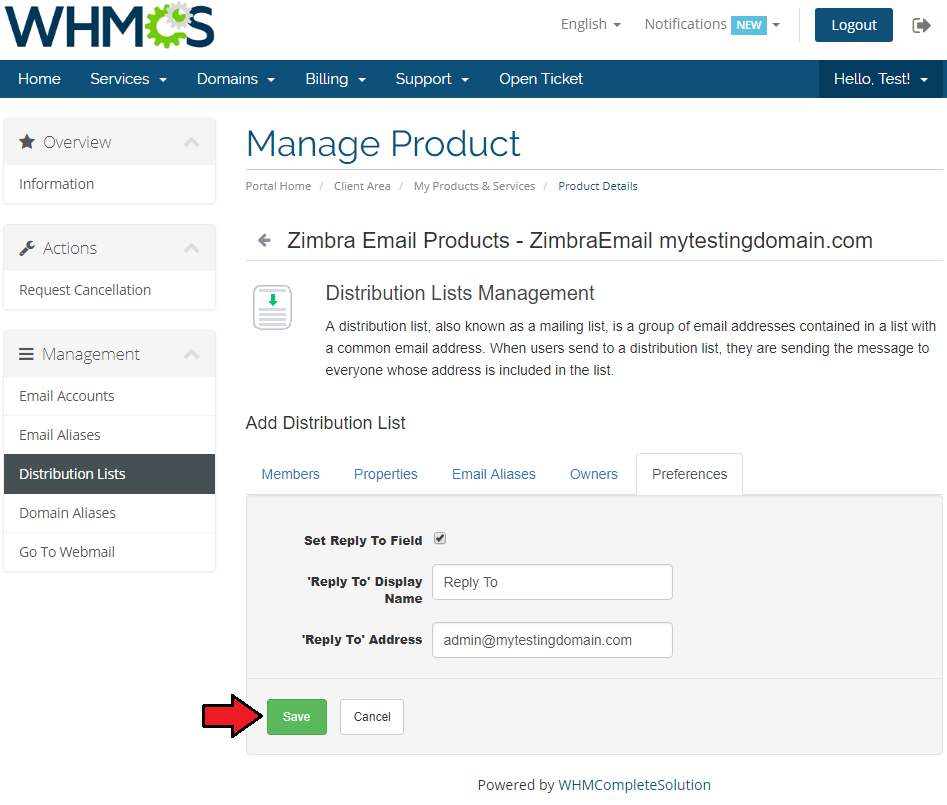
| Create them in the same way you would do that in Zimbra panel. |
|
|
|
|
| As soon as you configure the list, press 'Save' to create it. |
|
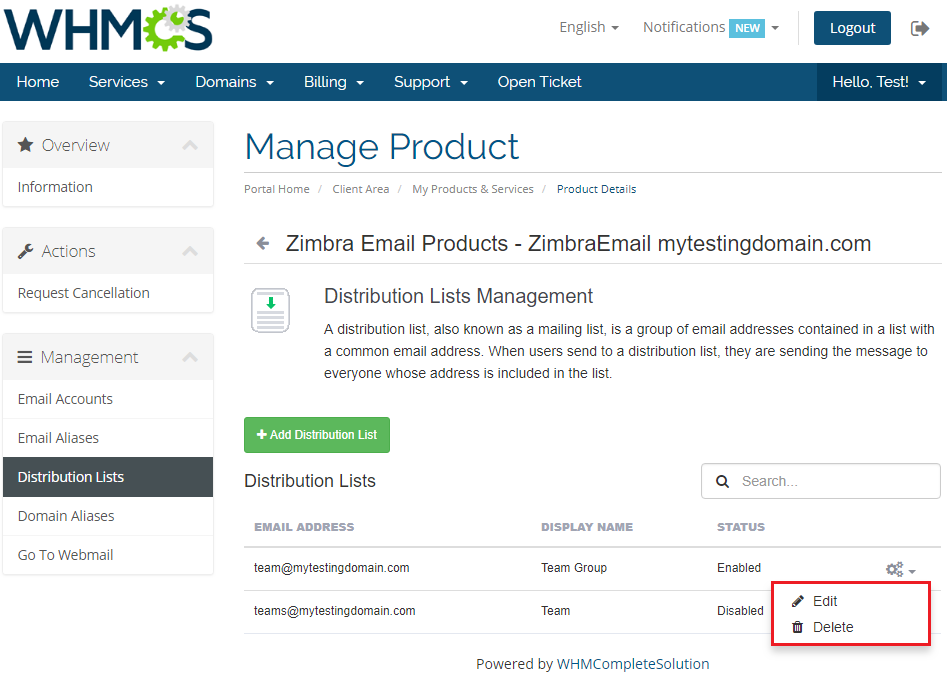
| If you made a mistake while creating a list, you can quickly edit it or remove it completely. |
|
Management of Billing
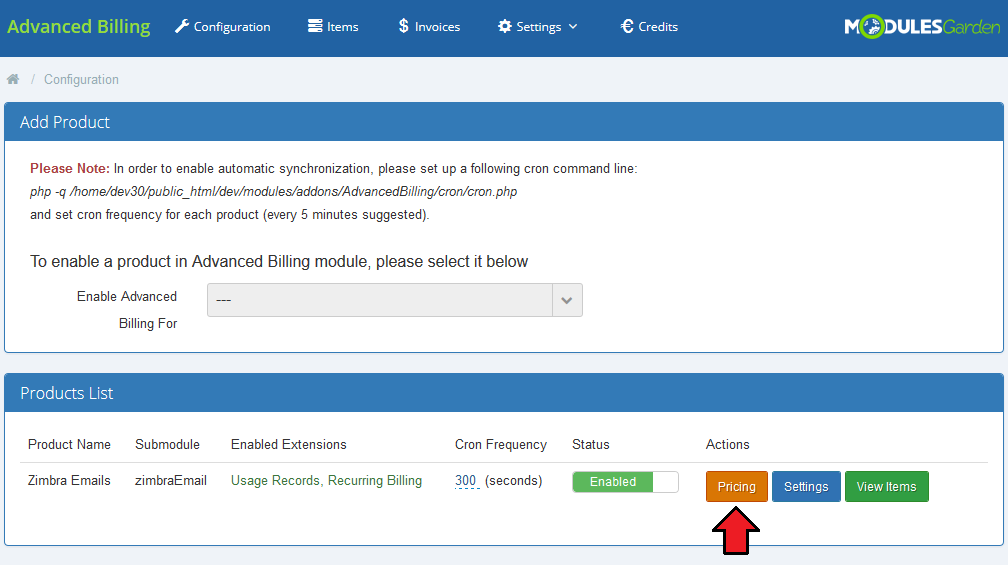
| When you combine Zimbra Email For WHMCS with Advanced Billing For WHMCS, you will be able to set up additional billing options. |
|
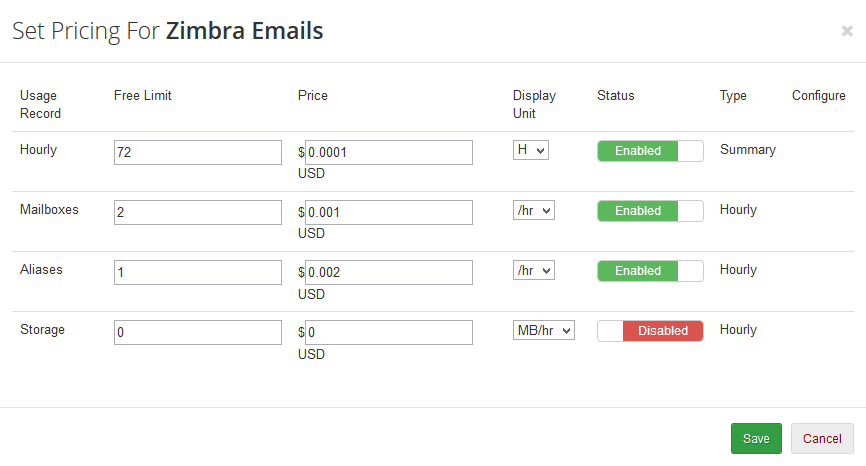
| Module allows you to charge your customers basing on the server resources used by them. |
|
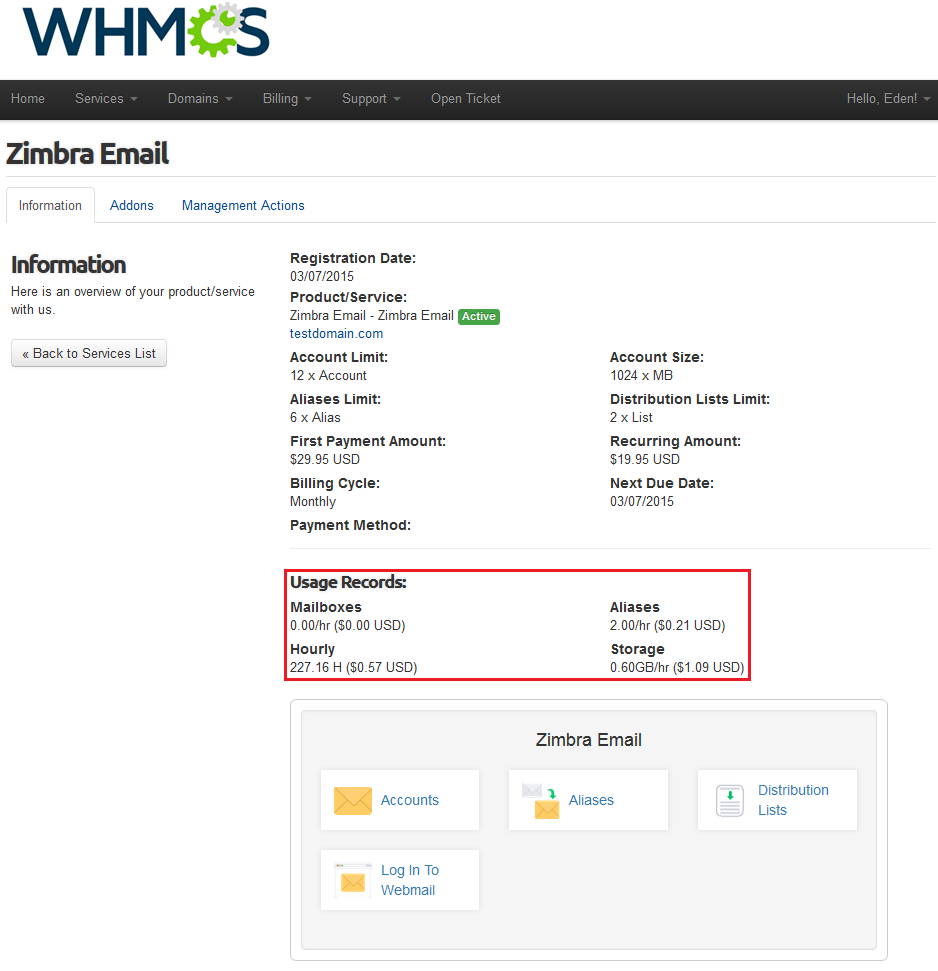
| With Advanced Billing module, you can also display the current server resource usage and their cost and let your customers see it. |
|
Tips
| 1. Zimbra Email For WHMCS requires SOAP installed on your server. |
Common Problems
| 1. When you have problems with connection, check whether your SELinux or firewall does not block ports. |
|
2. The error 'Could not connect to host' is connected with SOAP. To fix it, make sure that port default 7071 is open. |

|