Abandoned Cart For WHMCS
Article update is ongoing on this page, watch out for broken links, unclear descriptions and images!
We are sorry for the inconvenience caused.
Contents |
About Abandoned Cart For WHMCS
| Abandoned Cart For WHMCS is a perfect tool that allows you to learn about your clients' habits and prevent unfinished purchases. Check the content of shopping carts abandoned by your guests and send them customized email messages to remind about incomplete shopping. |
- Addon Module:
| ✔ Send Email Reminders To Clients And Guests Who Abandoned Their Shopping Carts |
| ✔ Access And Manage Carts Statistics: |
| ✔ View Number Of All Carts And Completed Orders |
| ✔ View Percentage Of Existing Clients Carts To All Carts |
| ✔ Display Statistics From Last: |
| ✔ 1 Month |
| ✔ 3 Months |
| ✔ 6 Months |
| ✔ 12 Months |
| ✔ View Shopping Carts Snapshots With Logs On: |
| ✔ Added And Removed Items |
| ✔ Placed Orders |
| ✔ Configure Email Reminders Settings: |
| ✔ Add Multiple Reminders |
| ✔ Select Custom Email Templates For: |
| ✔ Logged In Clients |
| ✔ Guest Clients |
| ✔ Specify Related Items In Cart: |
| ✔ Products |
| ✔ Products Addons |
| ✔ Domains |
| ✔ Send Reminders For Carts Created Within Specified Timeframe |
| ✔ Configure General Settings: |
| ✔ Require Guest Clients To Provide Email Address Upon Adding Item To Cart |
| ✔ Force Guest Clients To Log In Or Register Upon Adding Item To Cart |
| ✔ Select Support Department For Reminders Sent To Guest Clients |
| ✔ View Module Logs |
- Client Area Features:
| ✔ Optional Requirements For Guest Clients Upon Adding Item To Cart: |
| ✔ Provide Email Address |
| ✔ Log In To Existing Account |
| ✔ Register New Account |
- General Info:
| ✔ Multi-Language Support |
| ✔ Supports PHP 7.4 Up To PHP 8.1 |
| ✔ Supports WHMCS V8.4 And Later |
| ✔ Requires ionCube Loader V12 Or Later |
| ✔ Easy Module Upgrade To Open Source Version |
Installation
| This tutorial will show you how to successfully install and configure Abandoned Cart For WHMCS. We will guide you step by step through the whole installation and configuration process. |
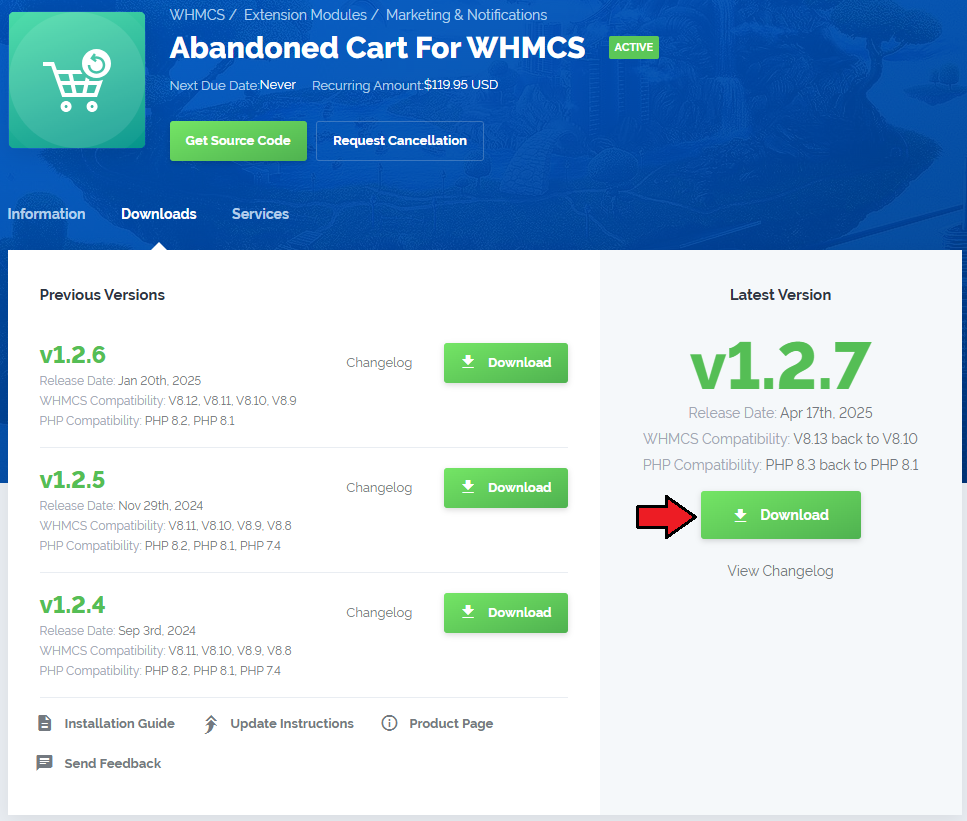
| 1. Log in to our client area and download the module. |
|
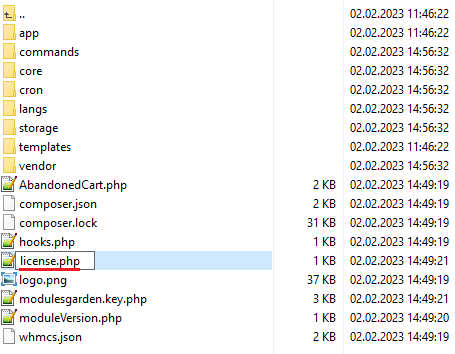
| 2. Upload and extract the extension into the main WHMCS directory. Extracted files in your WHMCS directory should look like this: |
| 3. When you install Abandoned Cart For WHMCS for the first time, you have to rename the 'license_RENAME.php' file. This file is located in 'modules/addons/AbandonedCart/license_RENAME.php'. Rename it from 'license_RENAME.php' to 'license.php'. |
|
| 4. In order to configure your license key, you have to edit the previously renamed 'license.php' file. Enter your license key between the quotation marks as presented on the following screen. You can find your license key in our client area → 'My Products'. |

|
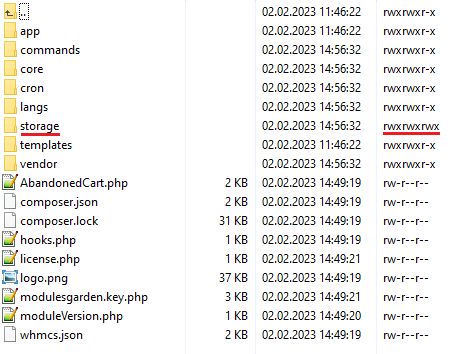
| 5. In the next step, set up the 'storage' folder as recursively writable. This folder is available at 'your_whmcs/modules/addons/AbandonedCart/' . |
|
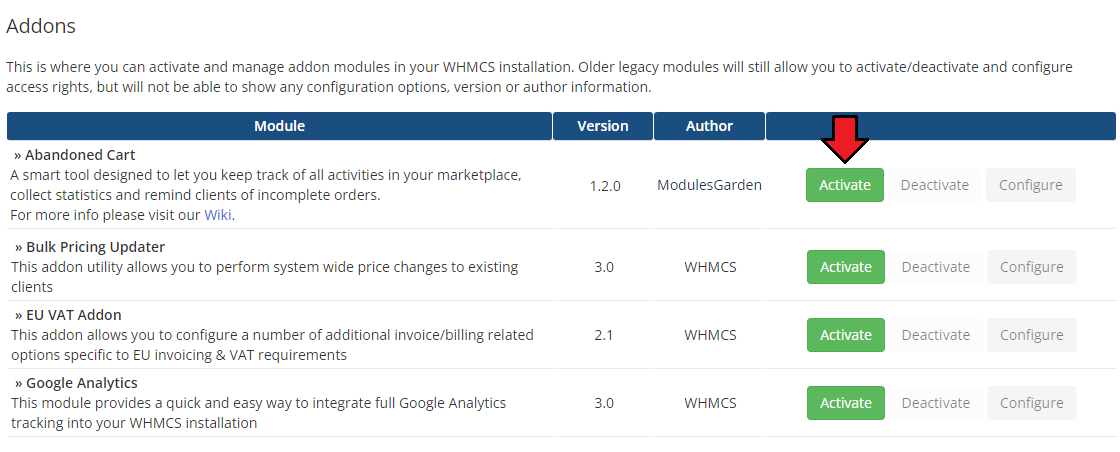
| 6. Now you have to activate the module in your WHMCS system. Log in to your WHMCS admin area. Go to 'System Settings' → 'Addon Modules'. Afterwards, find 'Abandoned Cart' and press the 'Activate' button. |
|
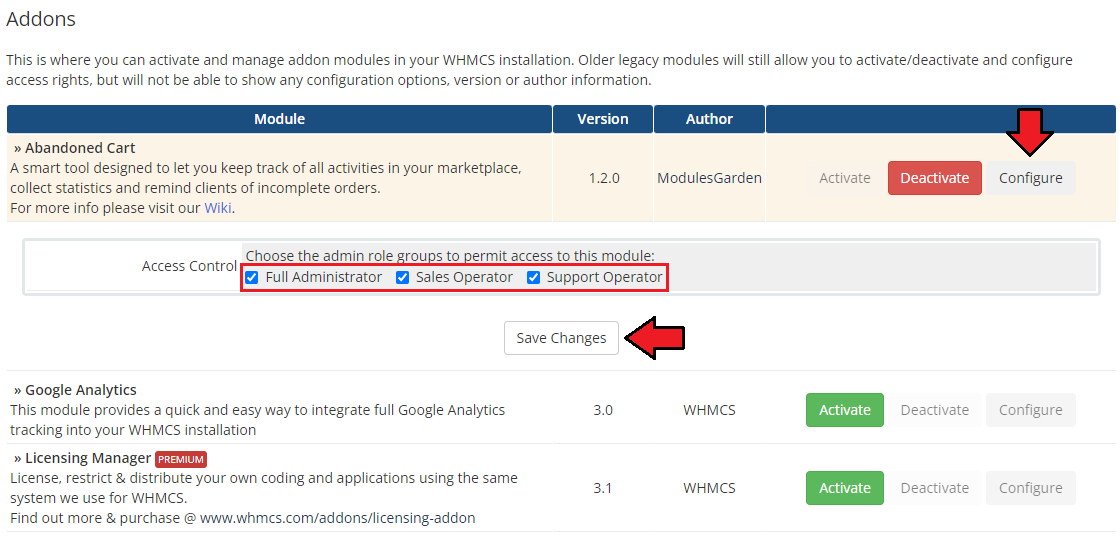
| 7. In the next step you need to permit access to this module. To do so, click on the 'Configure' button, tick 'Full Administrator' and press 'Save Changes'. |
|
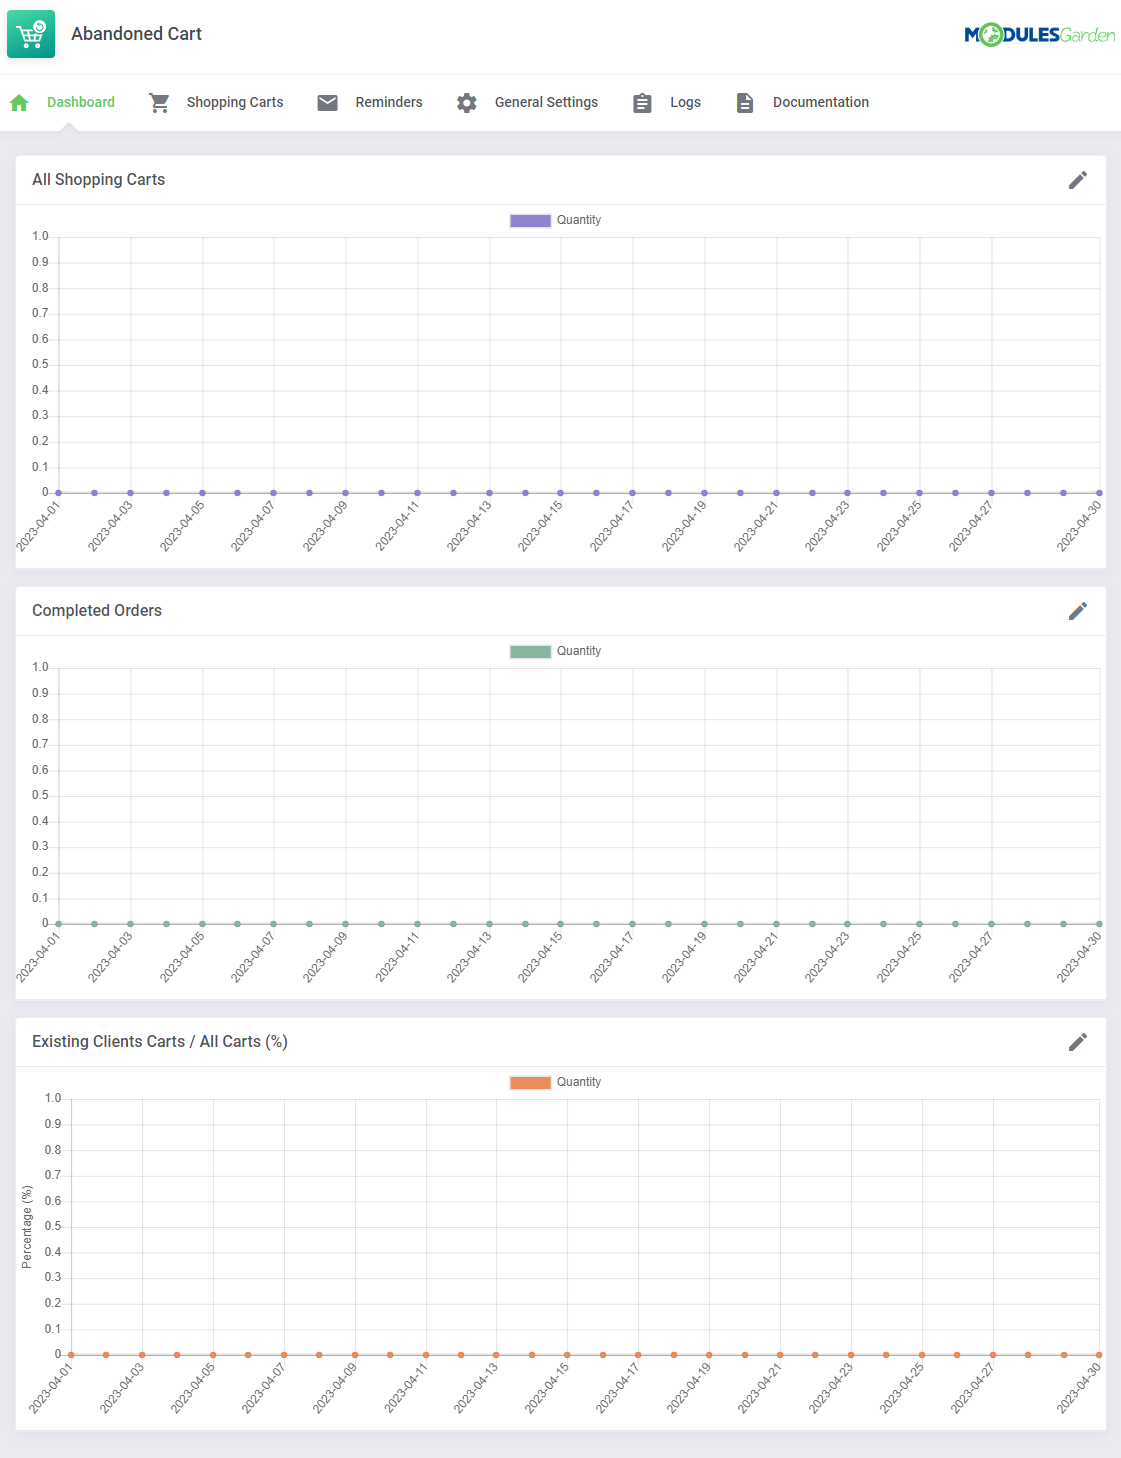
| 8. You have just successfully installed Abandoned Cart For WHMCS! You can access your module at 'Addons' → 'Abandoned Cart'. |
|
Configuration and Management
| Abandoned Cart For WHMCS allows you to control all the actions that take place in your marketplace. Check the manual below to learn how to configure the module to take all the advantages it has to offer. |
Addon Module
Dashboard
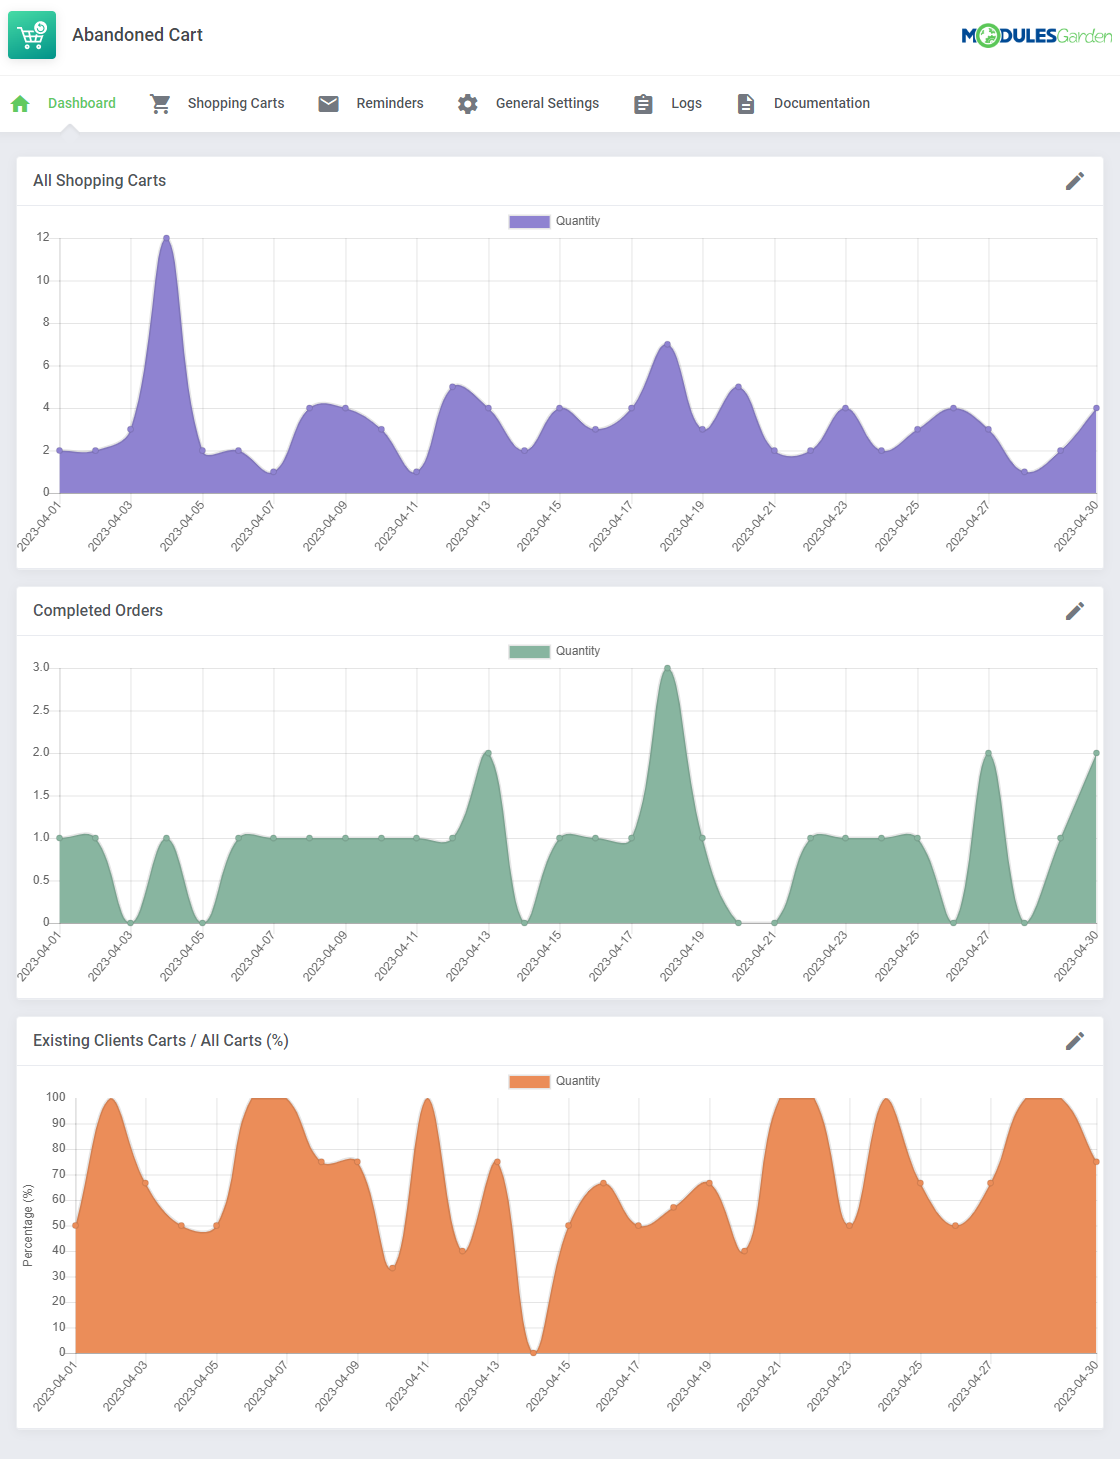
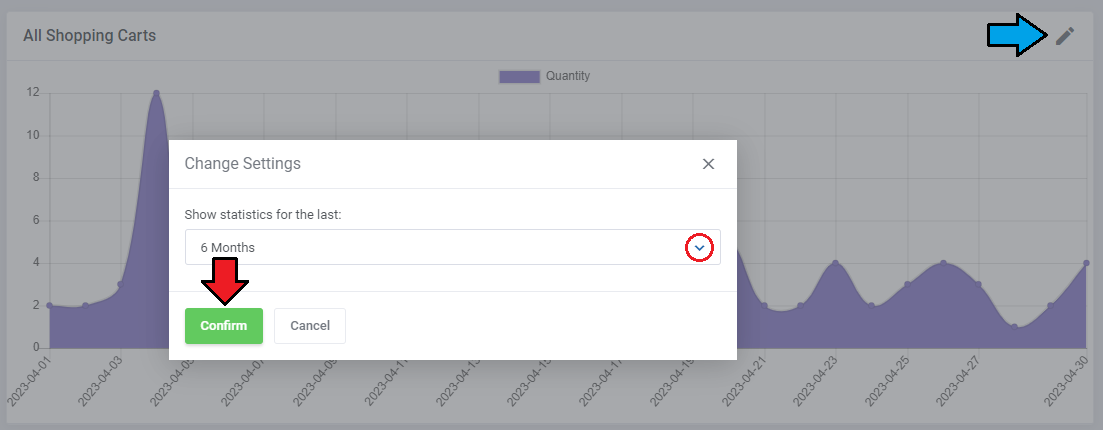
| In the dashboard you can find the summary graphs of recently created shopping cart. The first graph illustrates the number of all shopping carts created within the selected period of time. You may choose between 1, 3, 6 and 12 months to show the statistics for. |
|
|
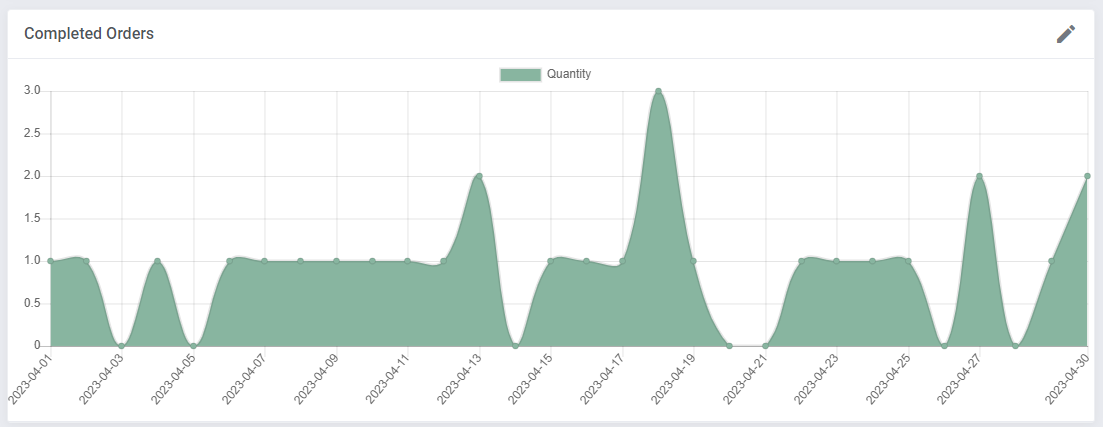
| The second graph is dedicated to show the summary of completed orders only. |
|
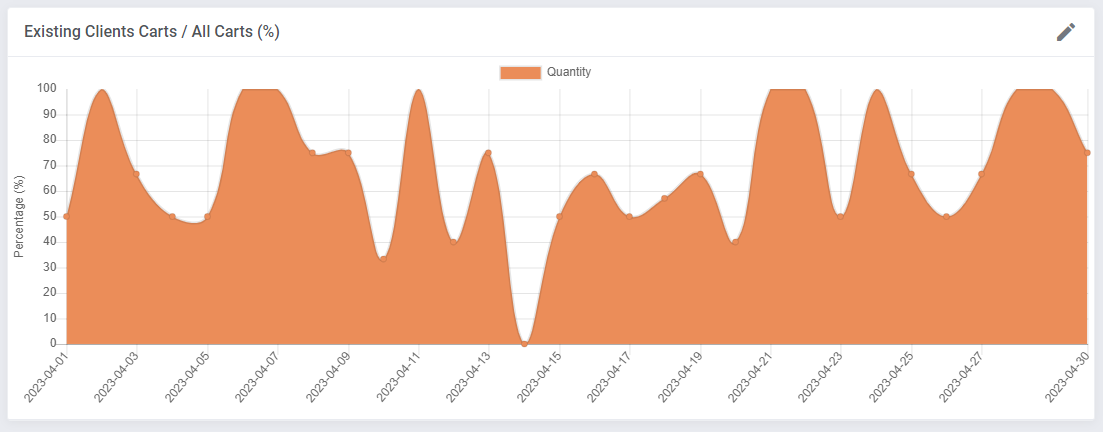
| The last graph "Existing Clients Carts / All Carts (%)" represents the percentage of cars created by the existing clients (unlogged guests are not taken into consideration) towards the number of all carts (created by existing clients and guests together). |
|
Shopping Carts
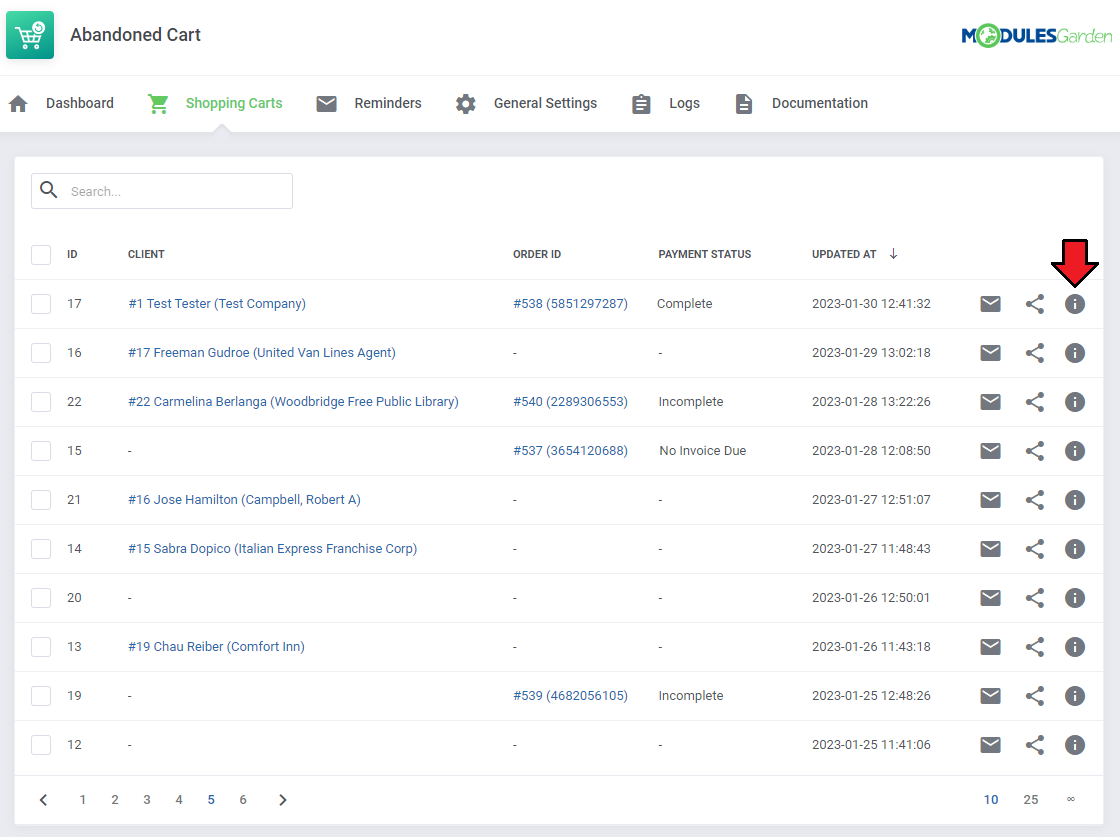
The 'Shopping Carts' section, as its name suggests, contains a list of all identified carts, with details included, as follows:
Press the "Snapshots" button to find more specific information on the cart content and actions performed within that cart. |
|
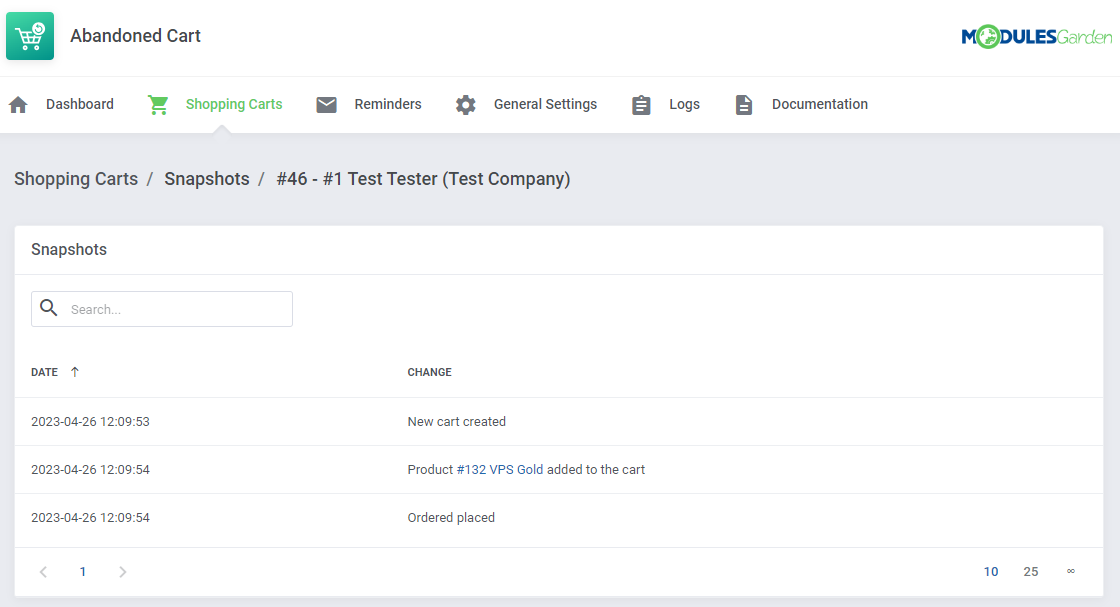
| Under "Snapshots" there are details on the cart content, visible at the moment of the last snapshot being taken. You will find there also the history of changes made by the client, such as:
|
|
Reminders
| "Reminders" is the clue section of the whole module. Compose the reminders settings to deliver adjusted notifications to clients who abandoned their cart. Press 'Create Reminder' button to create your first rule. |
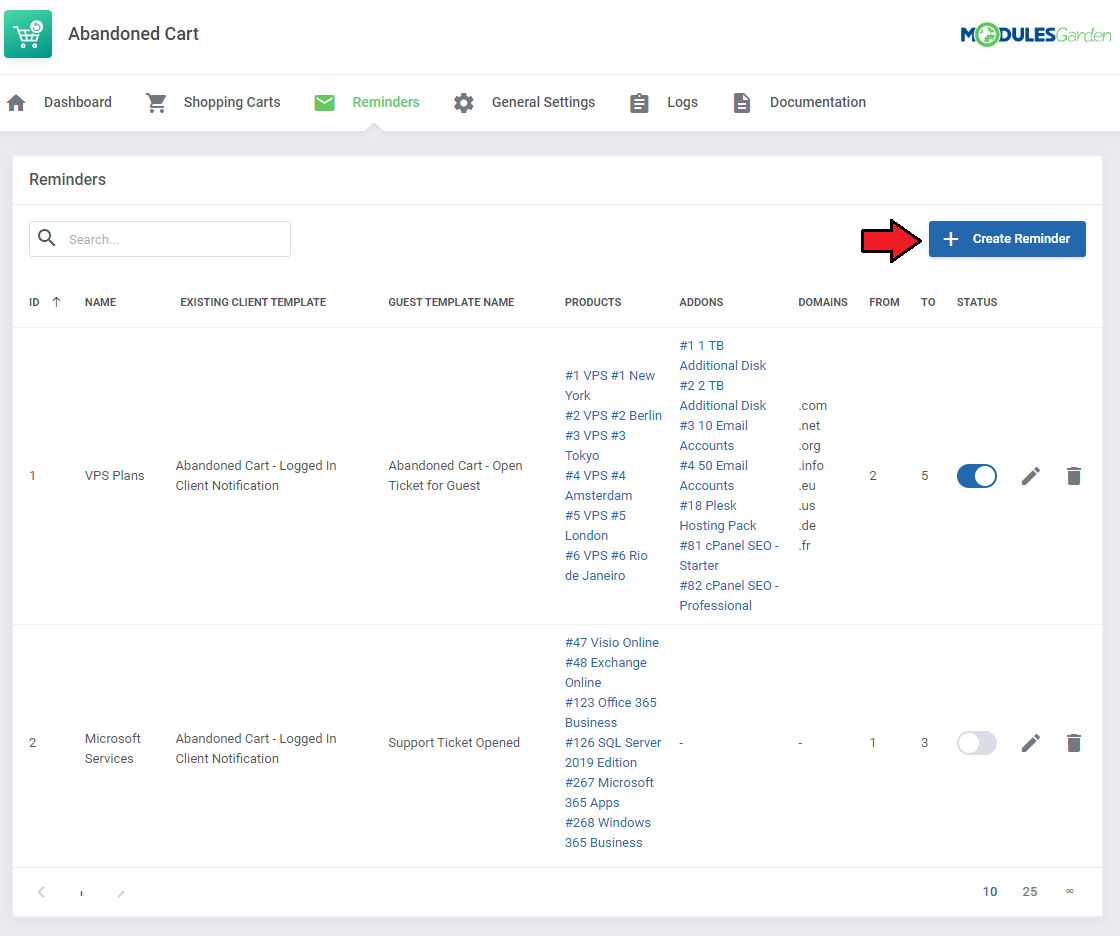
|
Configure the reminder by providing the details as explained below:
Press 'Confirm' when your reminder configuration is ready. |
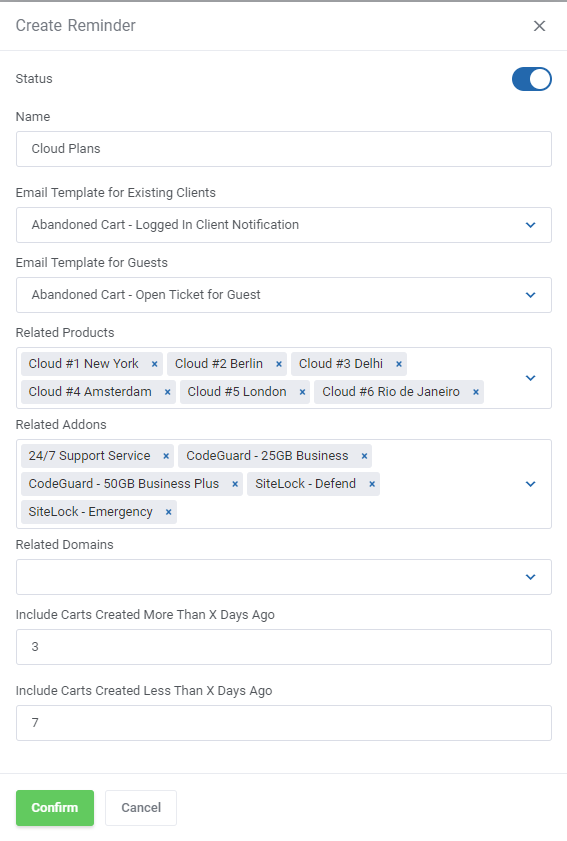
|
| The just created reminder rule will appear on the list with crucial details visible on the front page for a quick and easy preview. You may enable/disable the reminder, edit and delete it using the actions buttons. |
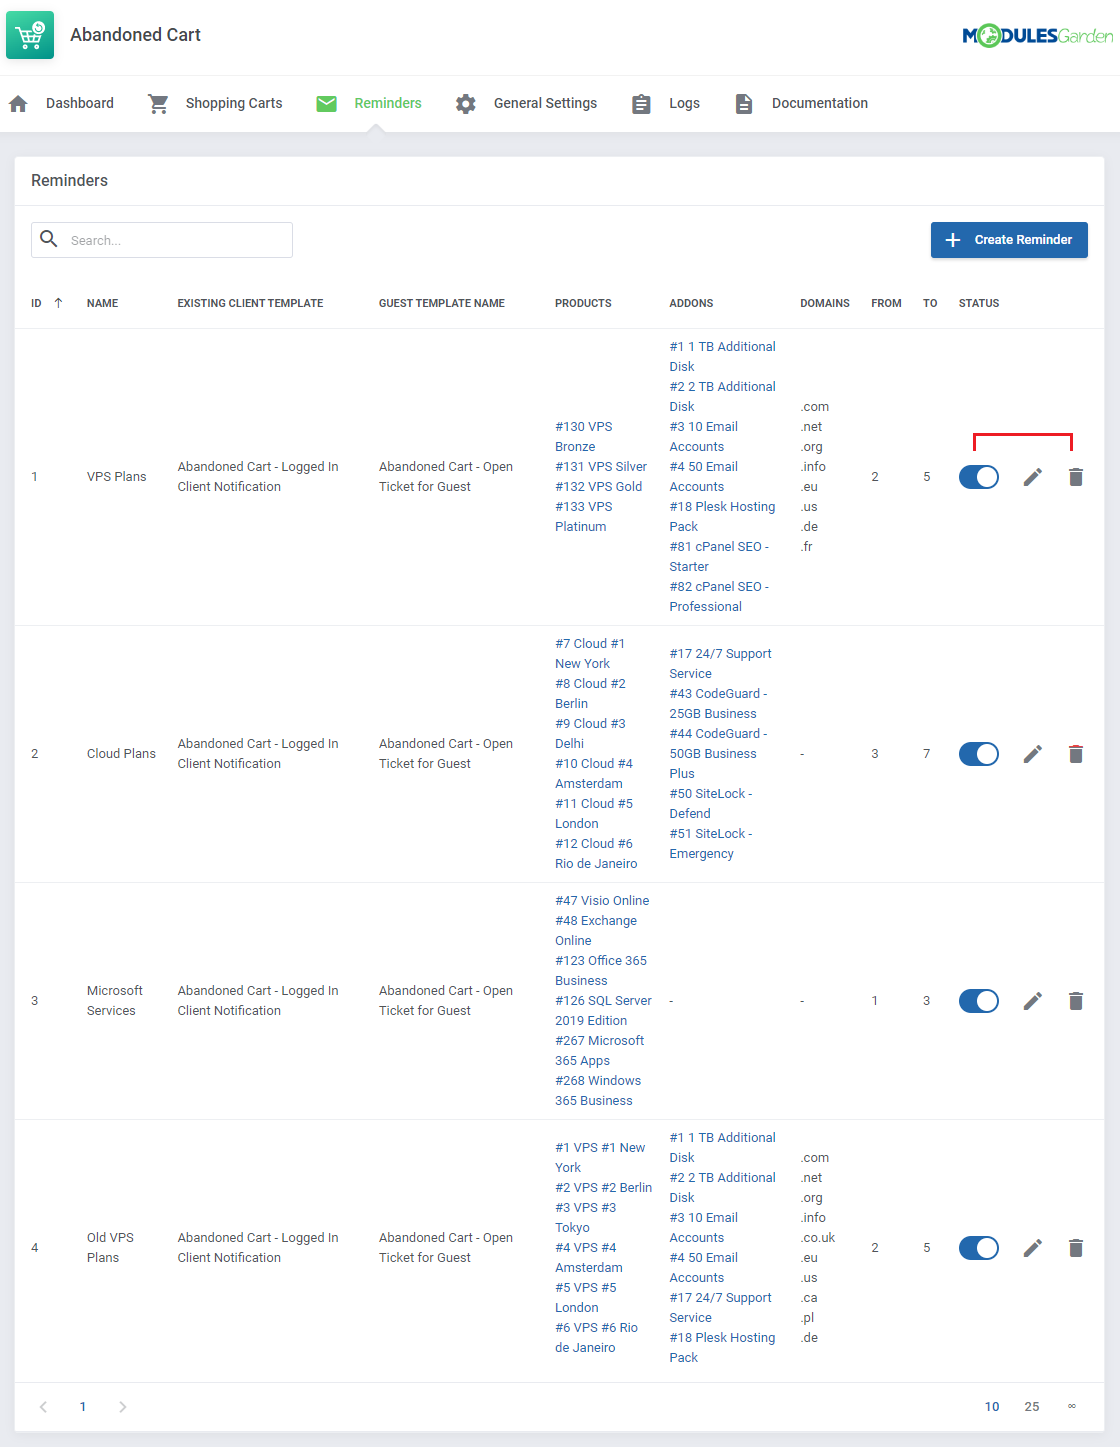
|
General Settings
| Under the 'General Settings' section you will find the cron details - setting it up is crucial for the module correct behavior and configuration.
Cron Task |
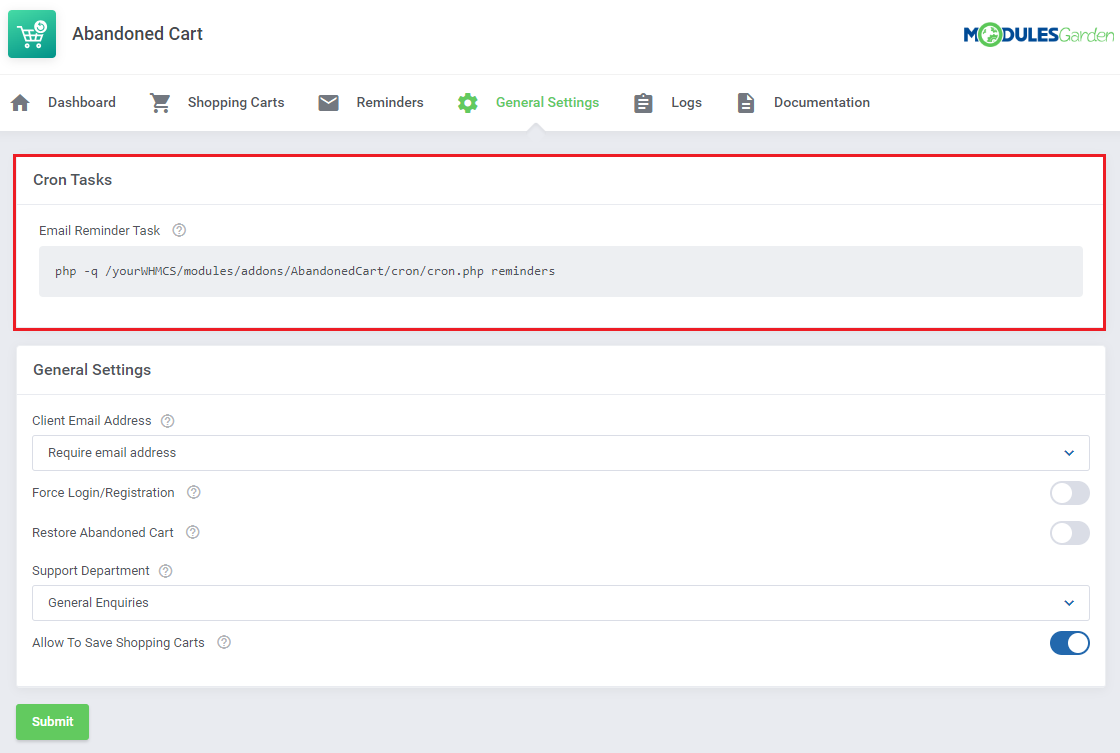
|
General Settings:
When your configuration ready, do not forget to press 'Submit' button to save your changes. |

|
Logs
| The 'Logs' section contains information an all actions taken by the module. |
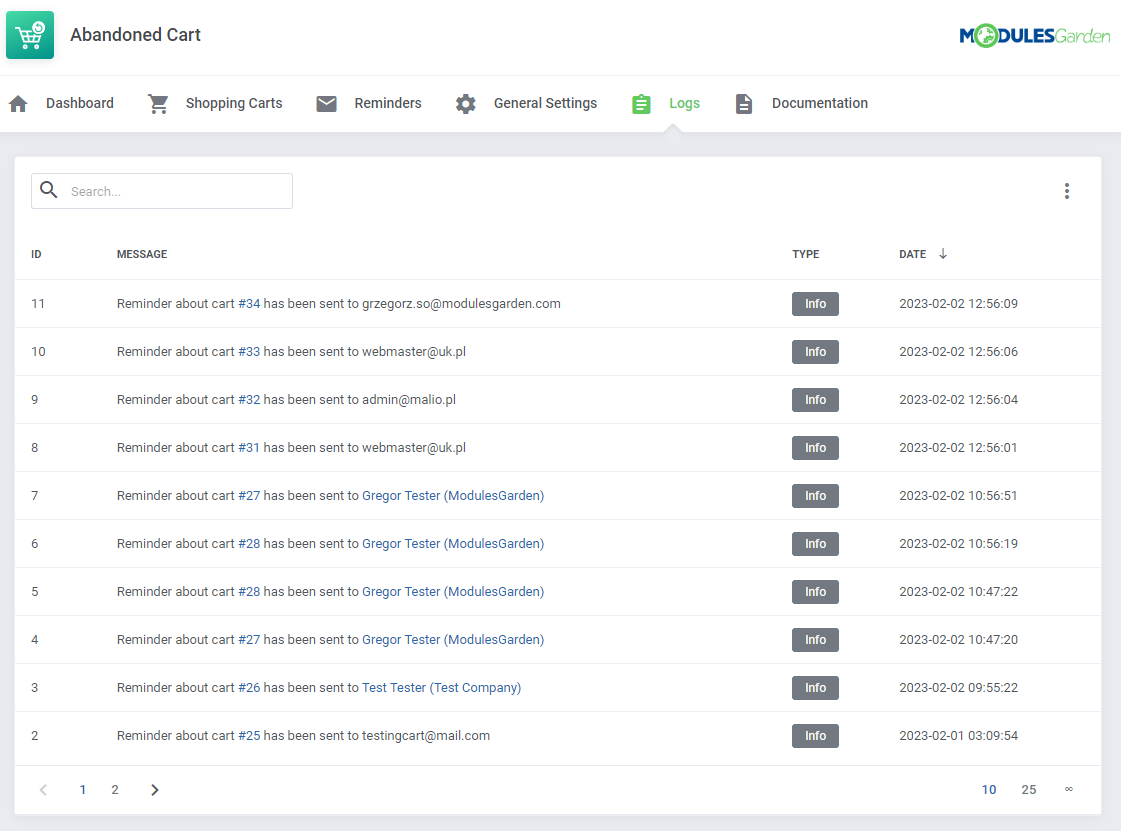
|
| You may always delete the logs if their number is extensive. Use the action button for mass removal of all existing log entries. |
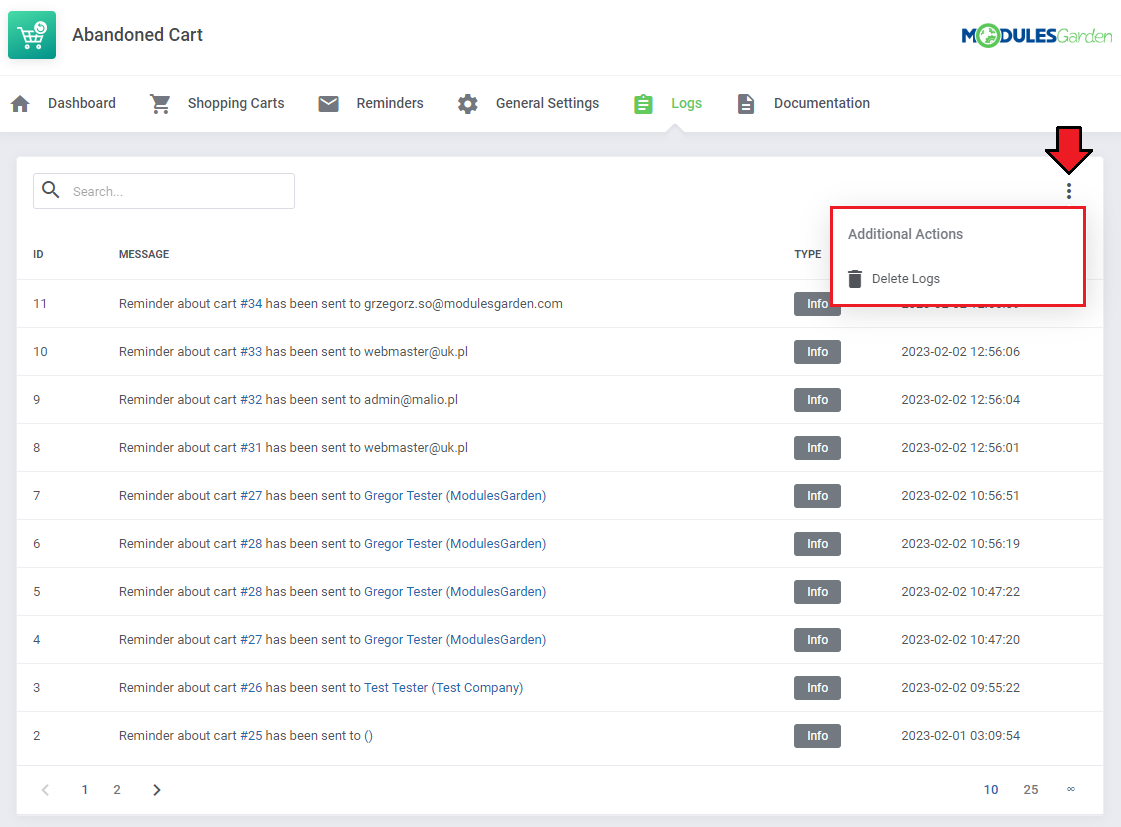
|
Client Area
| Once an unlogged client visits your marketplace, he will be forced to leave is personal data. The extent of what exactly must be provided, depends on the configuration. In order to fore the Abandoned Cart module action, any item (product, addon or domain) must be added to a cart: |
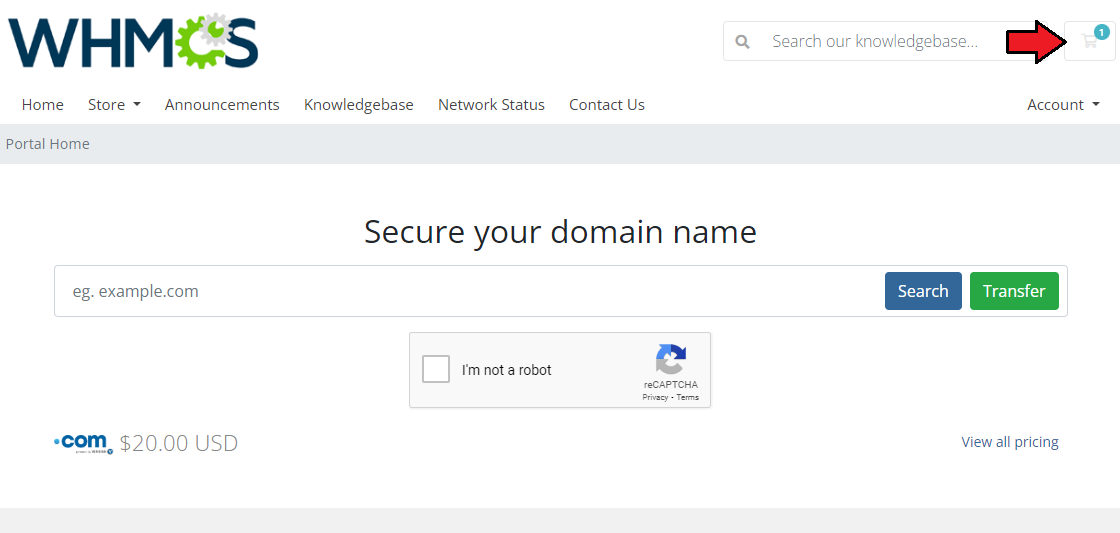
|
The moment the client wants to either continue shopping or complete the order, he will be forced to:
|
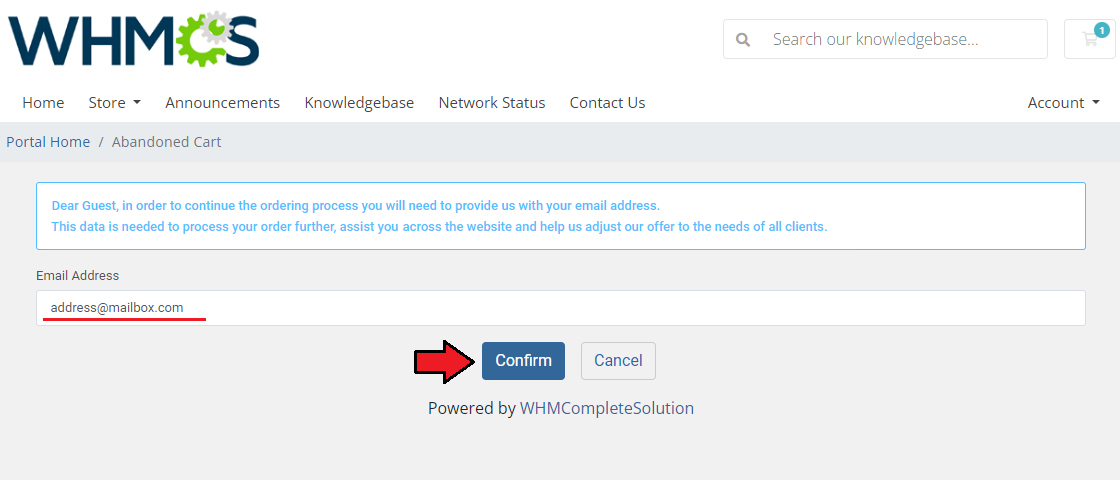
|
|
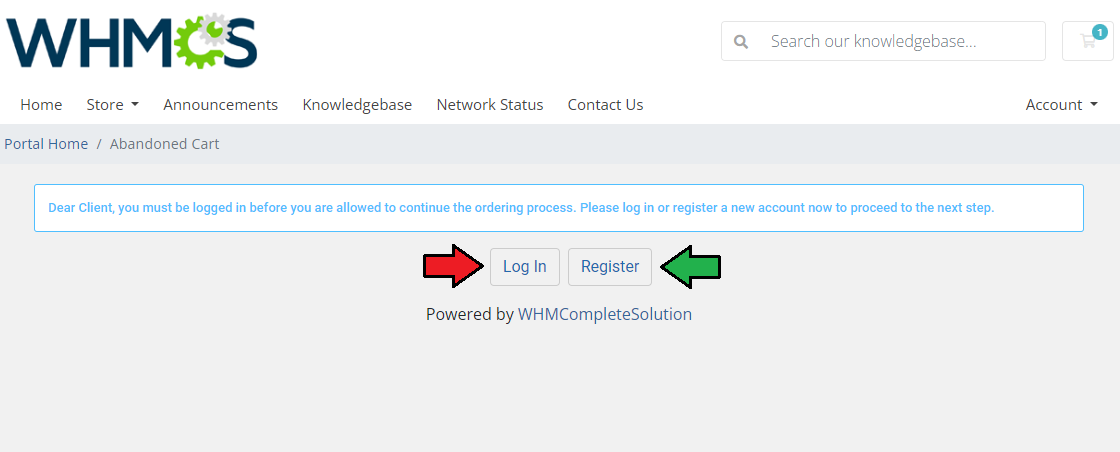
|
| If 'Log in' is selected, the potential customer will be redirected to the standard client area login page. |
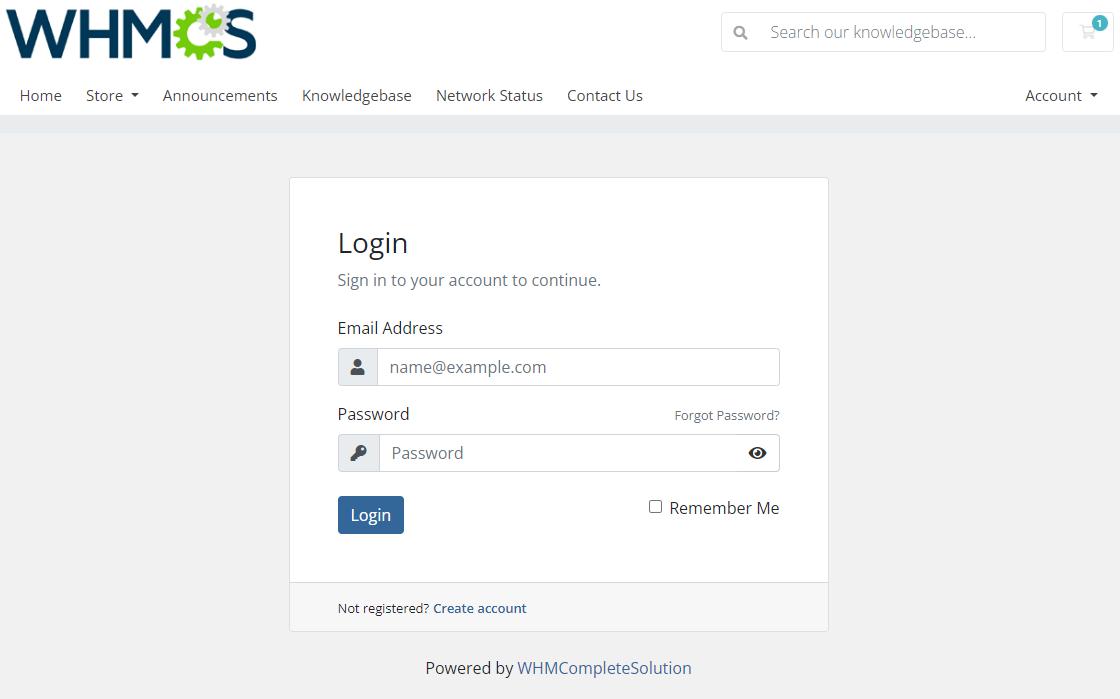
|
| For 'Register' choice, the visitor will be asked to create a new account using a standard form. |
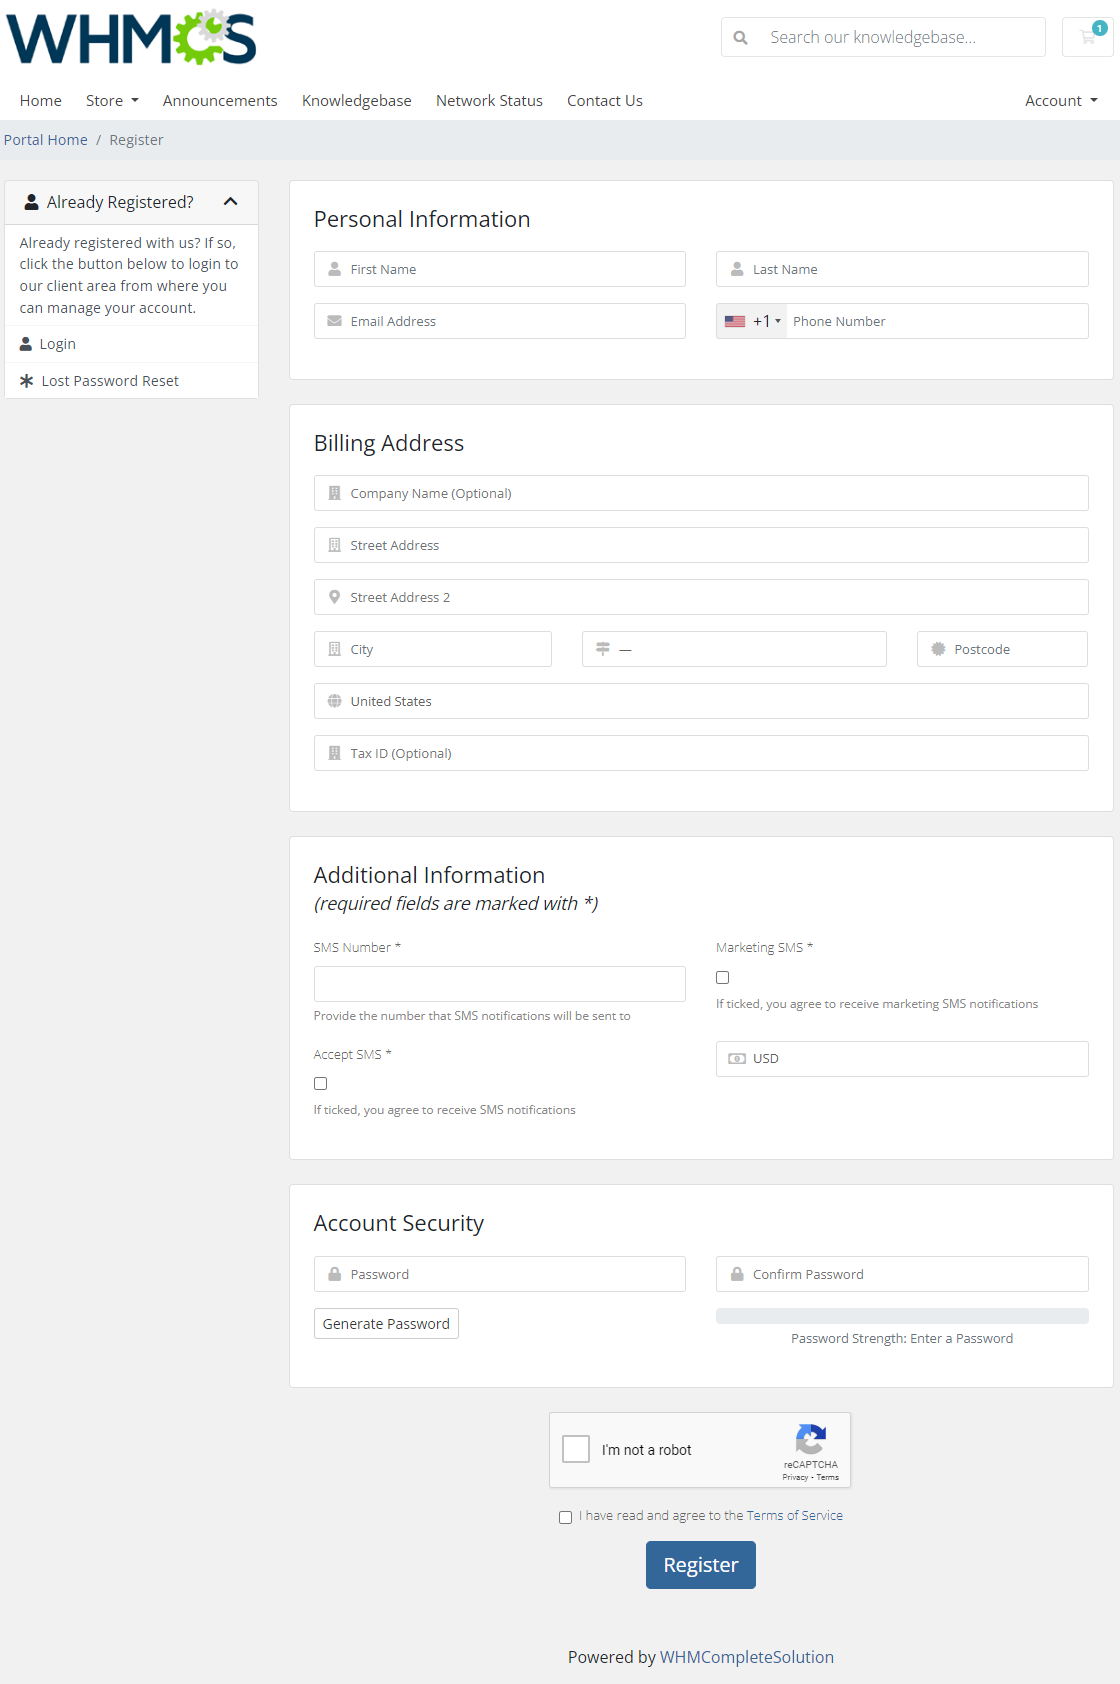
|
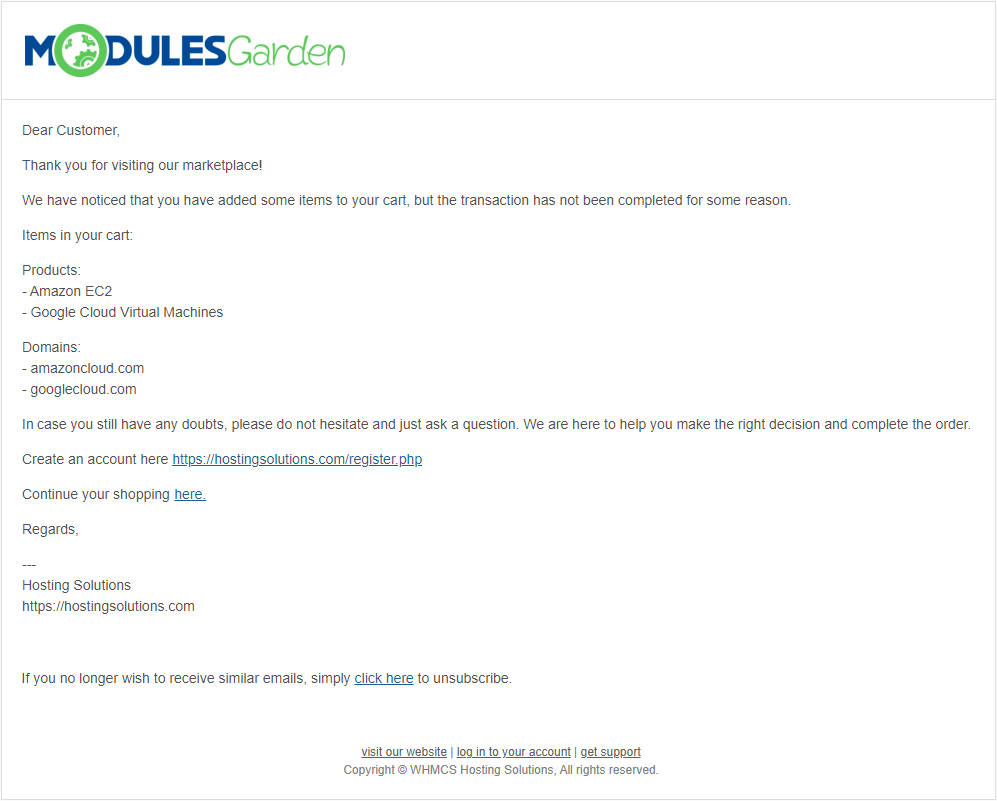
| Being logged in or leaving an email address is required for the module to be able to send email messages to clients reminding about abandoned carts and their content. This is how an exemplary email notification sent to a client might look like: |
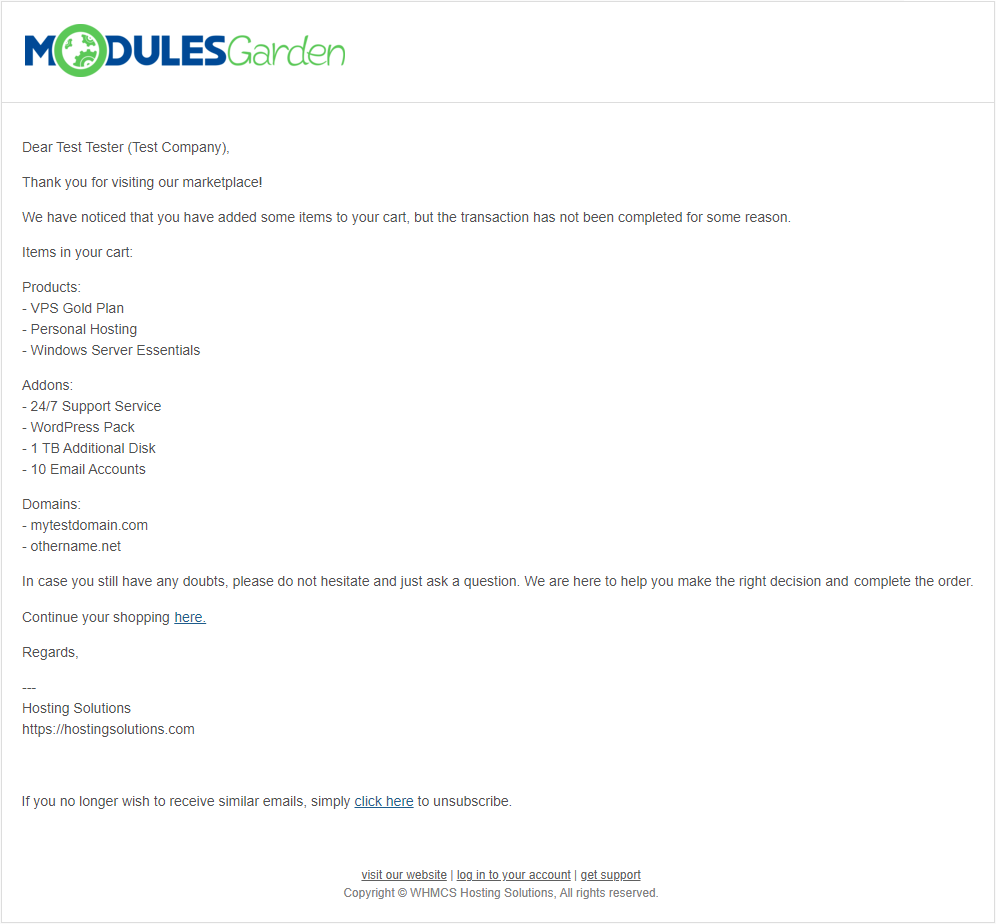
|
| Guest clients who leave only the email address and have no account in your system will get quite a similar notification email. Note: The system will open a new support ticket in a dedicated department at the same time. Only the assigned admin will have access to this ticket. |
|
Tips
| 1. The module collects information on products, addons and domains left in the cart. No data on configurable options, custom fields etc. related to products is stored. |
| 2. Upon sending an email message to a guest client, i.e. when only email address is provided, a ticket is automatically opened to notify an admin about the fact of sending such notification. We advise creating a dedicated support department to avoid numerous tickets being visible in your main ticketing system. |
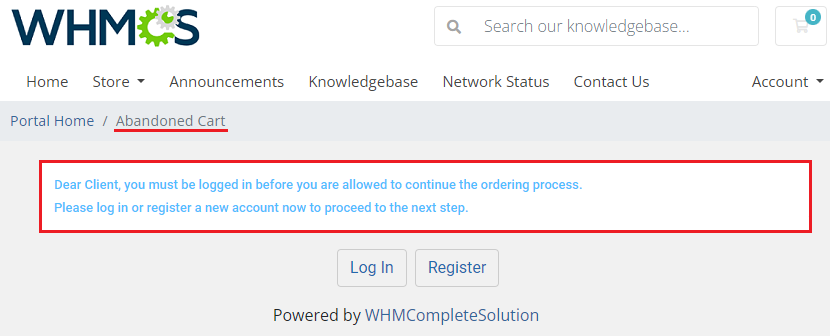
| 3. You can freely customize the content of breadcrumbs and messages visible to guests as well as logged in clients by editing them in the language file. The language file can be found in the following path: '/modules/addons/AbandonedCart/langs'. |
|
Update Instructions
| Essential guidance through the process of updating the module is offered here. Please keep in mind that there is a quick and easy option in our client area that lets you upgrade the license of your module to an open source version at any time - and at a lower price! |
Common Problems
| 1. In case of connection problems, please check whether your SELinux or firewall does not block ports. |