Hosting Quota Notifications 1.X For WHMCS
Contents |
About WordPress Manager For WHMCS
| WordPress Manager For WHMCS is a module that enables your customers to control and freely alter their WordPress instances right inside your WHMCS. Your clients will be able to perform WordPress updates, install plugins, install WordPress instances from custom scripts, create backups and toggle automatic upgrade of WordPress installation, plugins, and themes. |
- Admin Area Features:
| ✔ View Active WordPress Installations, Clients And Products Summary |
| ✔ View WordPress Installations List |
| ✔ Choose Supported Products |
| ✔ Toggle Debug Logs Per Product |
| ✔ Select Installation Scripts Per Product |
| ✔ Access Module Logs |
- Client Area Features:
| ✔ View/Create/Edit/Delete WordPress Installations |
| ✔ Create/Restore/Download/Delete WordPress Backups |
| ✔ Browse And Install Plugins |
| ✔ Perform Bulk Changes On Plugins And Backups |
| ✔ View/Create/Edit/Delete WP Config Records |
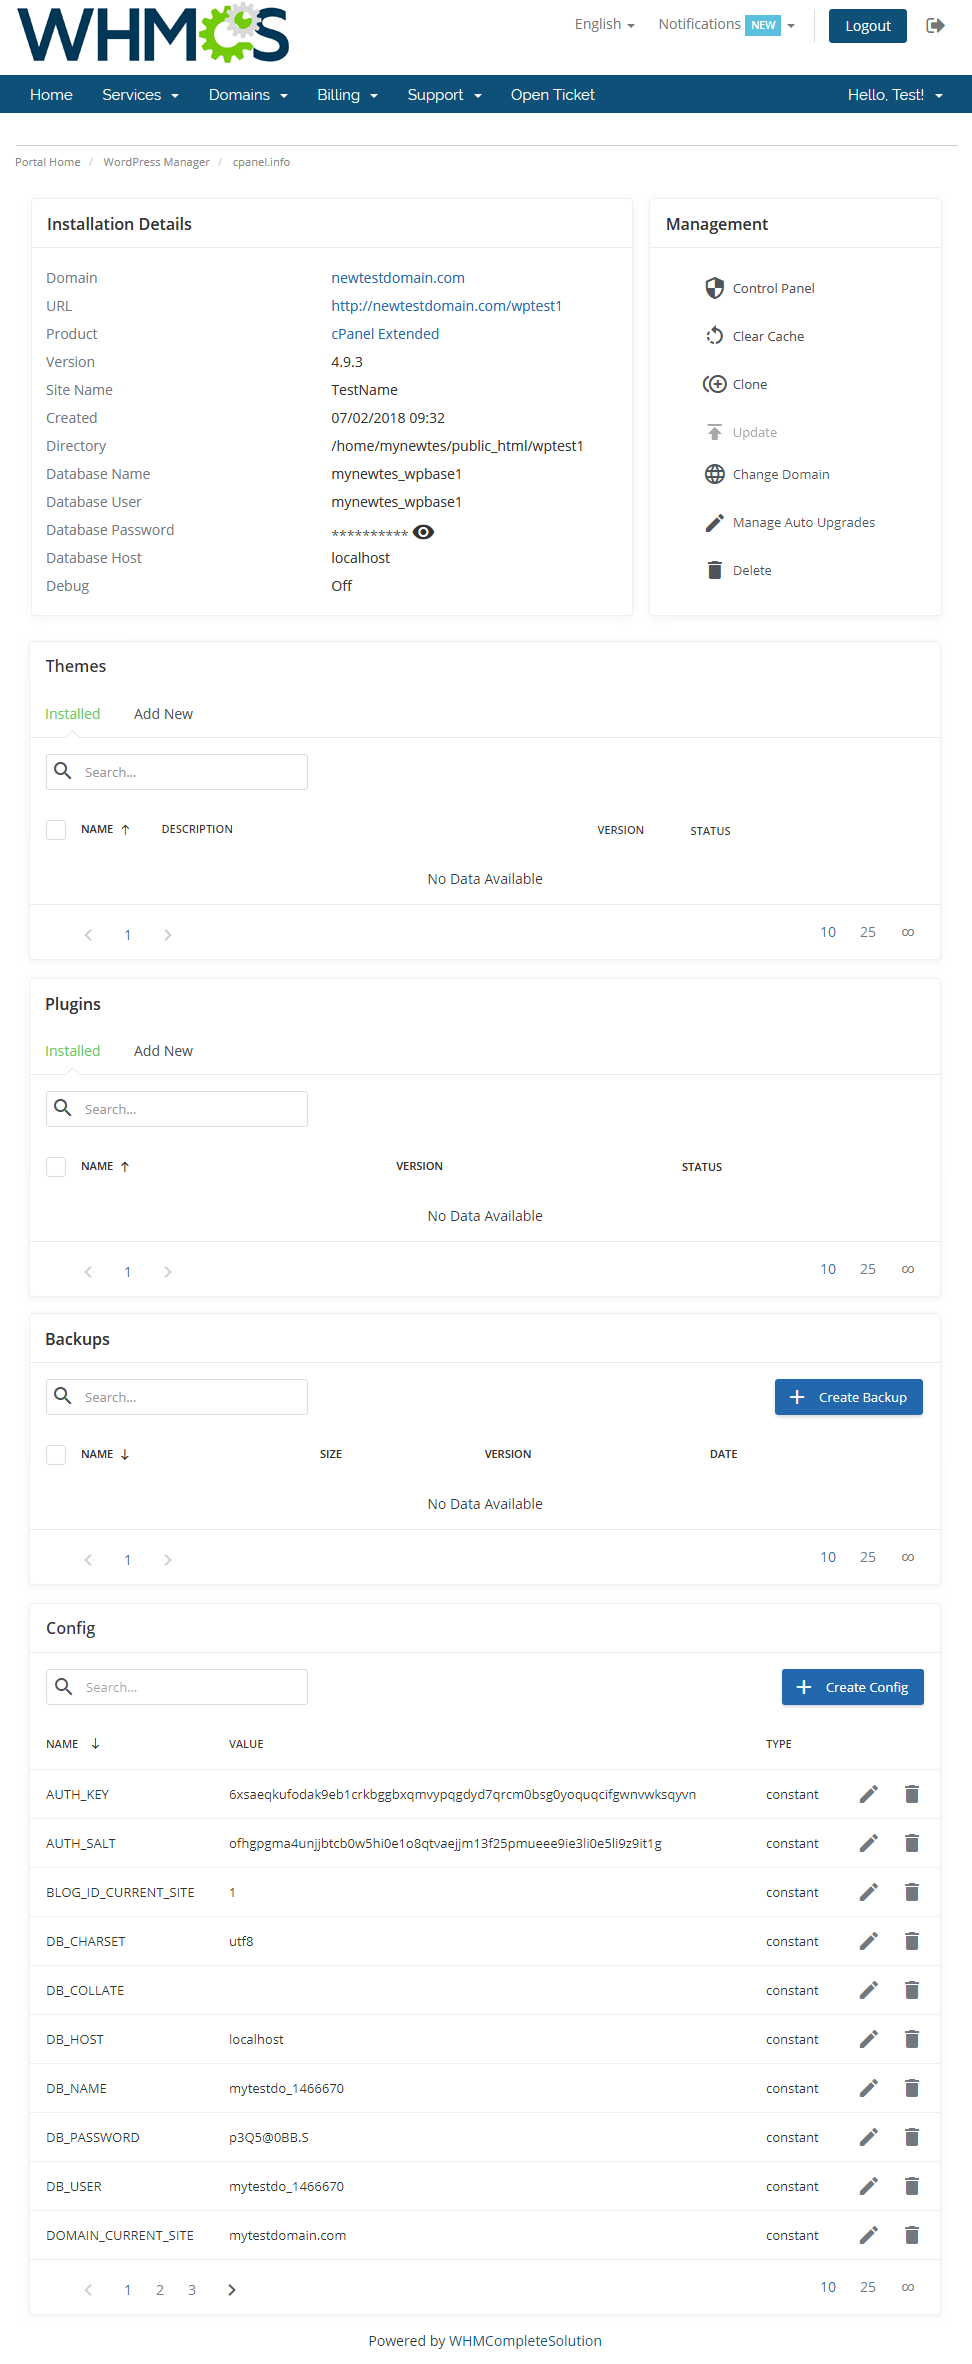
| ✔ Provide Installation Details |
| ✔ View Installation Details: |
| ✔ WordPress Version |
| ✔ Domain And URL |
| ✔ Product On Which Is Installed |
| ✔ Site Name |
| ✔ Creation Date |
| ✔ Directory Path |
| ✔ Database Access Details |
| ✔ Debug Status |
| ✔ Manage Installation: |
| ✔ Log In To Control Panel |
| ✔ Clear Cache |
| ✔ Clone To New Domain |
| ✔ Change Domain |
| ✔ Change Auto Upgrade Of: |
| ✔ WordPress Installation |
| ✔ WordPress Plugins |
| ✔ WordPress Theme |
| ✔ Update To Newer Version |
| ✔ Delete |
| ✔ Plugins Management: |
| ✔ Search And Install Plugins Directly From WordPress.com Base |
| ✔ Update Installed Plugins |
| ✔ Activate/Deactivate Installed Plugins |
- Supported Modules:
| ✔ DirectAdmin |
| ✔ DirectAdmin Extended |
| ✔ cPanel |
| ✔ cPanel Extended (With Supported Integration) |
- General Info:
| ✔ Requires Softaculous Auto Installer |
| ✔ Multi-Language Support |
| ✔ Supports PHP 5.6 Up To PHP 7.2 |
| ✔ Supports WHMCS Template Six |
| ✔ Supports WHMCS V7 |
Installation and Configuration
| In this short tutorial we will show you how to successfully install WordPress Manager For WHMCS. We will guide you step by step through the whole installation process. |
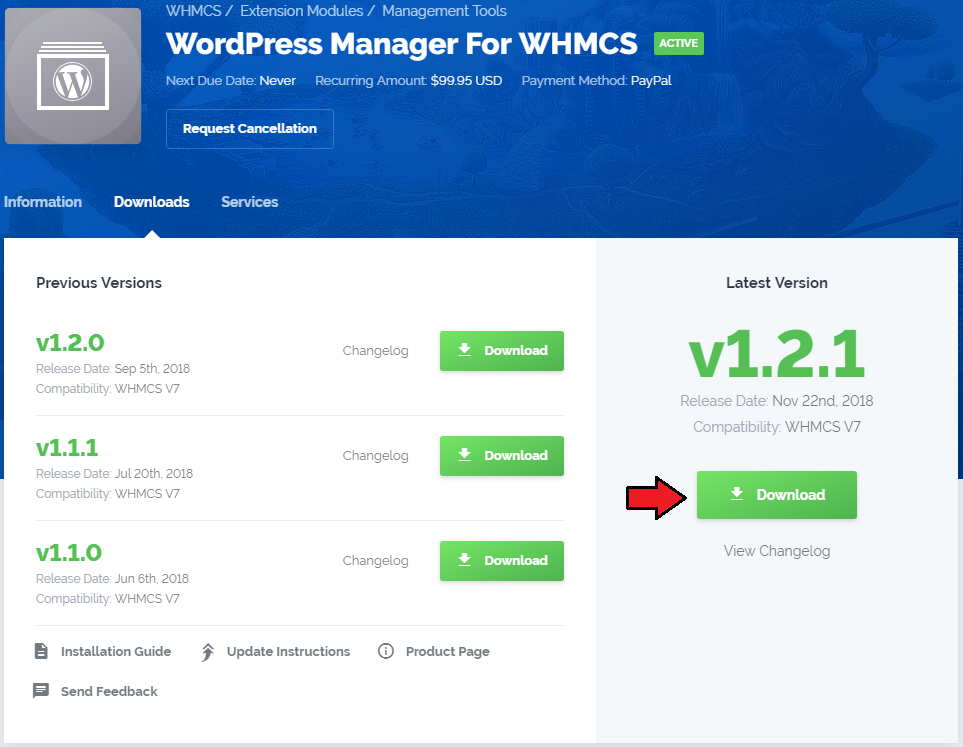
| 1. Log in to our client area and download the module. |
|
| 2. In the downloaded file you will find two packages that support different PHP versions. As presented on the screen below, the first one is dedicated to PHP 5.6 up to PHP 7.0, while the second one is aimed at PHP 7.1 up to PHP 7.2. It does not apply to open source versions. Note: You can check the current PHP version in your WHMCS. To do so, proceed to 'Utilities' › 'System' › 'PHP Info'. |

|
| 3. Choose the one with the right PHP version. In the package you will find another three folders. As presented on the screen below, the first one is supposed to be uploaded on WHMCS, the second one is aimed for DirectAdmin while the last one is for WHM (cPanel). |

|
cPanel (WHM) Installation
| 1. Upload and extract the 'UploadToWHM' folder into the /root cPanel directory. Files in your cPanel /root/uploadToWHM/ directory should look like these on the following screen. |

|
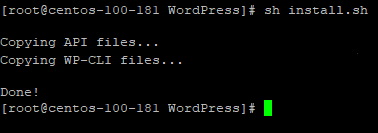
2. Once the module is uploaded, enter the /root/uploadToWHM/ catalog and run the following command in the console:sh install.sh After a brief moment you should see a confirmation that the plugin has been successfully installed. |
|
DirectAdmin Installation
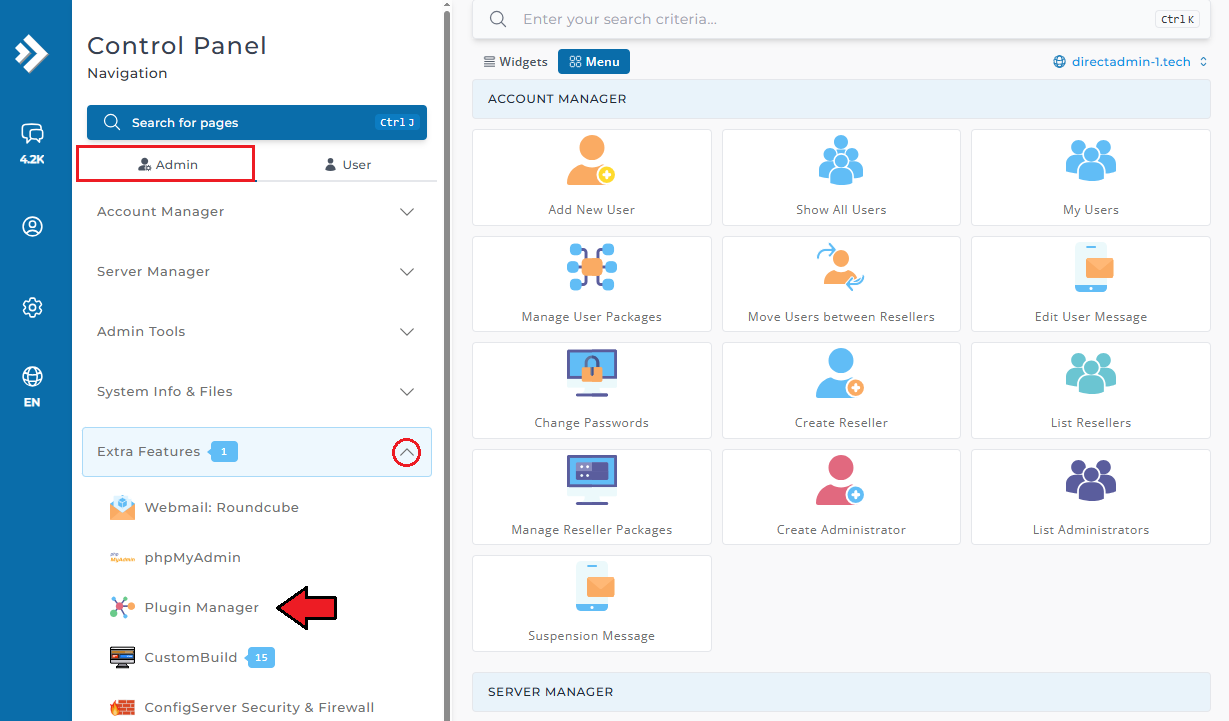
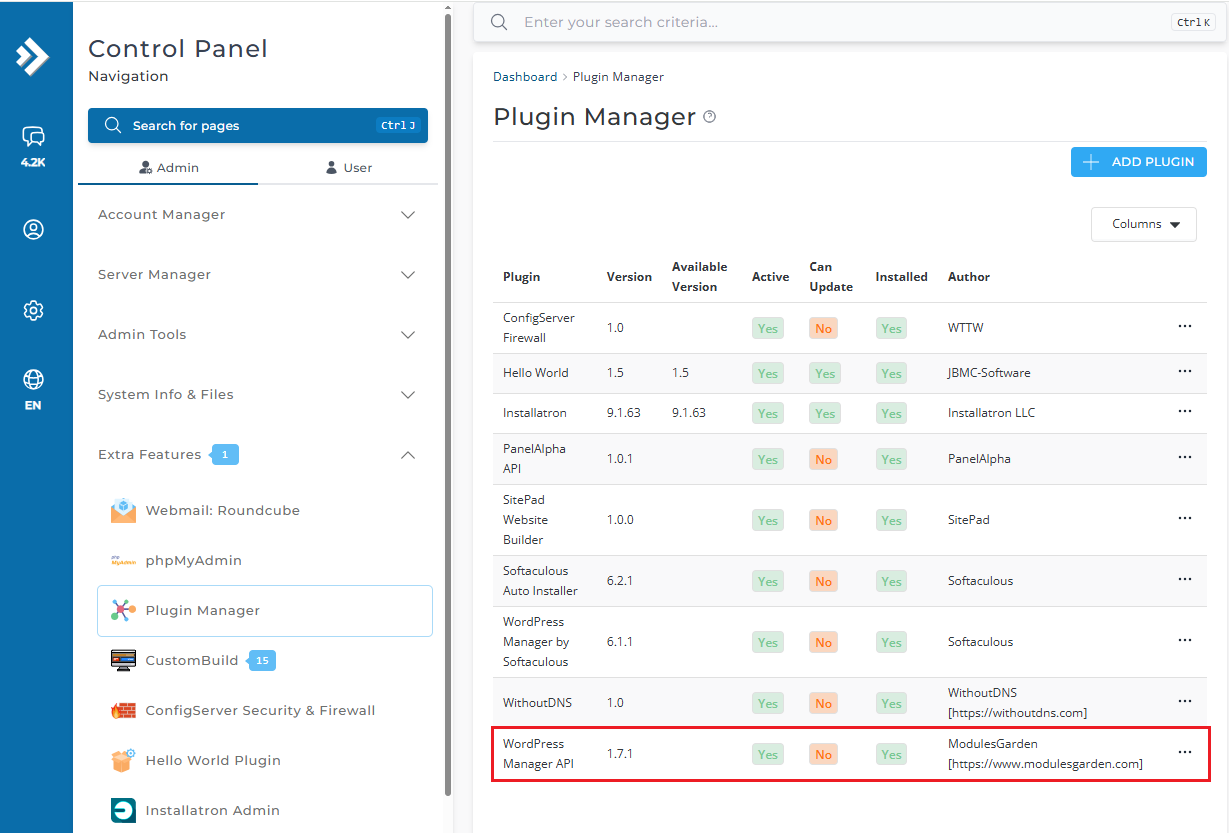
| 1. In the 'uploadToDirectAdmin' folder find the 'wordpress_cli.tar.gz' package. Next log in to your DirectAdmin panel as administrator and to to the 'Plugin Manager' . |
|
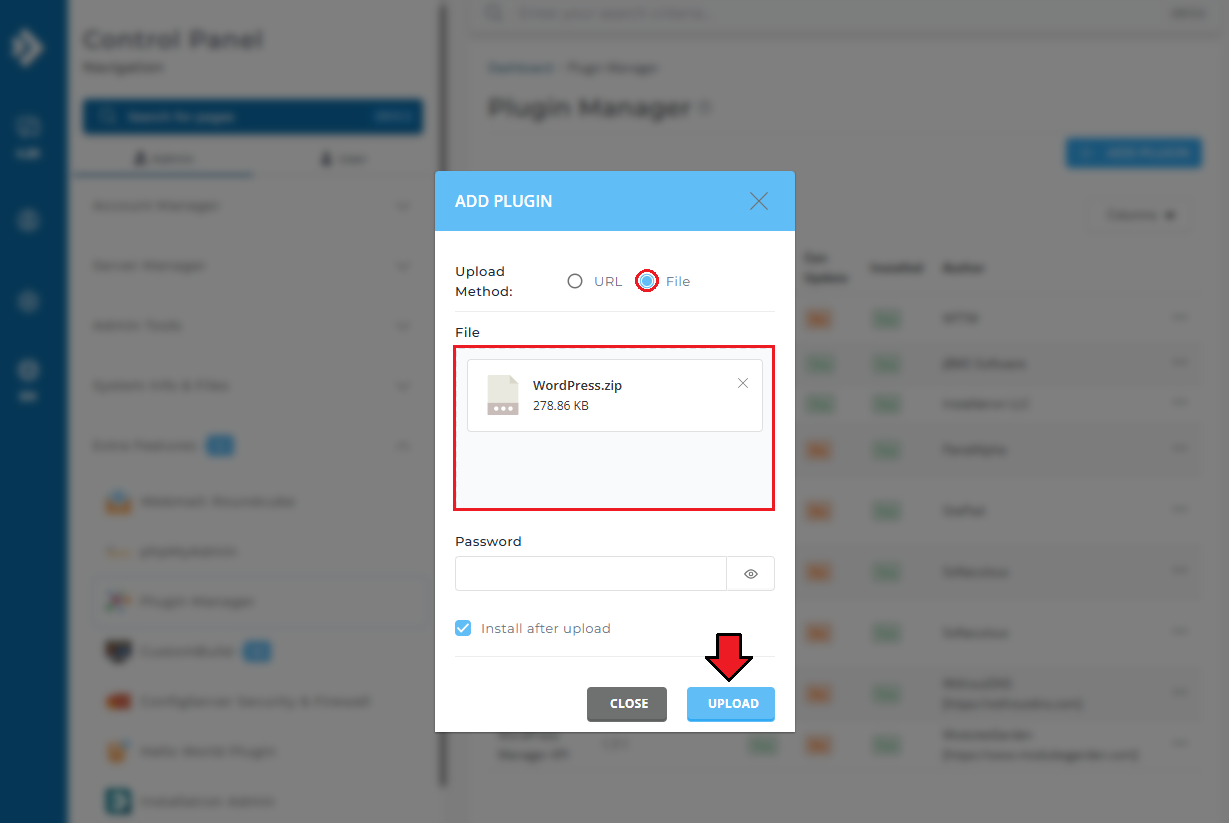
| 2. Now in the 'Add Plugin' select 'File' option and choose the 'wordpress_cli.tar.gz' package to upload. Additionally mark the 'Install after upload' option and press 'Add Plugin' button. |
|
| 3. Once the plugin is uploaded and successfully installed you should see it on the plugins list. |
|
WHMCS Installation
| 1. Extract the 'modules' catalog into the main WHMCS directory. |

|
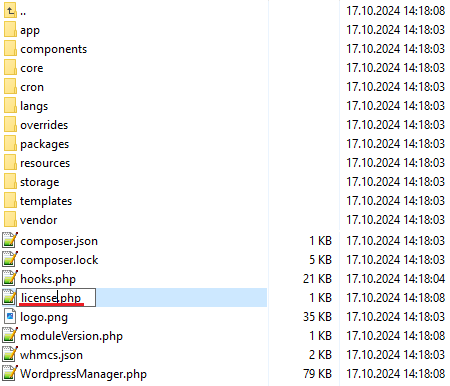
| 2. When you install WordPress Manager For WHMCS for the first time, you have to rename the 'license_RENAME.php' file. This file is located in 'modules/addons/wordpress_manager/license_RENAME.php.' Rename it from 'license_RENAME.php' to 'license.php'. |
|
| 3. In order to configure your license key, you have to edit the previously renamed 'license.php' file. Enter your license key between quotation marks as presented on the following screen. You can find your license key in our client area → 'My Products'. |

|
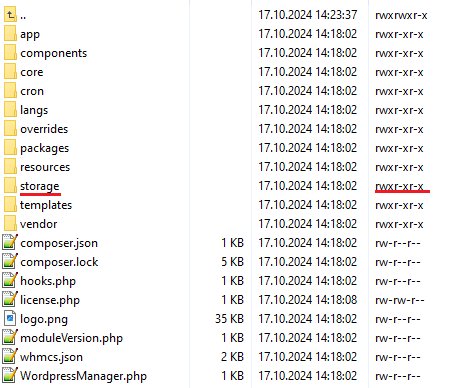
| 4. In the next step, set up the 'storage' folder as recursively writable. This folder is available at 'your_whmcs/modules/addons/WordpressManager/' . |
|
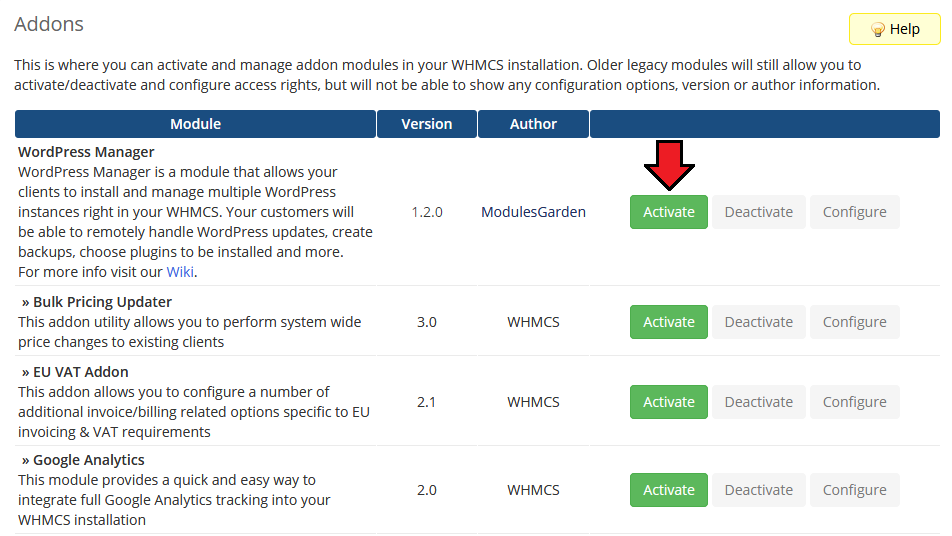
| 5. Now you have to activate the module in your WHMCS system. Log in to your WHMCS admin area. Click 'Setup' , then choose 'Addon Modules'. |
|
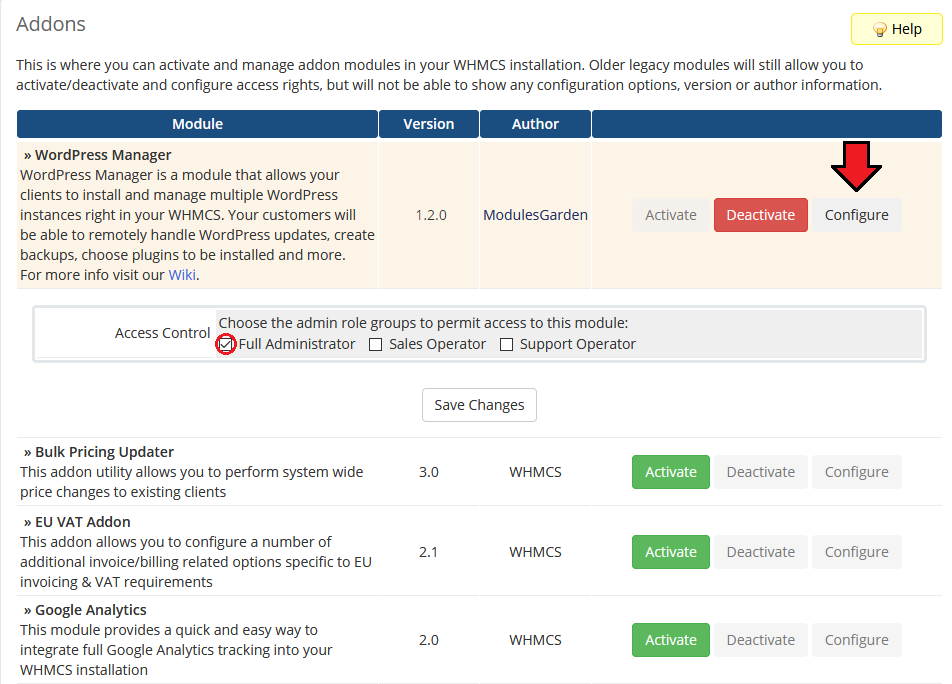
| 6. Then, you need to permit access to this module. To do so, click on the 'Configure' button, choose 'Full Administrator' and press 'Save Changes'. |
|
7. Now you have to add a cron job as shown below (5 - 10 minutes interval is recommended).php -q /your_whmcs/modules/addons/WordPressManager/cron/cron.php Synchronize Do not forget to replace 'your_whmcs' with your WHMCS root location. |
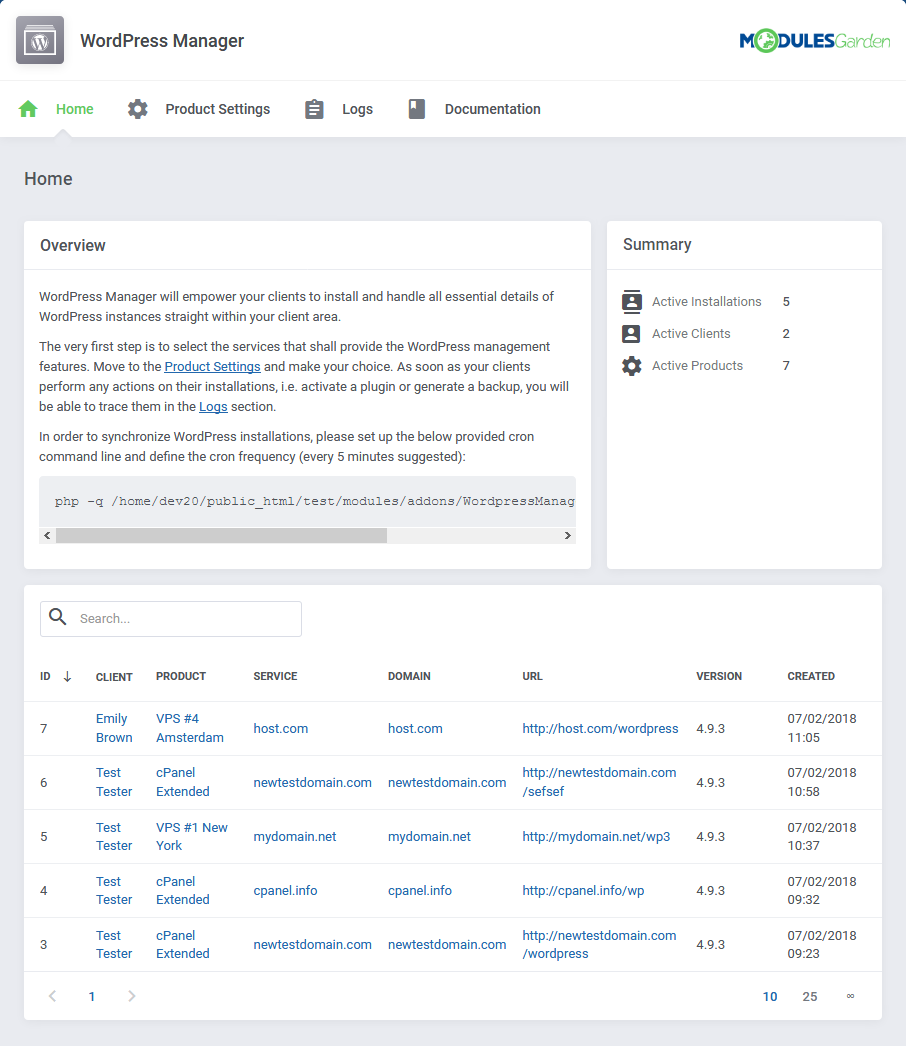
| 8. Good job! You have just successfully installed WordPress Manager For WHMCS! Now in your WHMCS press 'Addons' and then 'WordPress Manager'. |
|
Management
| This section has been divided into two main parts to allow full and, at the same time, easy understanding of the functionality of the whole module. In the first part 'Management of Addon' you will see a general outlook of the module's basic configuration, through the product management from the admin area. The second part describes additional settings and tools concerning WordPress installations that can be used while working in the client area. |
Admin Area
| Now that your module is already configured, you may access it from 'Addons' → 'WordPress Manager' . |
Home
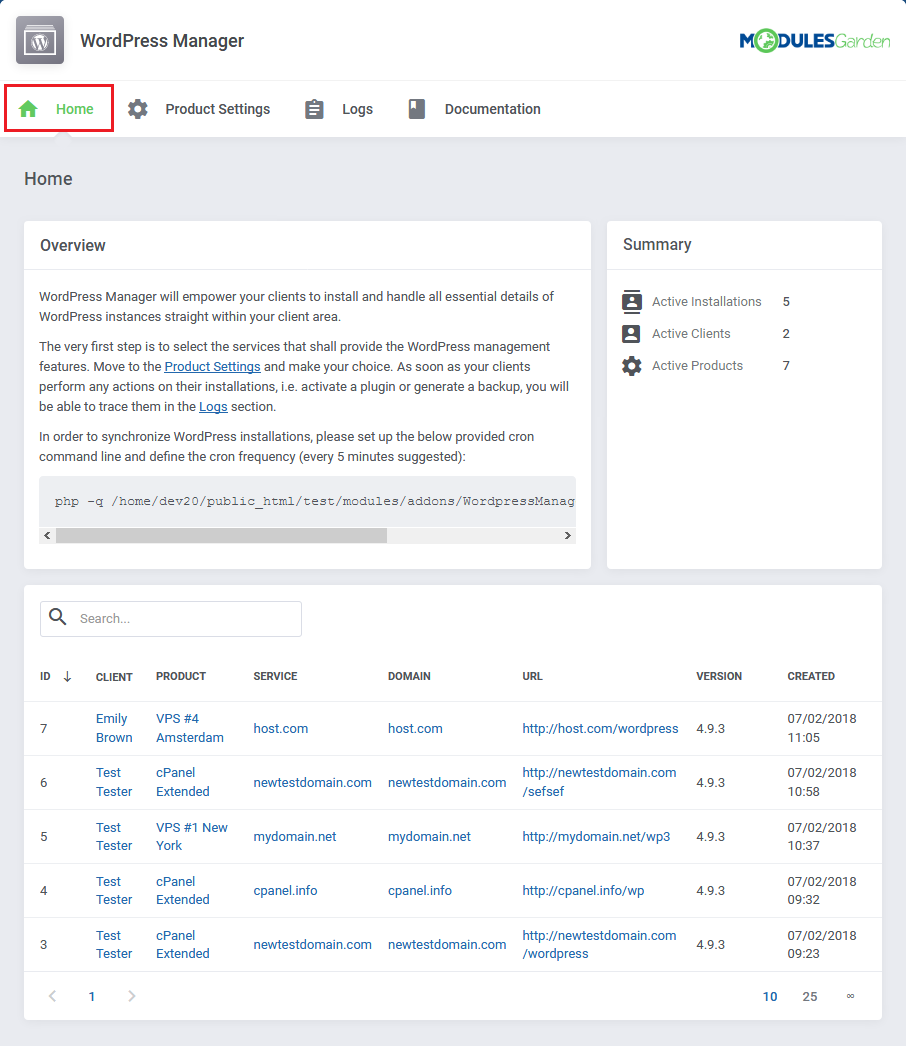
| 'Home' should be your first choice. In this section you will see all active WordPress installations and the list of the clients who already have them. |
|
Product Settings
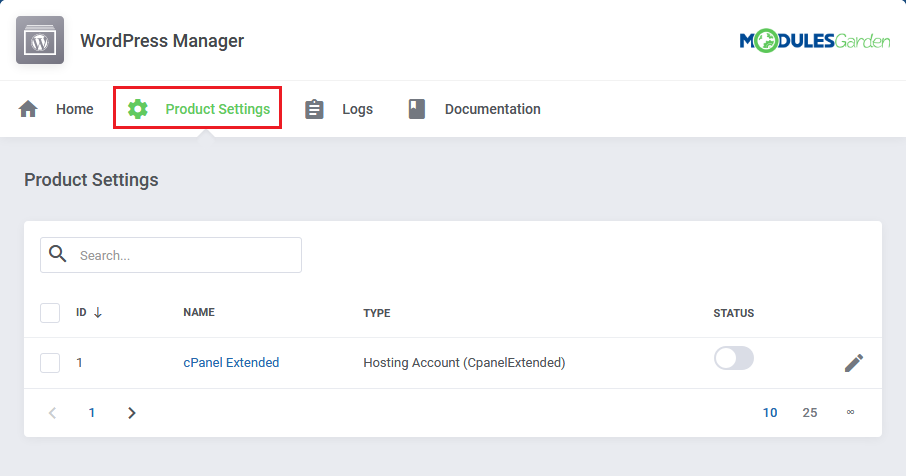
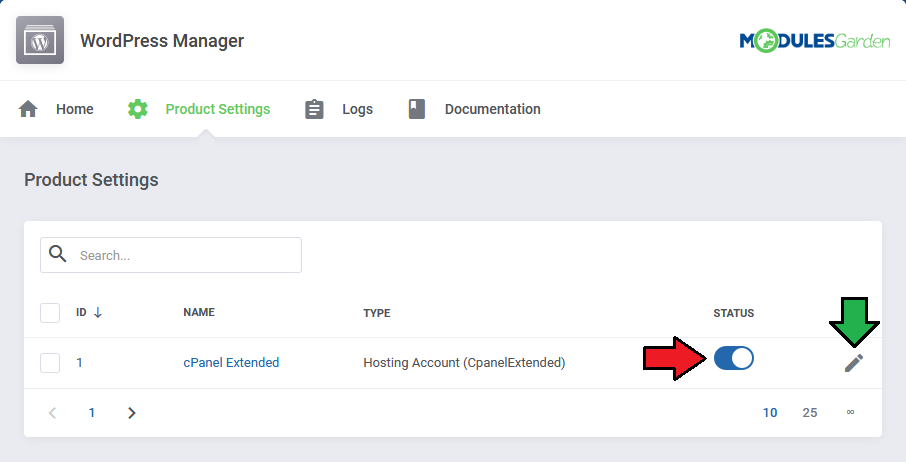
| In the 'Product Settings' section you can see the list of compatible products that WordPress can be configured with. |
|
| Activate your product and press the 'Edit' button marked with the green arrow. |
|
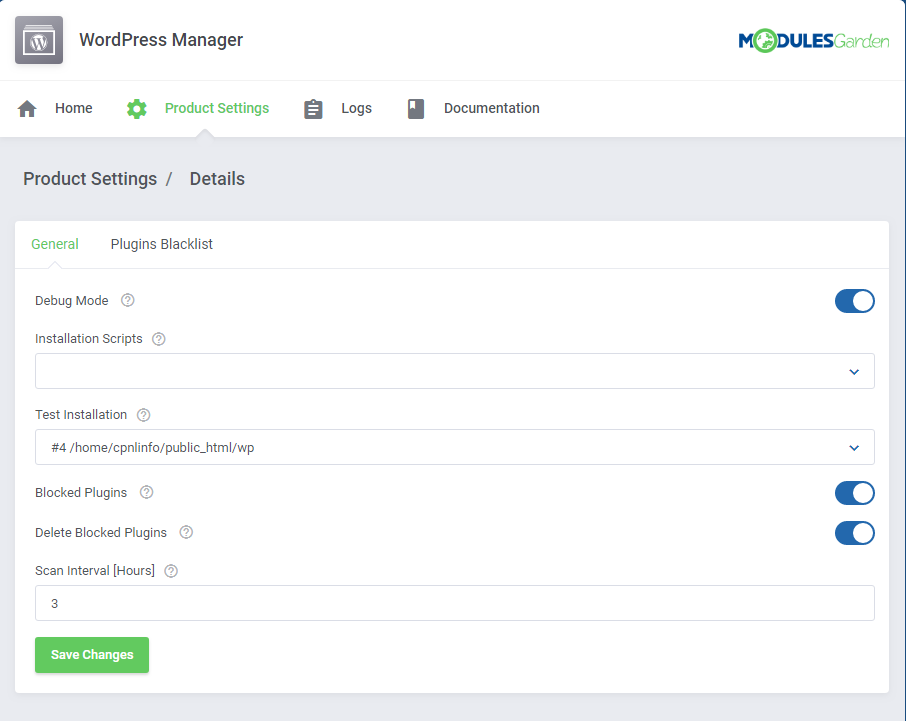
| Enabling Debug Mode will result in the module's activity details being gathered in the 'Logs' tab. By choosing any 'Installation Scripts' you can allow clients to install your pre-configured WordPress instances instead performing a clean installation only. |
|
| Note: By default, installation script names in the client area will be displayed without their IDs. If you want to still change their names to more client-friendly you can do it through a language file. Go to the Tips section and see for more details in the second point. |
Logs
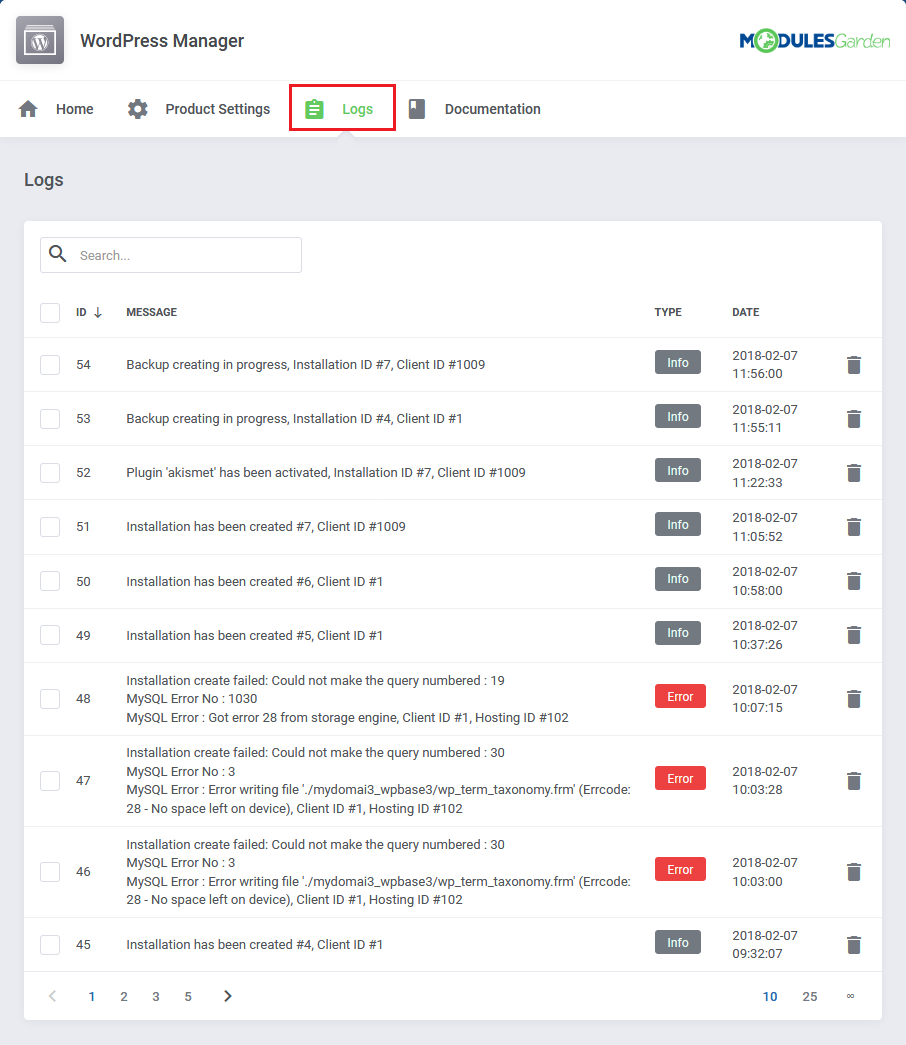
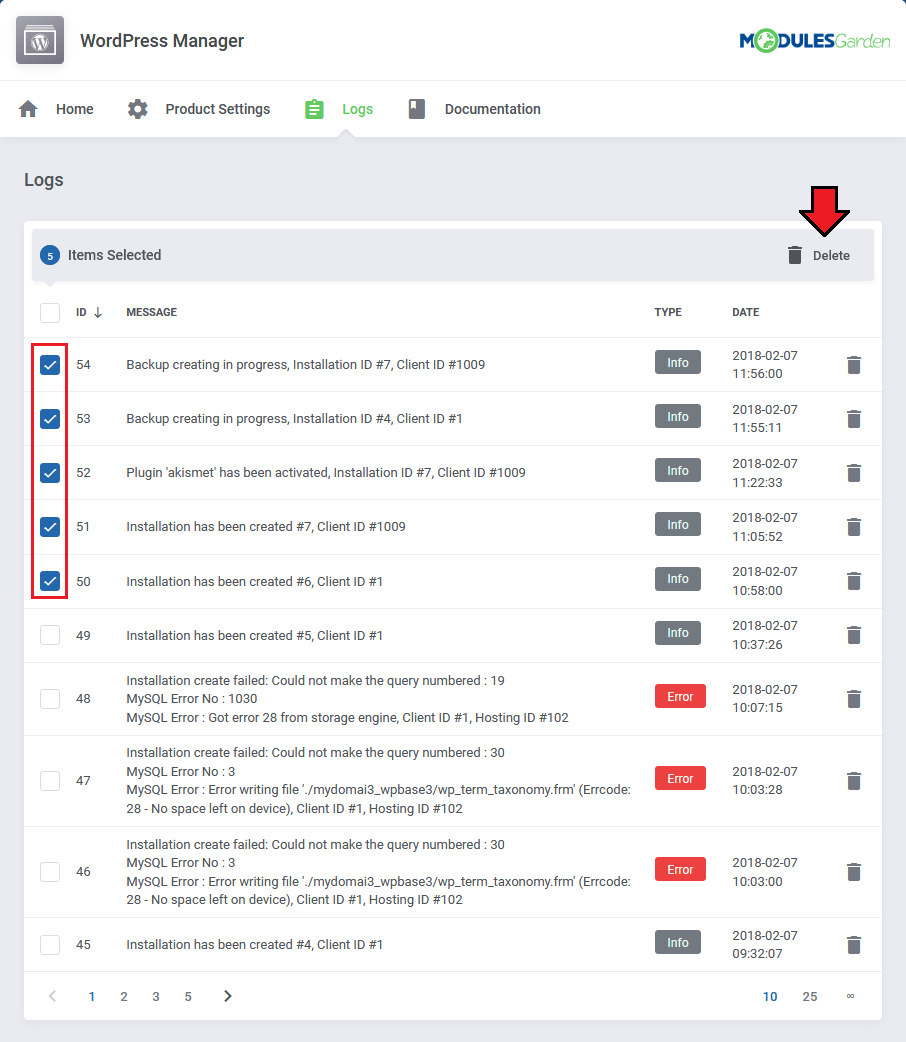
| All module activities are recorded in the section named 'Logs' . |
|
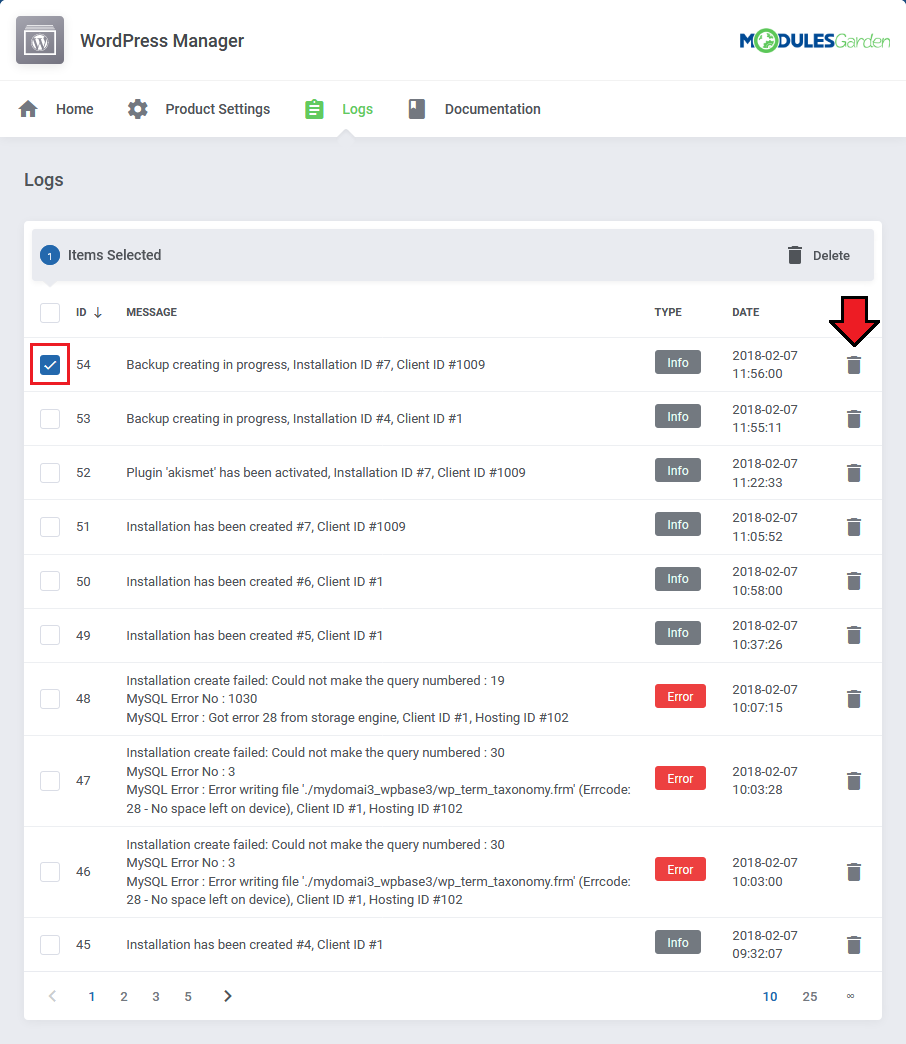
| All entries can be deleted separately. To do that, just click the button marked on the screen below. |
|
| Keep in mind that you can remove multiple logs at once. |
|
Client Area
WordPress Management
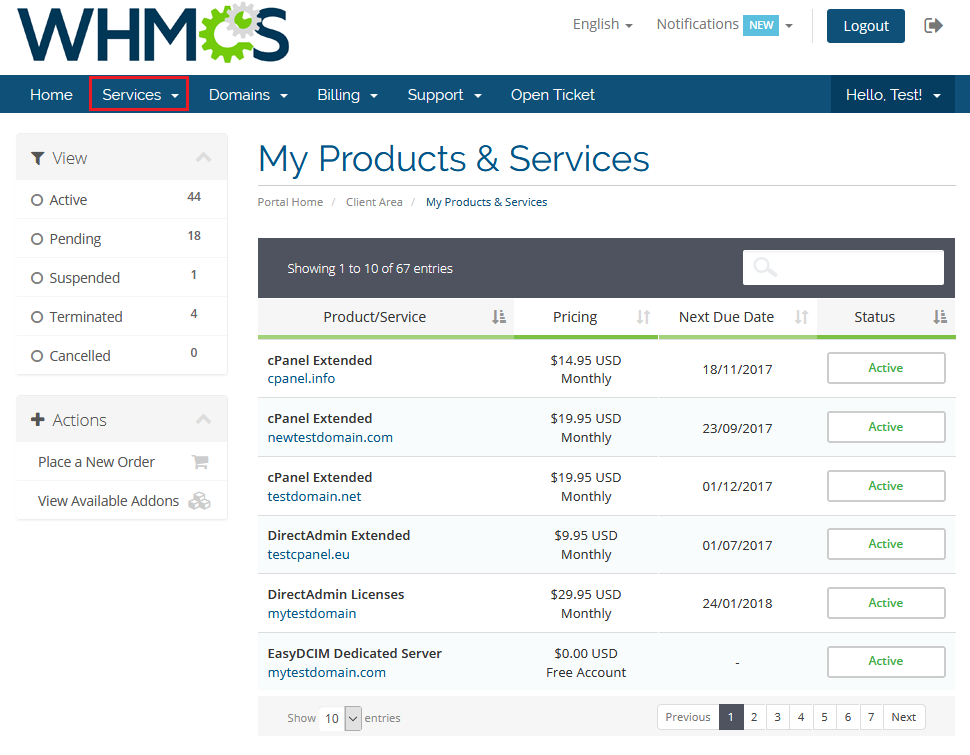
| Now that you already have the module configured, you may see the process of adding and and managing the WordPress installations by your clients. While in the client area, find the button 'My Services' and go to the section presented on the following screen. |
|
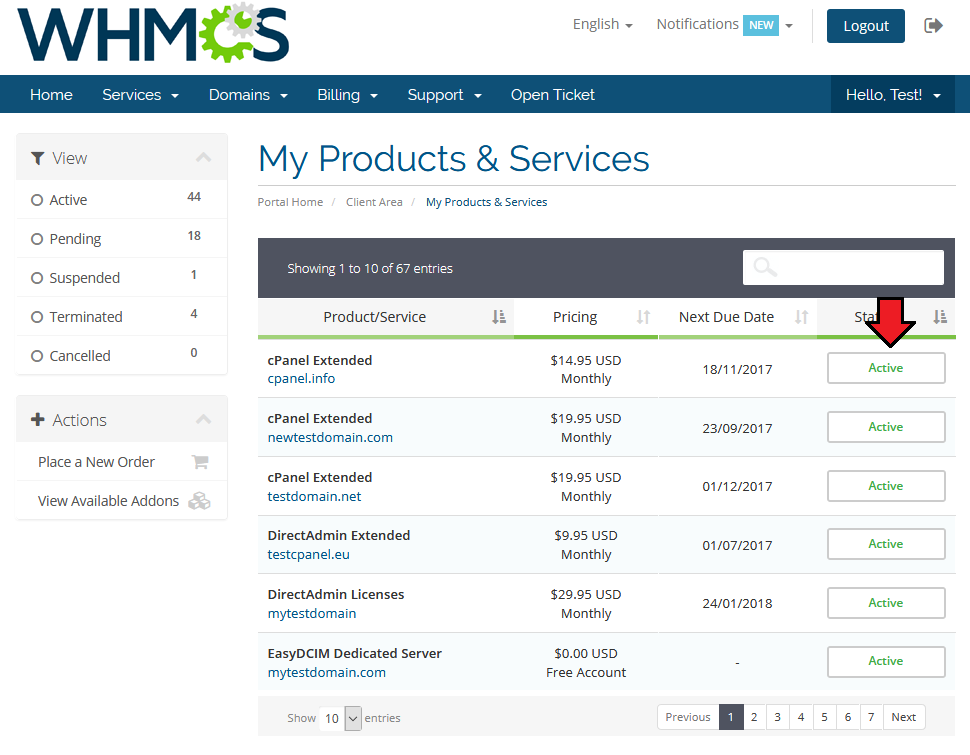
| Choose your product and enter its details. |
|
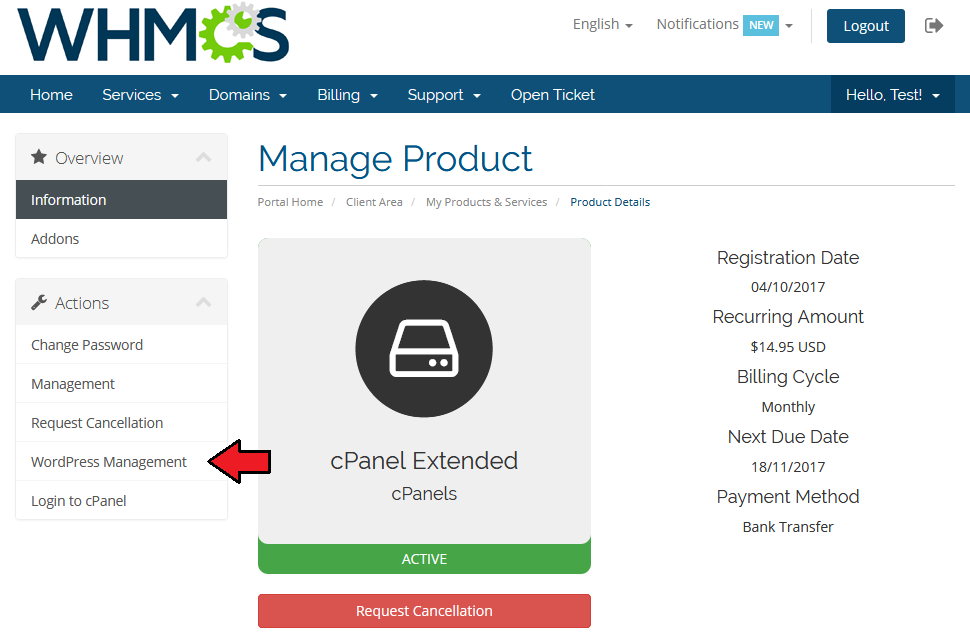
| Now, move directly to the 'WordPress Management' section. |
|
New Installation
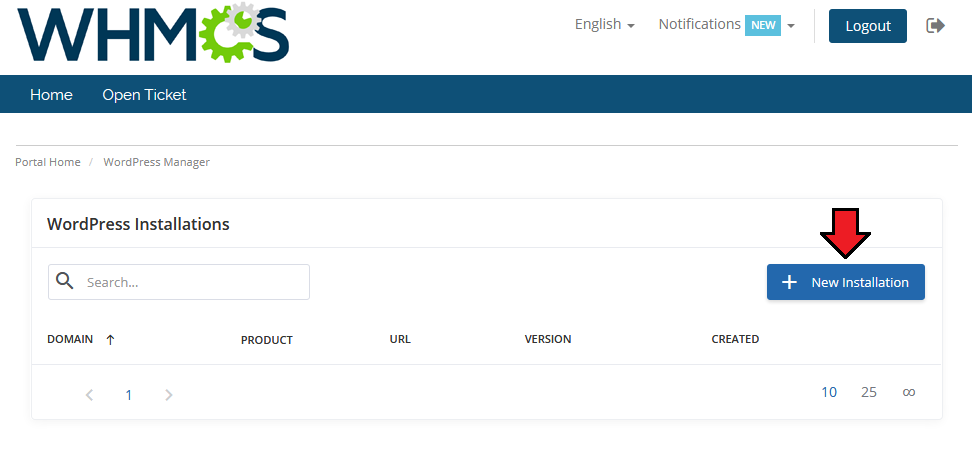
| Next, you will need to add a new installation. Press the button marked on the screen below. |
|
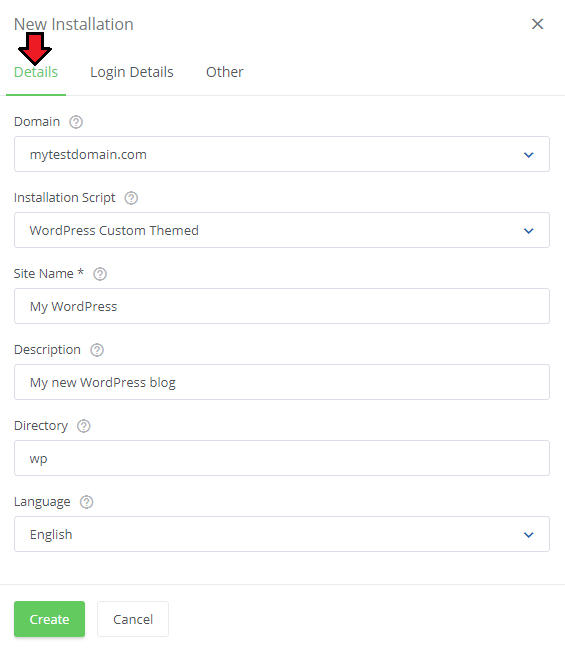
| A new window split to three tabs will open. In the first Details tab fill the following fields:
Note that only those fields marked with * (e.g. 'Site Name') are required to complete the creation. |
|
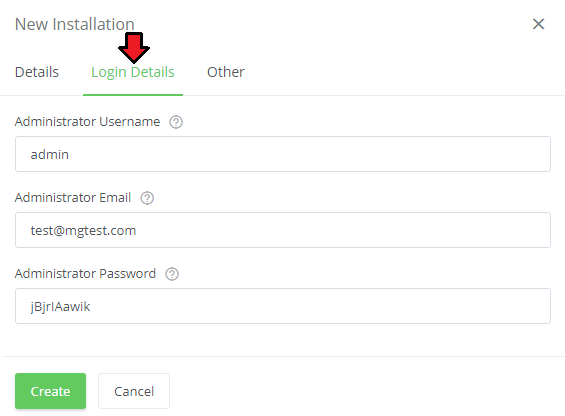
In the Login Details tab enter the following fields:
|
|
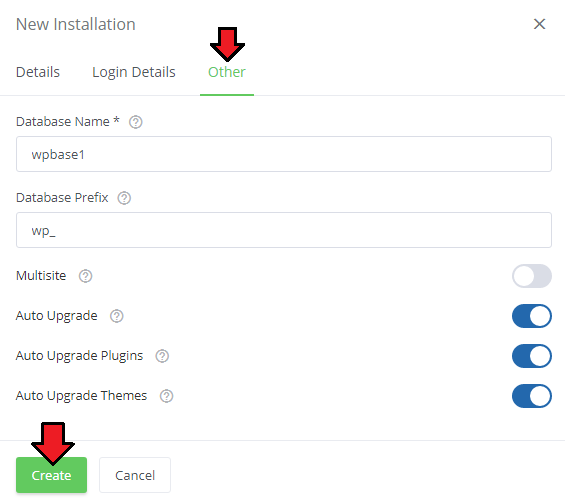
Complete the configuration by switching to the Other tab and enter the remaining fields:
If you have entered all the data correctly, you can now press the 'Create' button to complete the installation. |
|
Installation Details
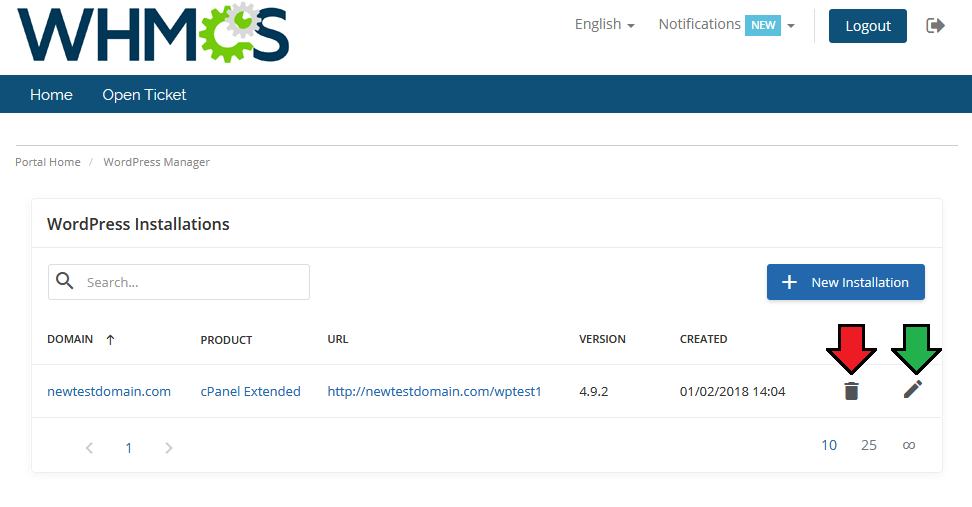
| Once you have successfully created a new installation, you can edit its advanced options (the green arrow) or simply remove it in case you no longer need it (the red arrow). Let us press the green one. |
|
| This is how an example configuration of your installation may look like: |
|
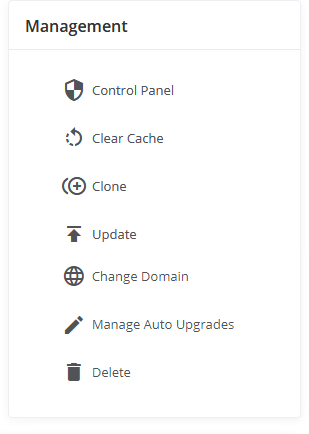
In the 'Management' area you can find the following options:
|
|
Plugins
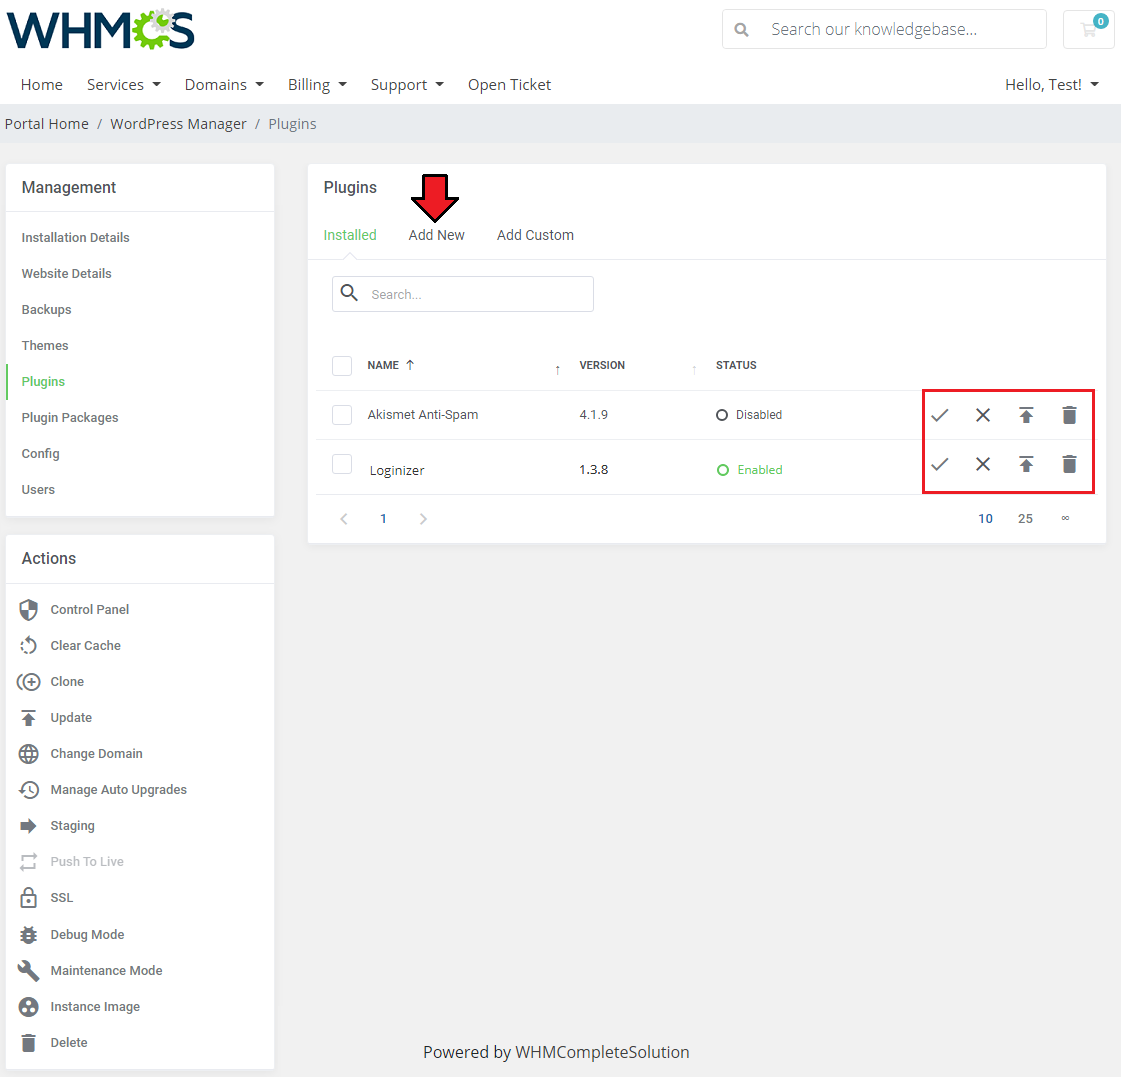
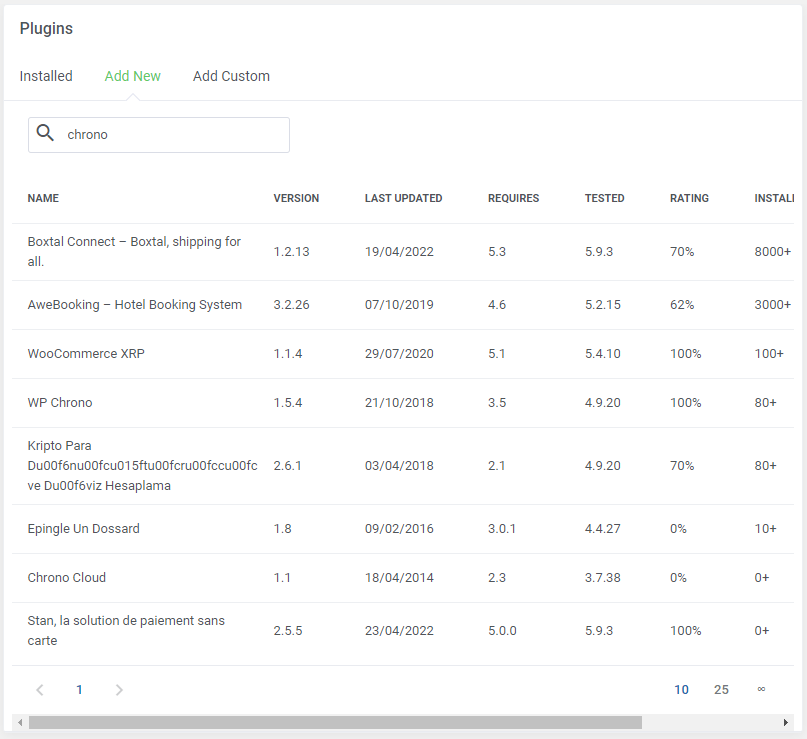
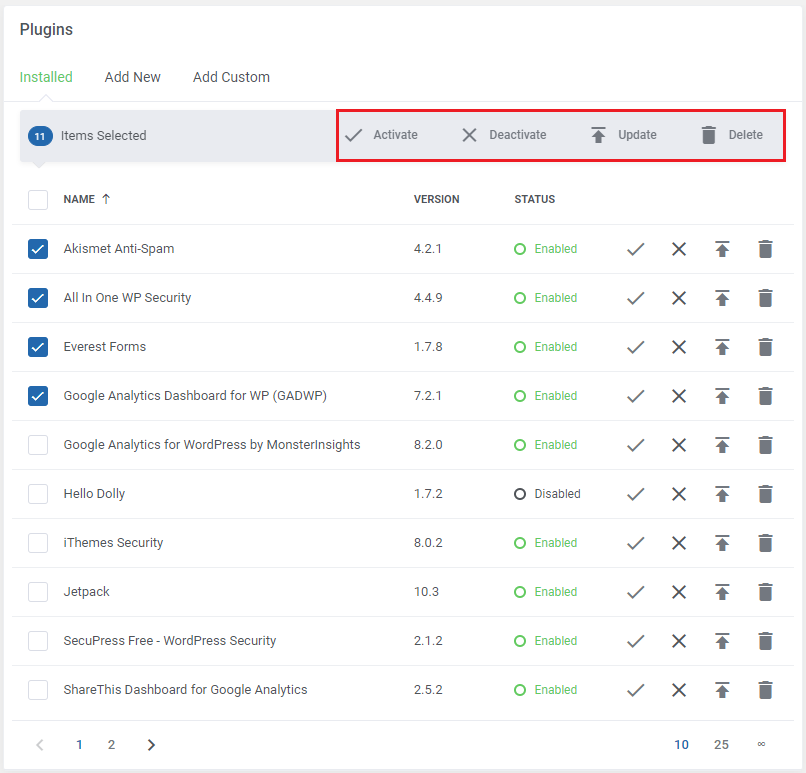
| Here you are enabled to activate, deactivate, delete or update the already existing plugins. You can also add new plugins to your WordPress installation in the 'Add New' tab. |
|
| To add a new plugin, you are required to type in at least the initial letters of the desired plugin's name into the search field to see the actual results. Afterwards, press the symbol marked on the screenshot below, and confirm your choice in the window that should be visible on your screen. |
|
| The 'Mass Action' feature is also present in this section, so you will be able to handle multiple plugins more efficiently and at the same time. |
|
Backups
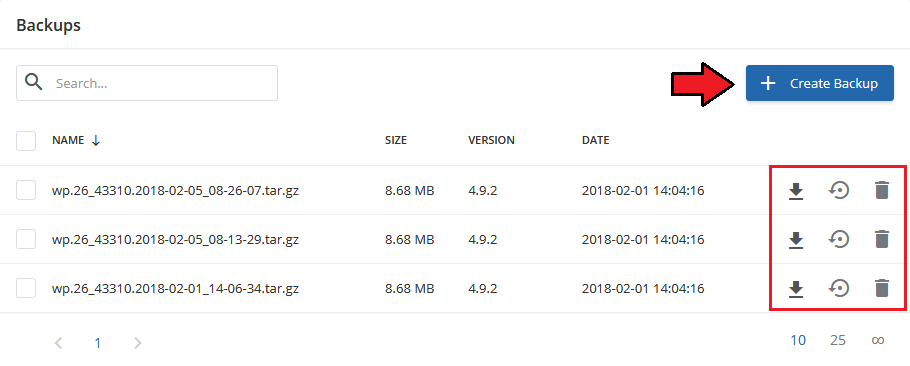
| As the name suggests, this section provides you with an ability to add or modify backups. You are allowed to download, restore and delete a particular backup. |
|
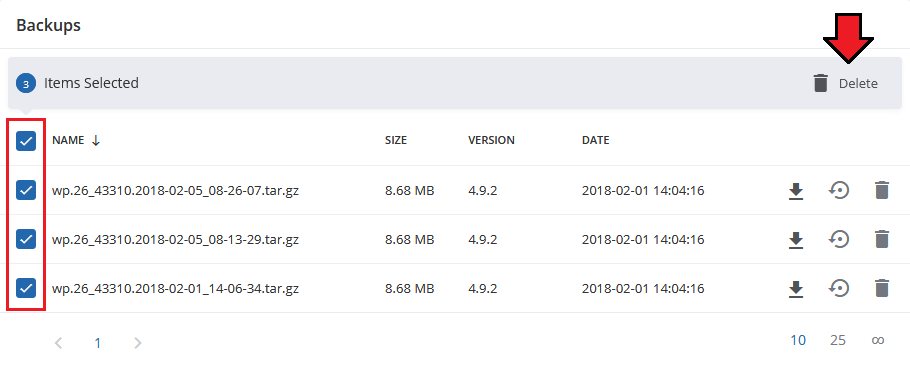
| Here you can delete multiple backups at once. See the screenshot below. |
|
Config
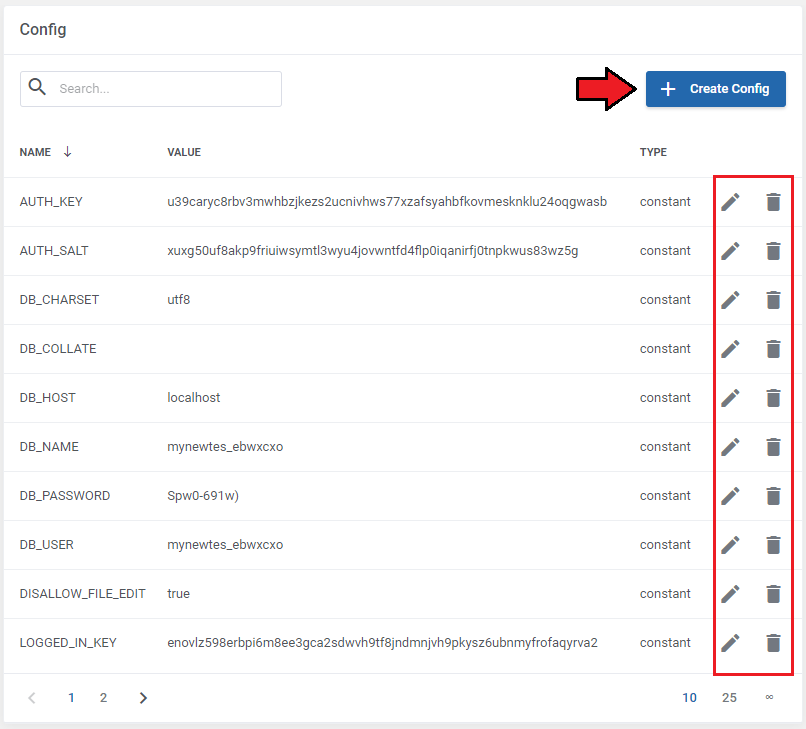
| In this section you can directly manipulate records from the wp-config.php file. This file is located in the root of your WordPress file directory and contains your website's configuration details, such as database connection information. You are allowed to edit or delete already existing config records as well as creating a new ones. Important: Be particularly careful when editing these config records! You can find more information about edition 'wp-config.php' file here. |
|
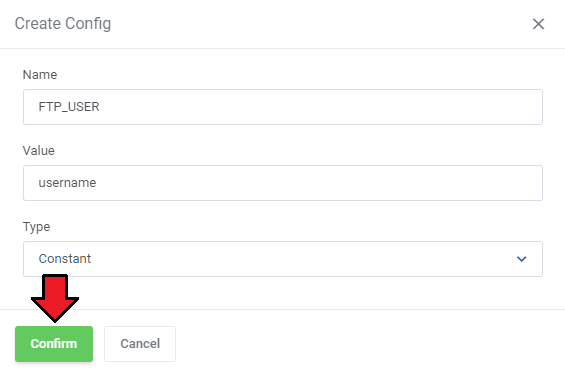
| When creating a new config record enter its proper name, value and chose one of three types ( 'Constant', 'Variable' or 'All' ). |
|
Tips
1. In case you wish to remove one of your plugins from WHM, make sure you delete the additional content too:
/usr/local/cpanel/Cpanel/API/Wordpress.pm /usr/local/cpanel/share/WordPressManager/wp |
| 2. If you wish to change the names of your WordPress installations scripts to more friendly in the client area you can do this in language file. Simply open your default 'english.php ' file located in '/yourWHMCS/modules/addons/WordpressManager/langs' directory and add a new language record in the following format: $_LANG['WordPress Script Name']="WordPress Friendly Name"; |
Update Instructions
| Essential guidance through the process of updating the module is offered here. Important: If you are updating from a previous version of WordPress Manager with cPanel you have to also update files and run again the installation script on your WHM server. |
Common Problems
| 1. When you have problems with connection, check whether your SELinux or firewall does not block ports. |
| 2. If you do not see the config records make sure that you have also updated the WHM files to the latest version. |