Hosting Quota Notifications 1.X For WHMCS
From ModulesGarden Wiki
(Difference between revisions)
|
|
| Line 329: |
Line 329: |
| | ====Logs==== | | ====Logs==== |
| | {| | | {| |
| − | |style="padding: 10px 0px 15px 15px;"| | + | |style="padding: 10px 0px 15px 15px;"|In '' 'Logs' '' section you have a full view on any attempted action on any contract. |
| − | |}
| + | |
| − | {|
| + | |
| − | |style="padding: 0px 0px 20px 25px;"|[[File:RB_.png]]
| + | |
| − | |}
| + | |
| − | {|
| + | |
| − | |style="padding: 0px 0px 15px 15px;"|
| + | |
| − | |}
| + | |
| − | {|
| + | |
| − | |style="padding: 0px 0px 20px 25px;"|[[File:RB_.png]]
| + | |
| − | |}
| + | |
| − | {|
| + | |
| − | |style="padding: 0px 0px 15px 15px;"|
| + | |
| | |} | | |} |
| | {| | | {| |
Revision as of 11:22, 23 November 2015
| Recurring Billing For WHMCS .....
|
| ✔ Supports WHMCS Templates Five and Six
|
| ✔ Supports WHMCS V5 and V6
|
Installation
This tutorial will show you how to successfully install and configure Recurring Billing For WHMCS.
We will guide you step by step through the whole installation and configuration process.
|
Installation
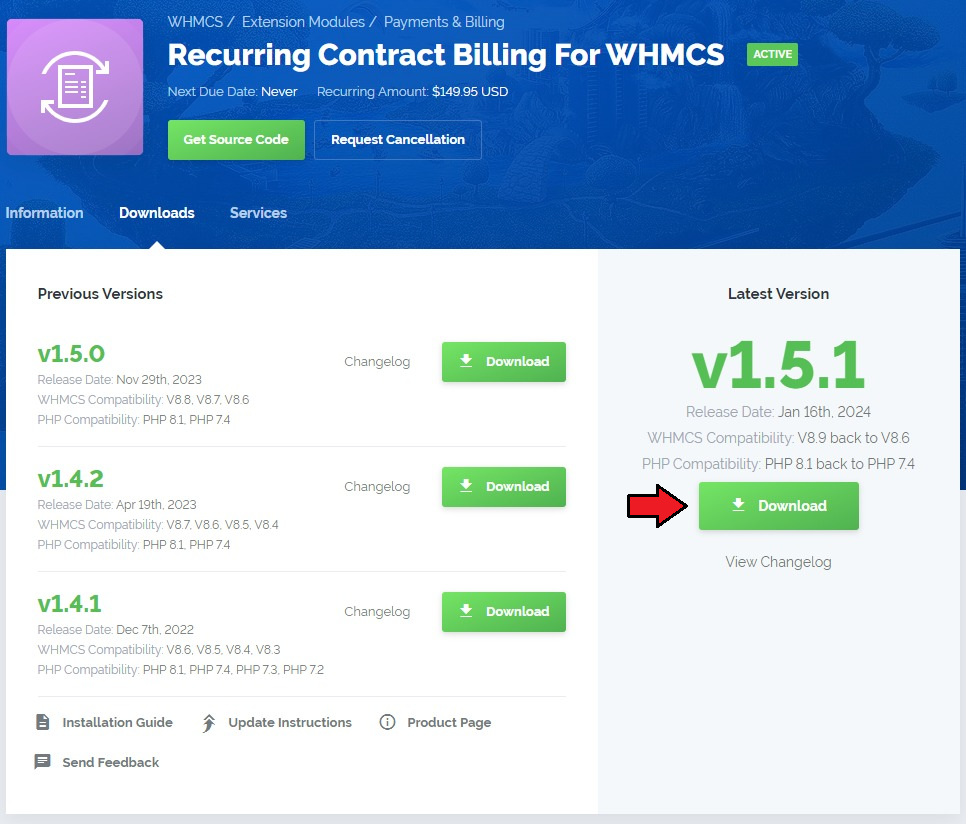
| 1. Log in to your client area and download Recurring Billing For WHMCS.
|
2. Upload and extract the module into the main WHMCS directory.
Files in your WHMCS directory should look like on the following screen.
|
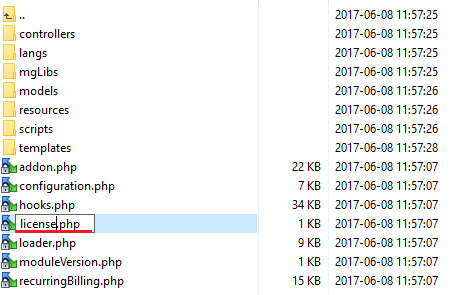
3. When you install Recurring Billing For WHMCS for the first time you have to rename 'license_RENAME.php' file.
File is located in 'modules/addons/recurring_billing/license_RENAME.php'. Rename it from 'license_RENAME.php' to 'license.php'.
|
4. In order to configure your license key, you have to edit the previously renamed 'license.php' file.
Enter your license key between quotation marks as presented on the following screen. You can find your license key in your client area → 'My Products'.
|
Activation
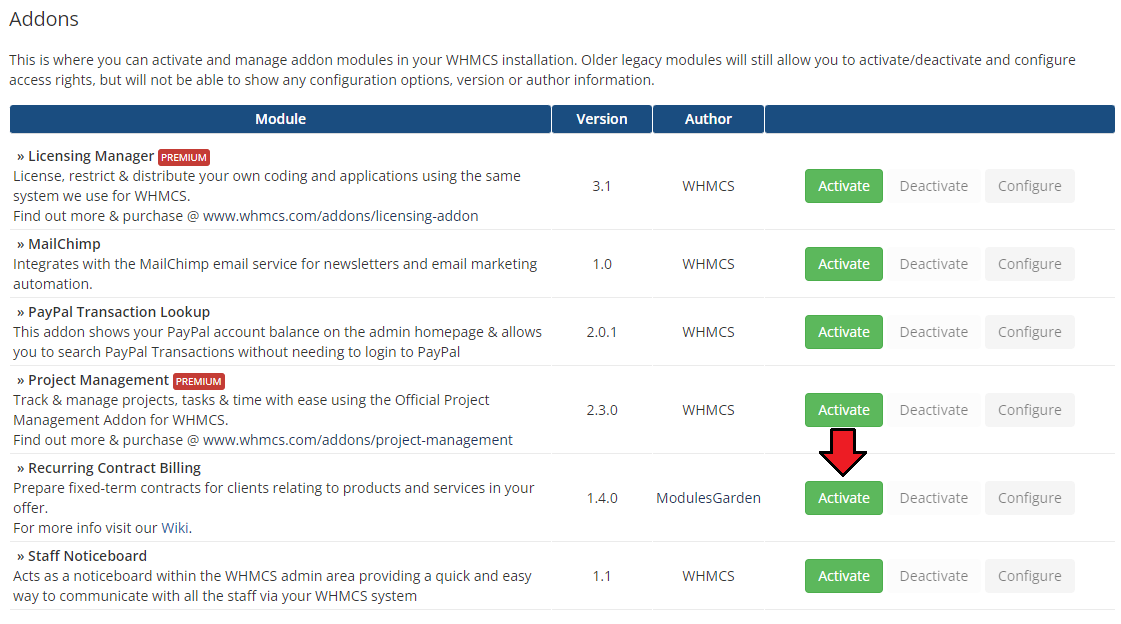
5. Now, you have to activate the module in your WHMCS system.
Log in to your WHMCS admin area and proceed to 'Setup' → 'Addon Modules'.
Afterwards, find 'Recurring Billing' and press 'Activate' button.
|
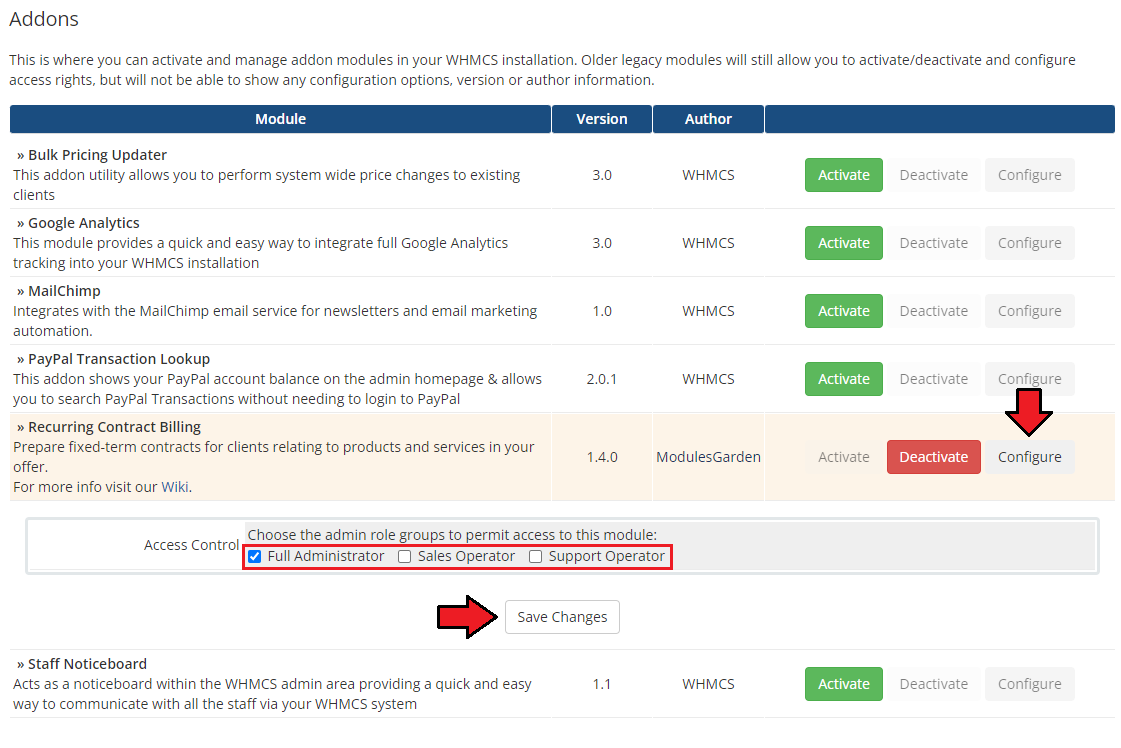
6. In the next step you need to permit access to this module.
To do so, click on 'Configure' button, tick checkboxes to assign desired admin roles.
Press 'Save Changes'.
|
7. Now it is time to insert proper integration codes. Note that this step is required only if you are using WHMCS V5 x.x.
There is no integration required for WHMCS V6 x.x.
Open the currently used template. For presentation purposes we opened modern template. You will them in 'yourWHMCs/template/orderforms/modern/viewcart.tpl'.
Find line 450. Insert the below code inside this line and save the changes.
 <div class="signupfields">
                  <h2>Contracts</h2>
                  {$contractOutput}
              </div>
Remember that you must insert the code to every used order form template.
That is how a properly inserted code should look like:
|
| 8. You have just successfully installed Recurring Billing For WHMCS!
|
Configuration and Management
Once you have properly installed and activated the product you may move to its actual configuration.
Read the below sections to learn how to use Recurring Billing For WHMCS completely.
|
Configuration
In order to start using your Recurring Billing For WHMCS move to 'Addons → Recurring Billing'.
By default, you will be moved to the addon's dashboard with a guide opened. You will find there short notes on how to configure the product.
In this article we will expand these instructions a bit more.
|
| Hide the guide when you have completed the configuration and learn how to reconstruct the process.
|
Contract Content
| First off all, create your first contract's content. To do so, move to 'Contract Content' section and press 'Add New' button.
|
Here you can compose the content of a contract.
- Type in the ' 'Name' of a contract
- Fill out the filed with 'Content', ' you may use 'Available Merge Fields' to do so
- Client Fields
- Product Fields
- Contract Fields
- Use advanced edition tool to perfectly shape the contract.
|
| Do not forget to 'Save' the changes once you have finished.
|
Your newly created contract draft is now visible on the list.
Use action buttons to edit the contract or delete it if you are sure it is useless.
|
Contract Templates
| Now, that you have a contract's content draft, move to 'Contract Templates'.
In this section you can predefine which contract content draft and a specific product a template will refer to.
Press 'Add New' to begin.
|
Fill out the contract template form. Name the template, as mentioned before, choose Content Name from the ones you prepared previously (see 'Contract Content' section).
Select product that this template will be available with.
Note! You can assign only one template to a single product!
Choose Fixed or Percentage values for Promotion and Penalty amounts.
Remember to 'Save' the changes.
|
Once you have added a new template, you have to fill out contract's details. An appropriate box should appear next to the template form.
Find there the payment type and the price set up, number of signed contracts and checkbox,
which when selected allows to order assigned product without the need to accept this contract.
Press '+' to see more.
|
In this form you can define:
- Length - how long such contract shall last
- Promo Amount - as fixed amount or percentage, depending on the previously selected type in the template form
- Penalty Amount - as fixed amount or percentage, depending on the previously selected type in the template form
- Notice Period - number of days when a client may resign from the contact without any consequences or giving reason of resignation
Next to each of the options (except 'Notice Period') there will appear counted pricing of product.
Remember to 'Save' the changes again.
|
Configuration
| The last step mentioned in the 'Guide' is setting up 'Notifications' and 'Penalty'. These options can be found under 'Configuration' tab.
|
Select which email notifications you want your clients to receive, enter number of days before due date to send the notification.
Enabled notifications are sent automatically with daily cron run.
|
Define number of days when a client can be late with payment.
If a client misses to make payment for longer than the specified here number of days, a penalty will be imposed on such client.
Note: penalty type and amount are specified in 'Contract Template' details.
|
Here you can also turn off the guide or turn it on again once you have hidden it.
'Save' the changes once your configuration is ready.
|
Management
Client Area
Admin Area
Signed Contracts
Dashboard
Logs
| In 'Logs' section you have a full view on any attempted action on any contract.
|
Additional Information
Tips
Common Problems
| 1. When you have problems with connection, check whether your SELinux or firewall does not block ports.
|
| 2. Remember that Recurring Billing For WHCMS contracts can be applied only to products with recurring payment type.
|


