Access Control Tool
(→Rules) |
(→Rules) |
||
| Line 39: | Line 39: | ||
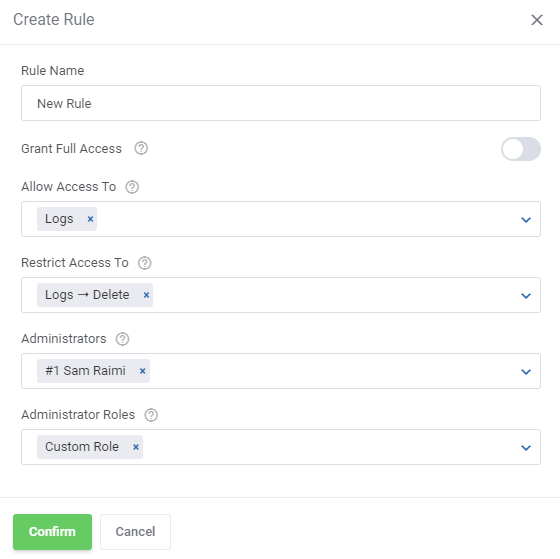
*'''Allow Access To''' - Designate the resources that the specified personnel will have access to. | *'''Allow Access To''' - Designate the resources that the specified personnel will have access to. | ||
*'''Restrict Access To''' - Specify the resources that the specified personnel will not have access to. | *'''Restrict Access To''' - Specify the resources that the specified personnel will not have access to. | ||
| − | *'''Administrators''' - Specify which singular administrators will be subject to the new rule. If the specific administrator is already included in the group you have picked, you do not need to add | + | *'''Administrators''' - Specify which singular administrators will be subject to the new rule. If the specific administrator is already included in the group you have picked, you do not need to add them separately. <br/> '''''Note:''' All restrictions for specific administrators are summed with the restrictions on their role groups, across all rules.'' |
*'''Administrator Roles''' - Specify which administrator role groups will be subject to the new rule.<br/> | *'''Administrator Roles''' - Specify which administrator role groups will be subject to the new rule.<br/> | ||
'''Important:''' When picking specific sections, keep in mind that allowing a parent section '''will also allow all of its children.''' <br/> | '''Important:''' When picking specific sections, keep in mind that allowing a parent section '''will also allow all of its children.''' <br/> | ||
Revision as of 14:08, 25 November 2024
Contents |
About Access Control Tool
| The Access Control tool lets you define which sections and features of the module can be accessed by specific administrators. It also maintains detailed logs of admin activities, providing a clear record for accountability. With this tool, you can easily manage permissions and ensure that access is tailored to your team’s needs. |
- Available in Addon Modules:
| ✔ Hosting Renewals For WHMCS |
| ✔ Password Manager For WHMCS |
| ✔ Recurring Contract Billing For WHMCS |
| ✔ Report Generator For WHMCS |
| ✔ WordPress Manager For WHMCS |
Rules
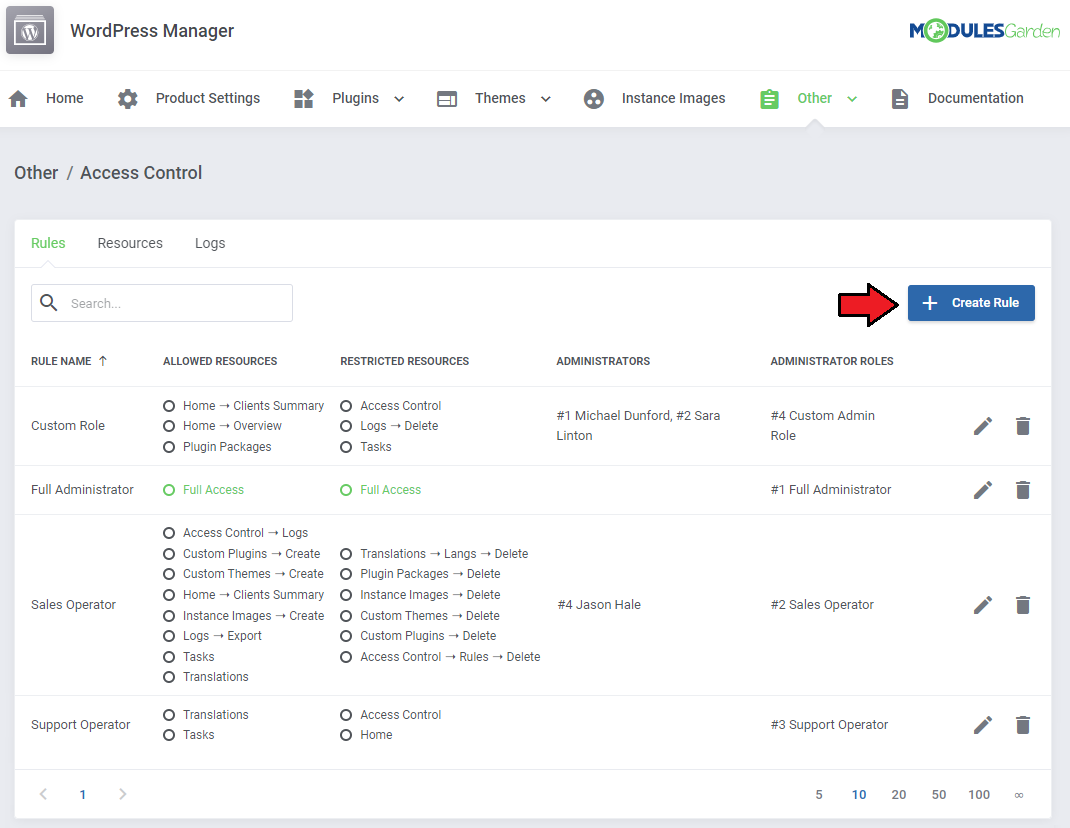
| The Access Control Tool can be located in one of two places, depending on the layout of the addon module menu. It may either appear directly in the main menu or under the "Other" section, grouped with a few additional features. (This placement is typically used when the addon includes a large number of menu entries). Start with creating a new rule, click on the 'Create Rule' button and a dedicated form will appear. Below you will find a description of every field required in the form. |
|
Fill out the following fields to create resources access rule:
Important: When picking specific sections, keep in mind that allowing a parent section will also allow all of its children. |
|
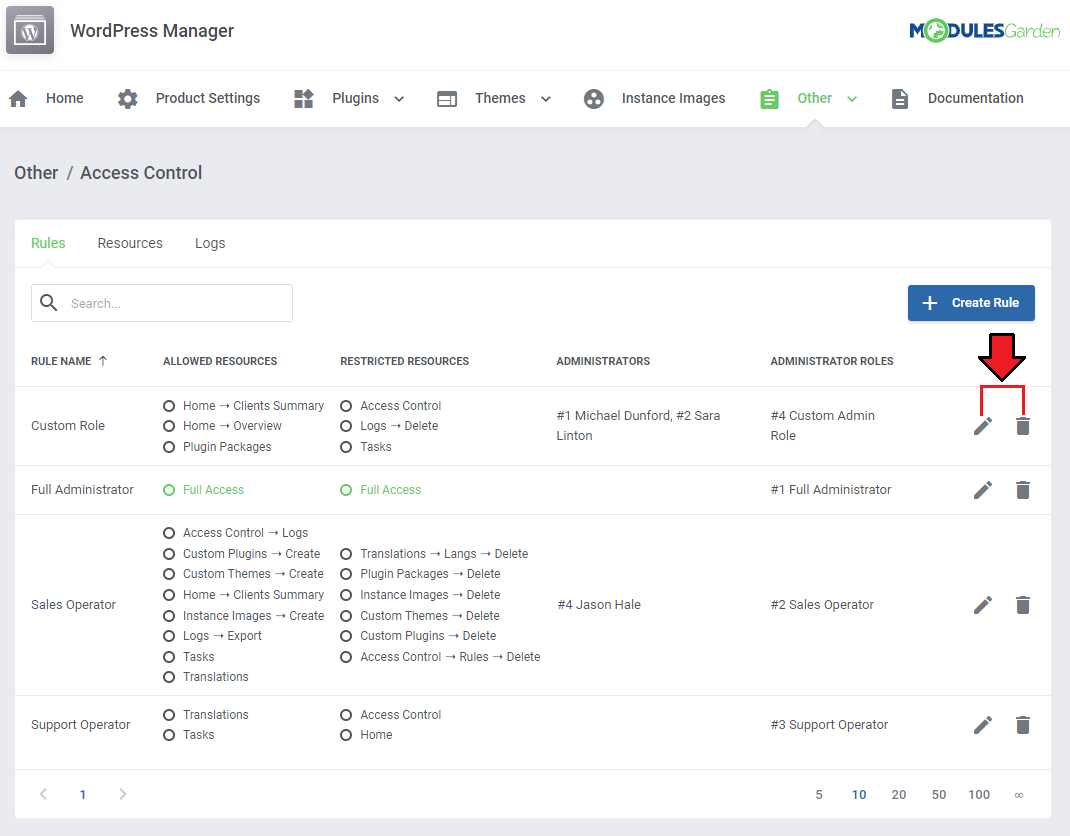
| To edit or delete existing rules, use the icons to the right. |
|
Resources
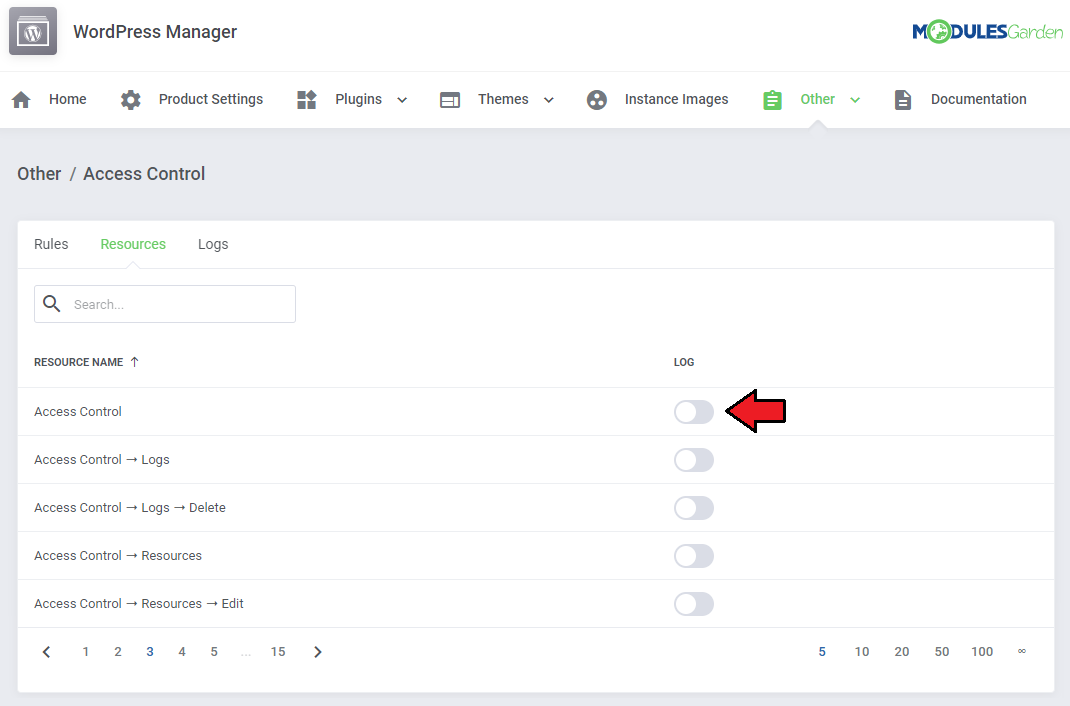
| Use the toggles in the 'Resources' section to specify which of them should be subject to logging. Every time an administrator requests a toggled resource, it will be recorded in the 'Logs' section. |
|
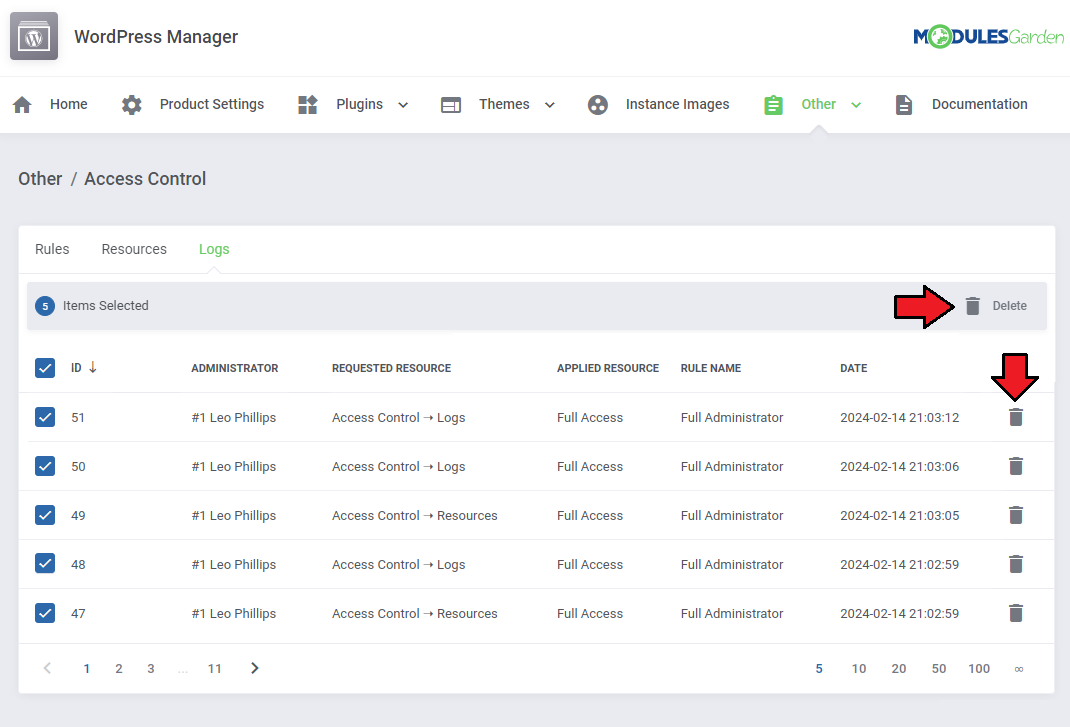
Access Control Logs
The logs entries include:
Use the trash bin icons to delete specific logs, or utilize the mass action function to delete multiple logs at once. |
|