Hosting Quota Notifications 1.X For WHMCS
From ModulesGarden Wiki
(Difference between revisions)
|
|
| Line 2: |
Line 2: |
| | <meta name="description" content="ModulesGarden Wiki Contains All The Information You Need About The GoDaddy Domain Registrar For Blesta Module."></meta> | | <meta name="description" content="ModulesGarden Wiki Contains All The Information You Need About The GoDaddy Domain Registrar For Blesta Module."></meta> |
| | | | |
| − | =About [http://www.modulesgarden.com/products/whmcs/godaddy_domain_registrar_blesta/features Godaddy Domain Registrar For Blesta]= | + | =About [https://www.modulesgarden.com/products/whmcs/godaddy-domain-registrar-blesta Godaddy Domain Registrar For Blesta]= |
| | {| | | {| |
| | |style="padding: 10px 0px 10px 0px;"|'''Godaddy Domain Registrar For Blesta''' enables registration of GoDaddy domains in your Blesta system.<br /> | | |style="padding: 10px 0px 10px 0px;"|'''Godaddy Domain Registrar For Blesta''' enables registration of GoDaddy domains in your Blesta system.<br /> |
Revision as of 09:28, 9 June 2017
Godaddy Domain Registrar For Blesta enables registration of GoDaddy domains in your Blesta system.
Your clients will be able to order and manage their domains directly in your Blesta client area.
The module is an excellent tool for every GoDaddy API Reseller who works with Blesta platform.
|
| ✔ Access Shopper ID And Password
|
| ✔ Log In To Shopper Panel
|
| ✔ Toggle EPP Code Visibility
|
| ✔ Register/Transfer/Renew/Cancel Domain
|
| ✔ Access Shopper ID And Password
|
| ✔ Toggle EPP Code Visibility
|
| ✔ Supports 301 Different TLDs & gTLDs
|
Installation and Configuration
In this brief tutorial we will show you how to successfully install and set up GoDaddy Domain Registrar For Blesta.
We will guide you step by step through the whole installation process.
|
Installation
1. In the beginning make sure that you are the GoDaddy API Reseller and your API User account is active.
Info: Please note that GoDaddy API Reseller and GoDaddy Reseller are not the same! Our module can be successfully used only with the former account.
|
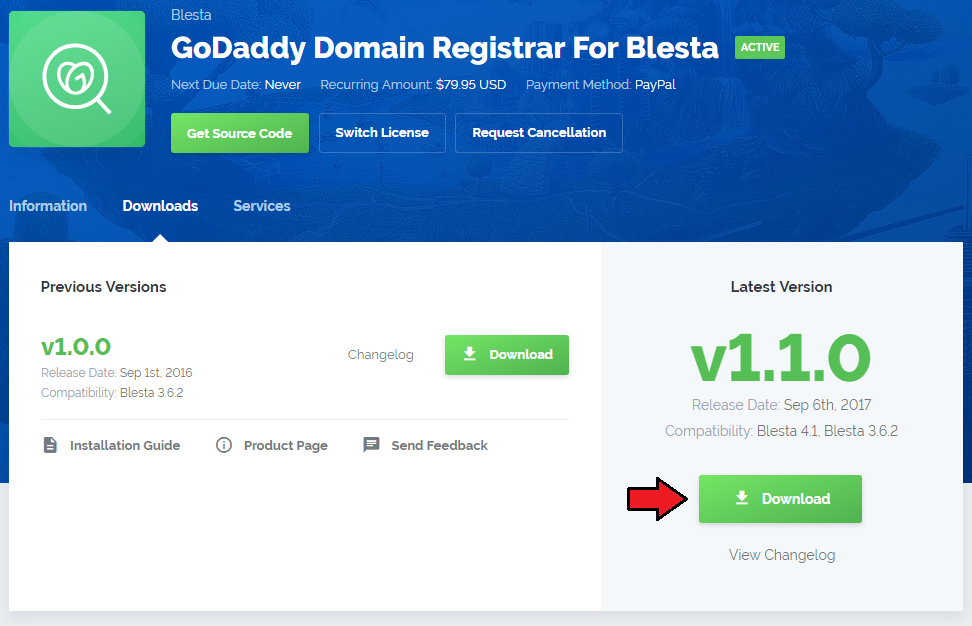
| 2. Log in to your client area and download GoDaddy Domain Registrar For Blesta.
|
3. Upload and extract the module into the main Blesta directory.
Files in your Blesta directory should look like this.
|
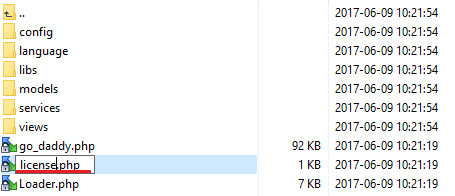
4. When you install GoDaddy Domain Registrar for the first time you have to rename 'license_RENAME.php' file.
File is located in 'components/modules/go_daddy/license_RENAME.php'. Rename it from 'license_RENAME.php' to 'license.php'.
|
5. In order to configure your license key you have to edit a previously renamed 'license.php' file.
Enter your license key between quotation marks as presented on the following screen. You can find your license key in your client area → 'My Products'.
|
Configuration
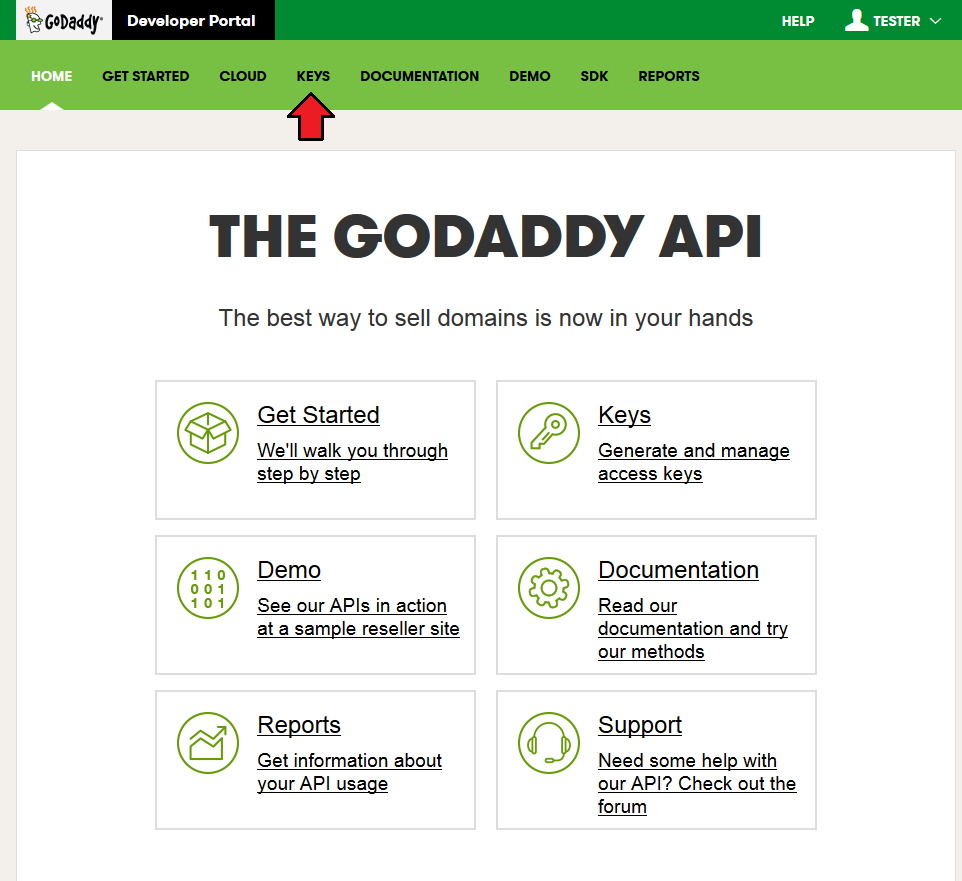
Before you can go one, you must generate your GoDaddy API Key and API Secret. You will need them to activate your registrar module.
Underneath you will find instructions where to find your API details.
|
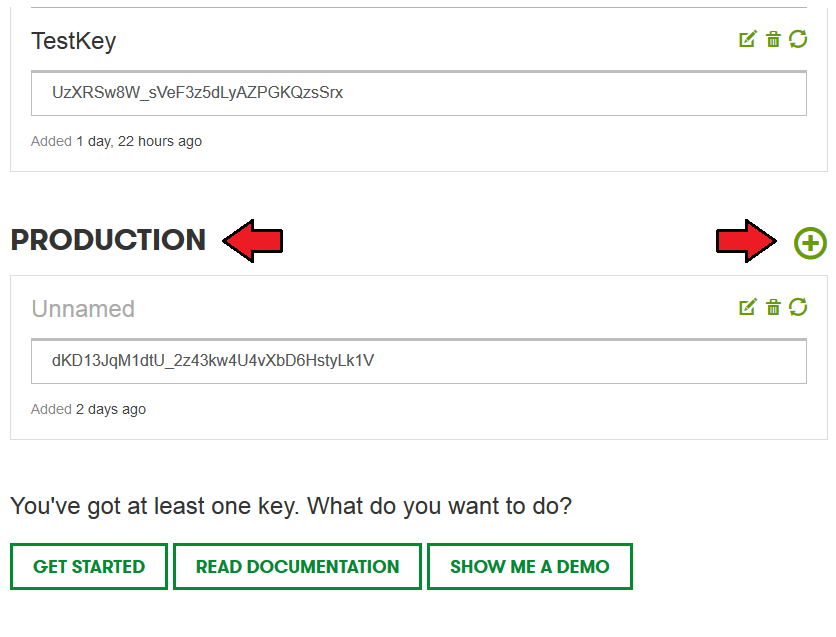
7. You will be moved to a section where keys can be generated and then managed. Please find 'Production' keys.
It should be seen at the bottom of the page, under 'Test' keys.
Press '+' to generate a new key.
|
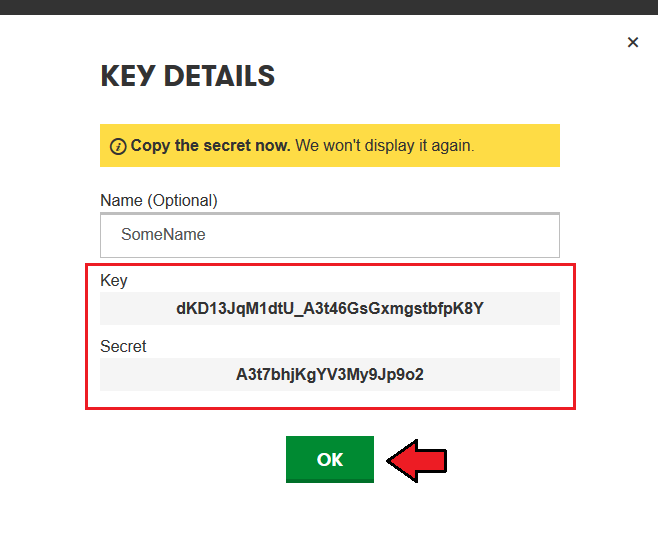
8. Keep your API Key and Secret in a safe place, you will need them in a moment. Note that it is not possible to vie 'API Secret' again!
Press 'OK' to finish.
|
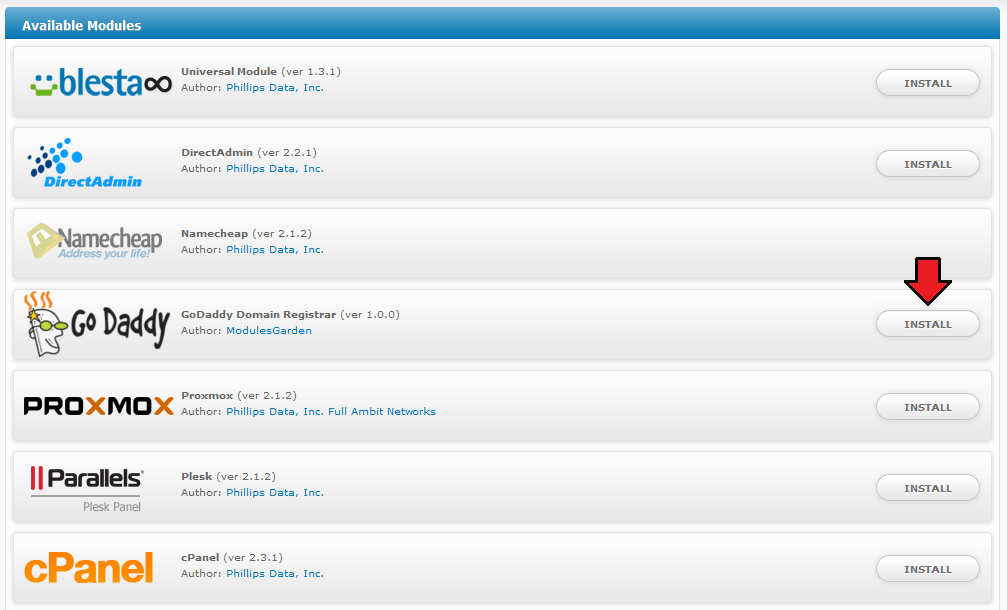
9. Now, log in to your Blesta and proceed to 'Settings' → 'Modules' → 'Available'.
Find 'GoDaddy Domain Registrar' and press 'Install' next to it.
|
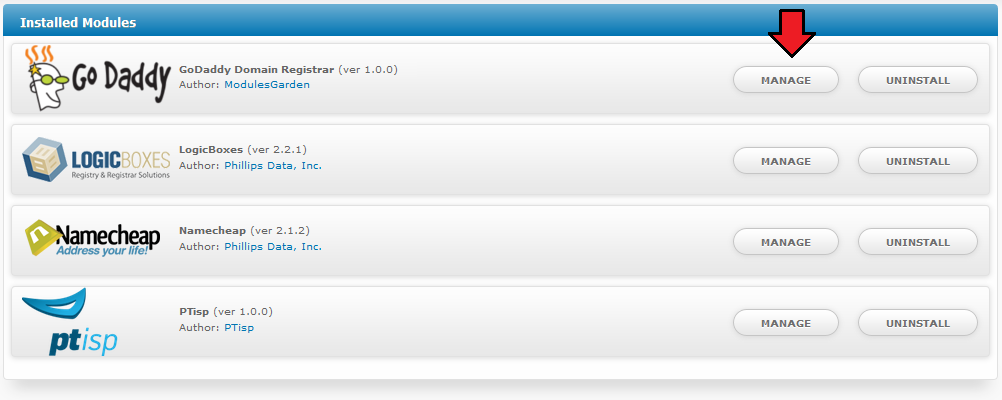
| 10. Afterwards, press 'Manage' to configure your API connection.
|
11. Enter your live API 'API Key', 'API Secret' and a URL to domain management site.
Press 'Save Changes' when ready.
|
Management
GoDaddy Domain Registrar allows you to offer GoDaddy TLDs through the Blesta system to your customers.
In this short guide we will present you the possibilities of our module.
|
Packages
New Package
Before you can offer new TLD for sale you must create some packages with selected TLDs and pricing.
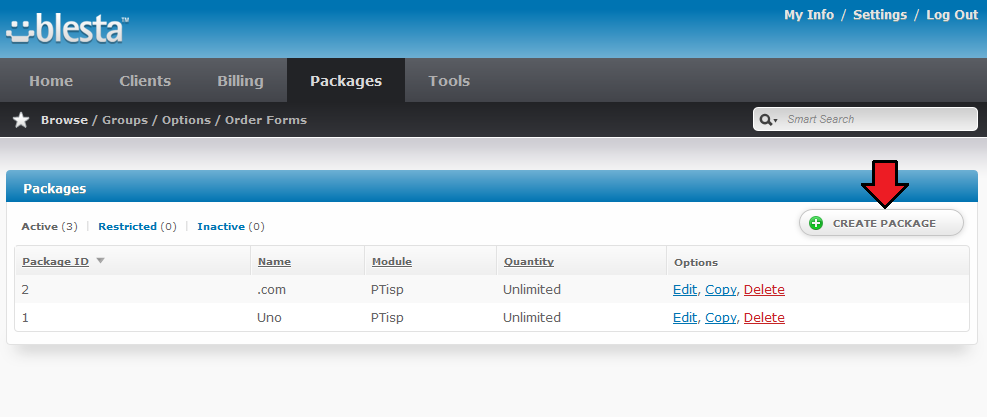
Go to 'Packages' → 'Browse' and press 'Create Package'.
|
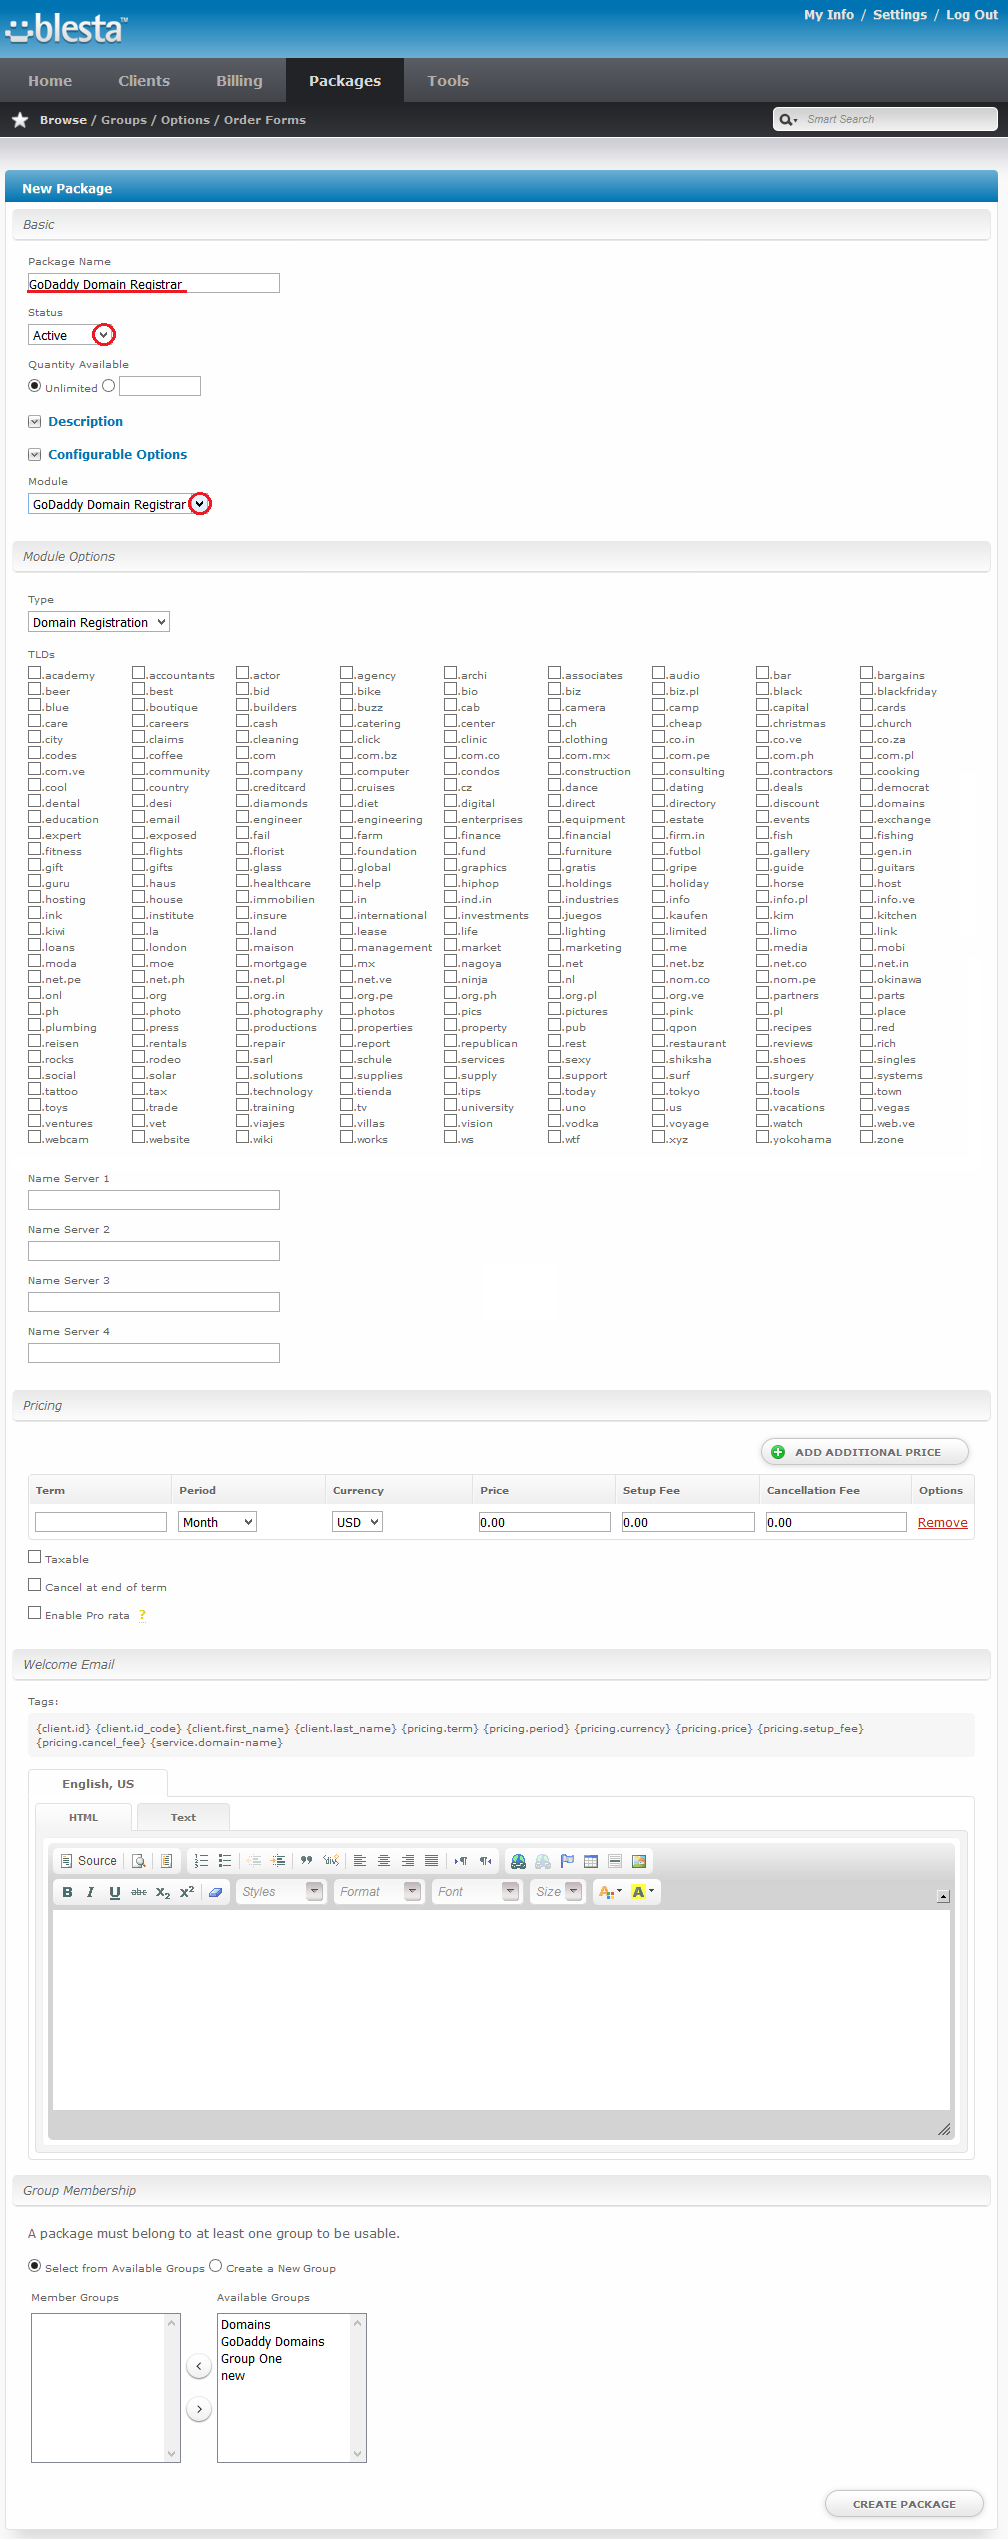
You will see an extensive form. Start with naming your package, select module - 'GoDaddy Domain Registrar' and activate it now.
Surely you can activate it later on.
|
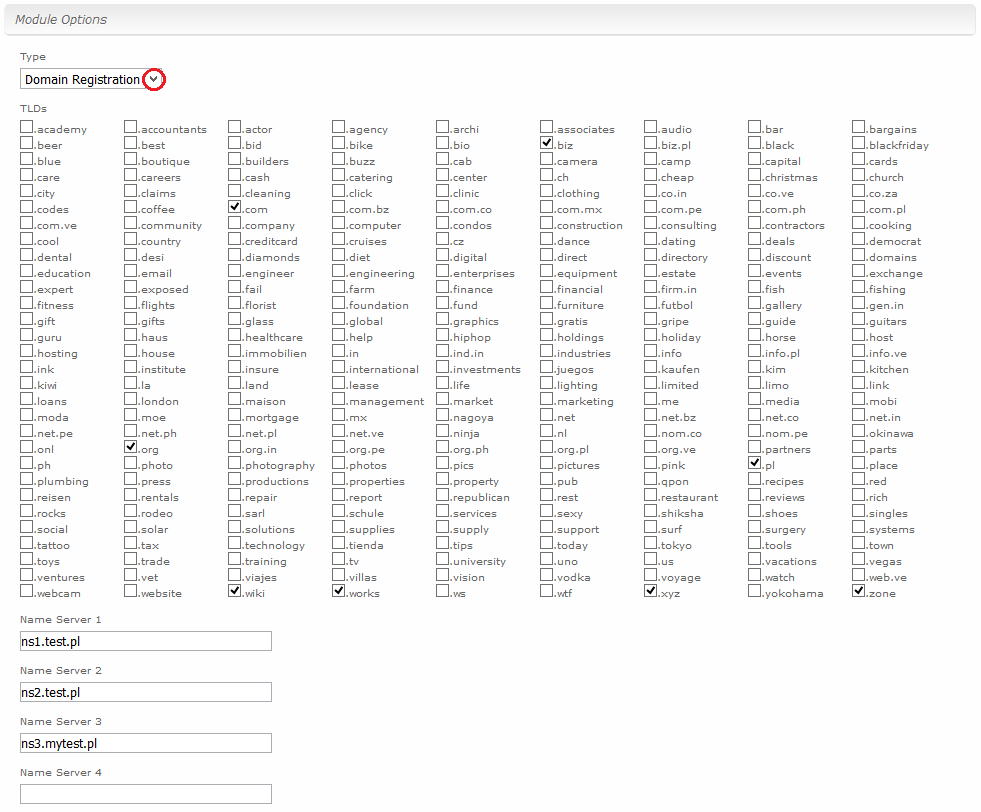
Next, you have to configure your module options.
- select type: 'Domain Registration'
- Select TLD you wish to allow for sale in this package
- provide default nameservers - they can be changed later on.
|
| In the next step set your prices.
|
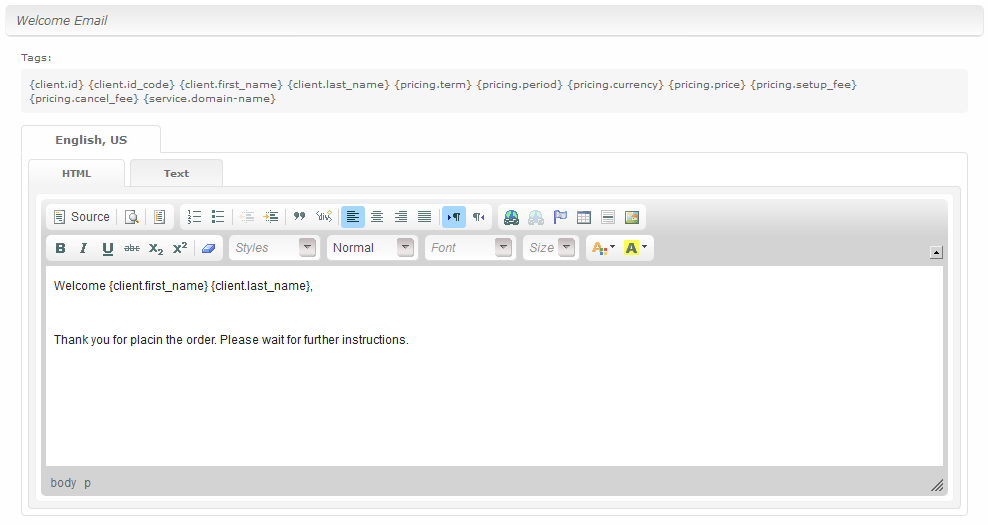
| You may also provide the content of a welcome email.
|
Finally, select a group to which the package will belong to. If you do not have any groups yet, you may quickly create one right now.
Do not forget to press 'Create Package' button in the end.
|
| Your package is ready now, create as many packages as you need to diversify your pricing offer.
|
Order Forms
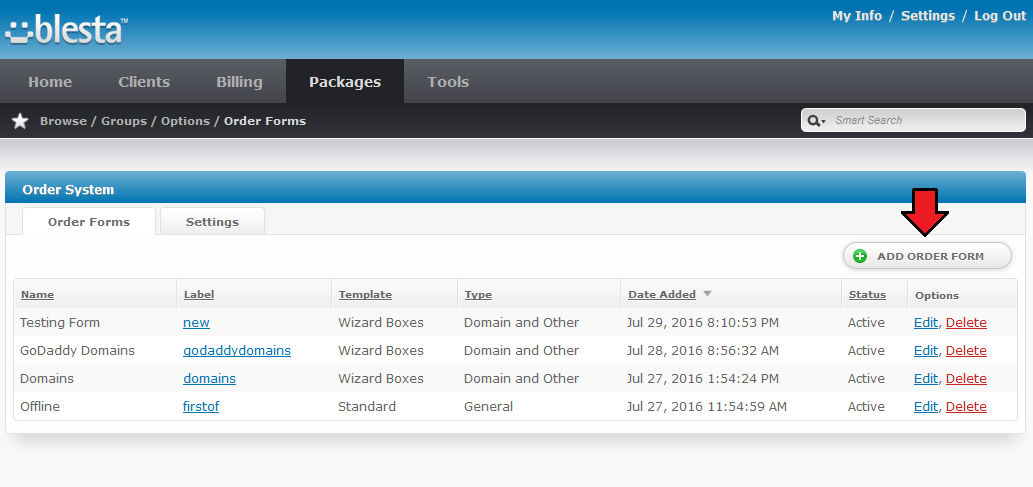
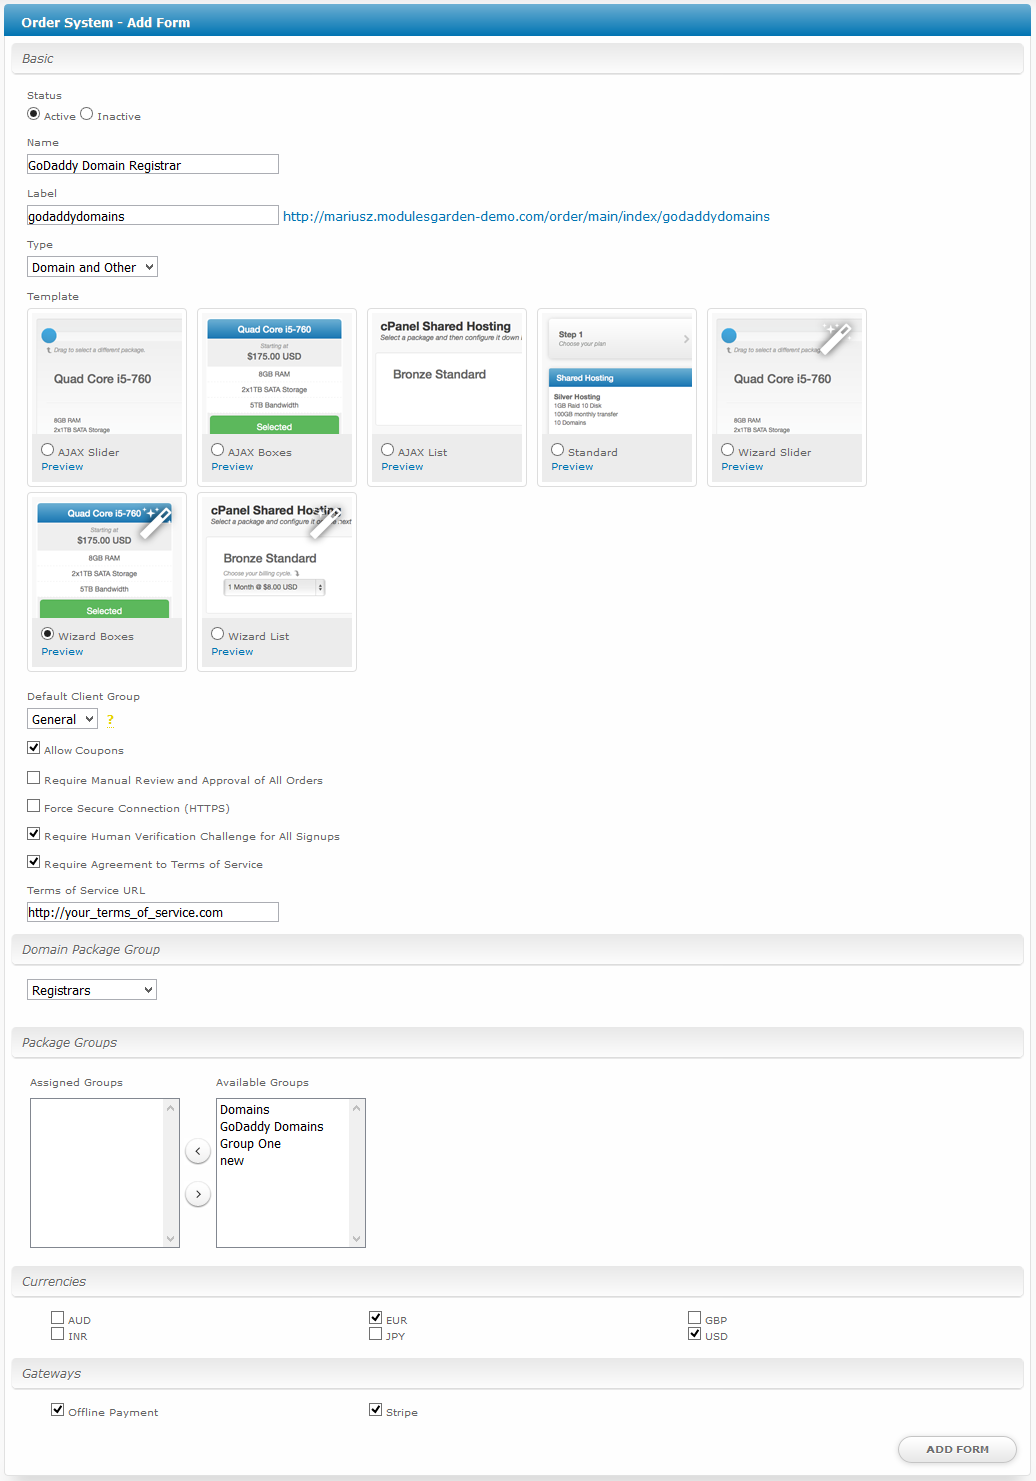
| Once you have your package ready, you have to create a new order form. Move to 'Packages' → 'Order Forms' and press 'Add Order Form'.
|
Provide 'Basic' settings for the order form that will be assigned to your previously created package.
- set the status
- name the order form
- provide a unique label (next to the label a URL to this order form in client area will appear)
- select type of the form - 'Domain And Other'
- choose template from the available
- configure any additional options like allowing coupons or human verification, etc
- select domain package group - the one you created in the previous step
- select allowed currencies and payment gateways
Press 'Add Form' when everything is ready.
|
Ordering
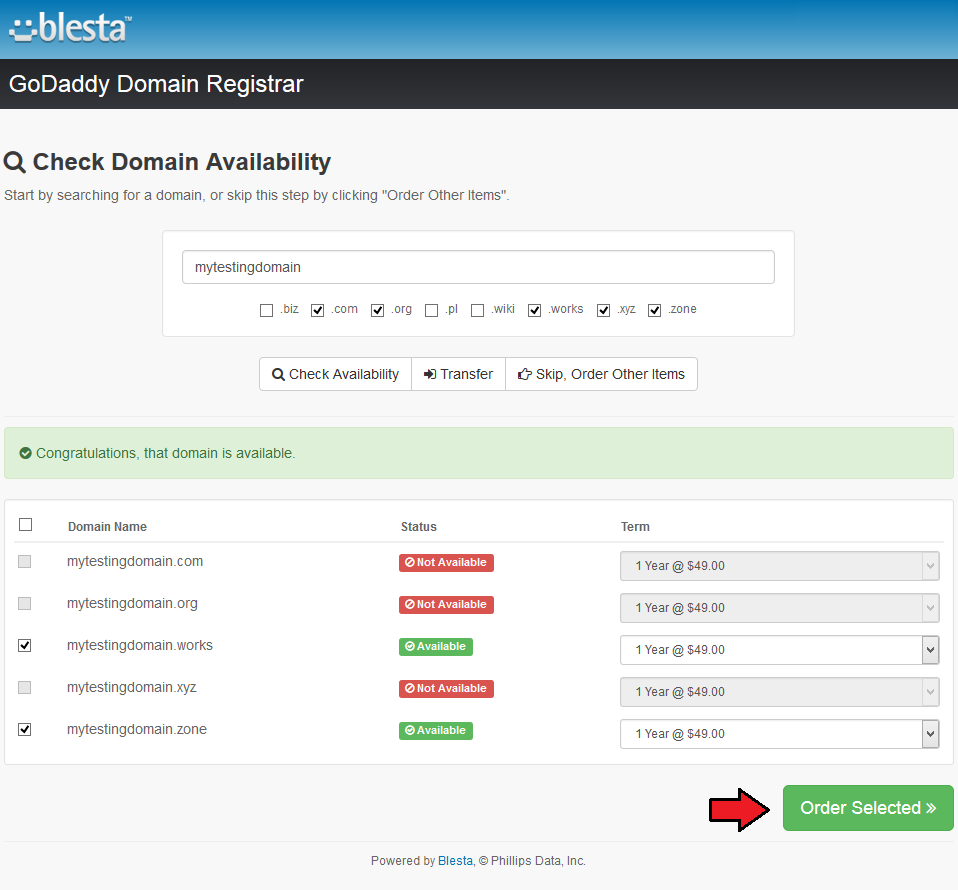
Ordering GoDaddy domains goes alike ordering other domains.
Check domain availability, order selected domain, make the payment and wait until it is activated.
|
Domain Management
Admin Area
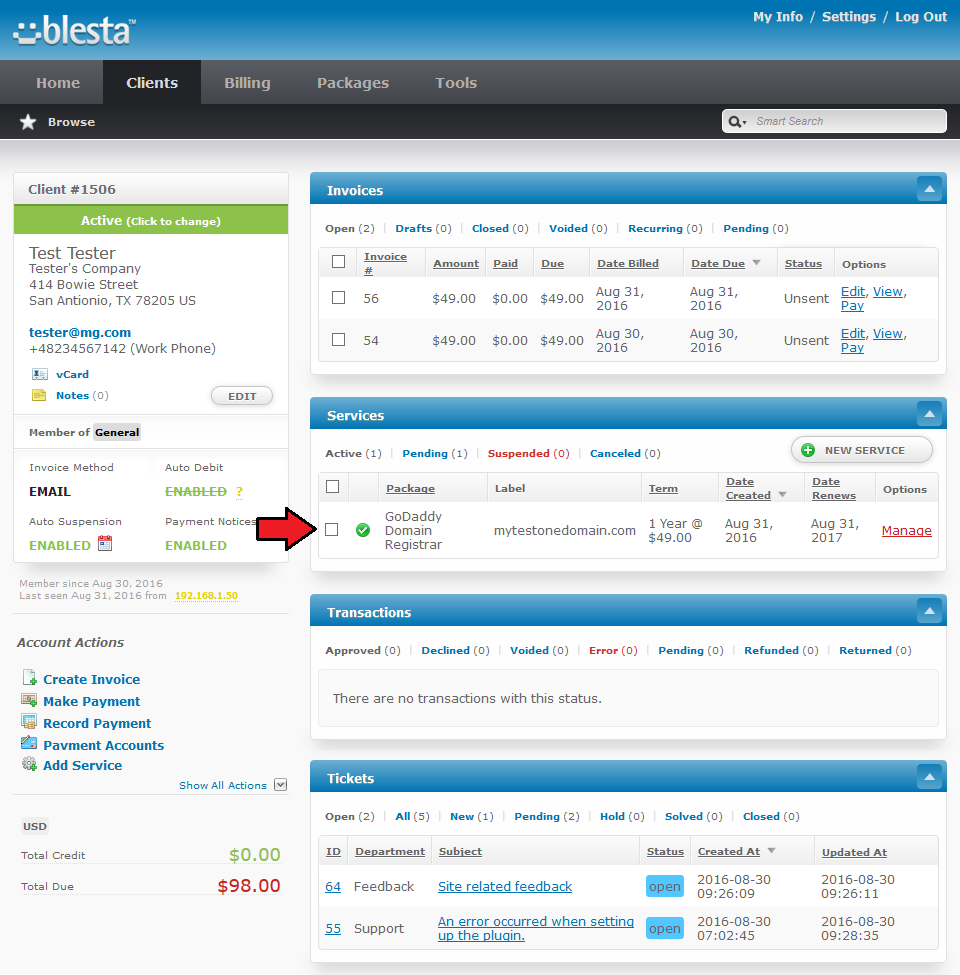
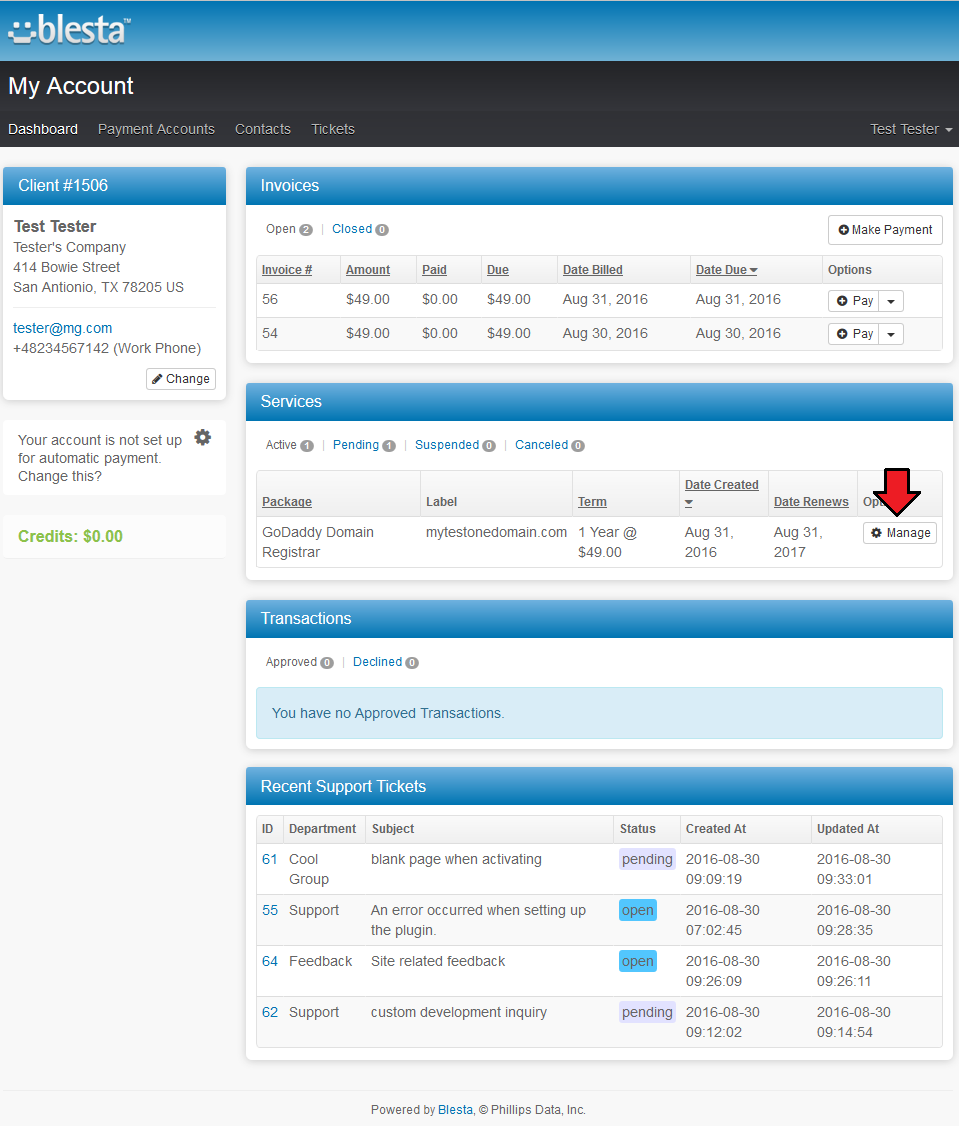
In the admin area you can manage all the aspects of the domain. Find the ordered domains under 'Services' table.
Press 'Manage' to see details of the domain.
|
Basic Options
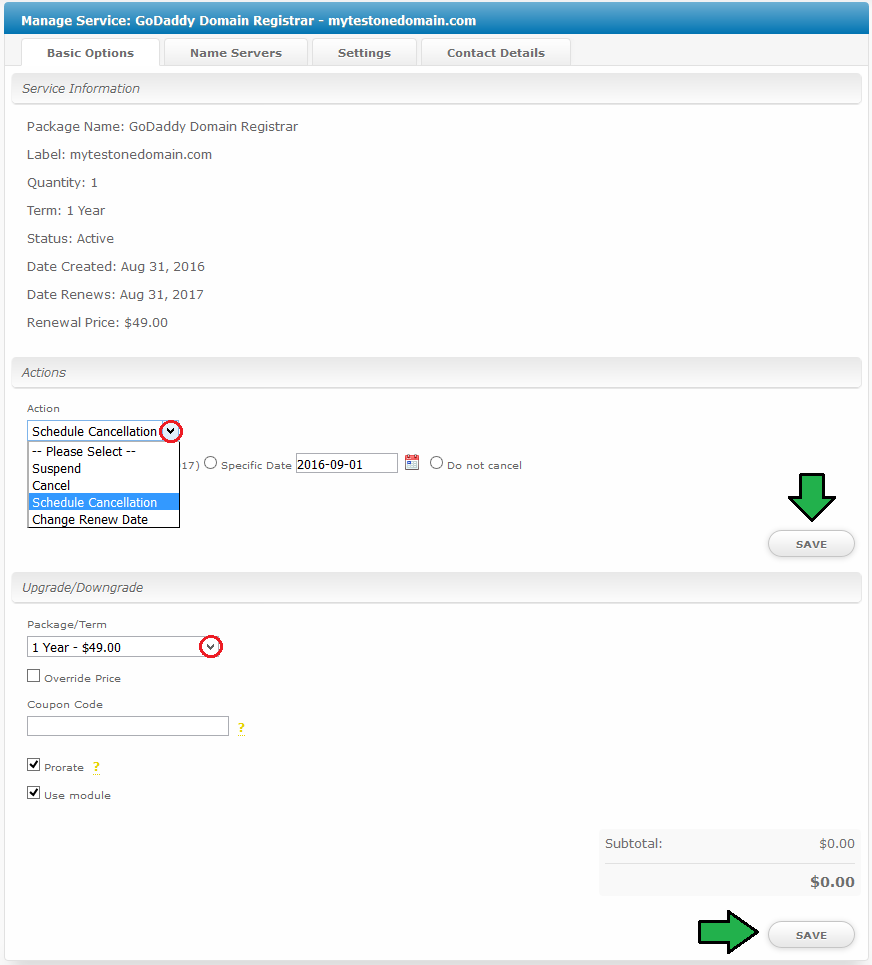
The first tab gathers data on service information, allowed actions and upgrade/downgrade feature.
Service Information:
- some basic data on the domain such as name, label, quantity, dates etc.
Actions:
- Suspend/cancel/schedule cancellation and change renew date
Select action, provide details depending on the chosen action and save the changes.
Upgrade/Downgrade
- If set up, you may choose other package or term from available to upgrade it or downgrade.
- enter coupon code to use
- select prorate
Again save the changes.
|
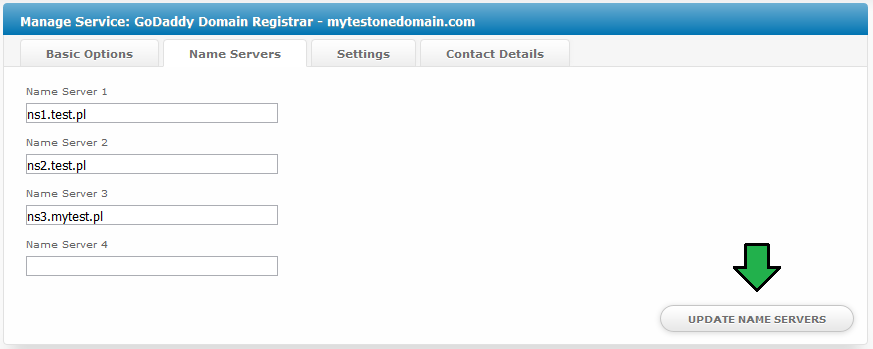
Name Servers
| In the next section you can preview ordered name servers. Update them if required.
|
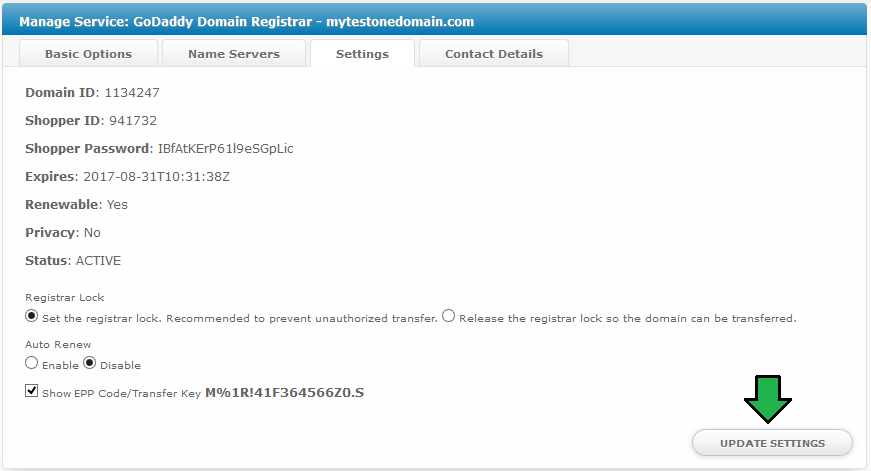
Settings
'Settings' section includes important details, such as:
- Domain ID
- Shopper ID and Password
- exact expiry date
- setup options: renewable/privacy/status
Here you can also:
- manage the registrar lock
- enable/disable auto-renewal option
- preview EPP code
|
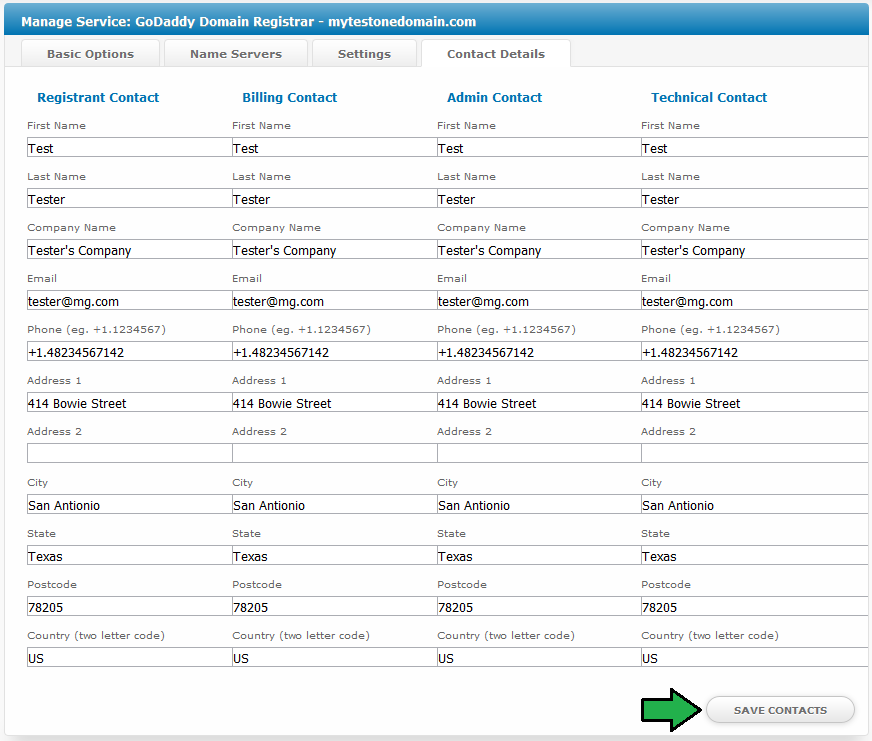
Contact Details
The very last section contains all contact details to:
- Registrant Contact
- Billing Contact
- Admin Contact
- Technical Contact
You may change/update the details here.
|
Client Area
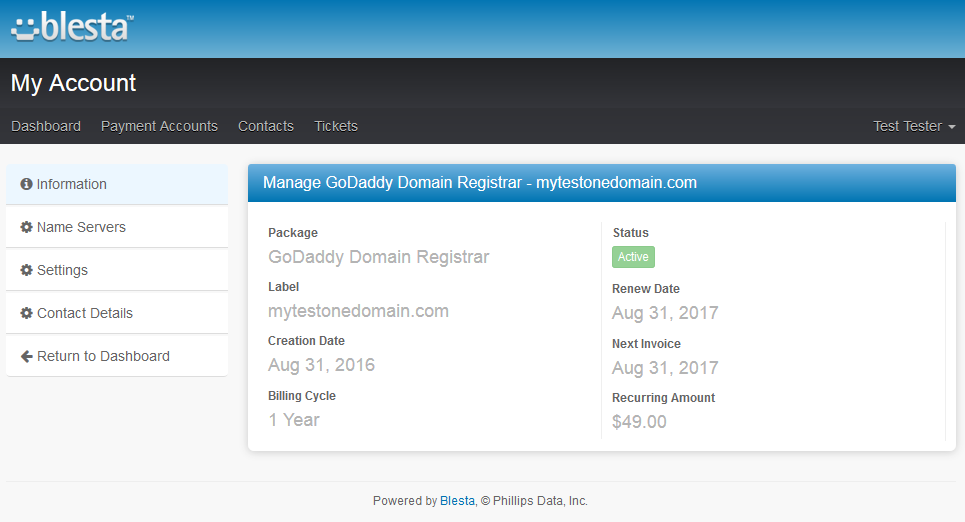
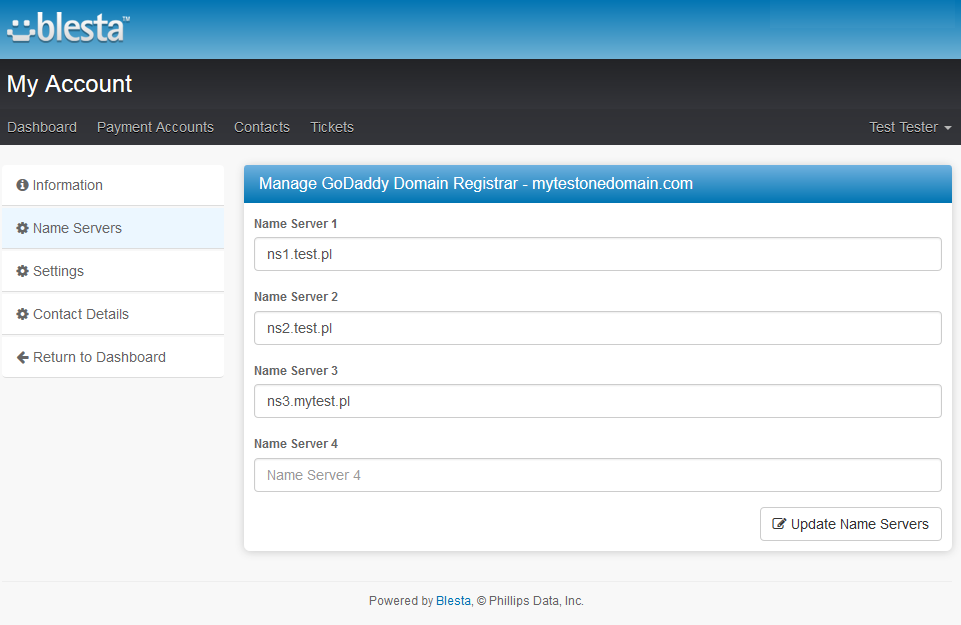
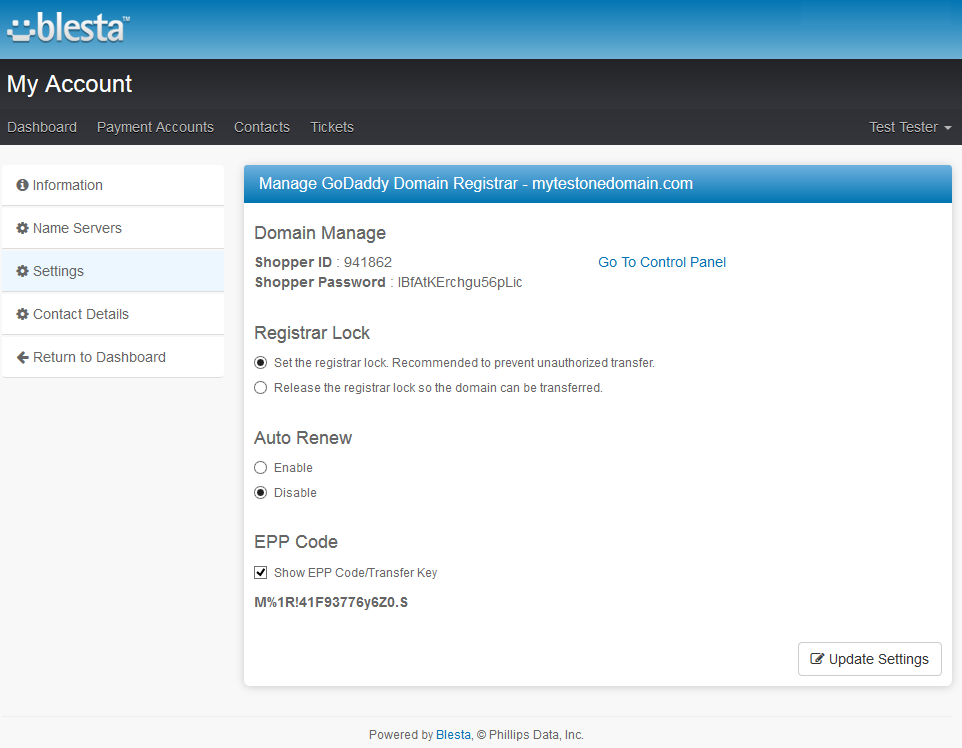
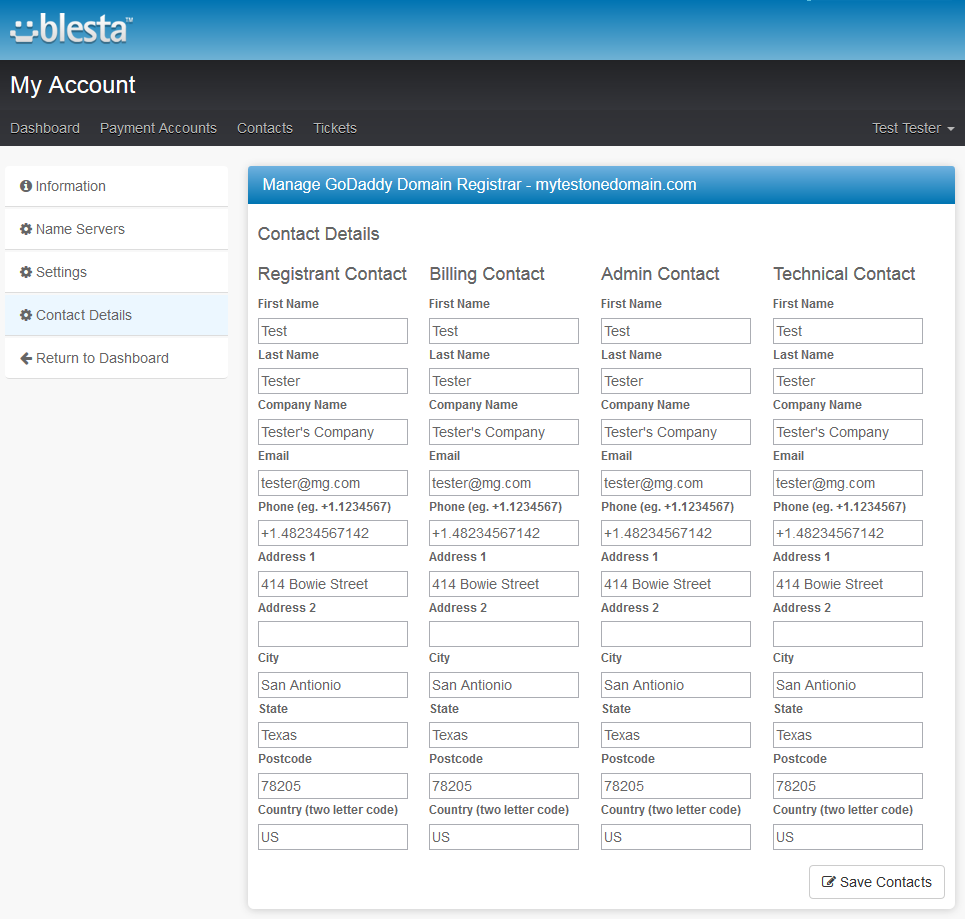
Your customers can perform various actions on their GoDaddy domain from the client area.
Clients can view basic information related to domains and perform several actions on them. Read below see exactly what can be done.
In addition to that, your clients can find here their GoDaddy account details and log into it through pressing 'Go To Control Panel' button.
|
| At 'Information' tab clients can see basic details on their domain. Used package name, status, recurring amount etc.
|
| 'Nameservers' tab allows clients to preview and change nameservers used by their domains.
|
'Settings ' section includes:
- domain management data - shopper ID and password
- 'Go To Control Panel' - press to log into the panel
- registrar lock - our customers can also lock/unlock their domains to prevent them from being transferred
- enable or disable auto renewal option
- preview EPP code
|
| Under 'Contact Details' your clients can also view and modify any contact information.
|
Tips
| 1. To use the test mode, simply select 'Sandbox' under the module management page.
|
Common Problems
| 1. When you have problems with connection, check whether your SELinux or firewall does not block ports.
|
