MetricsCube Connector For WHMCS
From ModulesGarden Wiki
(Difference between revisions)
|
|
| Line 155: |
Line 155: |
| | ===Cron Synchronization Method=== | | ===Cron Synchronization Method=== |
| | {| | | {| |
| − | |style="padding: 10px 0px 15px 15px;"|As soon as | + | |style="padding: 10px 0px 15px 15px;"|Having problems with data synchronization? |
| | |} | | |} |
| | {| | | {| |
| Line 161: |
Line 161: |
| | |} | | |} |
| | {| | | {| |
| − | |style="padding: 0px 0px 15px 15px;"|Our module | + | |style="padding: 0px 0px 15px 15px;"|As another option, you can take advantage of the ‘Cron’ synchronization method after you have |
| | + | establish connection to your WHMCS. In order to proceed, all you need to do is select ‘Cron’ from |
| | + | a drop-down menu that will be displayed after you click the arrow located next to the currently |
| | + | applied method. |
| | |} | | |} |
| | {| | | {| |
| Line 167: |
Line 170: |
| | |} | | |} |
| | {| | | {| |
| − | |style="padding: 0px 0px 20px 15px;"|Below these functions | + | |style="padding: 0px 0px 20px 15px;"|Afterwards, the MetricsCube will no longer attempt to connect your WHMCS using the ‘Webhooks’ |
| | + | method, because it will automatically detect that the cron script has been executed. |
| | |} | | |} |
| | {| | | {| |
| Line 173: |
Line 177: |
| | |} | | |} |
| | {| | | {| |
| − | |style="padding: 0px 0px 15px 15px;"|Lastly, you can a | + | |style="padding: 0px 0px 15px 15px;"|You've nailed it! There is nothing to stop you now from using all MetricsCube tools and boosting |
| | + | the productivity of your business processes! |
| | |} | | |} |
| | {| | | {| |
Revision as of 09:33, 18 October 2018
| MetricsCube Connector For WHMCS is a free module that will allow you to provide .....
|
| ✔ Supports PHP 5.6 Up To PHP 7.2
|
| ✔ Supports WHMCS Template Six
|
Installation and Configuration
This tutorial will show you how to successfully install and configure MetricsCube Connector For WHMCS.
We will guide you step by step through the whole installation and configuration process.
|
Installation
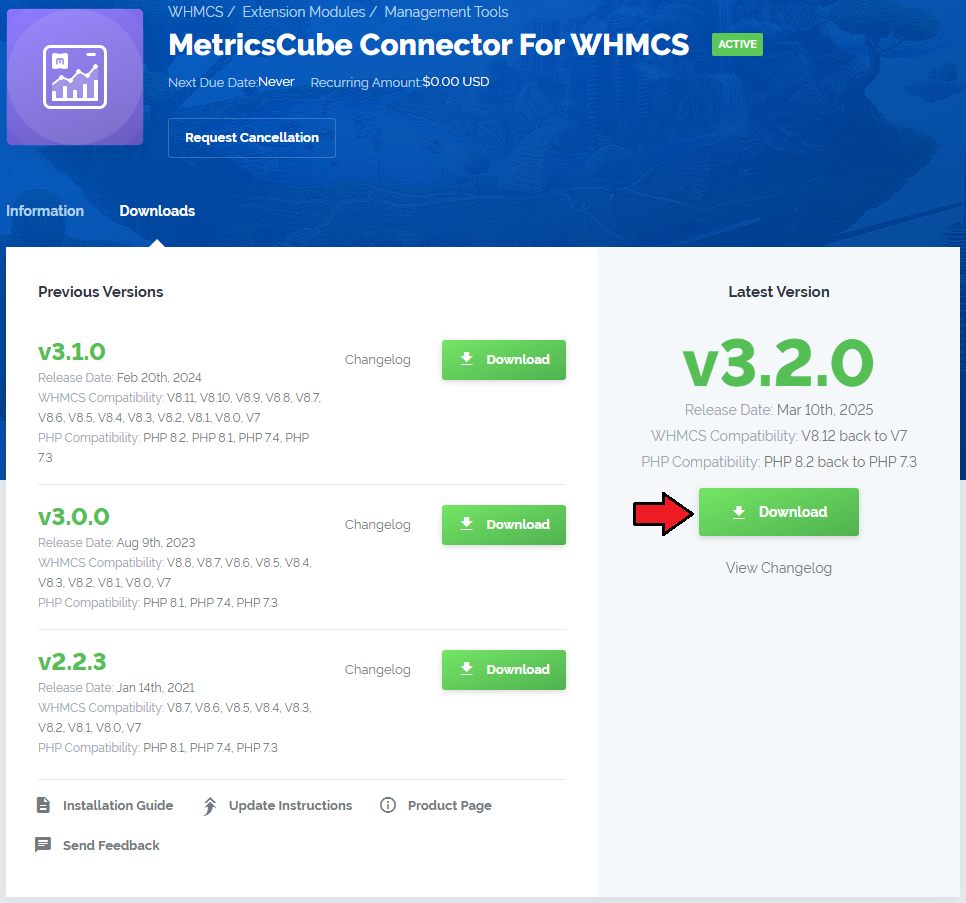
| 1. Log in to our client area and download the module.
|
2. Open the main WHMCS directory and upload the folder with files you have extracted previously
The content of your package should look like this.
|
Activate The Addon
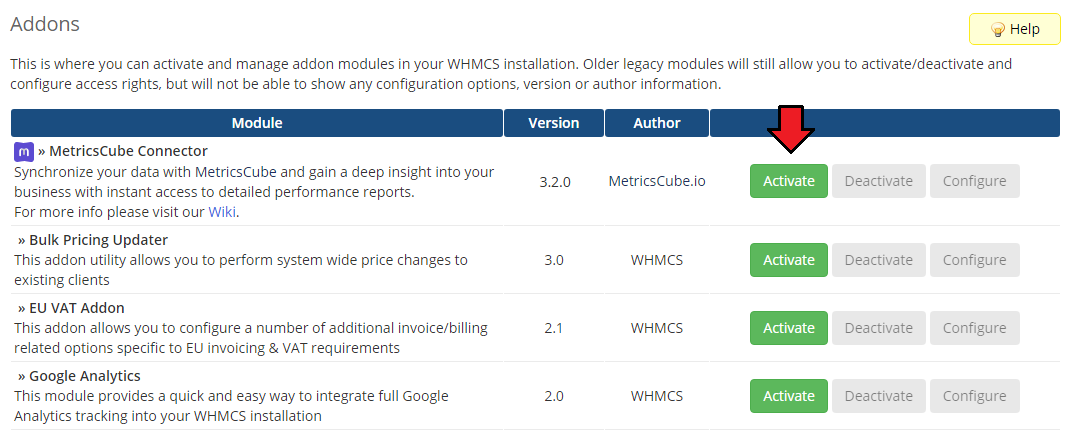
5. Now, you have to activate the module in your WHMCS system.
Please log in to your WHMCS admin area. Once there, navigate to the 'Setup' tab and select 'Addon Modules'.
Find 'MetricsCube Connector' on the list of addons and click the 'Activate' button.
|
6. After the module has been activated, you will need to enable access to your Admin Role.
To do that, click on 'Configure', simply tick the admin roles that should have access to the module, and save changes.
|
| 8. Congratulations! Your module has been successfully installed and activated.!
|
Sign Up To MetricsCube
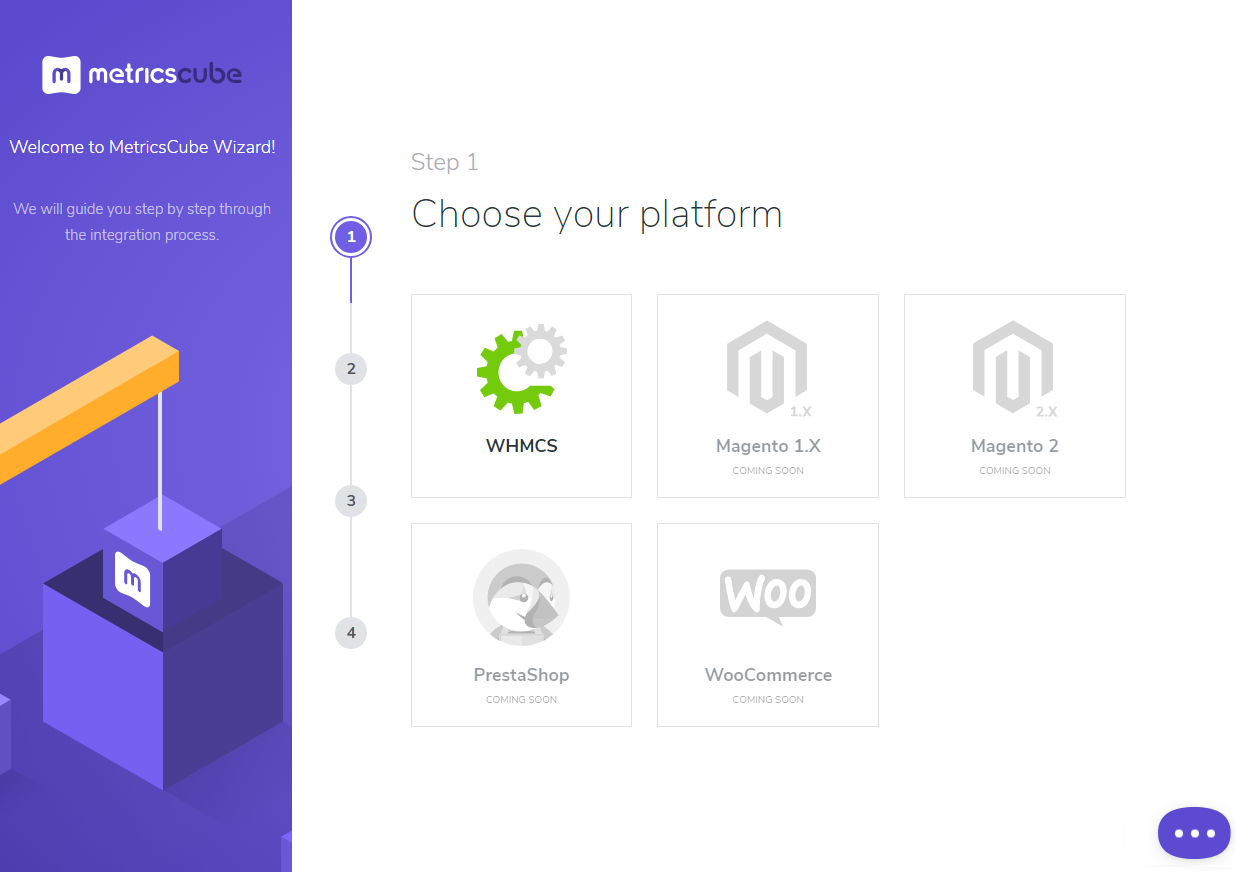
| 3. Now, move to metricscube.io and sign up with your account.
|
| 4. Use Wizzard to install
|
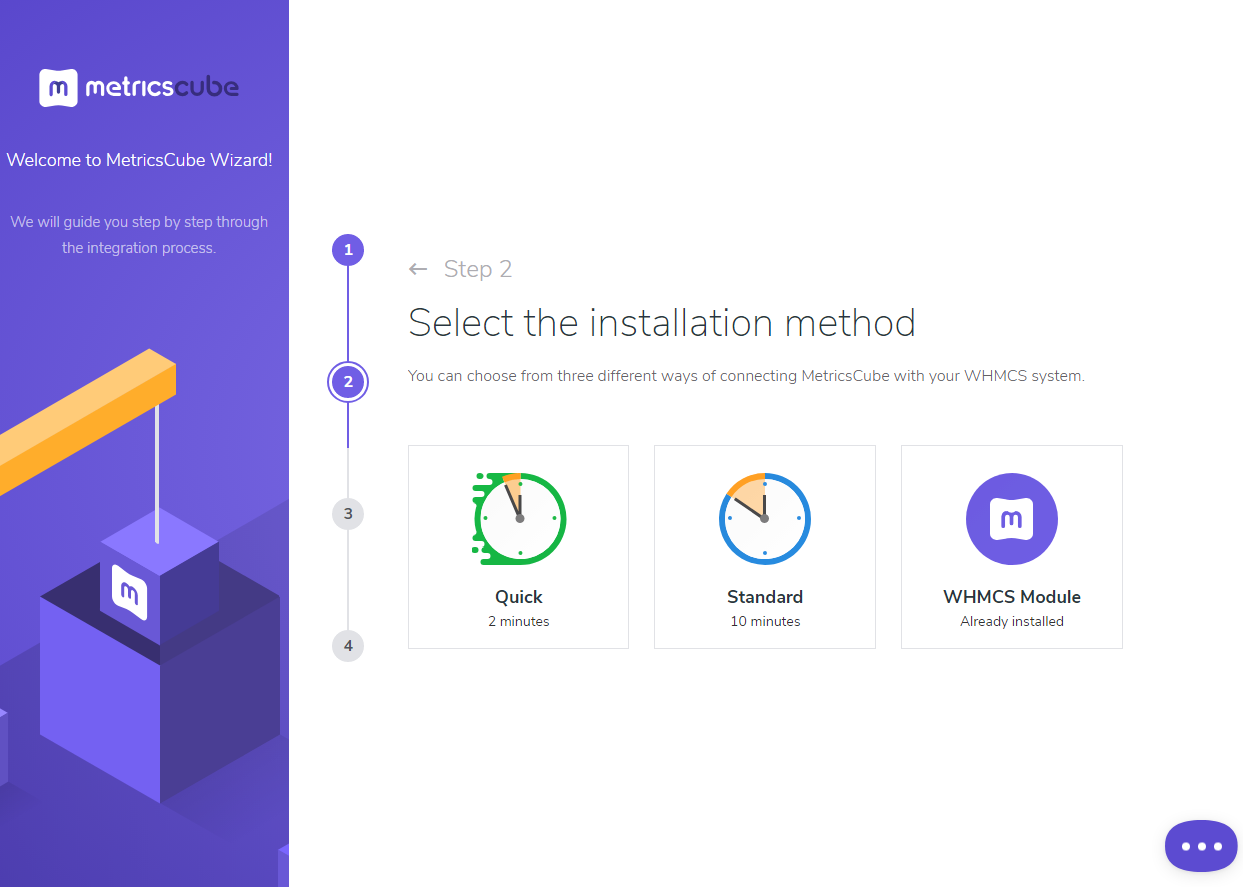
| 5. Select method of instalaltion - select point 3 - Connecting Already Installed Module
|
Management
In this section we will show you all functionalities of MetricsCube Connector For WHMCS.
Our module allows
|
Addon Synchronization With MetricsCube
Webhoohs Synchronizaton Method
| 3. Now, we will show you how to
|
| 5. The next step is creating
|
| 6. Enter the name, click on your
|
Cron Synchronization Method
| Having problems with data synchronization?
|
| As another option, you can take advantage of the ‘Cron’ synchronization method after you have
establish connection to your WHMCS. In order to proceed, all you need to do is select ‘Cron’ from
a drop-down menu that will be displayed after you click the arrow located next to the currently
applied method.
|
| Afterwards, the MetricsCube will no longer attempt to connect your WHMCS using the ‘Webhooks’
method, because it will automatically detect that the cron script has been executed.
|
| You've nailed it! There is nothing to stop you now from using all MetricsCube tools and boosting
the productivity of your business processes!
|
Client Area
Tips
Update Instructions
| Essential guidance through the process of updating the module is offered here.
|
Common Problems
| 1. When you encounter problems with connection, check whether your SELinux or firewall does not block ports.
|
