Unban Center For WHMCS
From ModulesGarden Wiki
(Difference between revisions)
|
|
| Line 9: |
Line 9: |
| | *'''Features:''' | | *'''Features:''' |
| | {| | | {| |
| − | |style="padding: 10px 0px 0px 30px;"|✔ Modularity (Addon Supported Modules Abuts On His Submodules) | + | |style="padding: 10px 0px 0px 30px;"|✔ Modularity - Each Feature Is Based On Used Submodule |
| | |} | | |} |
| | {| | | {| |
Revision as of 15:58, 10 April 2014
| Unban Center For WHMCS allows your clients to easily unban IP addresses in cPanel directly from your WHMCS client area.
Additionally module lets you create your own submodules to integrate with other systems and control panels.
|
| ✔ Modularity - Each Feature Is Based On Used Submodule
|
| ✔ User Friendly Creation Of Additional Submodules
|
| ✔ Configuration Of Unban Type
|
| ✔ Black List Of IP Addresses - Protection From Unban Actions
|
| ✔ Enable/Disable Unban Actions For Selected Products
|
| ✔ Flexible Unban Delay - Protection From Abuse
|
| ✔ Unban IP Address Of Selected Product
|
| ✔ Supports WHMCS V5 and Later
|
Installation
This tutorial will show you how to successfully install and configure Unban Center For WHMCS.
We will guide you step by step through the whole installation and configuration process.
|
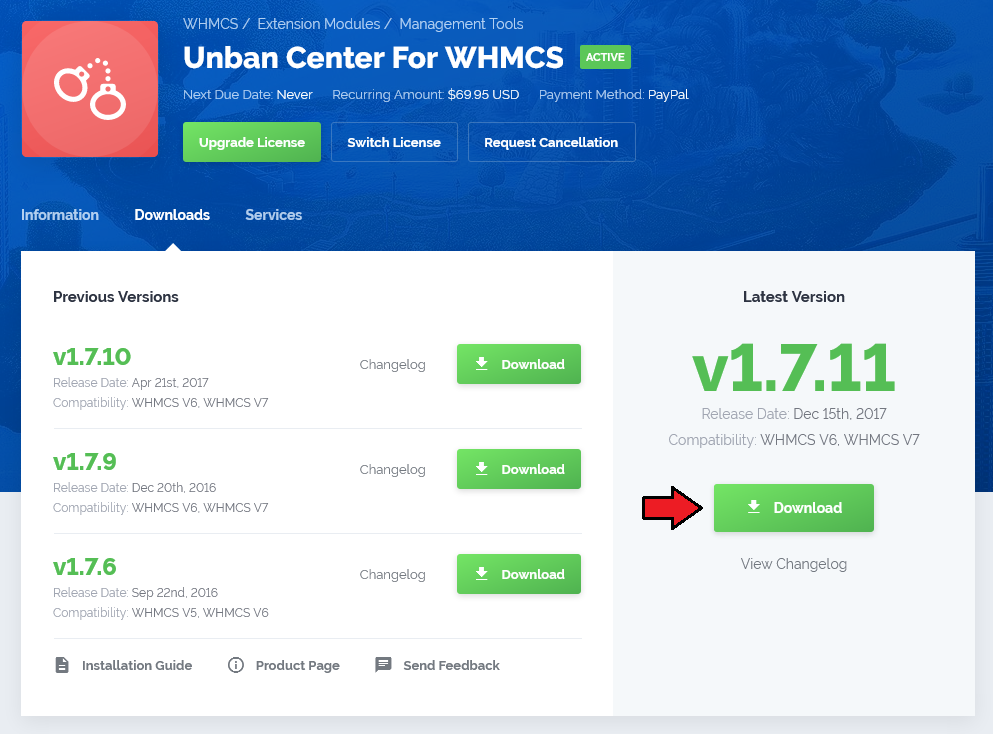
| 1. Log in to your client area and download Unban Center For WHMCS.
|
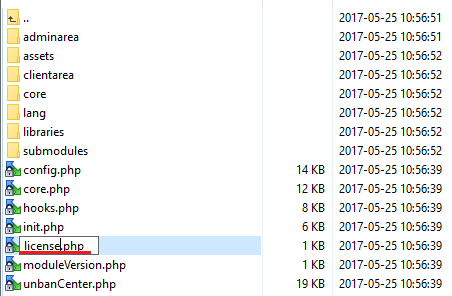
2. Upload and extract the module into the main WHMCS directory.
Files in your WHMCS directory should look like on the following screen.
|
3. When you install Unban Center for the first time you have to rename 'license_RENAME.php' file.
File is located at 'modules/addons/unbanCenter/license_RENAME.php' . Rename it from 'license_RENAME.php' to 'license.php' .
|
4. In order to configure your license key, you have to edit a previously renamed 'license.php' file .
Enter your license key between quotation marks as presented on the following screen. You can find your license key at your client area → 'My Products' .
|
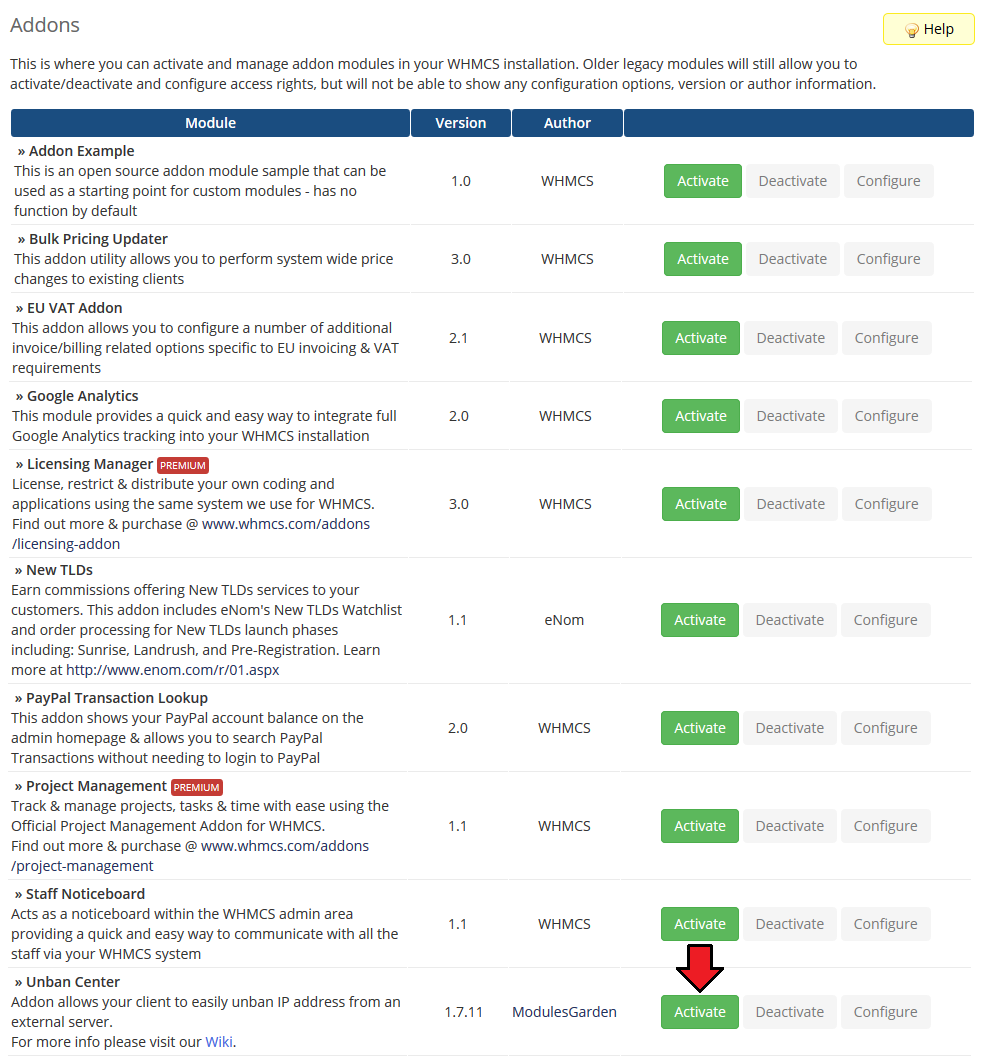
5. Now you have to activate the module in your WHMCS system.
Log in to your WHMCS admin area. Go to the 'Setup' → 'Addon Modules' . Afterwards, find 'Unban Center' and press 'Activate' button.
|
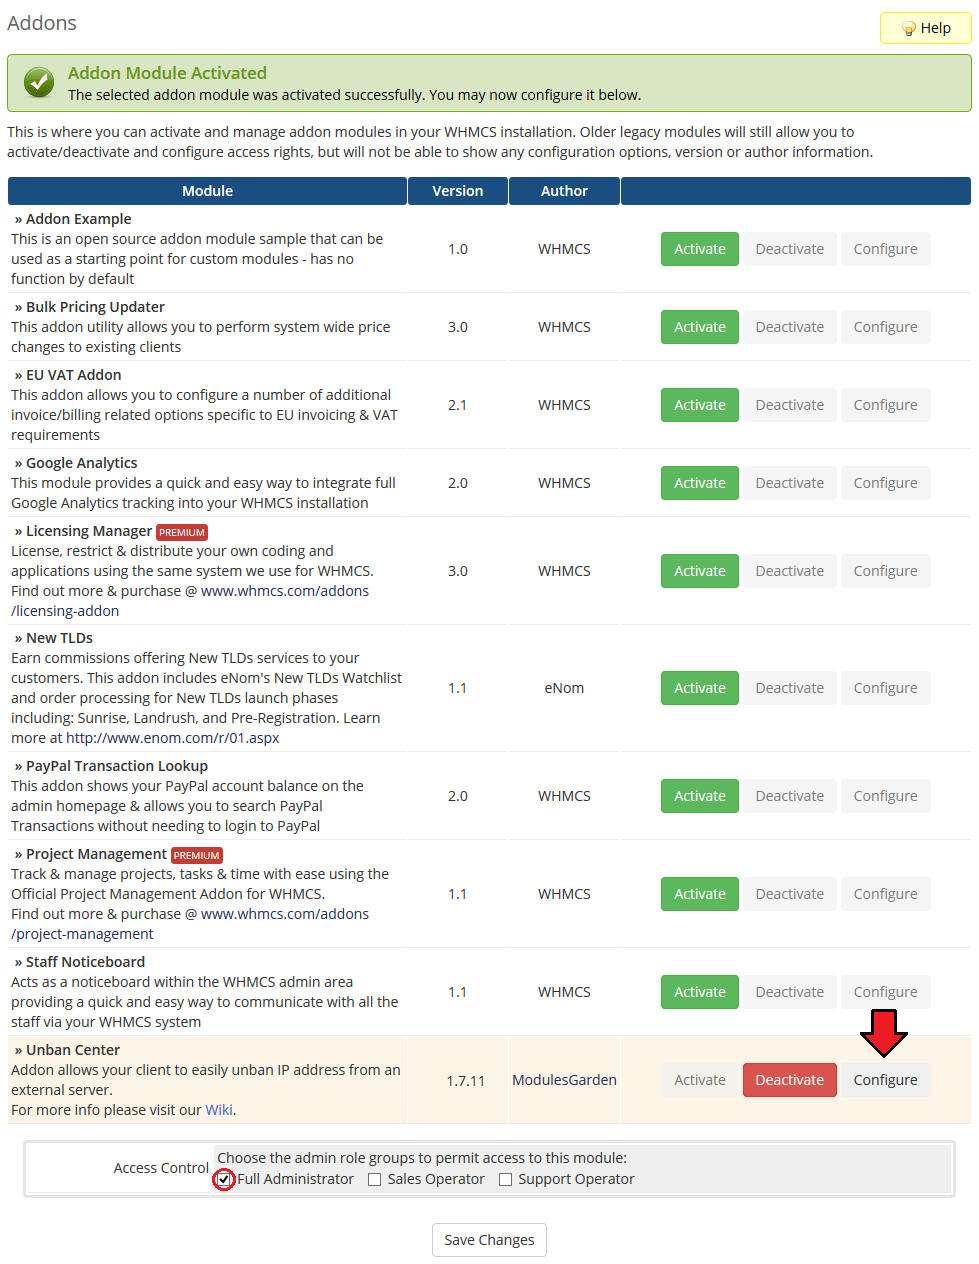
6. In the next step you need to permit access to this module.
To do so, click on 'Configure' button, tick 'Full Administrator' and press 'Save Changes' .
|
7. Go to the 'Addons' → 'Unban Center' → 'Integration Code' tab and follow the instruction of integration.
As soon as you place the integration code in a correct location, the status of integration will change from 'Undone' to 'Done' .
|
8. You have just successfully installed Unban Center For WHMCS!
You can access your module at 'Addons' → 'Unban Center' .
|
Configuration and Management
Unban Center For WHMCS allows you to provide your clients with ability to easily unban desired IP addresses from external server.
Additionally, you are able to protect specific IP addresses from the unban action.
|
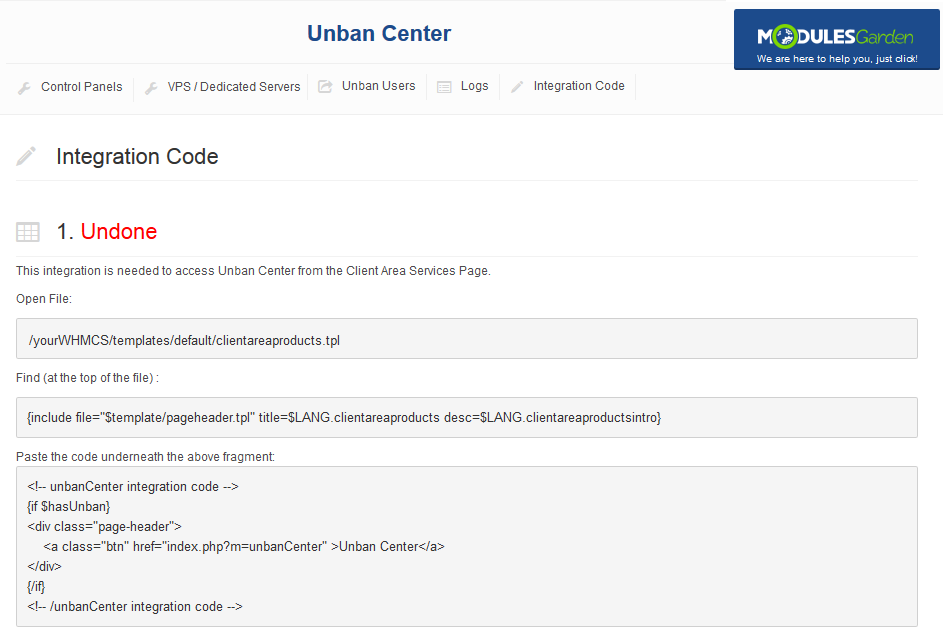
Integration Code
Placing integration code is necessity, otherwise your clients will not be able even to see 'Unban' button.
Integration code can be found at 'Unban Center' addon → 'Integration Code' tab.
As soon as you place integration code correctly, its status will be changed to 'Done' .
Correctly placed code is shown on the following screen.
|
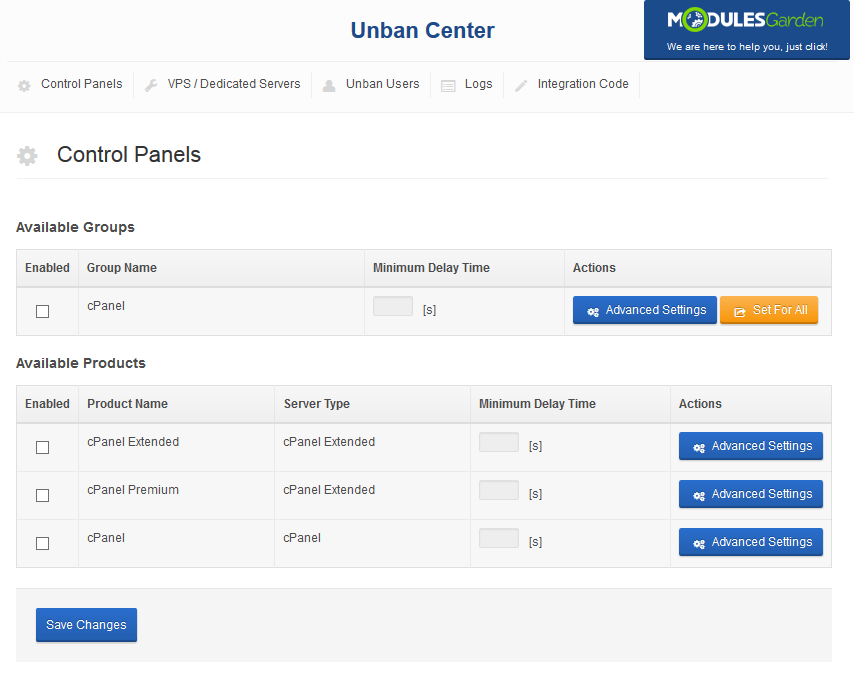
Module Configuration
At the 'Module Configuration' tab you can easily enable and configure unban action.
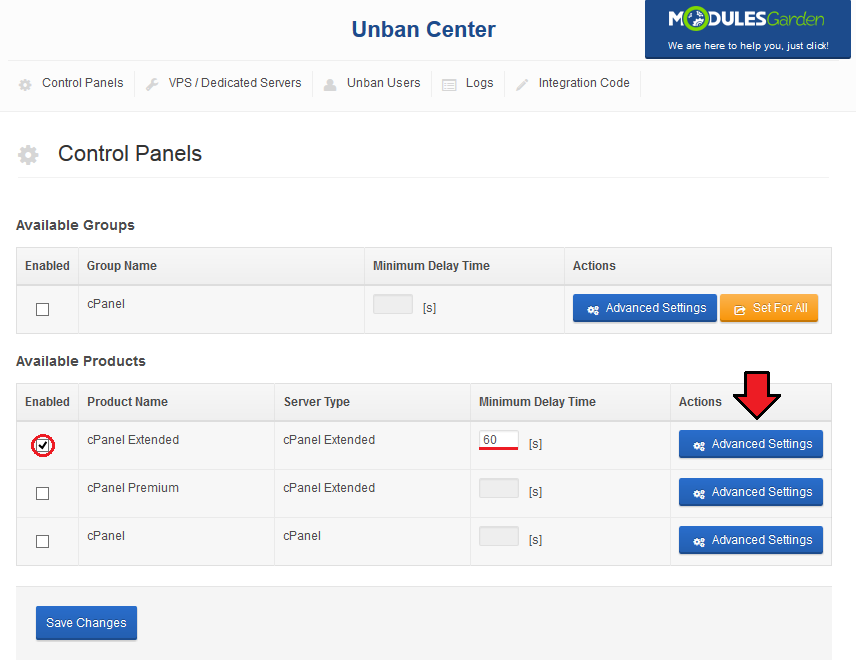
Let's enable unban action for cPanel Extended product.
Start of marking 'Enabled' checkbox and define how often your client will be able to perform unban action at specific product.
Afterwards, press 'Advanced Settings' .
|
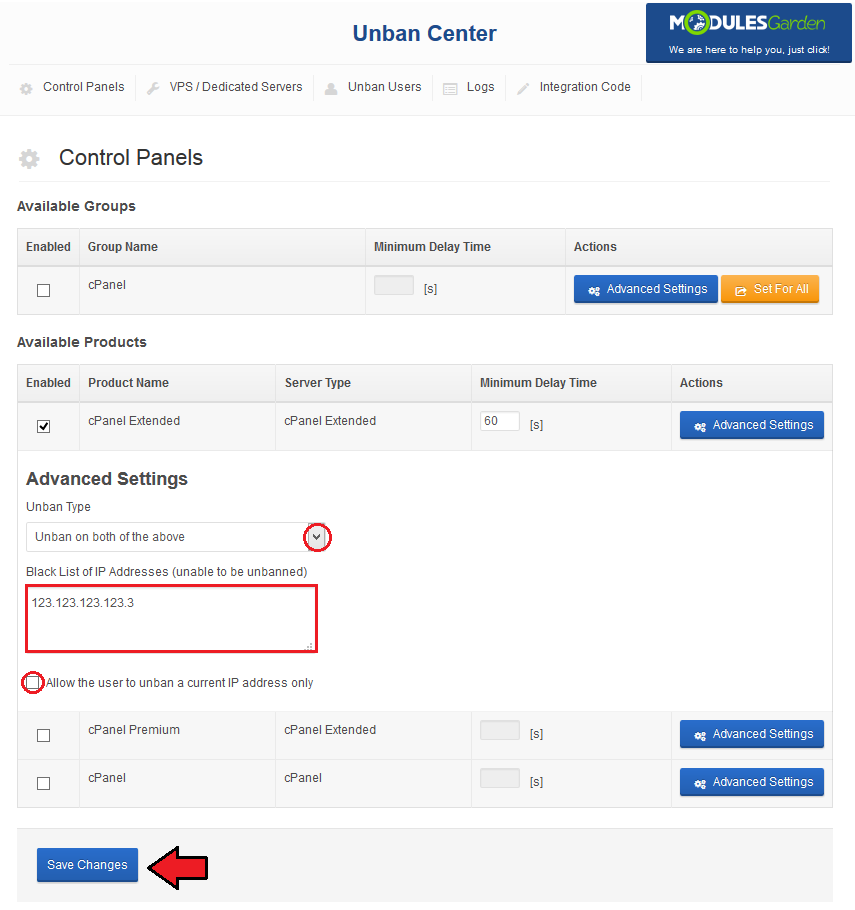
Next, select desired value from 'Unban Type' and enter IP addresses protected from unban action into 'Black List of IP Addresses' textbox.
Confirm those settings through pressing 'Save Changes' button.
|
Client Area
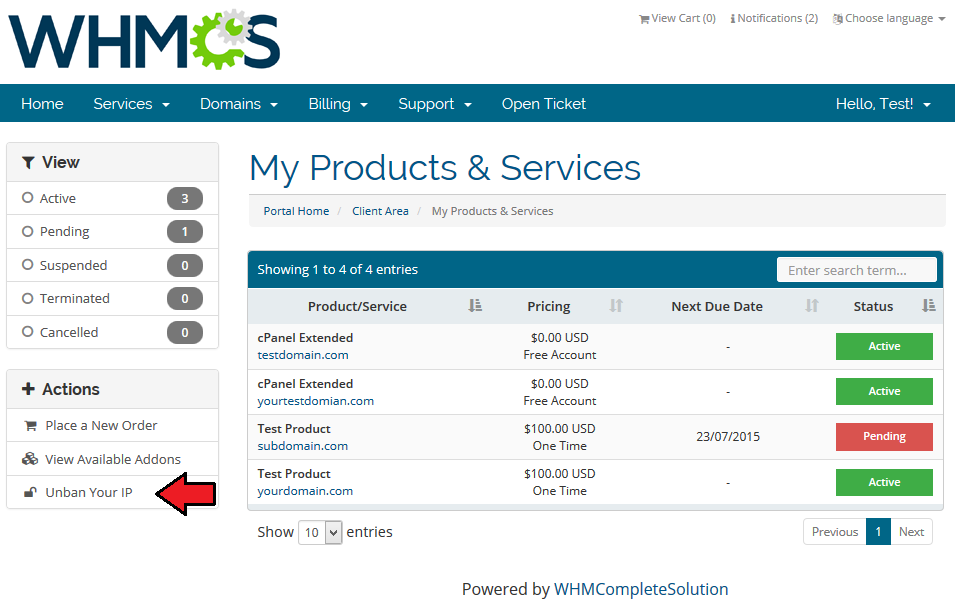
Let's proceed to the client area → 'Services' → 'My Services' in order to try out unban action.
Press 'Unban Center' in order to continue.
|
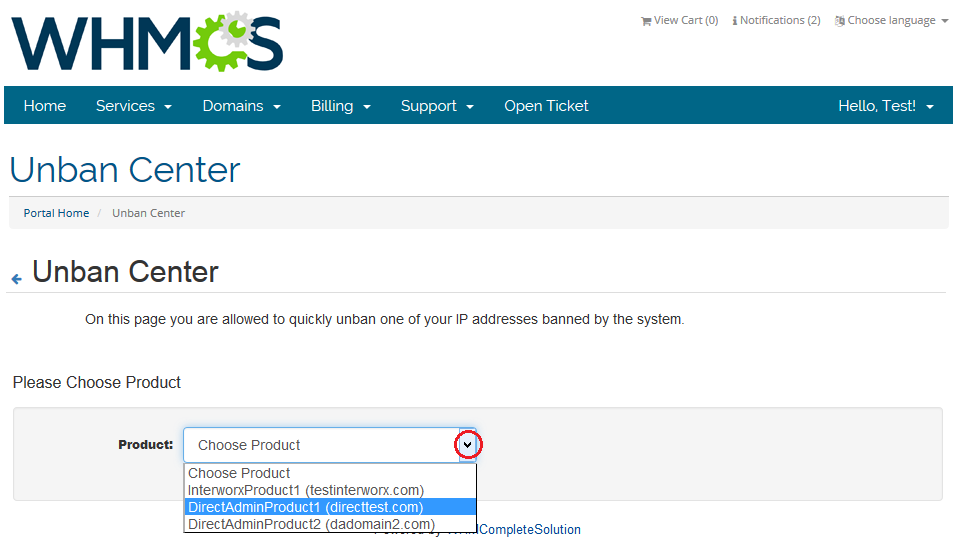
| Now, select product for which you want to perform unban IP address action and press 'Next Step' .
|
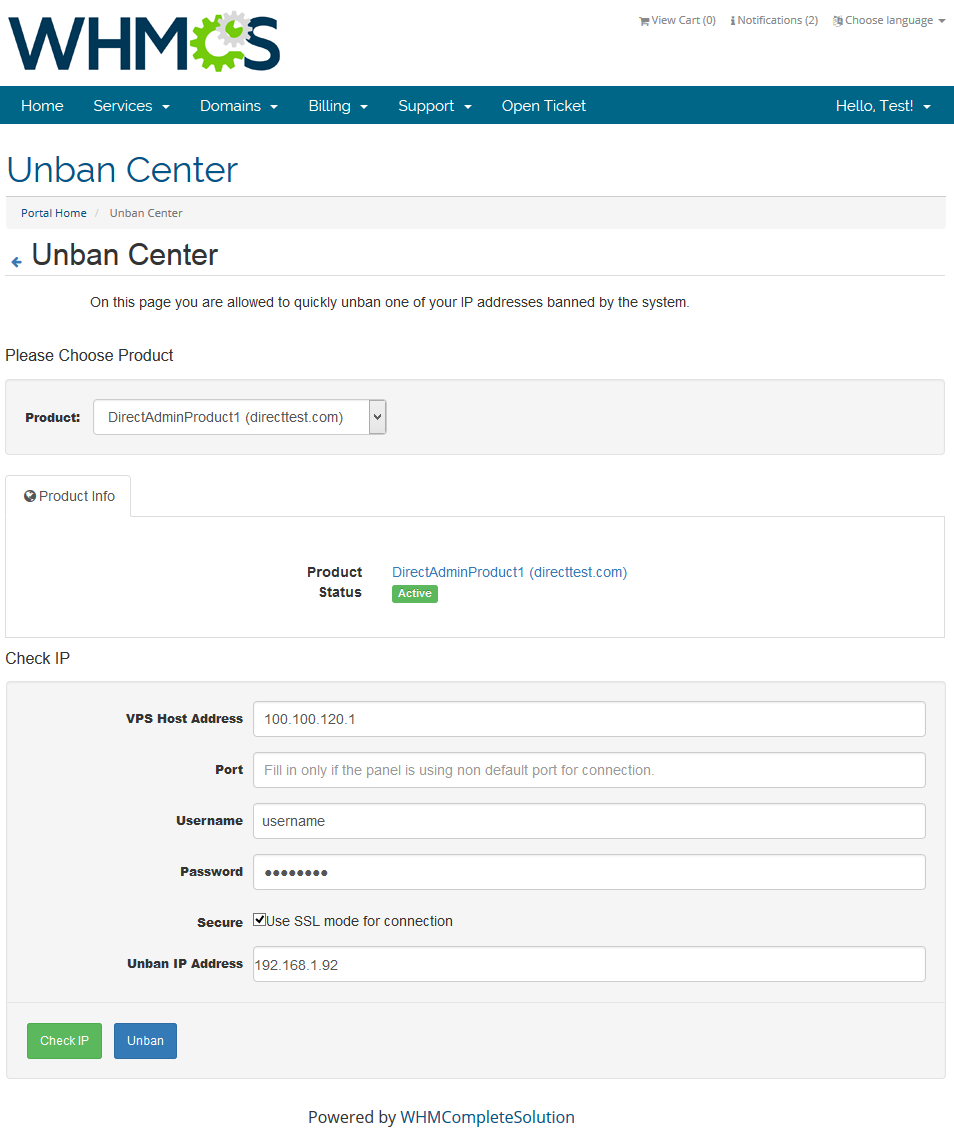
| Finish through typing IP address to unban in the field and press 'Unban' button.
|
Logs
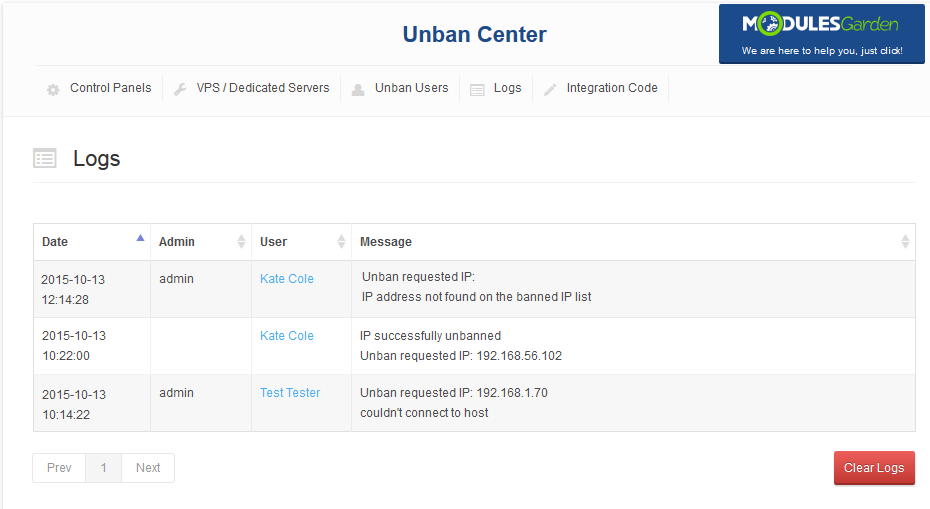
All unban requests and their results can be found at 'Unban Center' → 'Logs' tab.
In addition to that, you can find here information related to user who requested unban action and its date.
|
Creating 3rd Party Submodule
The main goal of Unban Center For WHMCS is allowing you to quickly and easily create additional submodules.
All you need is a little knowledge of PHP programming language and documentation of integrated module API.
Required information regarding to submodule itself is located inside examplary submodule.
It can be found at 'your_whmcs/modules/addons/unbanCenter/submodules/' .
Owing to that, you are able to made your offer much more competitive and extend it to other systems and control panels.
|

|
Start by renaming copy of 'sample' folder to the name used by 3rd party module.
Let's say folder with module to integrate with Unban Center For WHMCS, which is located at 'your_whmcs/modules/servers/' is named 'dummyIntegration' .
For that case, your folder at 'your_whmcs/modules/addons/unbanCenter/submodules/' should be named 'dummyIntegration' .
File 'sampleUnbanSubmodule' located at previously renamed folder should be renamed to 'dummyIntegrationUnbanModule' .
Afterwards, edit file 'dummyIntegrationUnbanModule' and follow instruction housed inside.
|
Tips
Common Problems
| 1. When you have problems with connection, check whether your SELinux or firewall is not blocking ports.
|
