Inactive Account Manager For cPanel
Contents |
About Inactive Account Manager For cPanel
| Inactive Account Manager For cPanel module has been created to allow smooth management of all the inactive accounts on your server. Actions such as terminate, activate or suspend an account, made in bulk or fully automated, will help to shorten the common searches of single users. Reduce the costs of cPanel licensing, based on the number of all accounts, with nothing more but this simple plugin. |
- WHM Admin Area:
| ✔ View Inactive Accounts: |
| ✔ Inactivity Time |
| ✔ Username/Domain/Email/Status |
| ✔ Account Inactivity Reason |
| ✔ Suspension/Termination Time |
| ✔ Manage Inactive Accounts: |
| ✔ Add To Ignored Accounts List |
| ✔ Suspend Account |
| ✔ Terminate Account |
| ✔ Manage Ignored Accounts: |
| ✔ Toggle Sending Inactivity Alerts |
| ✔ Toggle Account Auto Suspension |
| ✔ Toggle Account Auto Termination |
| ✔ Remove From List |
| ✔ Edit Email Message Templates: |
| ✔ Exceeded Inactivity Period |
| ✔ Account Suspension |
| ✔ Account Termination |
| ✔ Configure Module Settings: |
| ✔ Provide Sender Email Used For Notifications |
| ✔ Provide Notifications Recipient Email |
| ✔ Set Cron Frequency |
| ✔ Set Number Of Days Before: |
| ✔ Sending Email Notifications |
| ✔ Suspending Account |
| ✔ Terminating Account |
| ✔ Toggle Automatic Accounts Suspension And Termination |
| ✔ Provide DNS Servers To Be Skipped |
| ✔ Provide Account Owners To Be Skipped |
| ✔ View Module Logs |
- WHM Reseller Area:
| ✔ View Inactive Accounts: |
| ✔ Inactivity Time |
| ✔ Username/Domain/Email/Status |
| ✔ Account Inactivity Reason |
| ✔ Suspension/Termination Time |
| ✔ Manage Inactive Accounts: |
| ✔ Add To Ignored Accounts List |
| ✔ Suspend Account |
| ✔ Terminate Account |
| ✔ Manage Ignored Accounts: |
| ✔ Toggle Sending Inactivity Alerts |
| ✔ Toggle Account Auto Suspension |
| ✔ Toggle Account Auto Termination |
| ✔ Remove From List |
| ✔ Provide Sender Email Used For Notifications |
| ✔ View Module Logs |
- General Info
| ✔ Monitor And Manage Inactive cPanel Accounts |
| ✔ Enable Automated Management Of Inactive Accounts |
| ✔ Requires ionCube Encoder |
| ✔ Multi-Language Support |
| ✔ Supports PHP 7.2 Up To PHP 7.4 |
| ✔ Supports cPanel & WHM 56 And Later |
Installation and Configuration
| This tutorial will show you how to successfully install and configure Inactive Account Manager For cPanel. We will guide you step by step through the whole installation and configuration process. |
Installation
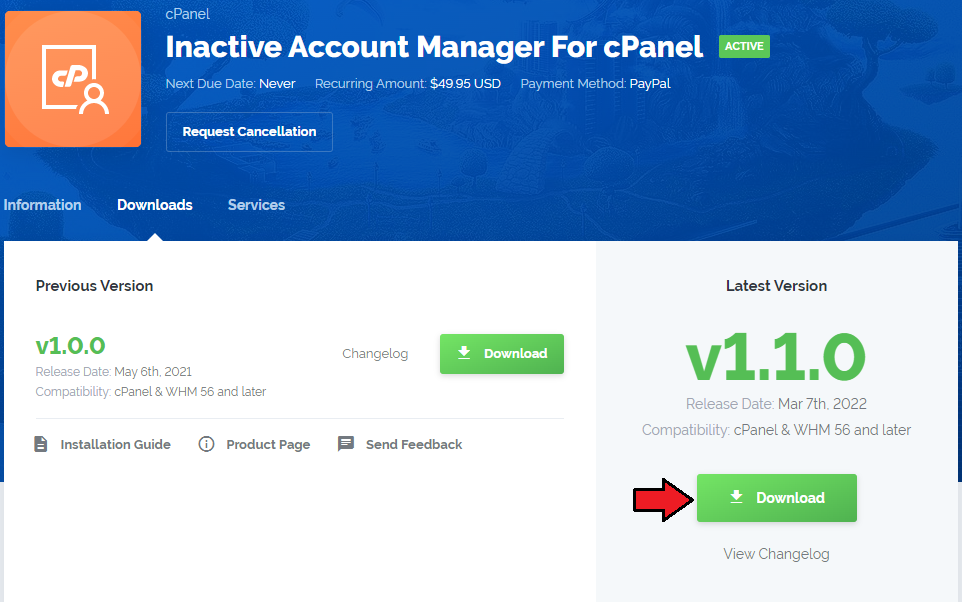
| 1. Log in to our client area and download the module. |
|
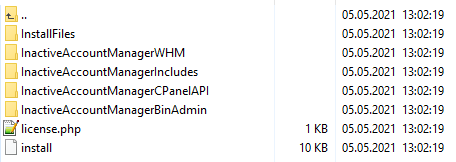
| 2. Upload and extract the module into the /root cPanel directory. Files in your cPanel /root/InactiveAccountManager directory should look like these on the following screen. |
|
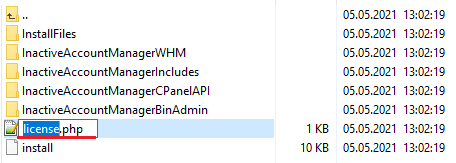
| 3. When you install Inactive Account Manager For cPenel for the first time you have to rename 'license_RENAME.php' file. File is located in 'plugins/IanctiveAccountManager/license_RENAME.php'. Rename it from 'license_RENAME.php' to 'license.php'. |
|
| 4. In order to configure your license key, you have to edit the previously renamed 'license.php' file. Enter your license key between quotation marks as presented on the following screen. You can find your license key in our client area → 'My Products'. |

|
5. Once the module is uploaded, run the following command from the console: cd /root/InactiveAccountManager/ sudo sh install Confirm the installation and wait until you see the following note in the console: |
| The installation process has finished successfully. Now, you can move to the module configuration itself in your WHM. |
Configuration
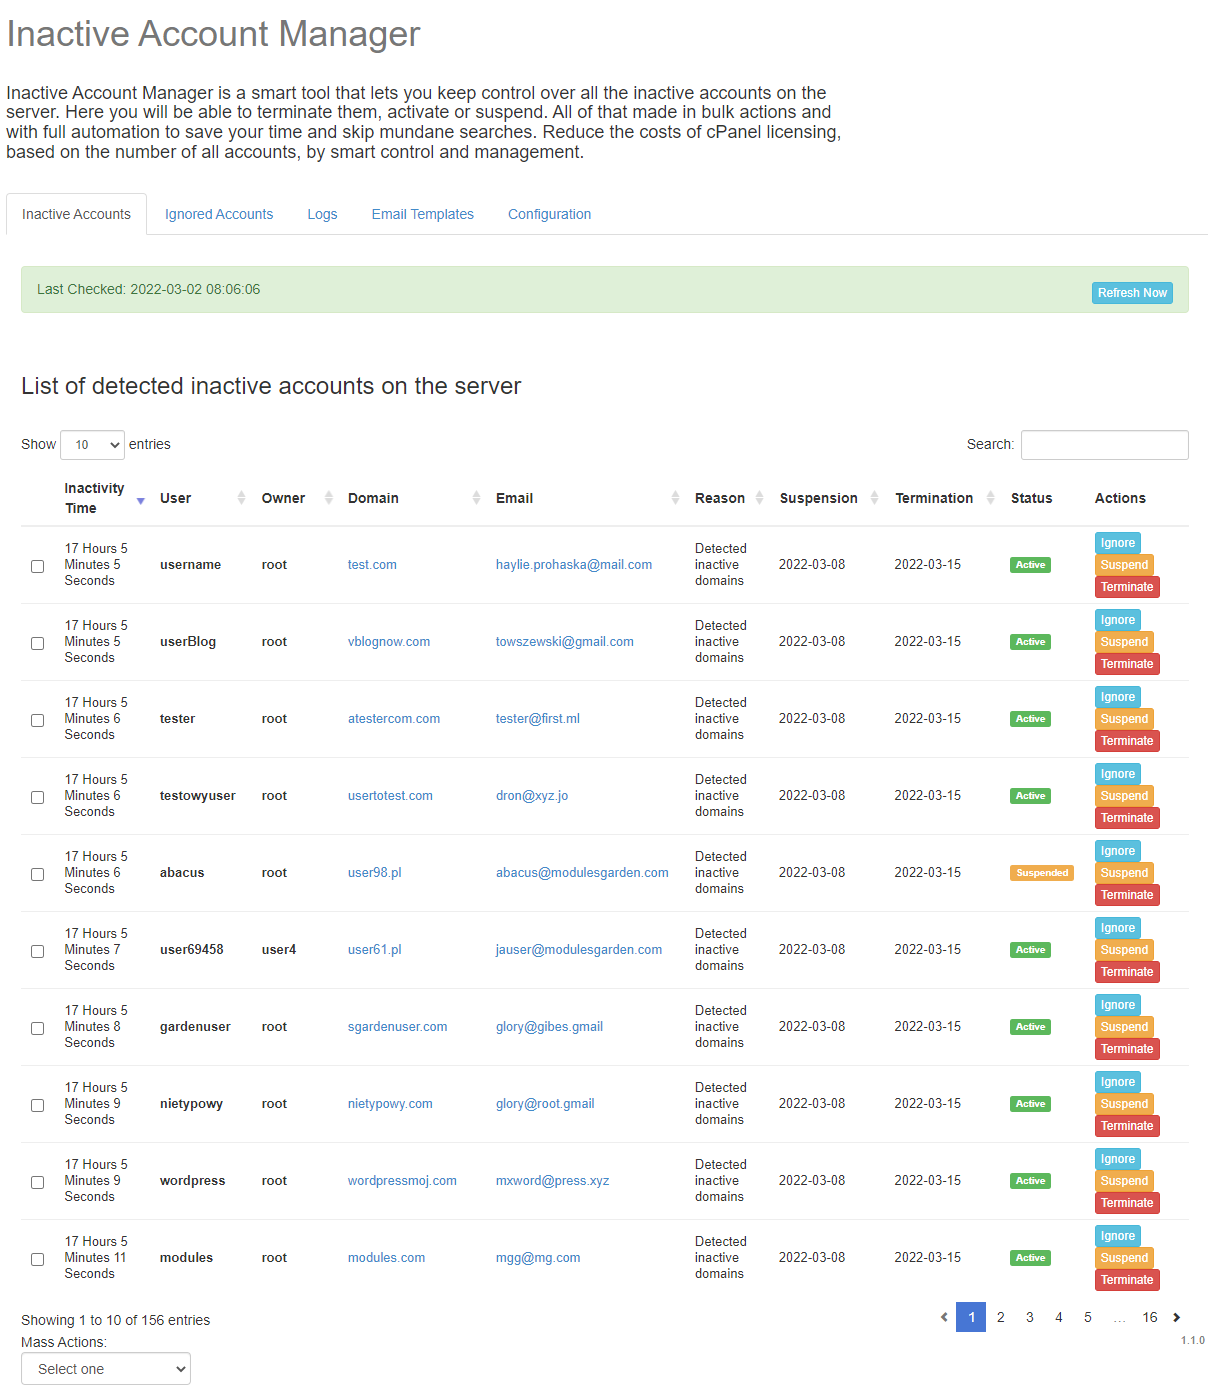
| Once the first phase, installation, has been completed in the previous steps, it is time to configure the module to let it work smoothly. Log into 'WHM' and then move to 'Plugins' → 'Inactive Account Manager' . The very first page you will see is named 'Inactive Accounts'. |
|
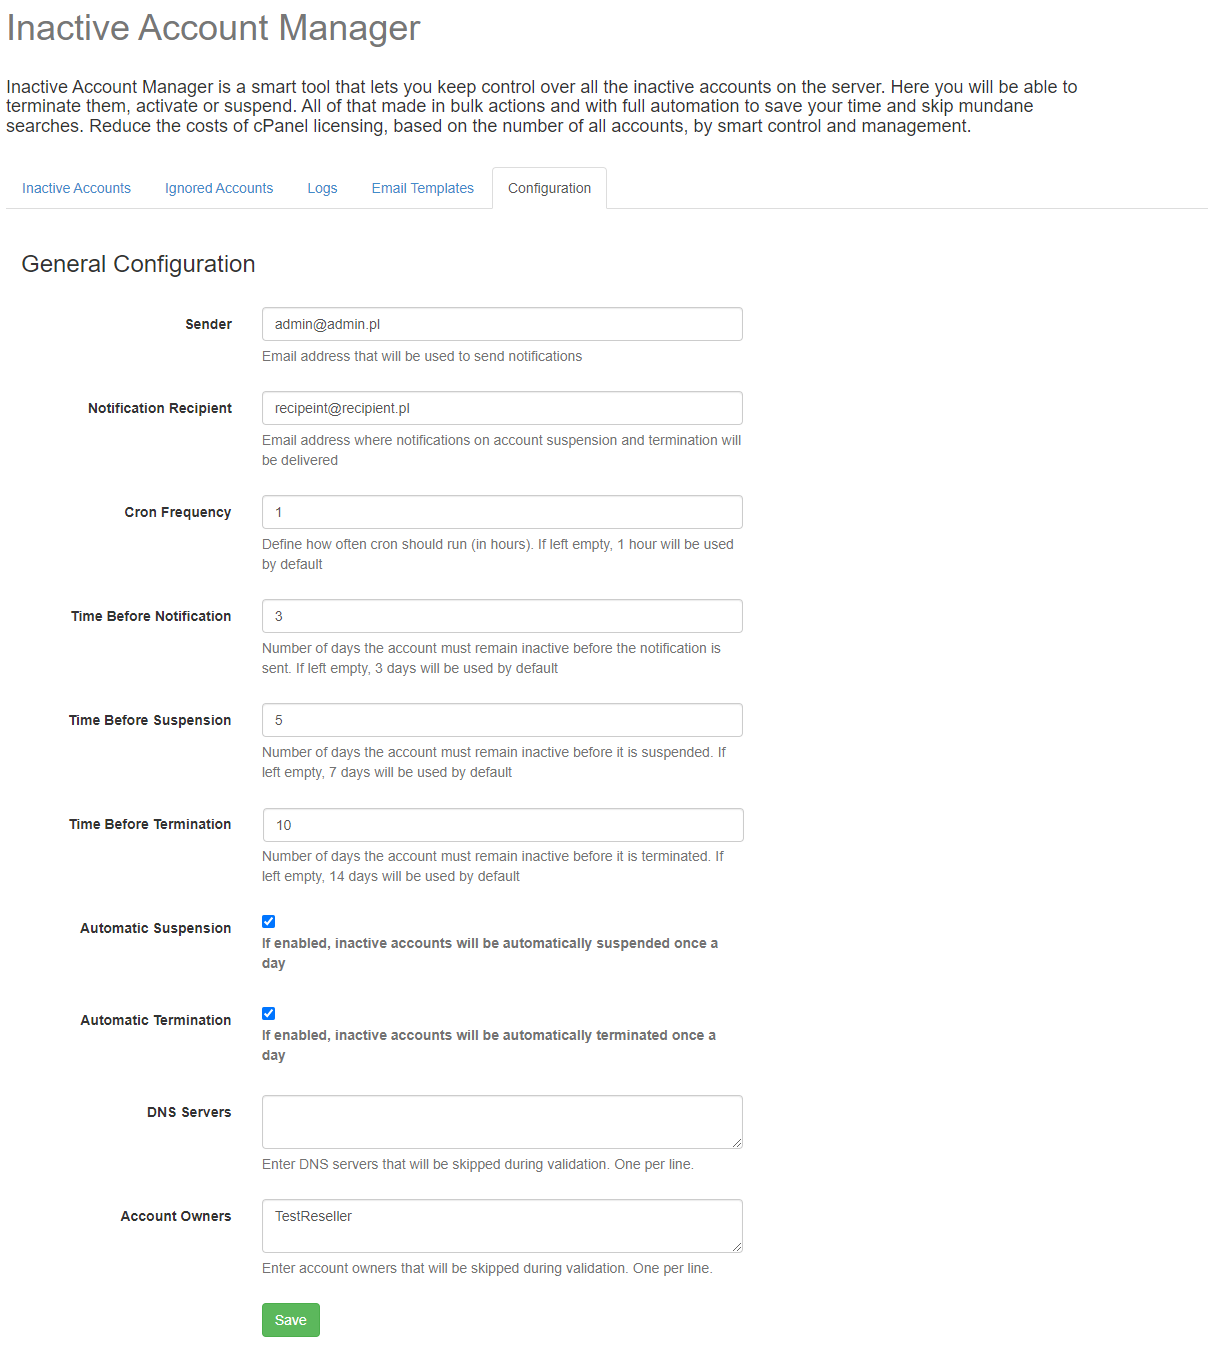
Move to the 'Configuration' section, where you will need to define several details to allow the plugin serve its functions:
|
Skip validation for:
|
|
| Well done! Your module is now ready to go. Do not waste any more time and put the accounts on you cPanel server in order just now. |
Management
| Inactive Account Manager For cPanel allows to quickly detect all accounts that remain inactive for some time.
Moreover, you are allowed to administer such accounts and take full control of their existence on your server. |
WHM Admin Area
| In the WHM admin area you will find the core of the plugin. Starting from precise configuration, through accounts lists, email templates, and logs. |
Inactive Accounts
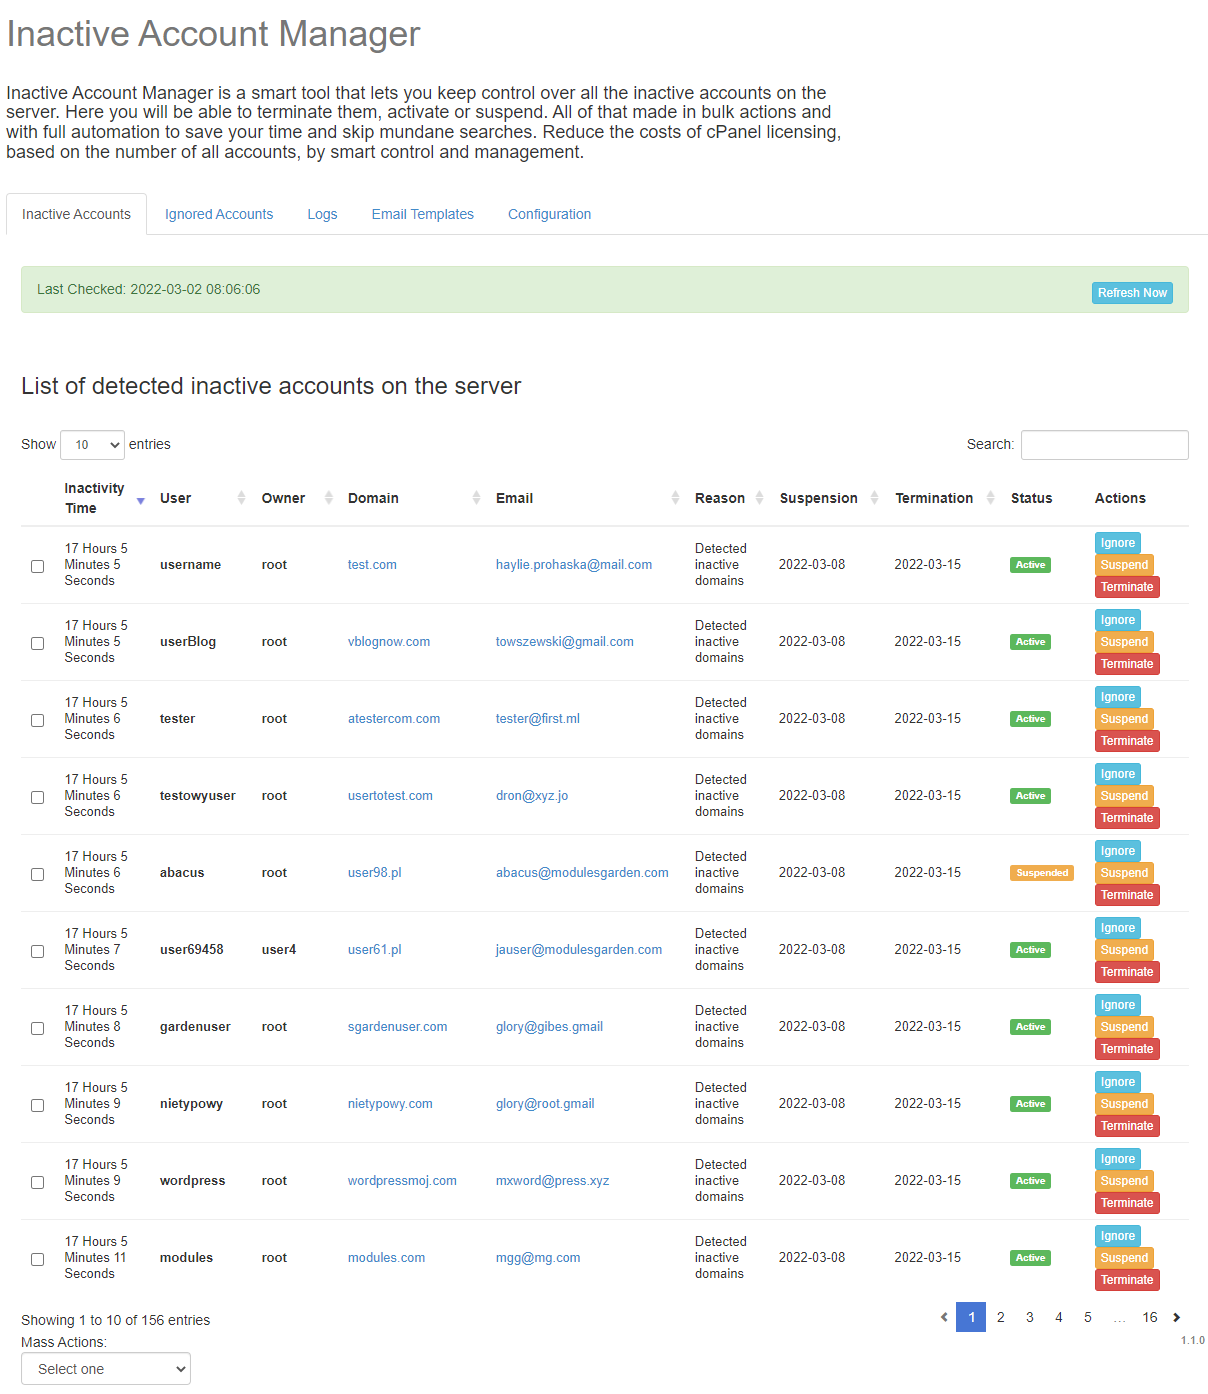
| The first and foremost section that you are automatically directed to when you open the module is called 'Inactive Accounts.' It is here that you can find the core of the module functionality and place to manage all the inactive accounts on your cPanel server. This section contains a list of all accounts on your server which are detected and claimed as inactive for any reason.
|
|
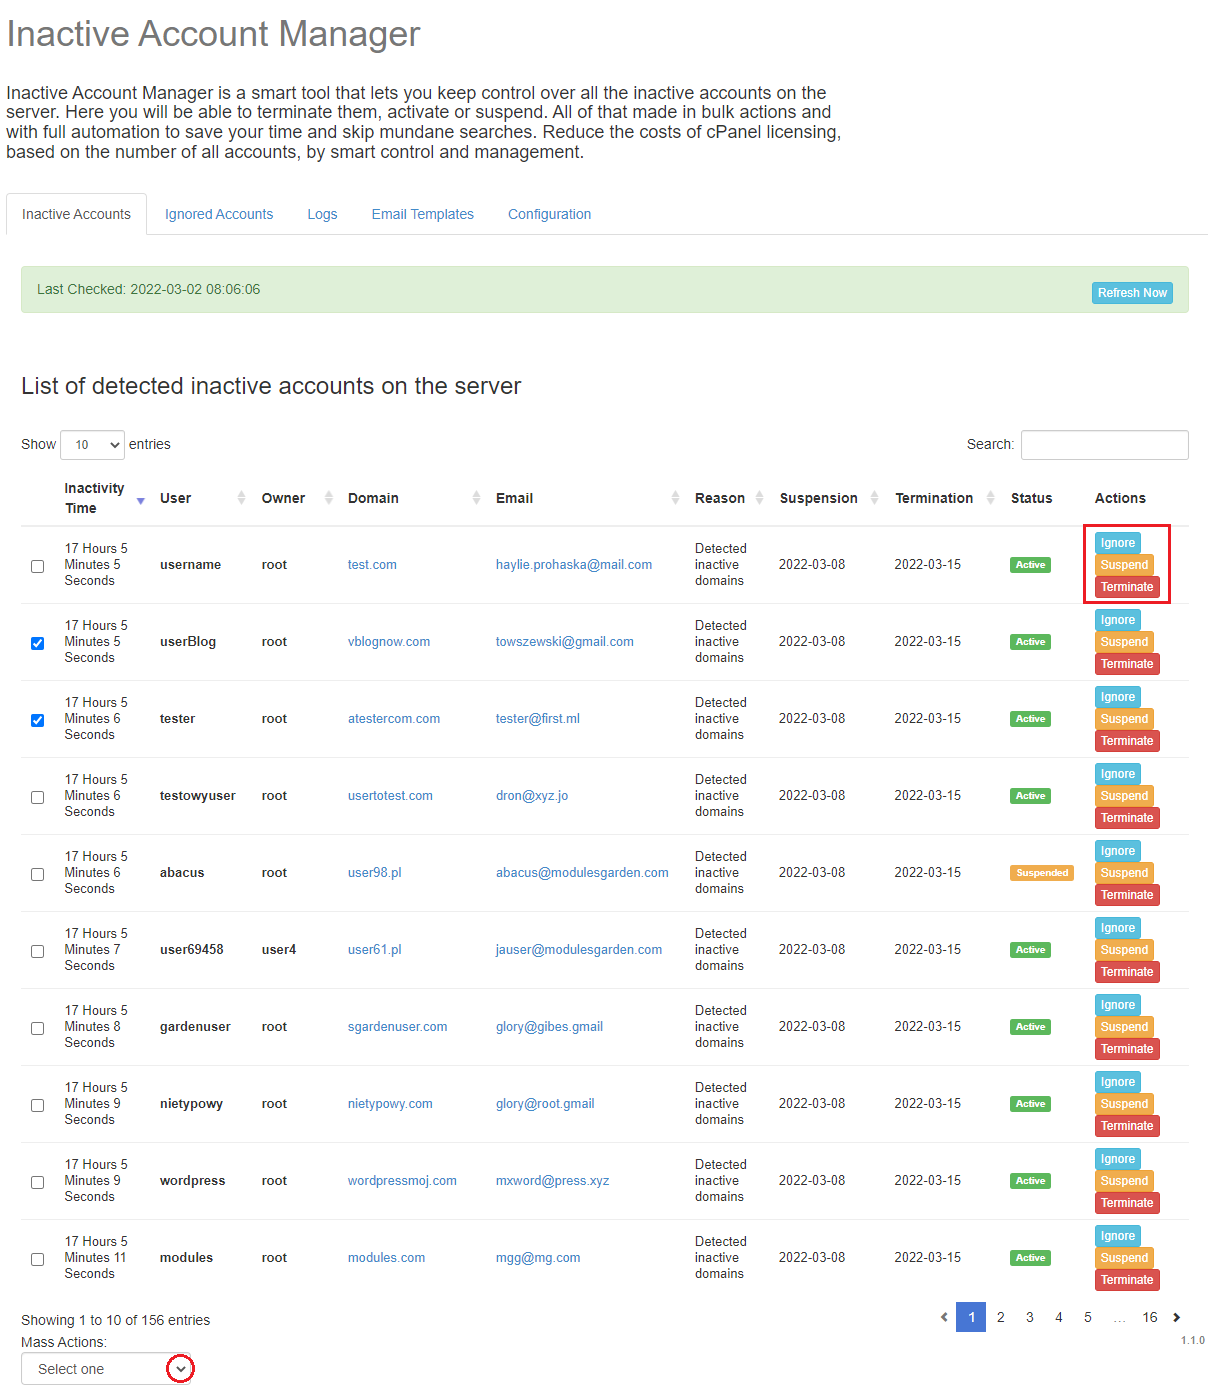
Actions that can be performed on any inactive account, either per single account or in bulk using Mass Actions option:
|
|
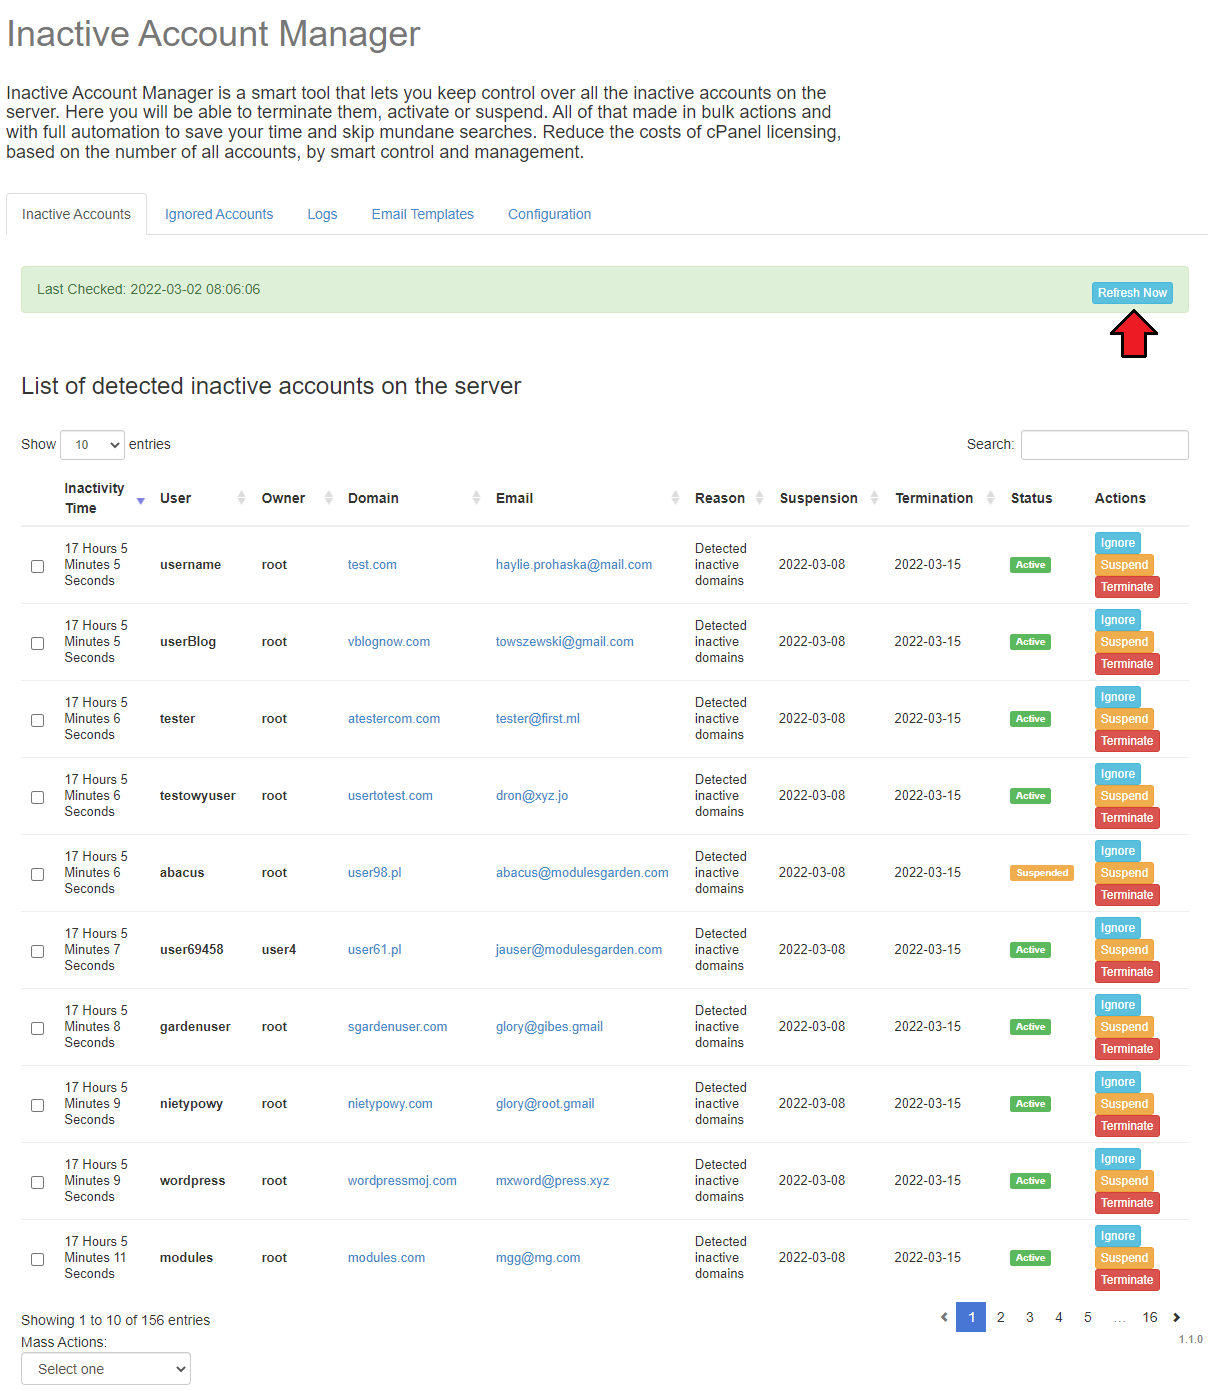
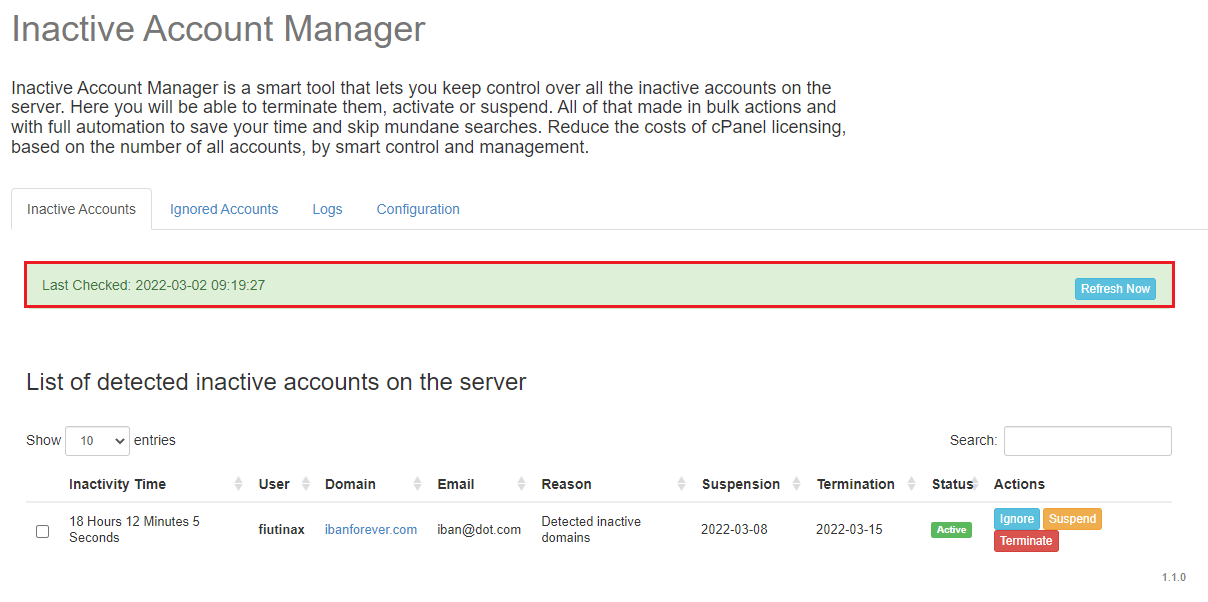
| At the top of this page, you can see the time when data were updated for the last time. By default, cron refreshes the list and its data according to your configuration (e.g. once a day or every 2 hours). In case of necessity, you can also manually force the module to refresh data at any moment. Press 'Refresh Now' button. |
|
Ignored Accounts
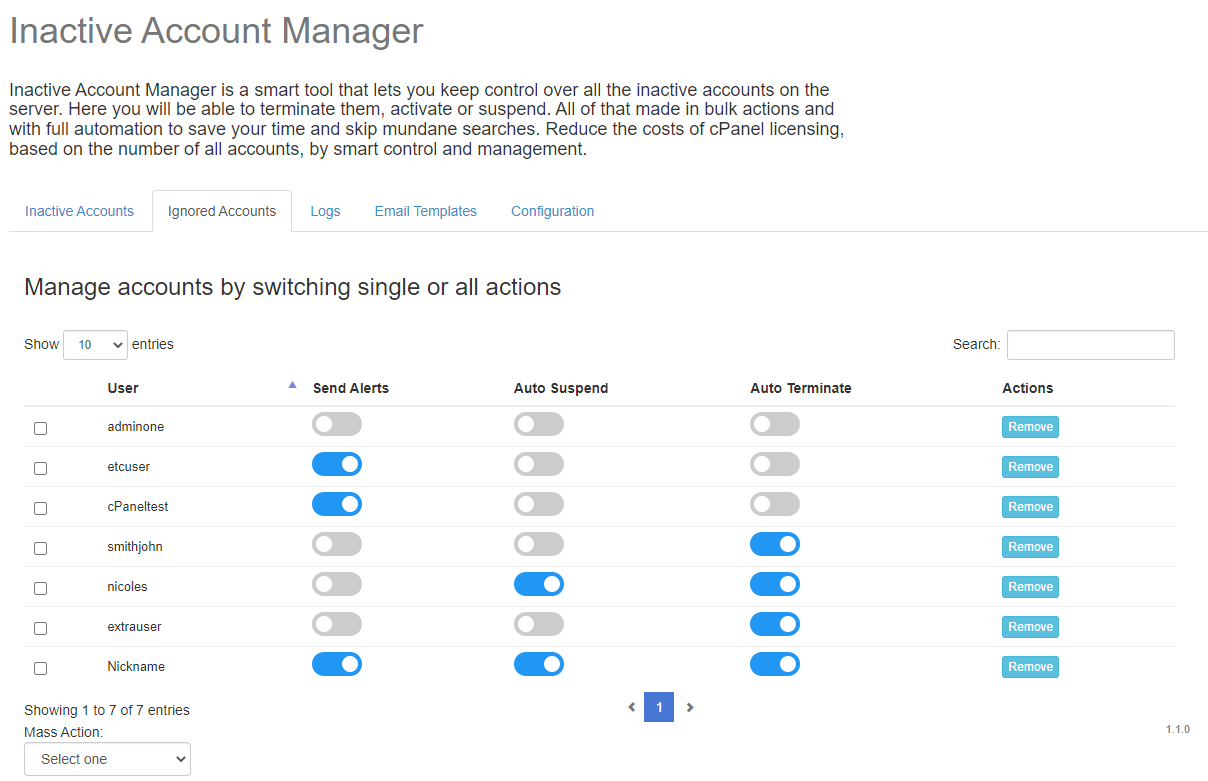
| 'Ignored Accounts' section contains all the inactive accounts that have been maually moved there by the admin. All accounts that are placed here can have personalized configuration, it is possible to turn off the three default options: sending alerts, auto suspension, and auto termination. |
|
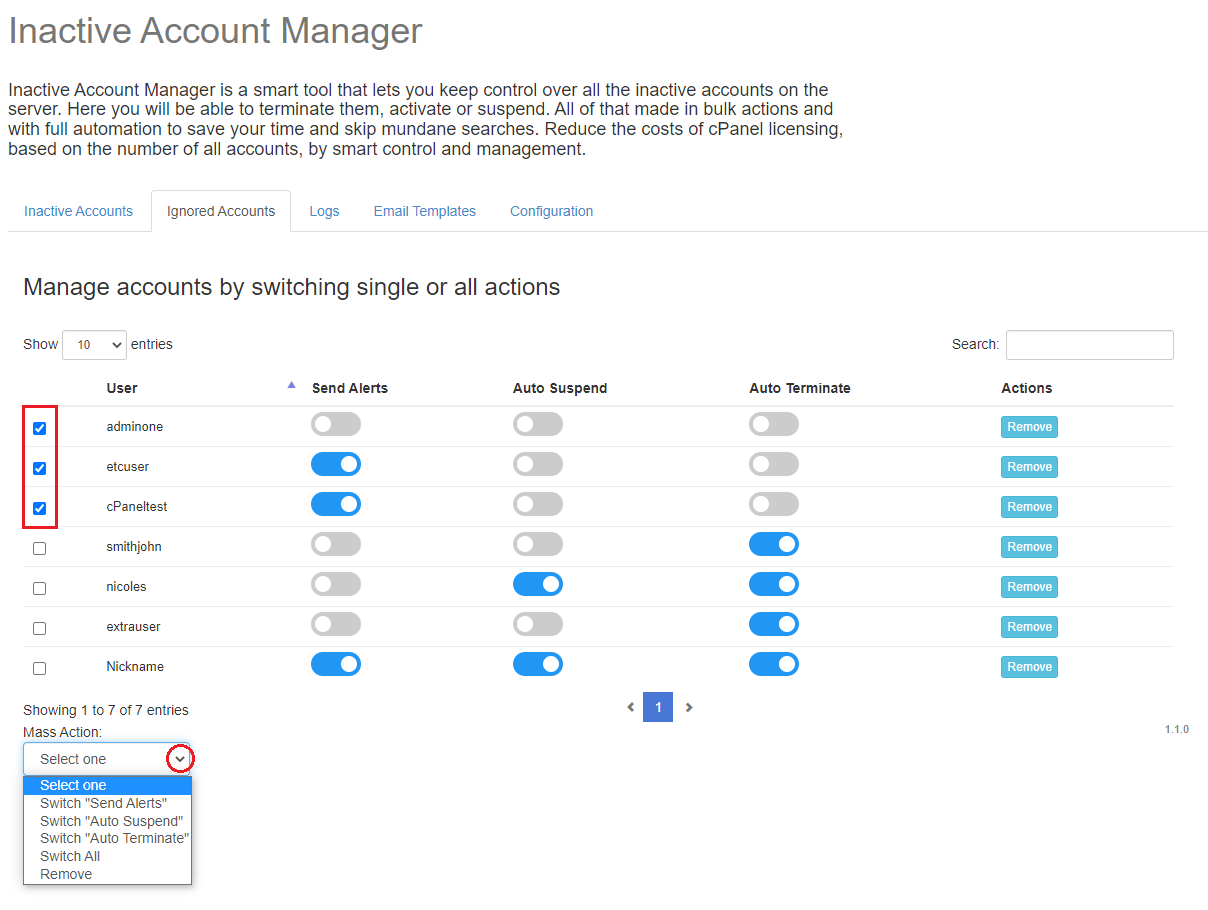
| You may switch off all the options for an account - then such account will be completely skipped and no action taken by the module. It is possible to turn off the module actions for numerous accounts. Select the accounts' users and then in Mass Actions choose the option you are interested in:
|
|
Logs
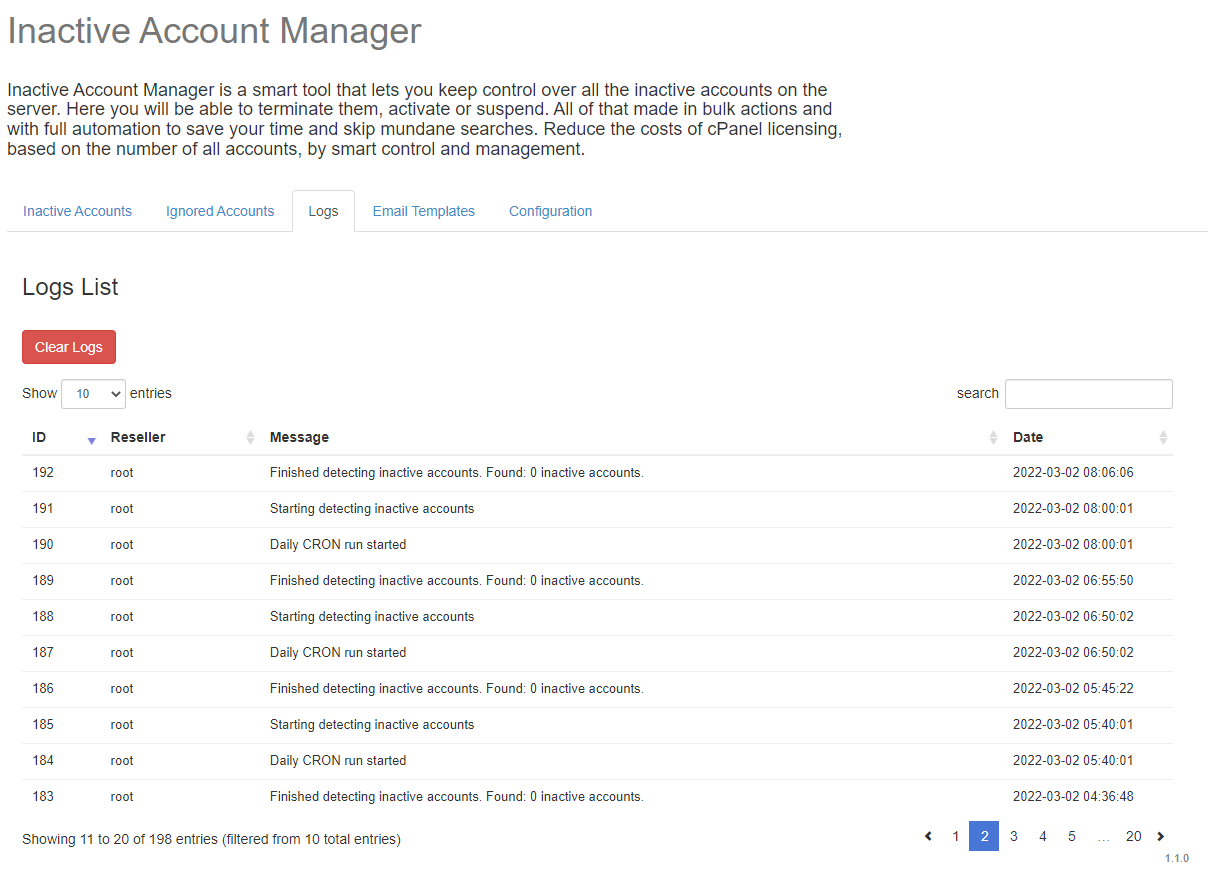
| Move to 'Logs' section to find a list of all actions triggered by the module. Review them in search of any needed information, you can use the 'Search' box to find the activities you need. |
|
Emial Templates
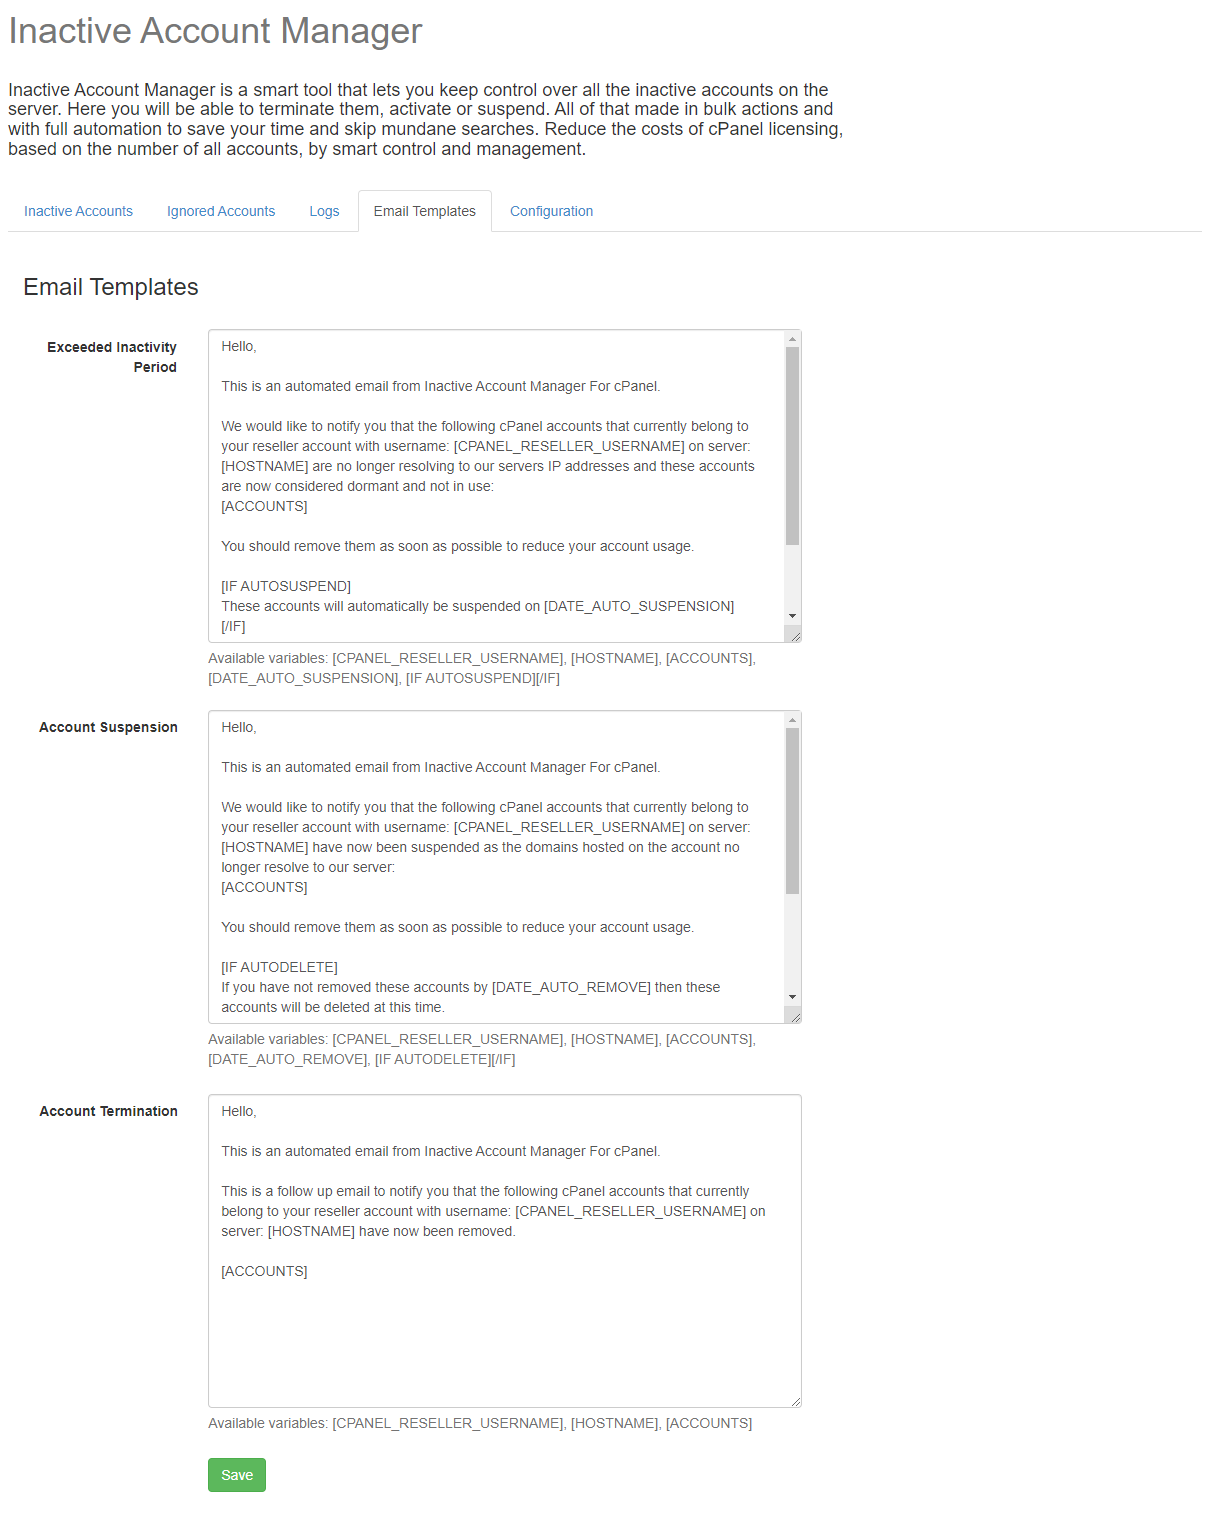
There are three defult email templates that are used by the module to send alerts to accounts owners:
Here you may see their content and change it freely. Under every template content, you can find variables available for this message. |
|
Reseller View In WHM
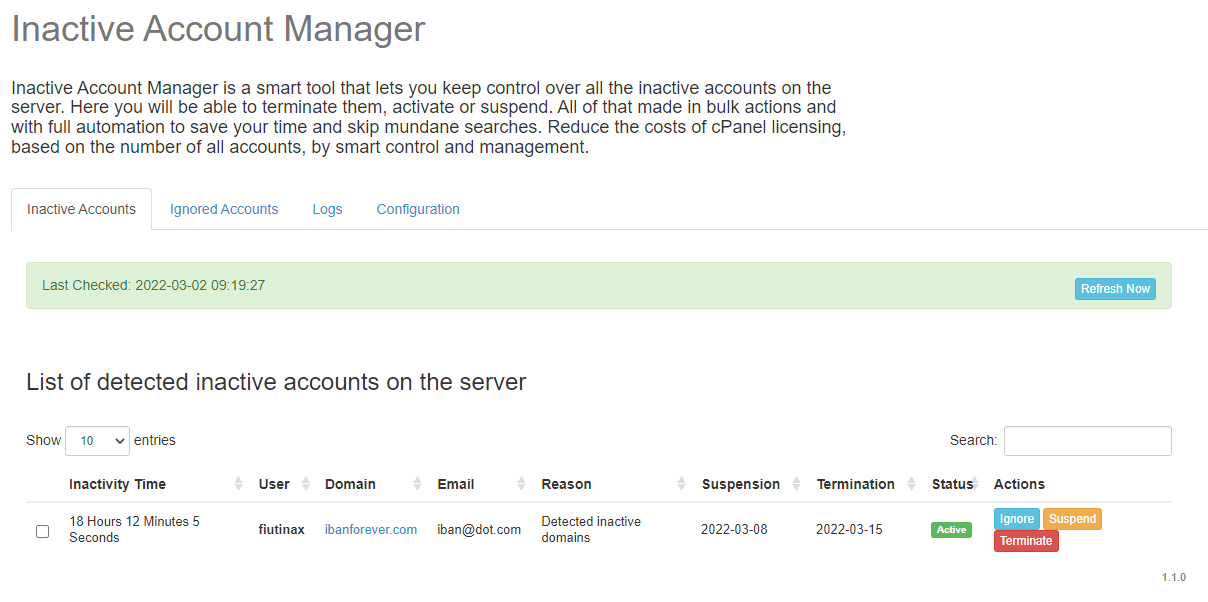
| Ianctive Account Manager plugin gives resellers certain possibilities as well. Read below to review all the opitons allowed to your resellers. |
|
Configuration
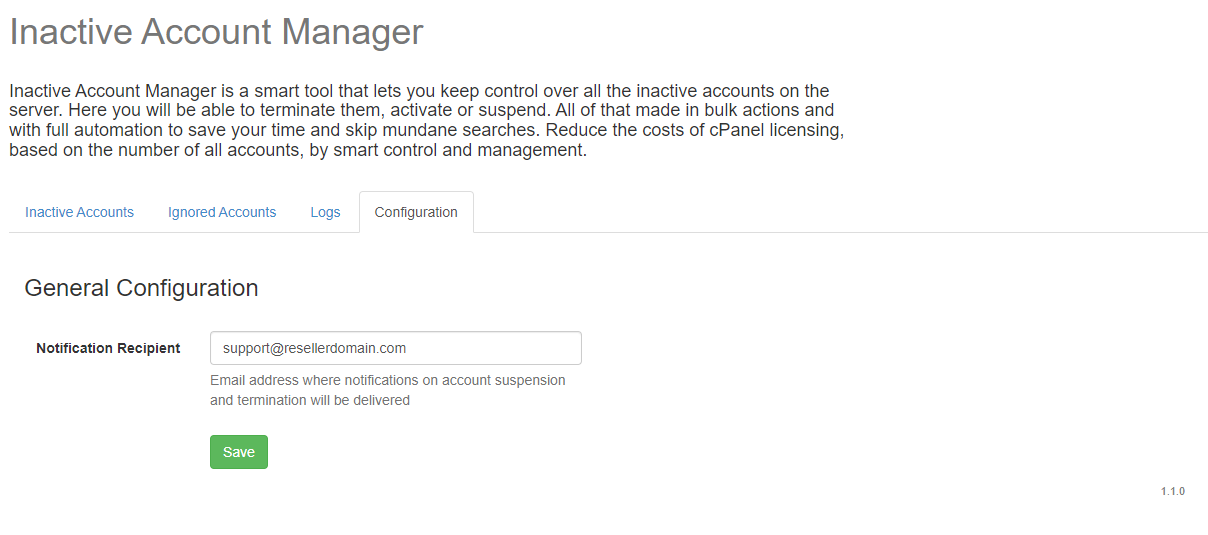
| In 'Configuration ' section reseller may change the 'Notification Recipient' - the email address where notifications and alerts from the module are sent. |
|
Inactive Accounts
| 'Inactive Accounts' section contains a list of your accounts that for some reason have been detected and claimed as inactive. The list includes information on every such account, that is:
Available actions:
At the top of this page, you can see the time when data were updated for the last time. |
|
Ignored Accounts
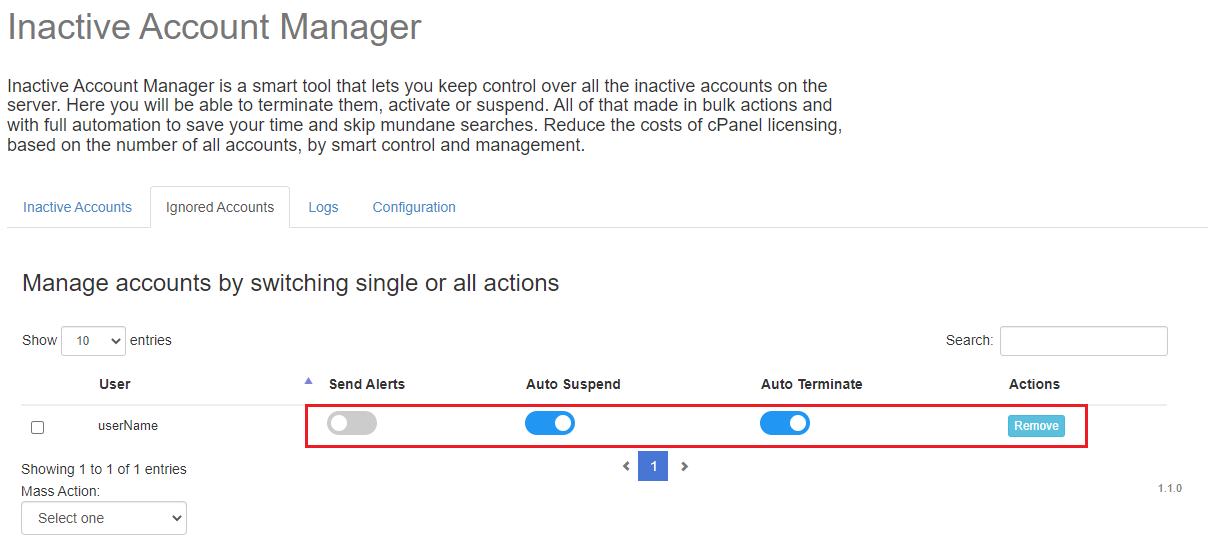
| Inactive accounts moved by the admin to 'Ignored Accounts' section. All accounts that are placed here can have personalized configuration, it is possible to turn off the three default options: sending alerts, auto suspension, and auto termination. |
|
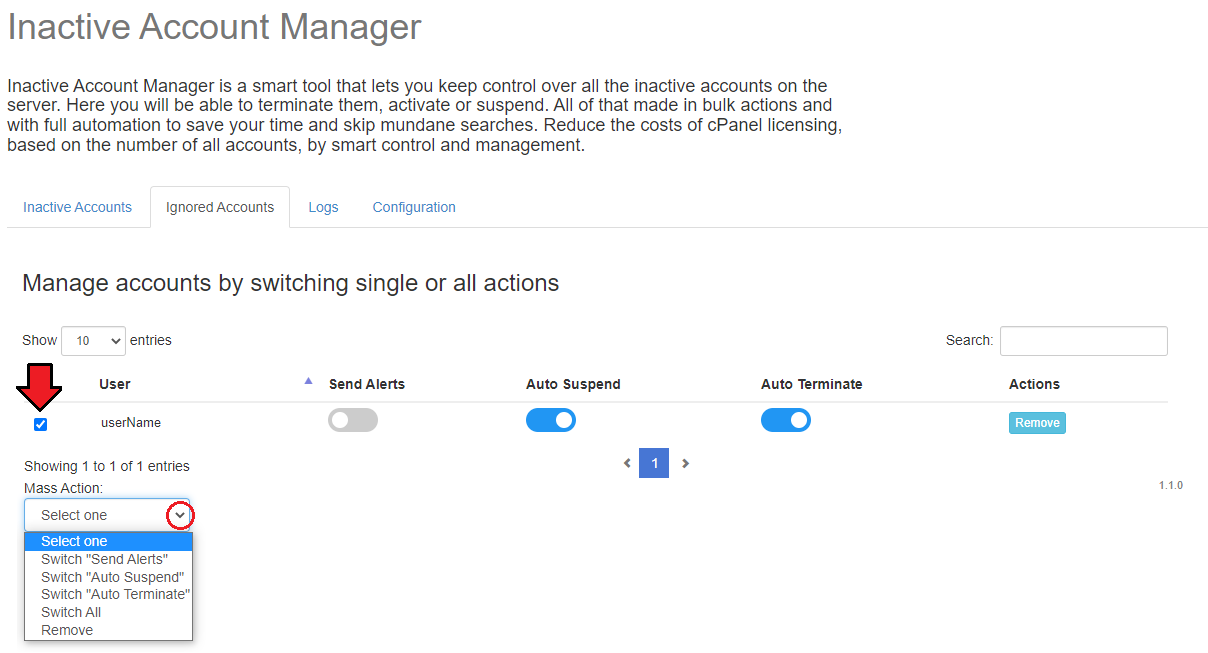
| You may switch off all the options for an account - then such account will be completely skipped and no action taken by the module. It is possible to turn off the module actions for numerous accounts. Select the accounts' users and then in Mass Actions choose the option you are interested in:
|
|
Logs
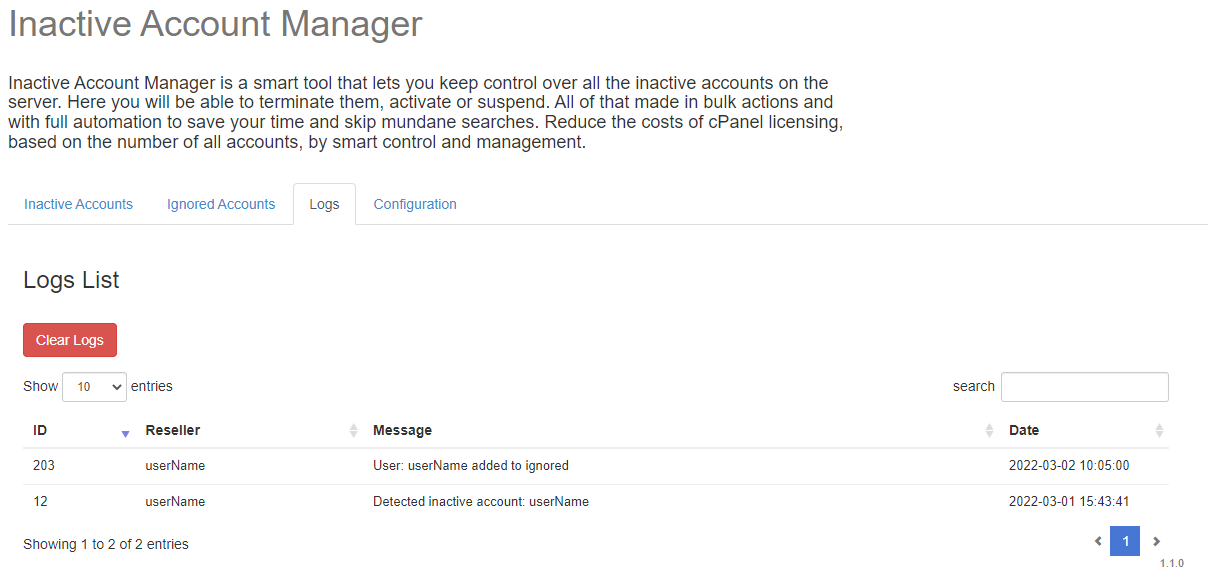
| 'Logs' includes a list of all actions attempted bn the module. Review them in search of any needed information, you may use the 'Search' box to find precise data. |
|
Plugin Workflow
Below you can see how the module works, read to find out its logic:
|
Uninstallation Process
| If you no longer wish to use Inactive Account Manager For cPanel, you may safely uninstall the plugin. To do so, simply open the console and execute the following commands: cd /root/InactiveAccountManager/ and then run: sh install uninstall That is all, the plugin is completely and successfully uninstalled now. |
Common Problems
| 1. When you have problems with connection, check whether your SELinux or firewall does not block ports. |