R1Soft Backups For WHMCS
(→Configuration of Server) |
(→Configuration of Product) |
||
| Line 103: | Line 103: | ||
==Configuration of Product== | ==Configuration of Product== | ||
{| | {| | ||
| − | |style="padding: 10px 0px 15px 15px;"|''' | + | |style="padding: 10px 0px 15px 15px;"|'''9. In order to create and configure a product, go to '' 'Setup' '' → '' 'Products/Services' '' → '' 'Products/Services' ''.'''<br /> |
Click on '' 'Create a New Group' ''. | Click on '' 'Create a New Group' ''. | ||
|} | |} | ||
| Line 110: | Line 110: | ||
|} | |} | ||
{| | {| | ||
| − | |style="padding: 0px 0px 20px 15px;"|''' | + | |style="padding: 0px 0px 20px 15px;"|'''10. Enter product group name and press '' 'Save Changes' ''.''' |
|} | |} | ||
{| | {| | ||
| Line 116: | Line 116: | ||
|} | |} | ||
{| | {| | ||
| − | |style="padding: 0px 0px 15px 15px;"|''' | + | |style="padding: 0px 0px 15px 15px;"|'''11. When you have a product group, you can create your product.'''<br /> |
To create a product click on '' 'Create a New Product' ''. | To create a product click on '' 'Create a New Product' ''. | ||
|} | |} | ||
| Line 123: | Line 123: | ||
|} | |} | ||
{| | {| | ||
| − | |style="padding: 0px 0px 15px 15px;"|''' | + | |style="padding: 0px 0px 15px 15px;"|'''12. Afterwards, choose your product group and type from dropdown menus, enter your product name and press '' 'Continue' ''.'''<br /> |
'' 'Product Type' '' should be set to '' 'Hosting Account' ''. | '' 'Product Type' '' should be set to '' 'Hosting Account' ''. | ||
|} | |} | ||
| Line 130: | Line 130: | ||
|} | |} | ||
{| | {| | ||
| − | |style="padding: 0px 0px 15px 15px;"|''' | + | |style="padding: 0px 0px 15px 15px;"|'''13. Now, go to '' 'Module Settings' '' section, choose both '' 'R1softbackups' '' and your previously created server group from dropdown menus.'''<br /> |
Next, click on '' 'Save Changes' ''.''' | Next, click on '' 'Save Changes' ''.''' | ||
|} | |} | ||
| Line 136: | Line 136: | ||
|style="padding: 0px 0px 20px 25px;"|[[File:RSB14.png]] | |style="padding: 0px 0px 20px 25px;"|[[File:RSB14.png]] | ||
|} | |} | ||
| + | |||
=Management= | =Management= | ||
{| | {| | ||
Revision as of 14:47, 5 May 2015
Contents |
About R1Soft Backups For WHMCS
| R1Soft Backups For WHMCS is a powerful module which allows you to automatically provision virtual servers to your customers. The great advantage of this module is the fact that customers can manage virtual servers, backups and much more in your own WHMCS client area! |
- Admin Area Features:
| ✔ Features |
| ✔ |
| ✔ |
- Client Area Features:
| ✔ Features |
| ✔ |
| ✔ |
- General Info:
| ✔ |
| ✔ Multi-Language Support |
| ✔ Supports WHMCS V5 and Later |
Installation and Configuration
| This tutorial will show you how to successfully install and configure R1Soft Backups For WHMCS. We will guide you step by step through the whole installation and configuration process. |
Installation
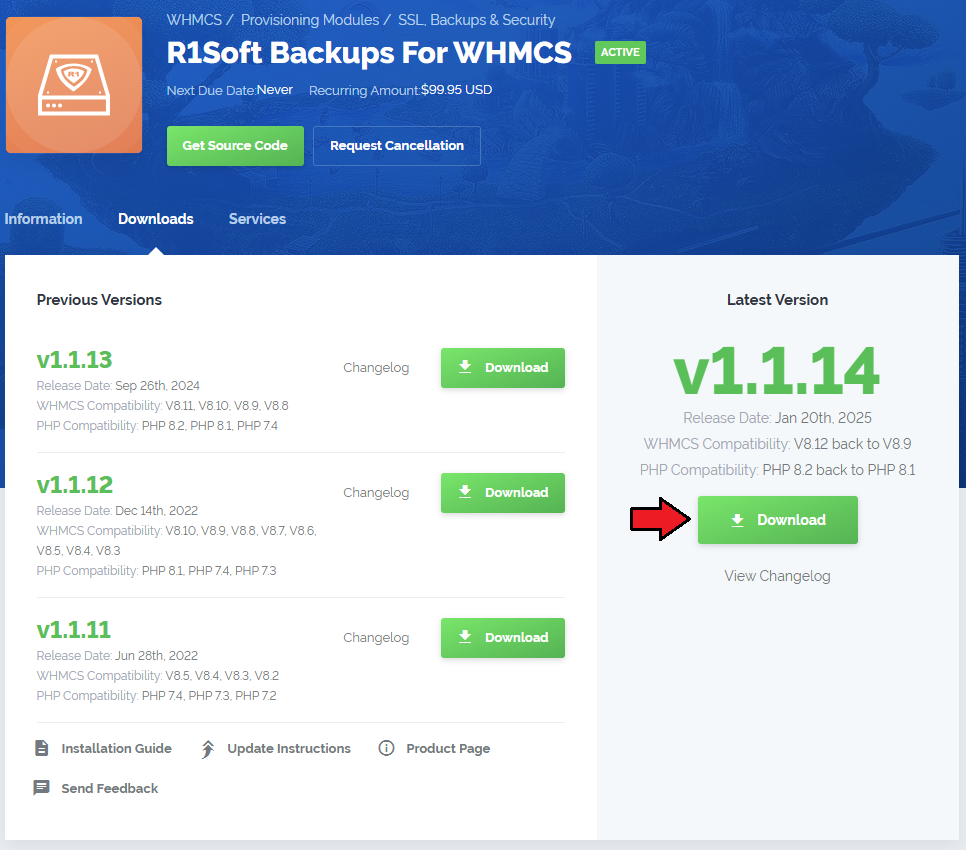
| 1. Log in to your client area and download R1Soft Backups For WHMCS. |
|
| 2. Upload and extract the module into the main WHMCS directory. |

|
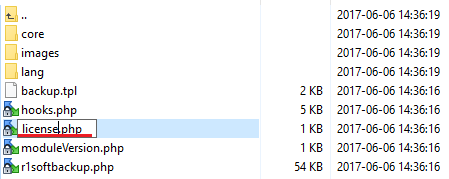
| 3. When you install R1Soft Backups for the first time you have to rename 'license_RENAME.php' file. File is located in 'modules/servers/R1SoftBackups/license_RENAME.php' . Rename it from 'license_RENAME.php' to 'license.php' . |
|
| 4. In order to configure your license key, you have to edit a previously renamed 'license.php' file. Enter your license key between quotation marks as presented on the following screen. |

|
Configuration of Server
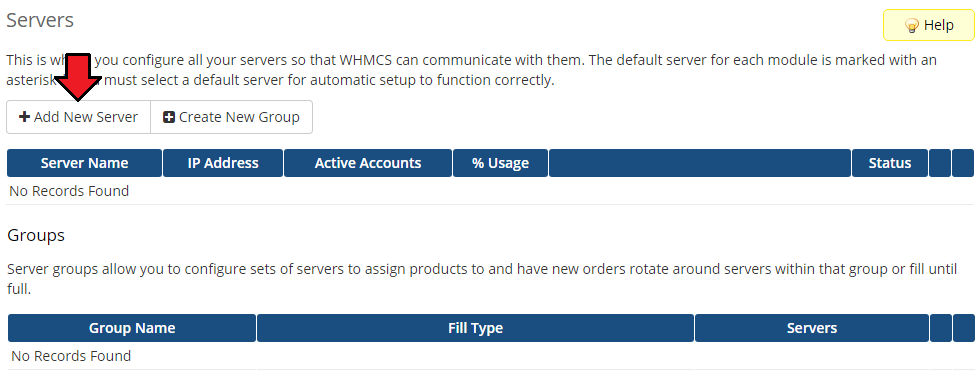
| 5. Now, we will show you how to configure a new product. Go to 'Setup' → 'Products/Services' → 'Servers' and press 'Add New Server' . |
|
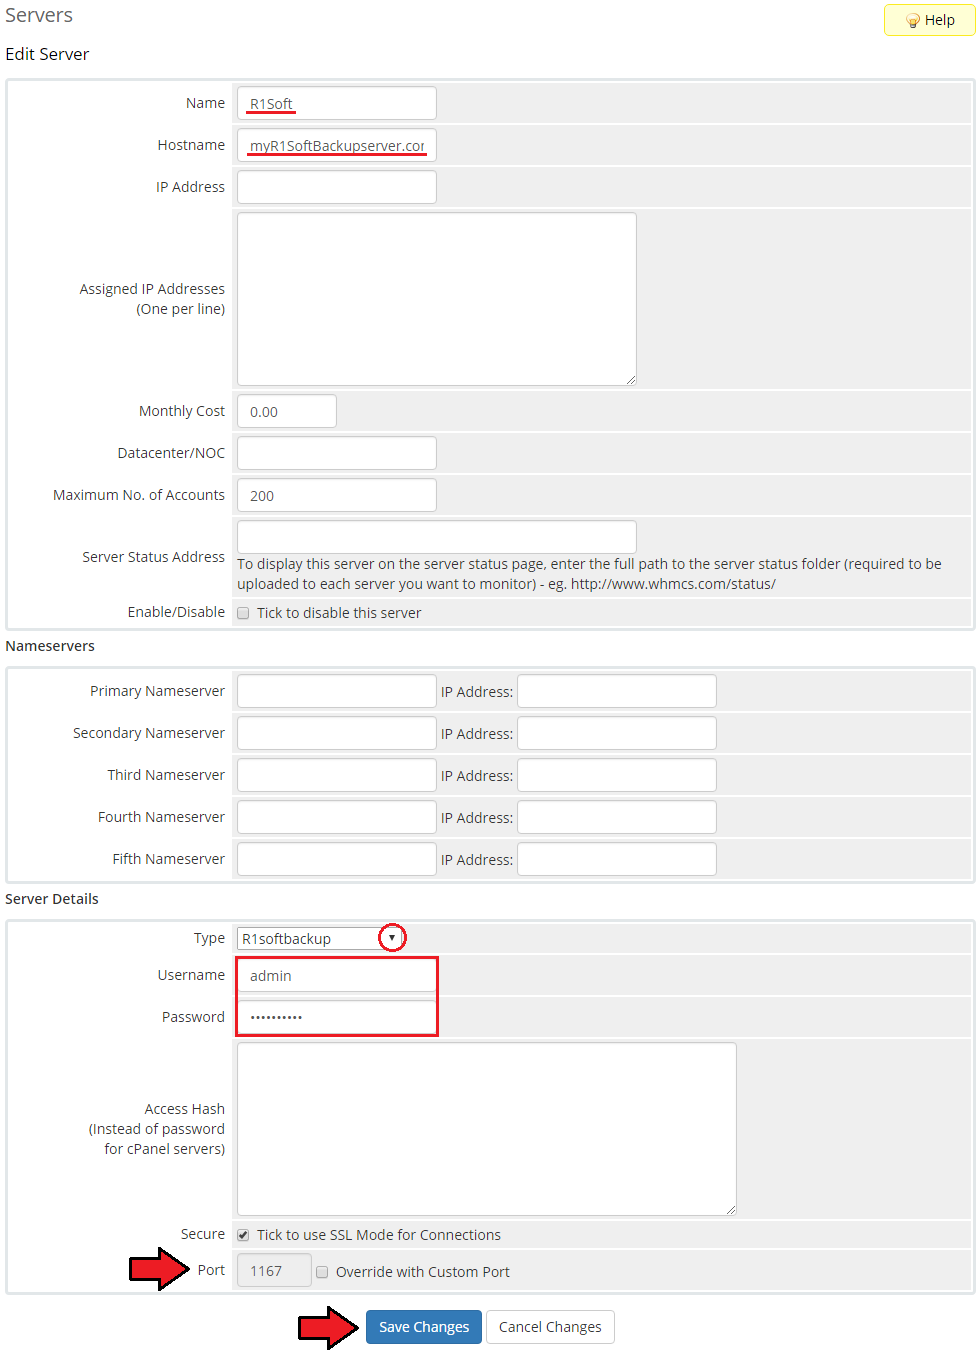
| 6. Next, enter your server name, IP address/hostname, username, password and admin tenant ID. Choose 'R1SoftBackups' from a dropdown menu and press 'Save Changes' . |
|
| 7. It is time to create a server group. To do so, click on 'Create Server Group' . |
|
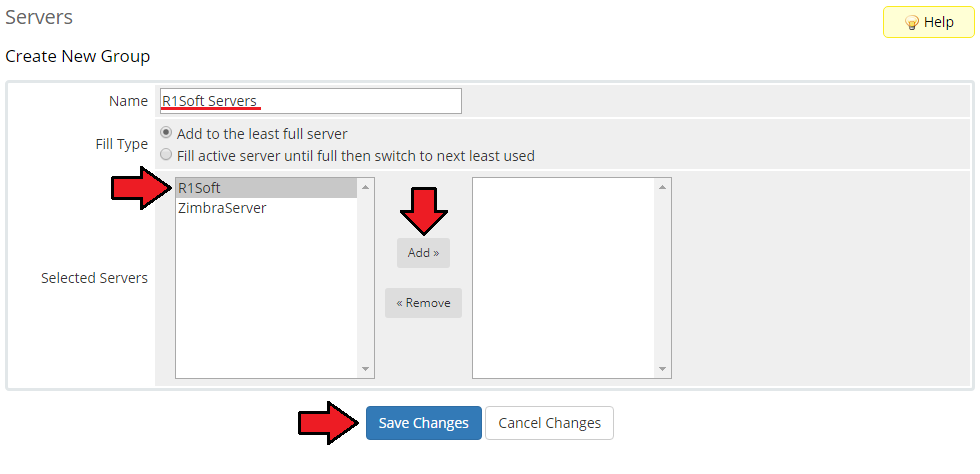
| 8. Enter name, click on your previously created server, press 'Add' and afterwards 'Save Changes' . |
|
Configuration of Product
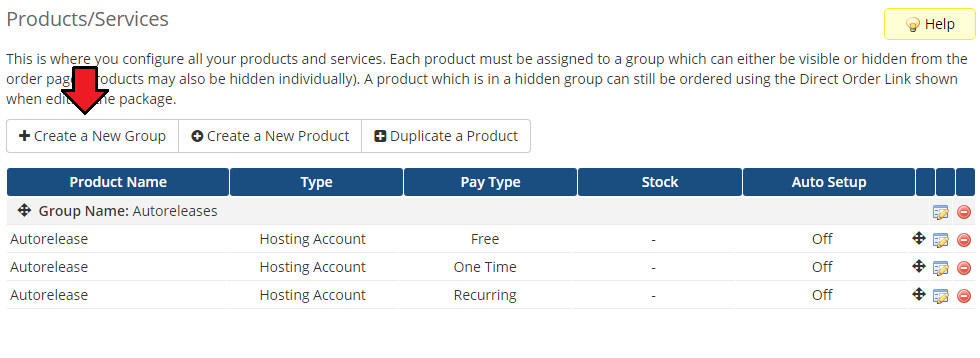
| 9. In order to create and configure a product, go to 'Setup' → 'Products/Services' → 'Products/Services' . Click on 'Create a New Group' . |
|
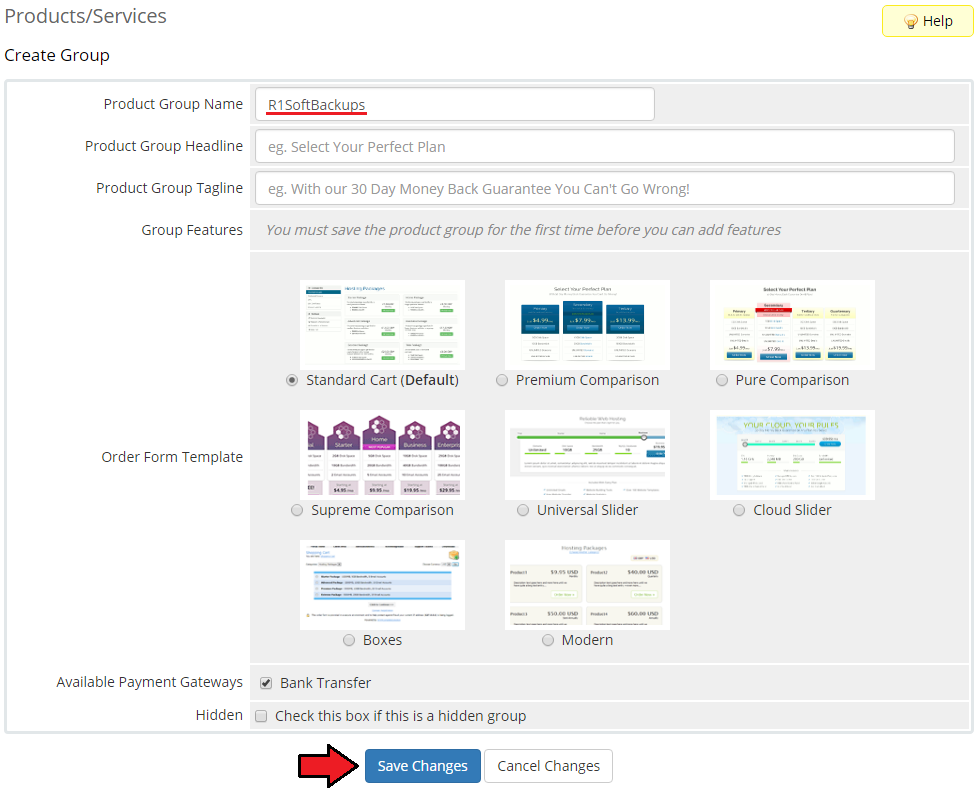
| 10. Enter product group name and press 'Save Changes' . |
|
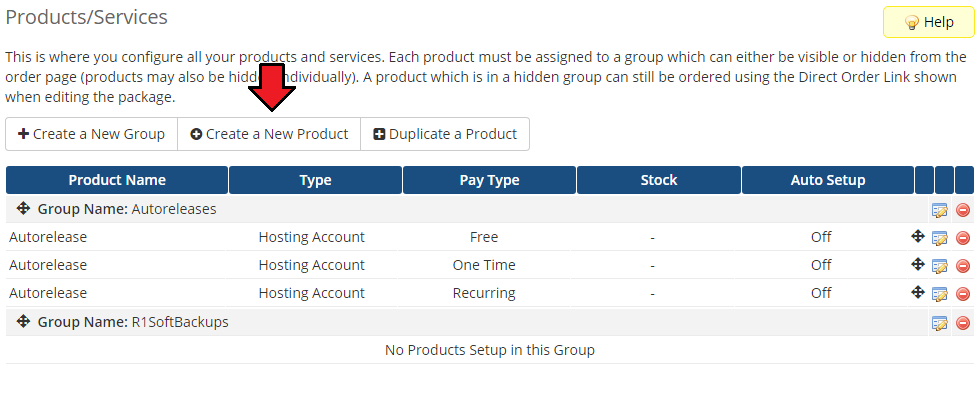
| 11. When you have a product group, you can create your product. To create a product click on 'Create a New Product' . |

|
| 12. Afterwards, choose your product group and type from dropdown menus, enter your product name and press 'Continue' . 'Product Type' should be set to 'Hosting Account' . |
|
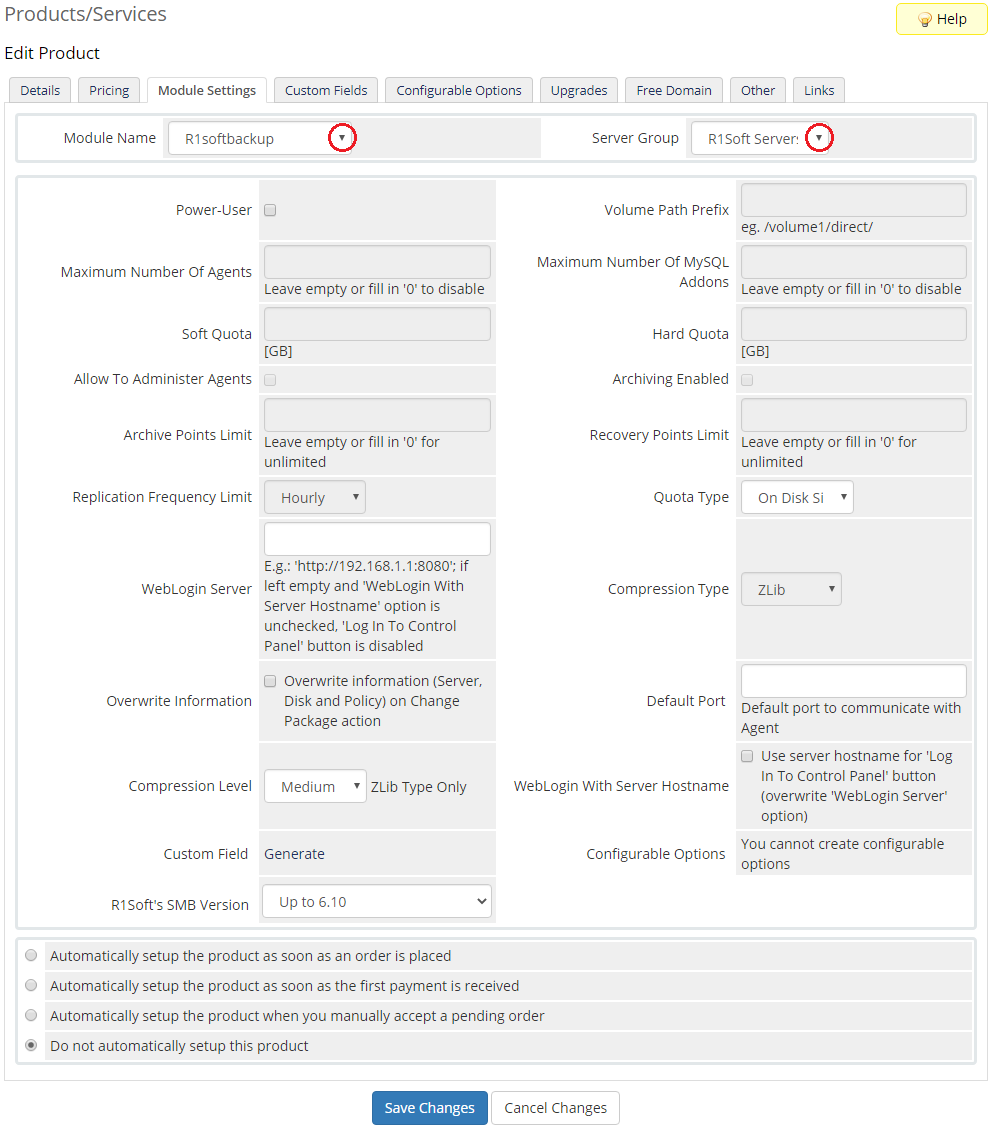
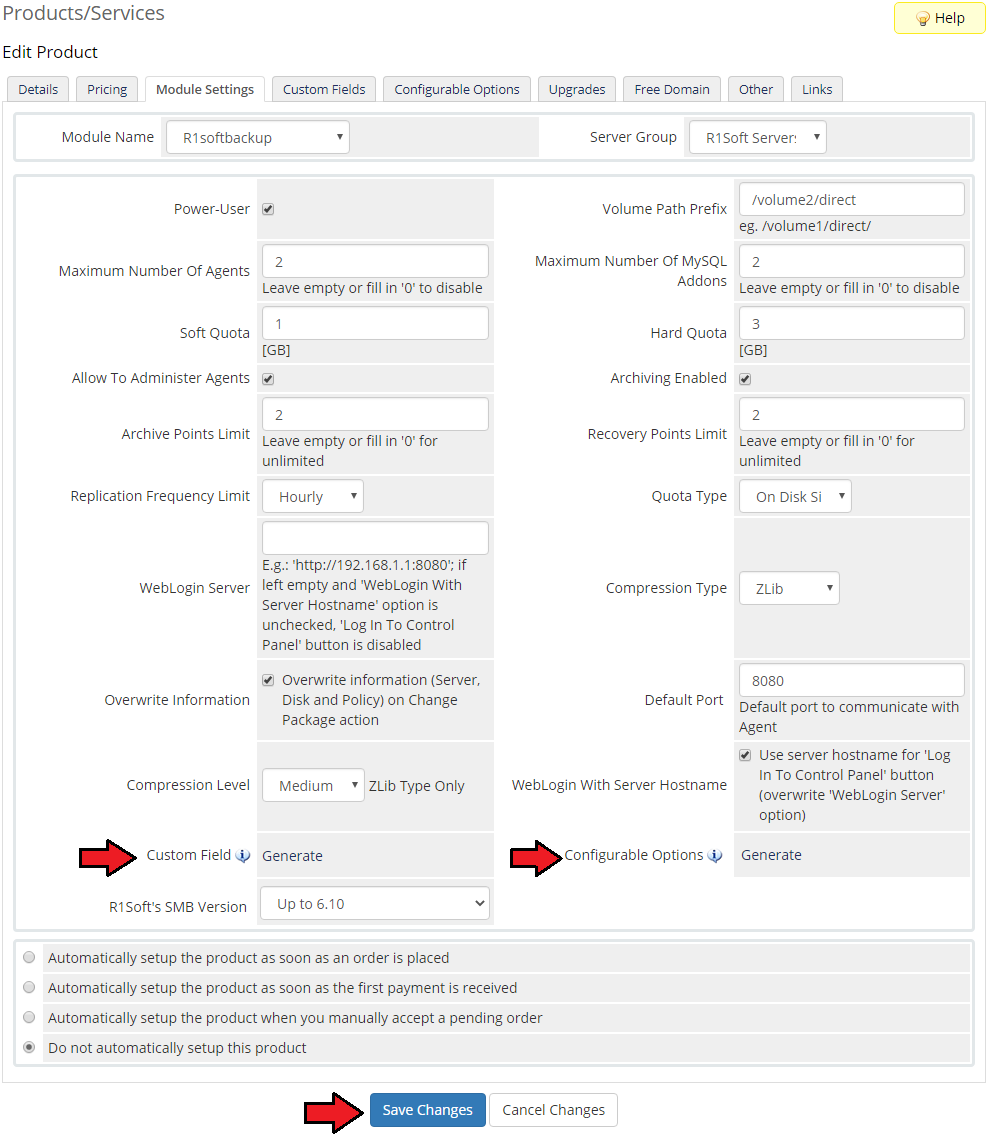
| 13. Now, go to 'Module Settings' section, choose both 'R1softbackups' and your previously created server group from dropdown menus. Next, click on 'Save Changes' . |
|
Management
| R1Soft Backups For WHMCS allows you |
Ordering
Client Area
TipsCommon Problems
|