QuickBooks Desktop For WHMCS
Contents |
About QuickBooks Desktop For WHMCS
| QuickBooks Desktop For WHMCS module allows integration between the two systems and helps you improve your accounting management. This module synchronizes the clients, invoices and transactions details gathered in your WHMCS with QuickBooks database. |
- Module Features:
| ✔ |
| ✔ |
| ✔ |
| ✔ View Logs |
- General Info:
| ✔ Multi-Currency Support |
| ✔ |
| ✔ Multi-Language Support |
| ✔ Supports WHMCS V5 and V6 |
- Requirements:
| ✔ |
| ✔ PHP 5.3 |
| ✔ |
Installation
| This tutorial will show you how to successfully install and configure QuickBooks Desktop For WHMCS. We will guide you step by step through the whole installation and configuration process. |
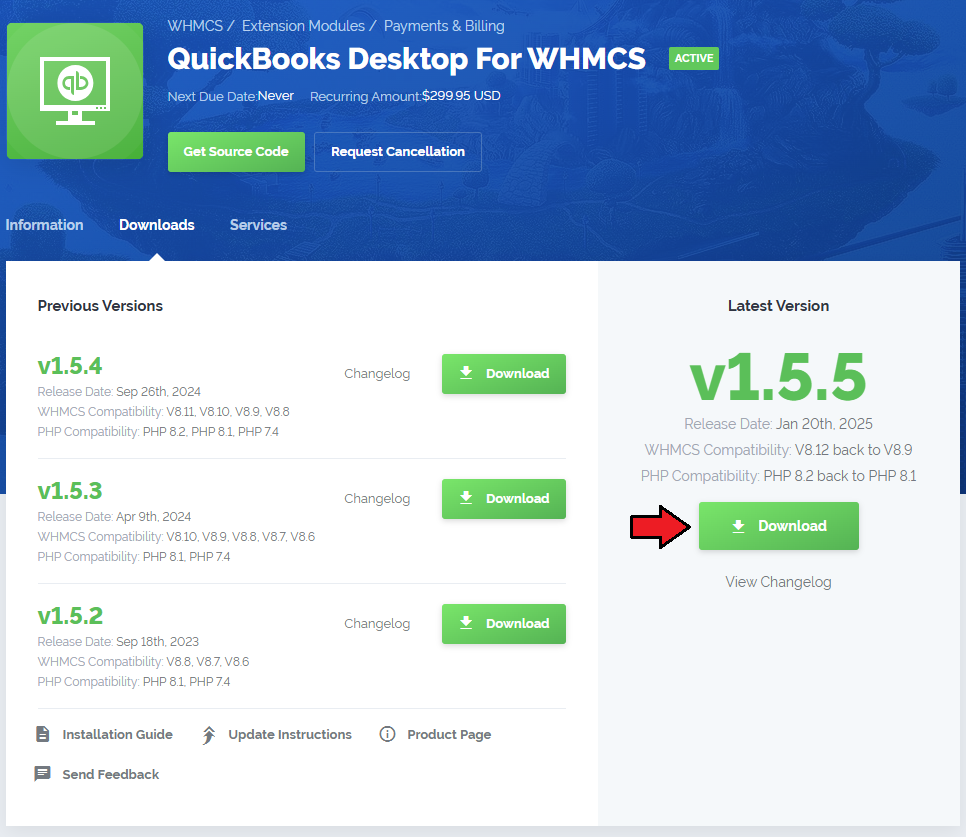
| 1. Log in to your client area and download QuickBooks Desktop For WHMCS. |
|
| 2. Upload and extract the module into the main WHMCS directory. Files in your WHMCS directory should look like on the following screen. |

|
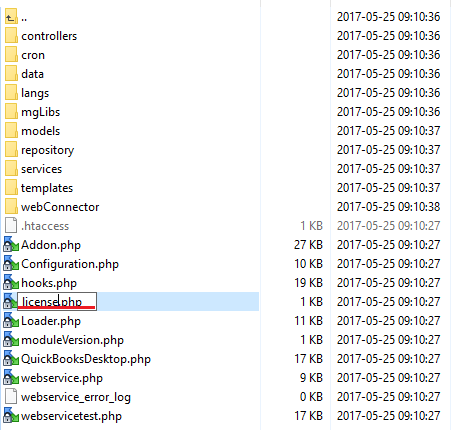
| 3. When you install QuickBooks Desktop for the first time you have to rename 'license_RENAME.php' file. File is located in 'modules/addons/QuickBooks_Desktop/license_RENAME.php'. Rename it from 'license_RENAME.php' to 'license.php'. |
|
| 4. In order to configure your license key, you have to edit the previously renamed 'license.php' file. Enter your license key between quotation marks as presented on the following screen. You can find your license key in your client area → 'My Products'. |

|
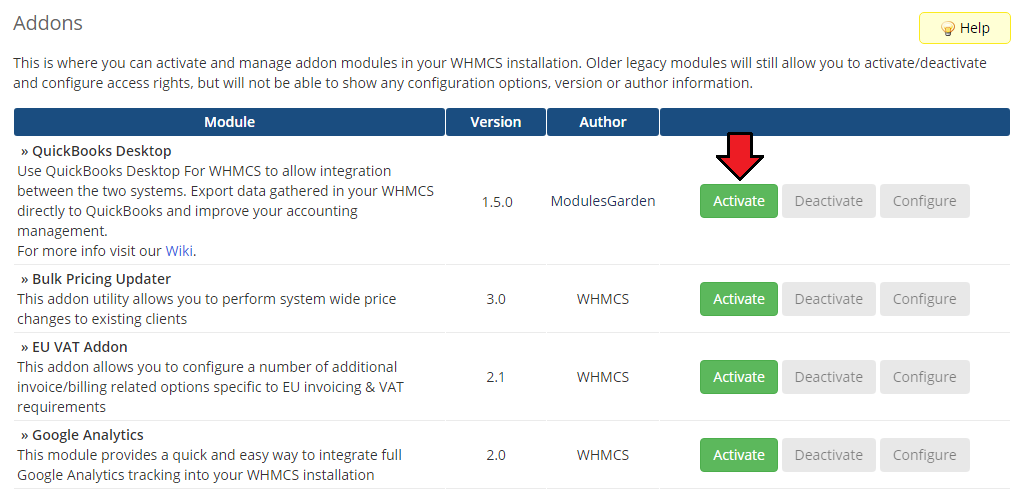
| 5. Now you have to activate the module in your WHMCS system. Log in to your WHMCS admin area. Go to 'Setup' → 'Addon Modules' . Afterwards, find 'QuickBooks Desktop' and press 'Activate' button. |
|
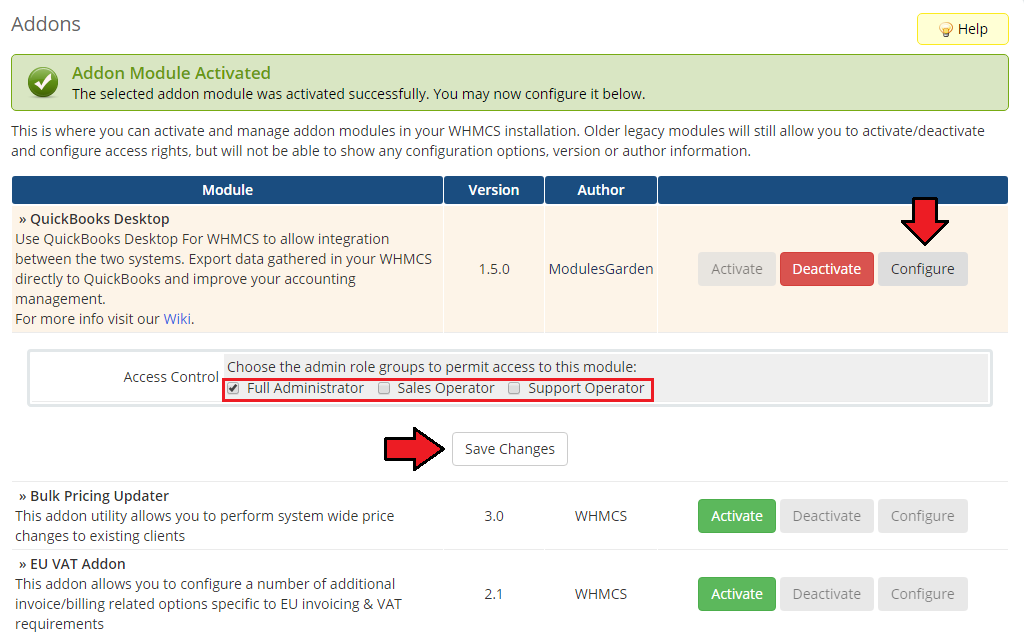
| 6. In the next step you need to permit access to this module. To do so, click on 'Configure' button, check required group of administrators and press 'Save Changes'. |
|
| 7. You have just successfully installed QuickBooks Desktop For WHMCS! You can access your module under 'Addons' → 'QuickBooks Desktop'. |
Configuration and Management
| QuickBooks Desktop For WHMCS is a module which allows you to export any data on clients, invoices and transactions directly to QuickBooks Desktop. |
Configuration
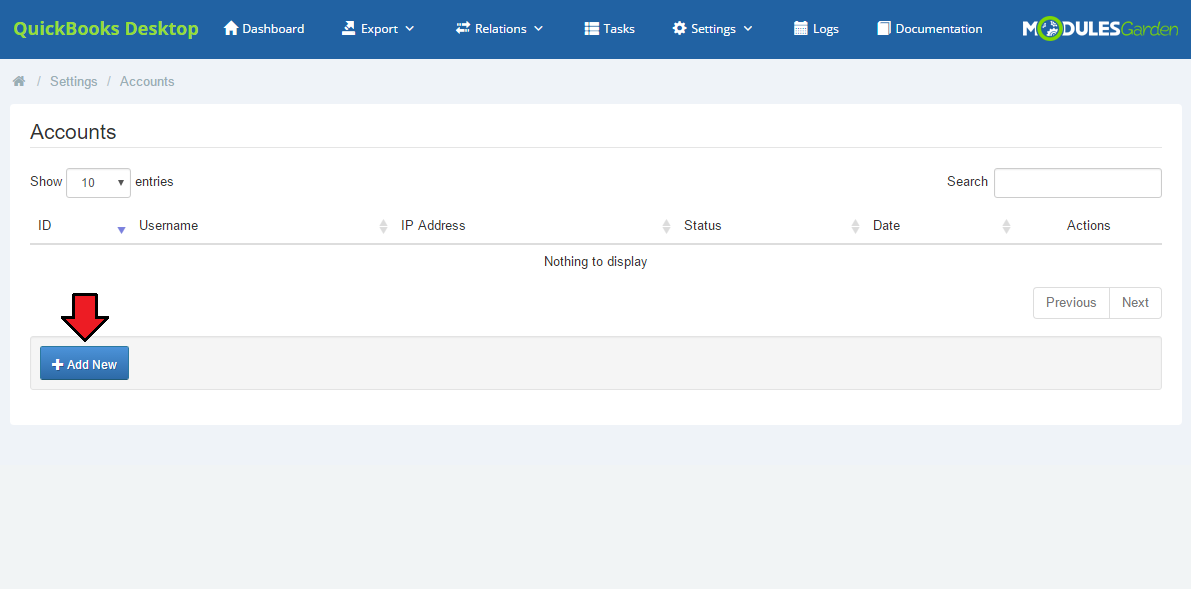
| 1. To configure your module properly, first you have to add new account. To do so proceed to 'Addons' → 'QuickBooks Desktop' → 'Settings' → 'Accounts'. |
|
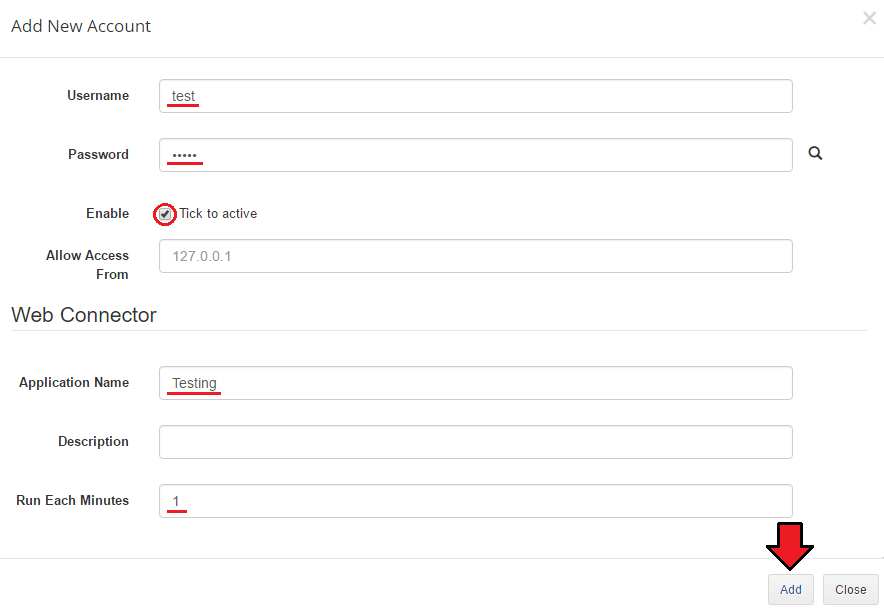
| In order to use the module fully, your account will be linked to Web Connector, a tool allowing integration beetween your WHMCS system and QuickBooks Desktop. Provide the necessary information. You can also define when the data will be synchronized automatically. |
|
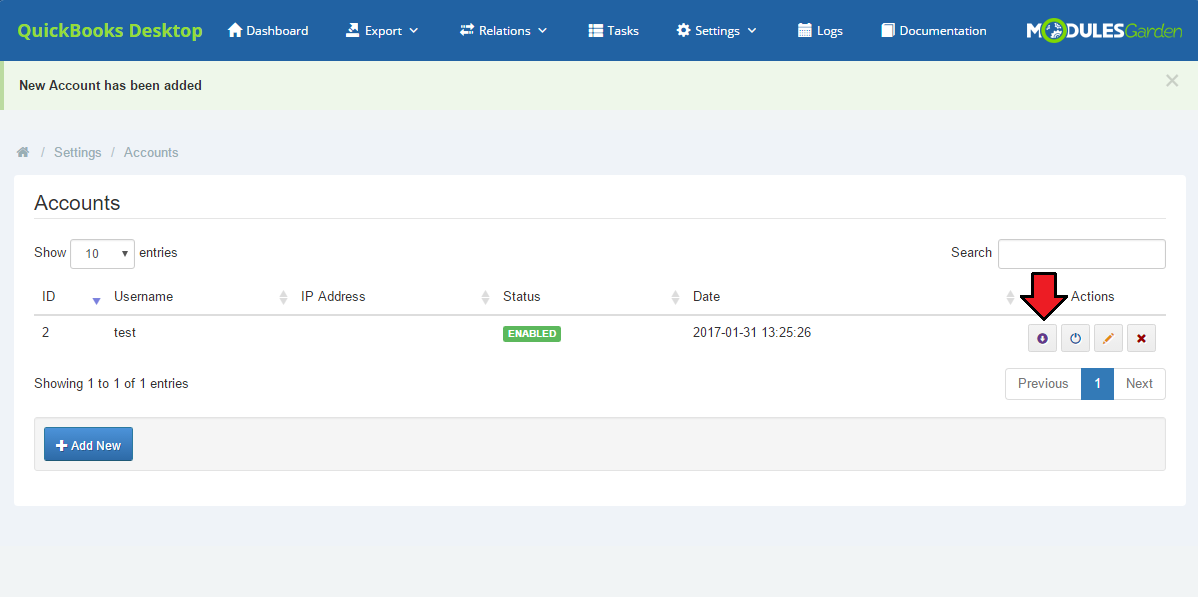
| Your account should appear on the list. It can be switched on/off, edited or deleted. For the proper configuration, you need to download the file for Web Connector now, as shown below. |
|
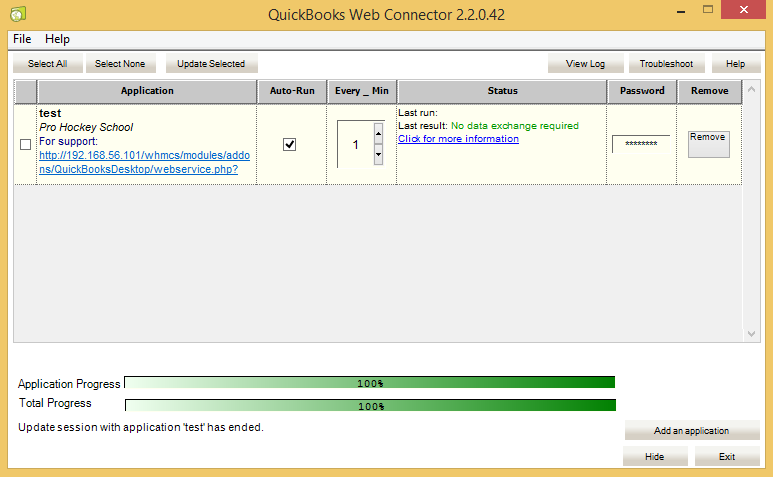
| Open the file in the QuickBooks Web Connector. |
| You should see Web Connector window.
You have successfully added your account! |
|
| 2. To use the module properly, remember to set the relations correctly. It is possible to manually declare relations between WHMCS clients, products as well as invoices and corresponding to them QuickBooks Desktop elements. |
Relation: Clients
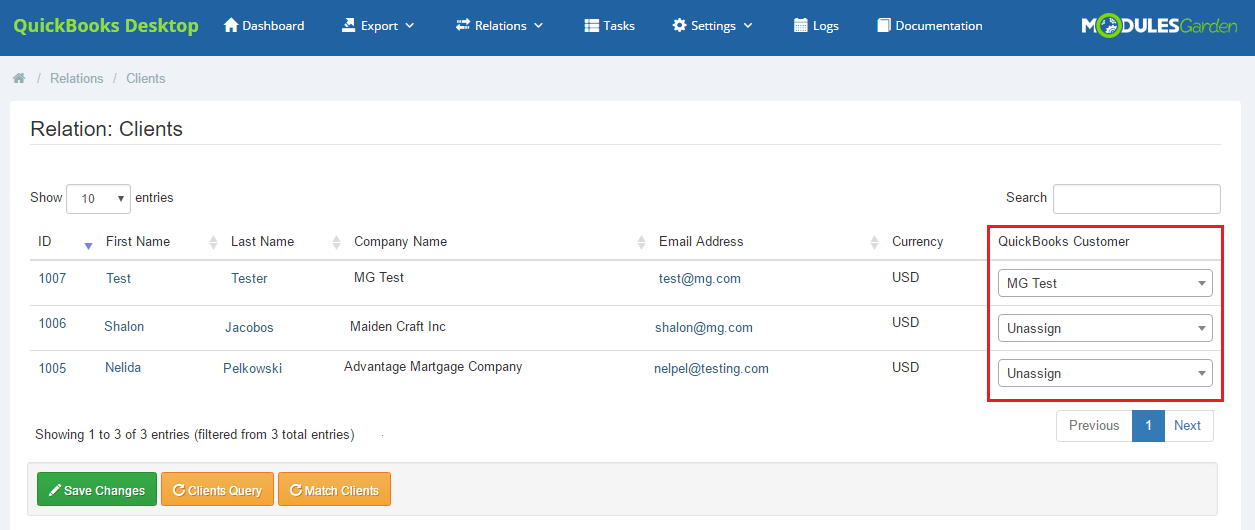
| The first possible relations to be declared are relations between WHMCS clients and QuickBooks customers. Proceed to 'Relation' → 'Clients,' you will find there a list of all clients, with their email addresses, that exist in WHMCS, |
|
Relation: Custom Client Fields
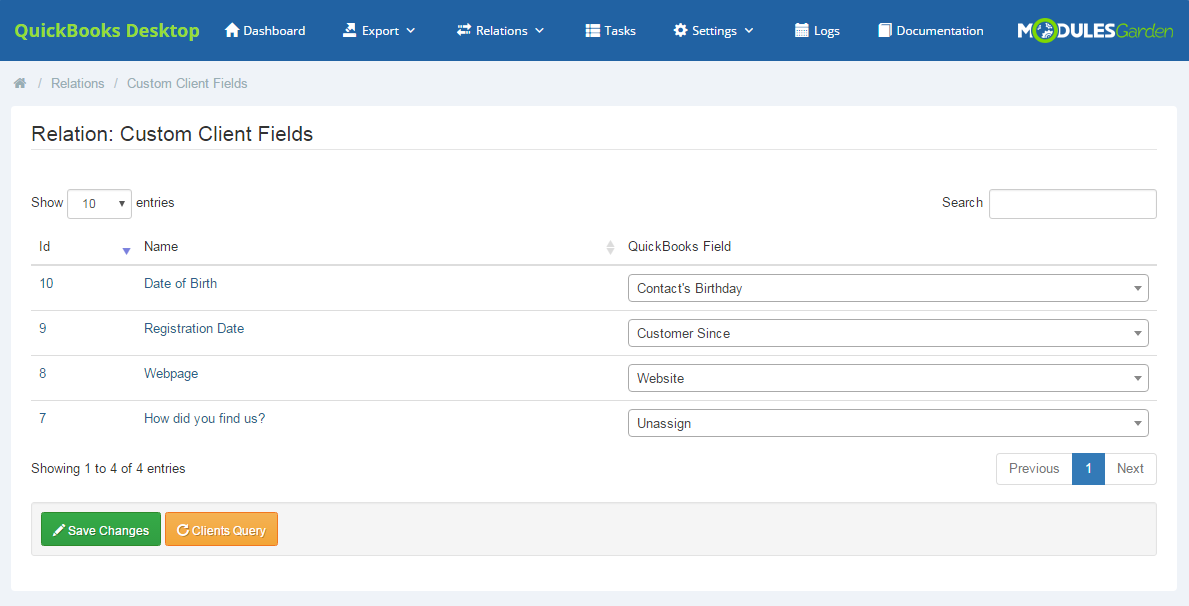
| When you go to 'Relation' → Custom Client Fields' , you will find a list of fields which appear in the client profile. |
|
Relation: Products
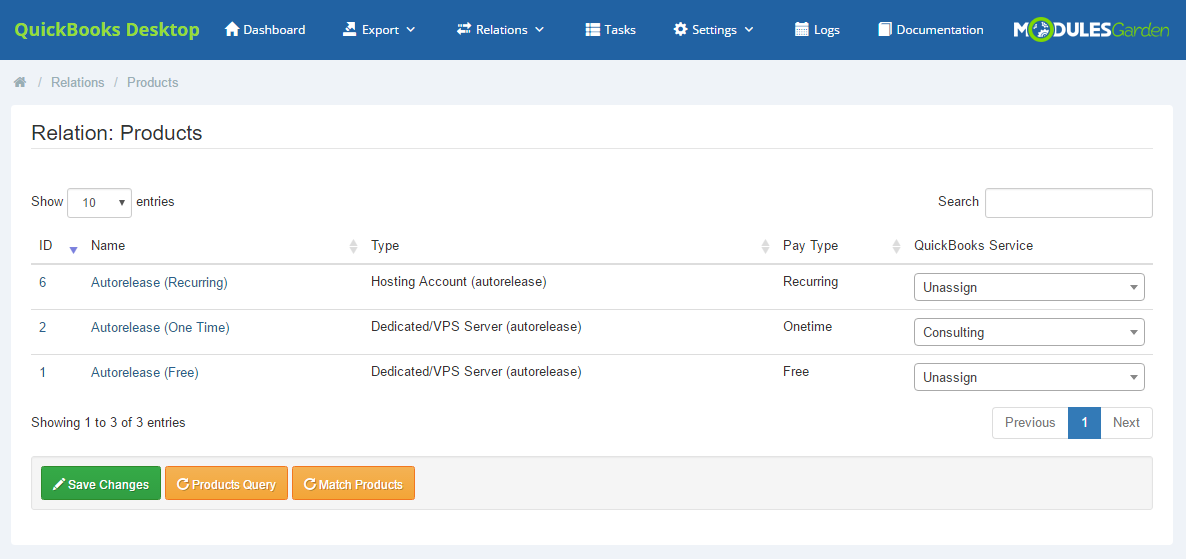
| Products relations can be declared manually and for each product separately along with those declared in 'Configuration' → 'Synchronization Settings.' ' Proceed to 'Relation' → 'Products,' you will find there a list of all products with their type and payment standard. |
|
Relation: Invoices
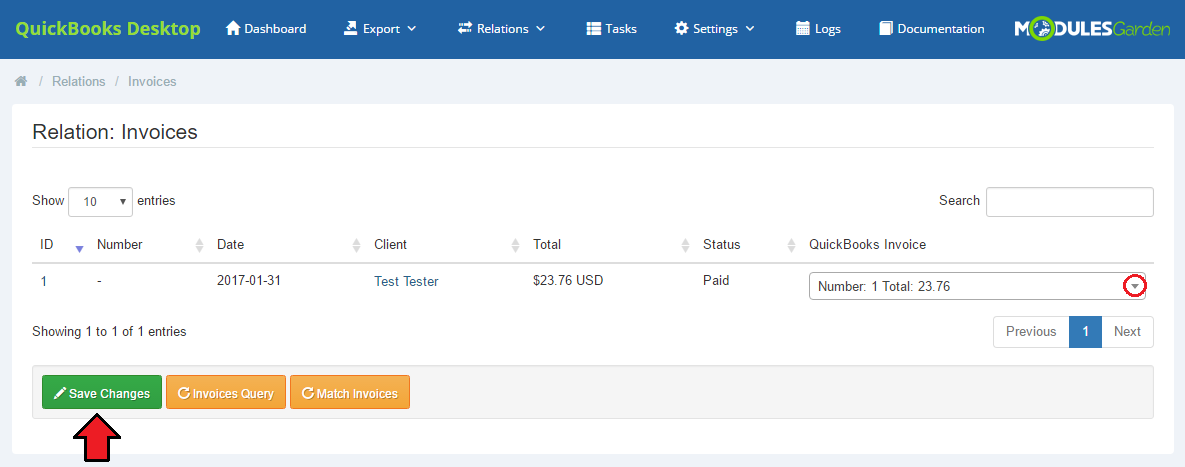
| In 'Relation' → 'Invoices' directory, you will find a list of all WHMCS invoices with their ID, date of creation, assigned client, total sum on it and status. It is possible to assign such WHMCS invoice to another invoice already exported to QuickBooks Desktop. Just choose such from dropdown menu and save changes. |
|
Relation: Tax Rules
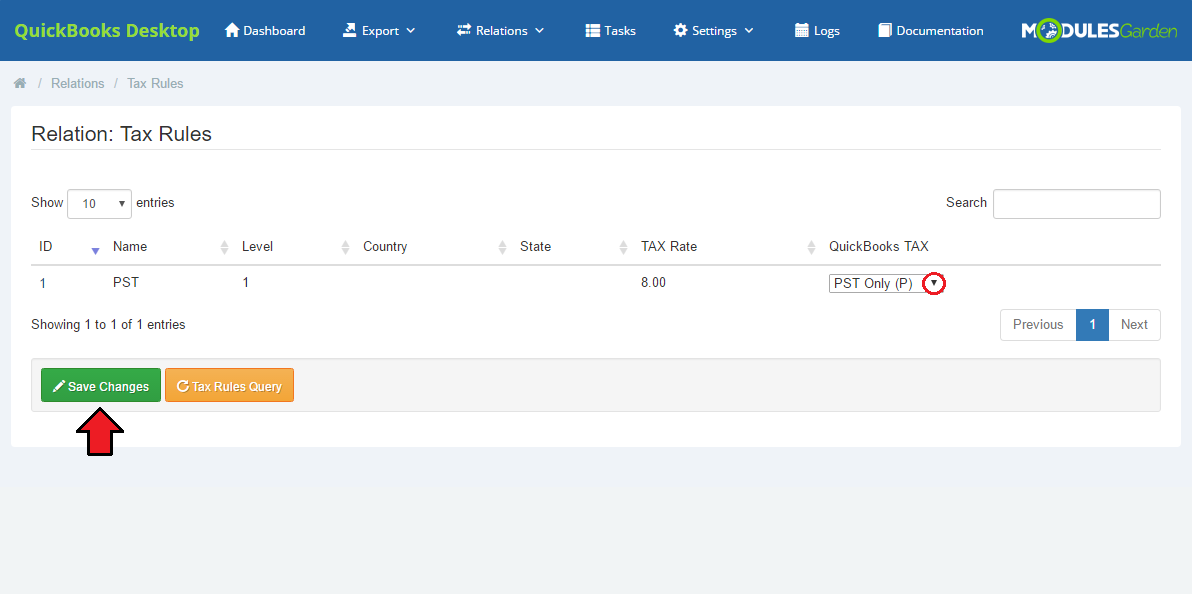
| In 'Relation' → 'Tax Rules' directory, you will find a list of defined taxes rules. Assign each rule to a specific QuickBooks tax. Select one from a dropdown menu and save changes. |
|
Relation: Currencies
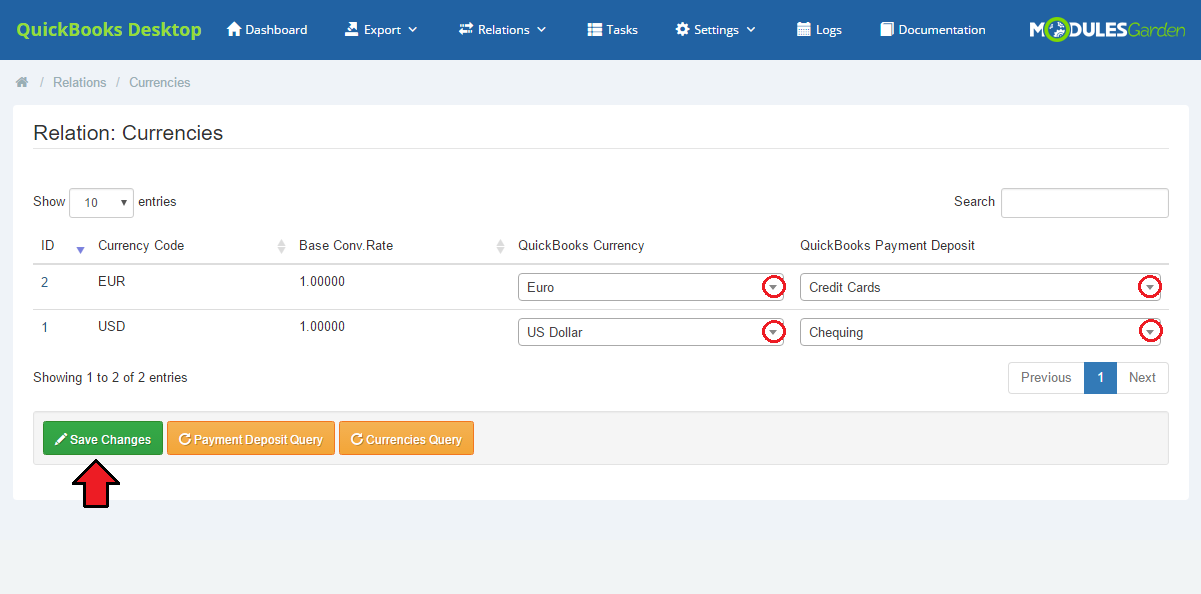
| In 'Relation' → 'Currencies' directory, you will find a list of defined currencies. Assign each currency to a specific one from QuickBooks Desktop. Select one from a dropdown menu and save changes. |
|
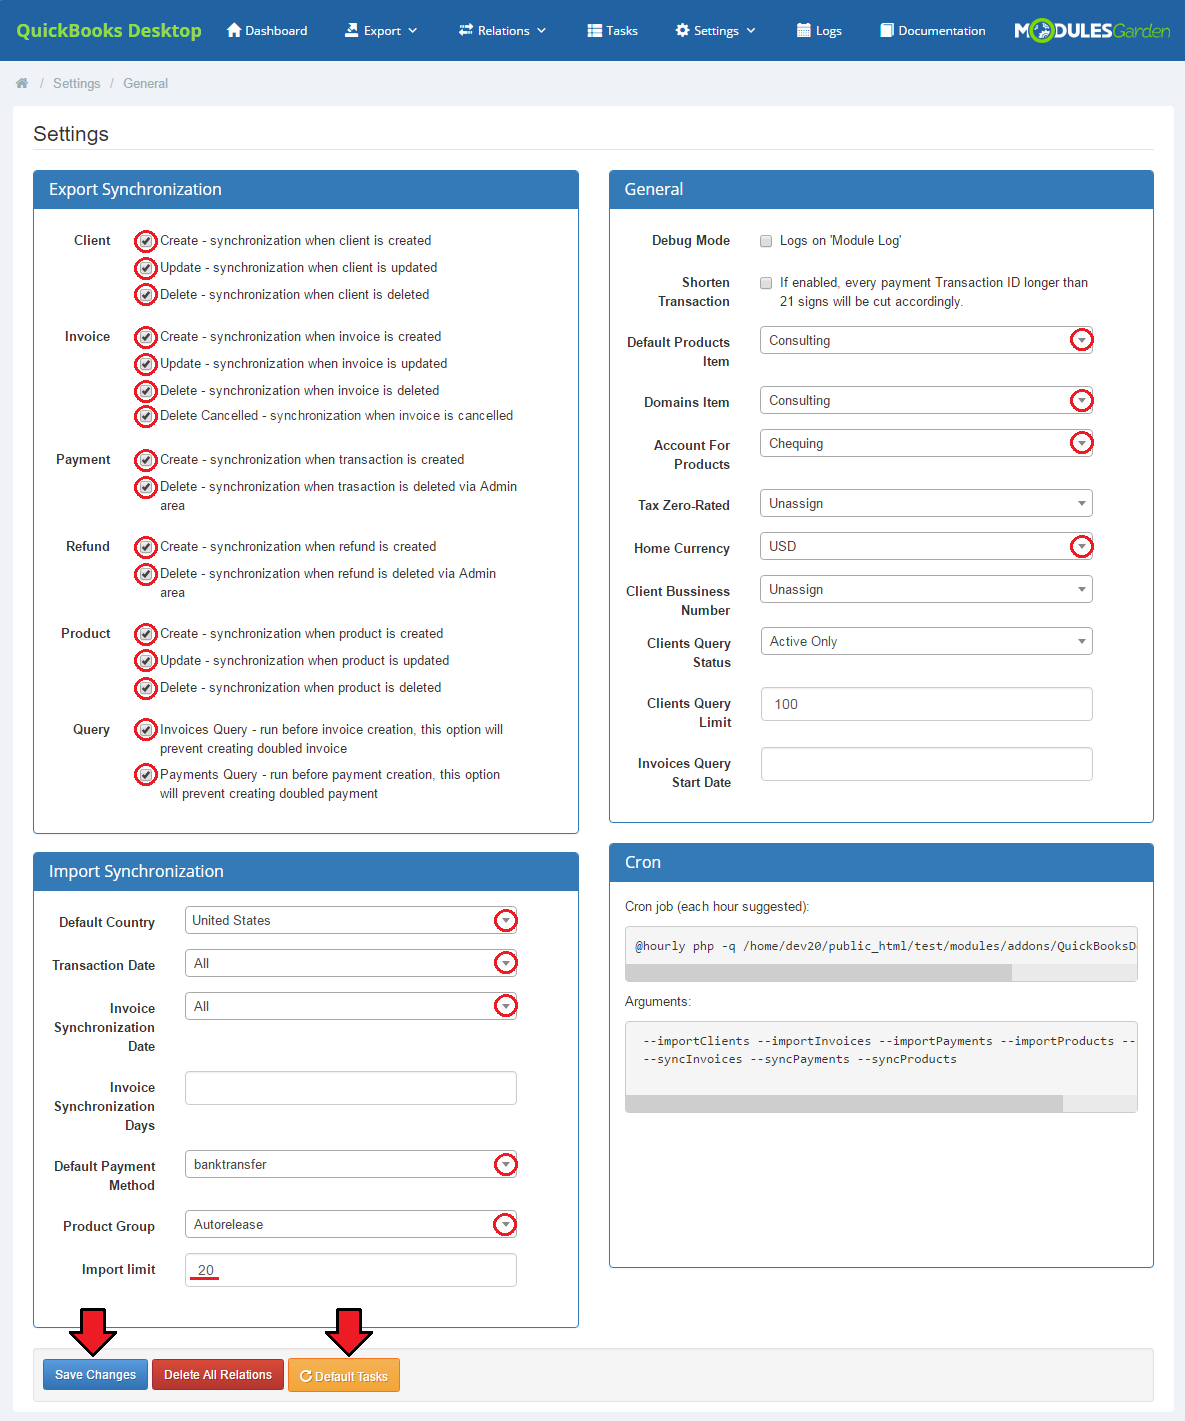
| 3. Synchronization Settings - decide which of the possible synchronization options you want to enable. Tick the ones you are interested in. |
| There are: Clients synchronization:
Invoices synchronization:
Payments synchronization:
Refunds synchronization:
Products synchronization:
Query synchronization:
|
| Apart from choosing required synchronization options, you have to decide here, which items from QuickBooks Desktop, 'Products ' and 'Domains' will be associated with. Note: Default Product will be used only when tehre is no relation set for the selected product in 'Relation: Product' section. Choose other options from the dropdown menu to set up.
Press Save Changes button. |
| You can also set the default task that will be run automatically. |
|
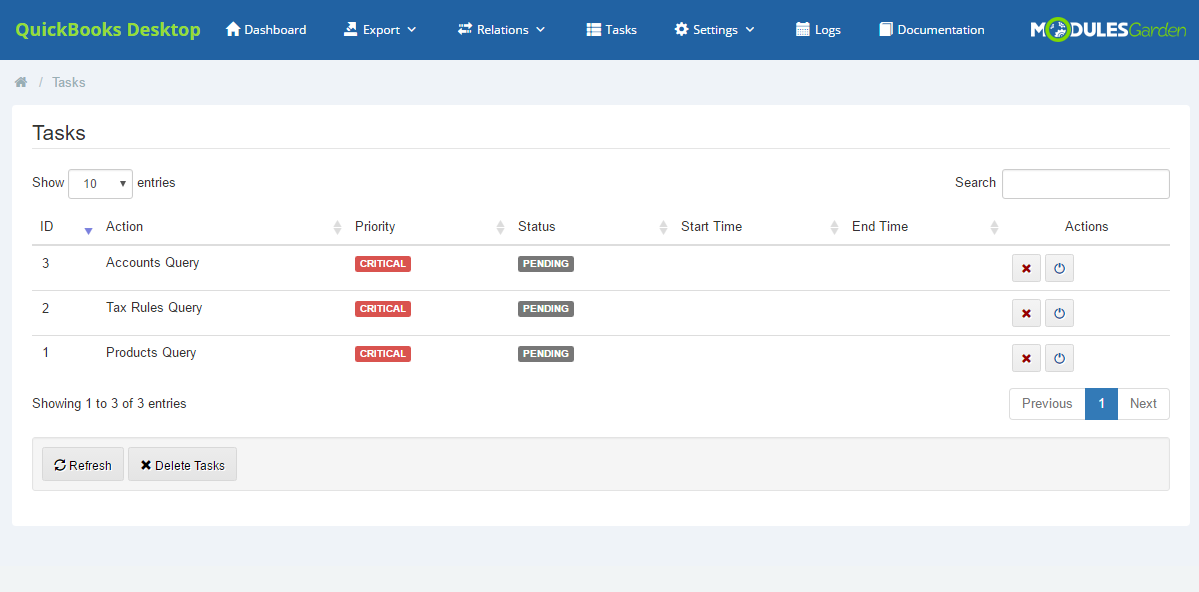
| All the tasks and their statuses will be displayed in Task tab. |
|
Management
| At this section we will show you the possibilities of QuickBooks Desktop For WHMCS. Once it has been properly connected with QuickBooks Desktop and all the configuration is now ready, we can move on to 'Export' section. |
Export
| Our module allows several ways to export any data gathered in your WHMCS. Read the below points to learn what data can be synchronized with QuickBooks Desktop and what are the possible means of such synchronizations. |
Clients
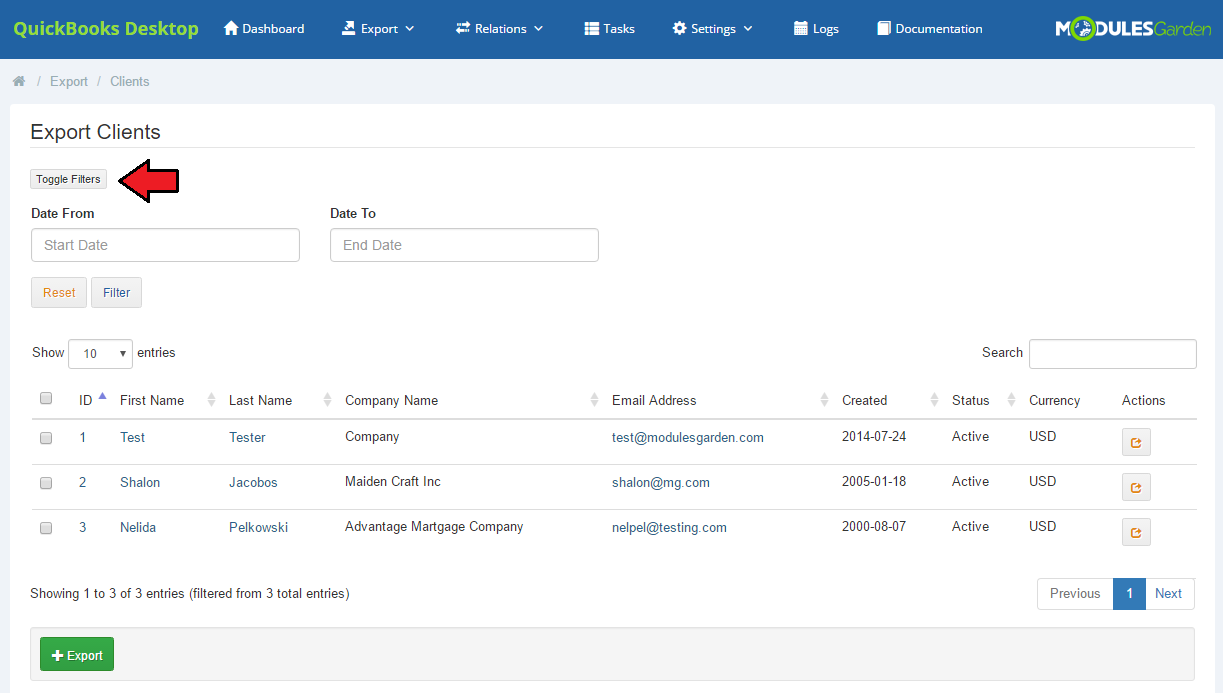
| The first option offered by our module is the export of clients from WHMCS to QuickBooks Desktop, proceed to 'Export' → 'Clients.' You will see here a list of all clients who exist in your WHMCS and have not been synchronized with QuickBooks yet. Use filter to find clients with their account created during the specified period of time. |
|
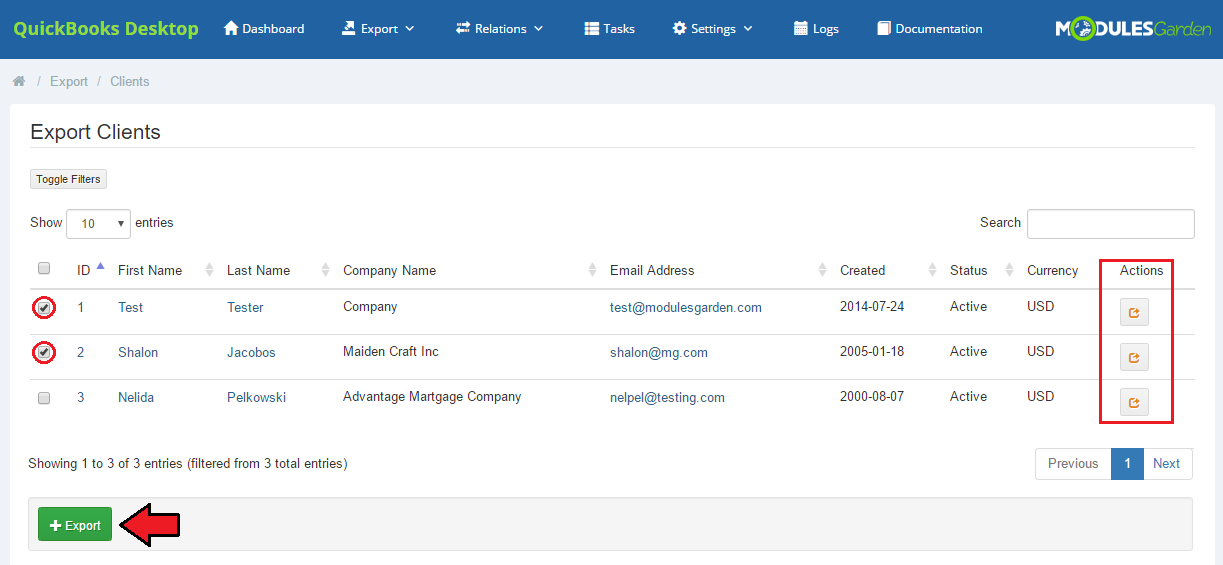
| Now, you can manually export all of the clients available on the list or choose only some of them. Check boxes next to the clients you are going to export and press 'Export' button as marked on the screen. If you want to export only one client you can do it by pressing 'Export' button located in 'Action' column next to the name of the client. |
|
| If a client has already been exported from WHMCS to QuickBooks, they will no longer be visible on the list. All clients newly added to WHMCS will be automatically synchronized with QuickBooks unless otherwise stated in 'Synchronization Settings.' |
Invoices
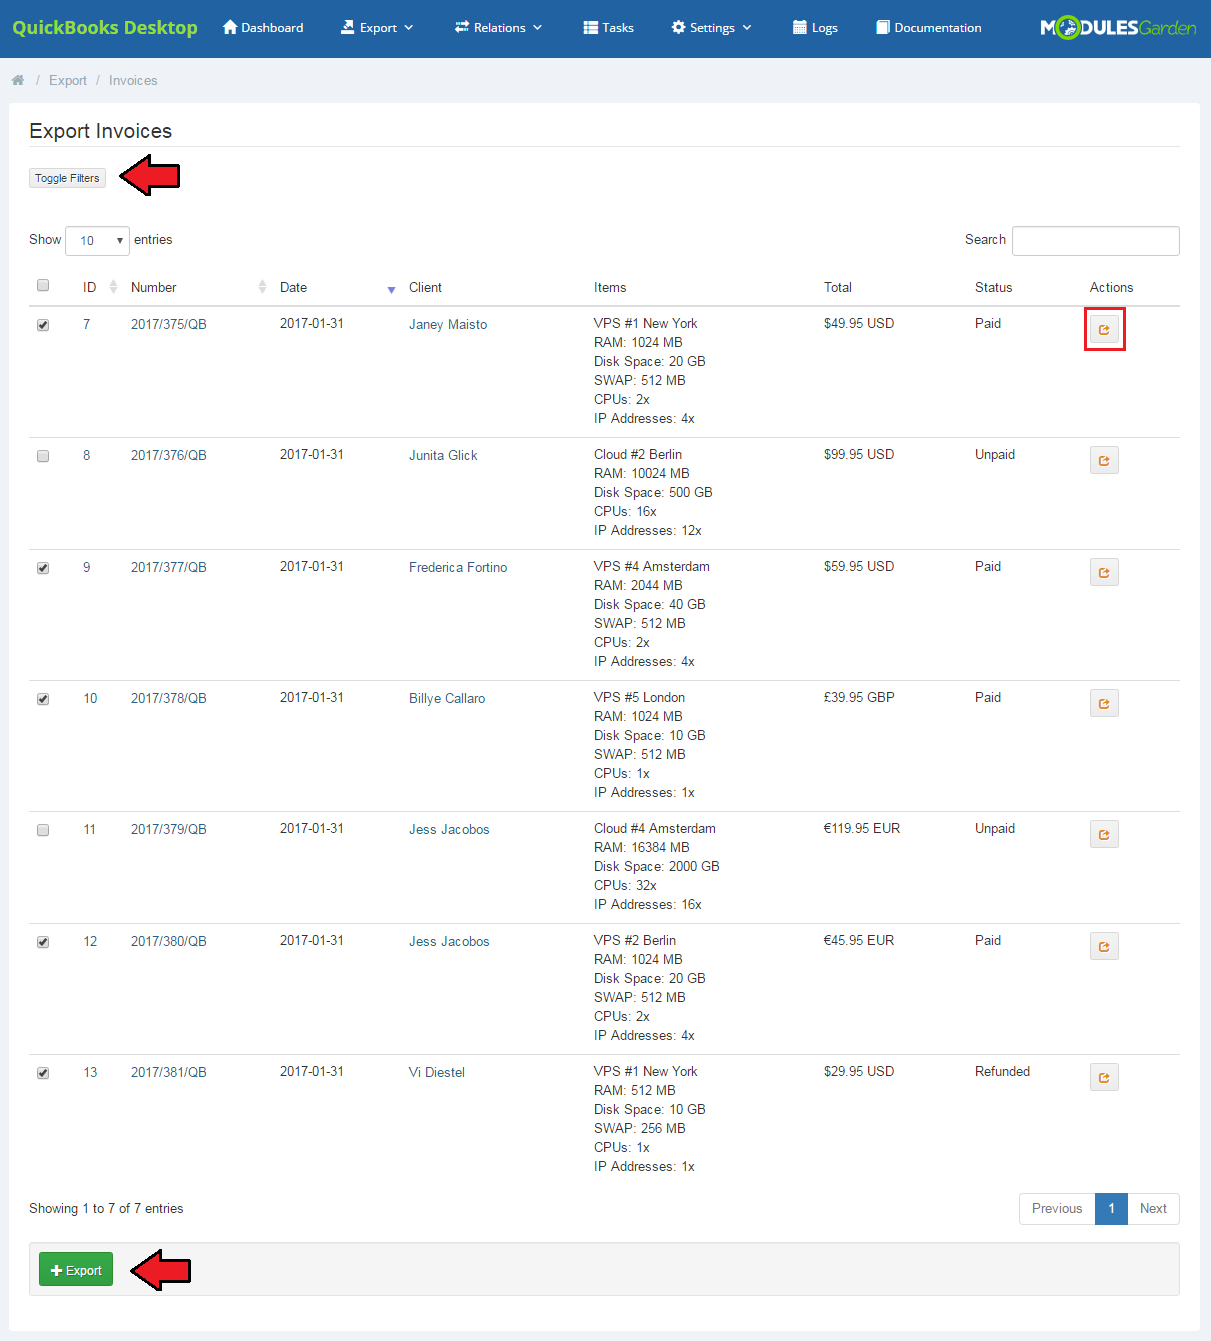
| The other choice is the export of invoices. Proceed to 'Export' → 'Invoices' and you will find a list of all invoices existing in our WHMCS that have not been synchronized with QuickBooks yet. In details you will find information on the invoice:
|
Just like in case of clients:
|
|
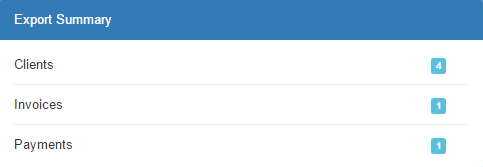
| Once you have exported some of the invoices you will see their number along with the number of any transactions connected with them in 'Summary' table on the dashboard. |
|
| Keep in mind that all newly added (after the first usage of QuickBooks For WHMCS) invoices and transactions are automatically synchronized and exported to QuickBooks Desktop unless otherwise stated in 'Synchronization Settings.' |
Cron Jobs
| Properly set up cron job with a recommended interval is responsible for synchronization of any updates done on invoices or clients' accounts. All changes will be immediately visible in QuickBooks, after cron job has run, without any additional actions taken manually from QuickBooks For WHMCS. |
Logs
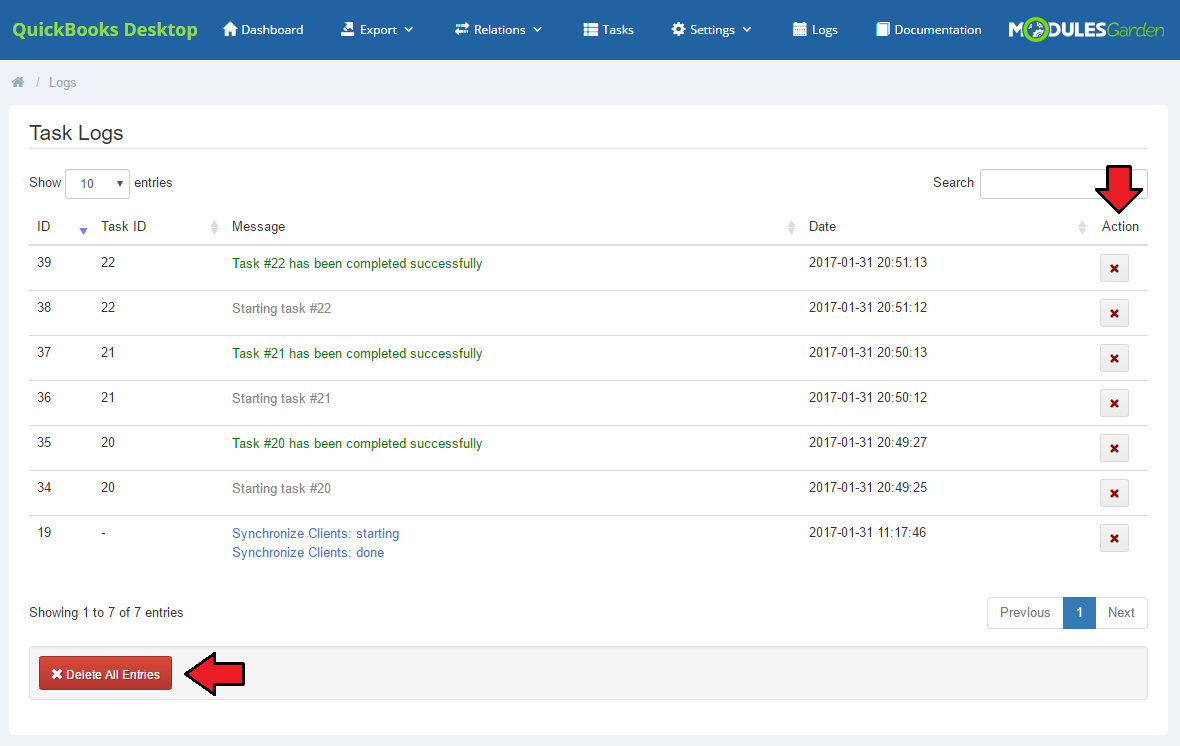
| In 'Logs' tab there are enumerated ALL actions on clients, invoices and transactions. No matter if they were taken manually in the module, automatically or by a cron job. Find there a list of all entries with precisely described details and an exact date of the action. |
|
| Clear all the entries or delete only some of them. Use buttons marked on the screen above. |
Dashboard
| 'Dashboard' includes two useful and user-friendly tables. The first one, 'Export Summary' contains data on the number of exported clients, invoices and payments. |

|
Documentation
| The very last tab 'Documentation' once clicked will redirect you to the article you are currently reading! |
Tips
| 1. |
Common Problems
| 1. When you have problems with connection, check whether your SELinux or firewall does not block ports. |
| 2. |