Product Free Trial Manager For WHMCS
Contents |
About Product Free Trial Manager For WHMCS
| Product Free Trial Manager For WHMCS allows you to activate a dedicated payment gateway for free trial access for all or single products in your offer. Let your clients test your products by offering them free of charge, but limited in time, access to the ordered products, and make a well-thought decision to avoid cancellations and misunderstandings. Use the module to make your offer even more competitive and much practical to your clients. |
- Features:
| ✔ |
| ✔ |
| ✔ |
| ✔ |
| ✔ |
| ✔ |
| ✔ |
- General Info:
| ✔ Multi-Language Support |
| ✔ Supports PHP 7.2 Up To PHP 7.4 |
| ✔ Supports WHMCS Themes "Six" And "Twenty-One" |
| ✔ Supports WHMCS V8.1 And Later |
| ✔ Easy Module Upgrade To Open Source Version |
Installation
| This tutorial will show you how to successfully install and configure Product Free Trial Manager For WHMCS. We will guide you step by step through the whole installation and configuration process. |
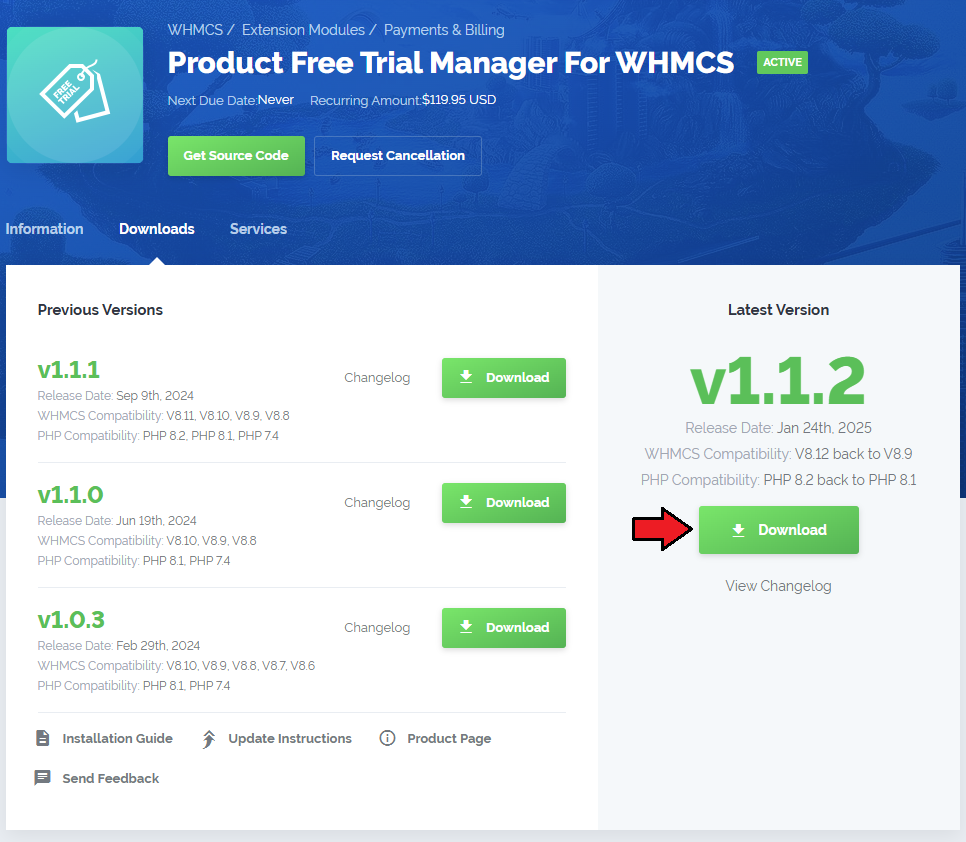
| 1. Log in to our client area and download the module. |
|
| 2. Extract the package and upload its content into the main WHMCS directory.
The content of the package to upload should look like this. |

|
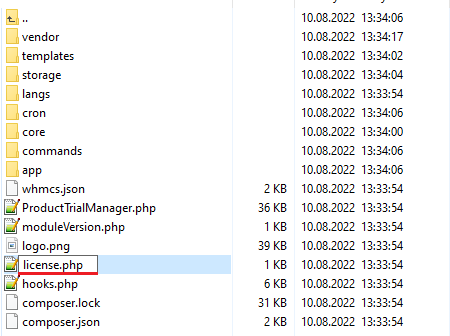
| 3. When installing Product Trial Manager For WHMCS for the first time, you have to rename the 'license_RENAME.php' file. The file is located in 'your_whmcs/modules/addons/ProductFreeTrialManager/license_RENAME.php'. Rename it from 'license_RENAME.php' to 'license.php'. |
|
| 4. In order to configure your license key, you have to edit the previously renamed 'license.php' file. Enter your license key between the quotation marks as presented on the following screen. You can find your license key in our client area → 'My Products'. |

|
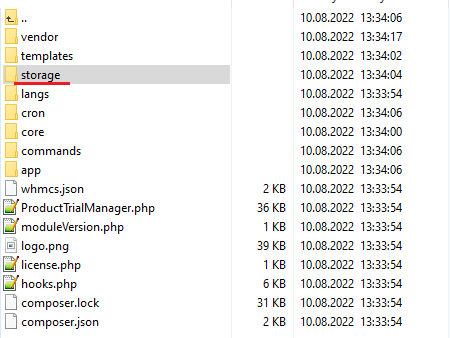
| 5. Now, set up the 'storage' folder as recursively writable. This folder is available at 'your_whmcs/modules/addons/ProductFreeTrialManager/'. |
|
Configuration of Addon
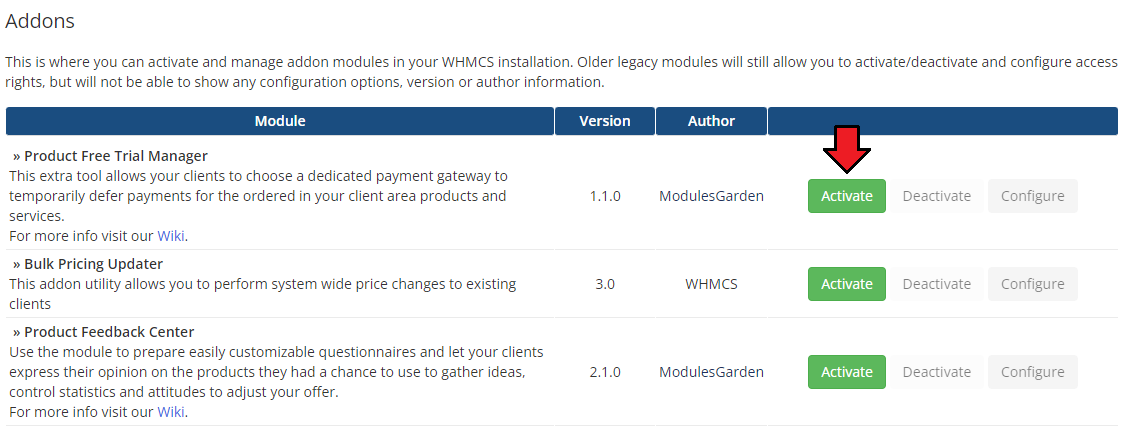
| 6. Now you have to activate the module in your WHMCS system. Log in to your WHMCS admin area. Go to 'System Settings' → 'Addon Modules'. Afterwards, find 'Product Free Trial Manager' and press the 'Activate' button. |
|
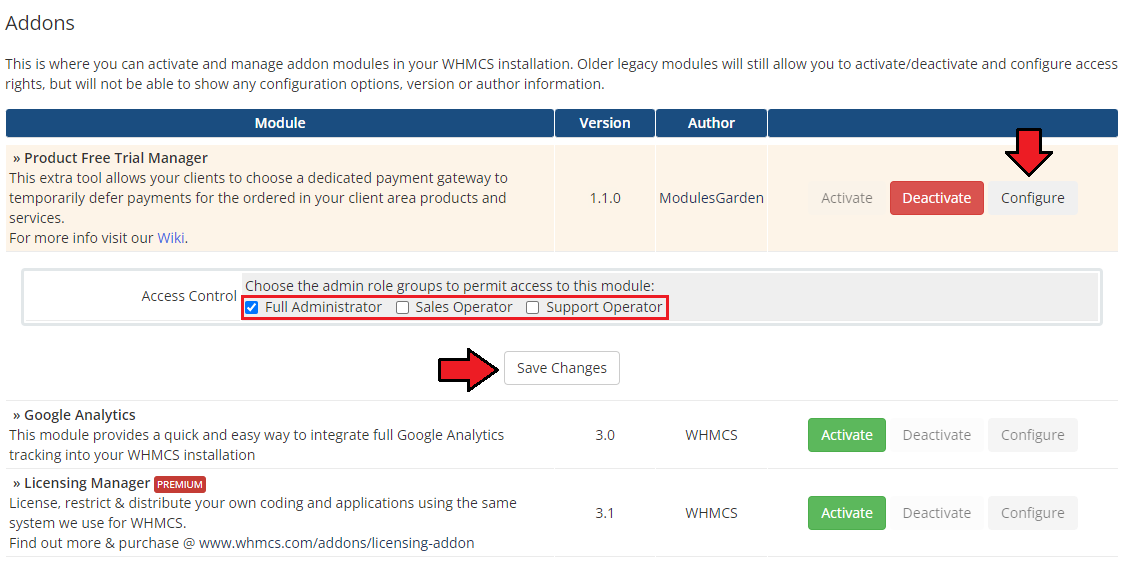
| 7. In the next step you need to permit access to this module. To do so, click on the 'Configure' button, tick 'Full Administrator' and press 'Save Changes'. |
|
Additional Steps Required
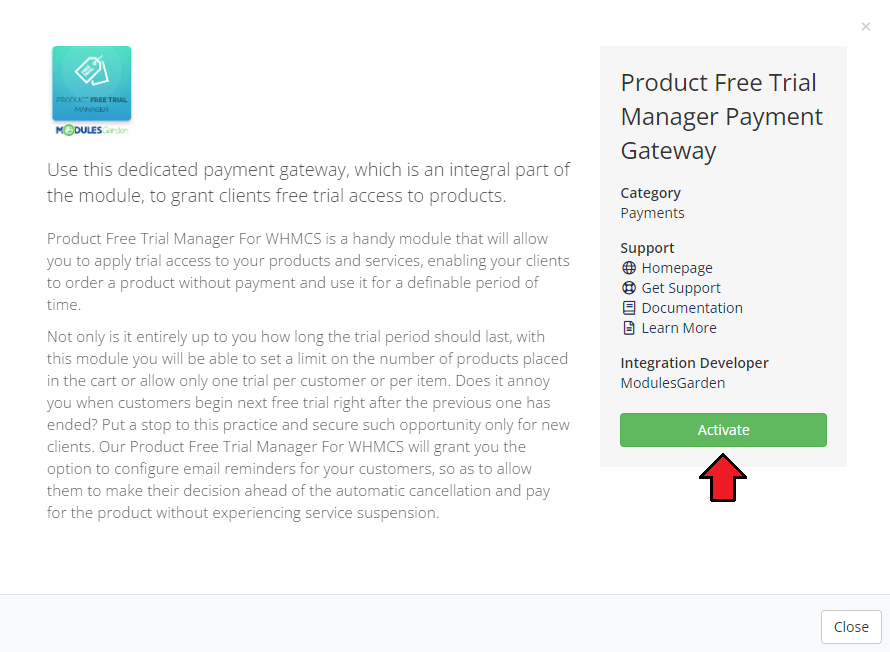
| 8. Now, proceed to 'System Settings' → 'Payment Gateways' → 'All Payment Gateways' Find the 'Product Free Trial Manager' gateway and activate it. |
|
| 9. Afterwards, move to 'Manage Existing Gateways' to add your custom display name. Press 'Save Changes'. The gateways will be available to choose as a payment method for clients depending on the configuration in the Product Free Trial Manager addon. |

|
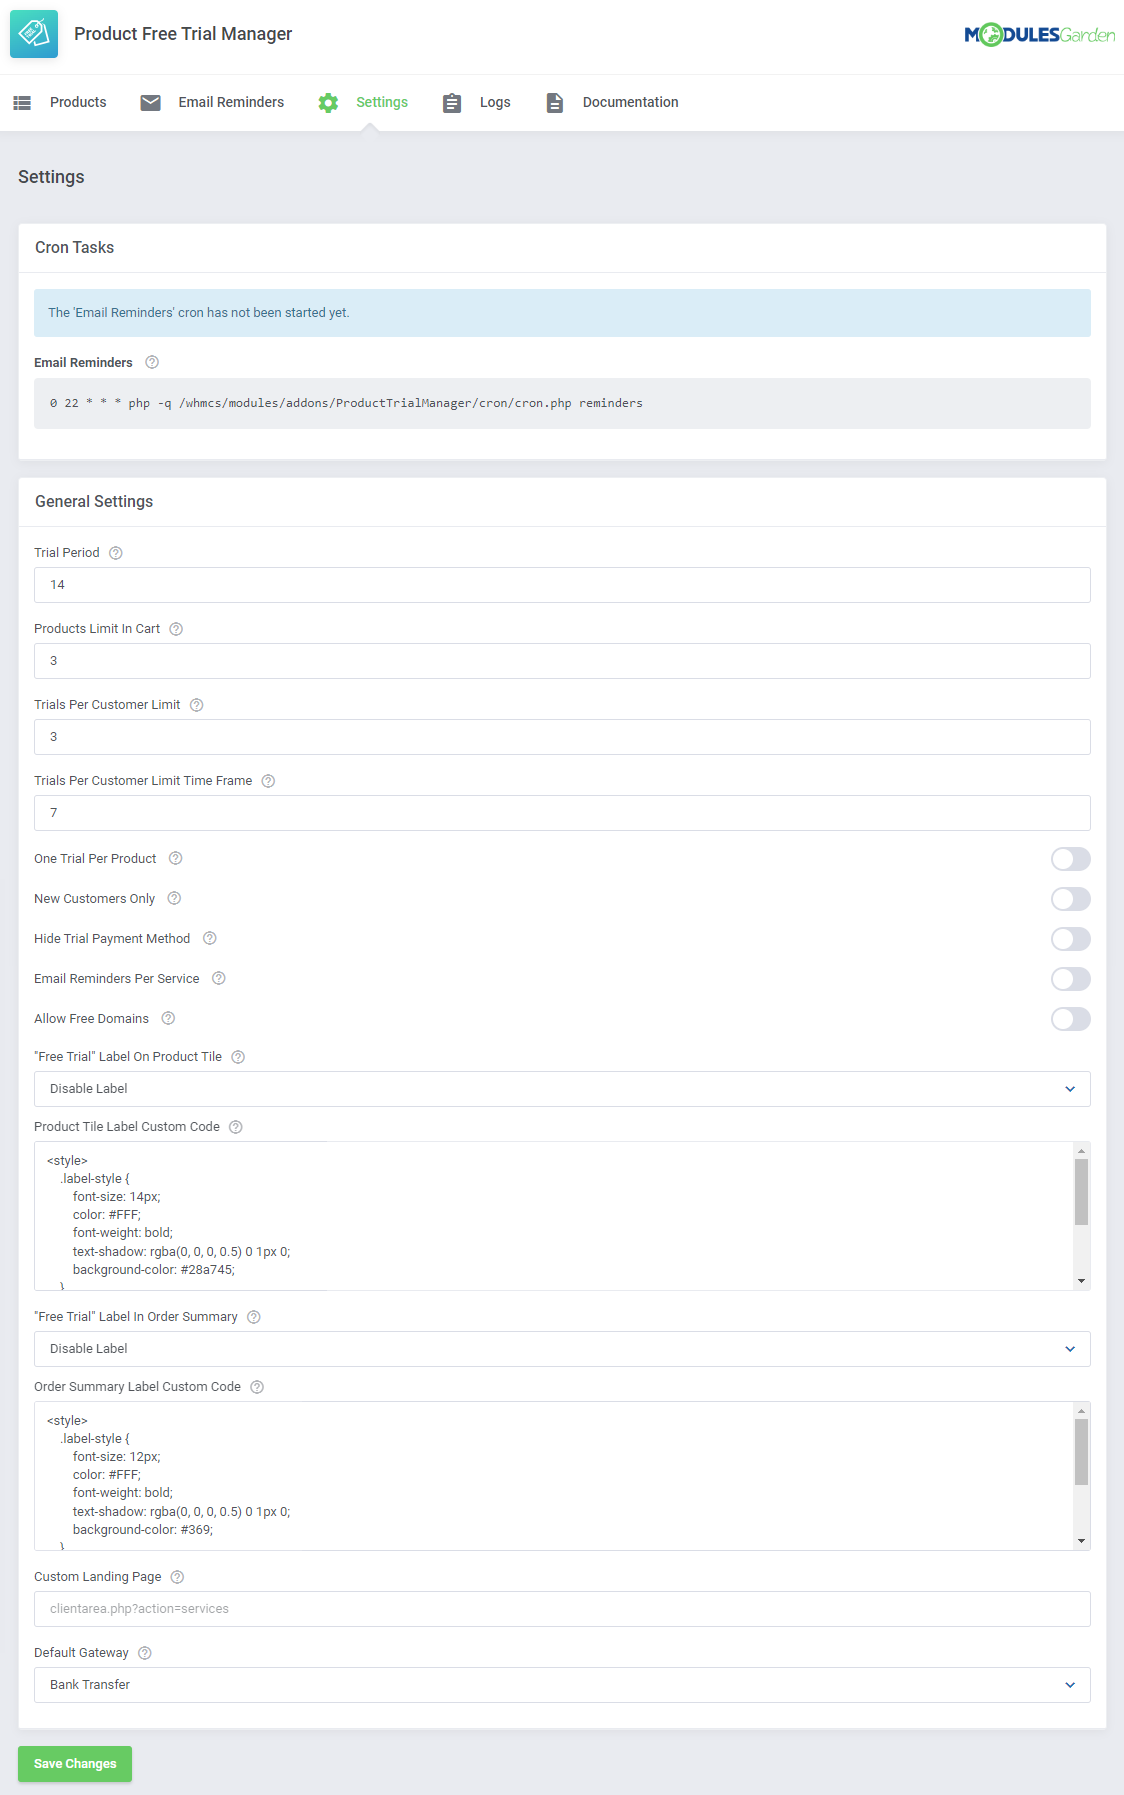
| 9. Congratulations, you have just successfully installed Product Free Trial Manager For WHMCS! You can now access your module from 'Addons' → 'Product Free Trial Manager'. |
|
Management
| In this section we will show you the possibilities of Product Free Trial Manager For WHMCS. Our module allows you to ........... |
Settings
| At the 'Settings' tab you can set up the module's behavior. Configure free trial access settings and cron tab behavior. |

|
| At the 'Cron Settings' tab you can set up the crons behavior. |

|
In 'Gateway Settings' select whether you want to allow:
|
| File:PTM 9 1.png |
Excluded Users
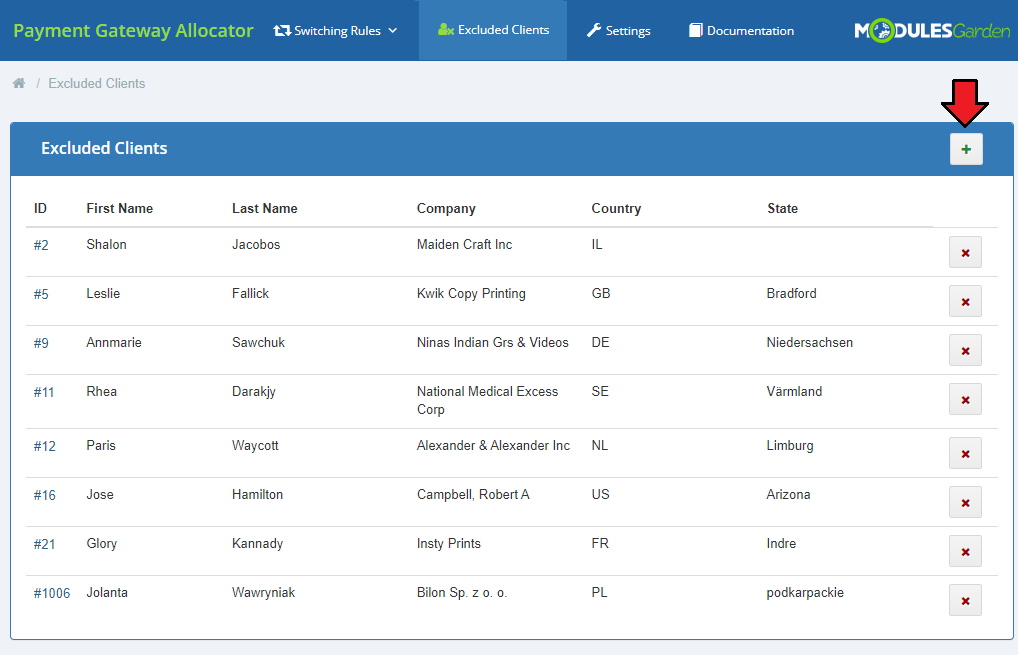
| In the 'Excluded Clients' section, you can list clients who will be skipped when validating the gateway rules. Add clients to the list. |
|
| Choose a clients from the list. Add client one by one. |

|
Gateway Switches
| 'Gateways Switches' tab allows you to define switching rules per payment gateway. You will find there a list of all active gateways in your system. |
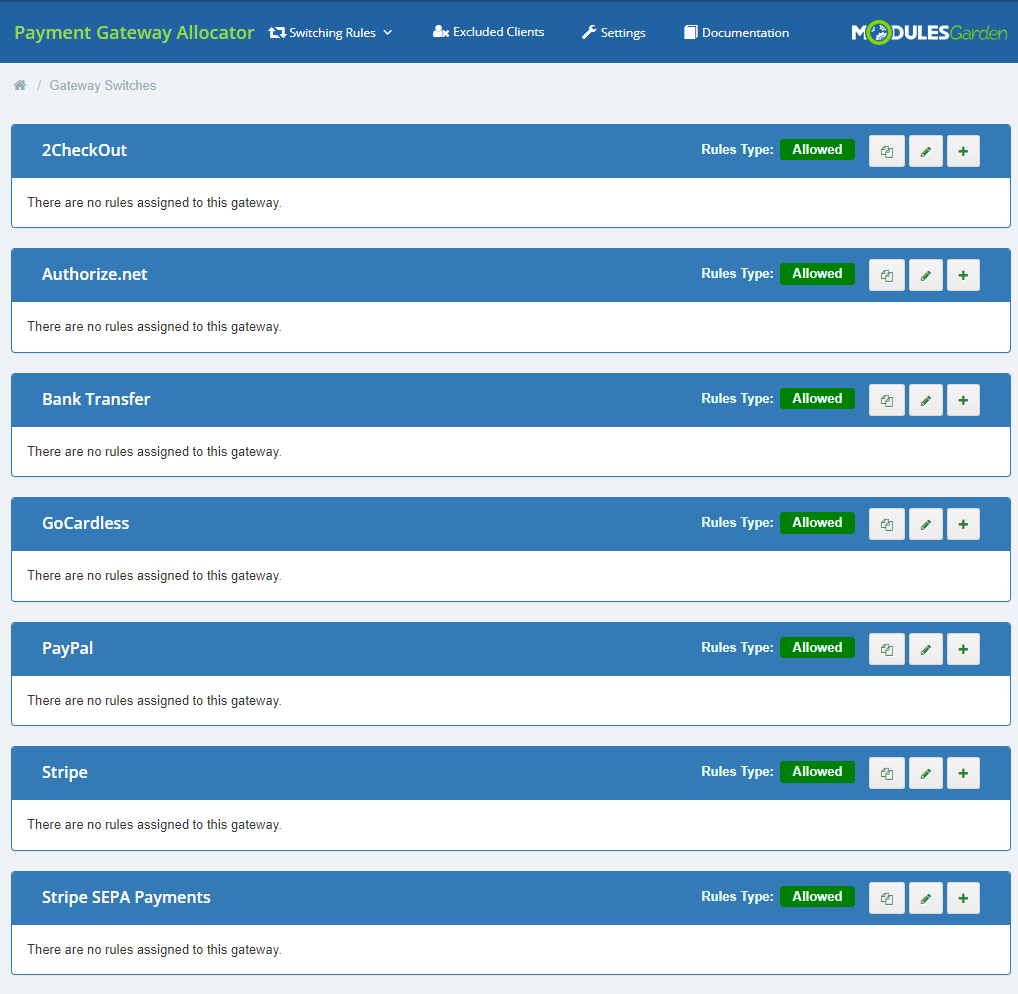
|
Creating New Switching Rules
| In order to limit access to a selected payment gateway, press '+' button. |
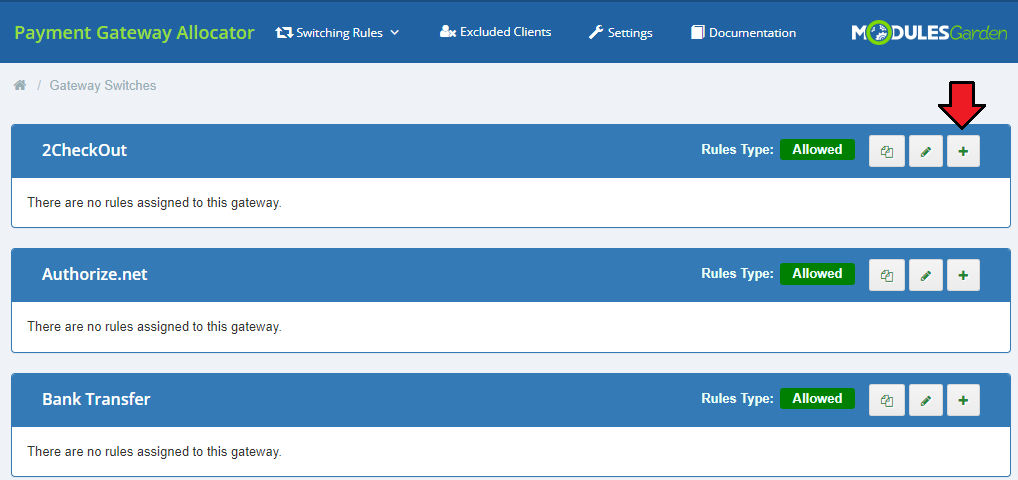
|
| Select a country and states (optional). The gateway will be available for clients who do purchases in that region only.
Press 'Add' to complete. |

|
| Repeat the process for all gateways you wish to limit. Use action buttons to edit rules or delete them. |
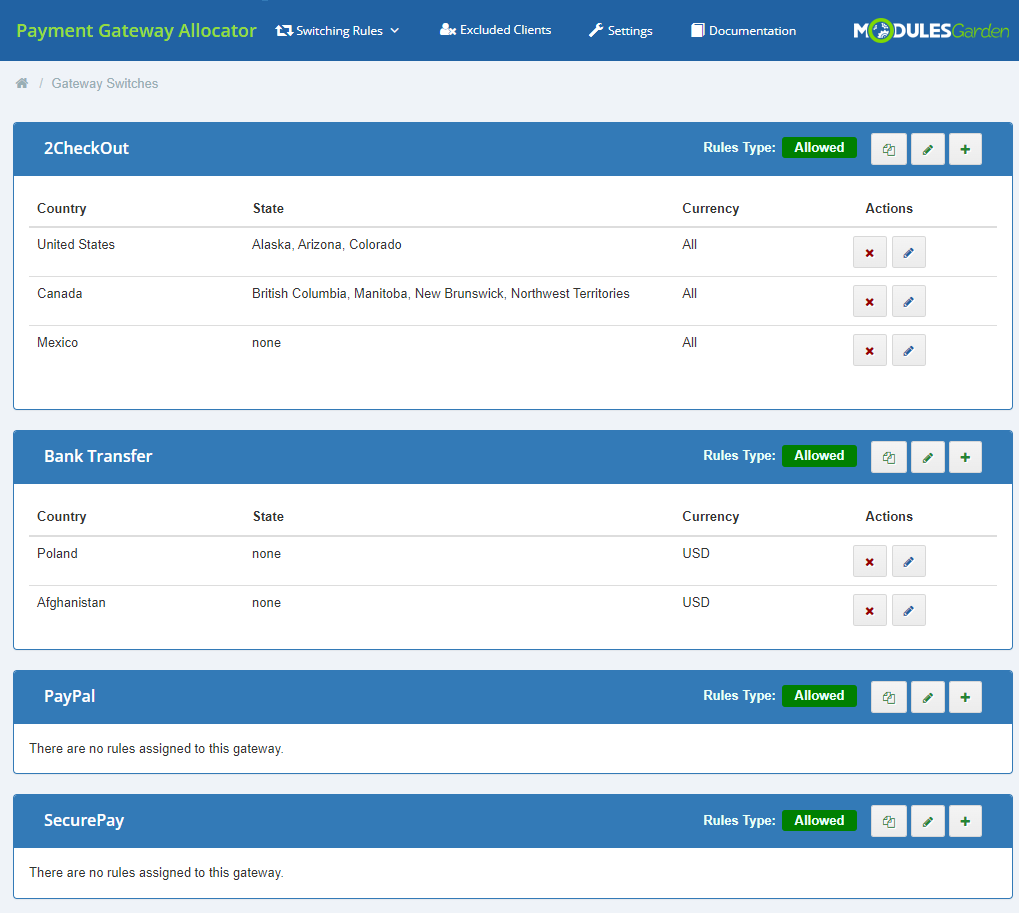
|
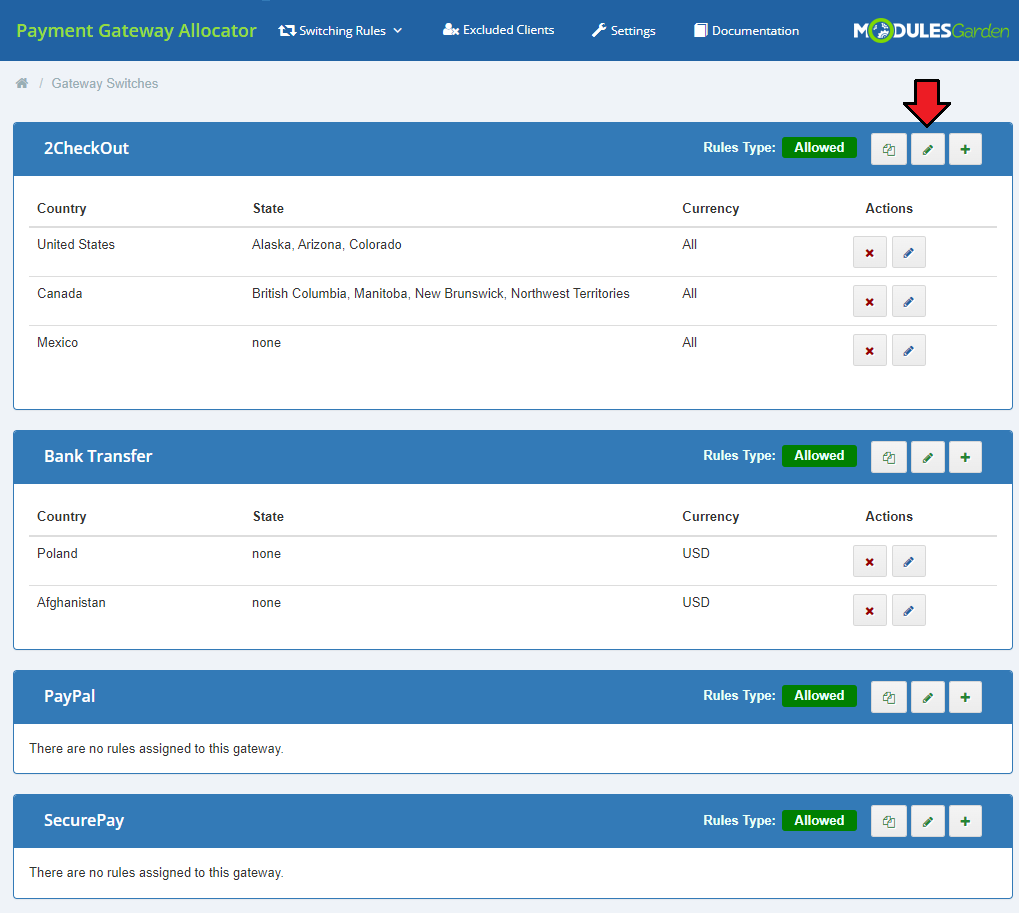
| Perform the above steps for all active gateways that you wish to use. You may add rules per single gateway manually or copy rules from another gateway. To do so, simply press marked button and choose teh geteway whose rules you are going to copy. Remember to save the changes when ready. |
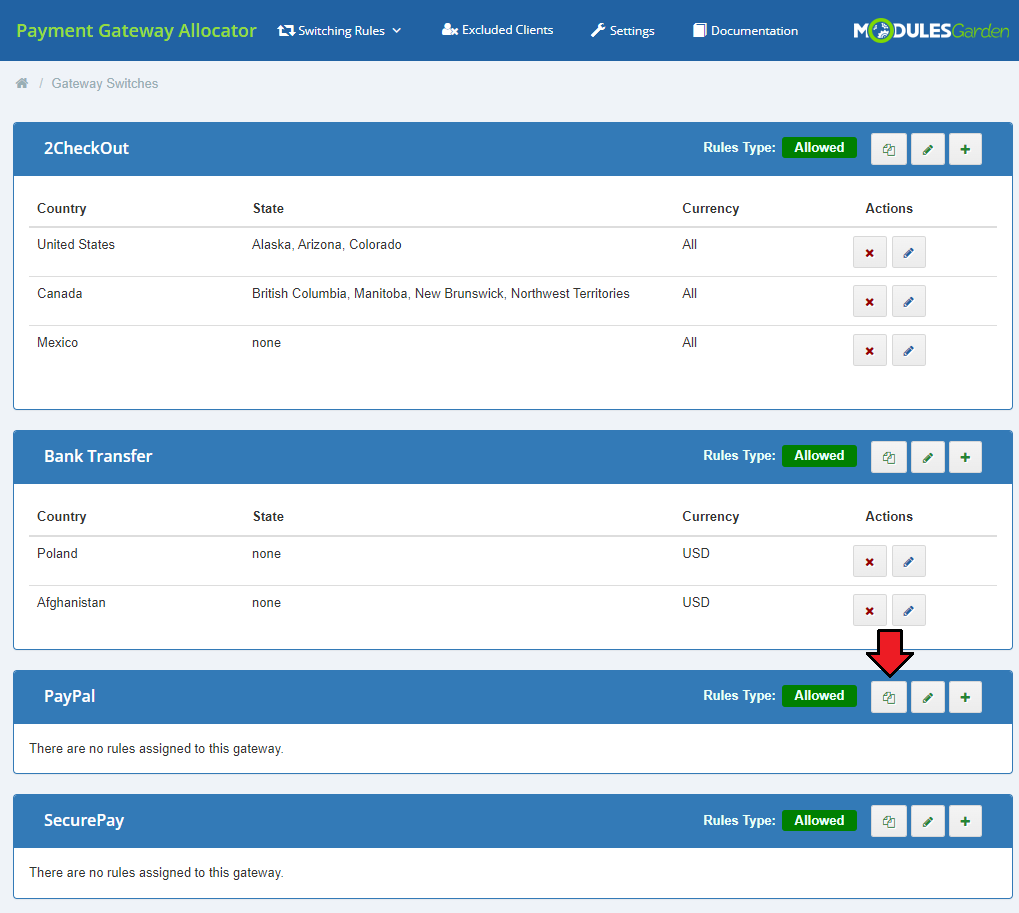
|

|
| Edit the rule, to move to the gateway settings. |
|
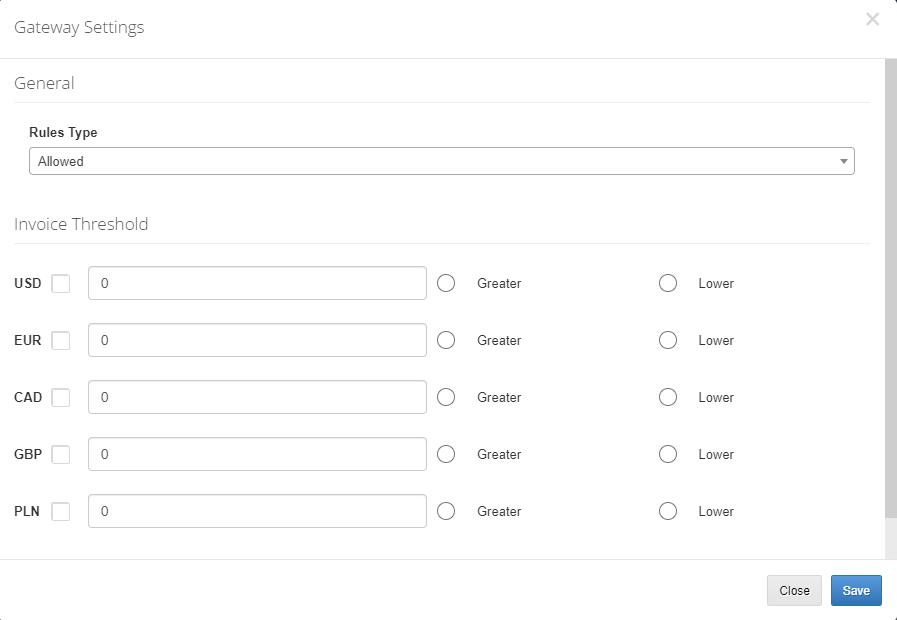
There define the gateway rules type:
Define the invoice threshold per enabled currency, provide the invoice value and mark 'Greater' or 'Lower' to specify the rule performance. |
|
Payment Gateways On The Order Form
| Payment Gateway Allocator For WHMCS affects only client area. Let's take a look how the addon affects the payments process. |
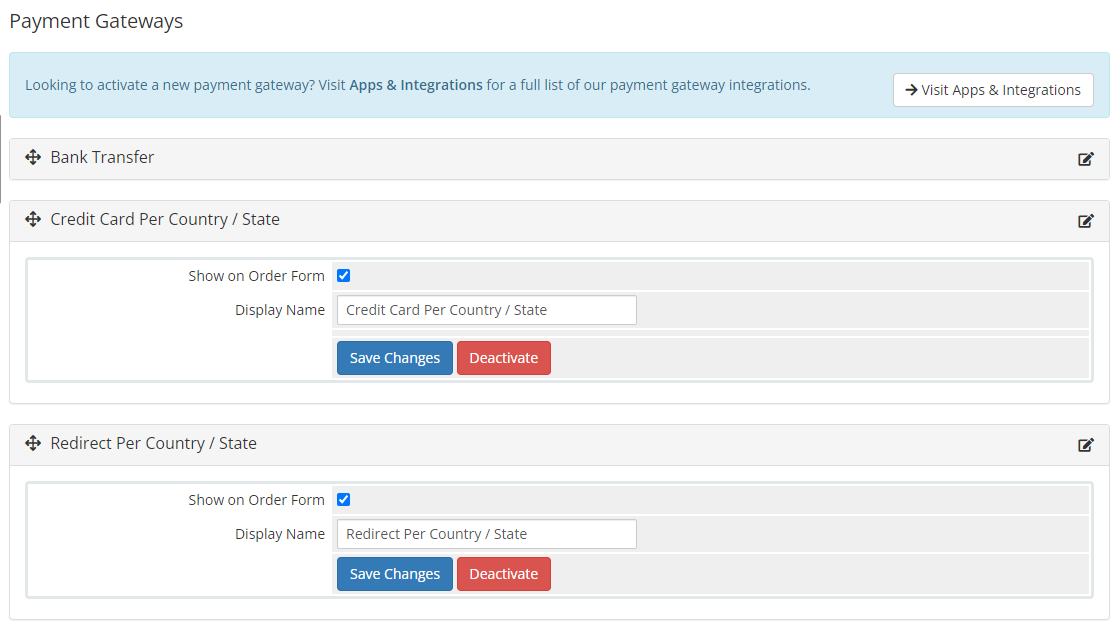
| Case One: 'Credit Card Per Country / State' and 'Redirect Per Country / State' payment methods have been activated. |
|
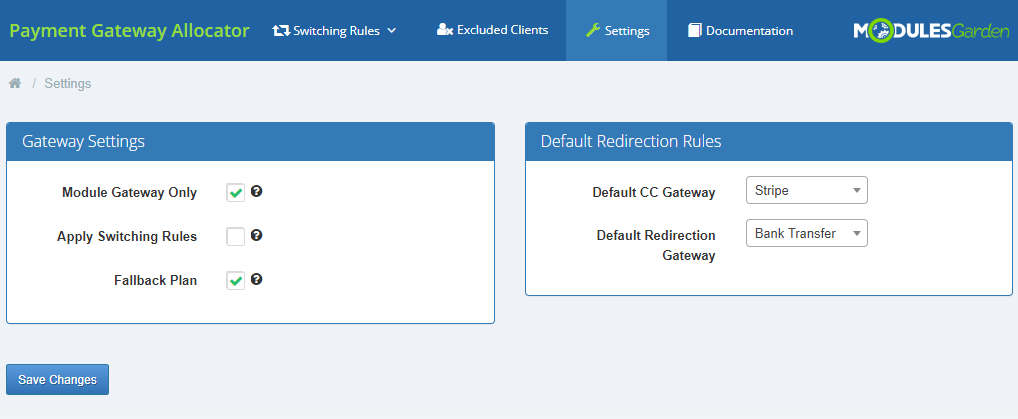
| In 'Setting' section option 'Module Gateway Only' has been selected together with two default gateways for 'Credit Card' and 'Redirection' payments. |
|
Consequently, client may now choose only between:
|
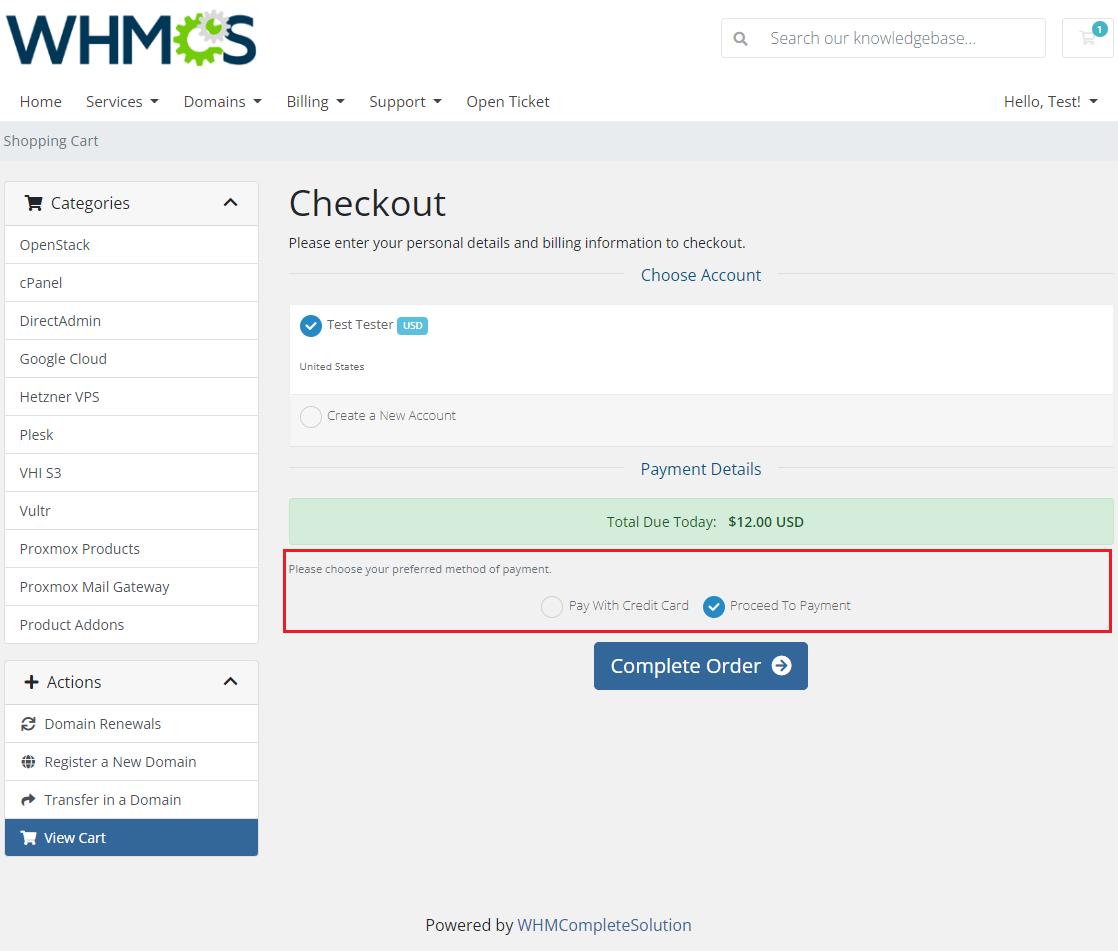
|
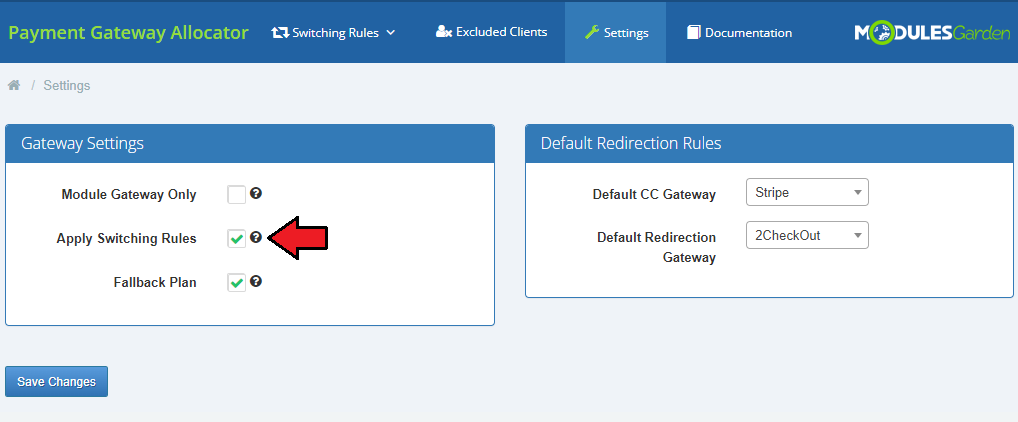
| Case Two: In another scenario, in 'Settings' section of the module 'Apply Switching Rules' option is selected. |
|
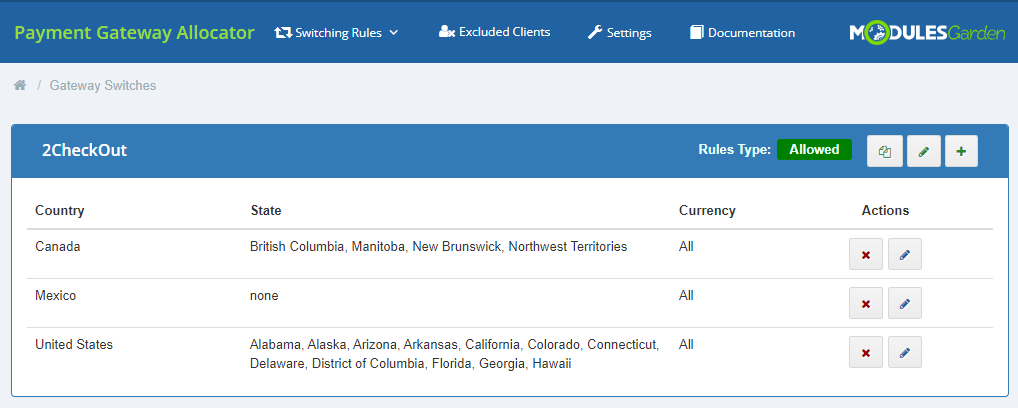
| In 'Gateway Switches' section, there is a rule forcing clients from United States to pay with '2CheckOut' payment gateway. |
|
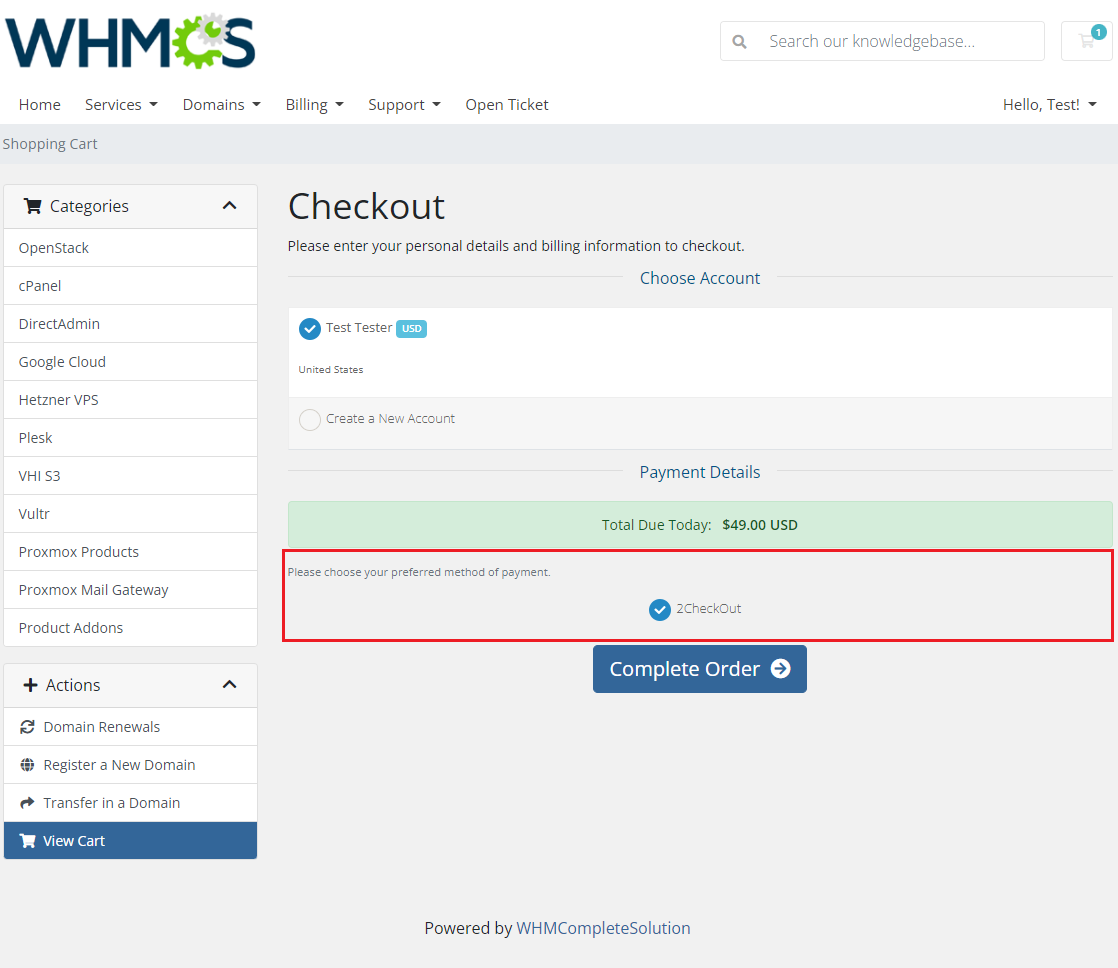
| Consequently, client Test Tester, who is from USA, has no choice, but to pay with the enforced by the admin payment gateway. |
|
| Case Three: To allow all gateways in the client area, proceed to the addon → 'Settings' page and clear the settings. |
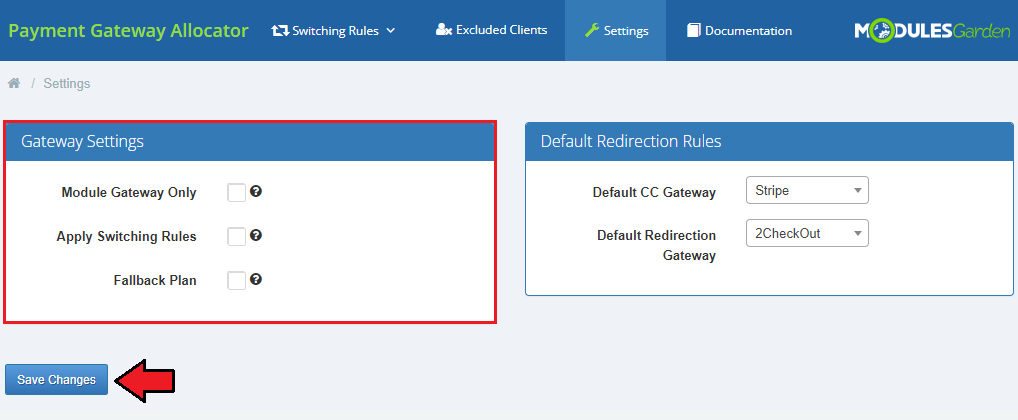
|
| Let's check payment options in the client area once again. Now, your clients are able to pay using every active payment gateway. However, when selecting 'Pay With Credit Card' or 'Proceed To Payment' option, client will be redirected to a gateway keeping any switching rules. |
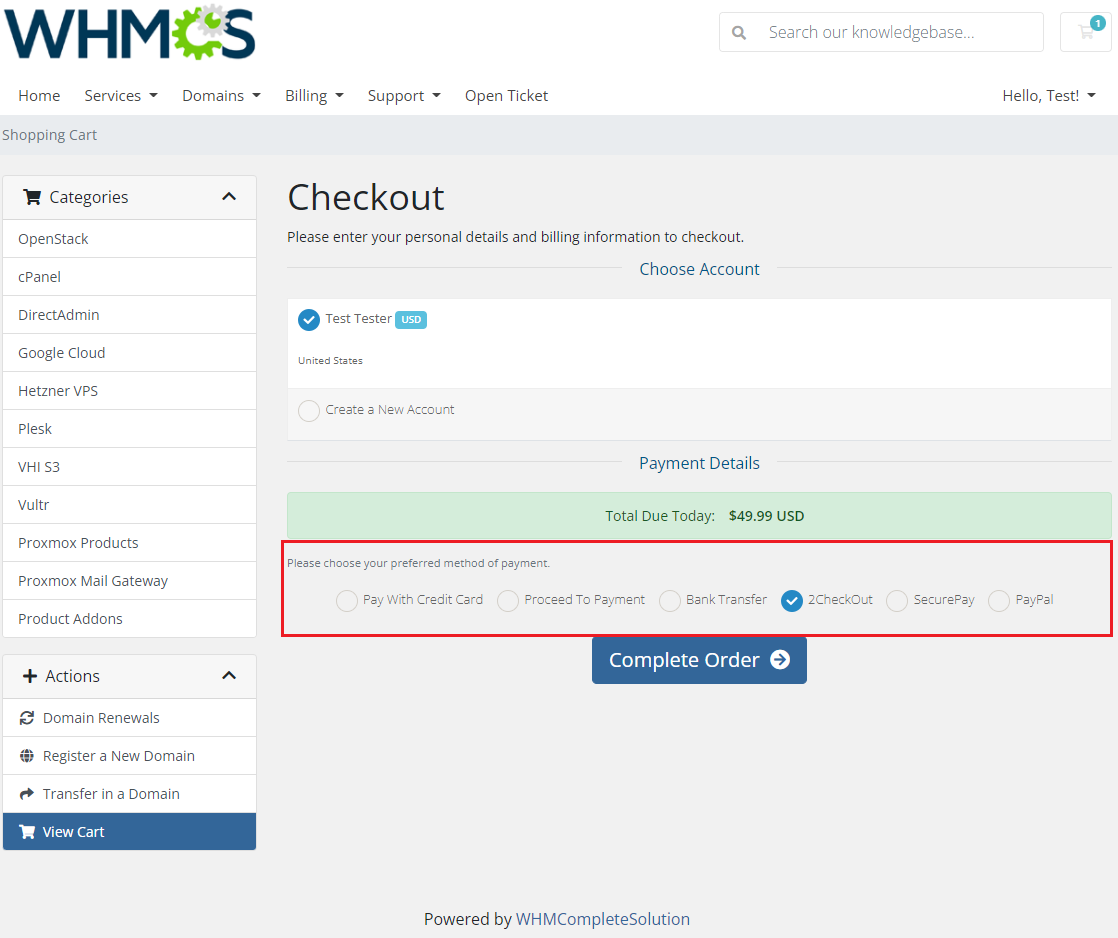
|
| If you wish to hide only part of the gateways, for example only those for which switching rules are set, proceed to 'Setup' → 'Payments' → 'Payment Gateways'. Afterwards, uncheck 'Show On Order Form' checkbox next to the desired gateway and press 'Save Changes'. Repeat this step for each gateway you wish to hide from the client area. |
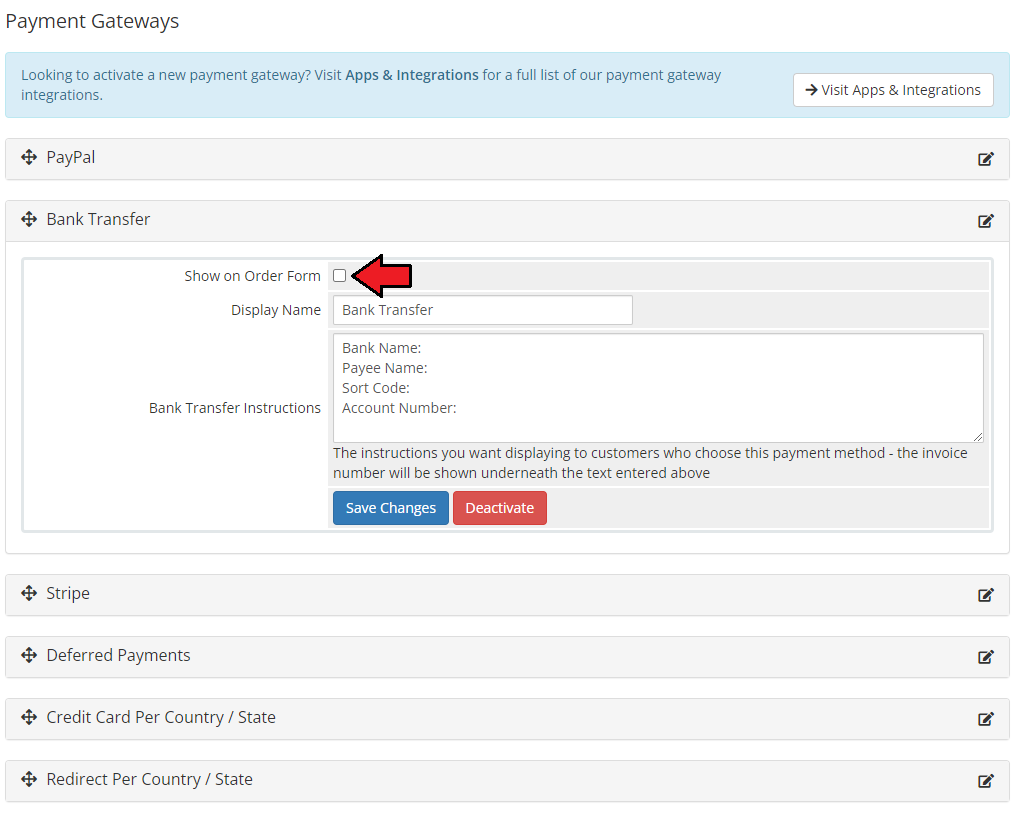
|
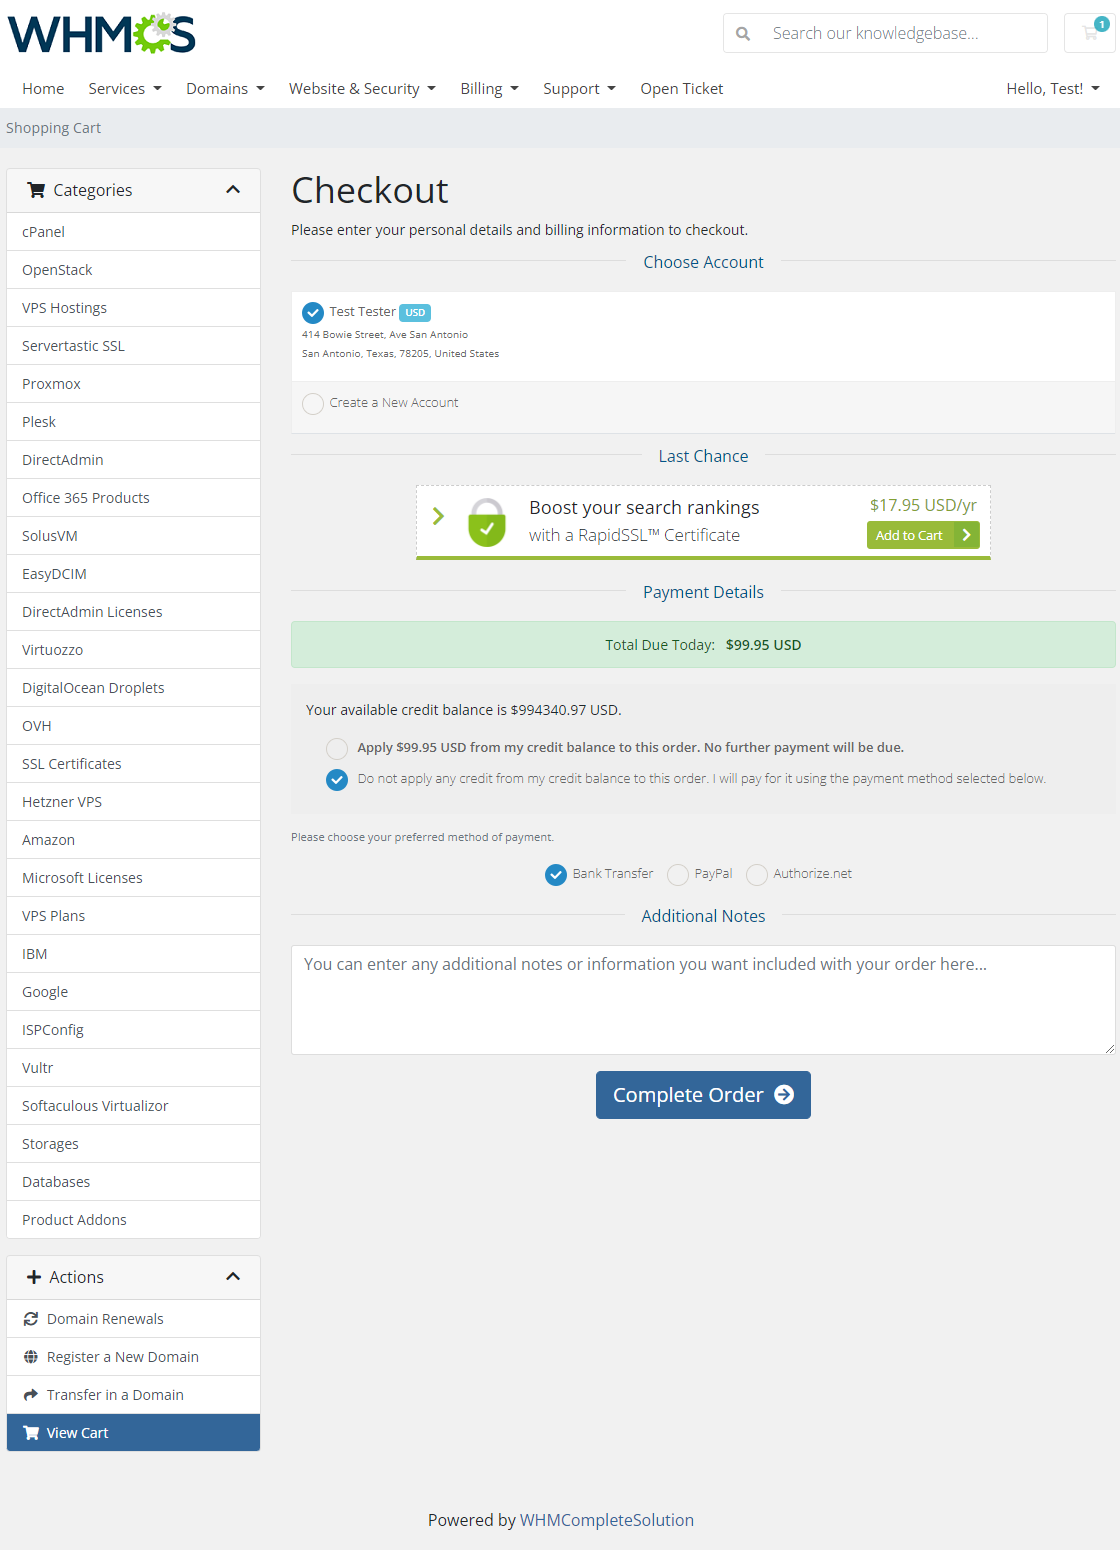
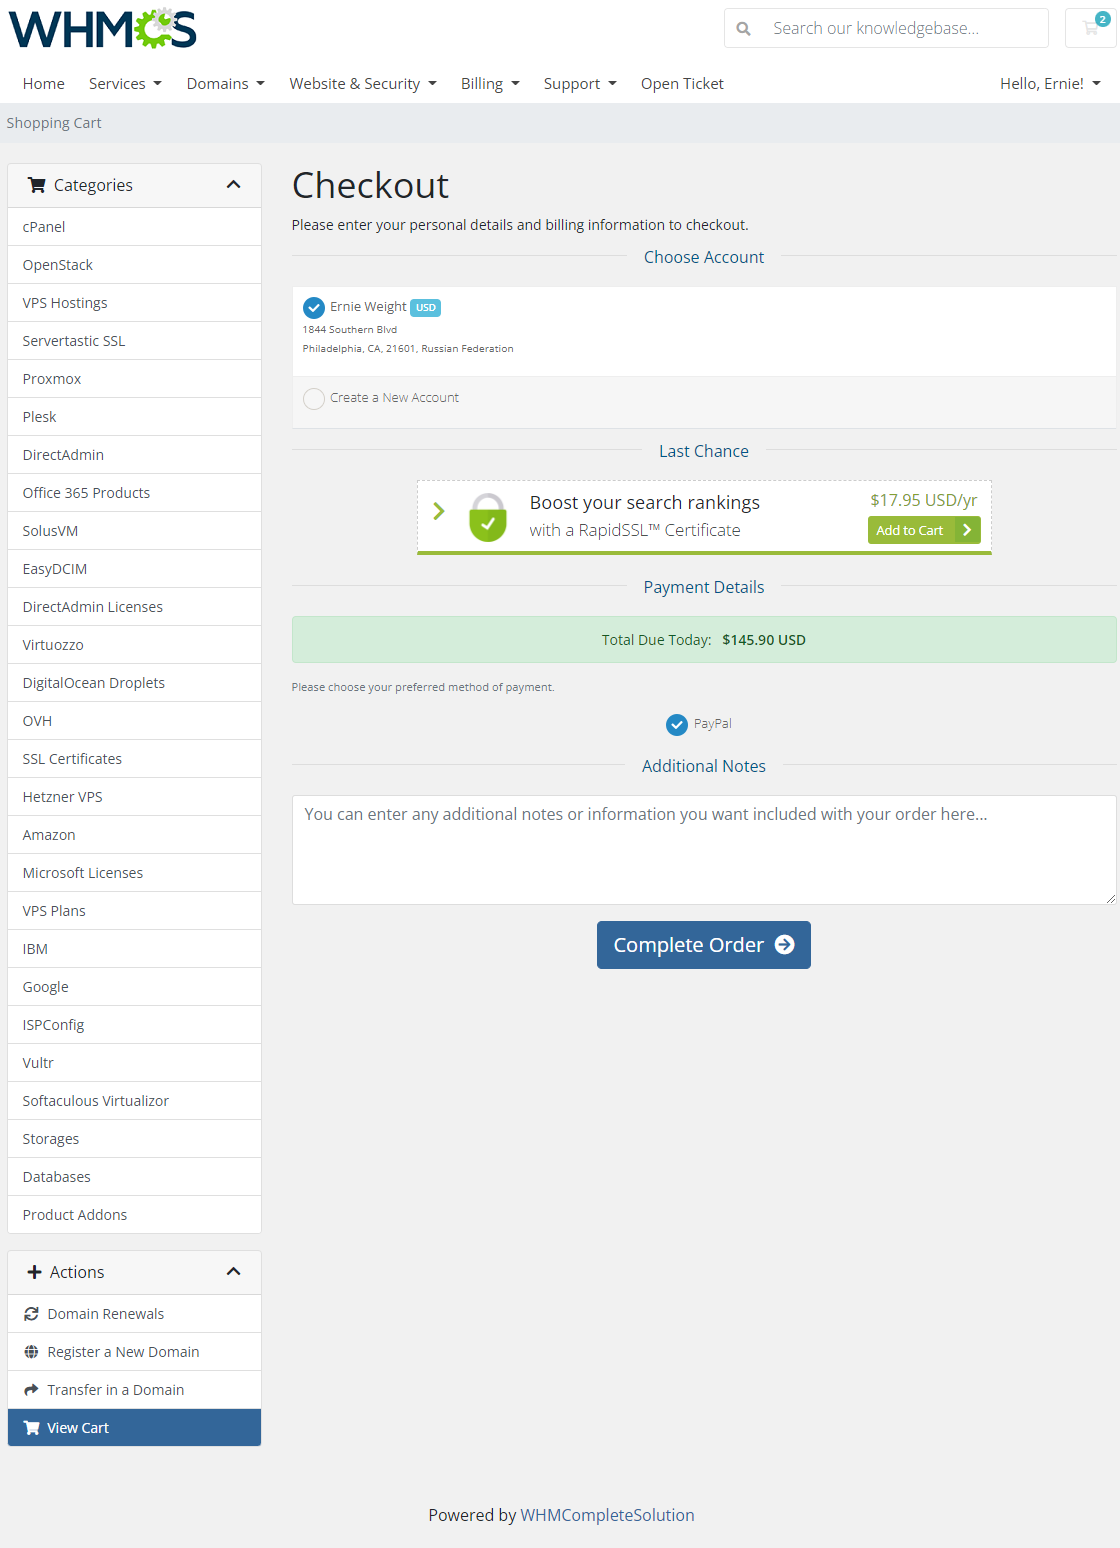
| Case Four: 'Authorize.net' gateway is marked as 'Allowed' for added rules. |
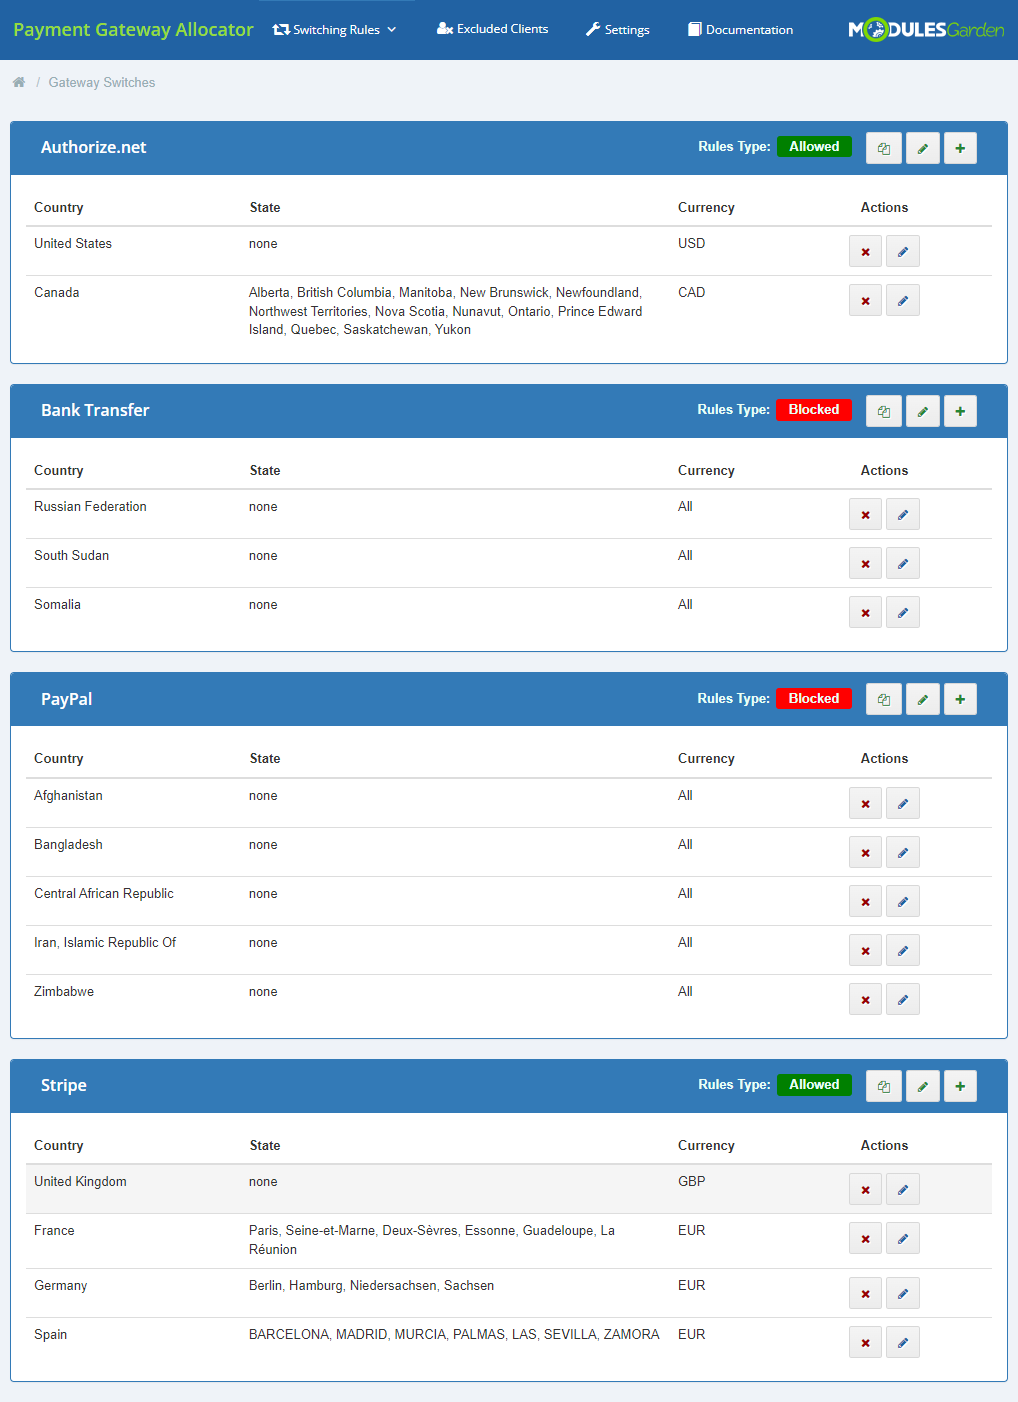
|
| Taking into account the above gateways settings and rules, a client from USA is allowed to choose among three gateways as visible on the screen below: |
|
| The same settings and rules bring following consequences for a client from Russian Federation, that is, such client is allowed to use only one payment gateway. |
|
Tips
| 1. xxx |
Common Problems
| 1. When you have problems with connection, check whether your SELinux or firewall does not block ports. |