PKNIC Domain Registrar For WHMCS
From ModulesGarden Wiki
(Difference between revisions)
|
|
| Line 143: |
Line 143: |
| | |} | | |} |
| | {| | | {| |
| − | |style="padding: 0px 0px 30px 15px;"|This is it! From now on your customers can start ordering '' '.pk' '' domains directly from your WHMCS client area. | + | |style="padding: 0px 0px 30px 15px;"|That is all! Your customers can now begin ordering '' '.pk' '' domains directly from your WHMCS client area. |
| | |} | | |} |
| | | | |
Revision as of 13:09, 26 September 2023
PKNIC Registrar For WHMCS is a domain registrar module that introduces automated provisioning and management of .eu domains in WHMCS.
The module will let your clients manage domains straight in your client area as well.
|
| ✔ Register/Renew .PK ccTLD Domains
|
| ✔ Toggle Domain Auto Renewal
|
| ✔ View Registrar Account Credit Balance As Dashboard Widget
|
| ✔ Register .PK ccTLD Domains
|
| ✔ Enable/Disable Domain Auto Renewal
|
| ✔ Toggle Domain Auto Renewal
|
| ✔ Supports PHP 8.1 Back To PHP 7.4
|
| ✔ Supports WHMCS Themes "Six" And "Twenty-One"
|
| ✔ Supports WHMCS V8.8 Back To WHMCS V8.6
|
| ✔ Requires ionCube Loader V12 Or Later
|
Installation
This tutorial will show you how to successfully install PKNIC Domain Registrar For WHMCS.
We will guide you step by step through the whole installation and configuration process.
|
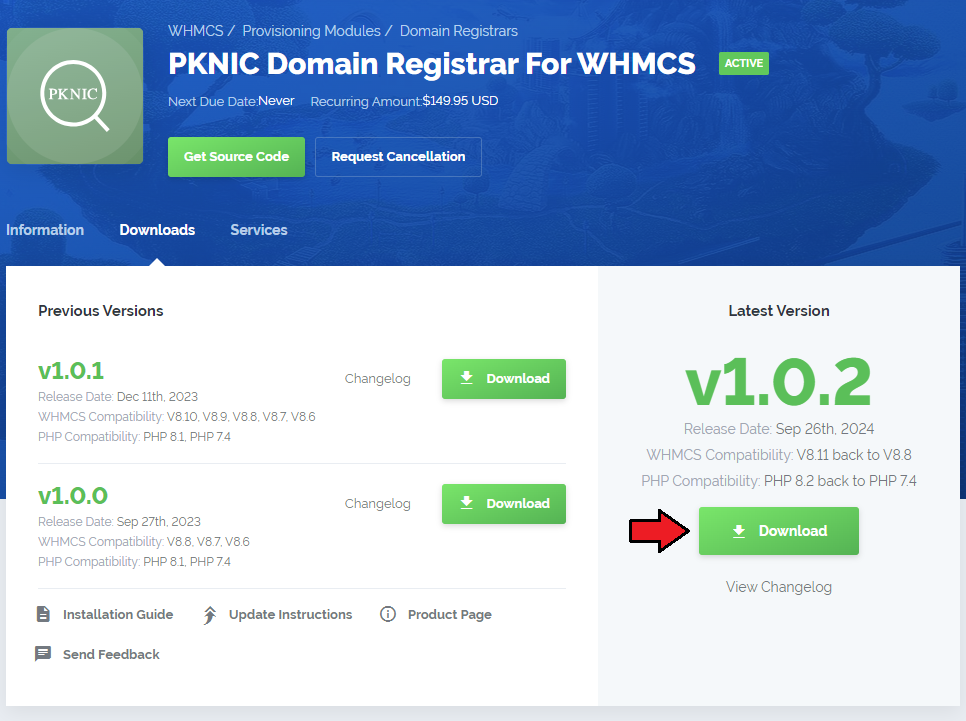
| 1. Log in to our client area and download the module.
|
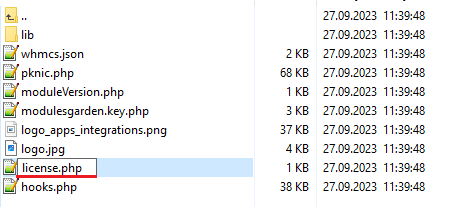
2. Extract the package and upload its content into the main WHMCS directory.
The content of the package to upload should look like this.
|
3. When you install PKINC Domain Registrar For WHMCS for the first time you have to rename 'license_RENAME.php' file.
File is located in 'modules/registrars/pknic_domain/license_RENAME.php'. Rename it from 'license_RENAME.php' to 'license.php'.
|
4. In order to configure your license key, you have to edit a previously renamed 'license.php' file.
Enter your license key between quotation marks as presented on the following screen. You can find your license key in our client area → 'My Products'.
|
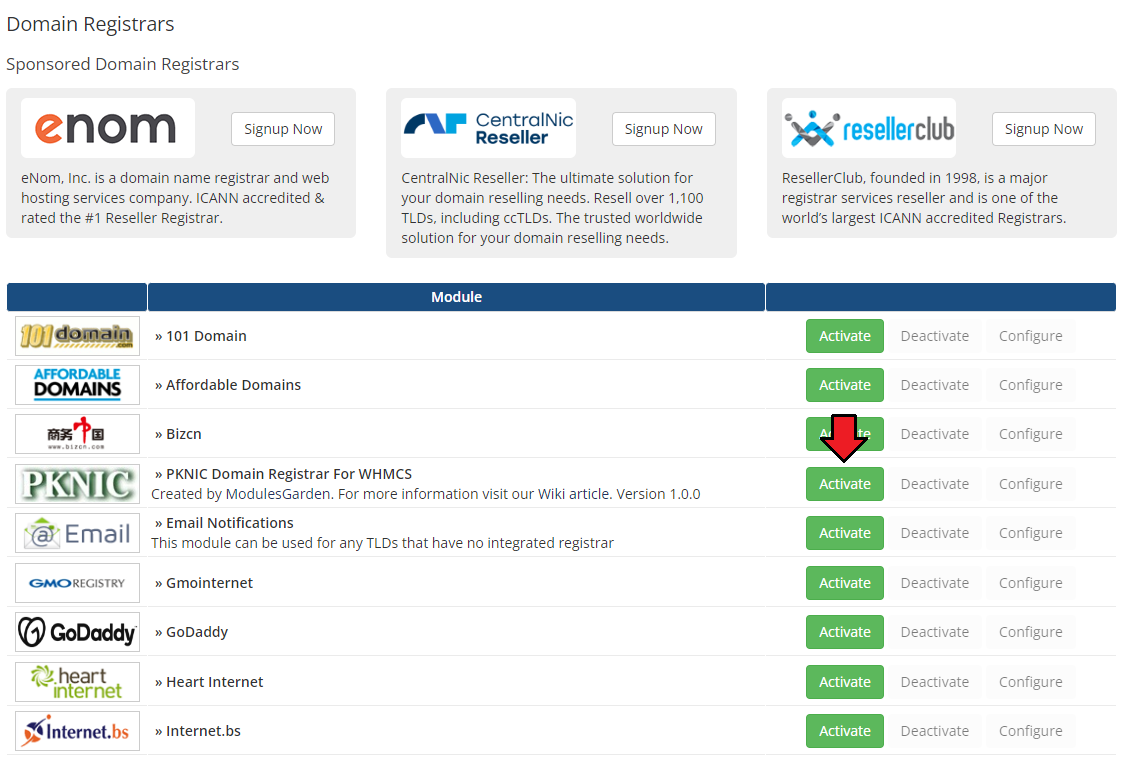
5. Now you have to activate the module in your WHMCS system.
Log in to your WHMCS admin area. Go to 'Setup' → 'Products/Services' → 'Domain Registrars'.
Afterwards, find 'EURid' and press 'Activate' button.
|
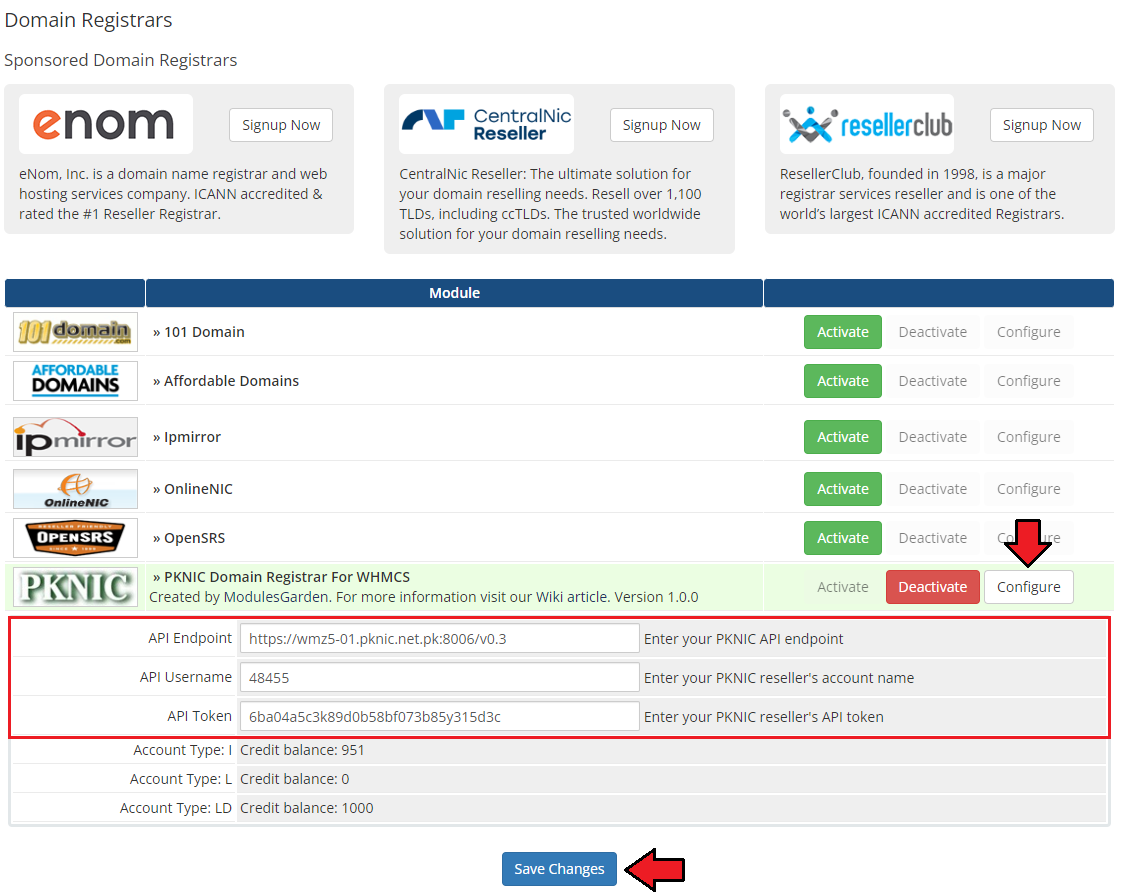
6. In the next step, you need to set up access to the PKNIC panel API.
To do so, fill in 'API Endpoint', 'API Username' and 'API Token' fields with your PKNIC reseller's account details.
Important: If you cannot locate the access credentials within your reseller panel, consider reaching out to [email protected] for assistance in obtaining them.
Next, confirm by clicking the 'Save Changes' button.
|
| 7. You have just successfully installed PKNIC Domain Registrar For WHMCS!
|
Configuration and Management
PKNIC Domain Registrar For WHMCS enables you to offer TLDs from PKNIC through the WHMCS system.
Furthermore, PKNIC Domain For WHMCS empowers your customers to oversee their domains directly from the WHMCS client area.
|
Management of TLDs
Adding a new TLD is a straightforward process. Follow these steps:
- Navigate to "System Settings" → "Domain Pricing".
- Enter the desired .pk TLD to add
- From the "Auto Registration" dropdown menu, select 'PKNIC Domain Registrar For WHMCS' as displayed on the screen.
- You can also determine whether to provide additional features to your customers, such as EPP Code or ID Protection
- Finally, click 'Save Changes' to confirm your settings.
|
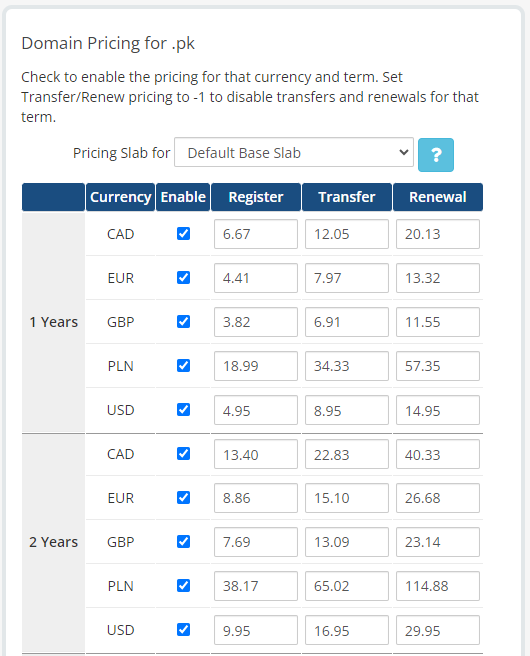
| Move to the 'Pricing' section and set up the pricing for the domain TLD.
|
| In the newly opened window, you can configure your prices. Don't forget to save the changes once your configuration is complete!
|
| That is all! Your customers can now begin ordering '.pk' domains directly from your WHMCS client area.
|
Ordering Process
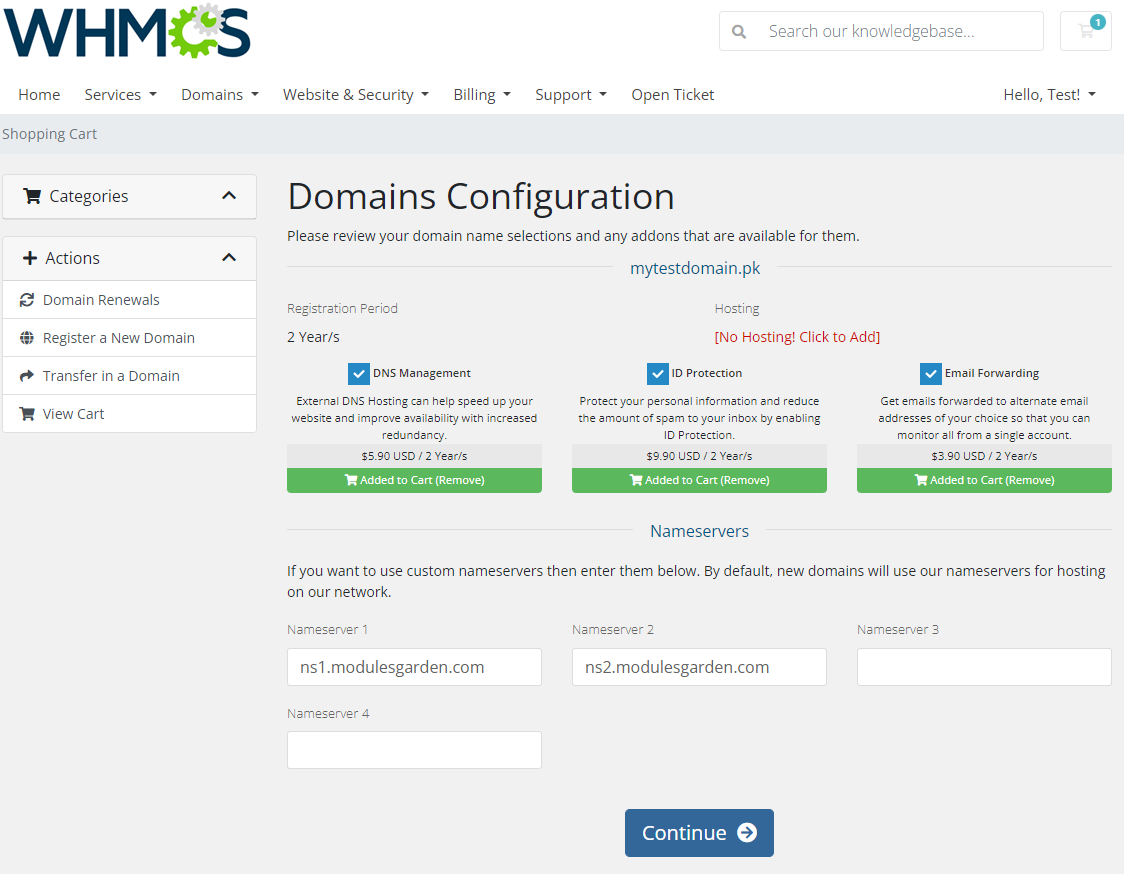
The process of ordering a PKNIC domain is similar to ordering any other domain. Simply search to see if the domain is available, add it to your cart, and, if necessary, add nameservers.
Then, proceed to complete the order.
|
Domain Management
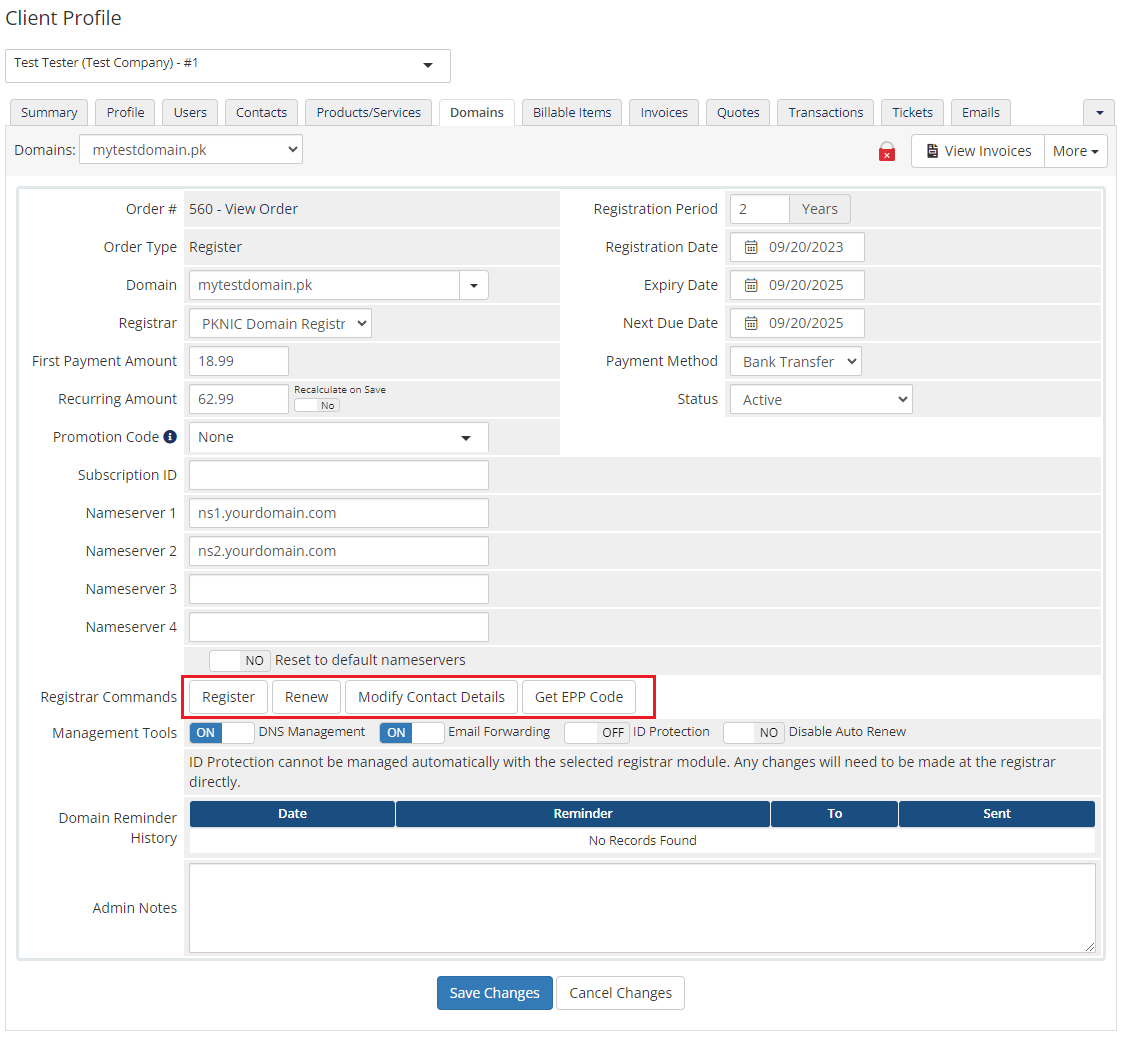
| In the admin area, under the client overview, navigate to the 'Domains' tab, where you can oversee all aspects of the domain. In addition to fundamental actions such as 'Register' and 'Renew', you also have access to the 'Modify Contact Details' and 'Get EPP Code' features.
|
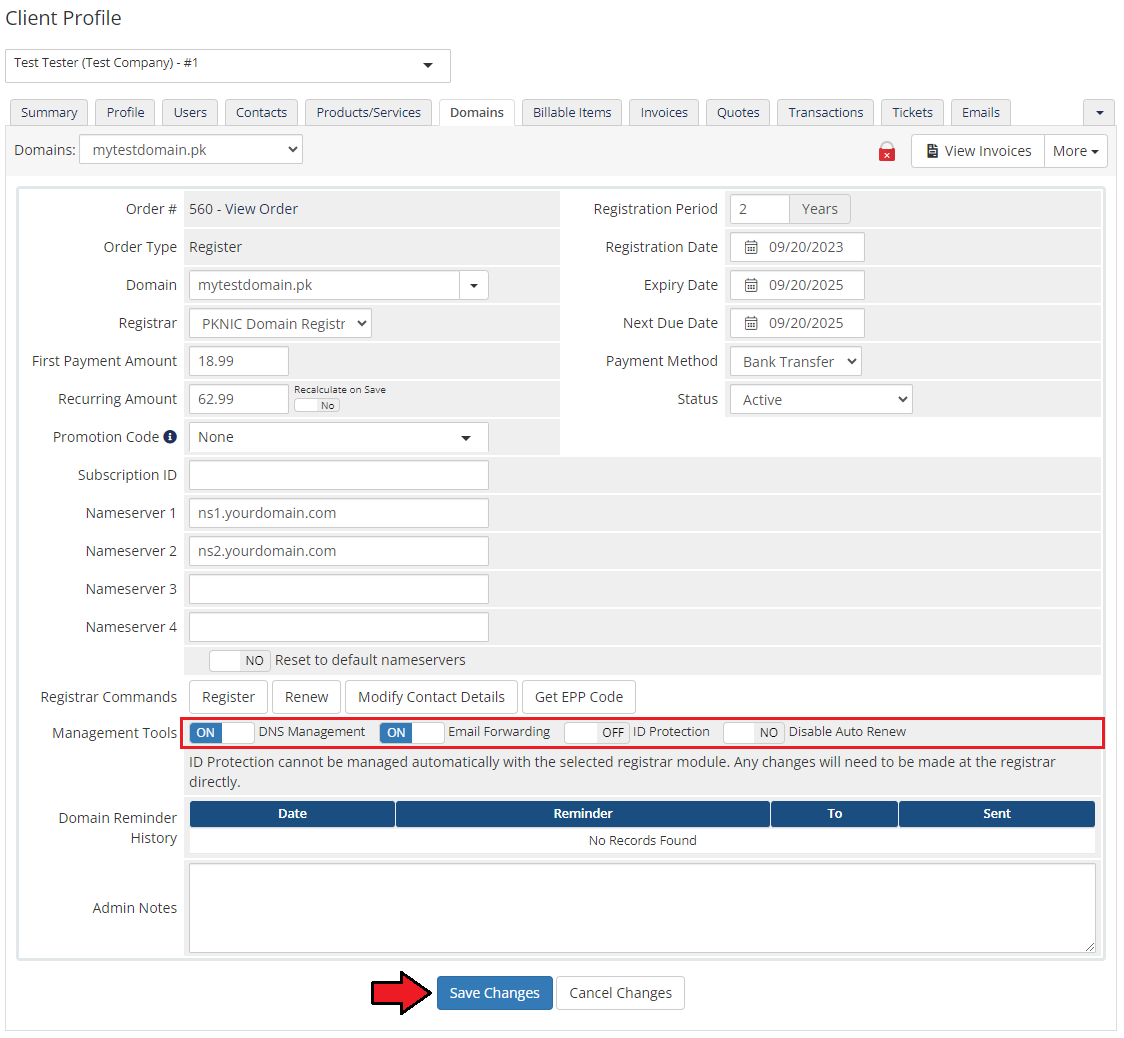
You can also disable/enable:
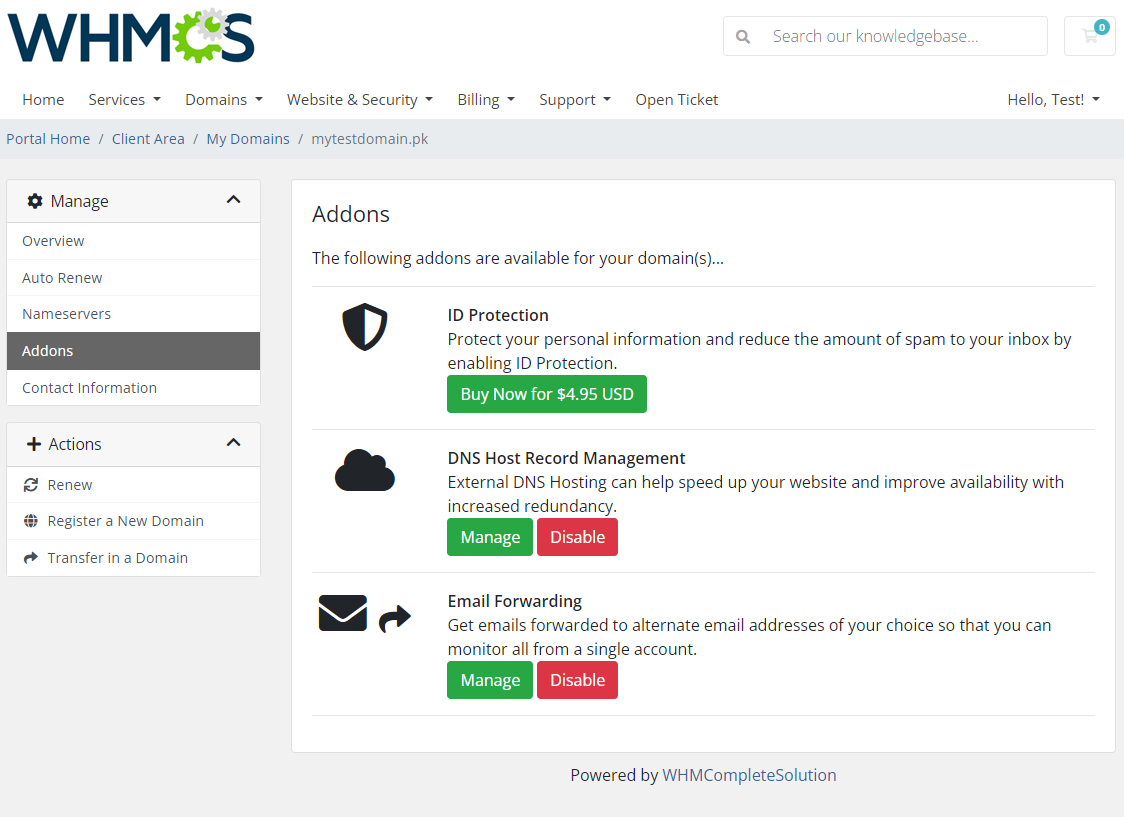
- DNS Management
- Email Forwarding
- ID Protection
- Auto Renew
simply mark/unmark the corresponding to this option checkbox.
Confirm changes by clicking on the 'Save Changes' button.
|
Client Area
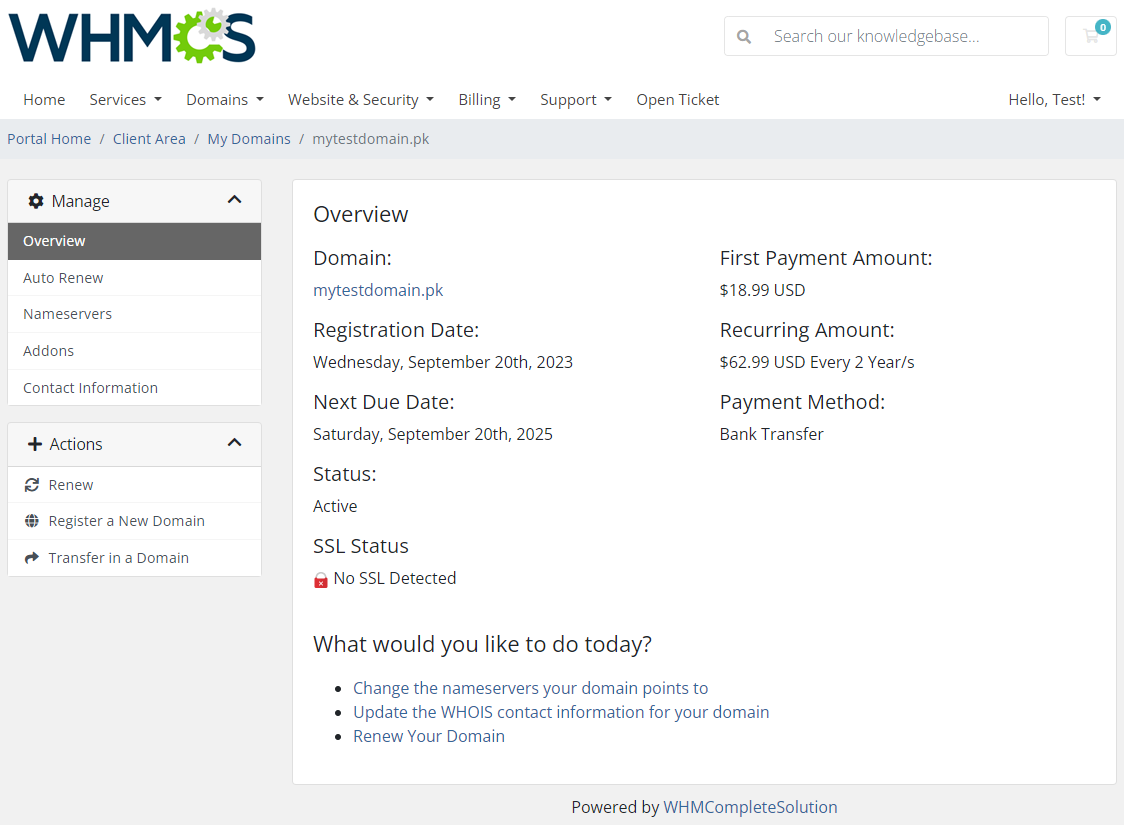
Your customers can order various actions on their PKNIC domain in the client area.
View basic information related to the domain.
|
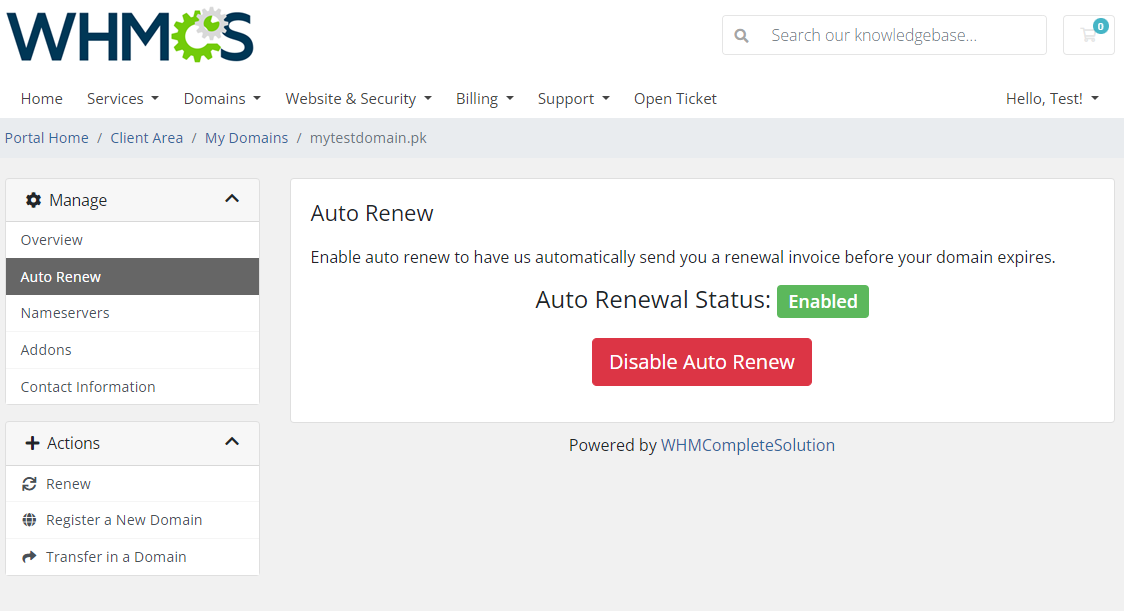
| At 'Auto Renew' tab clients can enable/disable auto-renewal by pressing 'Enable Auto Renew'/'Disable Auto Renew' button.
|
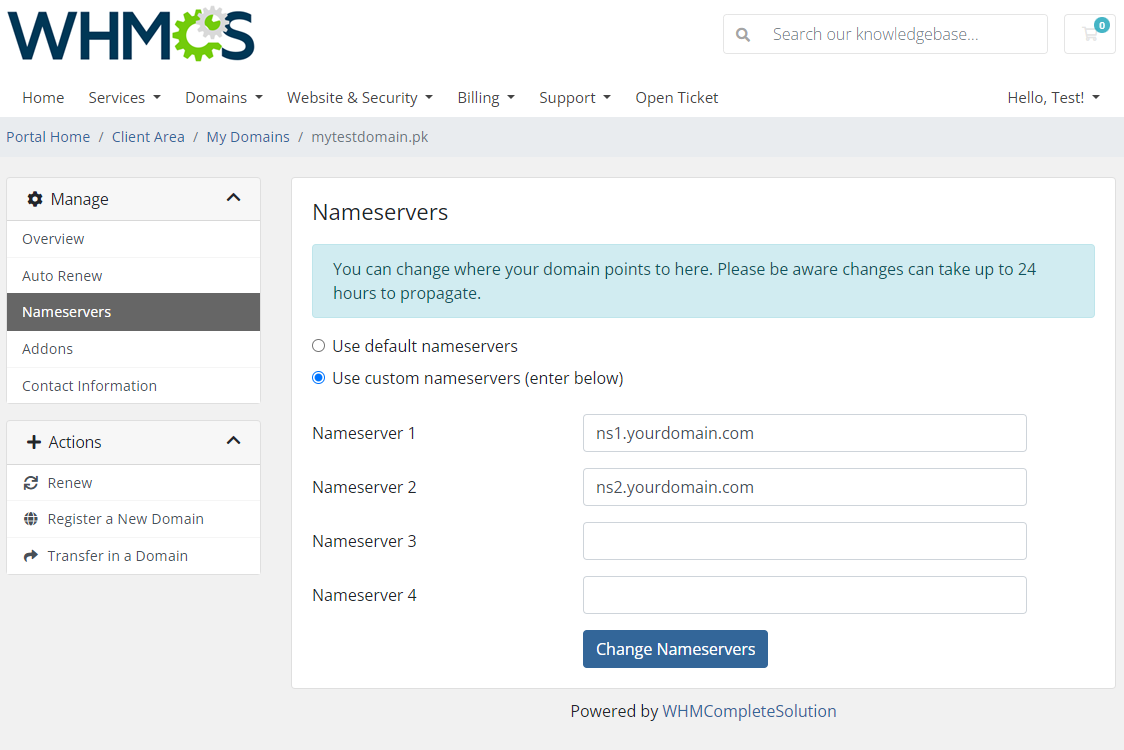
| 'Nameservers' tab allows clients to change nameservers used by their domain.
|
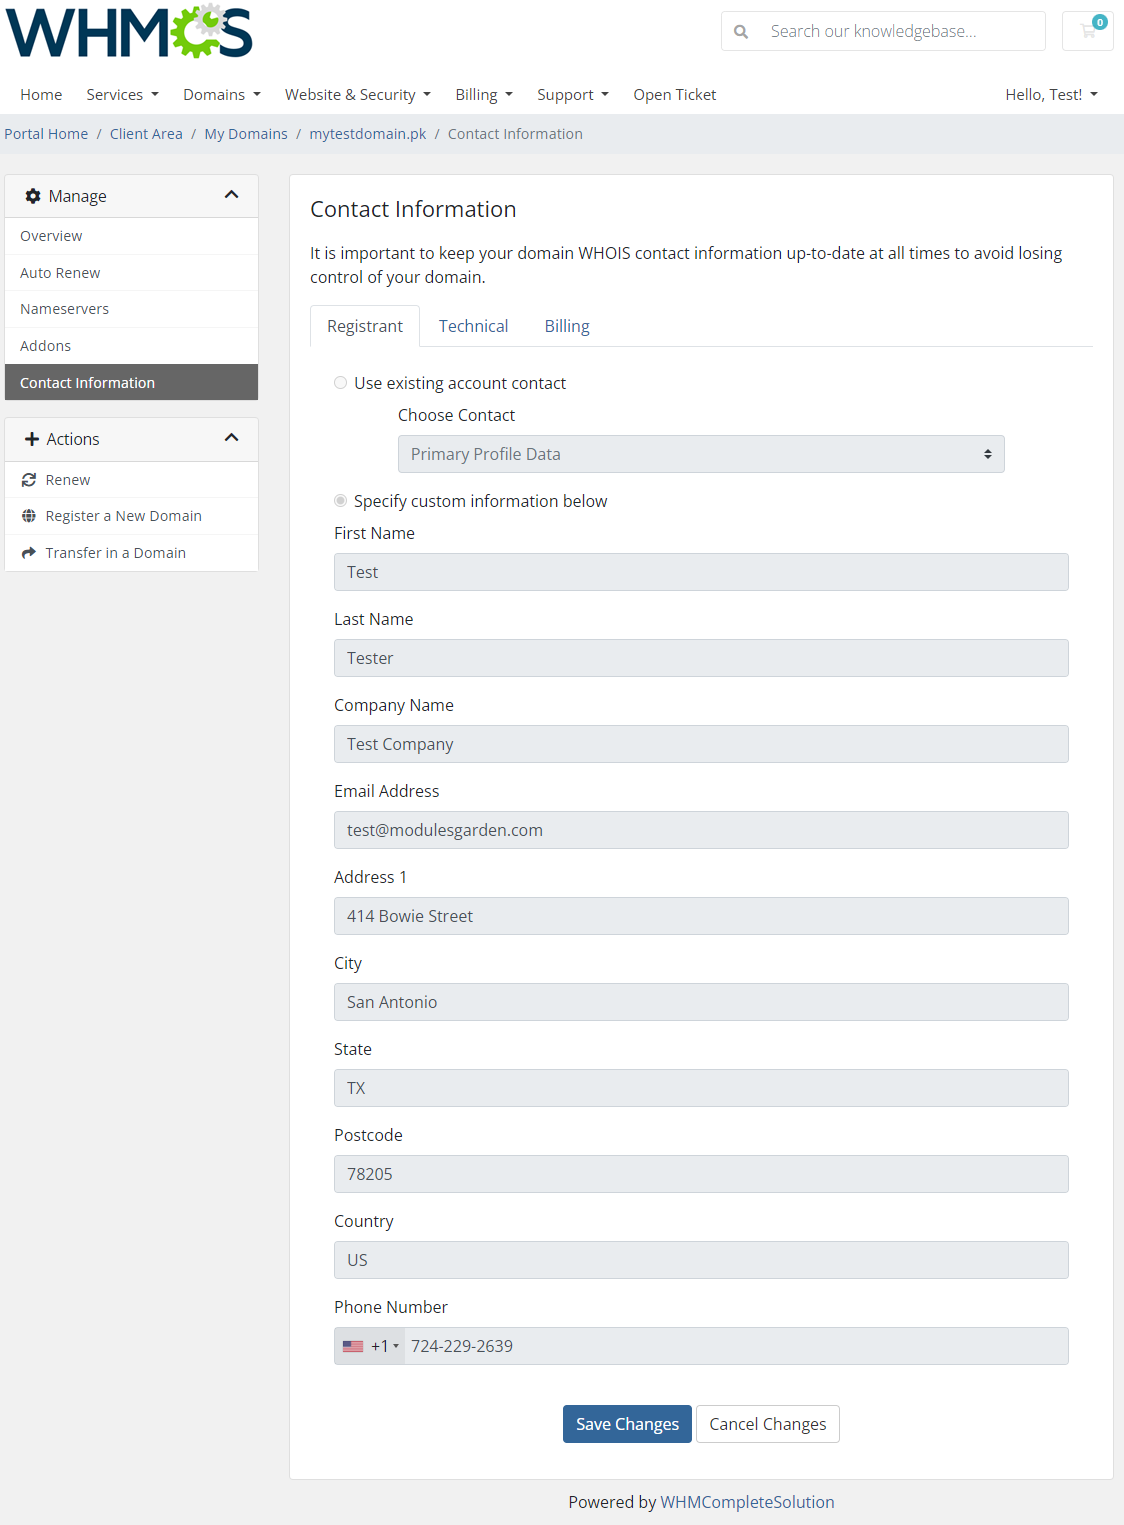
Under 'Manage' → 'Contact Information' your clients can also view and modify the registrant contact information.
Note: Billing and Tech contacts' details may be edited in the admin area only. The two contact details should be always the same.
|
Widget Management
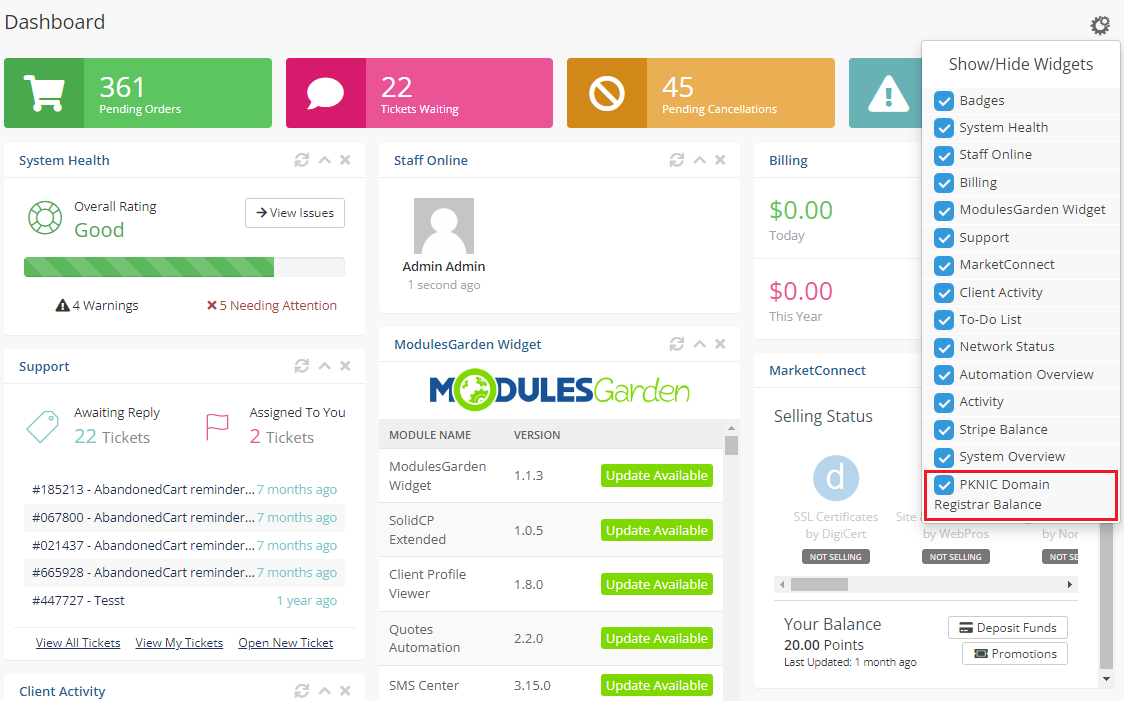
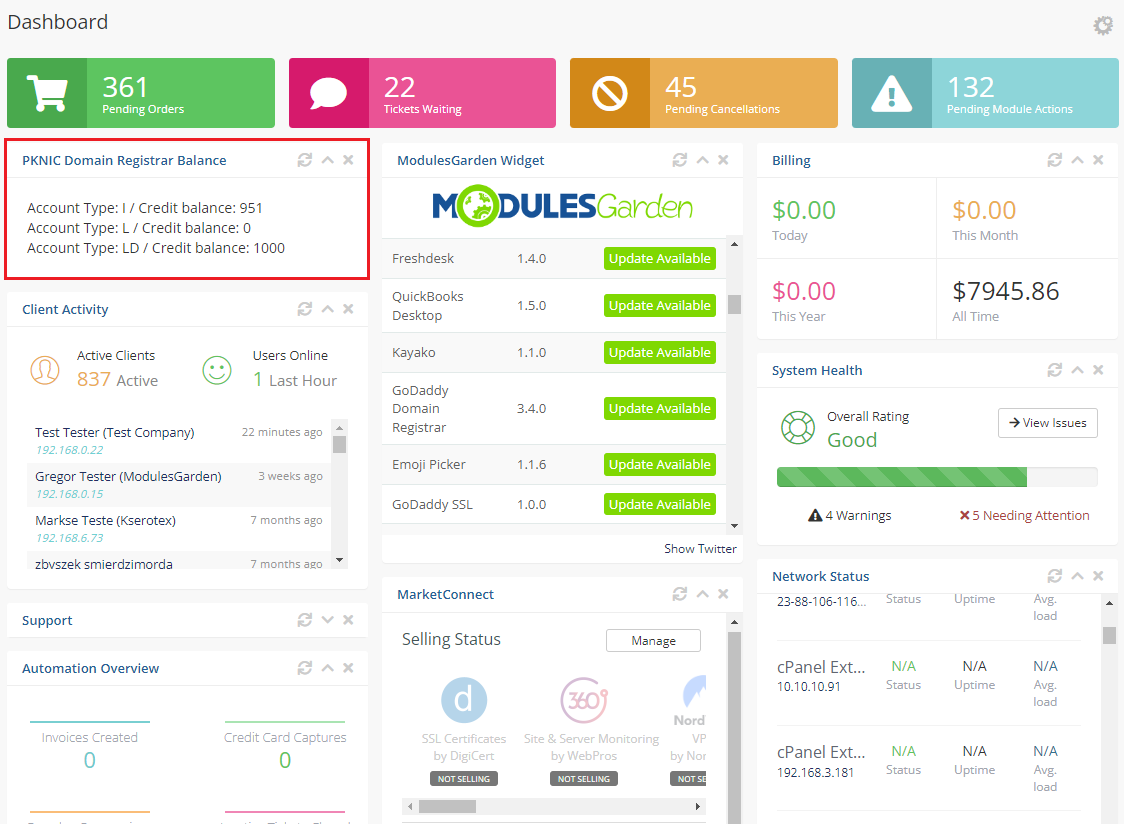
| Thanks to inbuilt widget, you can.... Enable the widget Dashboard → Show/Hide Widget Setting -> PKNIC Registar Balance.
|
| Keep an eye on the current credit balance per account types: I/L/LD:
|
Tips
| 1. As soon as a domain expires, its status in WHMCS system is synchronized.
|
Update Instructions
Essential guidance through the process of updating the module is offered here.
Keep in mind there is a quick and easy option in our client area that will let you upgrade the license of your module to an open source version at any time - and at a lower price!
To take advantage of it, simply use the License Upgrade button located on the product's page and a discounted invoice will be generated automatically.
|
Common Problems
| 1. When you have problems with connection, check whether your SELinux or firewall does not block ports.
|
