Office 365 For WHMCS
From ModulesGarden Wiki
(Difference between revisions)
|
|
| Line 221: |
Line 221: |
| | ==Client Area== | | ==Client Area== |
| | {| | | {| |
| − | |style="padding: 10px 0px 20px 15px;"|At the moment the module does not support any special features in the client area. The customer can change their password to [http://www.office.com Office 365] panel or request a subscription cancellation. | + | |style="padding: 10px 0px 20px 15px;"|At the moment the module does not support any special features in the client area. The customer can change their password to [http://www.office.com Office 365] panel, upgrade subscription plan or request a service cancellation. |
| | |} | | |} |
| | {| | | {| |
Revision as of 15:03, 6 June 2017
Office 365 For WHMCS will enable you to provision and manage Office 365 accounts in your own WHMCS system.
xxxxxxxxxxxxxxxxxxxxxxxxxxxxxxxx.
|
| ✔ Create/Suspend/Unsuspend/Terminate Account
|
| ✔ Supports PHP 5.4 Up To PHP 7
|
| ✔ Supports WHMCS Template Six
|
| ✔ Supports WHMCS V6 and V7
|
Installation and Authentication
This tutorial will show you how to successfully install and authenticate Office 365 For WHMCS.
We will guide you step by step through the whole installation and authentication process.
|
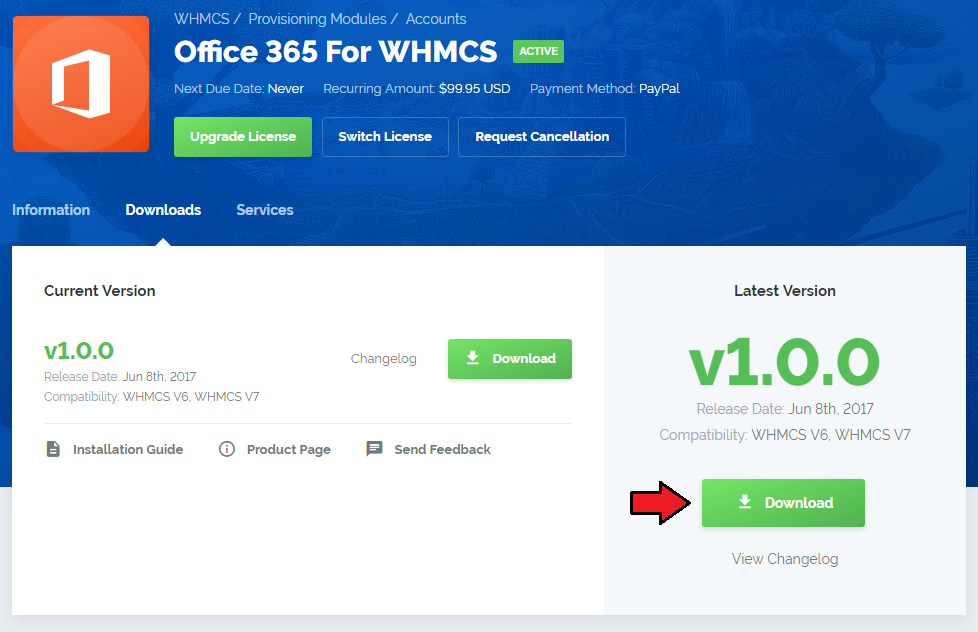
| 1. Log in to your client area and download Office 365 For WHMCS.
|
2. In the downloaded file you will find two packages that support different PHP versions.
As presented on the screen below, the first one is dedicated to PHP 7, while the second one is aimed at PHP 5.4 up to PHP 5.6.
It does not apply to open source versions.
Note: You can check current PHP version in your WHMCS. To do so proceed to 'Utilities' → 'System' → 'PHP Info'.
|
3. Extract the downloaded file and choose the one with the right PHP version. Upload and extract the PHP file into the main WHMCS directory.
The content of PHP version files should look like this.
|
4. When you install Office 365 For WHMCS for the first time you have to rename 'license_RENAME.php' file.
File is located in 'modules/servers/office365/license_RENAME.php'. Rename it from 'license_RENAME.php' to 'license.php'.
|
5. In order to configure your license key you have to edit a previously renamed 'license.php' file.
Enter your license key between quotation marks as presented on the following screen. You can find your license key in your client area → 'My Products'.
|
Configuration of Server
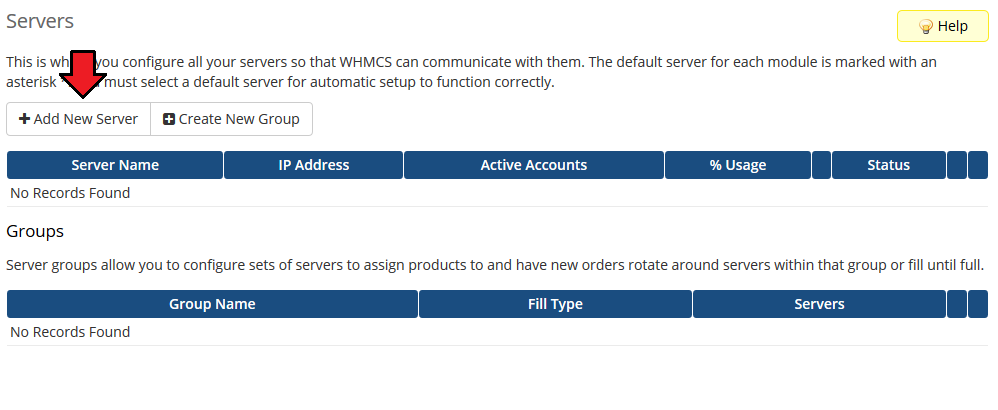
6. To begin, you must add a new server.
Go to 'Setup' → 'Products/Services' → 'Servers' and press 'Add New Server'.
|
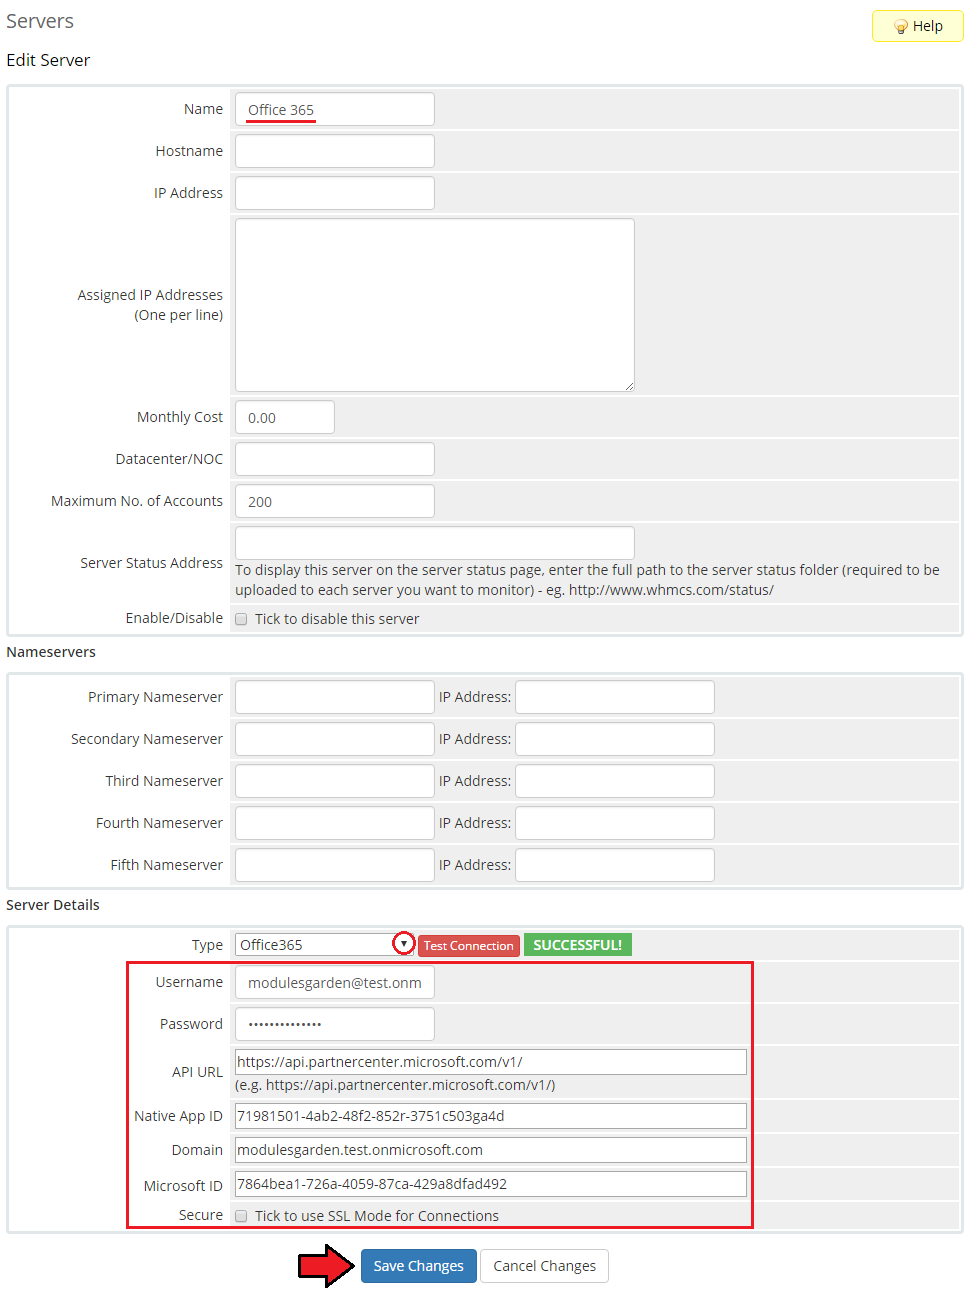
7. Enter your server name. Choose 'Office365' from a dropdown menu. Enter your Microsoft Partner username, password, API URL, Native APP ID, Domain And Microsoft ID. Then press 'Save Changes'.
|
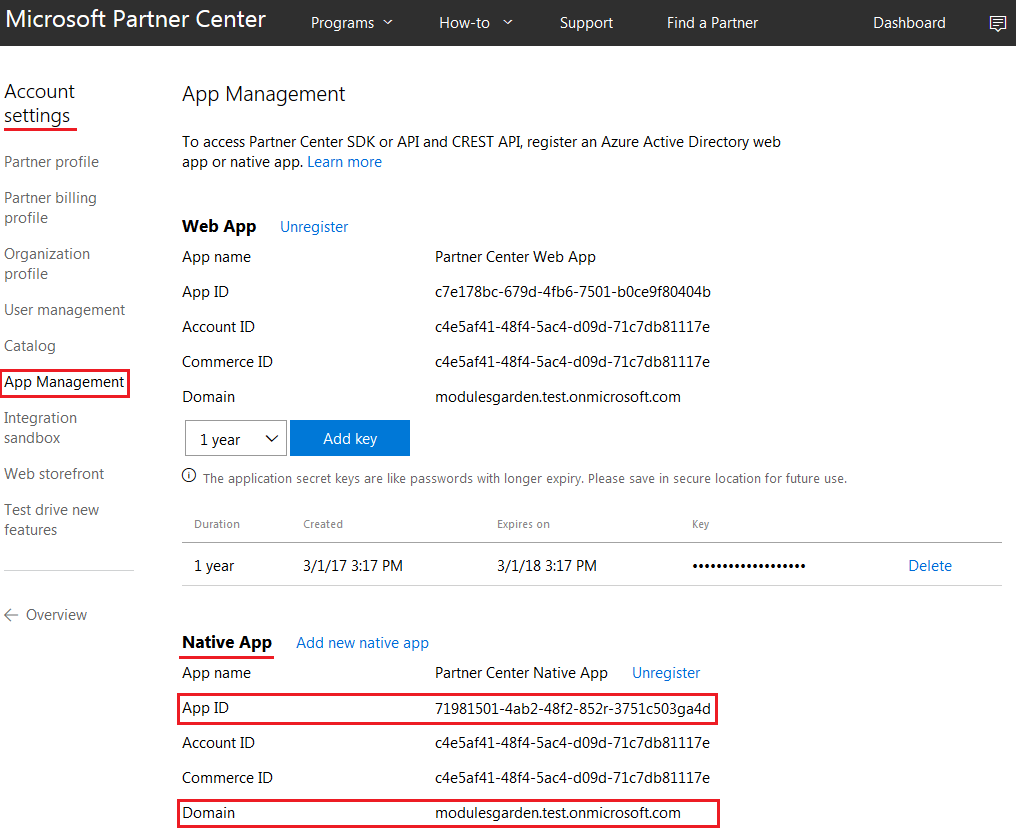
- To find your 'Native APP ID' go to the 'Microsoft Partner Center' panel → 'Account Settings' → 'App Management' and copy 'App ID' from 'Native App' section:
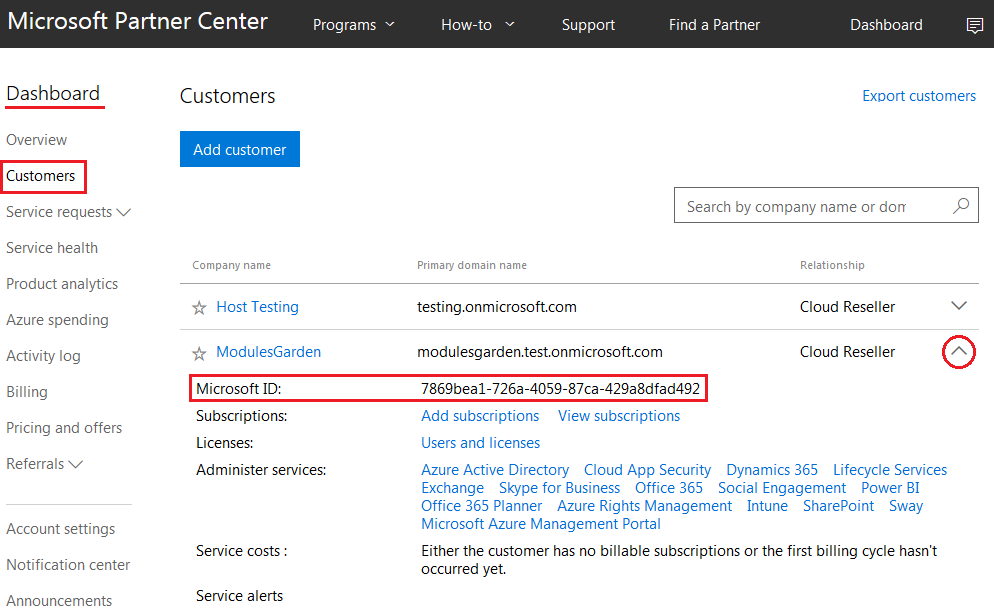
- To obtain 'Domain' and 'Microsoft ID' go to the 'Microsoft Partner Center' panel → 'Dashboard' → 'Customers' and expand desired account you want use to sell subscriptions:
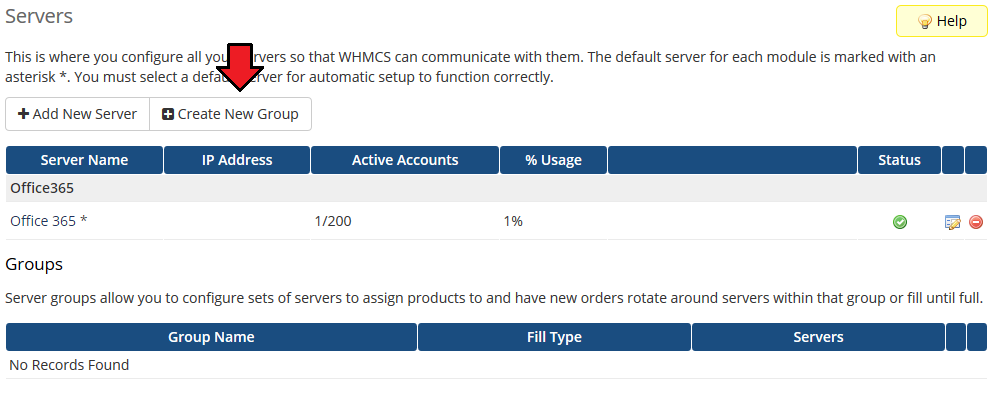
8. Once your server has been configured correctly, you will see a following screen.
Create a new group for your server. Press 'Create New Group' to follow.
|
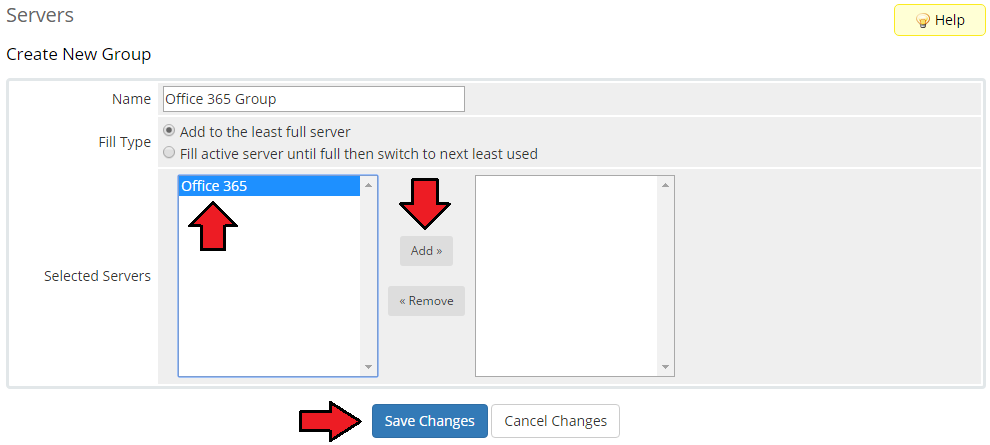
| 9. Enter name, click on your previously created server, press 'Add' then 'Save Changes'.
|
Configuration of Product
10. In order to create a product, go to 'Setup' → 'Products/Services' → 'Products/Services' .
If you do not have a product group, click on 'Create a New Group' . If you do, simply skip step 13.
|
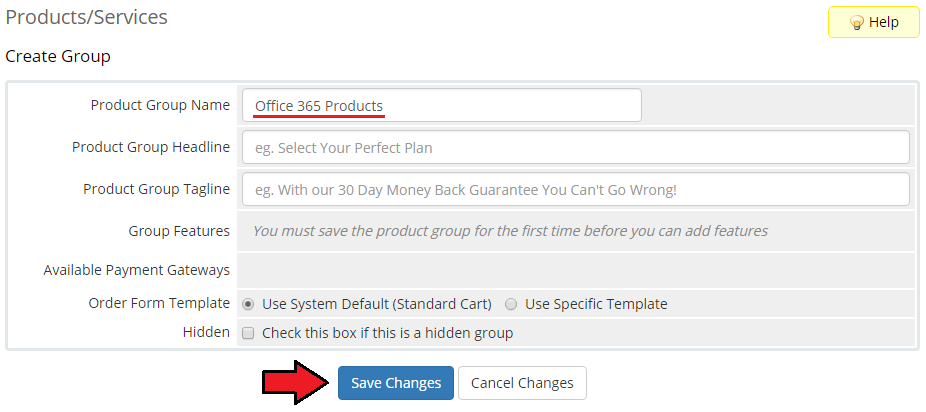
| 11. Fill in a product group name and press 'Save Changes'.
|
| 12. When you have a product group added, you can create your product and assign it to Office 365 module.
|
| 13. Afterwards, choose your product type and product group from dropdown menus, enter your product name and press 'Continue' .
|
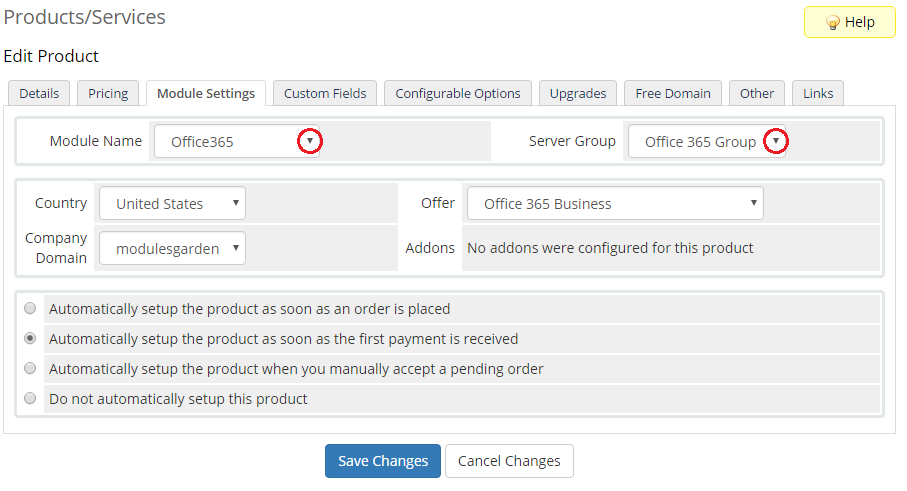
14. Now, go to 'Module Settings' section, choose both 'Office365' and a previously created server group from dropdown menus and press 'Save Changes' .
|
Configuration and Management
| Configuration and management of Office 365 For WHMCS is very intuitive. Read the below sections to see how easy it is.
|
Basic Configuration
| Let's start the module settings from choosing 'Office365' from 'Module Name' and previously created 'Server Group' .
|
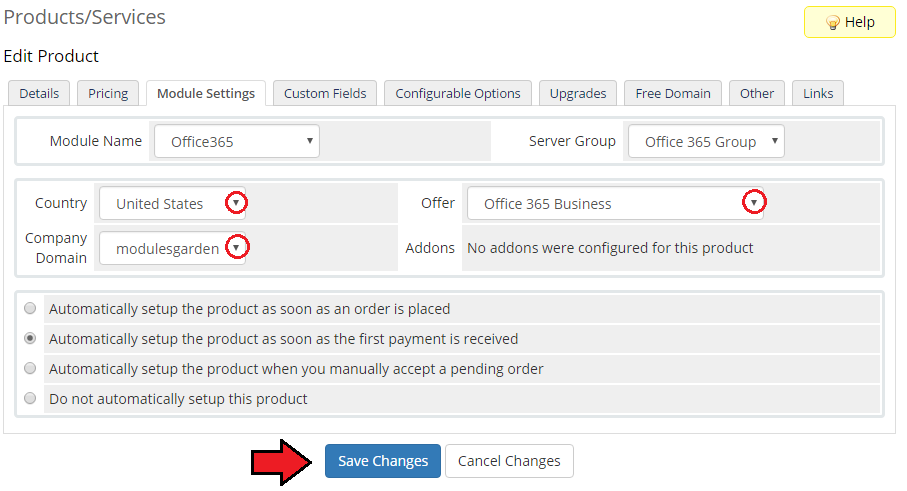
Now choose 'Country'. from which you will be offer your Office 365 services.
Next select available 'Company Domain' ' and choose one of desired Office 365 plans. You may also assign additional services to the main plan as addons which will be described in further parts.
|
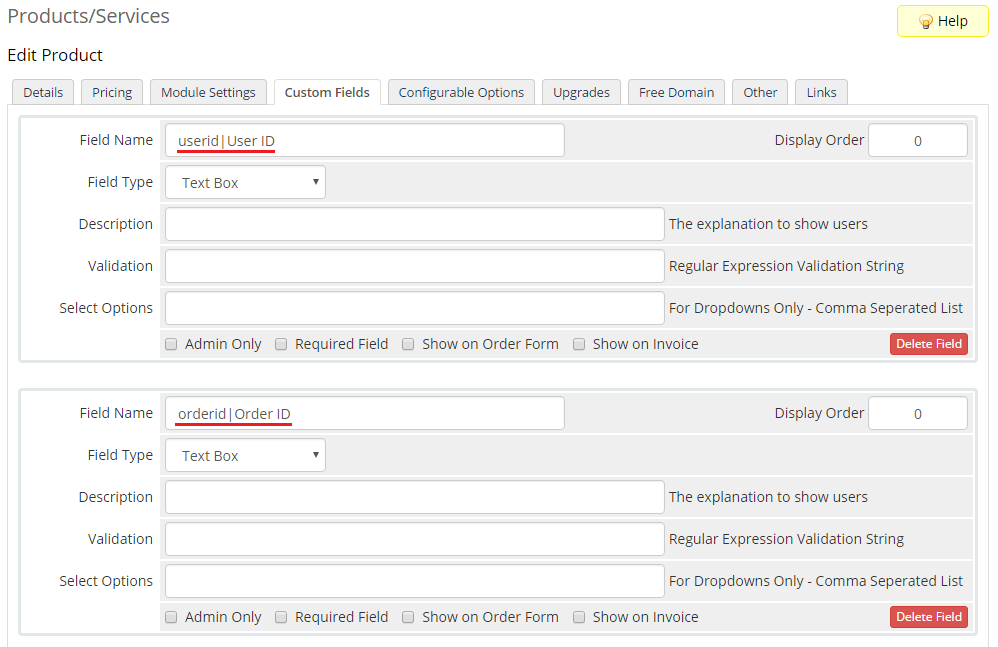
| Next go to the 'Custom Fields' tab and add two new text box fields: userid|User ID and orderid|Order ID as shown on the following screen:
|
Additional Services
|
In order to offer additional services for product plan you need to create new addon first.
In your WHMCS system press 'Setup' → 'Products/Services' → 'Product Addons' and press 'Add New Addon' .
|
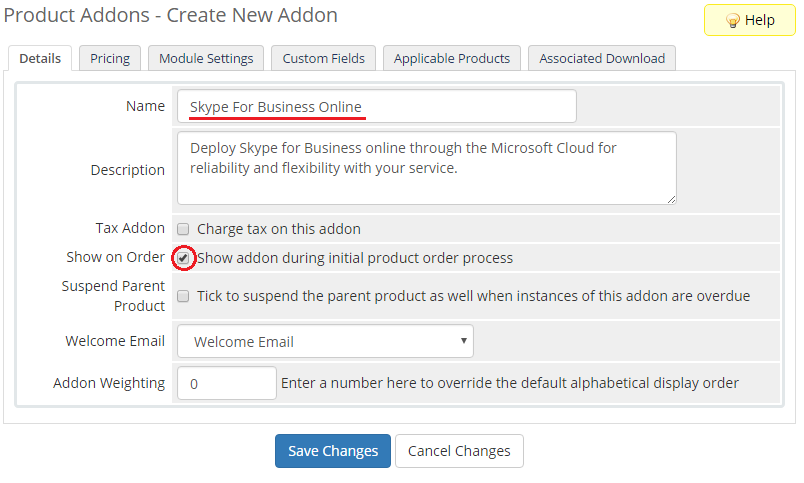
| Enter name for the addon, choose addon to be visible on order and configure the rest of the desired options.
|
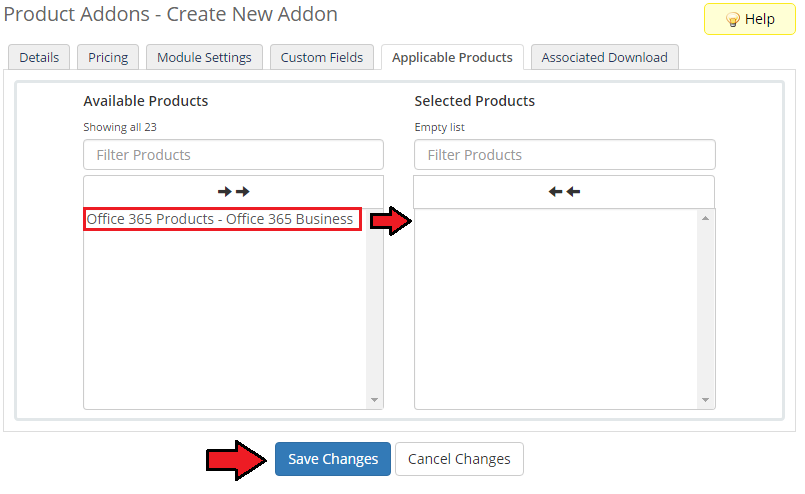
| Go to the 'Applicable Products' tab and select product for which you want to offer this addon. 'Save Changes' .
|
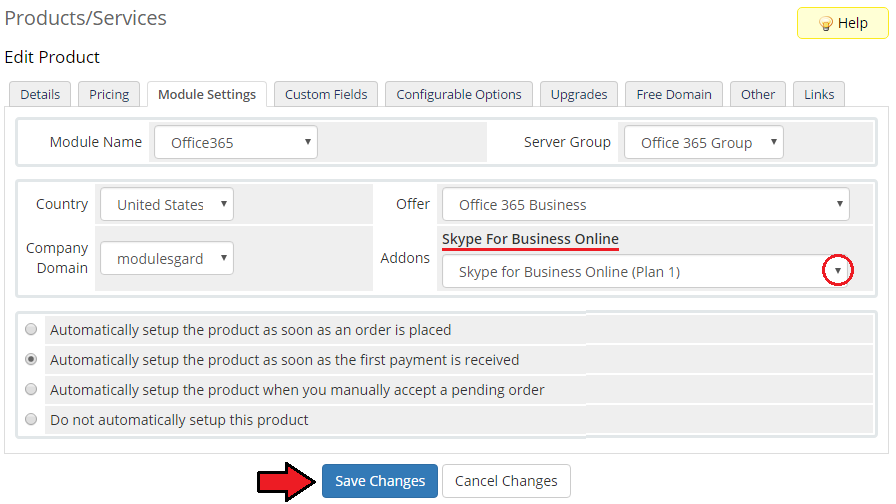
| Go back your product and at 'Module Settings' tab you can now associate created addon with one of the available additional services.
|
'Save Changes' . Remember that you can add more addons for other services.
|
Order
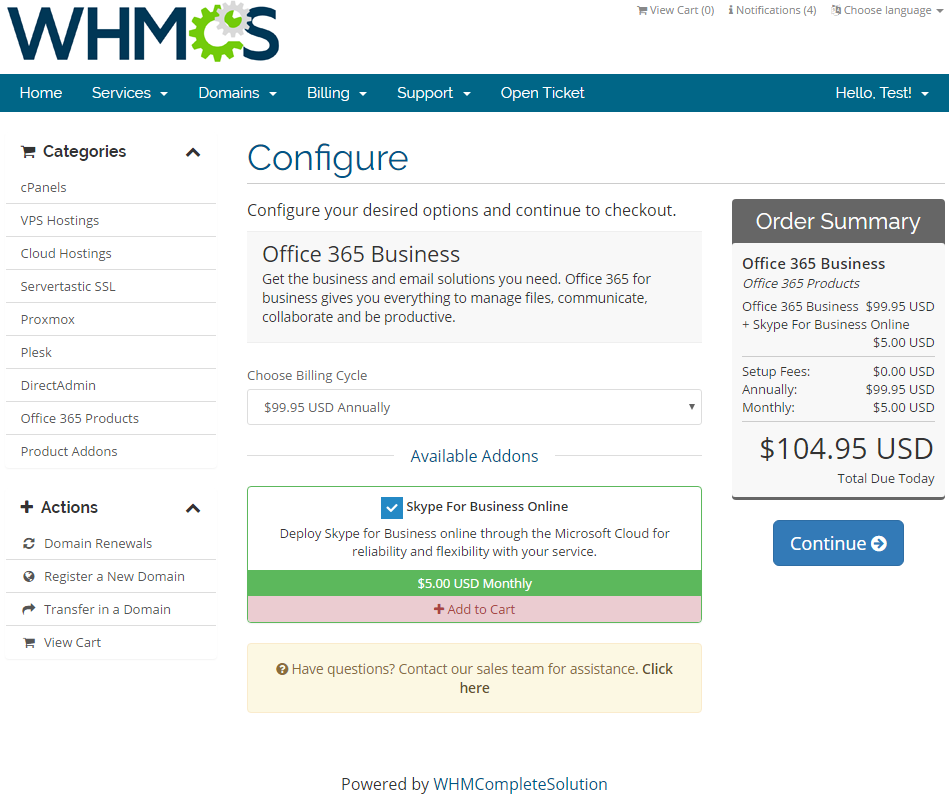
Once the product configuration is complete, clients will be able to order the selected subscription and addons.
|
Client Area
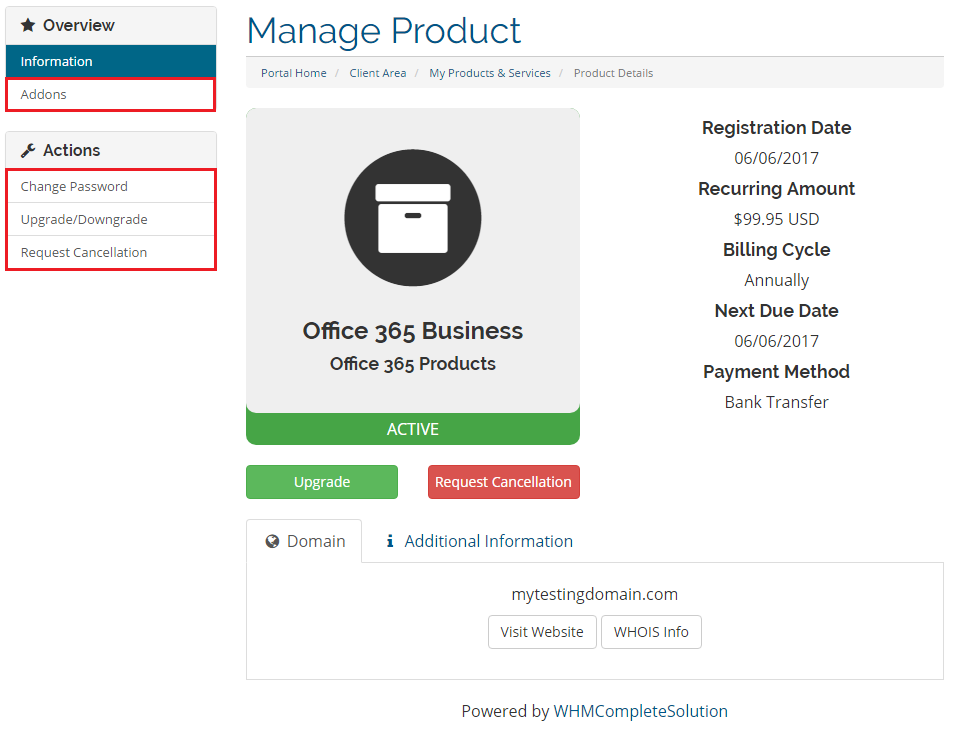
| At the moment the module does not support any special features in the client area. The customer can change their password to Office 365 panel, upgrade subscription plan or request a service cancellation.
|
Admin Area
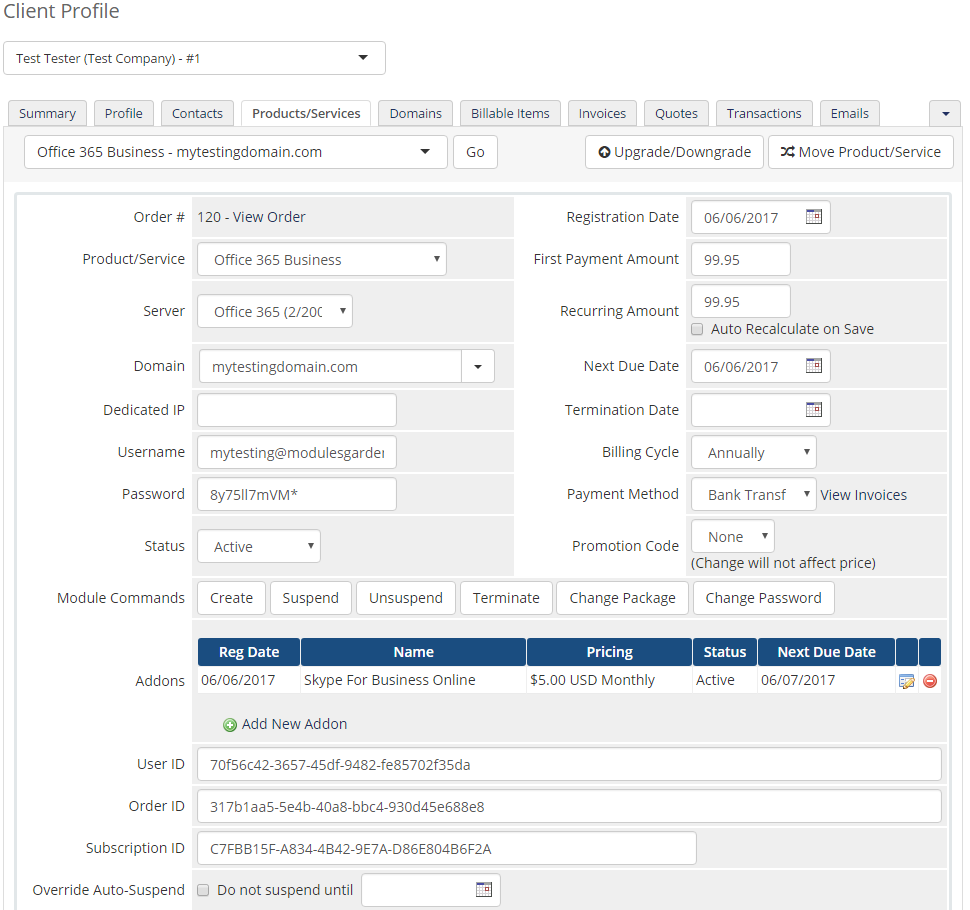
Let's check your new product in admin area product page. It should look like on the screen below.
|
Tips
Common Problems
| 1. When you have problems with connection, check whether your SELinux or firewall does not block ports.
|
