Multibrand 1.X For WHMCS
From ModulesGarden Wiki
(Difference between revisions)
|
|
| Line 292: |
Line 292: |
| | |} | | |} |
| | {| | | {| |
| − | |style="padding: 0px 0px 30px 15px;"|2. If your CNAME record is not working, remember that first domain name in CNAME record should be branded domain.<br /> | + | |style="padding: 0px 0px 10px 15px;"|2. If your CNAME record is not working, remember that first domain name in CNAME record should be branded domain.<br /> |
| | The second one is the domain on which you have your WHMCS. The redirection goes from the first domain to the second. <br /> | | The second one is the domain on which you have your WHMCS. The redirection goes from the first domain to the second. <br /> |
| | + | Dots after domains are also important.<br /> |
| | Take note that there could be a delay with propagation of changes for DNS servers while using A type CNAME records. | | Take note that there could be a delay with propagation of changes for DNS servers while using A type CNAME records. |
| | + | |} |
| | + | {| |
| | + | |style="padding: 0px 0px 30px 15px;"|2. If your branded domain or WHMCS domain are using SSL connection, both of them need to have the same certificate.<br /> |
| | + | If both of them are using the same domain, you will need wildcard certificate.<br /> |
| | + | If they are using different domains, secure them with san certificate. |
| | |} | | |} |
Revision as of 14:12, 9 July 2014
| Multibrand For WHMCS will allow you to handle multiple brands on multiple websites while using a single WHMCS installation.
You will be able to customize your brand through modifying factors like client area template, logo, brand name, address and more.
Owing to Multibrand For WHMCS your customers will be able to log in to specified client areas in accordance to the brand under which they purchased a product or service.
|
| ✔ User Friendly Management Of Multiple Brands
|
| ✔ Easy Modification Of Existing Brands
|
| ✔ Display Active Clients, Invoices, Orders, Tickets And Services Associated To The Brand
|
| ✔ Preview Of Branded Client Area
|
| ✔ Brand Reports - List Of Clients, Invoices, Orders, Tickets And Services
|
| ✔ Publish/Unpublish Brand
|
| ✔ Define Default Brand Of Client Account Created By Administrator
|
| ✔ Log In From Different URLs Into Different Brands Dependant On Purchased Product
|
| ✔ Receive Branded Emails And Invoices
|
| ✔ Default Brand For New Accounts
|
| ✔ Supports WHMCS V5 and Later
|
Installation
This tutorial will show you how to successfully install and configure Multibrand For WHMCS.
We will guide you step by step through the whole installation and configuration process.
|
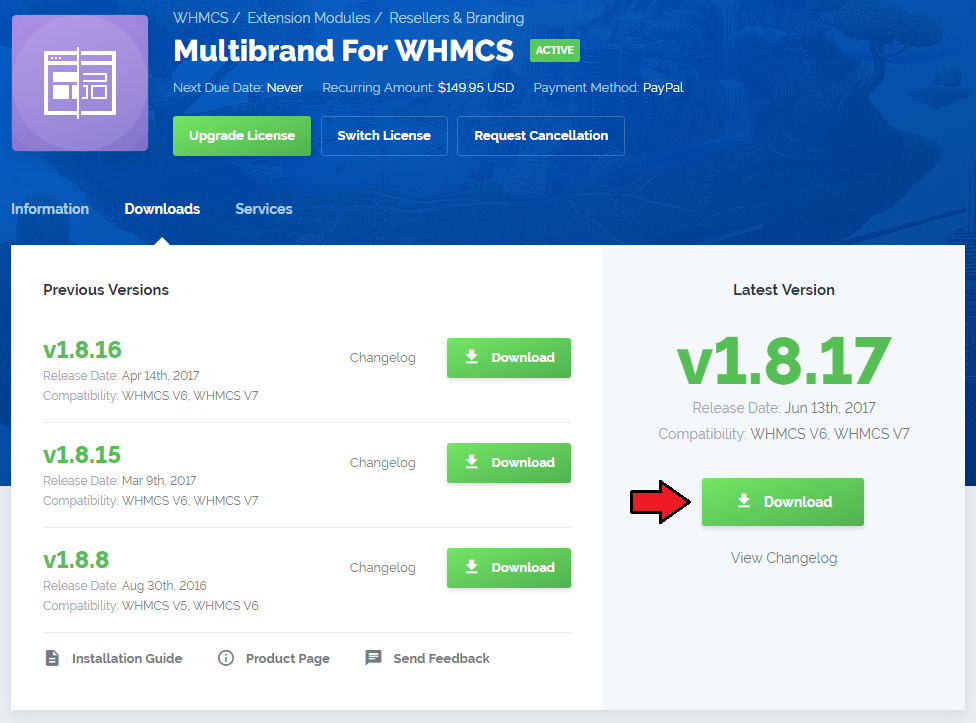
| 1. Log in to your client area and download Multibrand For WHMCS.
|
2. Upload and extract the module into the main WHMCS directory.
Files in your WHMCS directory should look like this.
|
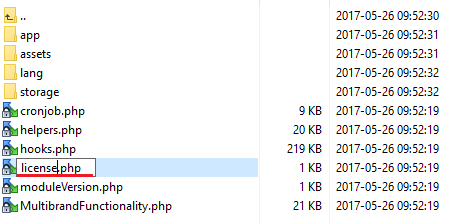
3. When you install Multibrand for the first time you have to rename 'license_RENAME.php' file.
File is located at 'modules/addons/MultibrandFunctionality/license_RENAME.php' . Rename it from 'license_RENAME.php' to 'license.php' .
|
4. In order to configure your license key, you have to edit a previously renamed 'license.php' file.
Enter your license key between quotation marks as presented on the following screen. You can find your license key at your client area → 'My Products' .
|
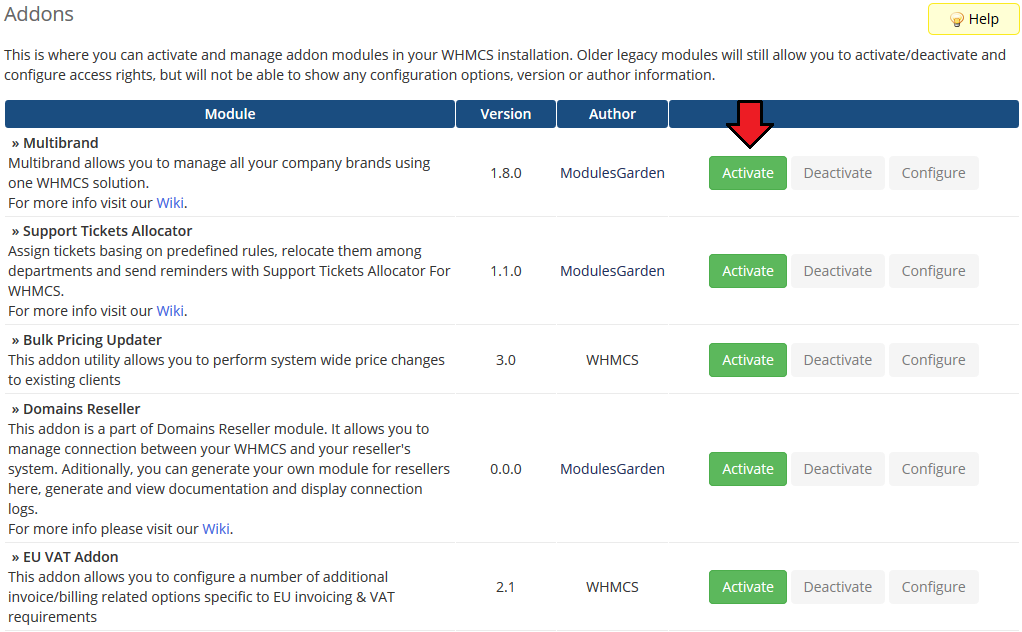
5. Now you have to activate the module in your WHMCS system.
Log in to your WHMCS admin area. Go to the 'Setup' → 'Addon Modules' . Afterwards, find 'Multibrand' and press 'Activate' button.
|
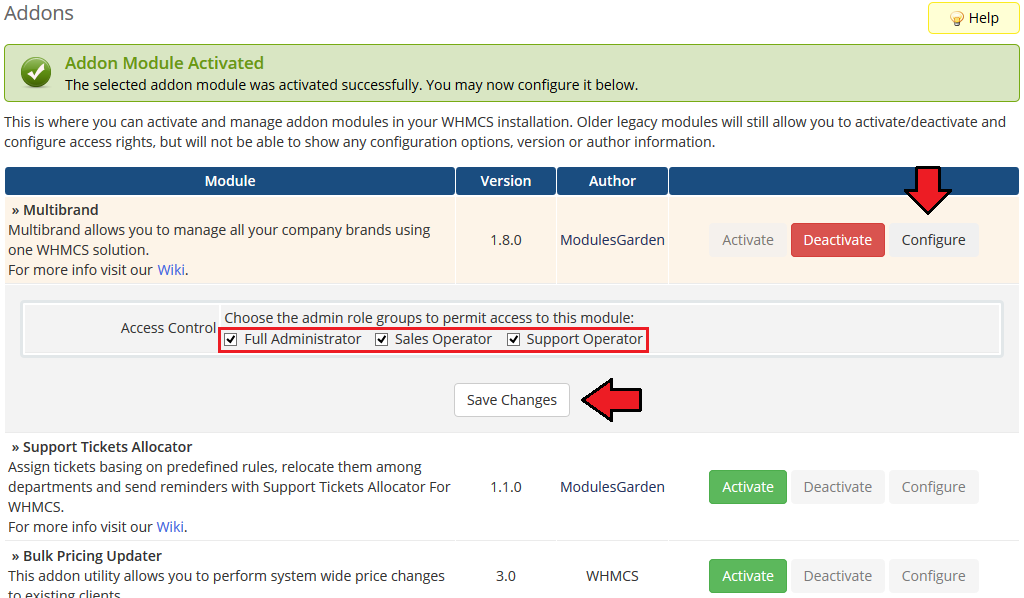
6. In the next step you need to permit access to this module.
To do so click on 'Configure' button, tick 'Access Control' near required admin role groups and press 'Save Changes' .
|
7. Last step is setting 'logos' folder as writeable.
Folder is located at the 'you_whmcs/modules/addons/MultibrandFunctionality/storage/' .
|
8. You have just successfully installed Multibrand For WHMCS!
You can access your module at the 'Addons' → 'Multibrand' .
|
Configuration and Management
| At this section we will show you how to properly set up and use a Multibrand For WHMCS.
|
Dashboard
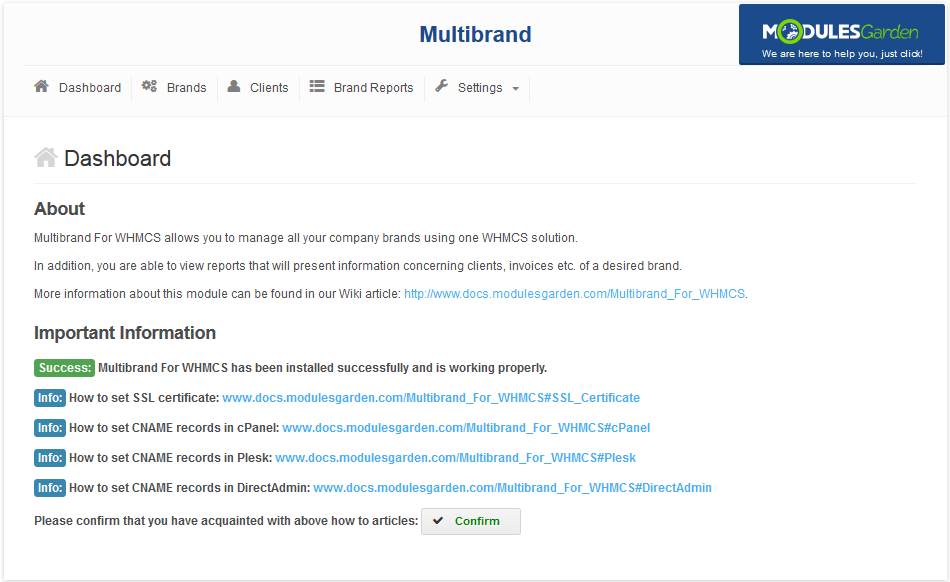
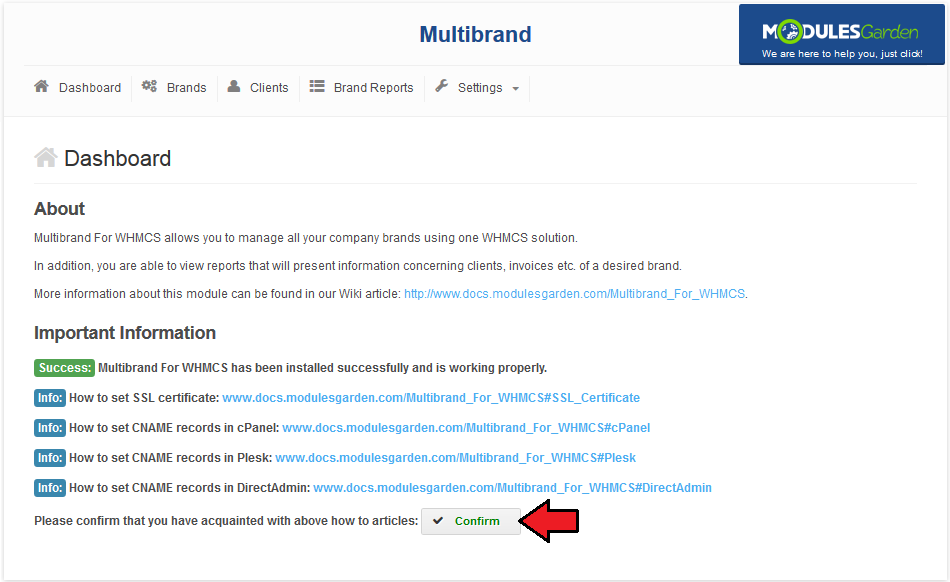
Under 'Dashboard' you can find basic information about the module and current status of 'logos' folder.
It is required to set up 'logos' folder as writable in order to upload logos of your brands.
|
Brands Management
| 'Brands Management' tab allows you to create and manage your brands on a single instance of WHMCS solution.
|
New Brand
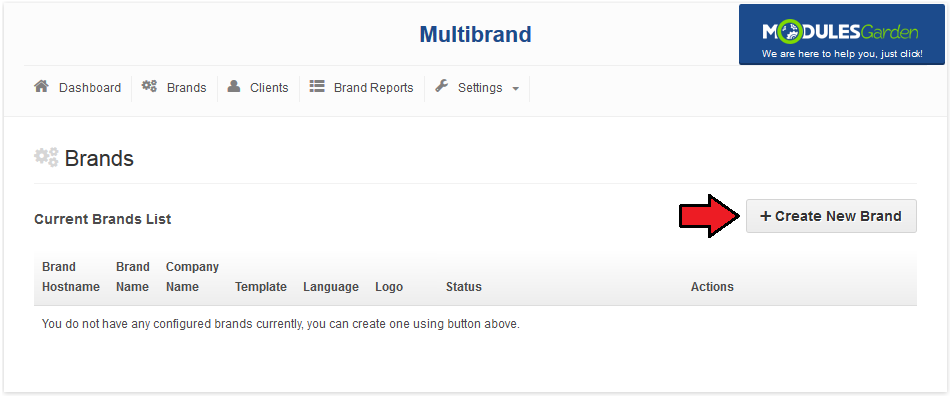
| Let's start by creating a new brand. For that purpose go to the 'Brands Management' tab and press 'Create New Brand' button.
|
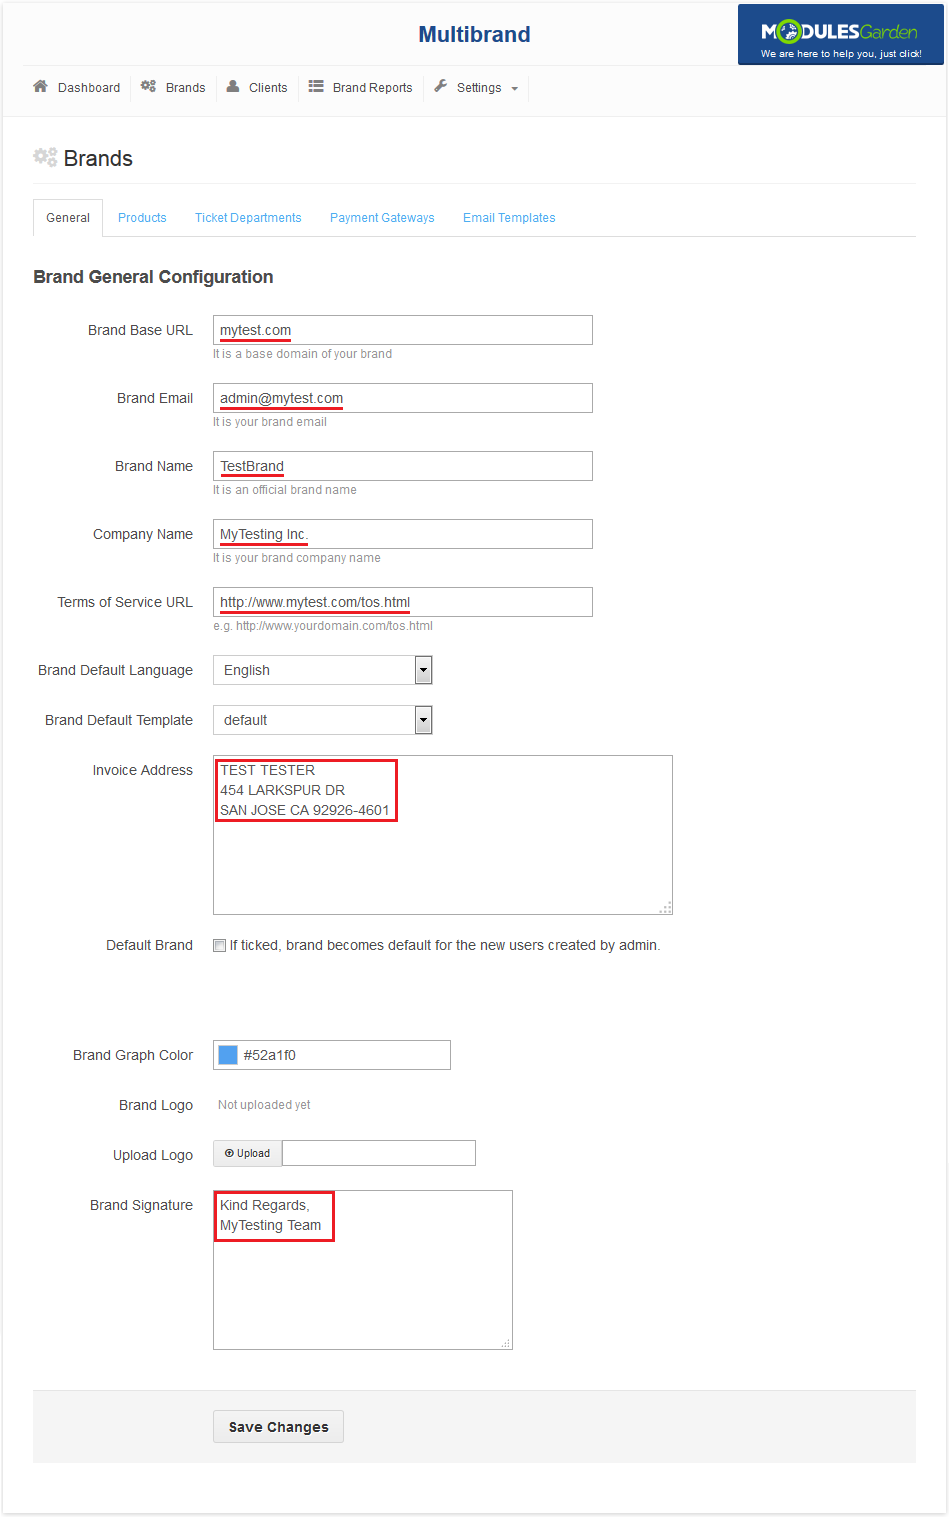
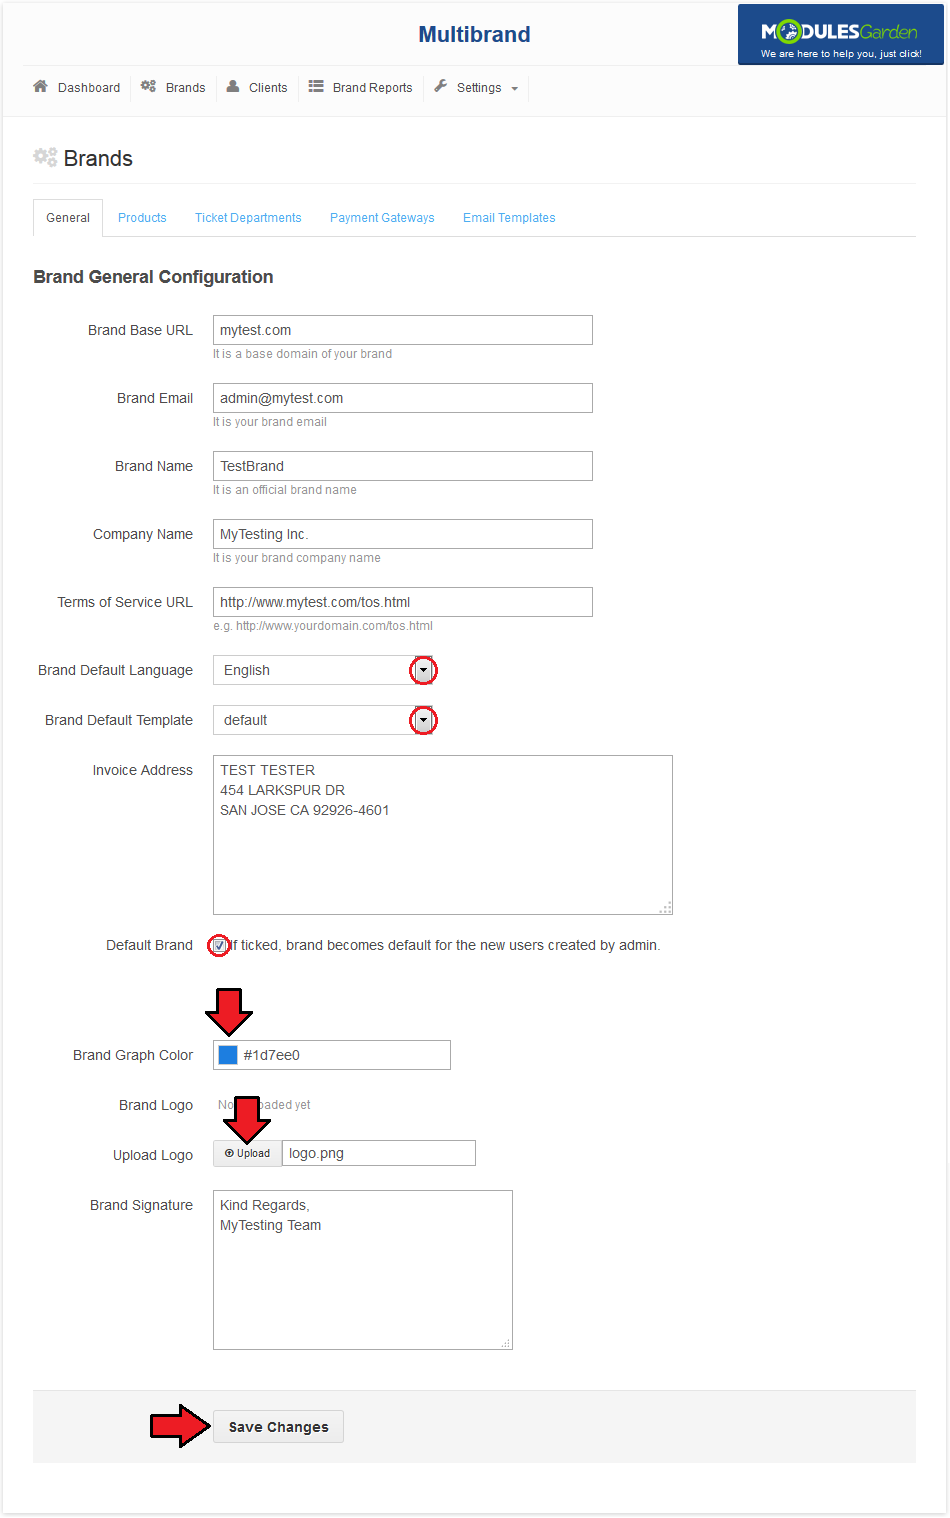
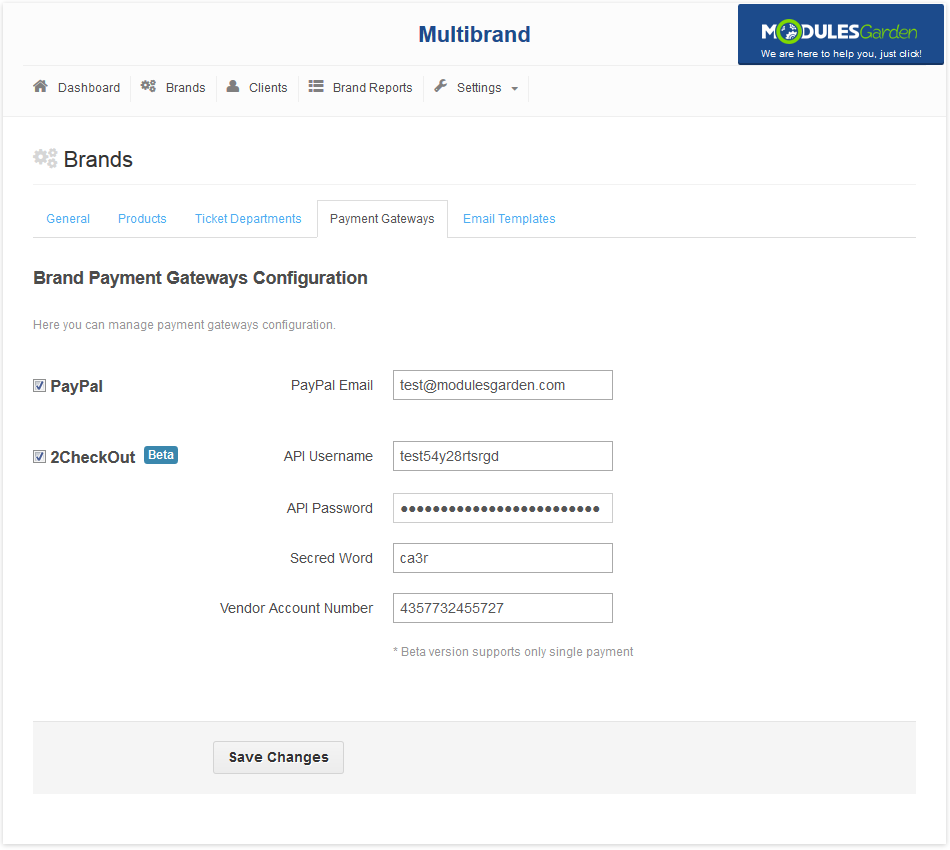
Now, fill 'Brand Base URL' , 'Brand Email' , 'Brand Name' , 'Company Name' and 'Address' with desired values.
Values at the 'Address' field will be used as a company address and displayed at e.g. created invoices.
'Brand Email' will be used for branded emails send to clients.
|
Afterwards, select desired brand language and template.
Additionally, upload logo which will be used at the branded invoices at the client area and branded emails.
Finish through deciding whether to set this brand as default for new users created by administrator and press 'Save Changes' .
|
Last step is setting up DNS record, which will be pointing from branded domain to your main domain used by WHMCS.
For that purpose create CNAME record in DNS settings. For example, your branded domain is reseller.com and domain with your WHMCS is whmcs.domain.com.
In this situation, your CNAME will be 'reseller.com. CNAME whmcs.domain.com.' .
Note: As you can see above, each domain have to be closed with dot.
|
If your branded domain or WHMCS domain are using SSL connection, both of them need to have the same certificate.
If both of them are using the same domain, you will need wildcard certificate.
If they are using different domains, secure them with san certificate.
|
Management of Existing Brands
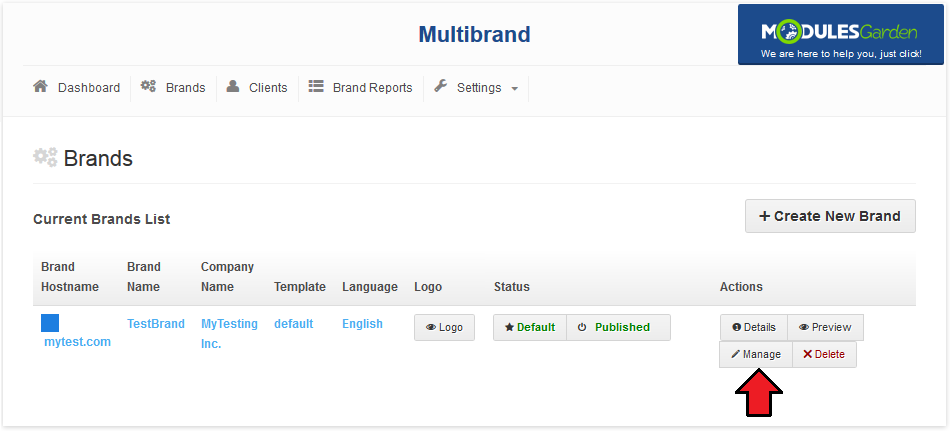
All parameters of previously created brand can be altered.
Simply, press 'Edit' button, alter desired values and click on 'Save Changes' button.
|
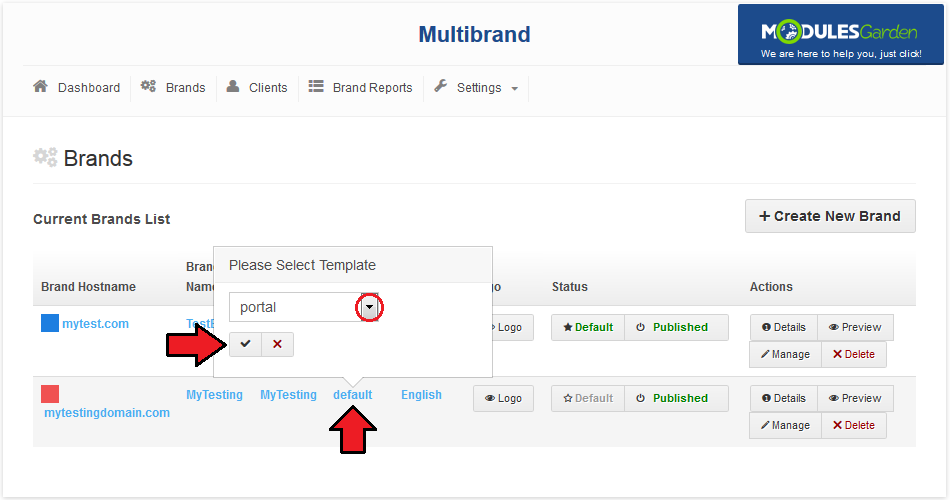
Alternatively, you can edit brand values visible at the 'Brands Management' tab by pressing on them.
Choose/type desired value and confirm changes.
|
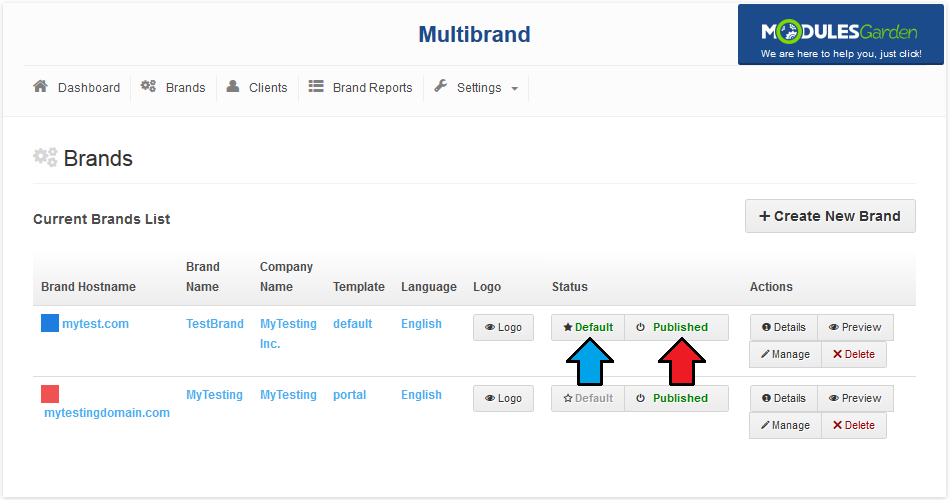
| Each brand can be disabled through pressing 'Published' at the 'Change Status' column as shown on the screen below.
|
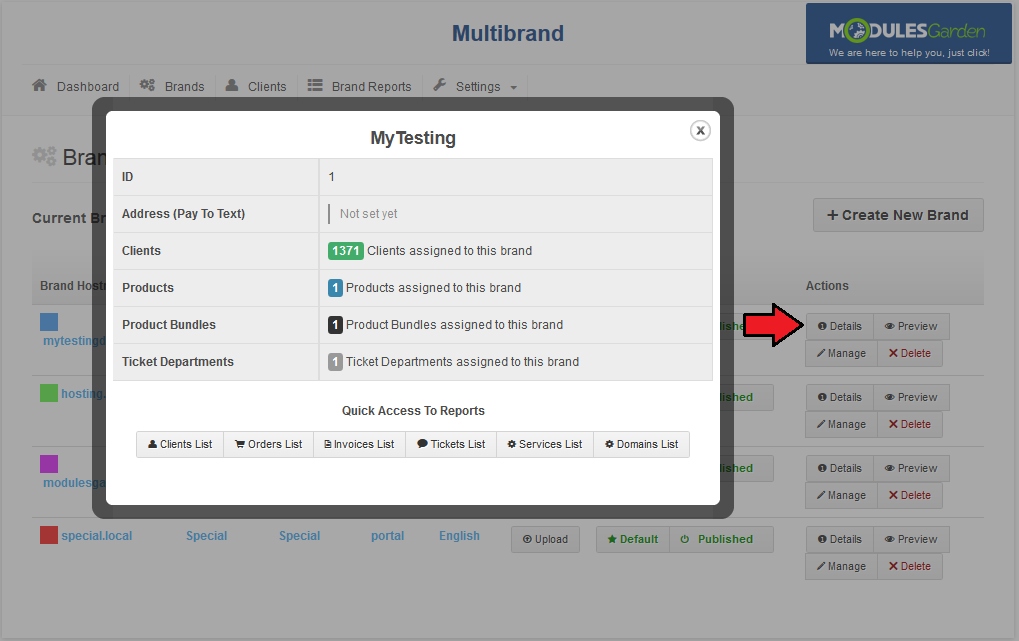
In order to view more details of brand, press 'Toggle Details' button next to a brand.
Here you can find ID of a brand, provided address and check whether this brand is set up as a default for new accounts.
|
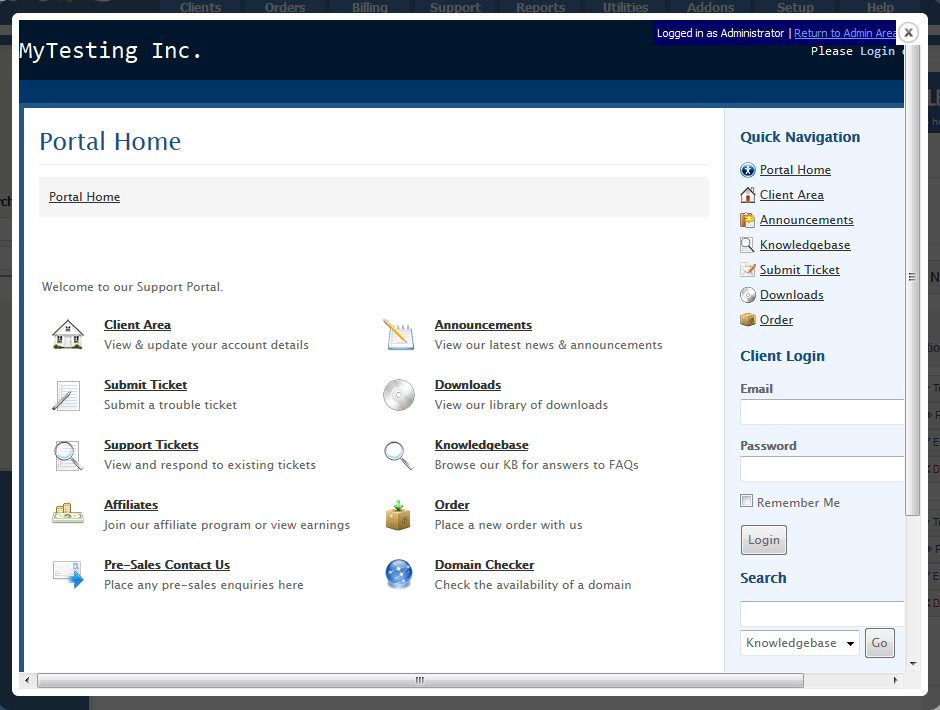
You can also access the client area of a brand through pressing a 'Preview' button.
Client area should appear in a popup window as shown on the following screen.
You can easily log into/register client account via this popup window.
|
Brand Reports
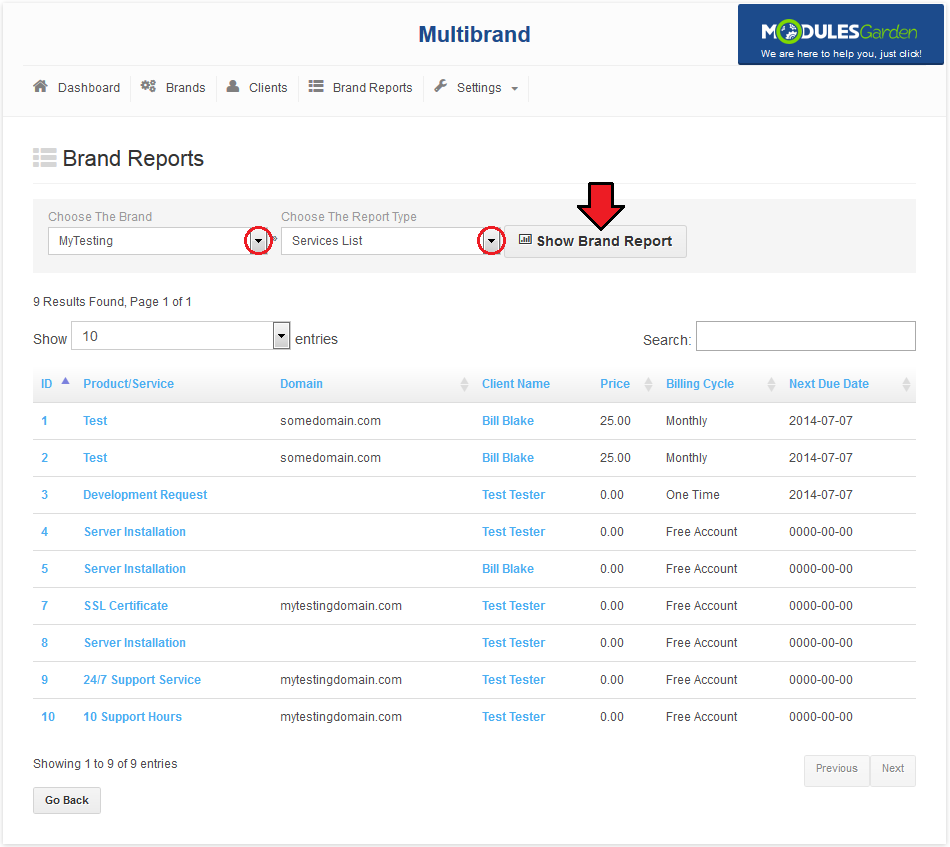
At the 'Brand Reports' tab you can easily view reports concerning specified brand.
You can check reports of clients, invoices, orders, tickets and services bounded to selected brand.
|
| In an addition to that, you can select quantity of records per page, search specified record and order records by selected column.
|
Membership At The Admin Area
Multibrand For WHMCS makes management of WHMCS easier through introducing 'Brand Details' column.
'Brand Details' column inform you about membership of clients, invoices or services to a brand.
Let's see how it looks for a client list.
|
At the order list it looks similar. This column was implemented for lists of clients, invoices, orders, tickets and services.
Through pressing a brand name, you will be moved directly to a report page of that brand.
Notice: Client, service etc. status has to be set to active in order to show brand it is assigned to.
|
Branded Client Area
| Owing to Multibrand For WHMCS your clients can log into different client areas which are using one WHMCS solution.
|
| Also invoices generated for different brands use settings of brand on which client is logged in.
|
Branded Email Templates
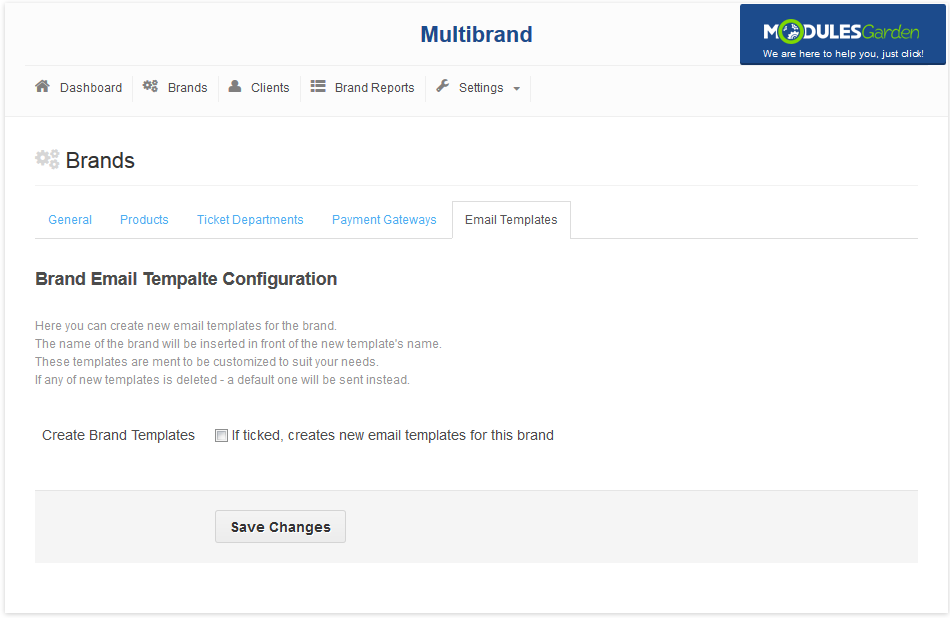
Settings of brand also apply to emails sent to clients.
On the following screen you can see exemplary order email.
|
Tips
1. Currently, client assigned to brand A is still able to log into the client area using brand B.
In that case, his invoice will be branded using brand B settings.
|
Common Problems
1. Using 'Login as Client' functionality returns:
The page isn't redirecting properly
Solution: This issue will be solved in the next version of module.
|
2. If your CNAME record is not working, remember that first domain name in CNAME record should be branded domain.
The second one is the domain on which you have your WHMCS. The redirection goes from the first domain to the second.
Dots after domains are also important.
Take note that there could be a delay with propagation of changes for DNS servers while using A type CNAME records.
|
2. If your branded domain or WHMCS domain are using SSL connection, both of them need to have the same certificate.
If both of them are using the same domain, you will need wildcard certificate.
If they are using different domains, secure them with san certificate.
|
