IP Manager For WHMCS
Contents |
About IP Manager For WHMCS
| Payment Gateway Charges For WHMCS allows you to charge additional fees and set up discounts for usage of chosen payment gateway. With this module you can easily set up products, addons, domains and other, which require an additional fee. |
- Admin Area Features:
| ✔ Create Multiple Configurations For The Multiple Scenarios Of The Assigning |
| ✔ Create Multplle Relations In One Configuration For Products, Addons, Configurable Options Or Servers |
| ✔ Assign Pool For Specified Client |
| ✔ View Whole IP List From Specified Pool |
| ✔ Filter Data In The IP List |
| ✔ Integrate IP Through Assigning With The 3rd Party Applications: cPanel |
| ✔ Create New Integration Modules |
| ✔ Manual Assigning/Unassigning The IP From Pool For Specified Client Service |
| ✔ Automatic Choosing The First Free IP Address In The Configuration Related Pools |
| ✔ View Information When The Configuration Assigned Pools Has No More Free IP Addresses Inside |
| ✔ Intelligent IP Assigning For Related Configurable Options With The 'Quantity' Type |
| ✔ Clean Graphs That Shows Current Usage Of The IP Pool Grouped By Months |
| ✔ IP Pool Usage Statistics Presented By Numbers And Progress Bars With Different Colors Dependant On The Usage Of The Pool |
- Client Area Features:
| ✔ Manage IP Addresses |
| ✔ Integration With WHMCS Client Area |
- Additionally:
| ✔ Multi-Language Support |
| ✔ Supports WHMCS V5 and Later |
Installation
| This tutorial will show you how to successfully install and configure Payment Gateway Charges For WHMCS. We will guide you step by step through the whole installation and configuration process. |
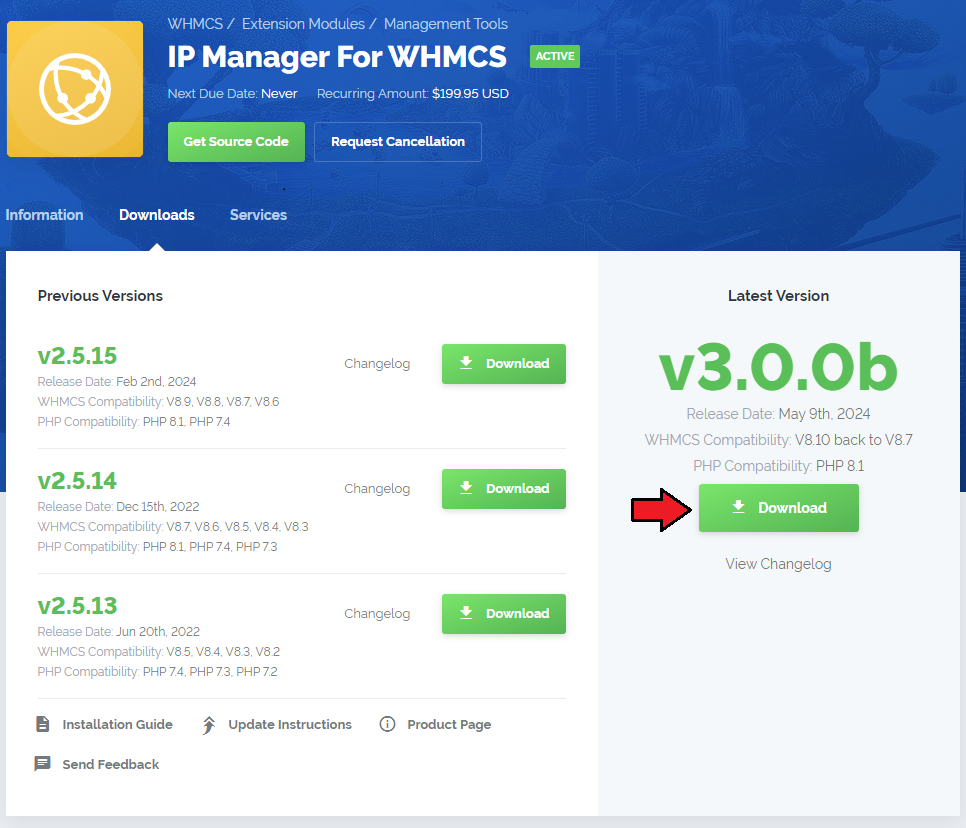
| 1. Log in to your client area and download IP Manager For WHMCS. |
|
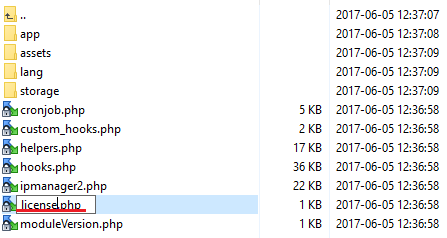
| 2. Upload and extract the module into the main WHMCS directory. Files in your WHMCS directory should look like this. |

|
| 3. When you install IP Manager for the first time you have to rename 'license_RENAME.php' file. File is located at 'modules/addons/ipmanager2/license_RENAME.php' . Rename it from 'license_RENAME.php' to 'license.php' . |
|
| 4. In order to configure your license key, you have to edit a previously renamed 'license.php' file.' Enter your licence key between quotation marks as presented on the following screen. You can find your license key at your client area → 'My Products' . |

|
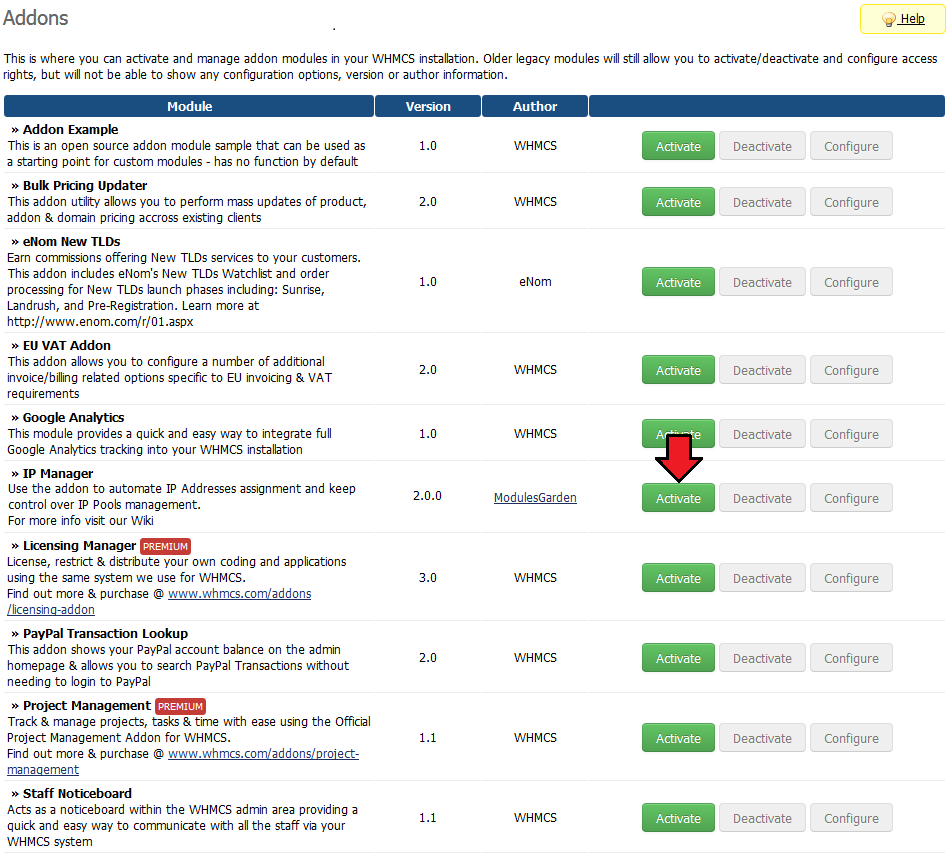
| 5. Now you have to activate the module in your WHMCS system. Log in to your WHMCS admin area. Go to 'Setup' → 'Addon Modules' . Afterwards find 'IP Manager' and press 'Activate' button. |
|
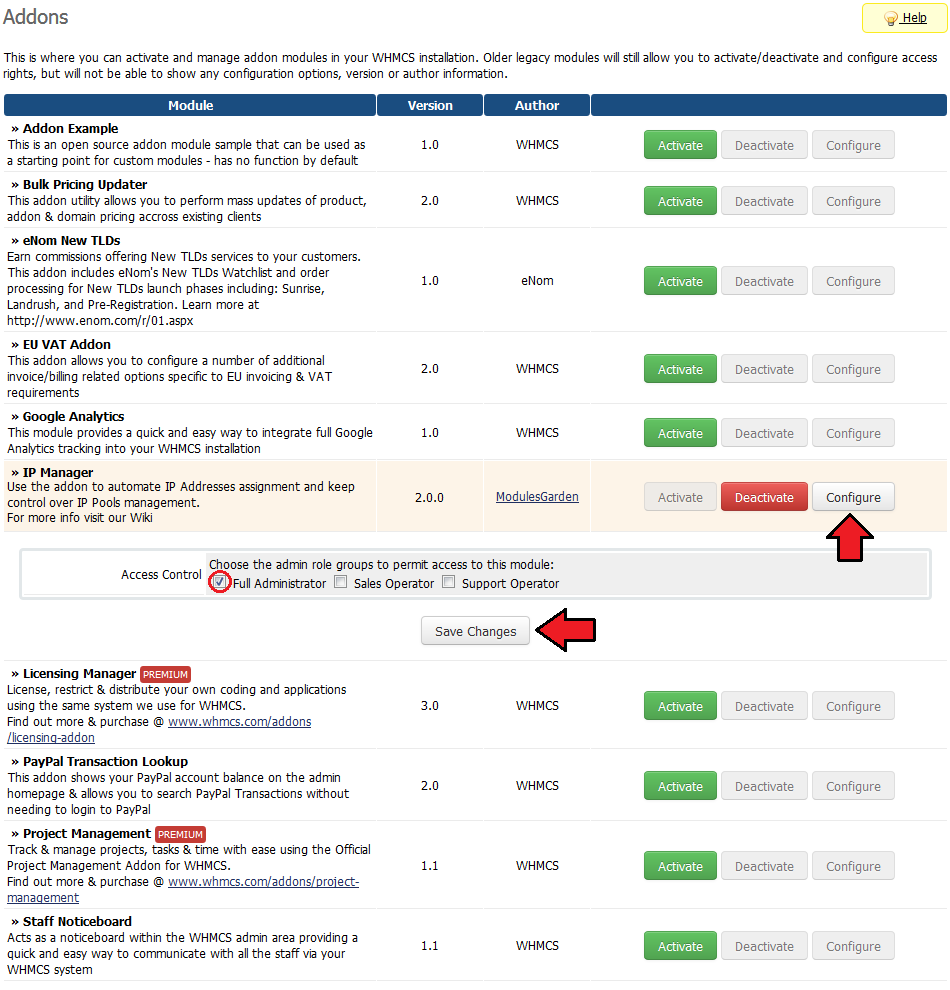
| 6. In the next step you need to permit access to this module. To do so click on 'Configure' button, tick 'Full Administrator' and press 'Save Changes' . |
|
| 7. You have just successfully installed Payment Gateway Charges! You can access your module at 'Addons' → 'IP Manager' . |
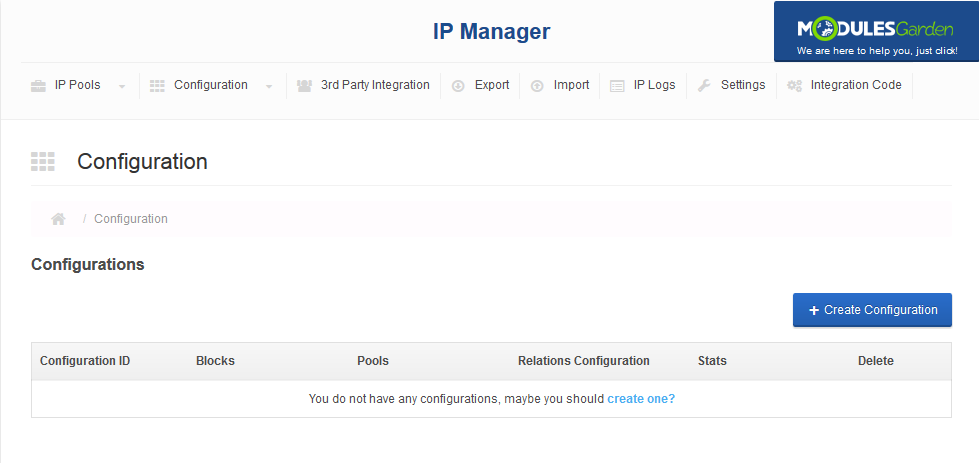
|
Configuration and Management
| IP Manager For WHMCS allows your customers to automatically manage dedicated IPs. In this short guide we will present you the possibilities of our module. |
IP Pools
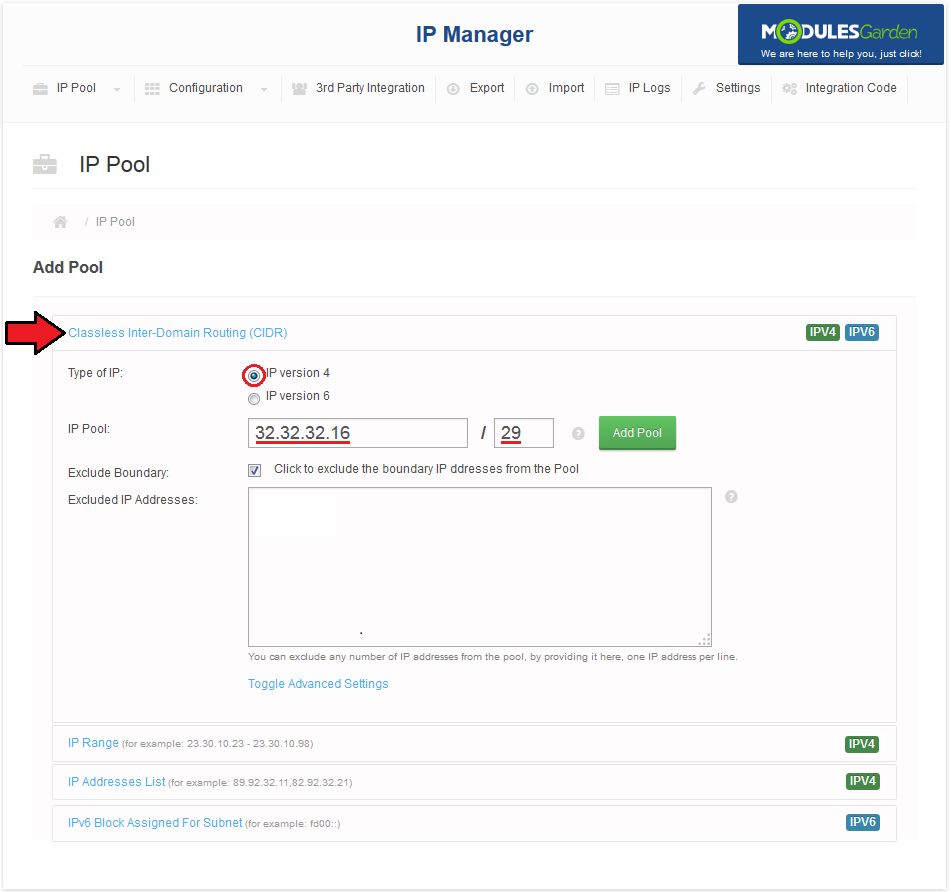
| To manage any IP pool via IP Manager you have to add it. In order to do so, go to 'IP Pools' tab, type first IP from pool and netmask(in prefix notation). |
|
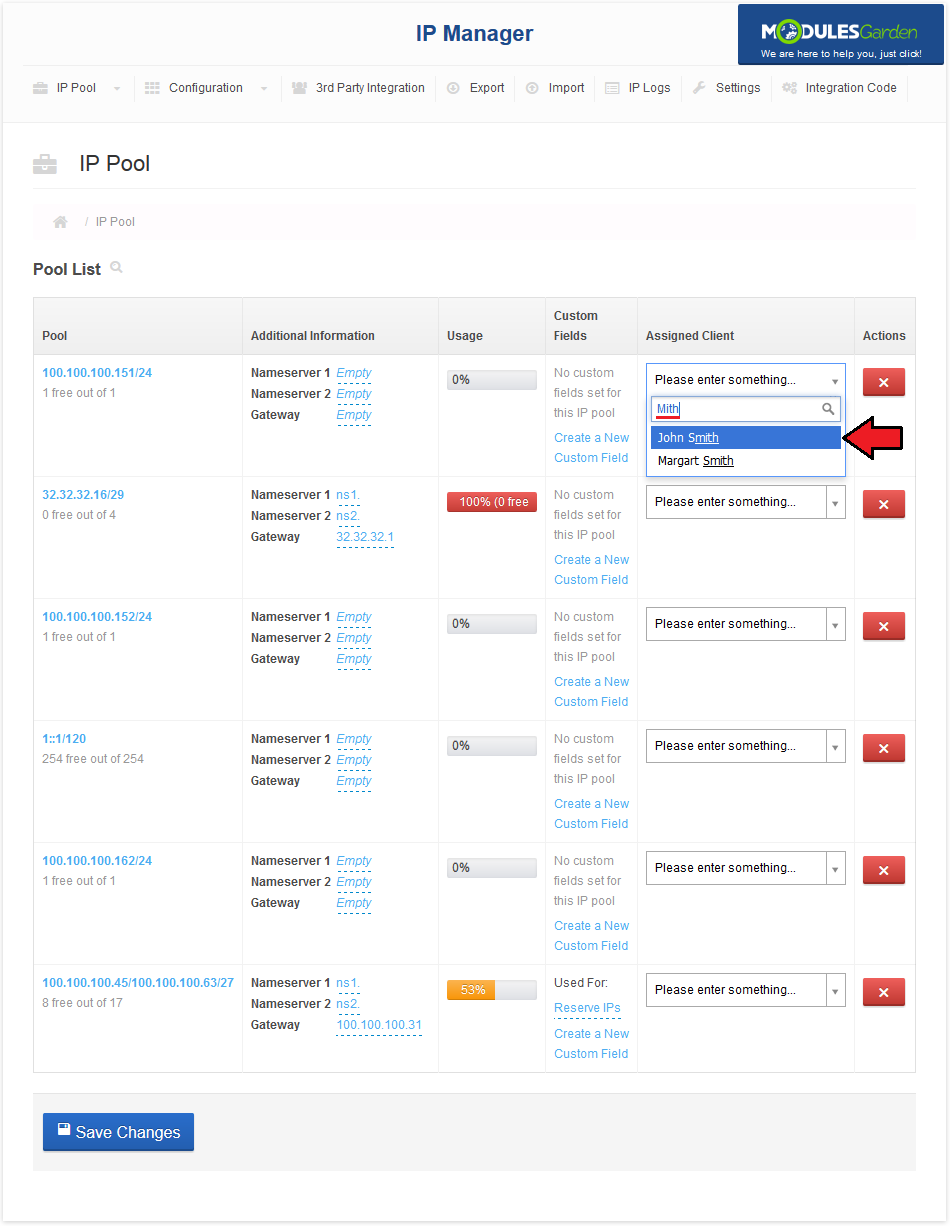
| If you want to assign pool of IP to specyfic client, our module make it available to you. Simply selecting him from a dropdown menu and pressing 'Save Changes' button. |
|
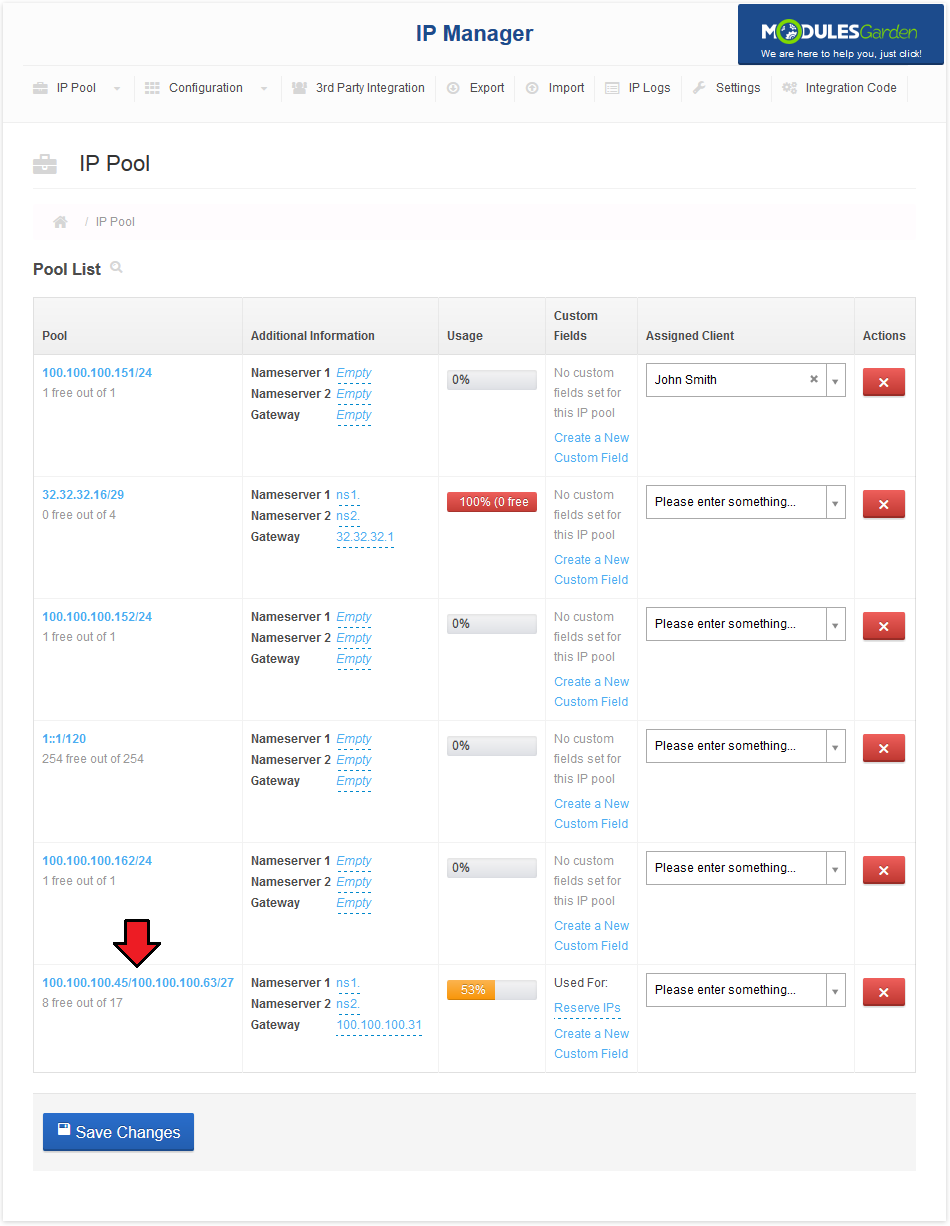
| To view IP pool details press on its address as shown on the screen below. |
|
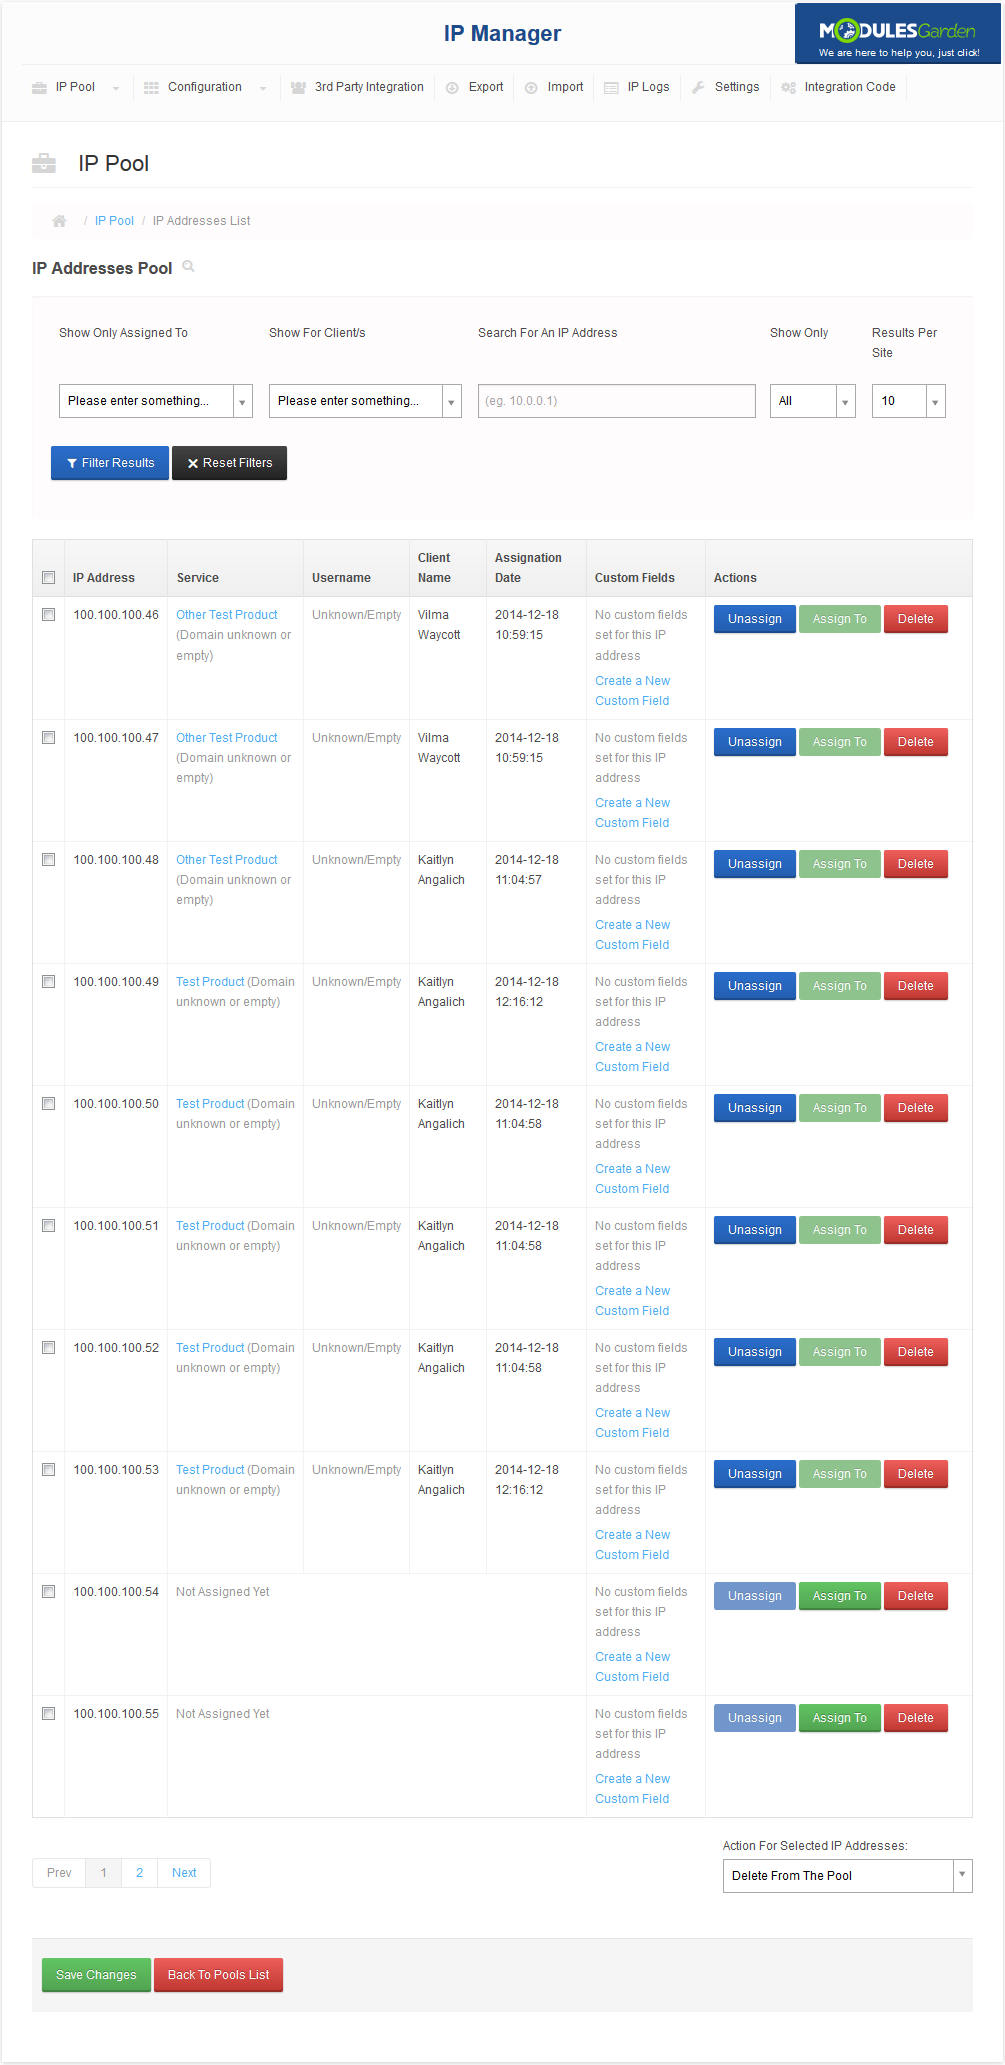
| In IP pool review you can find informations about current assignment of IP adresses from pool and manually manage their assignment. To facilitate the management of addresses we also added records filter. |
|
Automatic IP Assignment
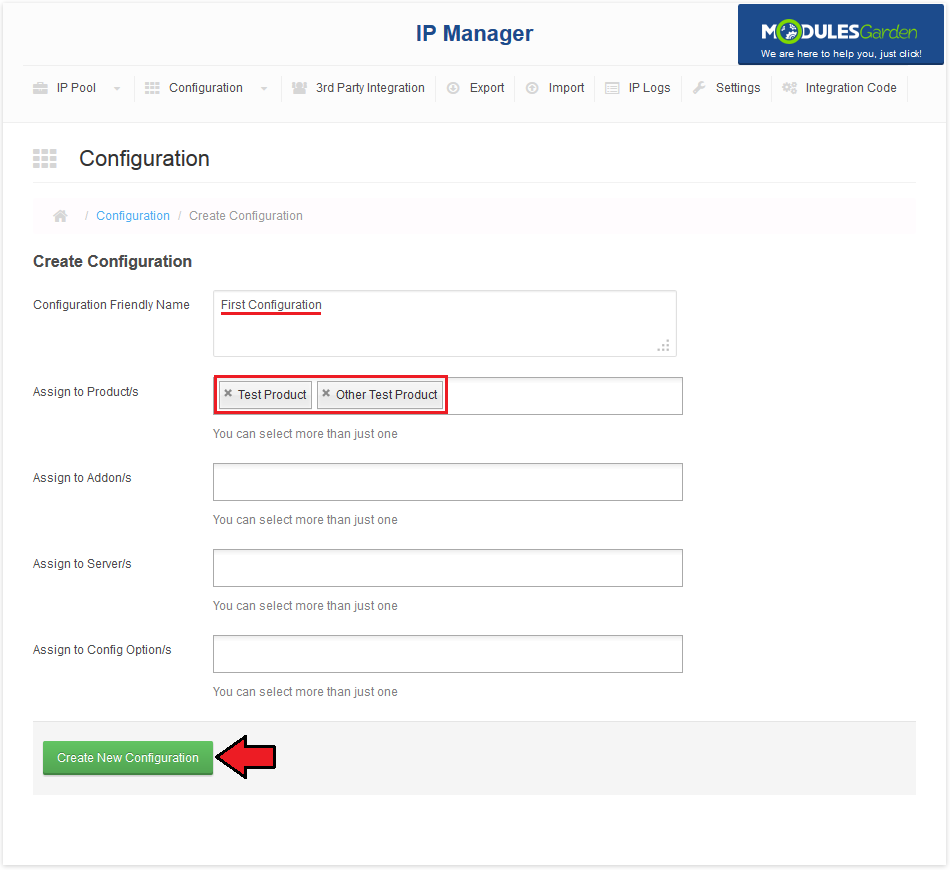
| Main reason for creation of this module was to automatize the assignment of IP addresses. Here we will show you how to set up configuration for it. |
|
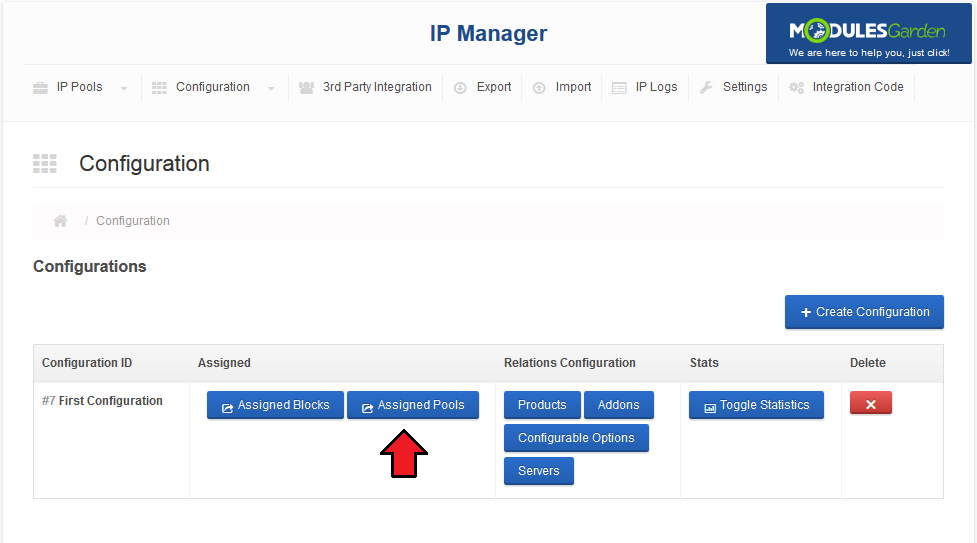
| Now you have to assign at least one IP pool to configuration. You can do it by pressing 'Assigned Pools' button. |
|
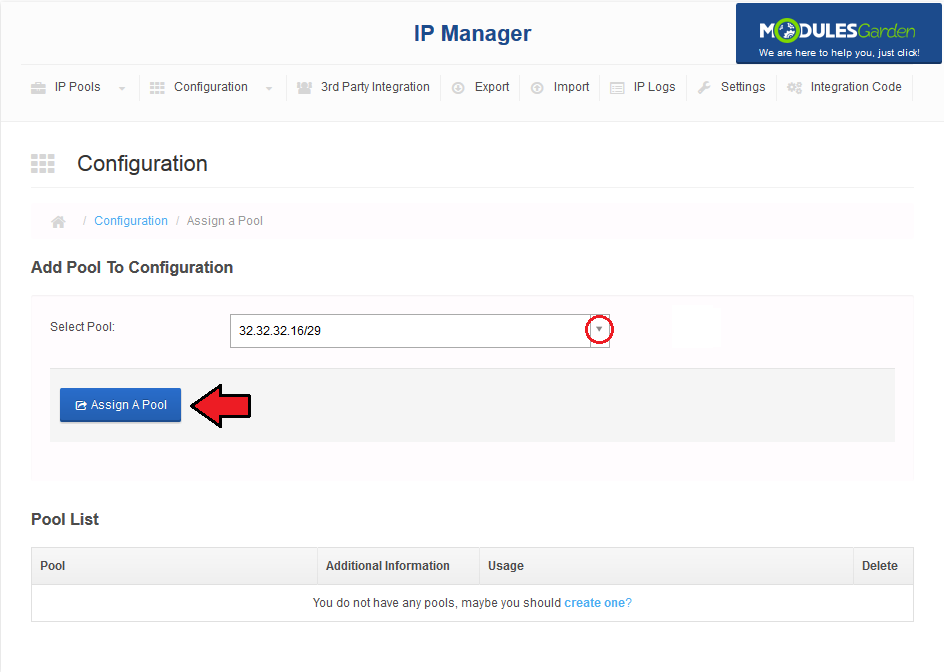
| Next, choose IP pool from dropdown menu and press 'Add Pool' button, you can assign multiple pools to configuration. |
|
Advanced Configuration
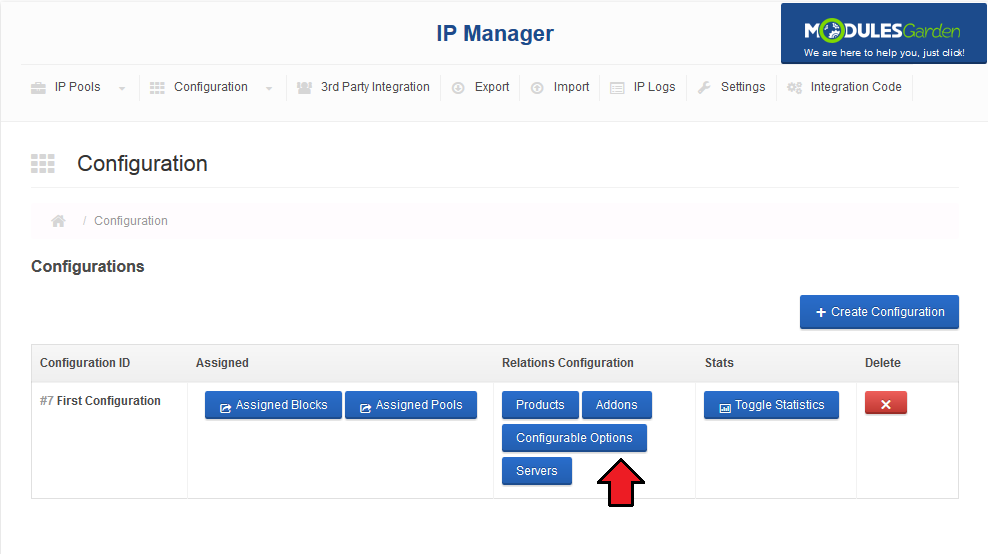
| Lets say, that you want to set multiple IP assingment to specyfic product or so on, it is available with our module! Here I will show you how to set up multiple IP adresses assingment to configurable options 'Extra IP Adresses'. |
|
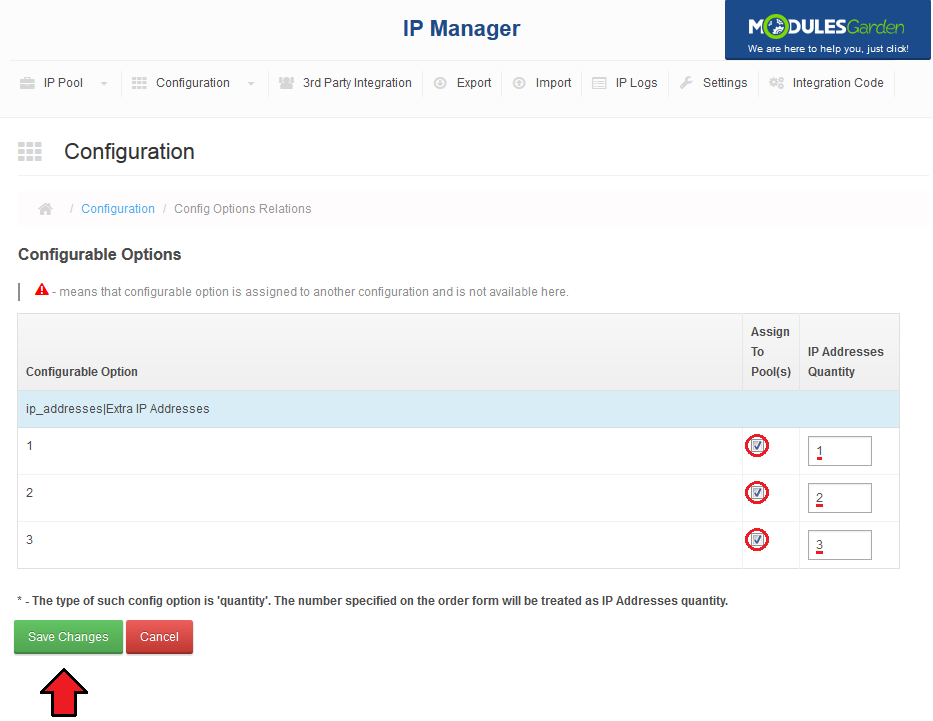
| Afterwards, mark checkboxes next to configurable options you wanna assinged IPs to. Enter quantity of IPs which will be assigned to each configurable options, next press 'Save Changes' . |
|
Usage Graph
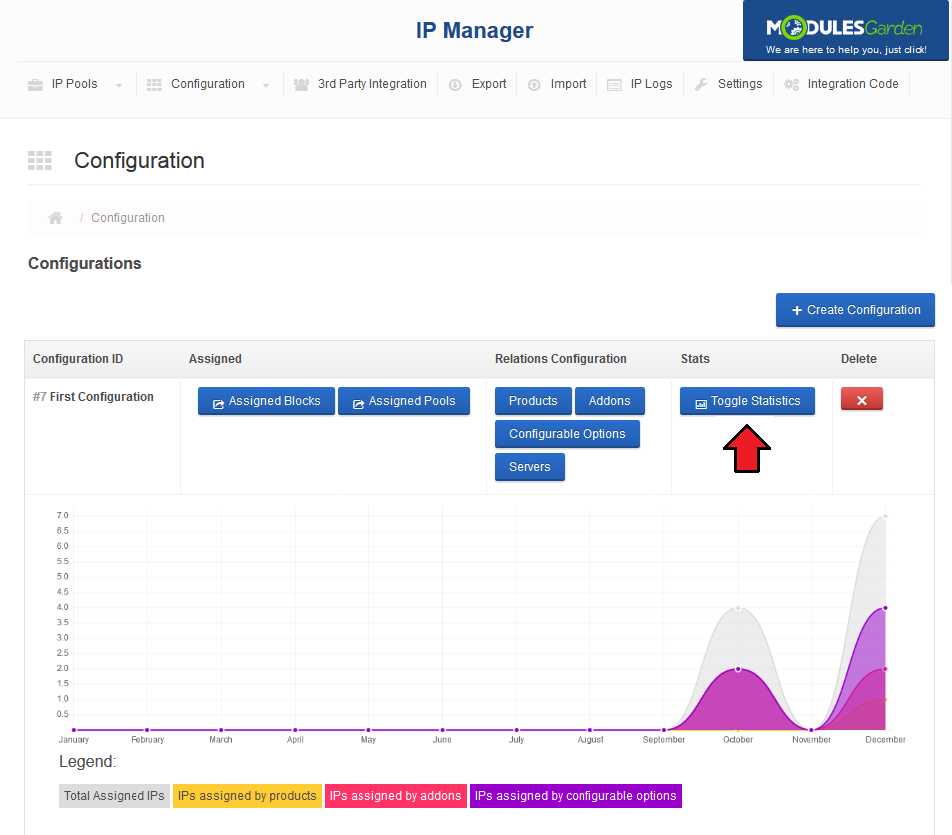
| At each configuration you can find graph of use, which shows you statistics of IP addresses assignment in time. |
|
3rd Party Integration
| In this tab you can setup 3rd party integration, it allows you to manage IP through our module in your whmcs and synchronize changes at 3rd party servers. |
Test Integration Module
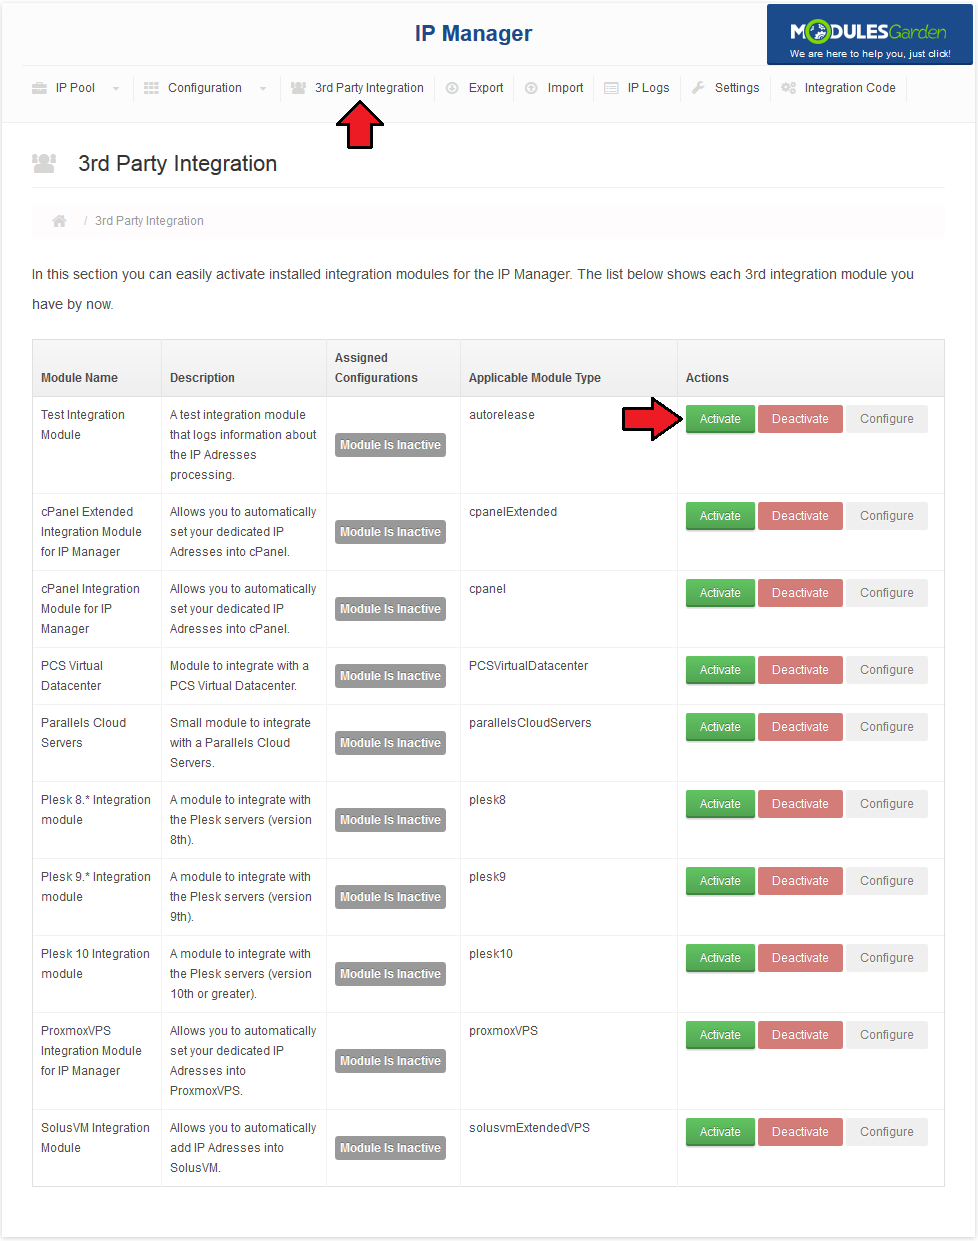
| This module logs informations about IP processing. In order to enable it press 'Activate' button. |
|
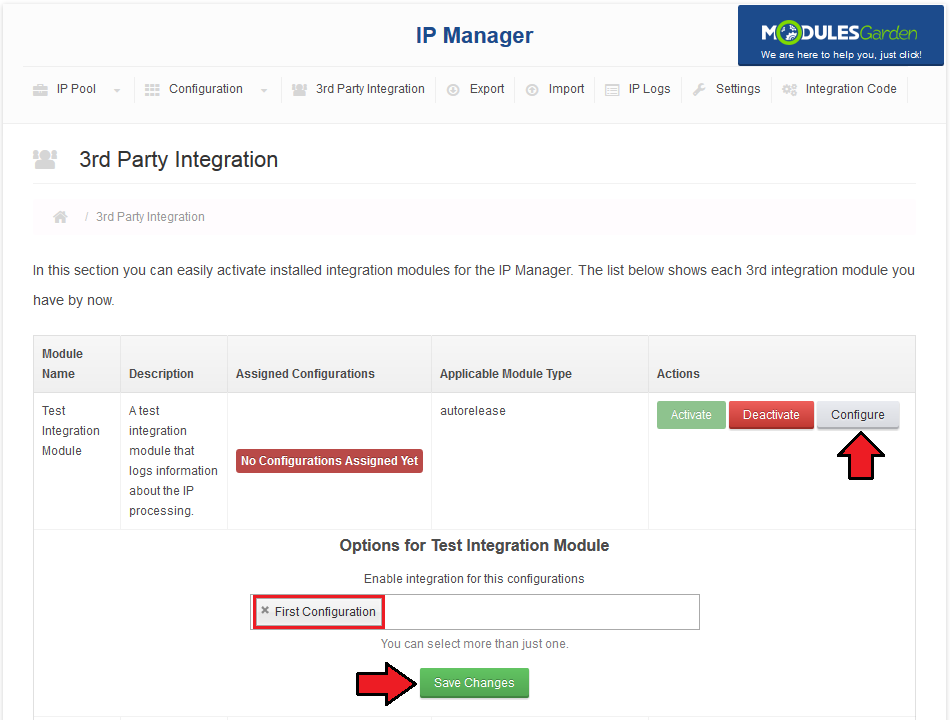
| If you wish to enable it for specyfic configuration, press 'Configure' button. Select configuration to apply module for and press 'Save Changes' . |
|
| You need to set up server of 'Autorelease' type, otherwise logs will not shows up. |
cPanel Integration Module for IP Manager
| Module manage synchronization between cPanel and IP Manager. In order to enable it press 'Activate' button. |
| File:IPM20.png |
| Press 'Configure' button, type 'Hostname' , 'Username' , 'Password' . If you wish to enable cPanel ony for specyfic configuration, select them. |
| File:IPM21.png |
Integration Code
| Integration described below is not obligatory. Module allows your customers to view their IP adresses any buy new one. |
| File:IPM22.png |
| Correctly placed code in is presented on the following screen. |
| File:IPM23.png |
| In the client area it should look like on the screen below. |
| File:IPM24.png |
Tips
| 1. If your client order product bonded to two configuration (for example: by product type, and configurable option) IP Manager will add IPs from both configurations. |
Common Problems
| 1. When you have problems with connection, check whether your SELinux or firewall is not blocking ports. |