Hosting Renewals For WHMCS
From ModulesGarden Wiki
(Difference between revisions)
|
|
| Line 299: |
Line 299: |
| | |} | | |} |
| | {| | | {| |
| − | |style="padding: 0px 0px 20px 15px;"|Correctly placed code in '' 'default' '' order form template is presented on the following screen. | + | |style="padding: 0px 0px 20px 15px;"|Underneath you will fond an example of a correctly placed code snippet in a '' 'default' '' order form template. |
| | |} | | |} |
| | {| | | {| |
| Line 305: |
Line 305: |
| | |} | | |} |
| | {| | | {| |
| − | |style="padding: 0px 0px 15px 15px;"|In the client area it should look like on the screen below.<br /> | + | |style="padding: 0px 0px 15px 15px;"|Once teh integration has beendone correctly, your clients should see buttons in the client area as marked on the screen:<br /> |
| − | '''Please note that displayed value of the button varies depending on the chosen billing cycle.''' | + | '''Note: buttons' naming varies depending on the chosen billing cycle.''' |
| | |} | | |} |
| | {| | | {| |
Revision as of 13:14, 7 October 2015
Article update is ongoing on this page, watch out for broken links and unclear descriptions!
We are sorry for the inconvenience caused.
Hosting Renewals For WHMCS is a module which offers your customers a possibility to manage their billing cycles, recurring payments and services' renewals.
The module will let your clients turn on/off automatic renewals, decide whether and when to renew their web hosting services and even change billing cycles on the fly.
With our product you will be able to configure billing cycle changing rules, prepare various discounts and send personalized email notifications to your customers.
|
| ✔ Allow Clients To Renew Services Before The Due Date
|
| ✔ Allow Clients To Turn On/Off Automatic Renewals
|
| ✔ Allow Clients To Change Billing Cycle
|
| ✔ Configuration Of Billing Cycle Changeable From The Client Area
|
| ✔ Configuration Of The Client Area Features Per Product Or Product Group
|
| ✔ Automatic Disable Auto Renewal For New Products
|
| ✔ Enable/Disable Automatic Renewal For All Instances Of Product Using One Button
|
| ✔ Enable Automatic Application Of Discount While Switching Product Billing Cycle
|
| ✔ Two Types Of Discounts - One Time And Recurring
|
| ✔ Enable/Disable Domain Renewal Along With A Product
|
| ✔ Send Email Notifications Of Upcoming Renewals
|
| ✔ Multiple Email Templates For Email Notification
|
| ✔ Decide Whether Client Should Be Moved To The Invoice Immediately After Renew
|
| ✔ Supports WHMCS Template Five
|
| ✔ Supports WHMCS V5 and V6
|
Installation
This tutorial will show you how to successfully install and configure Hosting Renewals For WHMCS.
We will guide you step by step through the whole installation and configuration process.
|
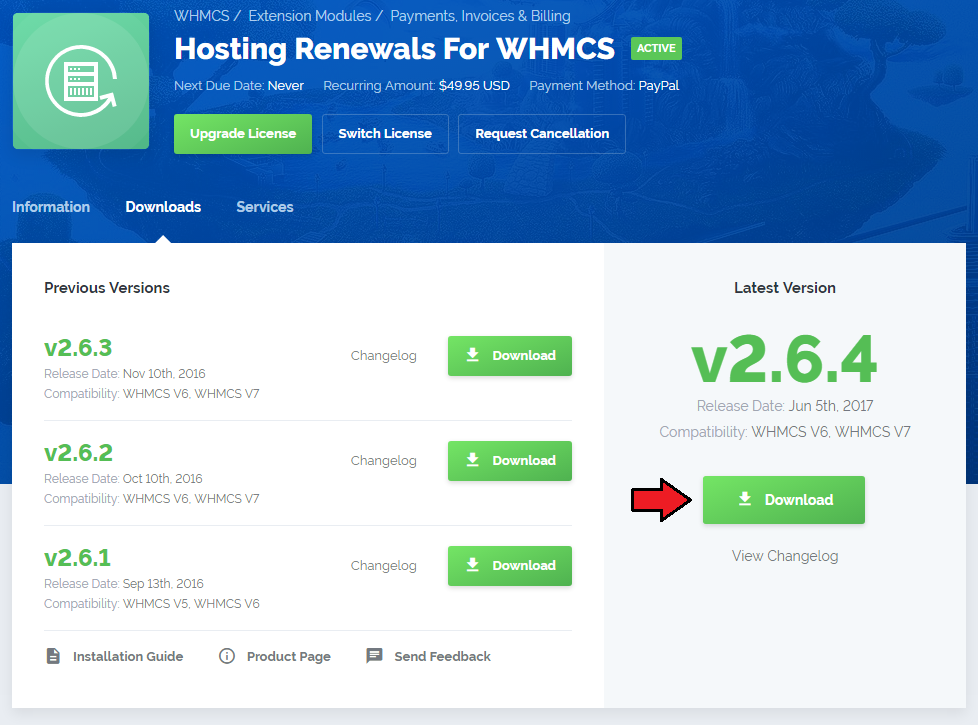
| 1. Log in to your client area and download Hosting Renewals For WHMCS.
|
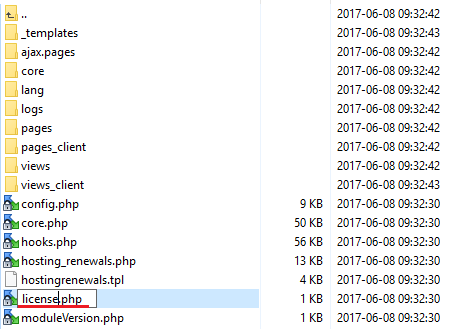
2. Upload and extract the module into the main WHMCS directory.
Files in your WHMCS directory should look like these.
|
3. When you install Hosting Renewals for the first time you have to rename 'license_RENAME.php' file.
File is located in 'modules/addons/hosting_renewals/license_RENAME.php'. Rename it from 'license_RENAME.php' to 'license.php'.
|
4. In order to configure your license key, you have to edit a previously renamed 'license.php' file.
Enter your license key between quotation marks as presented on the following screen. You can find your license key in your client area → 'My Products'.
|
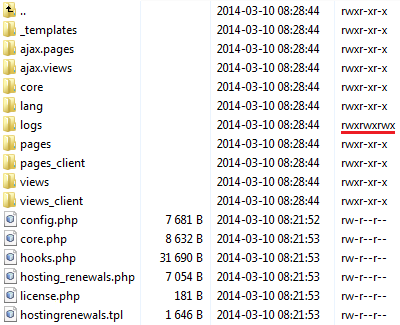
5. Now, you have to set up chmod for the 'logs' folder located in 'your_whmcs/modules/addons/hosting_renewals'.
You will be now allowed to read activity logs in the module.
|
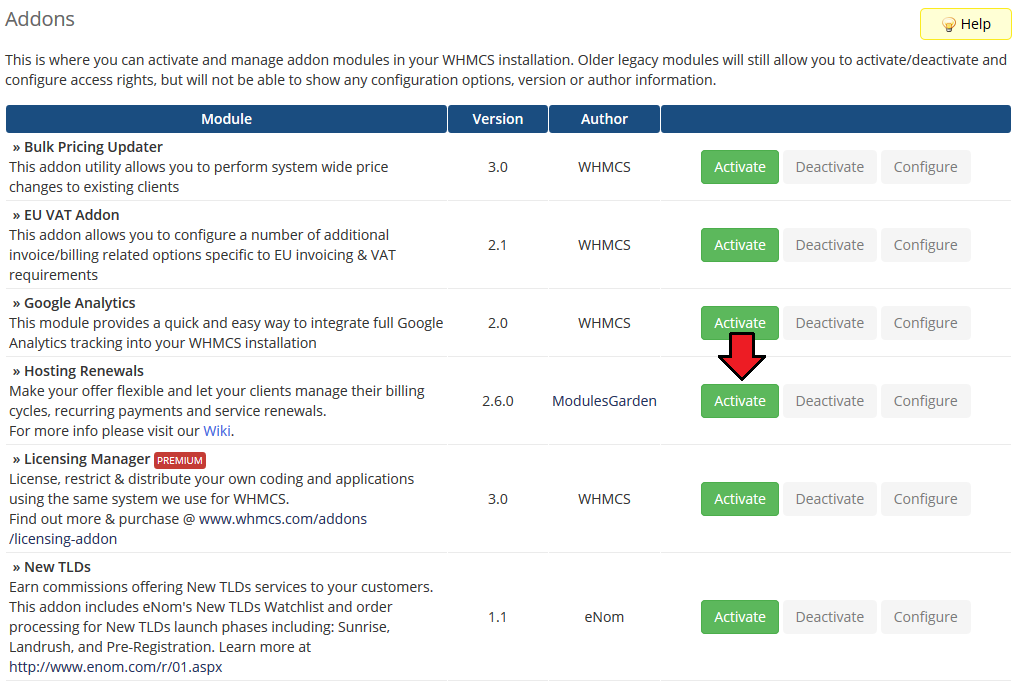
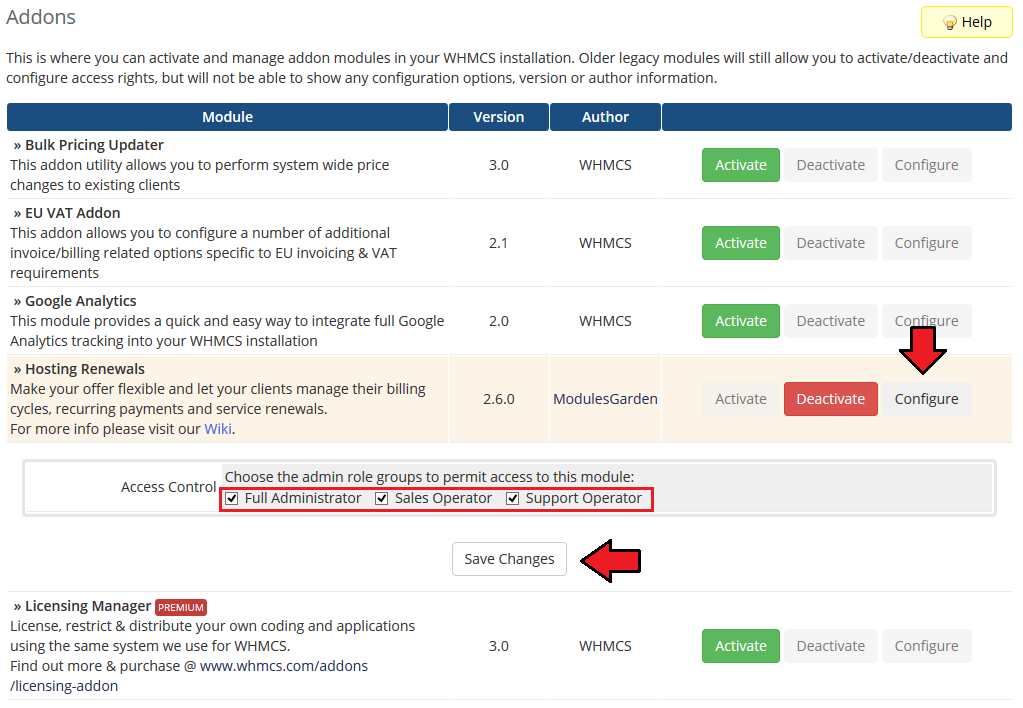
6. Next, you have to activate the module in your WHMCS system.
Log in to your WHMCS admin area. Go to 'Setup' → 'Addon Modules'. Afterwards, find 'Hosting Renewals' and press 'Activate' button.
|
7. In the next step you need to permit access to this module.
To do so, click on 'Configure' button, tick 'Full Administrator' and press 'Save Changes'.
|
8. You have just successfully installed Hosting Renewals!
Access your module now at 'Addons' → 'Hosting Renewals'.
|
Configuration and Management
Hosting Renewals For WHMCS module allows your customers to fully manage their hosting renewals.
Turn on/off auto-renewals, alter billing cycles, receive customized email notifications.
|
Configuration
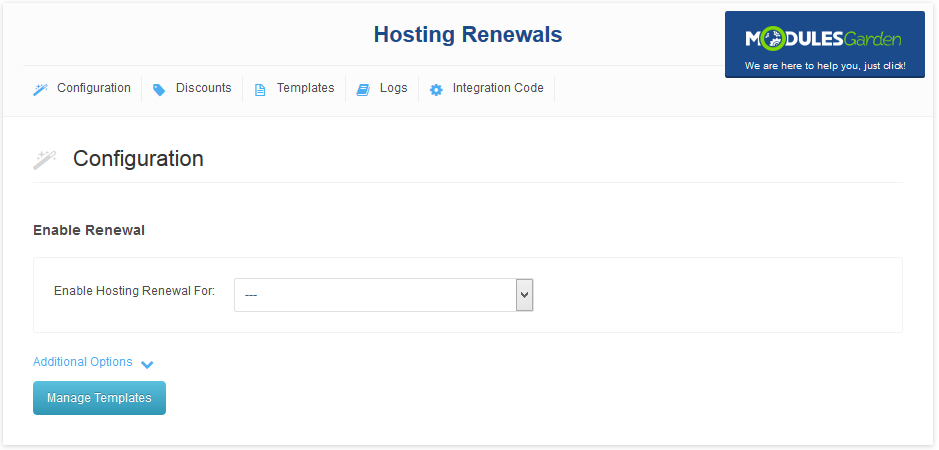
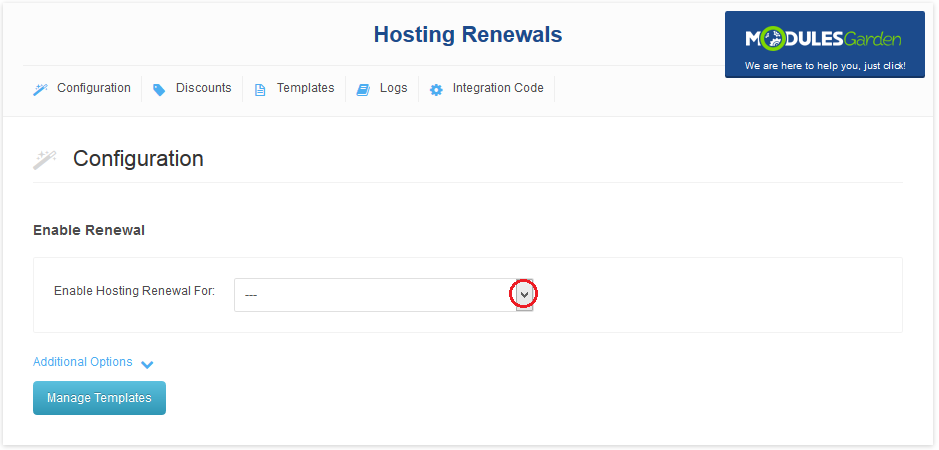
You can enable Hosting Renewals For WHMCS only for the products that have recurring payments configured.
Proceed to 'Addons' → 'Hosting Renewals' → 'Configuration' and choose from a dropdown menu of available products.
|
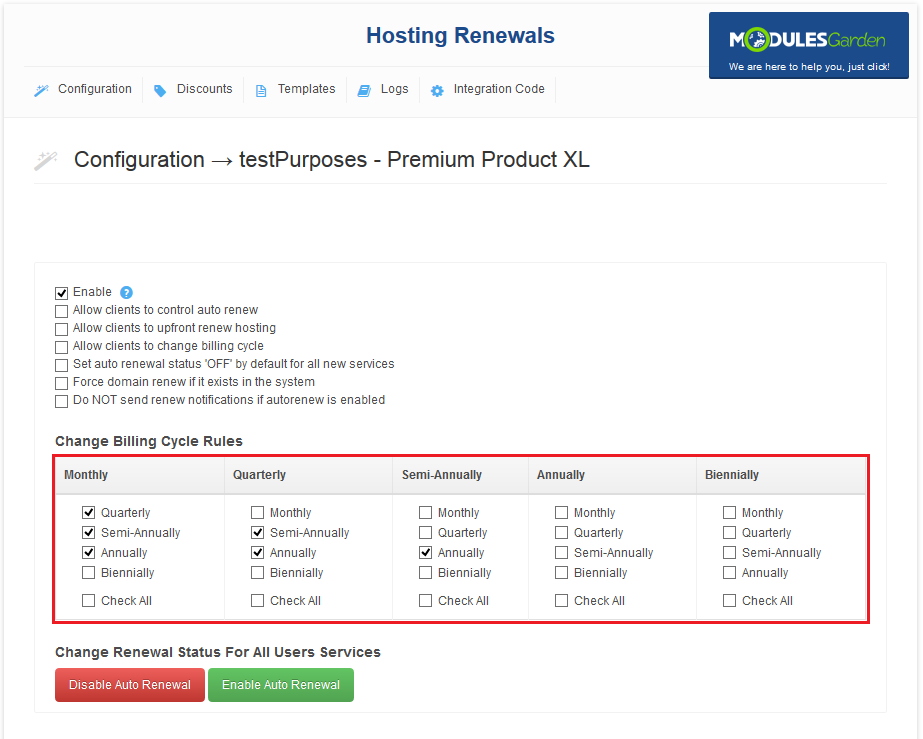
Press the name of a product with renewals enabled 'Hosting Renewals' → 'Configuration' → specific product and configure its rules.
Available options:
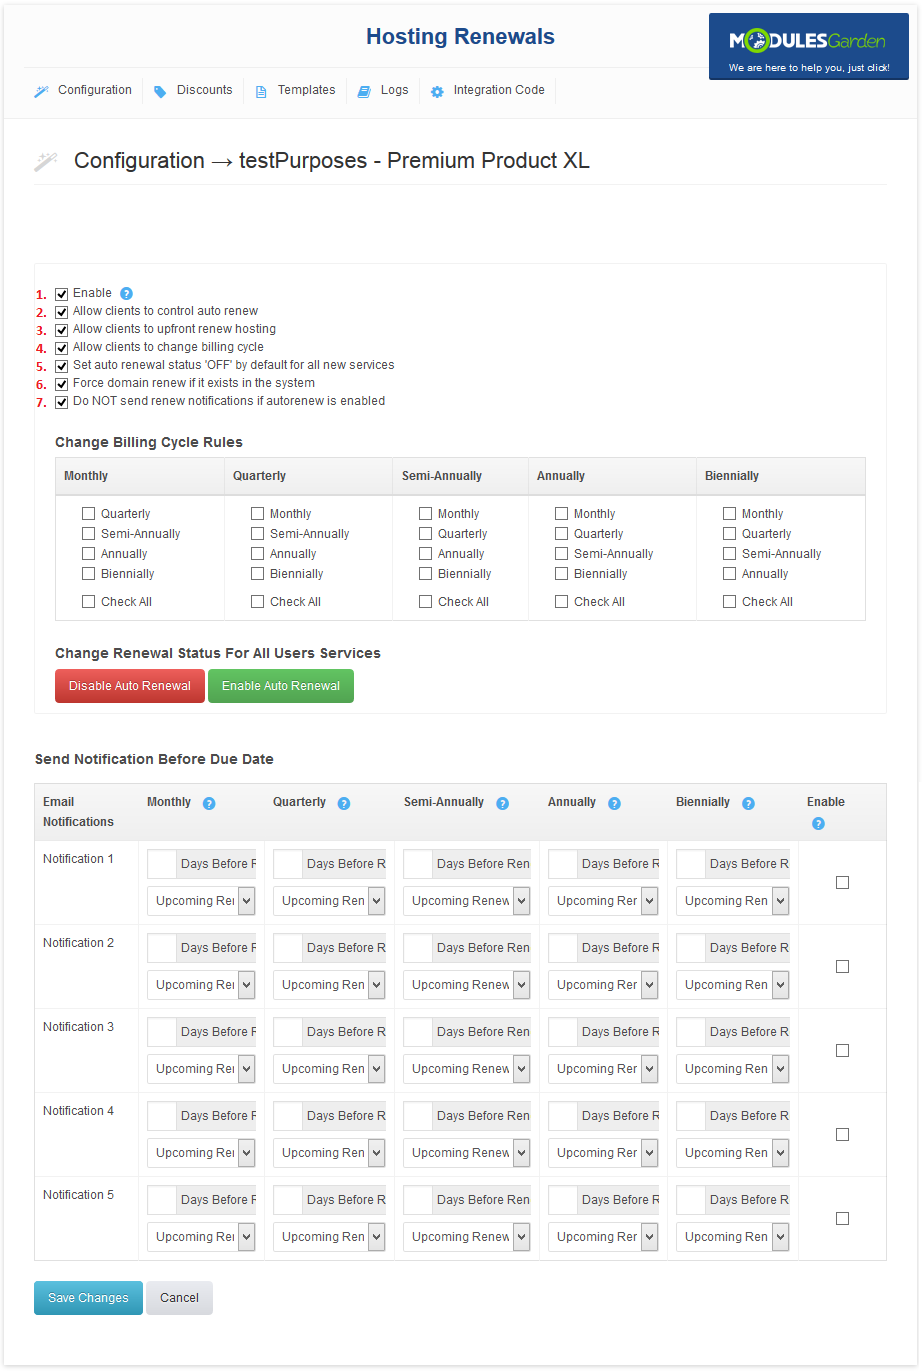
1. Option checked automatically, you may disable renewals for the product.
2. Clients can enable/disable auto-renewal from the client area.
3. Clients will be allowed to renew hosting before the due date.
4. Check to let clients manage billing cycle.
Available billing cycles can be set up in 'Change Billing Cycle Rules' table.
5. Disable auto renewal for a new hosting.
6. Renew domain assigned to service.
Once you have enabled options you are interested in press 'Save Changes'!
|
|
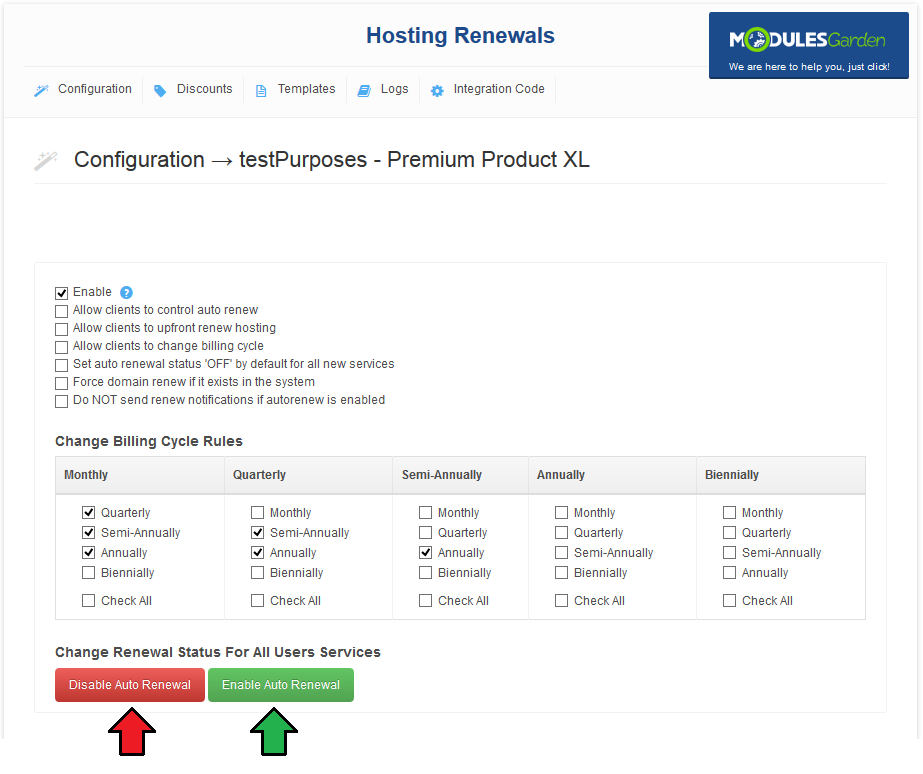
If you have enabled the option to change billing cycle from the client area, you must also define between which billing cycles the switch can be made.
On the screen below you can 'Change Billing Cycle Rules' table with available billing cycles. Clients will be able to choose between billing cycles from the column of their current billing cycle.
For example, settings on the following screen will enable clients to switch any billing cycle only to a longer one.
If a client currently uses 'Quarterly' billing cycle, then it can be changed to 'Semi-Annual' or 'Annually'.
|
Additionally, you can enable/disable auto renewal for all products from a selected configuration.
To do so, press 'Enable Auto Renewal' / 'Disable Auto Renewal' button as shown on the following screen.
|
|
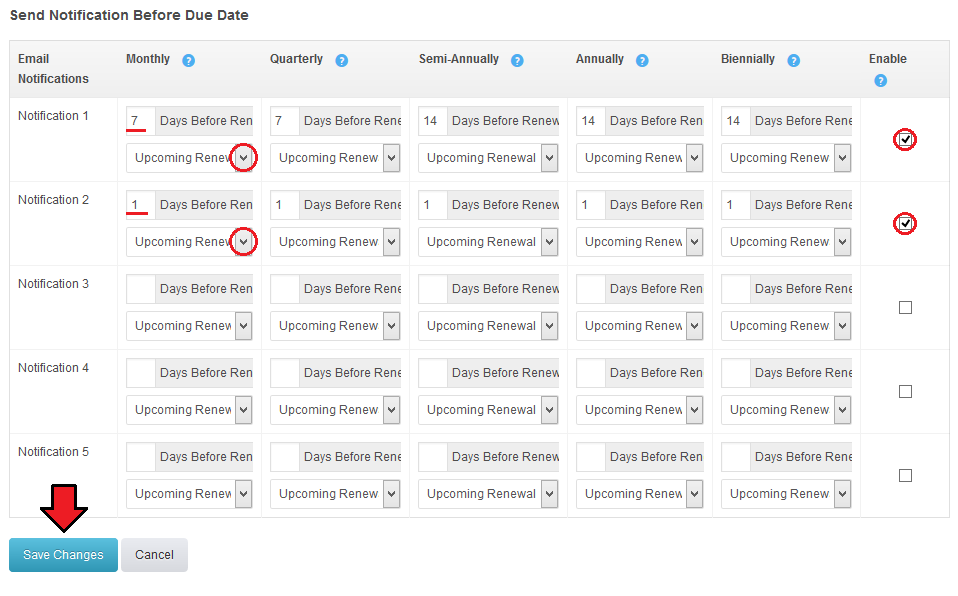
It is wise to inform your clients about incoming due date, you can do it by setting up notification emails.
You can configure up to five notification emails and specify the time when they shall be sent to the clients depending on a billing cycle the clients use.
Additionally, you can set up different email templates for each email notification.
On the screen below you can see settings for a product with monthly, quarterly, semi-annually and annually pricing types.
For each one of them a client receives only 2 notification emails.
The first notification will be sent a week before the due date for monthly and quarterly billing cycles and 2 weeks before the due date for semi-annually and annually billing cycles.
The second notification will be sent for each of the billing cycles a day before the due date.
Save settings through pressing 'Save Changes' button.
|
|
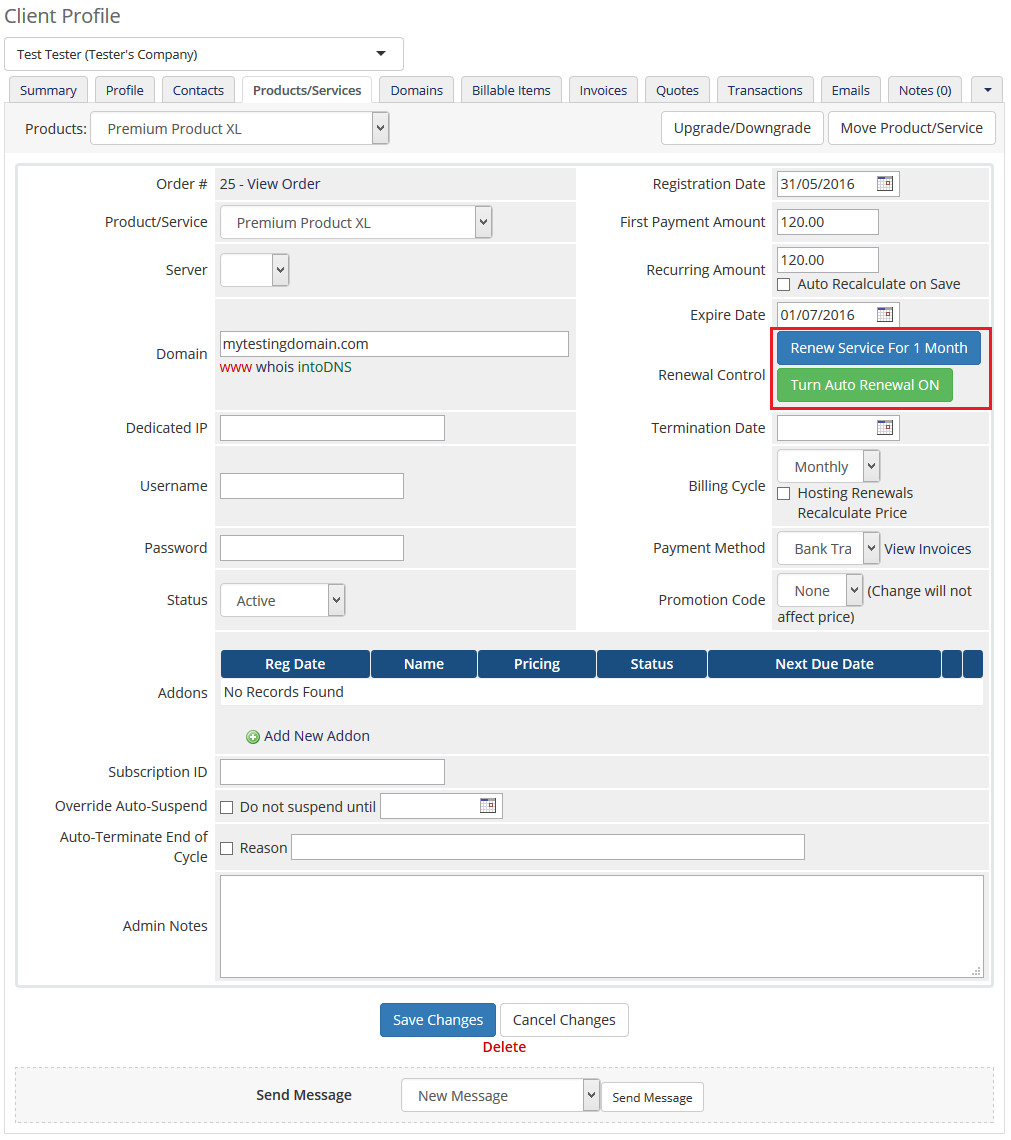
Once you have configured the hosting renewals, new buttons in your admin area product's page should be available.
Note: button's naming may change according to a chosen billing cycle.
|
Templates
When Hosting Renewals For WHMCS' is activated, only one email template is created for email notifications.
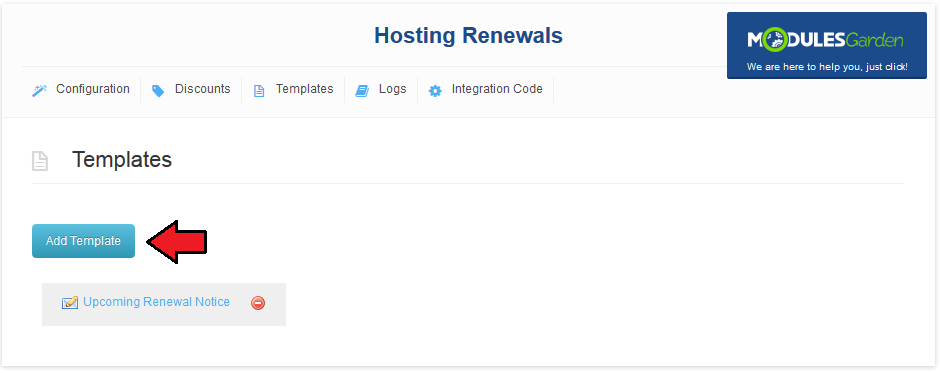
You can create additional email templates for notifications easily. Move to 'Templates' section and press 'Add Template'.
|
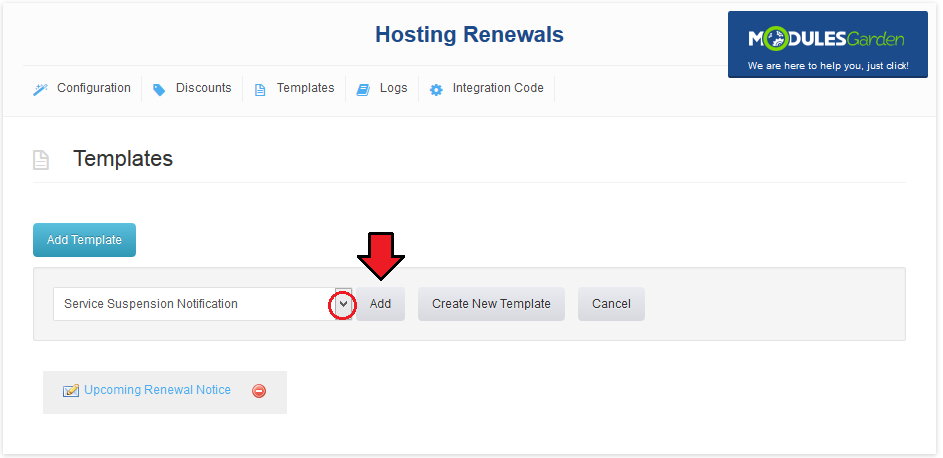
If you already have some email templates prepared for notification, select it from a dropdown menu and press 'Add' button.
As soon as you do that, it will be visible next to 'Upcoming Renewal Notice' email template and you will be able to assign it to notification.
|
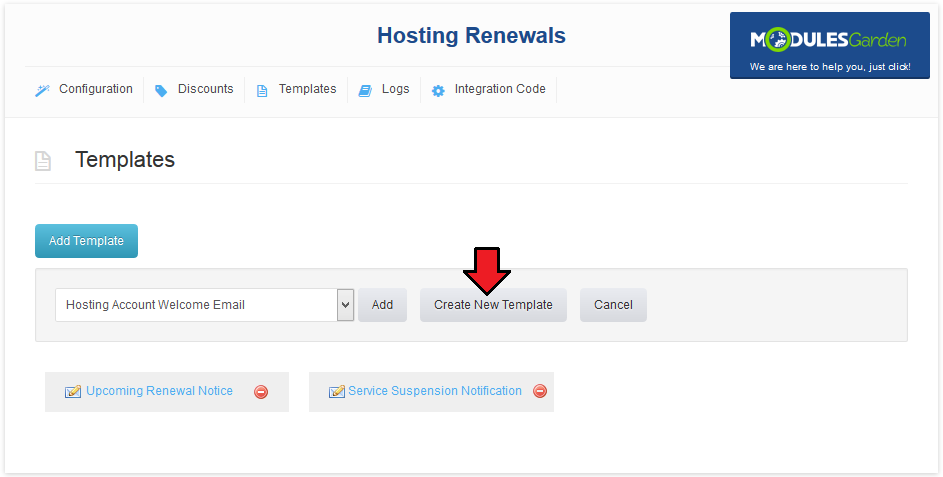
| If you want to prepare a new email template, press 'Create New Template' button.
|
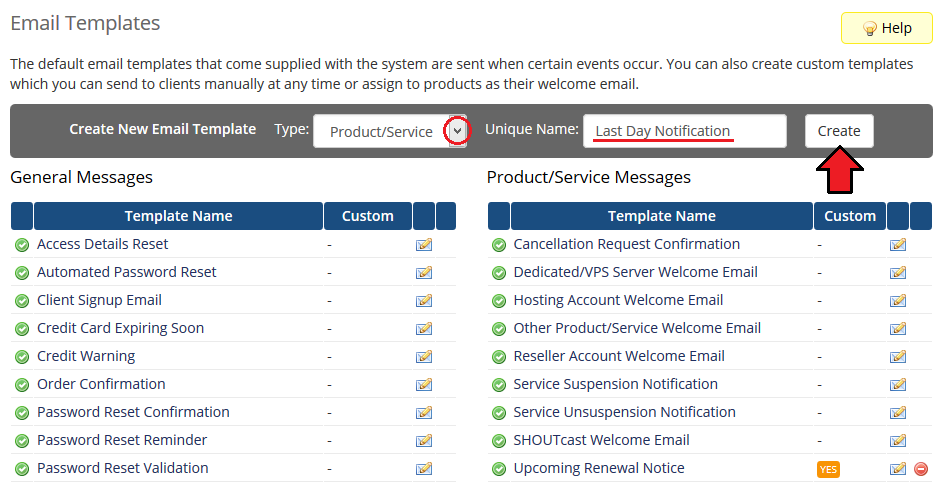
Afterwards, choose 'Product/Service' as an email template type and type in the name under which email template will be visible in your WHMCS.
Press 'Create'.
|
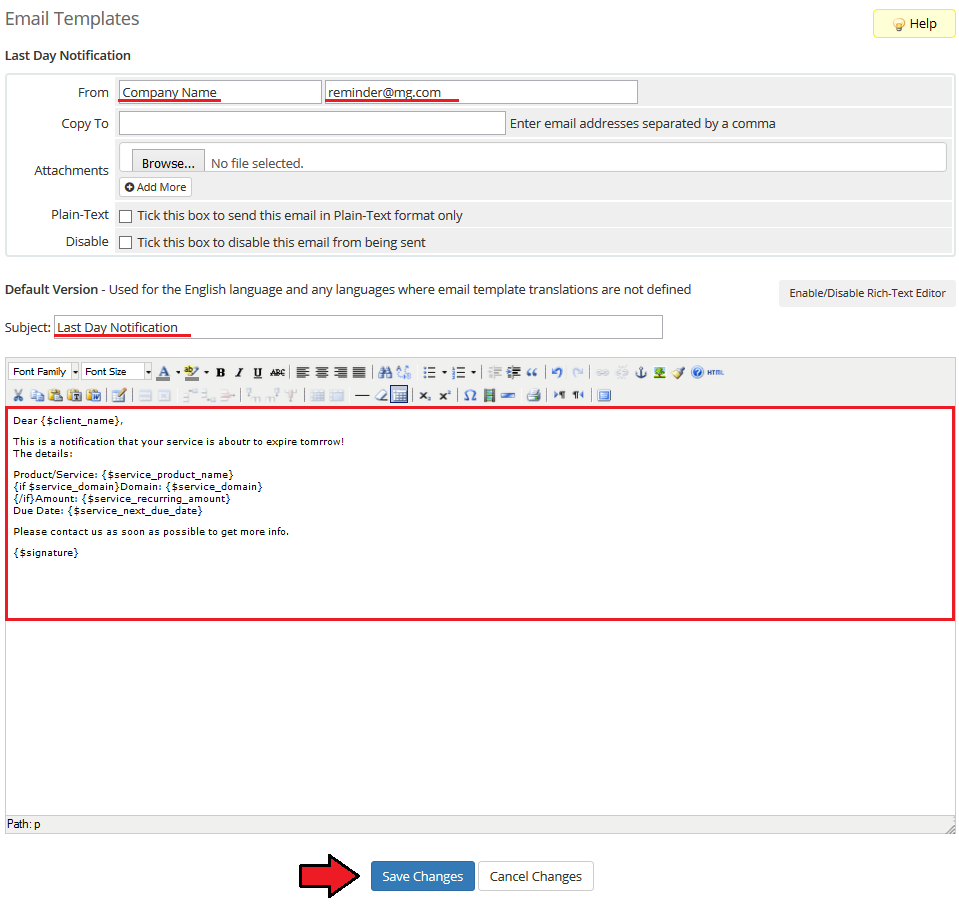
You will be moved to email template edition page. Start by filling in your company name, email address and email subject.
Afterwards, create your email template content in a textbox marked on the following screen.
Press 'Save Changes' button.
|
You can also use 'Merge Fields' in your email template.
To view a full list of fields, scroll down. These codes are replaced with actual data during sending email.
|
Assign Email Template
You can assign any of email templates added at 'Templates' tab to a desired notification.
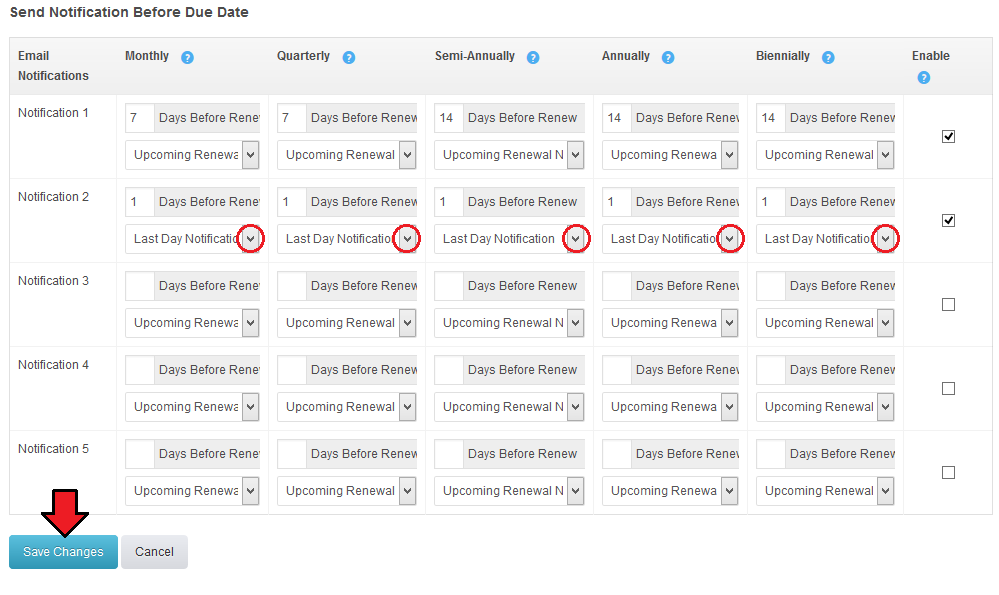
To do so, enter product configuration at 'Hosting Renewal' → 'Configuration' and select email templates from a dropdown menu next to a desired notification.
Confirm changes through pressing 'Save Changes' button.
On the screen below you can see a previously created 'Last Day Notification' email template assigned to a notification sent a day before due date.
|
Logs
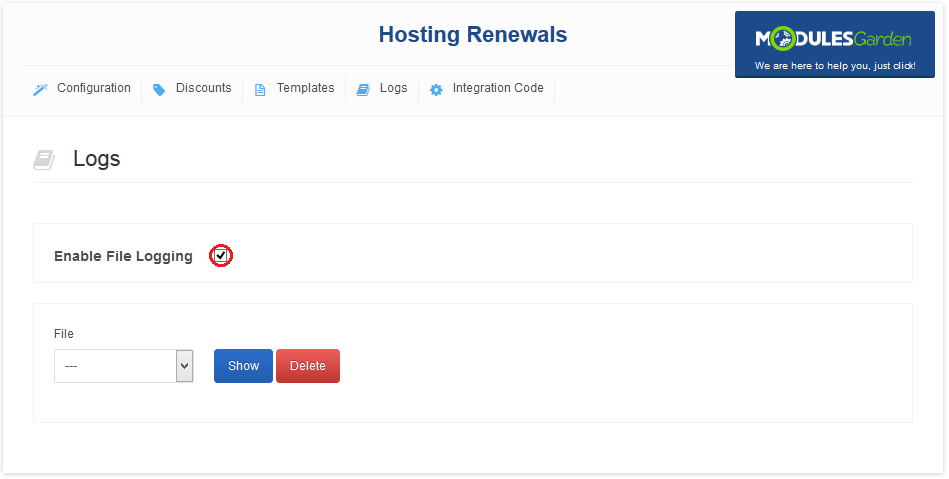
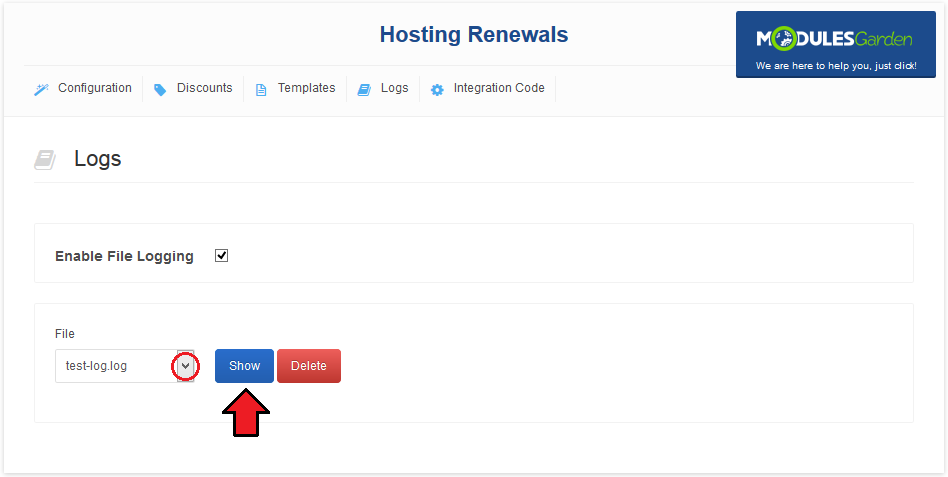
| All module activities are recorded in log files. To enable this feature, mark 'Enable File Logging' checkbox.
|
You can view any of the logs. Simply, choose it from 'File' dropdown menu and press 'Show' button.
Note: You will not be able to choose a log file if there are no logged actions yet.
|
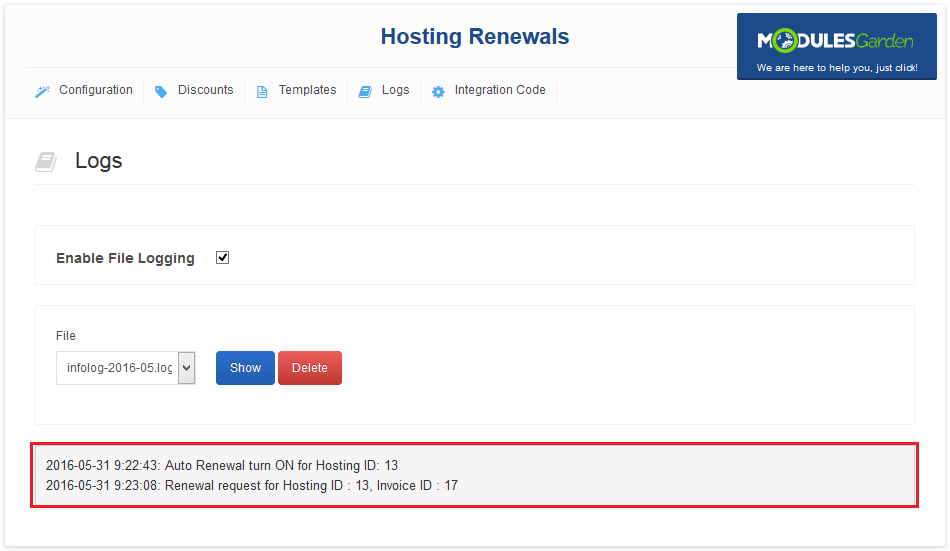
| Exemplary info log is shown on the following screen.
|
Discounts
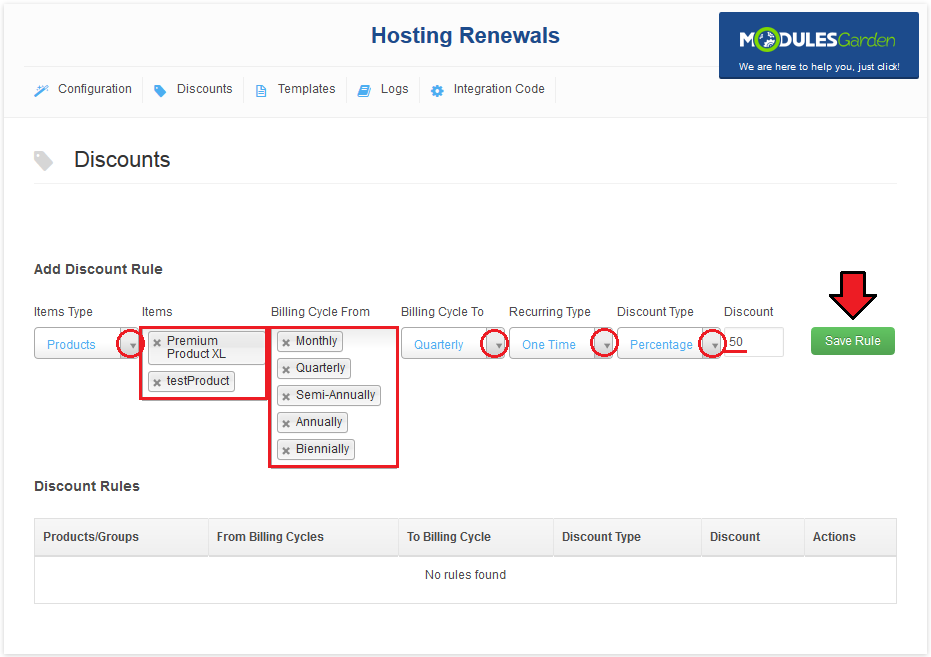
In 'Discounts' section you may set up various discounts for a changing billing cycle.
You can select two types of items:
1. Product - applies to a product selected in the 'Item' field.
2. Product Group - applies to all products in a product group which is selected in the 'Item' field.
You can set up two types of discounts:
1. One time discount - it applies to one billing cycle only.
2. Recurring discount - it will applie to all billing cycle payments, until your client again changes the billing cycle.
Now, we will set up one time discount for 'Support Service M' and 'Support Service L'.
If a client switches to a quarterly billing cycle from any other billing cycle, they will receive a 50% discount for payment at the first billing period.
|
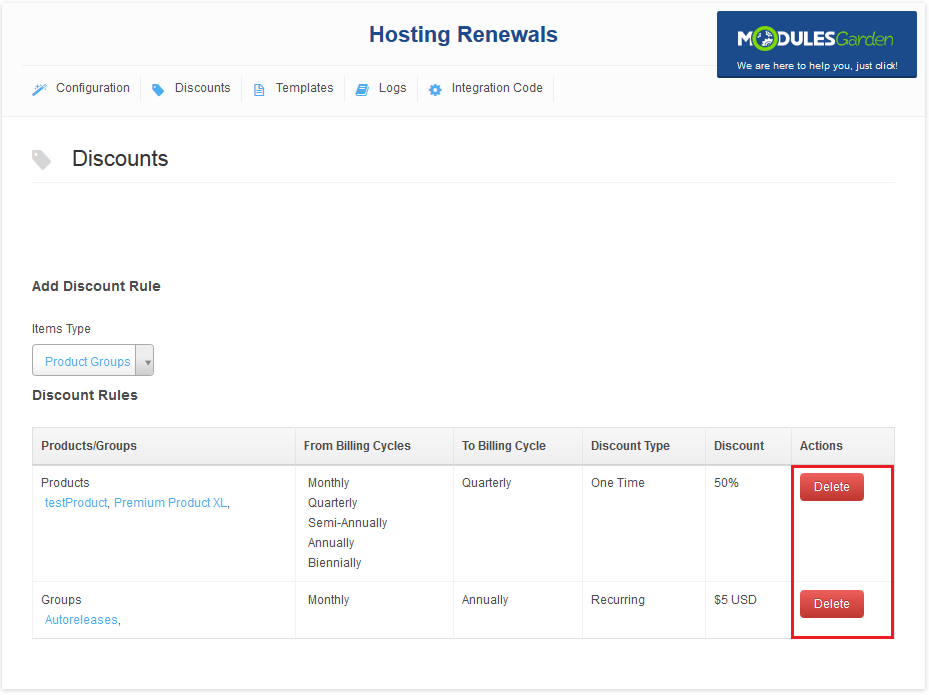
As you can see on the following screen, all discounts are listed below.
Each of them can be easily removed by pressing 'Delete' button.
|
Integration Code
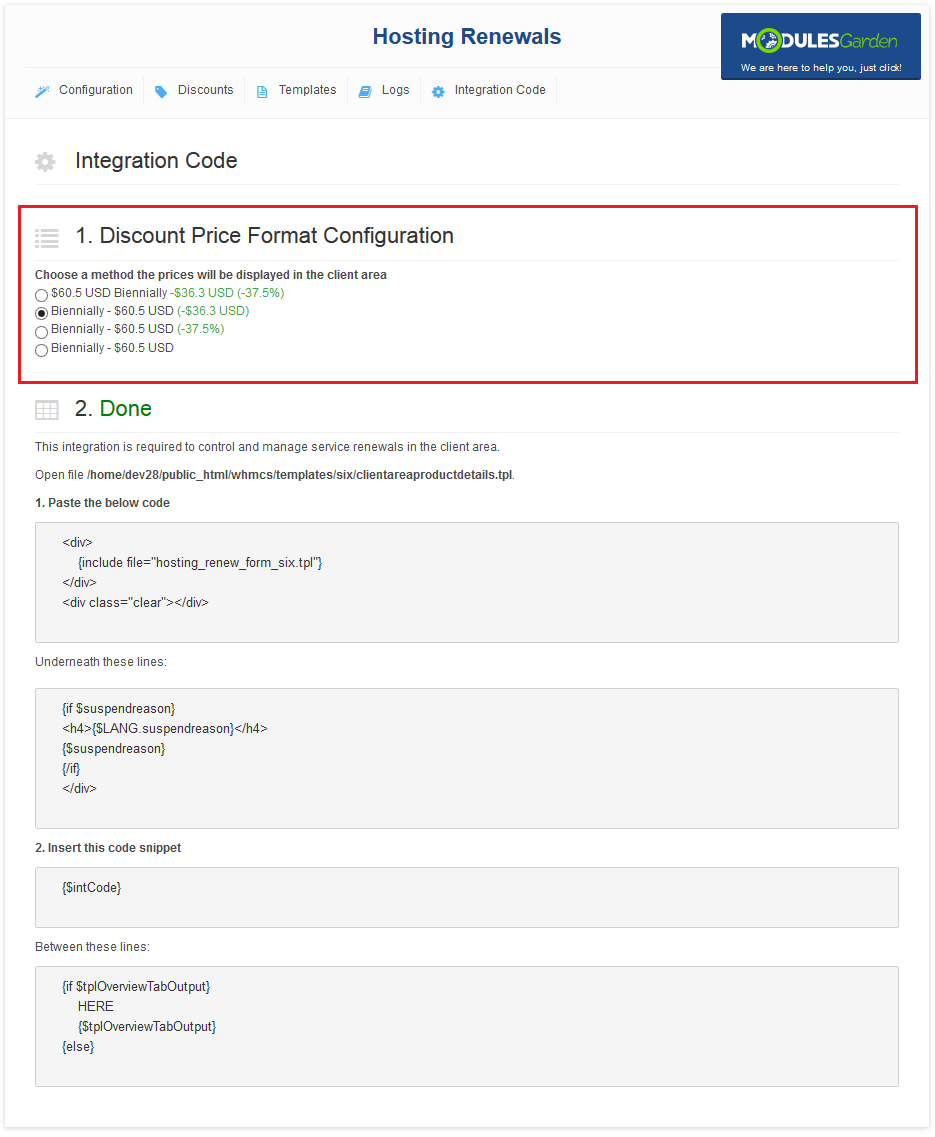
| Integration described below allows your customers to manually renew product, turn on/off auto renewal and change billing cycle from their client area.
|
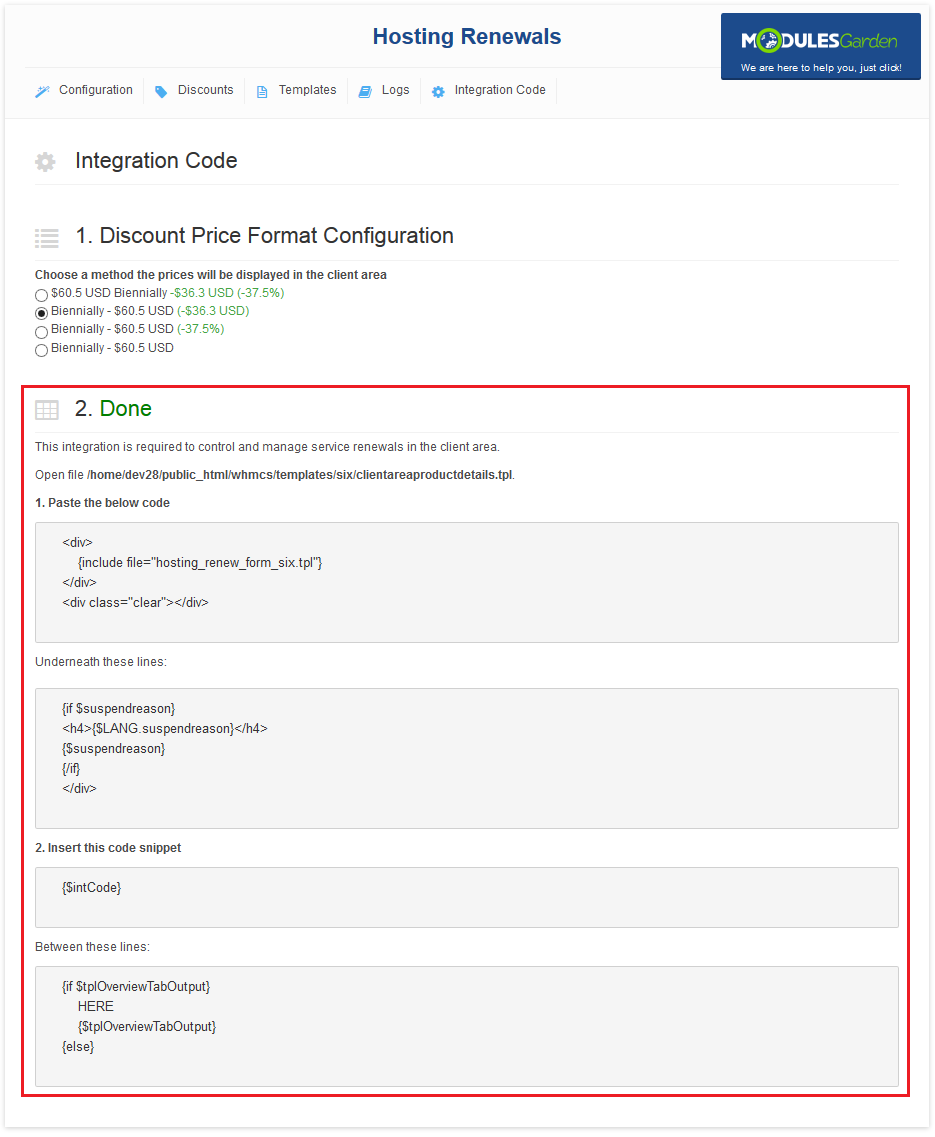
| Underneath you will fond an example of a correctly placed code snippet in a 'default' order form template.
|
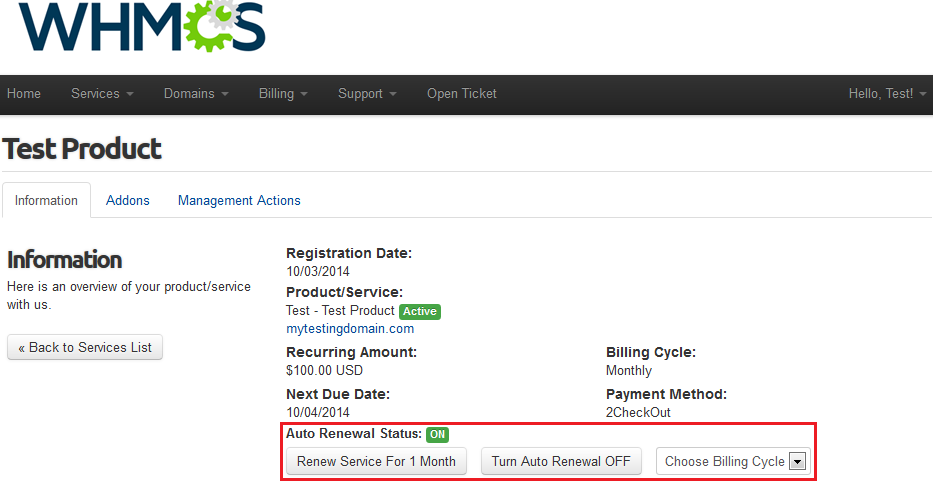
Once teh integration has beendone correctly, your clients should see buttons in the client area as marked on the screen:
Note: buttons' naming varies depending on the chosen billing cycle.
|
Tips
1. If your client will turn off autorenew and he will not manually run renewal, then service status will change to suspended/terminated after a certain time period.
Time period depends on WHMCS settings at 'Setup' → 'Automation Settings' → 'Automatic Module Functions '.
|
2. Hosting Renewals For WHMCS supports all billing cycles, from monthly to triennially.
Dependant on the chosen billing cycle, displayed value of renew button is changing according to the following code which is located in 'language' directory at your language file:
$LANG['cyclemonthly']='1 Month';
$LANG['cyclequarterly']='3 Months';
$LANG['cyclesemiannually']='6 Months';
$LANG['cycleannually']='1 Year';
$LANG['cyclebiennially']='2 Years';
$LANG['cycletriennially']='3 Years';
|
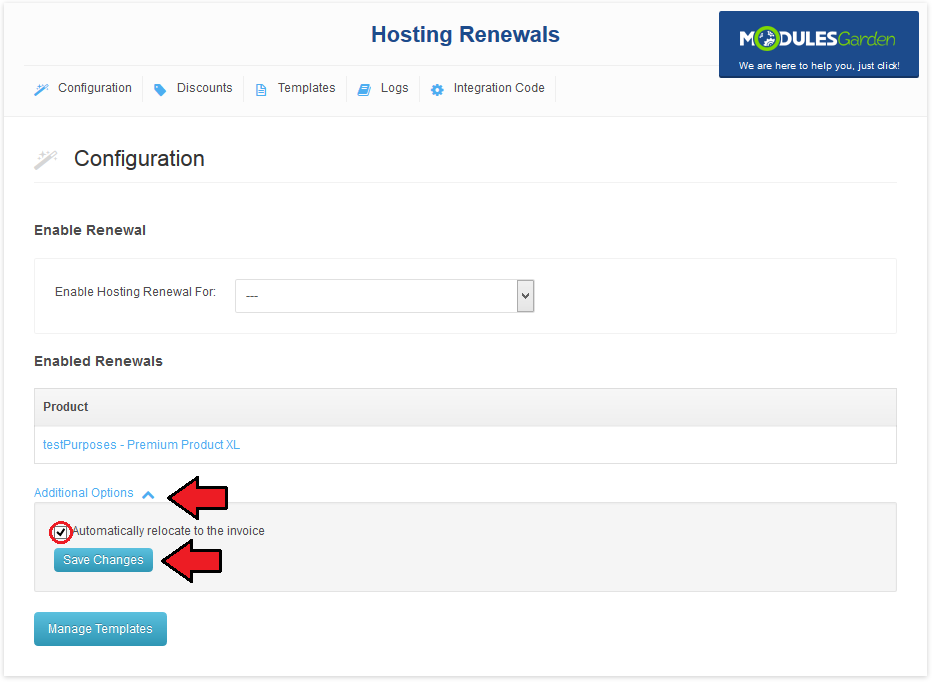
3. You can forward client directly to invoice page after successful renew.
To enable this, go to the 'Configuration' tab at our module and expand 'Additional Options' .
Afterwards,mark 'Automatically relocate to the invoice ' checkbox and press 'Save Changes' .
|
Common Problems
| 1. When you have problems with connection, check whether your SELinux or firewall does not block ports.
|
