EasyDCIM Colocation For WHMCS
(→About EasyDCIM Colocation For WHMCS) |
|||
| Line 2: | Line 2: | ||
<meta name="description" content="ModulesGarden Wiki Contains All The Information You Need About The EasyDCIM Colocation For WHMCS Module."></meta> | <meta name="description" content="ModulesGarden Wiki Contains All The Information You Need About The EasyDCIM Colocation For WHMCS Module."></meta> | ||
| − | =About [https://www.modulesgarden.com/products/whmcs/easydcim-colocation EasyDCIM Colocation For WHMCS]= | + | =About [https://www.modulesgarden.com/products/whmcs/easydcim-colocation EasyDCIM Colocation V2 For WHMCS]= |
{| | {| | ||
| − | |style="padding: 10px 0px 10px 0px;"|'''EasyDCIM Colocation For WHMCS''' is a free module that will allow you to provide and manage your [https://www.easydcim.com EasyDCIM] colocation services from the WHMCS area.<br/> | + | |style="padding: 10px 0px 10px 0px;"|'''EasyDCIM Colocation V2 For WHMCS''' is a free module that will allow you to provide and manage your [https://www.easydcim.com EasyDCIM] colocation services from the WHMCS area.<br/> |
You will be enabled to, among others, determine the status of each colocation, and your clients - turn off and on their power outlets remotely.<br/> | You will be enabled to, among others, determine the status of each colocation, and your clients - turn off and on their power outlets remotely.<br/> | ||
| − | At the same time you and your clients will both be empowered to display statistics on traffic and power usage as well as log in to the EasyDCIM panel with a single click. | + | At the same time you and your clients will both be empowered to display statistics on traffic and power usage as well as log in to the EasyDCIM panel with a single click. <br/> |
| + | <br/> | ||
| + | If you are still using the module in version 1.x and need its documentation, you will find it under [https://www.docs.modulesgarden.com/EasyDCIM_Colocation_V1.X_For_WHMCS this page]. | ||
|} | |} | ||
<!-- fixed --> | <!-- fixed --> | ||
| Line 153: | Line 155: | ||
|} | |} | ||
{| | {| | ||
| − | |style="padding: 0px 0px 0px 30px;"|✔ Supports PHP 7. | + | |style="padding: 0px 0px 0px 30px;"|✔ Supports PHP 7.3 Up To PHP 8.1 |
|} | |} | ||
{| | {| | ||
| − | |style="padding: 0px 0px 0px 30px;"|✔ Supports WHMCS | + | |style="padding: 0px 0px 0px 30px;"|✔ Supports WHMCS Templates "Six" And "Twenty-One" |
|} | |} | ||
{| | {| | ||
| − | |style="padding: 0px 0px 10px 30px;"|✔ Supports WHMCS | + | |style="padding: 0px 0px 10px 30px;"|✔ Supports WHMCS V8.3 And Later |
|} | |} | ||
| Line 193: | Line 195: | ||
|} | |} | ||
{| | {| | ||
| − | |style="padding: 0px 0px 20px 25px;"|[[File: | + | |style="padding: 0px 0px 20px 25px;"|[[File:EC2_3.png]] |
|} | |} | ||
{| | {| | ||
|style="padding: 0px 0px 15px 15px;"|'''4. Next, choose '' 'EasyDCIMColocation' '' from the '' 'Type' '' dropdown menu.<br/> | |style="padding: 0px 0px 15px 15px;"|'''4. Next, choose '' 'EasyDCIMColocation' '' from the '' 'Type' '' dropdown menu.<br/> | ||
| − | Fill in your server name, address, username and password (API Key). Then check the connection with the EasyDCIM server and press '' 'Save Changes'.''<br/> | + | Fill in your server name, address, username and password (API Key). Then check the connection with the EasyDCIM V2 server and press '' 'Save Changes'.''<br/> |
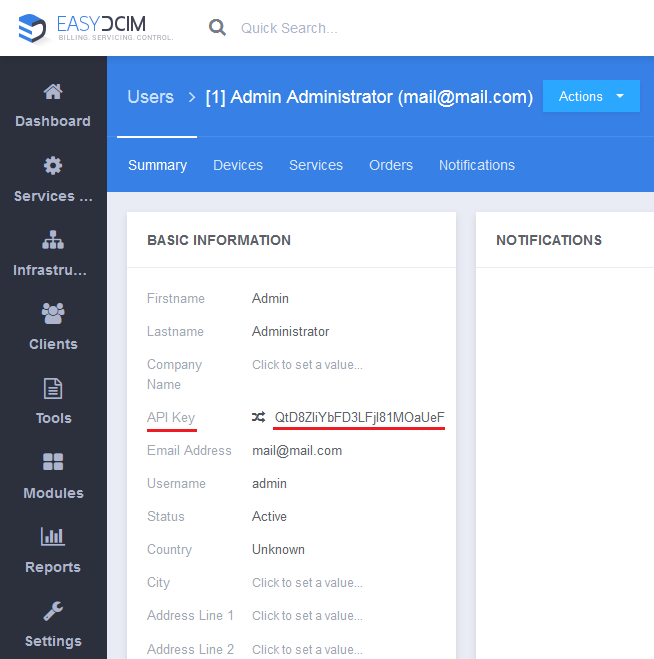
'' '''Note:''' The password can be found in your EasyDCIM administrator user profile listed as '[https://www.docs.modulesgarden.com/images/9/99/E_API_Key.png API Key]'. '' | '' '''Note:''' The password can be found in your EasyDCIM administrator user profile listed as '[https://www.docs.modulesgarden.com/images/9/99/E_API_Key.png API Key]'. '' | ||
|} | |} | ||
{| | {| | ||
| − | |style="padding: 0px 0px 20px 25px;"|[[File: | + | |style="padding: 0px 0px 20px 25px;"|[[File:EC2_4.png]] |
|} | |} | ||
{| | {| | ||
| Line 207: | Line 209: | ||
|} | |} | ||
{| | {| | ||
| − | |style="padding: 0px 0px 20px 25px;"|[[File: | + | |style="padding: 0px 0px 20px 25px;"|[[File:EC2_5.png]] |
|} | |} | ||
{| | {| | ||
| Line 213: | Line 215: | ||
|} | |} | ||
{| | {| | ||
| − | |style="padding: 0px 0px 30px 25px;"|[[File: | + | |style="padding: 0px 0px 30px 25px;"|[[File:EC2_6.png]] |
|} | |} | ||
| Line 222: | Line 224: | ||
|} | |} | ||
{| | {| | ||
| − | |style="padding: 0px 0px 20px 25px;"|[[File: | + | |style="padding: 0px 0px 20px 25px;"|[[File:EC2_8.png]] |
|} | |} | ||
{| | {| | ||
| Line 228: | Line 230: | ||
|} | |} | ||
{| | {| | ||
| − | |style="padding: 0px 0px 20px 25px;"|[[File: | + | |style="padding: 0px 0px 20px 25px;"|[[File:EC2_9.png]] |
|} | |} | ||
{| | {| | ||
| Line 235: | Line 237: | ||
|} | |} | ||
{| | {| | ||
| − | |style="padding: 0px 0px 20px 25px;"|[[File: | + | |style="padding: 0px 0px 20px 25px;"|[[File:EC2_10.png]] |
|} | |} | ||
{| | {| | ||
| Line 241: | Line 243: | ||
|} | |} | ||
{| | {| | ||
| − | |style="padding: 0px 0px 20px 25px;"|[[File: | + | |style="padding: 0px 0px 20px 25px;"|[[File:EC2_11.png]] |
|} | |} | ||
{| | {| | ||
| − | |style="padding: 0px 0px | + | |style="padding: 0px 0px 20px 15px;"|'''12. Now, move to the '' 'Module Settings' '' section. Keep in mind that the module configuration is only partly obligatory'''.<br/> The server will be assigned based on the provided configuration, and will therefore match only those options that have been specified. |
| − | + | ||
| − | + | ||
| − | + | ||
| − | + | ||
| − | + | ||
| − | + | ||
| − | + | ||
| − | + | ||
| − | + | ||
| − | + | ||
| − | + | ||
| − | + | ||
| − | + | ||
| − | + | ||
| − | + | ||
| − | + | ||
| − | + | ||
'''Default Options:''' | '''Default Options:''' | ||
*Configurable Options - generate if you want to use configurable options instead of '' 'Location' '' and '' 'Model' '' in the '' 'Module Settings' '' tab of a product. | *Configurable Options - generate if you want to use configurable options instead of '' 'Location' '' and '' 'Model' '' in the '' 'Module Settings' '' tab of a product. | ||
| Line 286: | Line 271: | ||
|} | |} | ||
{| | {| | ||
| − | |style="padding: 0px 0px 20px 25px;"|[[File: | + | |style="padding: 0px 0px 20px 25px;"|[[File:EC2_14.png]] |
|} | |} | ||
{| | {| | ||
| Line 294: | Line 279: | ||
|} | |} | ||
{| | {| | ||
| − | |style="padding: 0px 0px 30px 25px;"|[[File: | + | |style="padding: 0px 0px 20px 25px;"|[[File:EC2_15.png]] |
| + | |} | ||
| + | {| | ||
| + | |style="padding: 0px 0px 20px 25px;"|[[File:EC2_13.png]] | ||
| + | |} | ||
| + | {| | ||
| + | |style="padding: 0px 0px 15px 15px;"|'''14. Additionally, you can set up a percentile billing for additional traffic.'''<br /> | ||
| + | '' '''Note:''' This option is possible only if you do '''not''' have [https://www.modulesgarden.com/products/whmcs/advanced-billing Advanced Billing Form WHMCS] module installed. If you need a bit more advanced billing integration, please go [[#Advanced Billing Integration|here]] for more information. <br/> | ||
| + | Go to the '' 'Other' '' tab and enable '' 'Overages Billing' ''. First, define the standard [https://docs.whmcs.com/Disk_Space_and_Bandwidth_Overage_Billing overages bandwidth billing] and then set the following percentile values: | ||
| + | *Soft Limit - bandwidth usage in Mbps above which the customer will be additionally charged for the used transfer | ||
| + | *Cost - price per Mbps unit above the '' 'Soft Limit' '' value | ||
| + | E.g. If '' 'Soft Limit = 100' '' and '' 'Cost = 0.500' '' and the client exceeds the bandwidth by 10 Mbps, reaching to '' '110 Mbps' '', they will be additionally charged with ''$5 USD'' (''10 x 0.500''). <br /> | ||
| + | '' '''Note:''' The percentile billing requires the standard billing of bandwidth overages to be enabled. It will be also calculated during the execution of the [https://docs.whmcs.com/Crons#System_Cron WHMCS system cron]. | ||
| + | |} | ||
| + | {| | ||
| + | |style="padding: 0px 0px 30px 25px;"|[[File:EC2_12.png]] | ||
|} | |} | ||
| Line 304: | Line 304: | ||
|} | |} | ||
{| | {| | ||
| − | |style="padding: 0px 0px 30px 25px;"|[[File: | + | |style="padding: 0px 0px 30px 25px;"|[[File:EC2_7.png]] |
|} | |} | ||
| Line 316: | Line 316: | ||
|style="padding: 10px 0px 15px 15px;"| | |style="padding: 10px 0px 15px 15px;"| | ||
As soon as you set up a server for a client, you can perform various actions and view server details from the WHMCS admin area.<br/> | As soon as you set up a server for a client, you can perform various actions and view server details from the WHMCS admin area.<br/> | ||
| − | '' The 'Log In To Panel' '' button allows you to immediately log in to your client's EasyDCIM control panel. | + | '' The 'Log In To Panel' '' button allows you to immediately log in to your client's EasyDCIM control panel. <br/>Our module allows you to create/suspend/unsuspend/terminate server. <br/>By clicking on '' 'Update Order Information' '' you can also check the synchronization status of a service (works like a synchronization cron). |
|} | |} | ||
{| | {| | ||
| − | |style="padding: 0px 0px 20px 25px;"|[[File: | + | |style="padding: 0px 0px 20px 25px;"|[[File:EC2_16.png]] |
|} | |} | ||
{| | {| | ||
| − | |style="padding: 0px 0px 15px 15px;"| | + | |style="padding: 0px 0px 15px 15px;"|Below these functions you can also view traffic and power usage statistics and even specify the time intervals. |
|} | |} | ||
{| | {| | ||
| − | |style="padding: 0px 0px 20px 25px;"|[[File: | + | |style="padding: 0px 0px 20px 25px;"|[[File:EC2_17.png]] |
| − | + | ||
| − | + | ||
| − | + | ||
| − | + | ||
| − | + | ||
| − | + | ||
|} | |} | ||
{| | {| | ||
| Line 338: | Line 332: | ||
|} | |} | ||
{| | {| | ||
| − | |style="padding: 0px 0px 30px 25px;"|[[File: | + | |style="padding: 0px 0px 30px 25px;"|[[File:EC2_18.png]] |
|} | |} | ||
| Line 346: | Line 340: | ||
|} | |} | ||
{| | {| | ||
| − | |style="padding: 0px 0px 20px 25px;"|[[File: | + | |style="padding: 0px 0px 20px 25px;"|[[File:EC2_19.png]] |
|} | |} | ||
{| | {| | ||
| − | |style="padding: 0px 0px 15px 15px;"|They can | + | |style="padding: 0px 0px 15px 15px;"|They can view the graphs with traffic statistics and even define time intervals.<br /> |
'' '''Note:''' Available graphs and time intervals depend on the product registration date. | '' '''Note:''' Available graphs and time intervals depend on the product registration date. | ||
|} | |} | ||
{| | {| | ||
| − | |style="padding: 0px 0px 20px 25px;"|[[File: | + | |style="padding: 0px 0px 20px 25px;"|[[File:EC2_20.png]] |
|} | |} | ||
{| | {| | ||
| Line 359: | Line 353: | ||
|} | |} | ||
{| | {| | ||
| − | |style="padding: 0px 0px 20px 25px;"|[[File: | + | |style="padding: 0px 0px 20px 25px;"|[[File:EC2_21.png]] |
|} | |} | ||
{| | {| | ||
| Line 365: | Line 359: | ||
|} | |} | ||
{| | {| | ||
| − | |style="padding: 0px 0px 30px 25px;"|[[File: | + | |style="padding: 0px 0px 20px 25px;"|[[File:EC2_22.png]] |
| + | |} | ||
| + | {| | ||
| + | |style="padding: 0px 0px 30px 25px;"|[[File:EC2_22_0.png]] | ||
|} | |} | ||
=Advanced Billing Integration= | =Advanced Billing Integration= | ||
{| | {| | ||
| − | |style="padding: 10px 0px 20px 15px;"|EasyDCIM Colocation For WHMCS supports integration with the [https://www.modulesgarden.com/products/whmcs/advanced-billing Advanced Billing For WHMCS] module.<br/>This allows you to charge your customers for total bandwidth, power usage and 95th percentile billing for additional traffic.<br/> | + | |style="padding: 10px 0px 20px 15px;"|EasyDCIM Colocation For WHMCS supports integration with the [https://www.modulesgarden.com/products/whmcs/advanced-billing Advanced Billing For WHMCS] module.<br/>This allows you to charge your customers for total bandwidth ''(In, Out and Total)'', power usage and 95th percentile ''(In, Out and Total)'' billing for additional traffic.<br/> |
'' '''Note:''' We suggest to run the cron '''only once per hour''' (with the interval of 3600 seconds).<br/>This is due to the fact that while generating an invoice, '''only the last billed record''' is taken into account, so there is no need to collect data more often. | '' '''Note:''' We suggest to run the cron '''only once per hour''' (with the interval of 3600 seconds).<br/>This is due to the fact that while generating an invoice, '''only the last billed record''' is taken into account, so there is no need to collect data more often. | ||
|} | |} | ||
{| | {| | ||
| − | |style="padding: 0px 0px 20px 25px;"|[[File: | + | |style="padding: 0px 0px 20px 25px;"|[[File:EC2_23.png]] |
| − | + | ||
| − | + | ||
| − | + | ||
| − | + | ||
| − | + | ||
| − | + | ||
| − | + | ||
|} | |} | ||
| − | |||
{| | {| | ||
|style="padding: 0px 0px 20px 15px;"|Once the [https://www.docs.modulesgarden.com/Advanced_Billing_For_WHMCS#Usage_Records relevant options] are enabled, your clients will also be able to view billing for the current usage in your client area. | |style="padding: 0px 0px 20px 15px;"|Once the [https://www.docs.modulesgarden.com/Advanced_Billing_For_WHMCS#Usage_Records relevant options] are enabled, your clients will also be able to view billing for the current usage in your client area. | ||
|} | |} | ||
{| | {| | ||
| − | + | |style="padding: 0px 0px 30px 25px;"|[[File:EC2_24.png]] | |
| − | + | ||
| − | + | ||
| − | + | ||
| − | + | ||
| − | + | ||
| − | |style="padding: 0px 0px 30px 25px;"|[[File: | + | |
|} | |} | ||
| Line 408: | Line 391: | ||
=Update Instructions= | =Update Instructions= | ||
{| | {| | ||
| − | |style="padding: 10px 0px | + | |style="padding: 10px 0px 15px 15px;"|If you are updating your '''EasyDCIM Colocation For WHMCS''' module and wish to migrate your data to the new '''V2''' module version, it is advised to familiarize yourself with the below instructions firstly.<br/> |
| + | Please follow the instructions step by step to avoid any unexpected errors. | ||
| + | |} | ||
| + | {| | ||
| + | |style="color: #ff0000; padding: 0px 0px 15px 15px;"|'''Start with making a backup copy of your WHMCS files and database.'''<br/> This step is crucial as it will let you avoid losing any data in case of unexpected update failure or other issues. | ||
| + | |} | ||
| + | {| | ||
| + | |style="padding: 0px 0px 10px 15px;"|1. Download the latest version of the module from our [https://www.modulesgarden.com/client-area/products client area]. | ||
| + | |} | ||
| + | {| | ||
| + | |style="padding: 0px 0px 10px 15px;"|2. Upload and extract the new module files into your WHMCS root directory. | ||
| + | |} | ||
| + | {| | ||
| + | |style="padding: 0px 0px 10px 15px;"|3. Move to the ''System Settings → Servers'', create a new server and a new server group dedicated to the EasyDCIMcolocationv2 module. | ||
| + | |} | ||
| + | {| | ||
| + | |style="padding: 0px 0px 10px 15px;"|4. Move to the ''System Settings → Products/Services'', find and open the product you are going to update. | ||
| + | |} | ||
| + | {| | ||
| + | |style="padding: 0px 0px 10px 15px;"|5. Open the ''Module Settings'' section of the product of you interest, find and open the product you are going to update. | ||
| + | |} | ||
| + | {| | ||
| + | |style="padding: 0px 0px 10px 15px;"|6. Change the '' 'Module Name' '' from "EasyDCIMColocation" to '''"EasDCIMColocationv2"'''.<br/> Change the '' 'Server Group' '' to the created in the step '''4th''' one. | ||
| + | |} | ||
| + | {| | ||
| + | |style="padding: 0px 0px 10px 15px;"|7. Configure the module settings from scratch and save the changes. | ||
| + | |} | ||
| + | {| | ||
| + | |style="padding: 0px 0px 5px 15px;"|8. Open the ''Custom Fields'' section, correct the existing custom fields names as shown below: | ||
| + | *orderID|Order ID → OrderID|Order ID | ||
| + | *serverID|Server ID → ServerID|Server ID <br/>''(Differences in the upper/lower case.)'' | ||
| + | |} | ||
| + | {| | ||
| + | |style="padding: 0px 0px 10px 15px;"|9. Generate any configurable options if need any. | ||
| + | |} | ||
| + | {| | ||
| + | |style="padding: 0px 0px 30px 15px;"|10.* Regarding billing methods update:<br/> | ||
| + | *Advanced Billing For WHMCS:<br/> If the Advanced Billing For WHMCS module is used to calculate the billing, move to this module addon and set up the product pricing again, as described [[#Advanced_Billing_Integration|here]]. | ||
| + | *WHMCS inbuilt system is used:<br/> If you '''do not''' use the Advanced Billing For WHMCS module to calculate the billing, move to the ''System Settings → Products/Services → Other'' tab.<br/> Configure the ''"Percentile Usage", "Percentile Cost", "Power Usage"'' and ''"Power Usage Cost"'' fields from scratch. | ||
|} | |} | ||
Revision as of 11:33, 8 February 2023
Contents |
About EasyDCIM Colocation V2 For WHMCS
| EasyDCIM Colocation V2 For WHMCS is a free module that will allow you to provide and manage your EasyDCIM colocation services from the WHMCS area. You will be enabled to, among others, determine the status of each colocation, and your clients - turn off and on their power outlets remotely. |
- Admin Area Features:
| ✔ Create/Terminate/Suspend/Unsuspend Colocation |
| ✔ Update Order Information |
| ✔ One Click Login To User Control Panel |
| ✔ View Colocation Resource Usage: |
| ✔ Bandwidth Statistics |
| ✔ Traffic Statistics Graph |
| ✔ Power Usage Graph |
| ✔ Generate Default Configurable Options |
| ✔ Configure Colocation: |
| ✔ Model |
| ✔ Location |
| ✔ Toggle Automatic Order Acceptance And Colocation Matching |
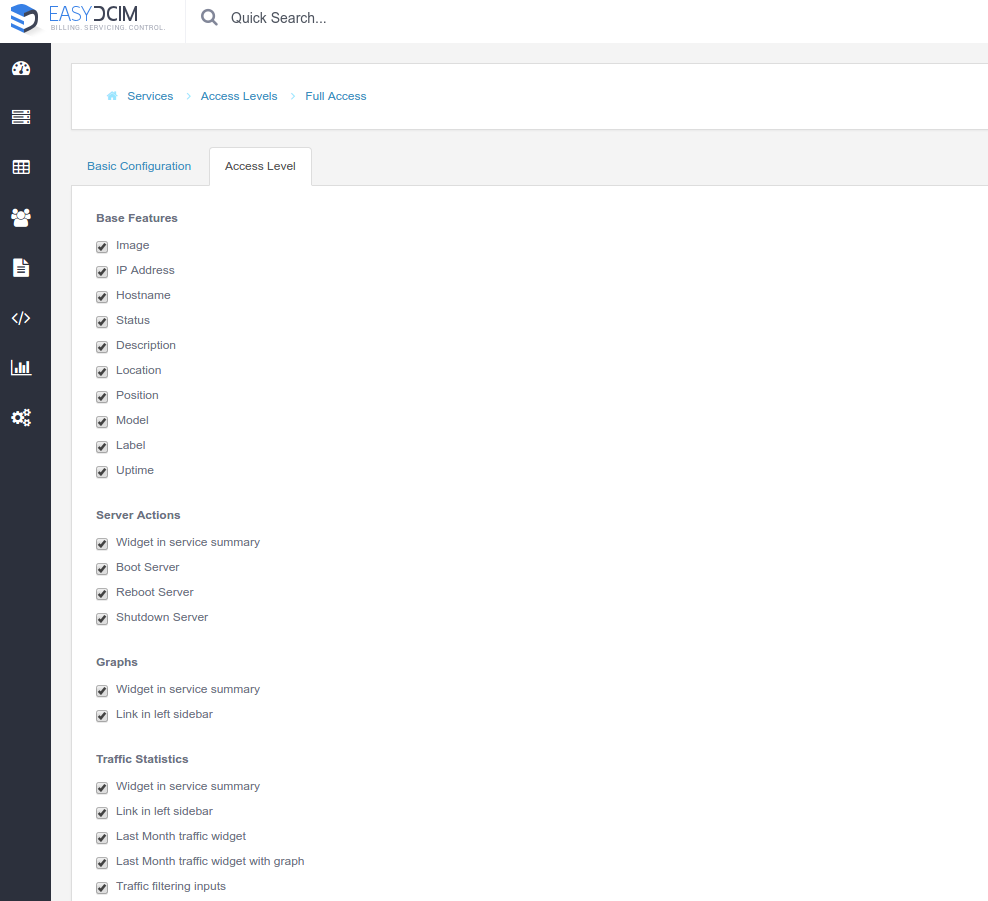
| ✔ Control Service Access Level |
| ✔ Control Service Actions And Email Notifications |
| ✔ Define Client Area Features: |
| ✔ Display Base Features: |
| ✔ Label |
| ✔ Model |
| ✔ Location |
| ✔ IP Address |
| ✔ Allow Colocation Actions: |
| ✔ Auto Login Link |
| ✔ Traffic Statistics |
| ✔ Display Other Features: |
| ✔ Traffic Statistics |
| ✔ Power Usage Statistics |
| ✔ Power Outlets |
- Client Area Features:
| ✔ View Colocation Model/Location/Label |
| ✔ One Click Login To User Control Panel |
| ✔ View Traffic Statistics Graph |
| ✔ View Power Usage Graphs |
| ✔ Enable/Disable/Restart Power Outlets |
- Configurable Options:
| ✔ Colocation Model |
| ✔ Colocation Location |
- Advanced Billing Integration:
| ✔ Bill For Current Power Usage |
| ✔ Bill For Current Bandwidth Usage |
| ✔ Apply 95th Percentile Billing Of Bandwidth Overages |
- Supported PDU Manufacturers:
| ✔ APC |
| ✔ CyberPower |
| ✔ Enlogic |
| ✔ Raritan |
- General Info:
| ✔ Integrated With Advanced Billing For WHMCS v3.2.2 And Later - Actual Server Resource Usage Billing (read more) |
| ✔ Multi-Language Support |
| ✔ Supports EasyDCIM v1.4.3 and Later |
| ✔ Supports PHP 7.3 Up To PHP 8.1 |
| ✔ Supports WHMCS Templates "Six" And "Twenty-One" |
| ✔ Supports WHMCS V8.3 And Later |
- Exclusive Promo Code From ModulesGarden:
| ✔ Save 20% For 3 Months On The EasyDCIM Control Panel With Coupon: WHMCS20%_ED |
Installation and Configuration
| This tutorial will show you how to successfully install and configure EasyDCIM Colocation For WHMCS. We will guide you step by step through the whole installation and configuration process. |
Installation
| 1. Log in to our client area and download the module. |

|
| 2. Extract the downloaded file into the main WHMCS directory. The content of the package should look like this. |

|
Configuration of Server
| 3. Now, we will show you how to configure a new product. Go to 'Setup' → 'Products/Services' → 'Servers' and press the 'Add New Server' button. |

|
| 4. Next, choose 'EasyDCIMColocation' from the 'Type' dropdown menu. Fill in your server name, address, username and password (API Key). Then check the connection with the EasyDCIM V2 server and press 'Save Changes'. |

|
| 5. The next step is creating a server group. To do so, click on 'Create Server Group'. |

|
| 6. Enter the name, click on your previously created server, press 'Add' and 'Save Changes' afterwards. |

|
Configuration of Product
| 7. In order to create and configure a product, go to 'Setup' → 'Products/Services' → 'Products/Services'. Click on 'Create a New Group'. |

|
| 8. Enter the product group name and press 'Save Changes'. |

|
| 9. Once you have a product group, you can assign your product to it. To create a product, click on 'Create a New Product'. |

|
| 10. Next, choose your product group, enter your product name and then press 'Continue'. |

|
| 12. Now, move to the 'Module Settings' section. Keep in mind that the module configuration is only partly obligatory. The server will be assigned based on the provided configuration, and will therefore match only those options that have been specified. Default Options:
Product Configuration
Service Actions
Client Area Features
|

|
| 13. You can also generate the default configurable options to allow your customers place orders tailored exactly to their needs. To do that, go to 'Setup' → 'Products/Services' → 'Configurable Options'. |

|

|
| 14. Additionally, you can set up a percentile billing for additional traffic. Note: This option is possible only if you do not have Advanced Billing Form WHMCS module installed. If you need a bit more advanced billing integration, please go here for more information.
E.g. If 'Soft Limit = 100' and 'Cost = 0.500' and the client exceeds the bandwidth by 10 Mbps, reaching to '110 Mbps' , they will be additionally charged with $5 USD (10 x 0.500). |

|
Custom Fields
| Once the configuration of the module settings has been completed, the following custom fields will be created automatically. Note: These fields will not be visible to your clients by default.
|

|
Management
| In this section we will show you all functionalities of EasyDCIM Colocation For WHMCS. Our module allows you to offer and manage EasyDCIM colocation service right in your WHMCS system. |
Admin Area
|
As soon as you set up a server for a client, you can perform various actions and view server details from the WHMCS admin area. |

|
| Below these functions you can also view traffic and power usage statistics and even specify the time intervals. |

|
| Lastly, you can also see the custom fields with currently assigned 'Order ID' and 'Server ID' from the EasyDCIM panel. An empty 'Server ID' field means that it has not been automatically assigned by the cron yet (e. g. it may not be activated in the EasyDCIM panel yet). |

|
Client Area
| In the main view of the client area your customers can check basic details of a colocation service as well as log in to their EasyDCIM control panel with a single click. |

|
| They can view the graphs with traffic statistics and even define time intervals. Note: Available graphs and time intervals depend on the product registration date. |

|
| The same goes for power usage statistics. |

|
| Additionally, your clients can see the current state of all power outlets with the possibility to turn them on, off or restart. |

|

|
Advanced Billing Integration
| EasyDCIM Colocation For WHMCS supports integration with the Advanced Billing For WHMCS module. This allows you to charge your customers for total bandwidth (In, Out and Total), power usage and 95th percentile (In, Out and Total) billing for additional traffic. Note: We suggest to run the cron only once per hour (with the interval of 3600 seconds). |

|
| Once the relevant options are enabled, your clients will also be able to view billing for the current usage in your client area. |

|
Tips
| 1. Note that placing two identical orders may result in assigning servers with slightly different parameters.
It is a natural result of how server matching in EasyDCIM works. In brief, it matches a server basing on the resources and models precised in the order, without considering other resources. |
Update Instructions
| If you are updating your EasyDCIM Colocation For WHMCS module and wish to migrate your data to the new V2 module version, it is advised to familiarize yourself with the below instructions firstly. Please follow the instructions step by step to avoid any unexpected errors. |
| Start with making a backup copy of your WHMCS files and database. This step is crucial as it will let you avoid losing any data in case of unexpected update failure or other issues. |
| 1. Download the latest version of the module from our client area. |
| 2. Upload and extract the new module files into your WHMCS root directory. |
| 3. Move to the System Settings → Servers, create a new server and a new server group dedicated to the EasyDCIMcolocationv2 module. |
| 4. Move to the System Settings → Products/Services, find and open the product you are going to update. |
| 5. Open the Module Settings section of the product of you interest, find and open the product you are going to update. |
| 6. Change the 'Module Name' from "EasyDCIMColocation" to "EasDCIMColocationv2". Change the 'Server Group' to the created in the step 4th one. |
| 7. Configure the module settings from scratch and save the changes. |
8. Open the Custom Fields section, correct the existing custom fields names as shown below:
|
| 9. Generate any configurable options if need any. |
10.* Regarding billing methods update:
|
Common Problems
| 1. When you encounter problems with connection, check whether your SELinux or firewall does not block ports. |