EasyDCIM Colocation For WHMCS
(→Installation) |
|||
| Line 88: | Line 88: | ||
|} | |} | ||
| − | = | + | <meta name="keywords" content="easydcim colocation for whmcs, easydcim colocation configuration, whmcs easydcim colocation management, whmcs easydcim colocation installation, whmcs easydcim colocation common problems, about whmcs easydcim colocation, whmcs easydcim colocation documentation, whmcs easydcim colocation faq, whmcs easydcim colocation help, whmcs easydcim colocation guide, whmcs easydcim colocation wiki, whmcs easydcim colocation tutorial, whmcs easydcim colocation tips, whmcs easydcim colocation wiki"></meta> |
| + | <meta name="description" content="ModulesGarden Wiki Contains All The Information You Need About The EasyDCIM Colocation For WHMCS Module."></meta> | ||
| + | |||
| + | =About [https://www.modulesgarden.com/products/whmcs/easydcim-dedicated-servers EasyDCIM Colocation For WHMCS]= | ||
{| | {| | ||
| − | |style="padding: 10px 0px | + | |style="padding: 10px 0px 10px 0px;"|'''EasyDCIM Colocation For WHMCS''' will allow you to xxxxxxxxxxxxxxxxxxxxx.<br/> |
| − | + | xxxxxxxxxxxxxxxx<br/> | |
| − | + | xxxxxxxxxxxxxxxxx. | |
|} | |} | ||
| + | <!-- fixed --> | ||
| + | *'''Admin Area Features:''' | ||
{| | {| | ||
| − | |style="padding: | + | |style="padding: 10px 0px 0px 30px;"|✔ Create/Terminate/Suspend/Unsuspend Server |
|} | |} | ||
{| | {| | ||
| − | |style="padding: 0px 0px | + | |style="padding: 0px 0px 0px 30px;"|✔ Boot/Reboot/Shutdown Server |
|} | |} | ||
{| | {| | ||
| − | |style="padding: 0px 0px | + | |style="padding: 0px 0px 0px 30px;"|✔ Change Server SSH Access Details |
| − | + | ||
|} | |} | ||
{| | {| | ||
| − | |style="padding: 0px 0px | + | |style="padding: 0px 0px 0px 30px;"|✔ View Server Details |
|} | |} | ||
{| | {| | ||
| − | |style="padding: 0px 0px | + | |style="padding: 0px 0px 0px 30px;"|✔ View Server Resource Usage Graphs |
| − | + | ||
|} | |} | ||
{| | {| | ||
| − | |style="padding: 0px 0px | + | |style="padding: 0px 0px 0px 30px;"|✔ Generate Default Configurable Options |
|} | |} | ||
{| | {| | ||
| − | |style="padding: 0px 0px | + | |style="padding: 0px 0px 0px 30px;"|✔ Configure Server: |
| − | File | + | |} |
| + | {| | ||
| + | |style="padding: 0px 0px 0px 45px;"|✔ Server Model | ||
| + | |} | ||
| + | {| | ||
| + | |style="padding: 0px 0px 0px 45px;"|✔ Server Location | ||
| + | |} | ||
| + | {| | ||
| + | |style="padding: 0px 0px 0px 45px;"|✔ OS Template | ||
| + | |} | ||
| + | {| | ||
| + | |style="padding: 0px 0px 0px 45px;"|✔ Server Resources | ||
| + | |} | ||
| + | {| | ||
| + | |style="padding: 0px 0px 0px 30px;"|✔ Toggle Automatic Order Acceptance And Server Matching | ||
| + | |} | ||
| + | {| | ||
| + | |style="padding: 0px 0px 0px 30px;"|✔ Define Required Devices | ||
| + | |} | ||
| + | {| | ||
| + | |style="padding: 0px 0px 0px 30px;"|✔ Define Required Item Models: | ||
| + | |} | ||
| + | {| | ||
| + | |style="padding: 0px 0px 0px 45px;"|✔ HDD Model | ||
| + | |} | ||
| + | {| | ||
| + | |style="padding: 0px 0px 0px 45px;"|✔ SSD Model | ||
| + | |} | ||
| + | {| | ||
| + | |style="padding: 0px 0px 0px 45px;"|✔ RAM Model | ||
| + | |} | ||
| + | {| | ||
| + | |style="padding: 0px 0px 0px 45px;"|✔ CPU Model | ||
| + | |} | ||
| + | {| | ||
| + | |style="padding: 0px 0px 0px 30px;"|✔ Define Client Area Features | ||
| + | |} | ||
| + | {| | ||
| + | |style="padding: 0px 0px 0px 30px;"|✔ Choose OS Templates Available For Rebuilding | ||
| + | |} | ||
| + | {| | ||
| + | |style="padding: 0px 0px 0px 30px;"|✔ Choose OS Templates Available For Rebuilding | ||
| + | |} | ||
| + | {| | ||
| + | |style="padding: 0px 0px 0px 30px;"|✔ Control Service Actions And Email Notifications | ||
| + | |} | ||
| + | {| | ||
| + | |style="padding: 0px 0px 0px 30px;"|✔ Determine Monthly Interval Of Bandwidth Usage | ||
| + | |} | ||
| + | {| | ||
| + | |style="padding: 0px 0px 0px 30px;"|✔ Define Percentile Billing Of Bandwidth Overage | ||
| + | |} | ||
| + | {| | ||
| + | |style="padding: 0px 0px 0px 30px;"|✔ One Click Login To EasyDCIM: | ||
| + | |} | ||
| + | {| | ||
| + | |style="padding: 0px 0px 0px 45px;"|✔ User Control Panel | ||
| + | |} | ||
| + | {| | ||
| + | |style="padding: 0px 0px 0px 45px;"|✔ Admin Panel | ||
| + | |} | ||
| + | {| | ||
| + | |style="padding: 0px 0px 10px 30px;"|✔ Toggle Debug Mode | ||
| + | |} | ||
| + | |||
| + | *'''Client Area Features:''' | ||
| + | {| | ||
| + | |style="padding: 10px 0px 0px 30px;"|✔ Boot/Reboot/Shutdown Server | ||
| + | |} | ||
| + | {| | ||
| + | |style="padding: 0px 0px 0px 30px;"|✔ Receive Email Notification On Complete Server Creation | ||
| + | |} | ||
| + | {| | ||
| + | |style="padding: 0px 0px 0px 30px;"|✔ Change Server Hostname | ||
| + | |} | ||
| + | {| | ||
| + | |style="padding: 0px 0px 0px 30px;"|✔ Change Server SSH Password | ||
| + | |} | ||
| + | {| | ||
| + | |style="padding: 0px 0px 0px 30px;"|✔ View Server Details | ||
| + | |} | ||
| + | {| | ||
| + | |style="padding: 0px 0px 0px 30px;"|✔ Access KVM Console (Dell And SuperMicro Servers) | ||
| + | |} | ||
| + | {| | ||
| + | |style="padding: 0px 0px 0px 30px;"|✔ Rebuild Server OS Using OS Templates And Your Own Credentials | ||
| + | |} | ||
| + | {| | ||
| + | |style="padding: 0px 0px 0px 30px;"|✔ View Server Resource Usage Graphs | ||
| + | |} | ||
| + | {| | ||
| + | |style="padding: 0px 0px 0px 30px;"|✔ View Traffic Statistics | ||
| + | |} | ||
| + | {| | ||
| + | |style="padding: 0px 0px 10px 30px;"|✔ One Click Login To User Control Panel | ||
| + | |} | ||
| + | |||
| + | *'''Configurable Options:''' | ||
| + | {| | ||
| + | |style="padding: 10px 0px 0px 30px;"|✔ Server Model | ||
| + | |} | ||
| + | {| | ||
| + | |style="padding: 0px 0px 0px 30px;"|✔ Server Location | ||
| + | |} | ||
| + | {| | ||
| + | |style="padding: 0px 0px 0px 30px;"|✔ OS Template | ||
| + | |} | ||
| + | {| | ||
| + | |style="padding: 0px 0px 0px 30px;"|✔ Bandwidth | ||
| + | |} | ||
| + | {| | ||
| + | |style="padding: 0px 0px 0px 30px;"|✔ Additional IP Addresses | ||
| + | |} | ||
| + | {| | ||
| + | |style="padding: 0px 0px 0px 30px;"|✔ HDD Size | ||
| + | |} | ||
| + | {| | ||
| + | |style="padding: 0px 0px 0px 30px;"|✔ SSD Size | ||
| + | |} | ||
| + | {| | ||
| + | |style="padding: 0px 0px 0px 30px;"|✔ RAM Size | ||
| + | |} | ||
| + | {| | ||
| + | |style="padding: 0px 0px 10px 30px;"|✔ CPU Cores | ||
| + | |} | ||
| + | |||
| + | *'''General Info:''' | ||
| + | {| | ||
| + | |style="padding: 10px 0px 0px 30px;"|✔ Multi-Language Support | ||
| + | |} | ||
| + | {| | ||
| + | |style="padding: 0px 0px 0px 30px;"|✔ Supports [https://www.easydcim.com EasyDCIM] v1.4.1 and Later | ||
| + | |} | ||
| + | {| | ||
| + | |style="padding: 0px 0px 0px 30px;"|✔ Supports PHP 5.4 Up To PHP 7 | ||
| + | |} | ||
| + | {| | ||
| + | |style="padding: 0px 0px 0px 30px;"|✔ Supports WHMCS Templates Five and Six | ||
| + | |} | ||
| + | {| | ||
| + | |style="padding: 0px 0px 30px 30px;"|✔ Supports WHMCS V6 and V7 | ||
| + | |} | ||
| + | |||
| + | =Installation and Configuration= | ||
| + | {| | ||
| + | |style="padding: 10px 0px 30px 15px;"|'''This tutorial will show you how to successfully install and configure EasyDCIM Colocation For WHMCS.'''<br/> | ||
| + | We will guide you step by step through the whole installation and configuration process. | ||
| + | |} | ||
| + | ==Installation== | ||
| + | {| | ||
| + | |style="padding: 10px 0px 20px 15px;"|'''1. Log in to our client area and download the module.''' | ||
| + | |} | ||
| + | {| | ||
| + | |style="padding: 0px 0px 20px 25px;"|[[File:EC1.png]] | ||
| + | |} | ||
| + | {| | ||
| + | |style="padding: 0px 0px 15px 15px;"|'''2. Extract the downloaded file into the main WHMCS directory.'''<br /> | ||
| + | The content of the package should look like this. | ||
| + | |} | ||
| + | {| | ||
| + | |style="padding: 0px 0px 30 25px;"|[[File:EC2.png]] | ||
| + | |} | ||
| + | |||
| + | |||
| + | ==Configuration of Server== | ||
| + | {| | ||
| + | |style="padding: 10px 0px 15px 15px;"|'''3. Now, we will show you how to configure a new product.'''<br/> | ||
| + | Go to '' 'Setup' → 'Products/Services' → 'Servers' '' and press the '' 'Add New Server' '' button. | ||
|} | |} | ||
{| | {| | ||
| Line 122: | Line 292: | ||
|} | |} | ||
{| | {| | ||
| − | |style="padding: 0px 0px 15px 15px;"|''' | + | |style="padding: 0px 0px 15px 15px;"|'''4. Next, choose '' 'EasyDCIM' '' from the '' 'Type' '' dropdown menu.<br/> |
| − | + | Fill in your server name, IP address, username and password, then press '' 'Save Changes'.''<br/> | |
| + | The password can be found in your EasyDCIM administrator user profile listed as '' 'API Key'.'' | ||
|} | |} | ||
{| | {| | ||
|style="padding: 0px 0px 20px 25px;"|[[File:EC4.png]] | |style="padding: 0px 0px 20px 25px;"|[[File:EC4.png]] | ||
|} | |} | ||
| − | |||
{| | {| | ||
| − | |style="padding: | + | |style="padding: 0px 0px 15px 15px;"|'''5. After configuring your server, you can check the connection.'''<br/> |
| − | + | In order to check the connection with an EasyDCIM server, edit the server configuration and press '' 'Test Connection' '' as shown on the screen below. | |
|} | |} | ||
{| | {| | ||
| − | |style="padding: 0px 0px 20px 25px;"|[[File: | + | |style="padding: 0px 0px 20px 25px;"|[[File:EC5.png]] |
|} | |} | ||
{| | {| | ||
| − | |style="padding: 0px 0px | + | |style="padding: 0px 0px 20px 15px;"|'''6. The next step is creating a server group, to do so, click on '' 'Create Server Group'.'' |
|} | |} | ||
{| | {| | ||
| − | |style="padding: 0px 0px 20px 25px;"|[[File: | + | |style="padding: 0px 0px 20px 25px;"|[[File:EC6.png]] |
|} | |} | ||
{| | {| | ||
| − | |style="padding: 0px 0px | + | |style="padding: 0px 0px 20px 15px;"|'''7. Enter the name, click on your previously created server, press '' 'Add' '' and '' 'Save Changes' afterwards.''''' |
|} | |} | ||
{| | {| | ||
| − | |style="padding: 0px 0px | + | |style="padding: 0px 0px 30px 25px;"|[[File:EC7.png]] |
|} | |} | ||
| + | |||
| + | ==Configuration of Product== | ||
{| | {| | ||
| − | |style="padding: 0px | + | |style="padding: 10px 0px 15px 15px;"|'''8. In order to create and configure a product, go to '' 'Setup' → 'Products/Services' → 'Products/Services'.'''''<br/> |
| + | Click on '' 'Create a New Group'.'' | ||
|} | |} | ||
{| | {| | ||
| − | |style="padding: 0px 0px 20px 25px;"|[[File: | + | |style="padding: 0px 0px 20px 25px;"|[[File:EC8.png]] |
|} | |} | ||
{| | {| | ||
| − | |style="padding: 0px 0px | + | |style="padding: 0px 0px 20px 15px;"|'''9. Enter the product group name and press '' 'Save Changes'.''''' |
|} | |} | ||
{| | {| | ||
| − | |style="padding: 0px 0px 20px 25px;"|[[File: | + | |style="padding: 0px 0px 20px 25px;"|[[File:EC9.png]] |
|} | |} | ||
{| | {| | ||
| − | |style="padding: 0px 0px 15px 15px;"|''' | + | |style="padding: 0px 0px 15px 15px;"|'''10. When you have a product group, you can assign your product to it.'''<br/> |
| − | + | To create a product, click on '' 'Create a New Product'.'' | |
|} | |} | ||
{| | {| | ||
| Line 168: | Line 341: | ||
|} | |} | ||
{| | {| | ||
| − | |style="padding: 0px 0px | + | |style="padding: 0px 0px 15px 15px;"|'''11. Next, choose your product group, enter your product name and then press '' 'Continue'.''''' |
|} | |} | ||
{| | {| | ||
| − | |style="padding: 0px 0px | + | |style="padding: 0px 0px 20px 25px;"|[[File:EC11.png]] |
|} | |} | ||
| − | |||
| − | |||
{| | {| | ||
| − | |style="padding: | + | |style="padding: 0px 0px 15px 15px;"|'''12. Now, go to the '' 'Module Settings' '' section, choose both '' 'EasyDCIM' '' and your previously created server group from dropdown menus.<br/> |
| − | + | Do not forget to click '' 'Save Changes'.''''' | |
|} | |} | ||
{| | {| | ||
| Line 183: | Line 354: | ||
|} | |} | ||
{| | {| | ||
| − | |style="padding: 0px 0px | + | |style="padding: 0px 0px 15px 15px;"|'''13. Before configuring the product, set up the EasyDCIM cron job which can be found here. |
|} | |} | ||
{| | {| | ||
| Line 189: | Line 360: | ||
|} | |} | ||
{| | {| | ||
| − | |style="padding: 0px 0px 20px 15px;"|''' | + | |style="padding: 0px 0px 20px 15px;"|'''14. The module configuration is partially non-mandatory. The server will be assigned basing on the defined configuration, matching only the filled out options. |
| + | '''Default Options:''' | ||
| + | *Model (required) - the EasyDCIM server model | ||
| + | *Location (required) - a desired server location | ||
| + | *OS Template - reinstall server with a chosen OS template before delivering it to client | ||
| + | *Bandwidth - define traffic limitation per server in a preferred monthly cycle | ||
| + | *Additional IP Addresses - the number of additional IP addresses assigned to a server | ||
| + | *HDD/SSD/RAM Size - a required amount of memory in specific parts (note: 1GB is equal to 1024 MB) | ||
| + | *CPU Cores - the number of CPU cores<br/> | ||
| + | '''Product Configuration''' | ||
| + | *Auto Accept - automatically run server matching, server will be provisioned in a few moments | ||
| + | *Require PDU - the provisioned server has to be connected to a PDU device | ||
| + | *Require Switch - the provisioned server has to be connected to a Switch device | ||
| + | *Debug Mode - use only when performing troubleshooting | ||
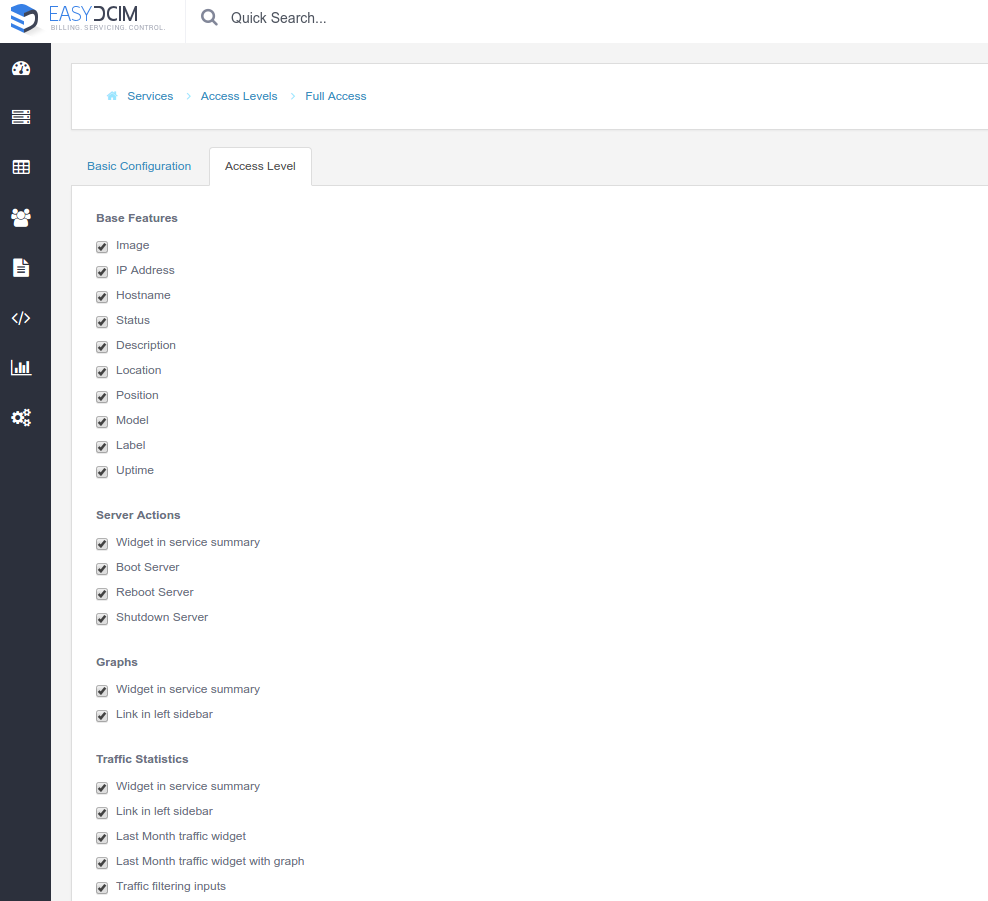
| + | *Service Access Level - configure the access level to control the features available to your clients. These levels and features are defined in your EasyDCIM at 'Clients' → 'Services' → '[[Media:ED_Easy_1.png|Access Level]]' tab.<br/> | ||
| + | '''Items Model'''<br/> | ||
| + | *Specify whether a chosen part has to be of a specific model, e.g. match the server using `Intel Xeon E3-1220 v5` CPU.<br/> | ||
| + | '''Client Area Features'''<br/> | ||
| + | *Define elements available to your customers in your WHMCS client area. | ||
| + | '''Service Actions'''<br/> | ||
| + | *Choose service actions to send chosen email notifications to selected administrators instead of performing provisioning actions immediately. <br />Leave the fields unchecked to perform WHMCS module commands in a default manner. | ||
| + | '''Service Notification'''<br/> | ||
| + | *Choose the email template that will be sent to the client when creation of the ordered server is finished. | ||
|} | |} | ||
{| | {| | ||
| Line 195: | Line 388: | ||
|} | |} | ||
{| | {| | ||
| − | |style="padding: 0px 0px | + | |style="padding: 0px 0px 15px 15px;"|'''15. Now, you can optionally generate the default configurable options to allow placing orders tailored to customer needs.<br/> |
| + | We recommend viewing and modifying them to fit your provisioning capabilities. You can find them under '' 'Setup' → 'Products/Services' → 'Configurable Options'.''<br/> | ||
| + | '' '''Note:''' Any configurable option will overwrite its counterpart from the product's 'Module Settings'.'' | ||
|} | |} | ||
{| | {| | ||
| Line 201: | Line 396: | ||
|} | |} | ||
{| | {| | ||
| − | |style="padding: 0px 0px | + | |style="padding: 0px 0px 15px 15px;"|'''16. Additionally, you can set up a percentile billing for additional traffic.'''<br /> |
| + | Go to the '' 'Other' '' tab, enable '' 'Overages Billing' ''. First, define the standard [https://docs.whmcs.com/Disk_Space_and_Bandwidth_Overage_Billing overages bandwidth billing] and then set the following percentile values: | ||
| + | *Soft Limit - bandwidth usage in Mbps, after which the customer will be additionally charged for the used transfer | ||
| + | *Cost - price per Mbps unit above the '' 'Soft Limit' '' value | ||
| + | E.g. If '' 'Soft Limit = 100' '' and '' 'Cost = 0.500' '' and the client exceed the bandwidth to '' '110 Mbps' '', it means that they will be additionally charged with ''$5 USD'' amount (''10 x 0.500''). <br /> | ||
| + | '' '''Note:''' The percentile billing required the standard overages bandwidth billing to be enabled. It will be also calculated during the execution of the [https://docs.whmcs.com/Crons#System_Cron WHMCS system cron]. | ||
|} | |} | ||
{| | {| | ||
| − | |style="padding: 0px 0px 30px 30px;"|[[File:EC16.png]] | + | |style="padding: 0px 0px 30px 25px;"|[[File:EC15_1.png]] |
| + | |} | ||
| + | |||
| + | ==Custom Fields== | ||
| + | {| | ||
| + | |style="padding: 10px 0px 15px 15px;"|'''Once the configuration of the module settings has been completed, the following custom fields will be created automatically.''' <br />'' '''Note:''' These fields will not be visible to clients by default.'' | ||
| + | *OrderID - the number used to link the product with EasyDCIM order number | ||
| + | *ServerID - the number used to link the product with EasyDCIM server ID | ||
| + | *bandwidthUsageFromRegistrationDate - if set to '' 'on' '', the billing cycle for transfer usage will be billed monthly starting from the date of product registration (e.g. from the 15th to the 15th of the following month). <br />Otherwise, usage charges will be calculated on the last day of each month as in [https://docs.whmcs.com/Disk_Space_and_Bandwidth_Overage_Billing default WHMCS cycle]. | ||
| + | *percentileUsage - the entire current usage, basing on which the value above the one specified previously in the percentile configuration will be calculated. | ||
| + | |} | ||
| + | {| | ||
| + | |style="padding: 0px 0px 30px 25px;"|[[File:EC15_2.png]] | ||
| + | |} | ||
| + | |||
| + | =Management= | ||
| + | {| | ||
| + | |style="padding: 10px 0px 30px 15px;"|'''In this section we will show you all the possibilities of EasyDCIM Colocation For WHMCS.'''<br/> | ||
| + | Our module allows you to offer and manage EasyDCIM servers right in your WHMCS system. | ||
| + | |} | ||
| + | ==Admin Area== | ||
| + | {| | ||
| + | |style="padding: 10px 0px 15px 15px;"| | ||
| + | As soon as you set up a server for a client, you can request various actions and view server details from WHMCS admin area.<br/> | ||
| + | '' The 'Log In To Panel' '' button allows you to immediately log in to the client's EasyDCIM control panel.<br/> | ||
| + | '' The 'Change Password' '' action alters the SSH access details to the client's server while '' 'Update Order Information' '' allows you to manually check if the server's matching order has been found and assigned. | ||
| + | |} | ||
| + | {| | ||
| + | |style="padding: 0px 0px 20px 25px;"|[[File:EC16.png]] | ||
| + | |} | ||
| + | {| | ||
| + | |style="padding: 0px 0px 20px 15px;"|Our module allows you to boot/reboot/shutdown server as well as view its details. | ||
| + | |} | ||
| + | {| | ||
| + | |style="padding: 0px 0px 20px 25px;"|[[File:EC17.png]] | ||
| + | |} | ||
| + | {| | ||
| + | |style="padding: 0px 0px 20px 15px;"|Below the mentioned functions, there are various usage graphs available at your disposal. | ||
| + | |} | ||
| + | {| | ||
| + | |style="padding: 0px 0px 30px 25px;"|[[File:EC18.png]] | ||
| + | |} | ||
| + | |||
| + | ==Client Area== | ||
| + | {| | ||
| + | |style="padding: 10px 0px 20px 15px;"|In the client area, your customers can view all details concerning their servers, manage their status remotely as well as log in to their EasyDCIM control panel with a single click. | ||
| + | |} | ||
| + | {| | ||
| + | |style="padding: 0px 0px 20px 25px;"|[[File:EC19.png]] | ||
| + | |} | ||
| + | {| | ||
| + | |style="padding: 0px 0px 20px 15px;"|Additionally, you can explore several usage graphs. | ||
| + | |} | ||
| + | {| | ||
| + | |style="padding: 0px 0px 20px 25px;"|[[File:EC20.png]] | ||
| + | |} | ||
| + | {| | ||
| + | |style="padding: 0px 0px 20px 15px;"|You can also view information about the traffic billing.<br /> | ||
| + | '' '''Note:''' Available time intervals depend on the date of the product registration. | ||
| + | |} | ||
| + | {| | ||
| + | |style="padding: 0px 0px 20px 25px;"|[[File:EC21.png]] | ||
| + | |} | ||
| + | {| | ||
| + | |style="padding: 0px 0px 20px 15px;"|As well as reinstall OS on your server. | ||
| + | |} | ||
| + | {| | ||
| + | |style="padding: 0px 0px 20px 25px;"|[[File:EC22.png]] | ||
| + | |} | ||
| + | {| | ||
| + | |style="padding: 0px 0px 20px 15px;"|Moreover, it is possible to control your reverse DNS. You can either edit the already existing records or create new ones. | ||
| + | |} | ||
| + | {| | ||
| + | |style="padding: 0px 0px 20px 25px;"|[[File:EC23.png]] | ||
| + | |} | ||
| + | {| | ||
| + | |style="padding: 0px 0px 20px 15px;"|To create a record, just fill in the necessary information. | ||
| + | |} | ||
| + | {| | ||
| + | |style="padding: 0px 0px 20px 25px;"|[[File:EC24.png]] | ||
| + | |} | ||
| + | {| | ||
| + | |style="padding: 0px 0px 20px 15px;"|Your newly created record will appear on the list. | ||
| + | |} | ||
| + | {| | ||
| + | |style="padding: 0px 0px 20px 25px;"|[[File:EC25.png]] | ||
| + | |} | ||
| + | {| | ||
| + | |style="padding: 0px 0px 20px 15px;"|If you are using ''Dell'' or ''SuperMicro'' servers you can also access the KVM console. | ||
| + | |} | ||
| + | {| | ||
| + | |style="padding: 0px 0px 30px 25px;"|[[File:EC26.png]] | ||
| + | |} | ||
| + | {| | ||
| + | |style="padding: 0px 0px 20px 15px;"|It will launch a ''Java'' applet that will automatically connect to your server.<br/> | ||
| + | '' '''Note:''' Your browser needs to have Java enabled with the correct permissions to make the console functioning.'' | ||
| + | |} | ||
| + | {| | ||
| + | |style="padding: 0px 0px 30px 25px;"|[[File:EC27.png]] | ||
| + | |} | ||
| + | |||
| + | =Tips= | ||
| + | {| | ||
| + | |style="padding: 10px 0px 5px 15px;"|1. Note that placing two identical orders may result in assigning servers with slightly different parameters. | ||
| + | It stems from the way EasyDCIM server matching works. It matches a server basing on the resources and models mentioned in the order, without considering other resources.<br /> | ||
| + | While it attempts to find a server matching the order completely, in case it fails, server that fulfills more requirements than others will be assigned.<br /> | ||
| + | More information about server provisioning flow can be found on [http://www.docs.easydcim.com/provisioning/flow/index.html EasyDCIM documentation page]. | ||
| + | |} | ||
| + | {| | ||
| + | |style="padding: 0px 0px 10px 15px;"|2. As this server supports the templates system, any changes made in the server's templates files will be saved after the upgrade process. | ||
| + | |} | ||
| + | {| | ||
| + | |style="padding: 0px 0px 30px 15px;"|3. Since the 1.3.0 version, the '' 'monthlyTrafficLimit|Monthly Traffic Limit' '' configurable option has been changed to '' 'Bandwidth|Bandwidth' ''. <br /> Remember to change it manually after updating the module. | ||
| + | |} | ||
| + | |||
| + | =Update Instructions= | ||
| + | {| | ||
| + | |style="padding: 10px 0px 30px 15px;"|Essential guidance through the process of updating the module is offered '''[https://www.docs.modulesgarden.com/How_To_Update_WHMCS_Module here]'''. | ||
| + | |} | ||
| + | |||
| + | =Common Problems= | ||
| + | {| | ||
| + | |style="padding: 10px 0px 30px 15px;"|'''1. When you have problems with connection, check whether your SELinux or firewall does not block ports.''' | ||
|} | |} | ||
Revision as of 12:24, 26 February 2018
Contents |
About EasyDCIM Colocation For WHMCS
| EasyDCIM Colocation For WHMCS has been designed to xxxxxxxxxxxxxxxxxxx. xxxxxxxxxxxxxxxxxxxxxxxxxxxxxxxxxxxxxxxxxxxxxxxxxxxxxxxxxxxx. |
- Admin Area Features:
| ✔ Create/Suspend/Unsuspend EasyDCIM Colocation Subscriptions |
| ✔ Create/Suspend/Unsuspend Addon Services |
| ✔ Change Package |
| ✔ Change Password |
- Client Area Features:
| ✔ Upgrade/Downgrade EasyDCIM Colocation Subscriptions |
| ✔ Change Password |
- Supported Services:
| ✔ EasyDCIM Colocation Education/Education E5 |
| ✔ EasyDCIM Colocation Business/Business Essentials/Business Premium |
| ✔ EasyDCIM Colocation ProPlus/Enterprise E1/E3/E5/K1 |
| ✔ Standalone Services: |
| ✔ Exchange Online |
| ✔ SharePoint Online |
| ✔ OneDrive For Business |
| ✔ Skype For Business Online |
| ✔ Office Applications |
| ✔ Project Portfolio Management |
| ✔ Yammer |
| ✔ Business Intelligence Service |
| ✔ Online Diagram Software |
| ✔ Information Rights Management |
- General Info:
| ✔ Requires Microsoft Partner Network |
| ✔ Requires Microsoft Cloud Solution Provider - Tier 1 |
| ✔ Supports PHP 5.4 Up To PHP 7 |
| ✔ Supports WHMCS Templates Five and Six |
| ✔ Supports WHMCS V6 and V7 |
About EasyDCIM Colocation For WHMCS
| EasyDCIM Colocation For WHMCS will allow you to xxxxxxxxxxxxxxxxxxxxx. xxxxxxxxxxxxxxxx |
- Admin Area Features:
| ✔ Create/Terminate/Suspend/Unsuspend Server |
| ✔ Boot/Reboot/Shutdown Server |
| ✔ Change Server SSH Access Details |
| ✔ View Server Details |
| ✔ View Server Resource Usage Graphs |
| ✔ Generate Default Configurable Options |
| ✔ Configure Server: |
| ✔ Server Model |
| ✔ Server Location |
| ✔ OS Template |
| ✔ Server Resources |
| ✔ Toggle Automatic Order Acceptance And Server Matching |
| ✔ Define Required Devices |
| ✔ Define Required Item Models: |
| ✔ HDD Model |
| ✔ SSD Model |
| ✔ RAM Model |
| ✔ CPU Model |
| ✔ Define Client Area Features |
| ✔ Choose OS Templates Available For Rebuilding |
| ✔ Choose OS Templates Available For Rebuilding |
| ✔ Control Service Actions And Email Notifications |
| ✔ Determine Monthly Interval Of Bandwidth Usage |
| ✔ Define Percentile Billing Of Bandwidth Overage |
| ✔ One Click Login To EasyDCIM: |
| ✔ User Control Panel |
| ✔ Admin Panel |
| ✔ Toggle Debug Mode |
- Client Area Features:
| ✔ Boot/Reboot/Shutdown Server |
| ✔ Receive Email Notification On Complete Server Creation |
| ✔ Change Server Hostname |
| ✔ Change Server SSH Password |
| ✔ View Server Details |
| ✔ Access KVM Console (Dell And SuperMicro Servers) |
| ✔ Rebuild Server OS Using OS Templates And Your Own Credentials |
| ✔ View Server Resource Usage Graphs |
| ✔ View Traffic Statistics |
| ✔ One Click Login To User Control Panel |
- Configurable Options:
| ✔ Server Model |
| ✔ Server Location |
| ✔ OS Template |
| ✔ Bandwidth |
| ✔ Additional IP Addresses |
| ✔ HDD Size |
| ✔ SSD Size |
| ✔ RAM Size |
| ✔ CPU Cores |
- General Info:
| ✔ Multi-Language Support |
| ✔ Supports EasyDCIM v1.4.1 and Later |
| ✔ Supports PHP 5.4 Up To PHP 7 |
| ✔ Supports WHMCS Templates Five and Six |
| ✔ Supports WHMCS V6 and V7 |
Installation and Configuration
| This tutorial will show you how to successfully install and configure EasyDCIM Colocation For WHMCS. We will guide you step by step through the whole installation and configuration process. |
Installation
| 1. Log in to our client area and download the module. |

|
| 2. Extract the downloaded file into the main WHMCS directory. The content of the package should look like this. |

|
Configuration of Server
| 3. Now, we will show you how to configure a new product. Go to 'Setup' → 'Products/Services' → 'Servers' and press the 'Add New Server' button. |

|
| 4. Next, choose 'EasyDCIM' from the 'Type' dropdown menu. Fill in your server name, IP address, username and password, then press 'Save Changes'. |

|
| 5. After configuring your server, you can check the connection. In order to check the connection with an EasyDCIM server, edit the server configuration and press 'Test Connection' as shown on the screen below. |

|
| 6. The next step is creating a server group, to do so, click on 'Create Server Group'. |

|
| 7. Enter the name, click on your previously created server, press 'Add' and 'Save Changes' afterwards. |

|
Configuration of Product
| 8. In order to create and configure a product, go to 'Setup' → 'Products/Services' → 'Products/Services'. Click on 'Create a New Group'. |

|
| 9. Enter the product group name and press 'Save Changes'. |

|
| 10. When you have a product group, you can assign your product to it. To create a product, click on 'Create a New Product'. |

|
| 11. Next, choose your product group, enter your product name and then press 'Continue'. |

|
| 12. Now, go to the 'Module Settings' section, choose both 'EasyDCIM' and your previously created server group from dropdown menus. Do not forget to click 'Save Changes'. |

|
| 13. Before configuring the product, set up the EasyDCIM cron job which can be found here. |

|
| 14. The module configuration is partially non-mandatory. The server will be assigned basing on the defined configuration, matching only the filled out options.
Default Options:
Product Configuration
Items Model
Client Area Features
Service Actions
Service Notification
|

|
| 15. Now, you can optionally generate the default configurable options to allow placing orders tailored to customer needs. We recommend viewing and modifying them to fit your provisioning capabilities. You can find them under 'Setup' → 'Products/Services' → 'Configurable Options'. |

|
| 16. Additionally, you can set up a percentile billing for additional traffic. Go to the 'Other' tab, enable 'Overages Billing' . First, define the standard overages bandwidth billing and then set the following percentile values:
E.g. If 'Soft Limit = 100' and 'Cost = 0.500' and the client exceed the bandwidth to '110 Mbps' , it means that they will be additionally charged with $5 USD amount (10 x 0.500). |
| File:EC15 1.png |
Custom Fields
| Once the configuration of the module settings has been completed, the following custom fields will be created automatically. Note: These fields will not be visible to clients by default.
|
| File:EC15 2.png |
Management
| In this section we will show you all the possibilities of EasyDCIM Colocation For WHMCS. Our module allows you to offer and manage EasyDCIM servers right in your WHMCS system. |
Admin Area
|
As soon as you set up a server for a client, you can request various actions and view server details from WHMCS admin area. |

|
| Our module allows you to boot/reboot/shutdown server as well as view its details. |

|
| Below the mentioned functions, there are various usage graphs available at your disposal. |

|
Client Area
| In the client area, your customers can view all details concerning their servers, manage their status remotely as well as log in to their EasyDCIM control panel with a single click. |

|
| Additionally, you can explore several usage graphs. |

|
| You can also view information about the traffic billing. Note: Available time intervals depend on the date of the product registration. |

|
| As well as reinstall OS on your server. |

|
| Moreover, it is possible to control your reverse DNS. You can either edit the already existing records or create new ones. |

|
| To create a record, just fill in the necessary information. |

|
| Your newly created record will appear on the list. |

|
| If you are using Dell or SuperMicro servers you can also access the KVM console. |

|
| It will launch a Java applet that will automatically connect to your server. Note: Your browser needs to have Java enabled with the correct permissions to make the console functioning. |

|
Tips
| 1. Note that placing two identical orders may result in assigning servers with slightly different parameters.
It stems from the way EasyDCIM server matching works. It matches a server basing on the resources and models mentioned in the order, without considering other resources. |
| 2. As this server supports the templates system, any changes made in the server's templates files will be saved after the upgrade process. |
| 3. Since the 1.3.0 version, the 'monthlyTrafficLimit|Monthly Traffic Limit' configurable option has been changed to 'Bandwidth|Bandwidth' . Remember to change it manually after updating the module. |
Update Instructions
| Essential guidance through the process of updating the module is offered here. |
Common Problems
| 1. When you have problems with connection, check whether your SELinux or firewall does not block ports. |
Configuration and Management
| Configuration and management of EasyDCIM Colocation For WHMCS is very intuitive. Read the below sections to see how easy it is. |
Basic Configuration
| Let's start the module configuration by choosing 'Office365' from 'Module Name' and previously created 'Server Group' . |
|
|
|
Now, choose 'Country'. that you will offer your EasyDCIM Colocation services from. |
|
|
| Then, go to the 'Custom Fields' tab and add two new text box fields: userid|User ID and orderid|Order ID as shown on the following screen. |
|
|
Additional Services
|
In order to offer additional services for a product plan you need to create a new addon first. |
|
|
| Enter a name for the addon, choose the addon to be visible in order and configure the rest of the desired options. |
|
|
| Go to the 'Applicable Products' tab and select the product that you want to offer this addon for. Then press 'Save Changes' . |
|
|
| Go back to your product and connect the created addon with one of the available additional services in the 'Module Settings' tab. |
|
|
| 'Save Changes' . Remember that you can add more addons for other services. |
Order
| Once the product configuration is complete, clients will be able to order the selected subscription and addons. |
| File:EC20 2.png |
Client Area
|
Currently, the module does not support any additional features in the client area. |
|
|
Admin Area
| Let's check your new product in the admin area product page. After a successful creation it should look like on the screen below. |
| File:EC19.1.png |
| The 'Username' and 'Password' are used to sign up to EasyDCIM Colocation user panel. |
|
|
|
The 'User ID' , 'Order ID' and 'Subscription ID' are custom fields used to connect the product to the created subscription in your Microsoft Partner Center. |
|
|
Suspend/Terminate
|
Due to API limitations, ordered subscriptions can only be suspended or unsuspended. For this reason, the 'Terminate' command will work in the same way as the 'Suspend' one. |
| File:EC30.png |
|
In case of product suspension, all addons that belong to the product will also be suspended. |
| File:EC31.png |
Change Password
|
'Change Password' will change the password for all services assigned to the user. To change it for a new one you need to:
|
| File:EC34.png |
Note that the password must also meet the following requirements:
|
Addons
| Information about addons will depend on their status and will be shown in the 'Admin Notes' field. By default, the 'Subscription ID' service should be provided. |
| File:EC28.png |
| For example, if the addon is suspended the information will also appear in this field. |
| File:EC29.png |
Tips
| 1. For more information on how the Microsoft Partner program works, see here. |
Update Instructions
| Essential guidance through the process of updating the module is offered here. Keep in mind there is a quick and easy option in our client area that will let you upgrade the license of your module to an open source version at any time - and at a lower price! |
Common Problems
| 1. When you have problems with connection, make sure that SELinux or firewall does not block ports. |