|
|
| Line 108: |
Line 108: |
| | |style="padding: 10px 0px 30px 15px;"|'''blabla''' | | |style="padding: 10px 0px 30px 15px;"|'''blabla''' |
| | |} | | |} |
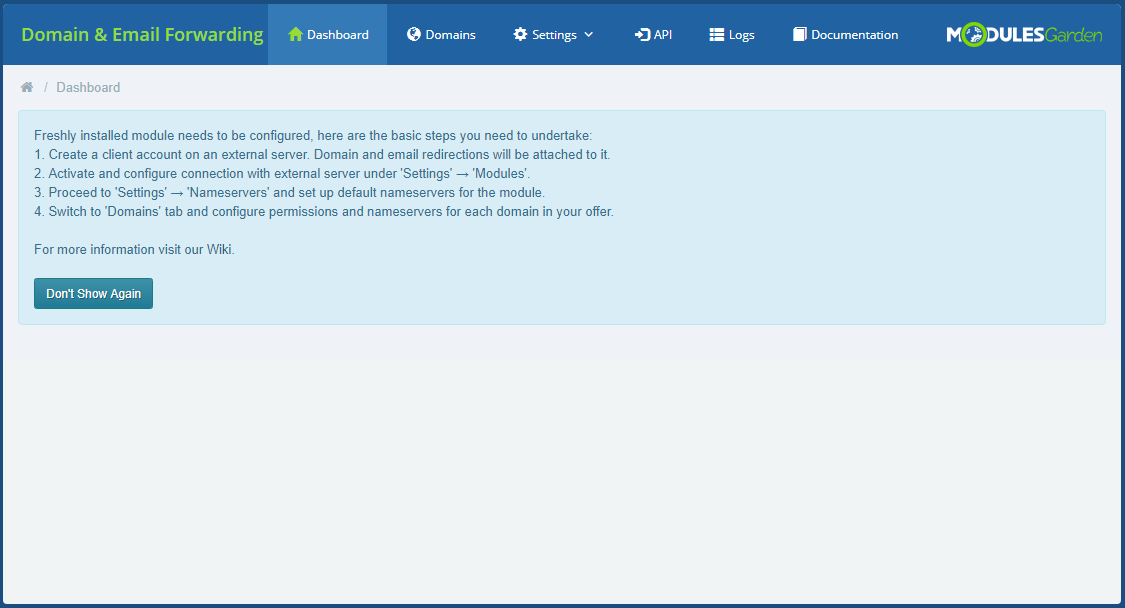
| − | | + | ==Dashboard== |
| | + | 1. Create a client account on an external server, domain and email redirections will be attached to it.<br/> |
| | + | 2. Activate and configure connection with external server under 'Settings' → 'Modules'.<br/> |
| | + | 3. Proceed to 'Settings' → 'Nameservers' and set up default nameservers for the module.<br/> |
| | + | 4. Switch to 'Domains' tab and configure permissions and nameservers for each domain in your offer.<br/> |
| | + | ==Settings== |
| | + | ===Modules=== |
| | + | ===General=== |
| | ==Logs== | | ==Logs== |
| | {| | | {| |
Revision as of 12:10, 15 July 2016
| Domain and Email Forwarding For WHMCS is a module ....
|
Installation
This tutorial will show you how to successfully install and configure Domain And Email Forwarding For WHMCS.
We will guide you step by step through the whole installation and configuration process.
|
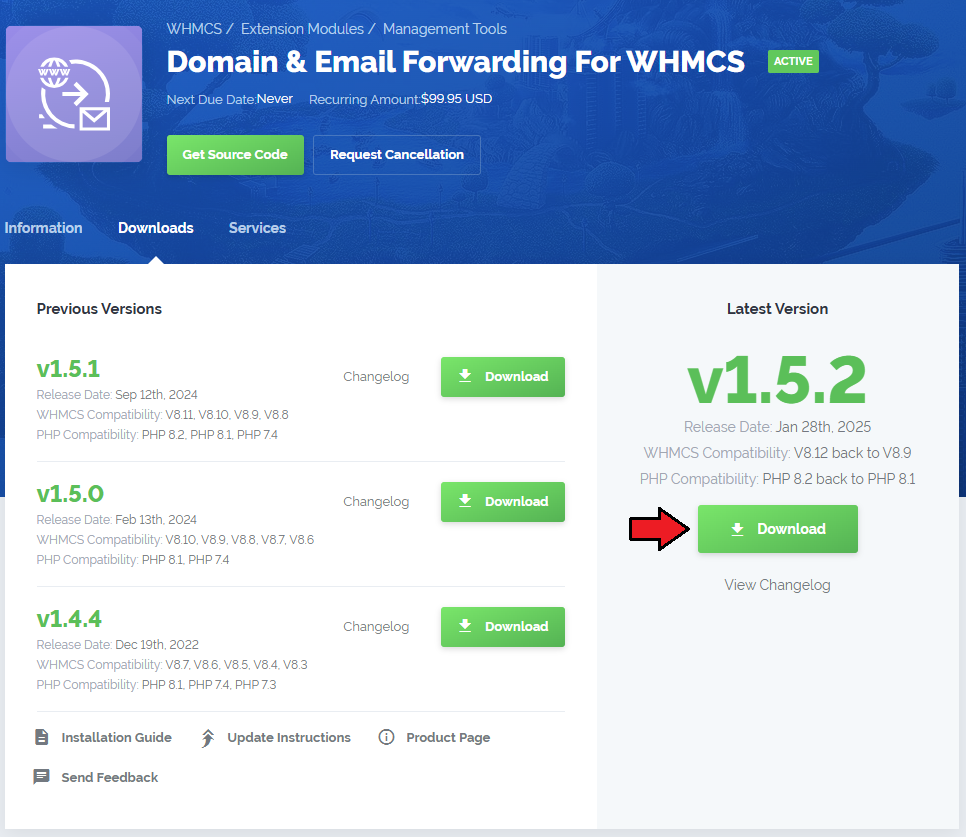
| 1. Log in to your client area and download Domain And Email Forwarding For WHMCS.
|
2. Upload and extract the module into the main WHMCS directory.
Files in your WHMCS directory should look like on the following screen.
|
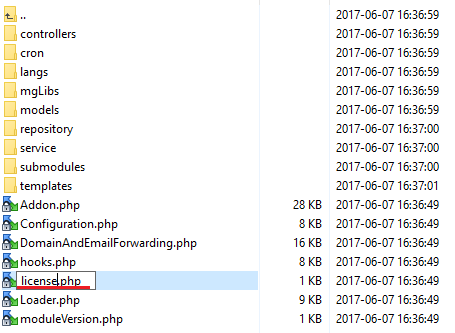
3. When you install Domain And Email Forwarding for the first time you have to rename 'license_RENAME.php' file.
File is located in 'modules/addons/DomainAndEamilForwarding/license_RENAME.php'. Rename it from 'license_RENAME.php' to 'license.php'.
|
4. In order to configure your license key, you have to edit the previously renamed 'license.php' file.
Enter your license key between quotation marks as presented on the following screen. You can find your license key in your client area → 'My Products'.
|
| 5. Set permissions to file: 'modules/addons/DomainAndEamilForwarding/templates/clientarea/assets/popup' to '0777'.
|
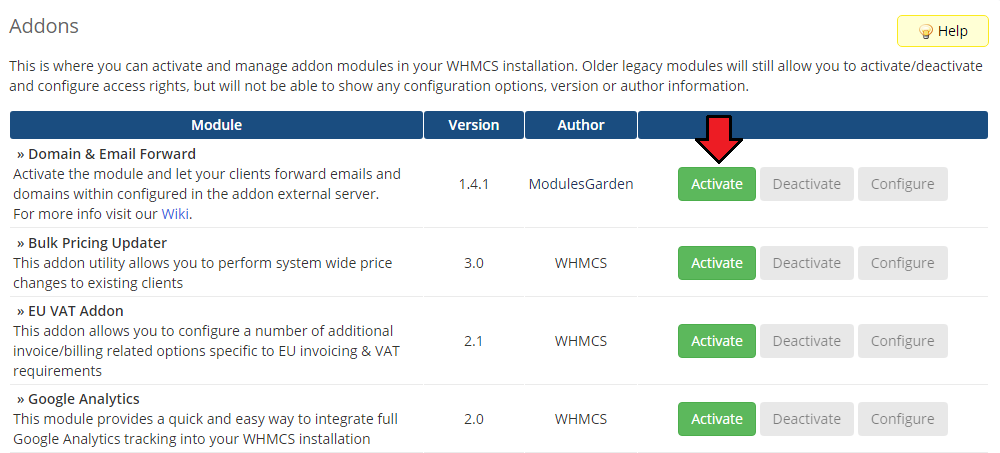
6. Now you have to activate the module in your WHMCS system.
Log in to your WHMCS admin area. Go to 'Setup' → 'Addon Modules'. Afterwards, find 'Domain And Email Forward' and press 'Activate' button.
|
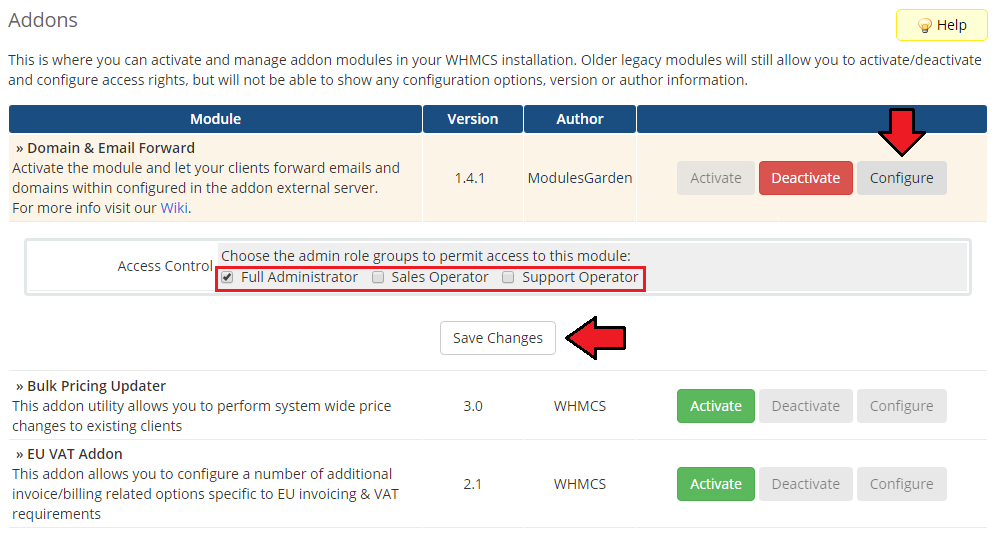
7. In the next step you need to permit access to this module.
To do so, click on 'Configure' button, tick 'Full Administrator' and press 'Save Changes'.
|
8. You have just successfully installed Client Area Popup For WHMCS!
You can access your module under 'Addons' → 'Domain And Email Forward'.
|
Configuration and Management
Dashboard
1. Create a client account on an external server, domain and email redirections will be attached to it.
2. Activate and configure connection with external server under 'Settings' → 'Modules'.
3. Proceed to 'Settings' → 'Nameservers' and set up default nameservers for the module.
4. Switch to 'Domains' tab and configure permissions and nameservers for each domain in your offer.
Settings
Modules
General
Logs
Under 'Logs' tab you will find all logs entries.
There are details on any successful or failed action in the module. Check it out any time you need to find some details on the actions taken.
Press 'Delete All Entries ' to clear all logs ar delete single ones.
|
Documentation
| The last position in your navigation menu, when pressed, redirects to the article you are currently reading.
|
Tips
Common Problems
| 1. When you have problems with connection, check whether your SELinux or firewall does not block ports.
|
