DigitalOcean Droplets For WHMCS
Contents |
About DigitalOcean Droplets For WHMCS
| DigitalOcean Droplets For WHMCS XXXXXXXXXXXXXXXXXXXXXXXXXXXXXXXXXXXXXXXXXXXXXXXX. XXXXXXXXXXXXXXXXXXXXXXXXXXXXXXXXXXXXXXXXXXXXXXXX. |
- Admin Area Features:
| ✔ Create/Suspend/Unsuspend/Terminate Server |
| ✔ Change Package - Supports Configurable Options |
| ✔ Change Password - Xen Virtualization Only |
| ✔ Rescue/Unrescue Server |
| ✔ View Server Status And Details |
| ✔ View Interface Details |
| ✔ View List Of Scheduled Tasks |
| ✔ Configure Client Area Features Per Product |
| ✔ Define Backup Quantity Limit |
| ✔ Set Security Groups |
| ✔ Enable Backups Routing |
| ✔ Toggle VM Protection |
| ✔ Execute Custom Scripts On Boot |
| ✔ Choose Welcome Email For VM Creation |
| ✔ Run Extended Connection Test |
- Client Area Features:
| ✔ View Server Status And Details |
| ✔ Start/Stop/Pause/Unpause/Resume/Rebuild Server |
| ✔ Reboot Server - Soft/Hard |
| ✔ Reset Network |
| ✔ Rescue/Unrescue Server |
| ✔ Toggle VM Protection From WHMCS Termination And Rebuilding |
| ✔ Change Password For Xen Virtualization |
| ✔ Access noVNC VNC, RDP, SPICE Or Serial Console |
| ✔ Create/Restore/Delete Backups |
| ✔ View/Add/Delete Firewall Rules |
| ✔ Download Public & Private SSH Keys |
| ✔ View List Of Scheduled Tasks |
| ✔ View Volumes Information |
| ✔ Receive Email Notification After VM Creation |
- Configurable Options:
| ✔ Flavor |
| ✔ VM Image |
| ✔ IP Addresses |
| ✔ Backups Files Limit |
| ✔ Disk |
| ✔ RAM |
| ✔ VCPUs |
| ✔ Region |
| ✔ Custom Script Files |
- Required Components:
| ✔ Keystone |
| ✔ Glance |
| ✔ Nova |
| ✔ Neutron |
| ✔ Ceilometer (Required For Advanced Billing For WHMCS) |
- General Info:
| ✔ Automated Generation Of SSH Keys - Public SSH Key Is Injected To VM Automatically |
| ✔ Integrated With Advanced Billing For WHMCS v3.2.2 And Later - Actual Server Resource Usage Billing (read more) |
| ✔ Integrated With Server Allocator For WHMCS - Automatic Assignment Of Specified Servers To Products (read more) |
| ✔ Multi-Language Support |
| ✔ Supports Cloud-Init Scripts |
| ✔ Supports DigitalOcean Queens and Previous |
| ✔ Supports DigitalOcean Gnocchi |
| ✔ Supports PHP 5.6 Up To PHP 7.2 |
| ✔ Supports WHMCS Template Six |
| ✔ Supports WHMCS V7 |
Installation and Configuration
| This tutorial will show you how to successfully install and configure DigitalOcean Droplets For WHMCS. We will guide you step by step through the whole installation and configuration process. |
Installation
| 1. Log in to our client area and download the module. |

|
| 2. In the downloaded file you will find two packages that support different PHP versions. As presented on the screen below, the first one is dedicated to PHP 5.6 up to PHP 7.0, while the second one is aimed at PHP 7.1 up to PHP 7.2. It does not apply to open source versions. Note: You can check the current PHP version in your WHMCS. To do so, proceed to 'Utilities' › 'System' › 'PHP Info'. |

|
| 3. Extract the downloaded file and choose the one with the right PHP version. Upload and extract the PHP file into the main WHMCS directory. The content of PHP version files should look like this. |
| 4. When you install DigitalOcean Droplets For WHMCS for the first time you have to rename 'license_RENAME.php' file. File is located in 'modules/servers/DigitalOceanDroplets/license_RENAME.php' . Rename it from 'license_RENAME.php' to 'license.php' . |

|
| 5. In order to configure your license key, you have to edit the previously renamed 'license.php' file. Enter your license key between quotation marks as presented on the following screen. |

|
| 6. Now, set up the 'storage' folder as recursively writable. This folder is available at '/your_whmcs/modules/servers/DigitalOceanDroplets/' . |

|
7. The last step is setting up a two cron jobs.
|
Configuration of Server
| 8. Now, we will show you how to configure a new product. Go to the 'Setup' → 'Products/Services' → 'Servers' and press 'Add New Server' . |

|
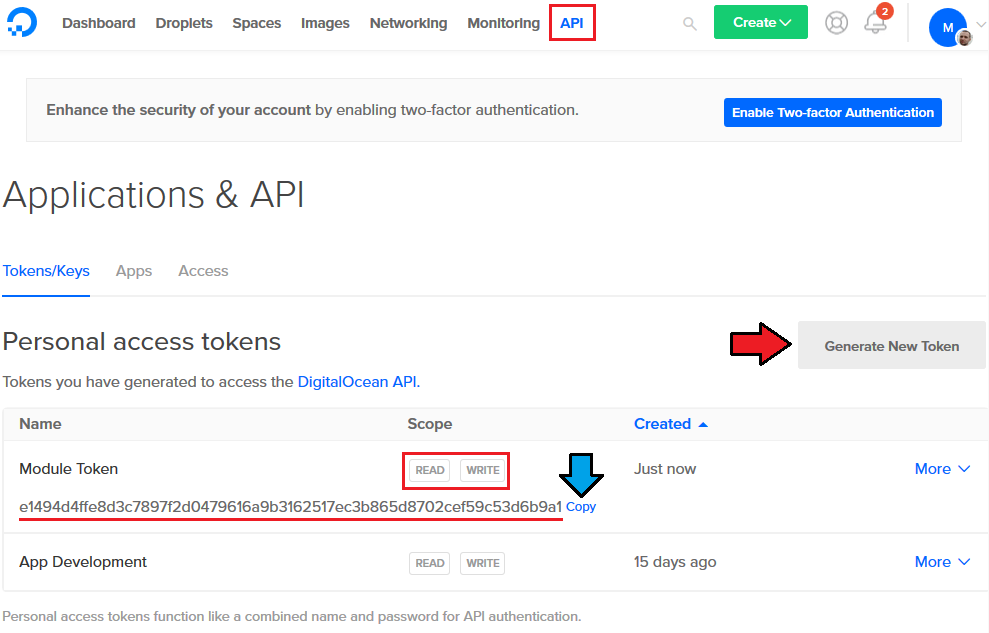
| 9. Next, enter your server name and select 'DigitalOcean Droplets' from type. Now in the 'Password' field provide your DigitalOcean API token and check the connection. If successful save changes. Note: To find your API token log in to your DigitalOcean panel and go to the API section where you can generate a new one. |

|
| 10. It is time to create a server group. To do so, click on 'Create Server Group' . |

|
| 11. Enter a name, click on your previously created server, press 'Add' and afterward 'Save Changes' . |

|
SSH Keys
| In the 'Custom Fields' tab you will find a 'SSH Public Key' field which is shown to clients on the order form by default. This field is used optionally for inserting by the clients their public key, in order to be able to log in to Droplet without the need to use a password.
If you would like to limit the possibility of entering the key e.g. only to 'ssh-rsa' format, then you can also use the regular expression such as /^(ssh-rsa)\s.*/ in the validation field. Important: During the tests we found out that some OS images, such as 'CoreOS', 'CentOS' or 'FreeBSD', may require the SSH key to create a Droplet. |

|
Configuration of Product
| 12. In order to create and configure a product, go to the 'Setup' → 'Products/Services' → 'Products/Services' . Click on 'Create a New Group' . |

|
| 13. Enter product group name and press 'Save Changes' . |

|
| 14. When you have a product group, you can create your product. To create a product click on 'Create a New Product' . |

|
| 15. Afterward, choose your product group and type from the dropdown menus, enter your product name and press 'Continue'. |

|
| 16. Now, go to the 'Module Settings' section, choose both 'DigitalOceanDroplets' and your previously created server group from the dropdown menus. Module should automatically save and reload settings. If not, click on 'Save Changes' manually. |

|
| 17. Now you can start configuring the settings of the Droplet you sell. In a similar way as when creating virtual machine in your DigitalOcean panel, you can configure such options as:
Important: Before providing any extra features to your WHMCS clients, remember to familiarize yourself with the additional costs that may be incurred on your DigitalOcean account. |

|
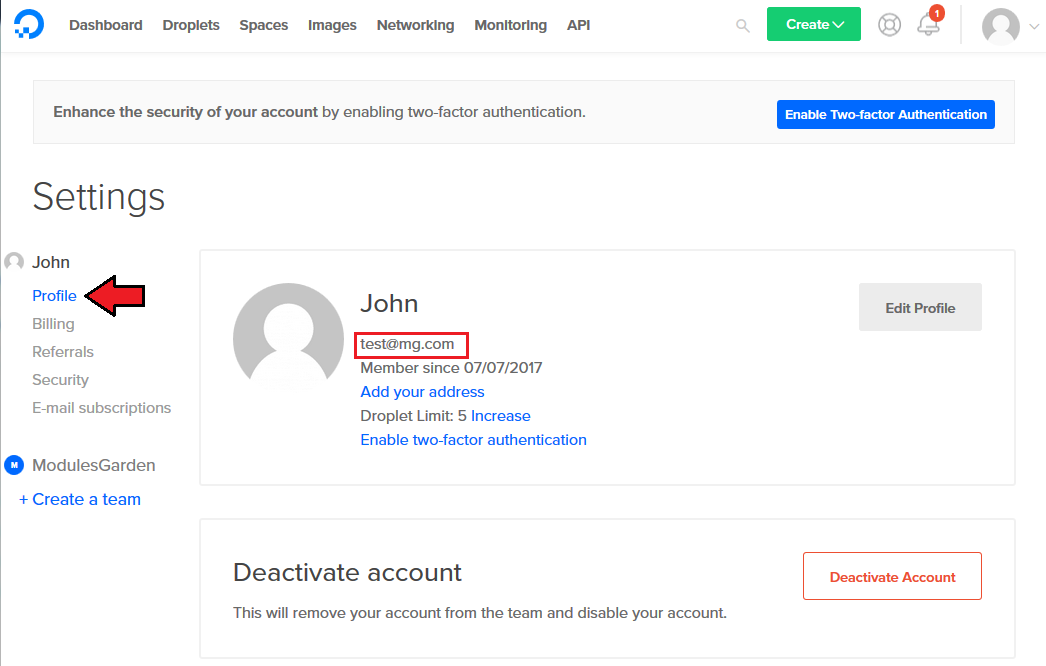
| 18. Afterward, set up incoming mail configuration. Due to API limitations all email massages with Droplets credentials can only be send to your DigitalOcean profile email address set in the panel here. Note: Even the module will accordingly filter the received messages from your mailbox, we recommend that you should use a separate mailbox for your main DigitalOcean profile account to avoid any issues with non DigitalOcean content. After setting up the dedicated mailbox, provide its valid creadentials below and test whether the connection is established correctly. |

|
| After successfull connection remember to save your module settings. From now the cron set at the last point of the module's installation should periodically check that mailbox for DigitalOcean messages. If any new received it will be then convert to your email template and send to corresponding client. These default email templates for product creation and password reset can be selected below. To edit their content, go to your WHMCS email templates section and edit them according to your needs. |

|
| 19. At the end of the configuration you can decide whether you want to generate configurable options for the product. The configurable options can be used by your clients to select each Droplet parameters individually during order placement. |

|
| If you decide to use configurable options press on the create button and select which options you want to generate. Note that the configuration for disabled options, will still be taken from the main product's configuration. More information about the how to use configuration options can be found here or in the official WHMCS documentation. |

|
Management
Admin Area
| DigitalOcean Droplets For WHMCS allows you to monitor and manage your customers Droplets via the admin area in your WHMCS system. These include features like:
|

|
|

|
Ordering
| Owing to configurable options, you are able to offer a product which your clients can tailor according to their needs. Additionally, you are able to set up pricing for each configurable option, which make your offer even more competitive. Based on the custom SSH key field configuration, you might also insert your public SSH key, which will allow you to log in to Droplet without the need to use the password. After the order placement and the successfully VM creation, the Droplet credentials will be sent to the client's email address according to the set cron execution intervals. |

|
Client Area
| Client area interface of DigitalOcean Droplets should look like the one on the screen below. As you can see, the control panel contains useful options needed for managing a Droplet. Module allows your customers to easily power on/off, shutdown, reboot and reset password of their servers through pressing the specific button. |

|
Rebuild
| The rebuild feature allows your clients to change a server's OS image. Press the 'Rebuild' button as shown on the following screen in order to move to reinstall your server to the chosen image and confirm your choice. |

|
Snapshots
| Use a snapshots to save a current state contents of the virtual machine memory. You may use them later to restore the VM's settings. |

|
| Press the 'Create New Snapshot' button and enter the uniqe snapshot name. Please note that the spaces in the snapshot name will be ignored by the API and saved as a single string name anyway . |

|
| Creating a snapshot may take a while, so it won't appear on the list right away. Its progression status can be tracked in Tasks History or by refreshing the snapshots list manually. |
Backups
| If the automatic backups have been enabled for product's Droplets then your client will be able to restore them from this section. Please note that DigitalOcean uses a snapshot-based backup system. |

|
Task History
| Task history allows you to view all tasks performed on your VM with the current progression status. Please note that only actions performed from the WHMCS level are logged here. |

|
Tips
| 1. You can use the DNS Manager For WHMCS module to manage your Droplet DNS records. It already has built-in support for DigitalOcean DNS server. |
| 2. xxxxxxxxxxxxxxxxxxxxxx |
Update Instructions
| Essential guidance through the process of updating the module is offered here. Keep in mind there is a quick and easy option in our client area that will let you upgrade the license of your module to an open source version at any time - and at a lower price! |
Common Problems
| 1. When you have problems with connection, check whether your SELinux or firewall does not block ports. |
| 2. Some OS distributions may cause the 'Action did not complete' error in logs when resetting the Droplet password. In such cases, we recommend to use SSH keys. |