CPanel Manage2 For WHMCS
From ModulesGarden Wiki
(Difference between revisions)
|
|
| Line 59: |
Line 59: |
| | |} | | |} |
| | {| | | {| |
| − | |style="padding: 0px 0px 20px 15px;"|Enter your licence key between quotation marks as presented on the following screen. You can find your license key at your clientarea -> '' 'My Products' ''. | + | |style="padding: 0px 0px 20px 15px;"|Enter your licence key between quotation marks as presented on the following screen. You can find your license key at your clientarea → '' 'My Products' ''. |
| | |} | | |} |
| | {| | | {| |
| Line 68: |
Line 68: |
| | |} | | |} |
| | {| | | {| |
| − | |style="padding: 0px 0px 20px 15px;"|To do so log in into your WHMCS. Now press '' 'Setup' '' -> '' 'Products/Services' '' -> '' 'Servers' '' (or '' 'Setup' '' -> '' 'Servers' '' in WHMCS v4.x). Afterwards press '' 'Add New Server' ''. | + | |style="padding: 0px 0px 20px 15px;"|To do so log in into your WHMCS. Now press '' 'Setup' '' → '' 'Products/Services' '' → '' 'Servers' '' (or '' 'Setup' '' → '' 'Servers' '' in WHMCS v4.x). Afterwards press '' 'Add New Server' ''. |
| | |} | | |} |
| | {| | | {| |
| Line 98: |
Line 98: |
| | |} | | |} |
| | {| | | {| |
| − | |style="padding: 0px 0px 0px 15px;"|'''9. In order to create and configure product click on '' 'Setup' '' -> '' 'Products/Services' '' -> '' 'Products/Services' ''.''' | + | |style="padding: 0px 0px 0px 15px;"|'''9. In order to create and configure product click on '' 'Setup' '' → '' 'Products/Services' '' → '' 'Products/Services' ''.''' |
| | |} | | |} |
| | {| | | {| |
Revision as of 14:05, 25 October 2012
About cPanel Manage2 For WHMCS
ModulesGarden cPanel Manage2 for WHMCS is an addon module which was created in order to handle the cPanel Licenses provisioning for the WHMCS system.
It will help you provide licenses to your clients automatically in WHMCS. Module is easy to setup and provides complex functionality for your clients.
|
- cPanel Manage2 functionality:
| ✔ Suspend/Unsuspend License
|
| ✔ WHMCS v4 and v5 Compatibility
|
Installation & Configuration
In this tutorial we will show you how to quickly install and configure cPanel Manage2 For WHMCS.
We will guide you step by step through the whole installation process.
|
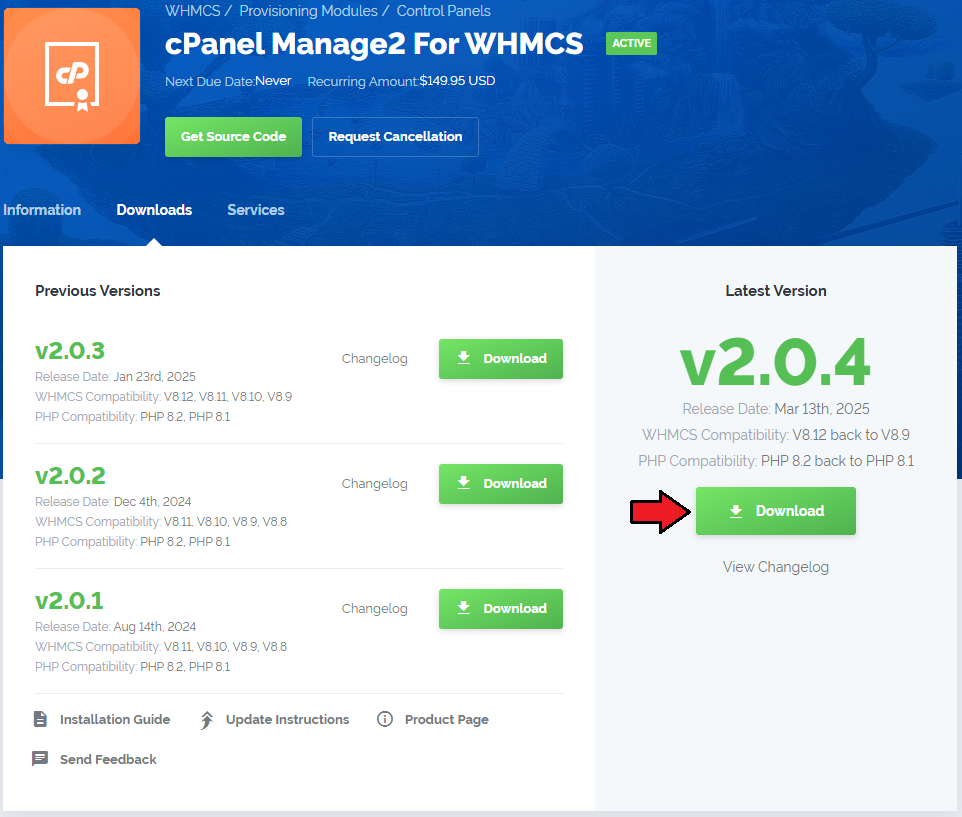
| 1. Login to your clientarea and download cPanel Manage2.
|
| 2. Upload and extract the module into 'your_main_whmcs_directory/modules/servers/' .
|
| Files in your WHMCS directory should look like this.
|
| 3. When you install cPanel Manage2 for the first time you have to rename 'license_RENAME.php' file.
|
| File is located at 'modules/servers/cpanel_managetwo/license_RENAME.php' . Rename it from 'license_RENAME.php' to 'license.php' .
|
| 4. In order to configure your license key you have to edit a previously renamed 'license.php' file.
|
| Enter your licence key between quotation marks as presented on the following screen. You can find your license key at your clientarea → 'My Products' .
|
| 5. Good job! You have just successfully installed cPanel Manage2 For WHMCS! Now we will show you how to configure a new product.
|
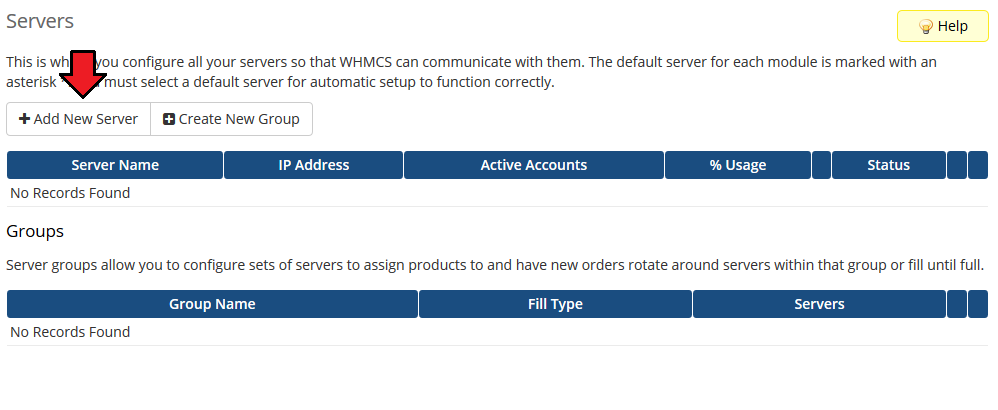
| To do so log in into your WHMCS. Now press 'Setup' → 'Products/Services' → 'Servers' (or 'Setup' → 'Servers' in WHMCS v4.x). Afterwards press 'Add New Server' .
|
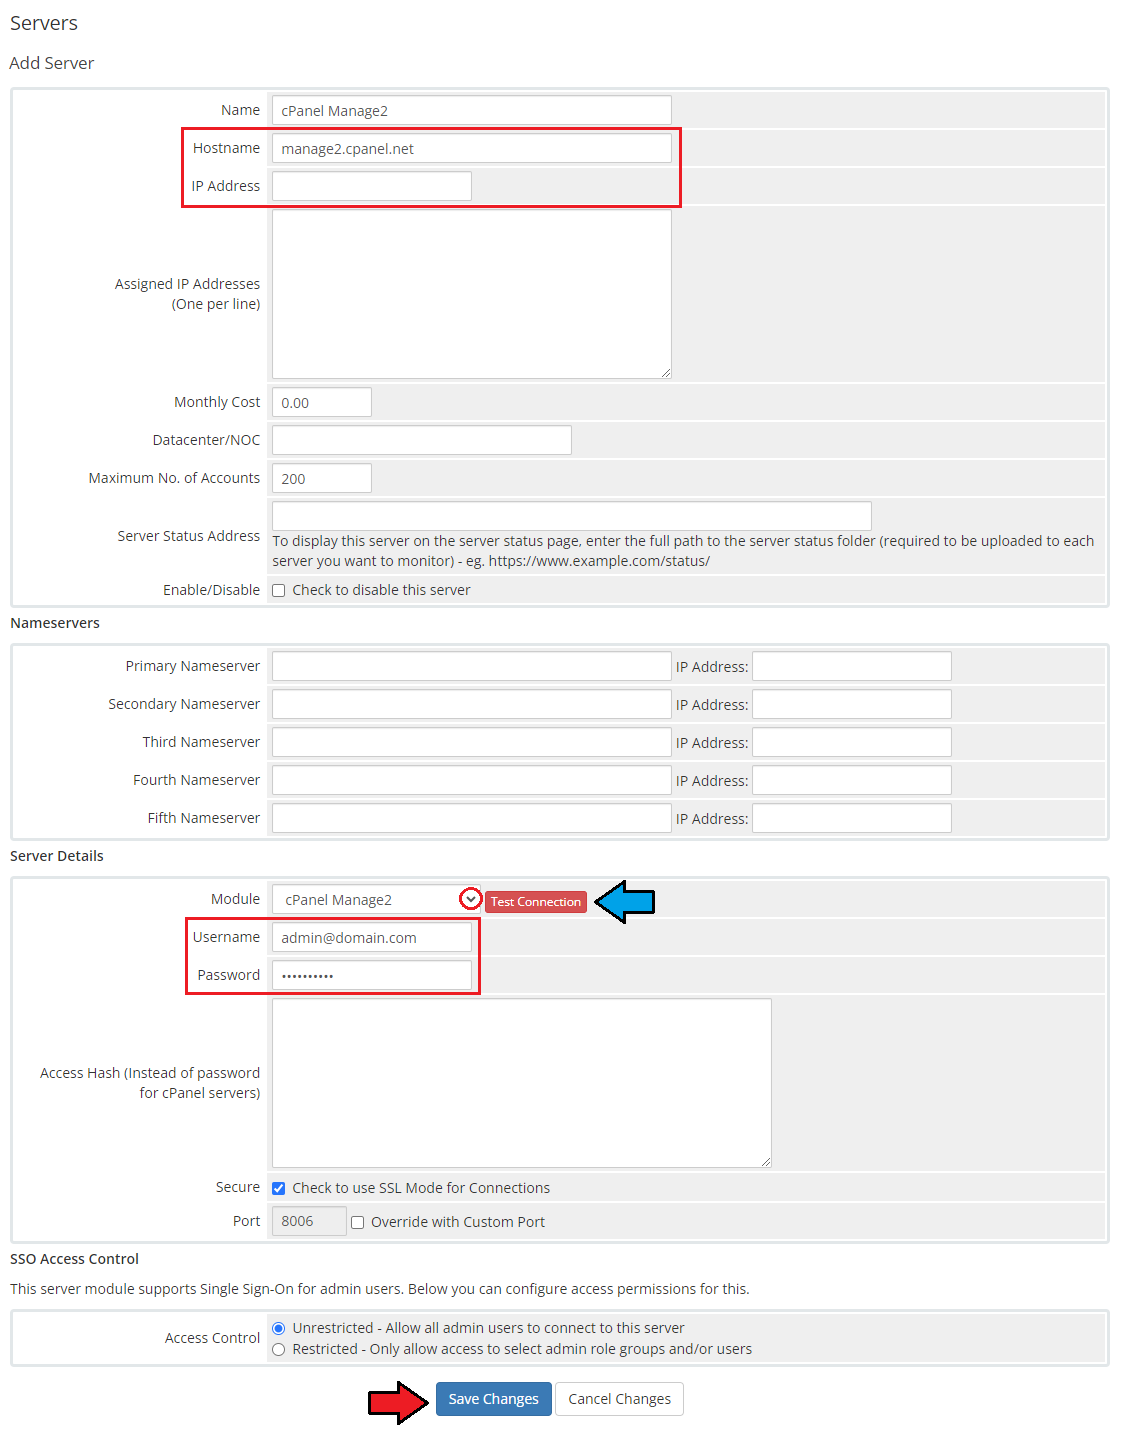
| 6. Next, enter your server name, IP adress, username and password. Choose 'Cpanel_managetwo' from a dropdown menu and press 'Save Changes' .
|
| Here you can also provide other server details like nameservers or maximum number of accounts.
|
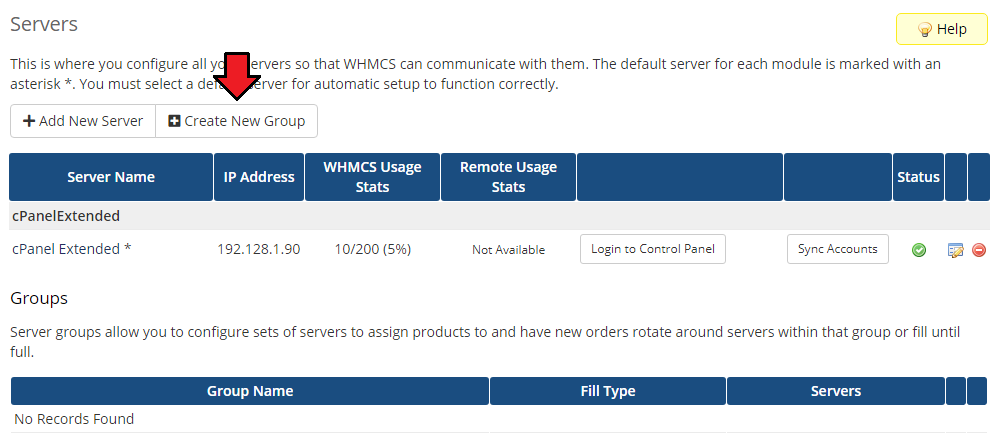
| 7. After you configure your server correctly, you will see a following screen.
|
| Now you need to create a new group for your server. For that purpose press 'Create New Group' .
|
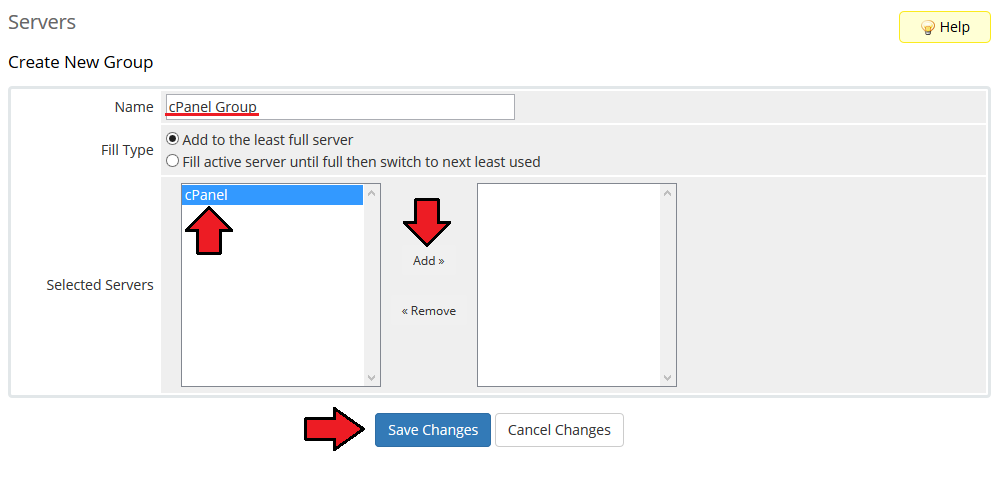
| 8. Enter name, click on your previously created server, press 'Add' then press 'Save Changes' .
|
| 9. In order to create and configure product click on 'Setup' → 'Products/Services' → 'Products/Services' .
|
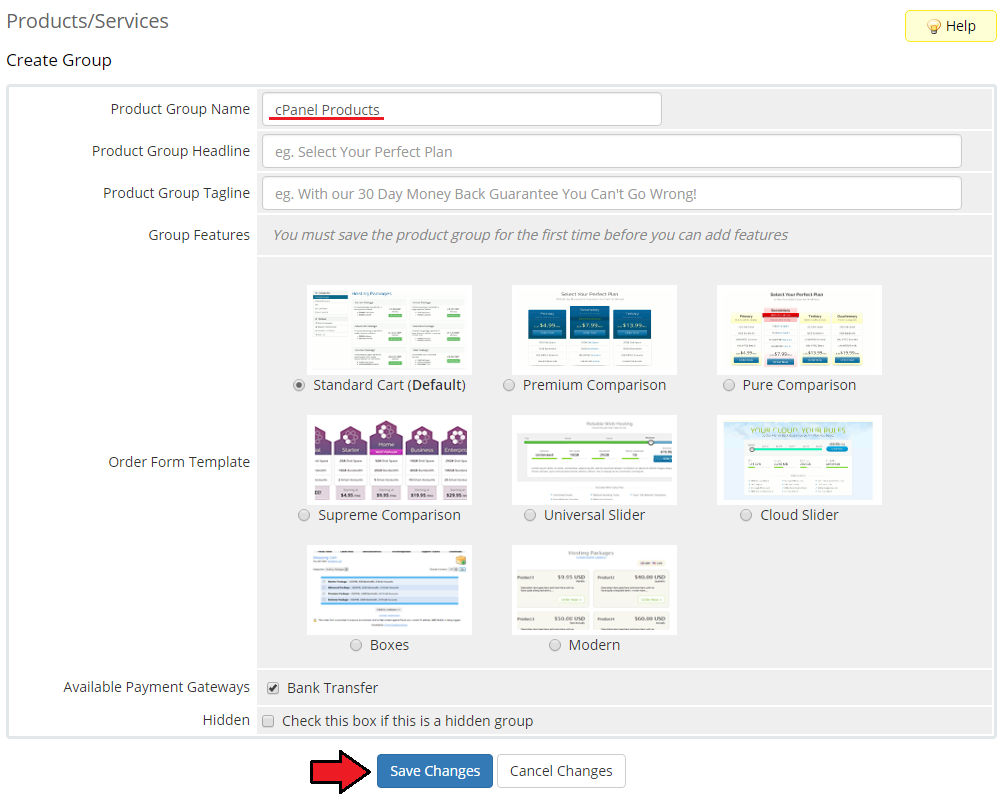
| If you don't have a product group, click on 'Create a New Group' . If you do, simply go to step 11.
|
| 10. Enter product group name and press 'Create Group' .
|
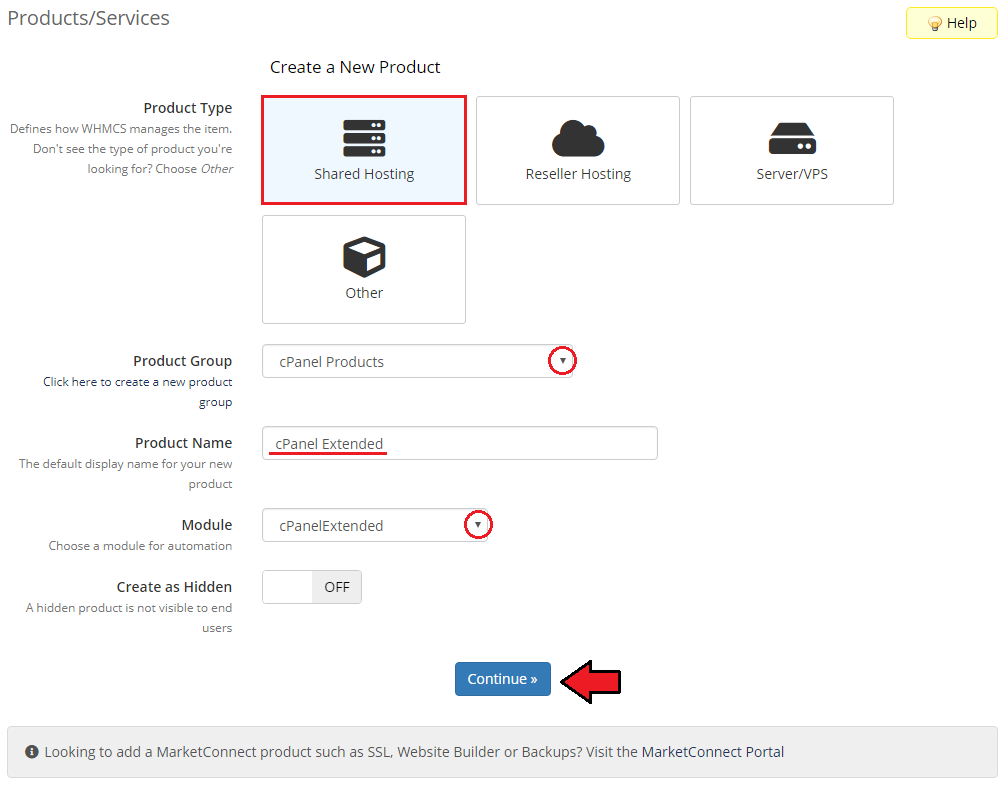
| 11. When you have a product group, you can create your product and assign it with cPanel Manage2. If you already have a product, go to step 13.
|
| To create a product click on 'Create a New Product' .
|
| 12. Afterwards choose your product type and product group from a dropdown menus, enter your product name and press 'Continue' .
|
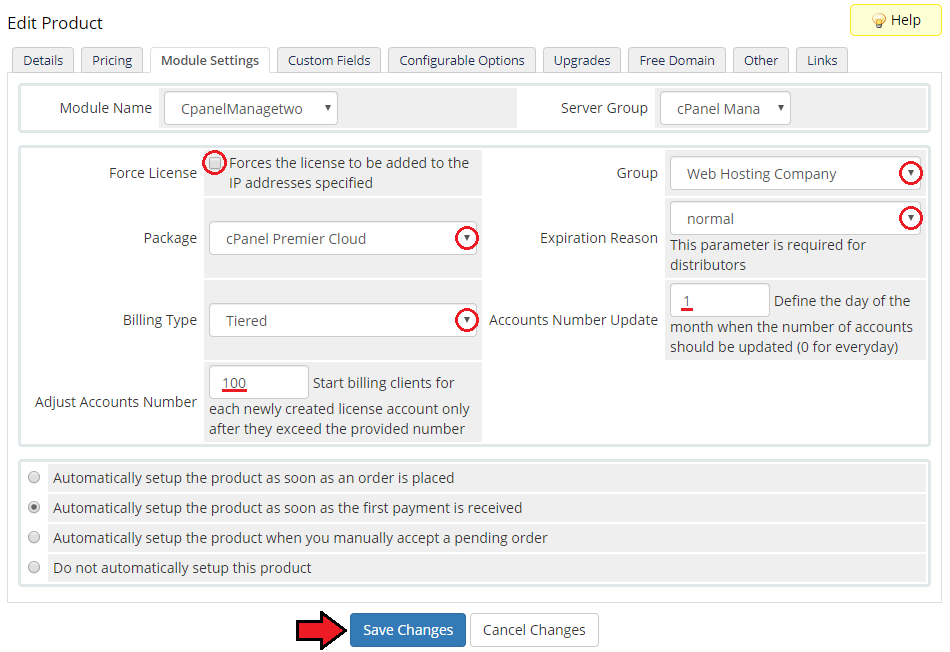
13. Now go to 'Module Settings' section, choose both 'Cpanel_managetwo' and your previously created server group from a dropdown menus.
Next tick 'Force License' , enter your Package ID and Group ID, then press 'Save Changes' .
|
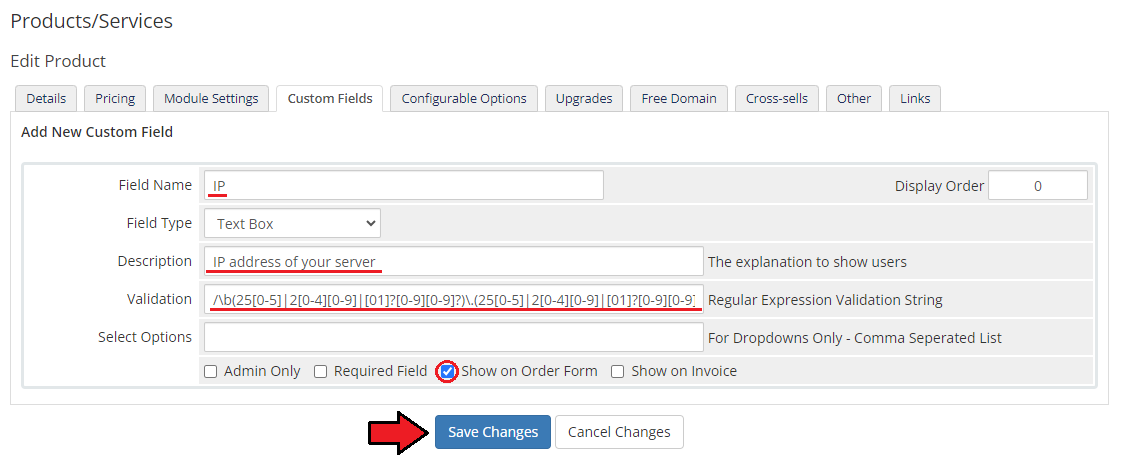
14. After modifying module settings press 'Custom Fields' which is on the right of the 'Module Settings' button.
In the 'Field Name' enter IP, choose 'Text Box' from a field type dropdown menu, enter description and set up validation as:
/\b(25[0-5]|2[0-4][0-9]|[01]?[0-9][0-9]?)\.(25[0-5]|2[0-4][0-9]|[01]?[0-9][0-9]?)
\.(25[0-5]|2[0-4][0-9]|[01]?[0-9][0-9]?)\.(25[0-5]|2[0-4][0-9]|[01]?[0-9][0-9]?)\b/
|
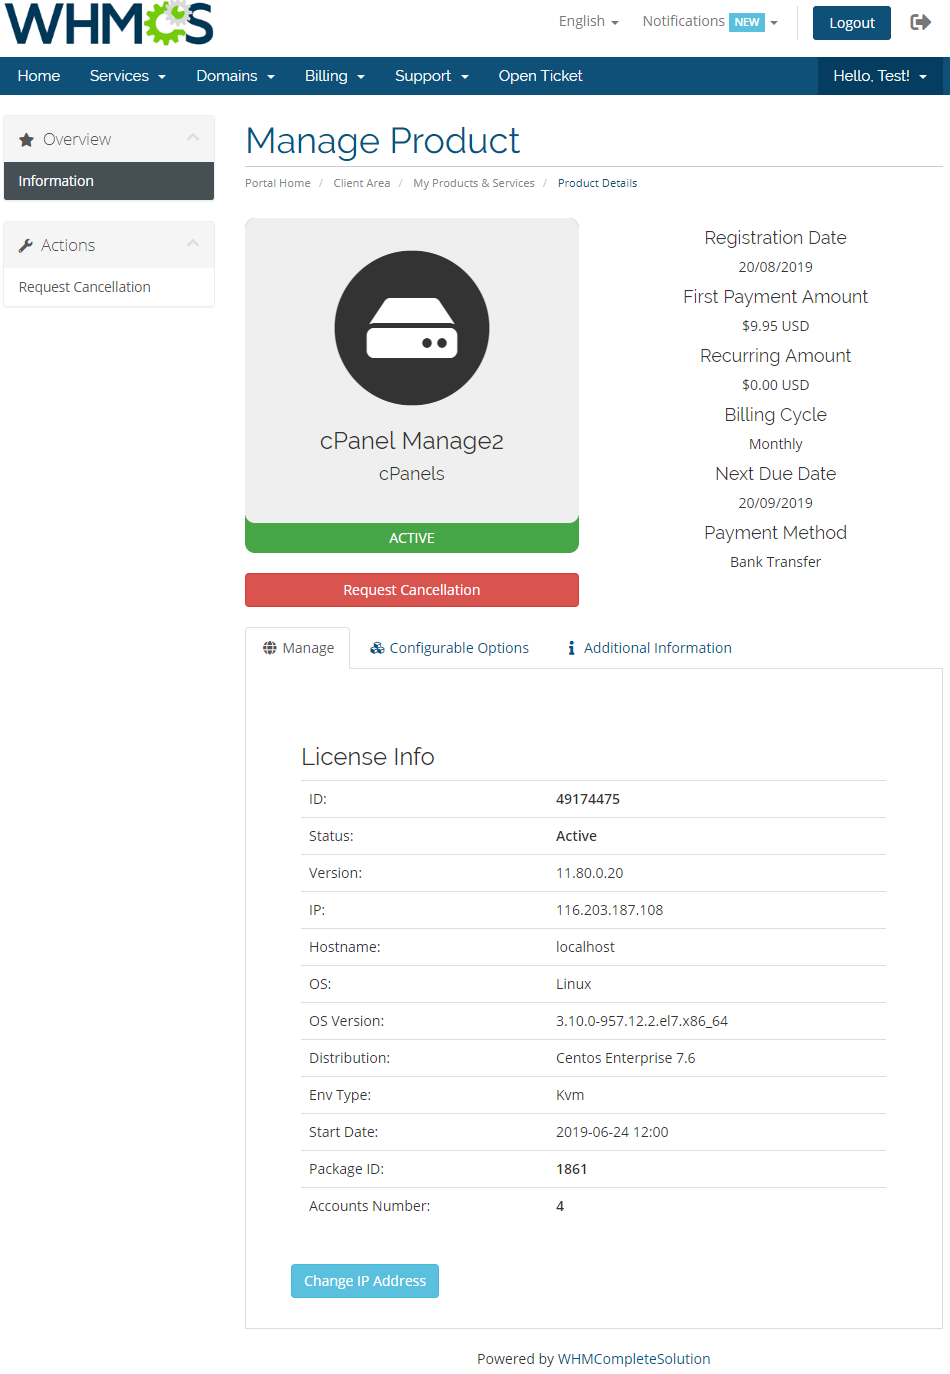
That's it. You have just successfully installed and configured cPanel Manage 2 For WHMCS!
On the following screen you can see how the addon will look like for your customers.
|
Tips
| 1. You must unlock your WHMCS System IP in the cPanel Manage2 to access the API.
|
Common Problems
| 1. If after install, you get IonCube encoder problem (wrong version), please open a support ticket. We will provide you different version of the module encrypted with the old version of IonCube.
|
