Abandoned Cart For WHMCS
Contents |
About Abandoned Cart For WHMCS
| Abandoned Cart For WHMCS allows to .................... |
- Client Area Features:
| ✔ .. |
| ✔ . |
| ✔ . |
| ✔ . |
| ✔ . |
| ✔ . |
- Admin Area Features:
| ✔ |
| ✔ |
| ✔ |
| ✔ |
| ✔ |
| ✔ |
| ✔ |
| ✔ |
| ✔ |
| ✔ |
| ✔ |
| ✔ |
| ✔ |
| ✔ P |
| ✔ |
| ✔ |
| ✔ |
| ✔ |
| ✔ |
| ✔ |
| ✔ |
| ✔ |
| ✔ |
| ✔ |
| ✔ A.. |
- General Info:
| ✔ Multi-Language Support |
| ✔ Supports PHP 7.3 Up To PHP 8.1 |
| ✔ Supports WHMCS Themes "Six" And "Twenty-One" |
| ✔ Supports WHMCS V8.3 And Later |
| ✔ Requires ionCube Loader V12 Or Later |
| ✔ Easy Module Upgrade To Open Source Version |
Installation
| This tutorial will show you how to successfully install and configure Abandoned Cart For WHMCS. We will guide you step by step through the whole installation and configuration process. |
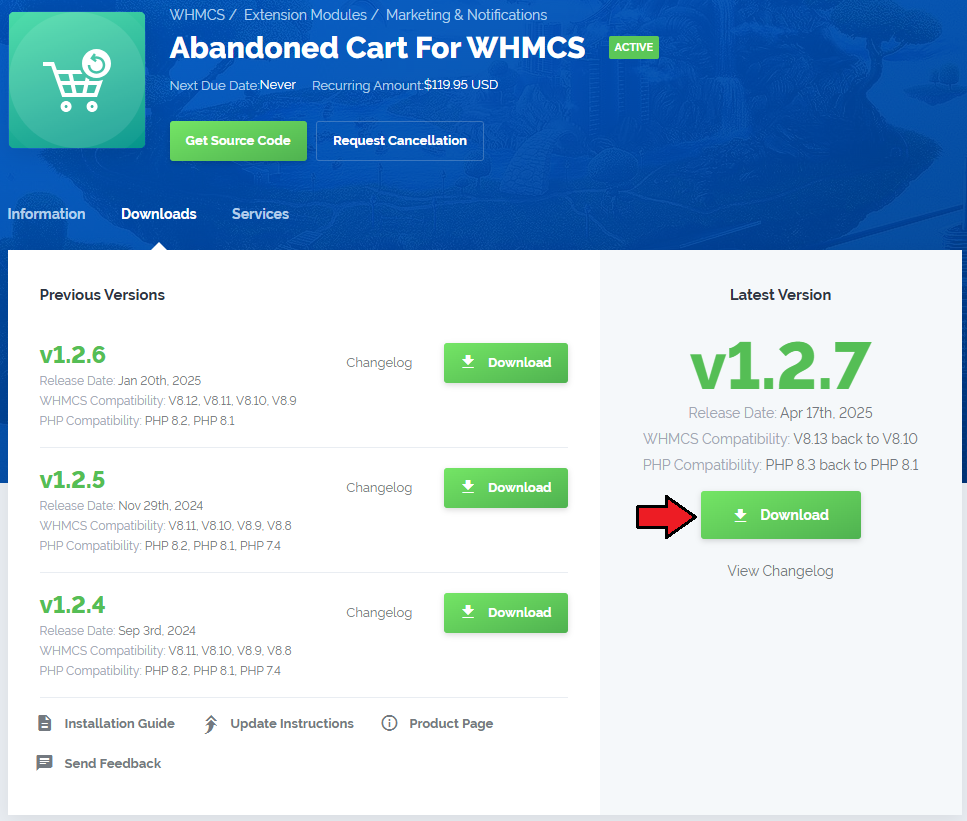
| 1. Log in to our client area and download the module. |
|
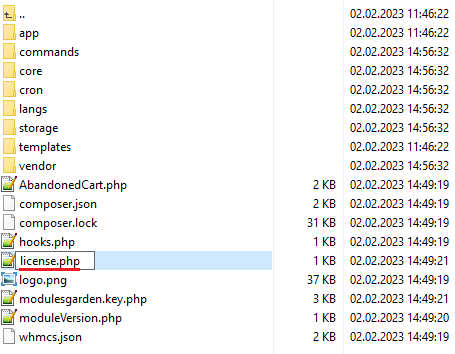
| 2. Upload and extract the extension into the main WHMCS directory. Extracted files in your WHMCS directory should look like this: |
| 3. When you install Product Feedback Center For WHMCS for the first time, you have to rename the 'license_RENAME.php' file. This file is located in 'modules/addons/abandonedCart/license_RENAME.php'. Rename it from 'license_RENAME.php' to 'license.php'. |
|
| 4. In order to configure your license key, you have to edit the previously renamed 'license.php' file. Enter your license key between the quotation marks as presented on the following screen. You can find your license key in our client area → 'My Products'. |

|
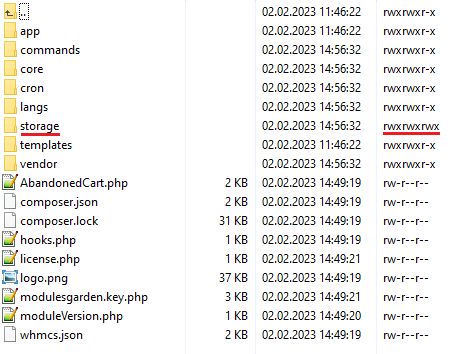
| 5. In the next step, set up the 'storage' folder as recursively writable. This folder is available at 'your_whmcs/modules/addons/abandonedCart/' . |
|
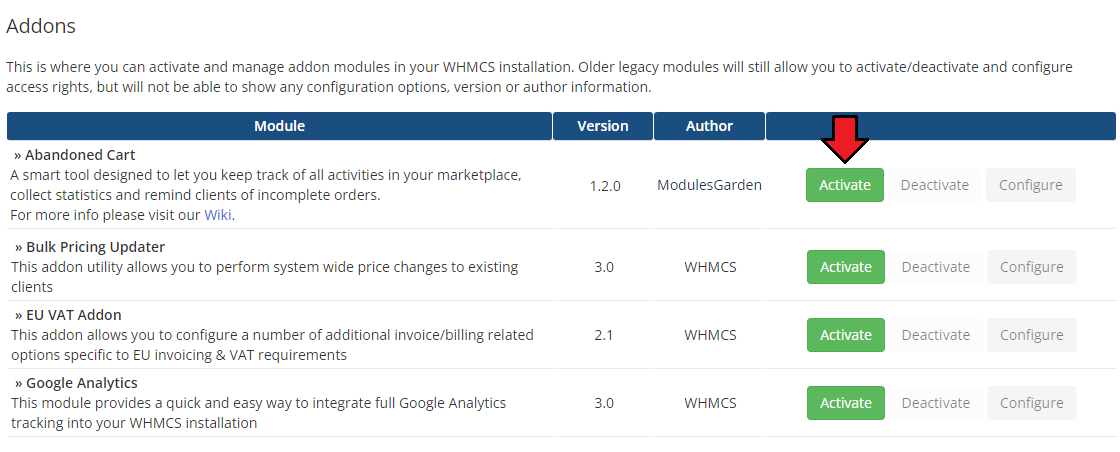
| 6. Now you have to activate the module in your WHMCS system. Log in to your WHMCS admin area. Go to 'System Settings' → 'Addon Modules'. Afterwards, find 'Abandoned Cart' and press the 'Activate' button. |
|
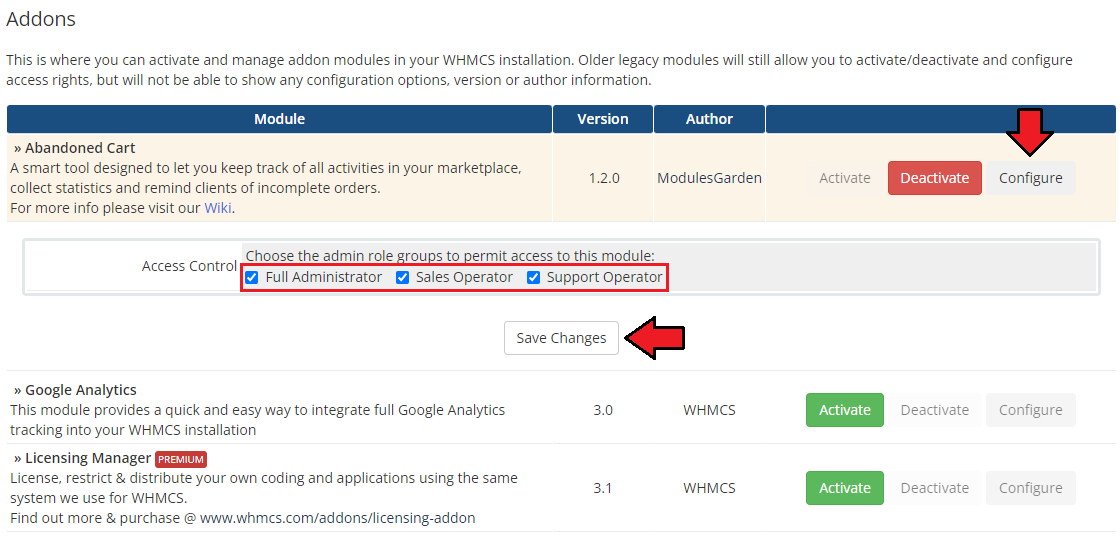
| 7. In the next step you need to permit access to this module. To do so, click on the 'Configure' button, tick 'Full Administrator' and press 'Save Changes'. |
|
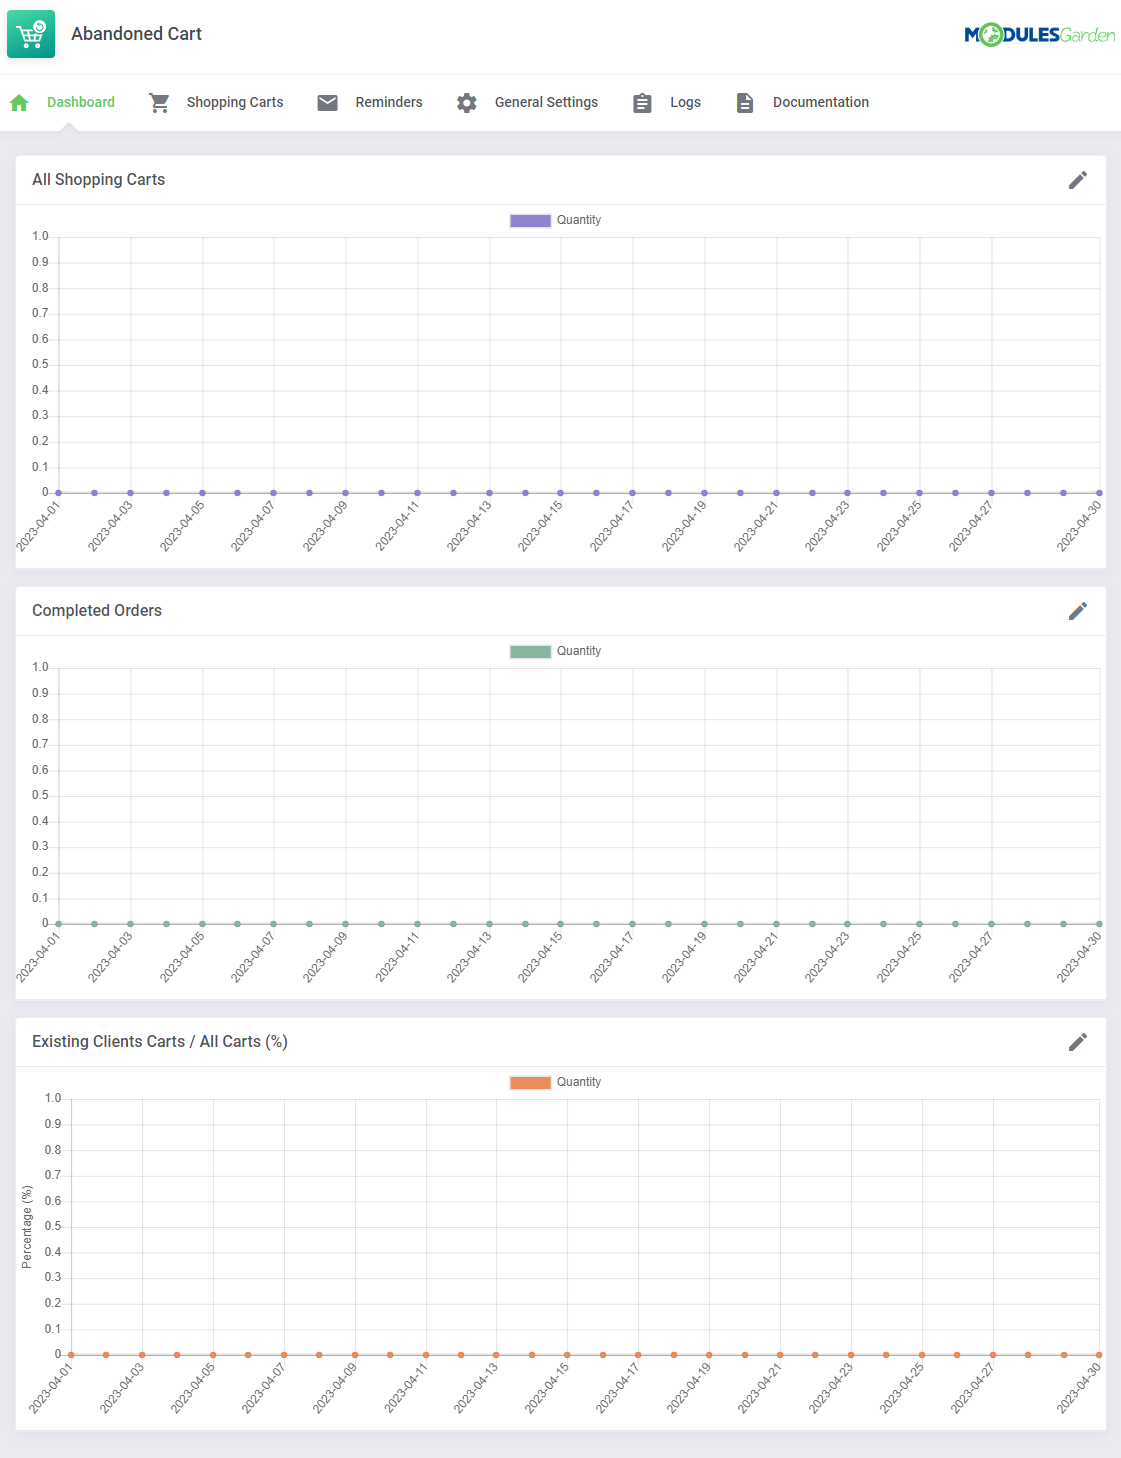
| 8. You have just successfully installed Abandoned Cart For WHMCS! You can access your module at 'Addons' → 'Abandoned Cart'. |
|
Configuration and Management
| Abandoned Cart For WHMCS allows you to ........ |
Dashboard
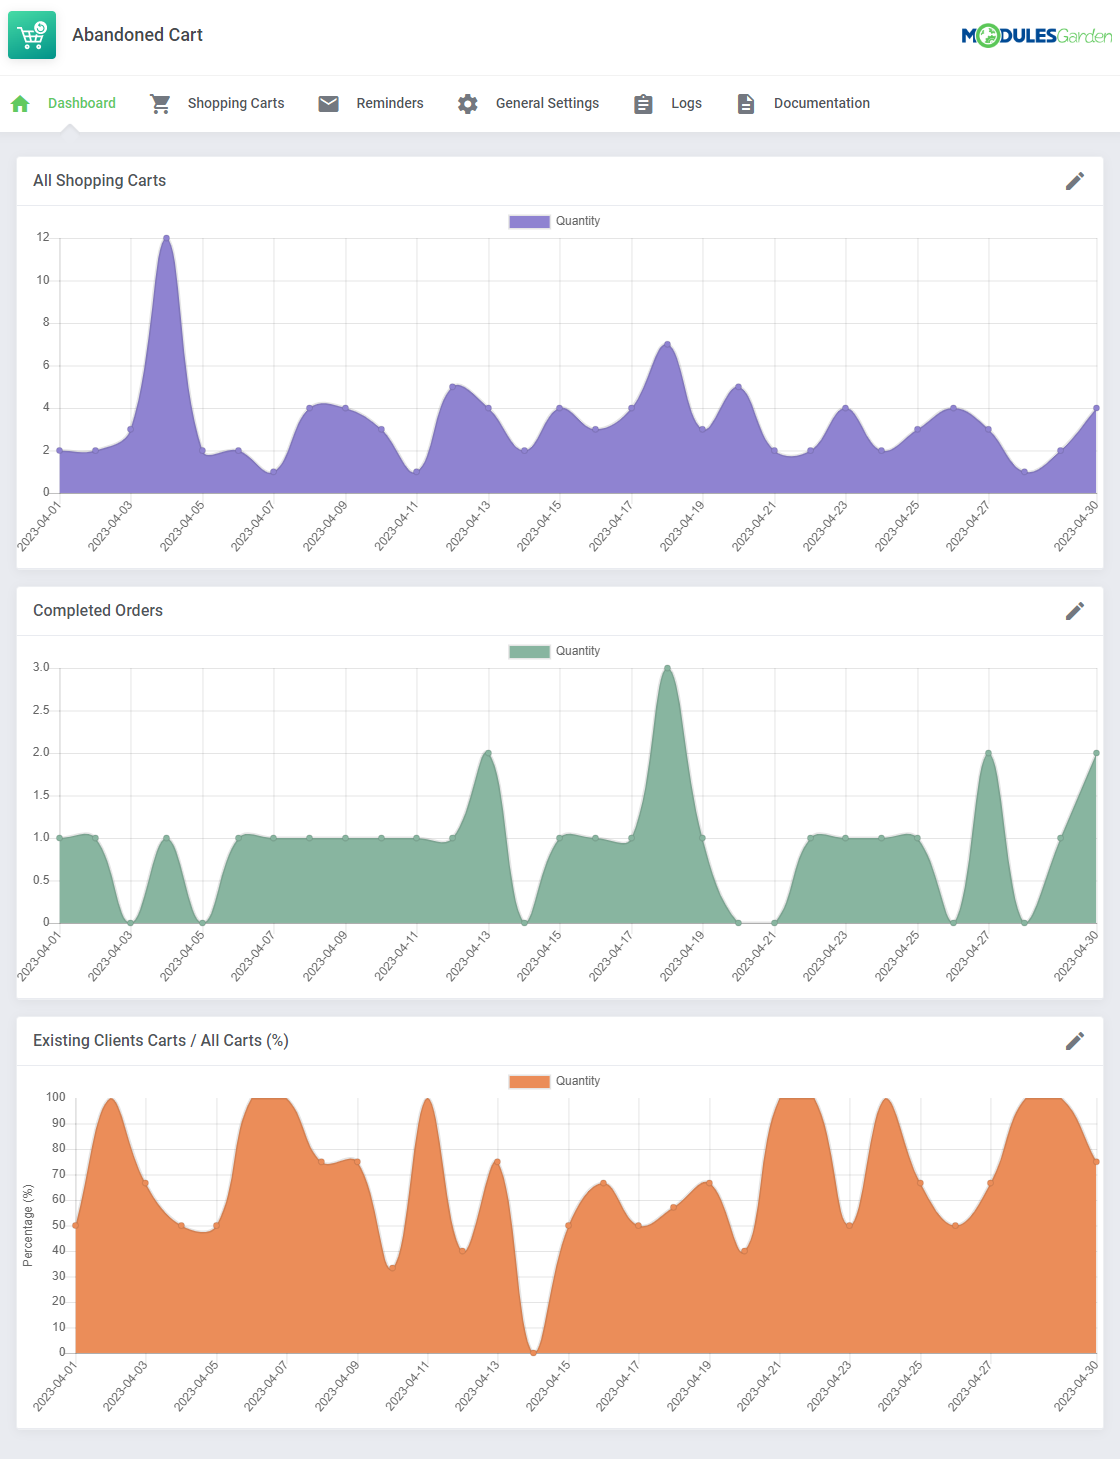
| In the dashboard you can find the summary graphs of recently submitted xxxxxxxxx. The first two graphs show the summary of xxxxxxxxxxxx. The next ones show xxxxxxxxxxxxxxxxx in the last 7 days. |
|
Shopping Carts
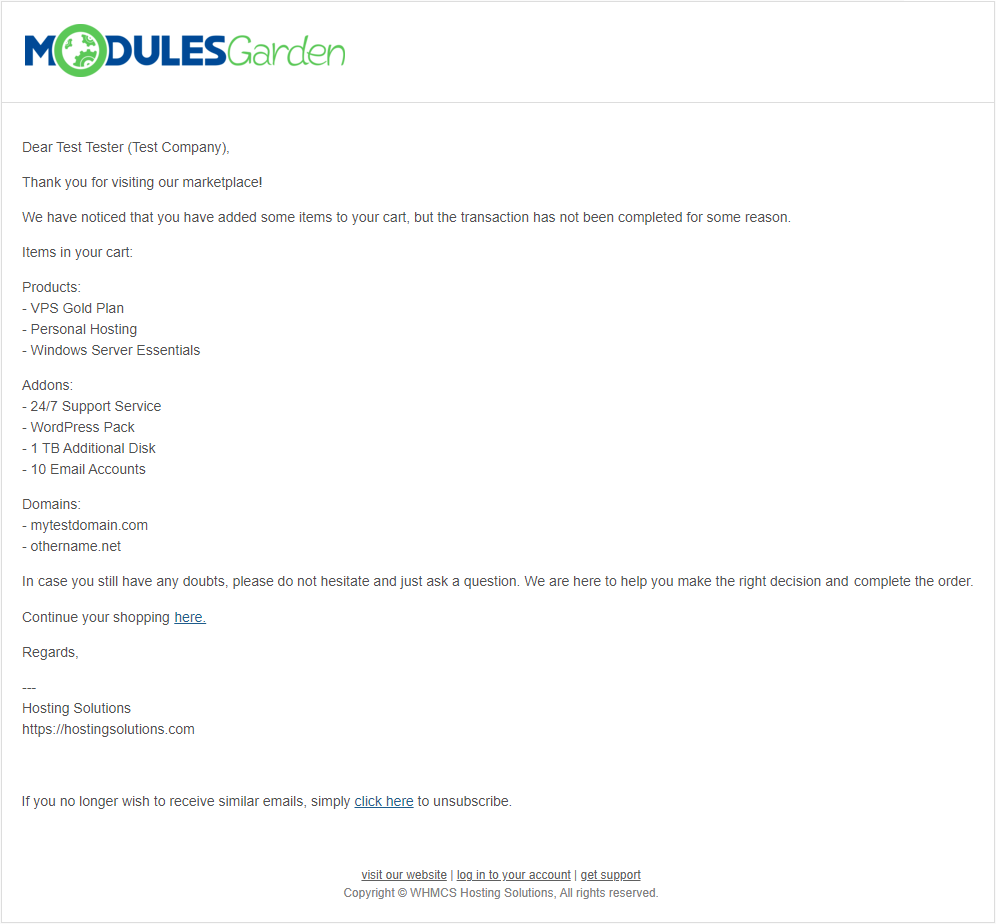
| In the ................. |
|
| You will see ............. |
| File:PAC 25.png |
Reminders
| The |
| File:AC x.png |
Support Feedback
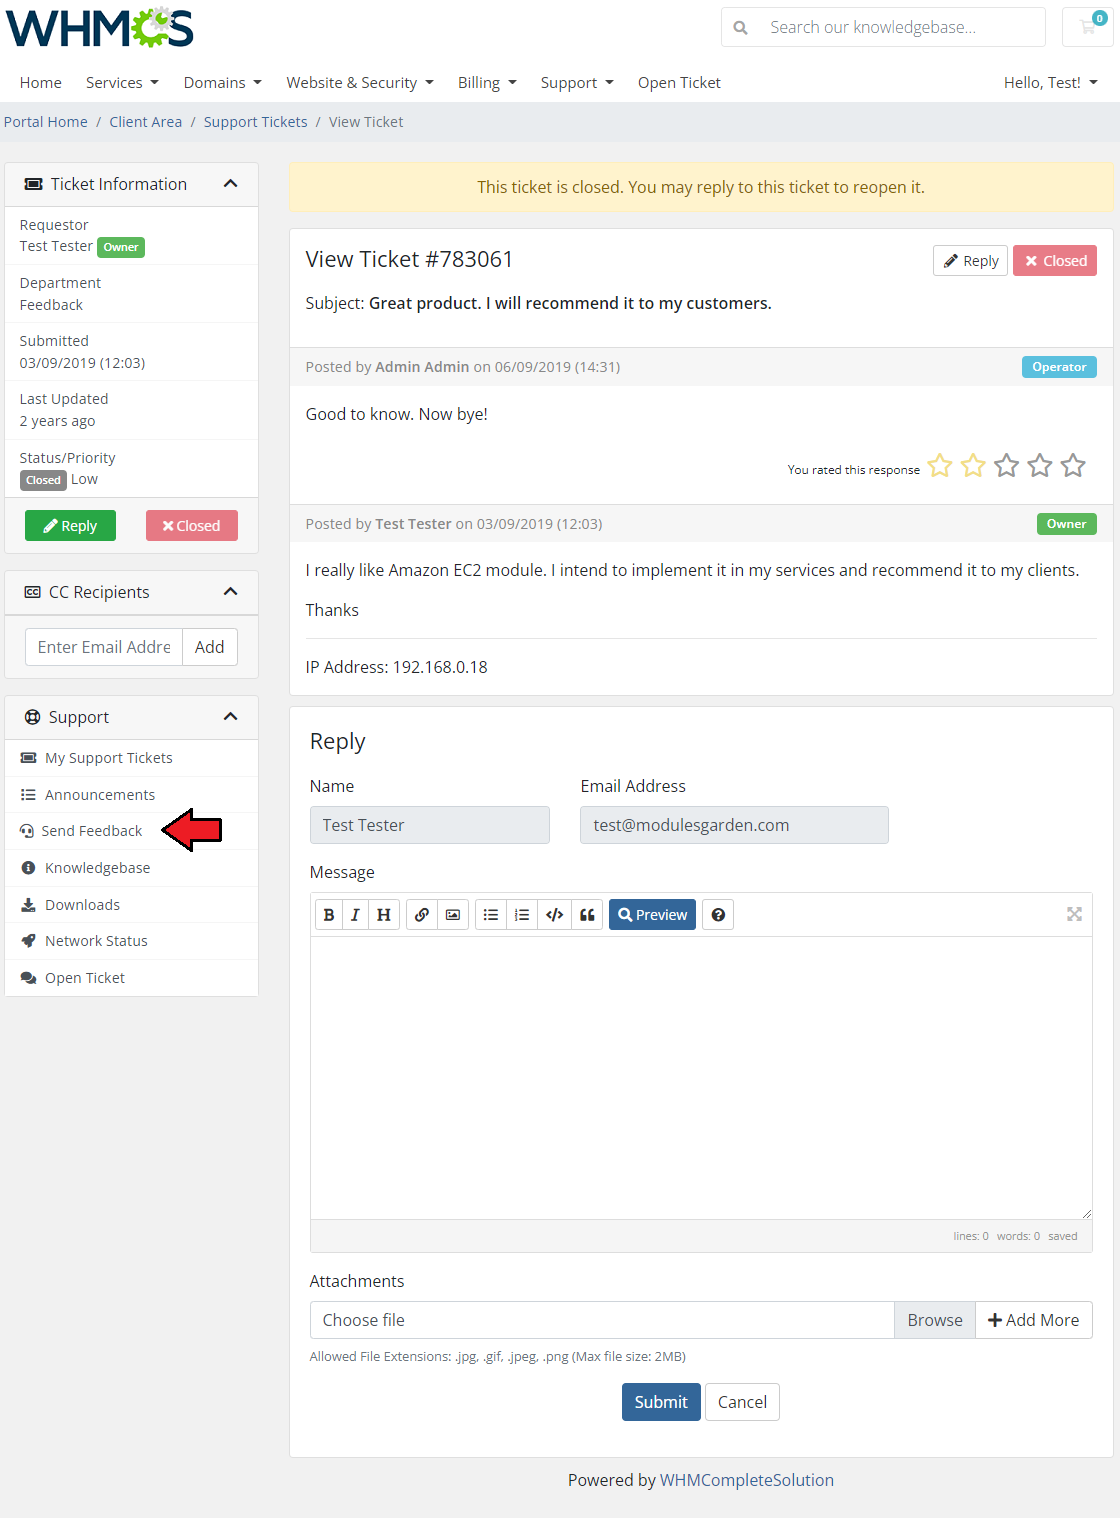
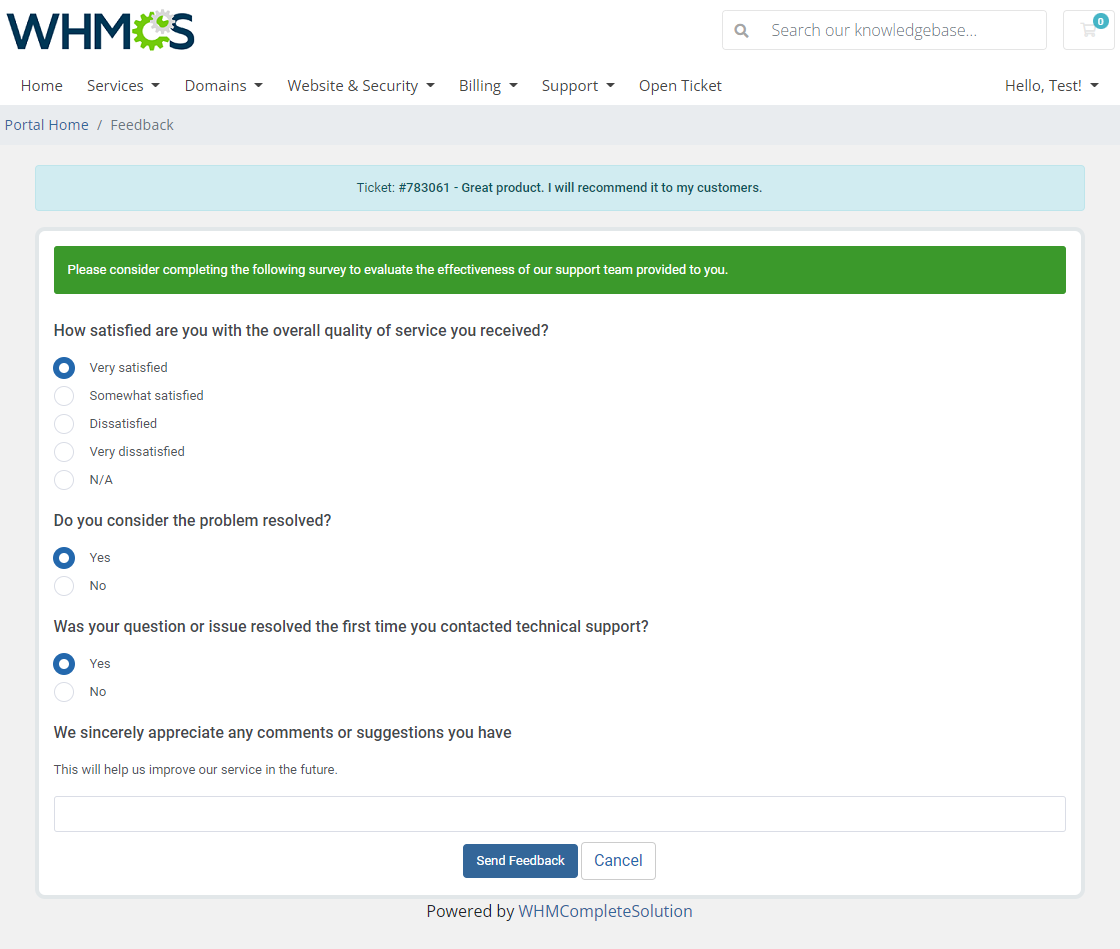
| The 'Support Feedback' section is dedicated to creating surveys for clients to let them express their opinion on their tickets and the way they are handled by our staff. Once a ticket gets the 'Closed' status, a client may rate it by sending feedback with the previously prepared survey. |
|
|
Support: Client Feedback
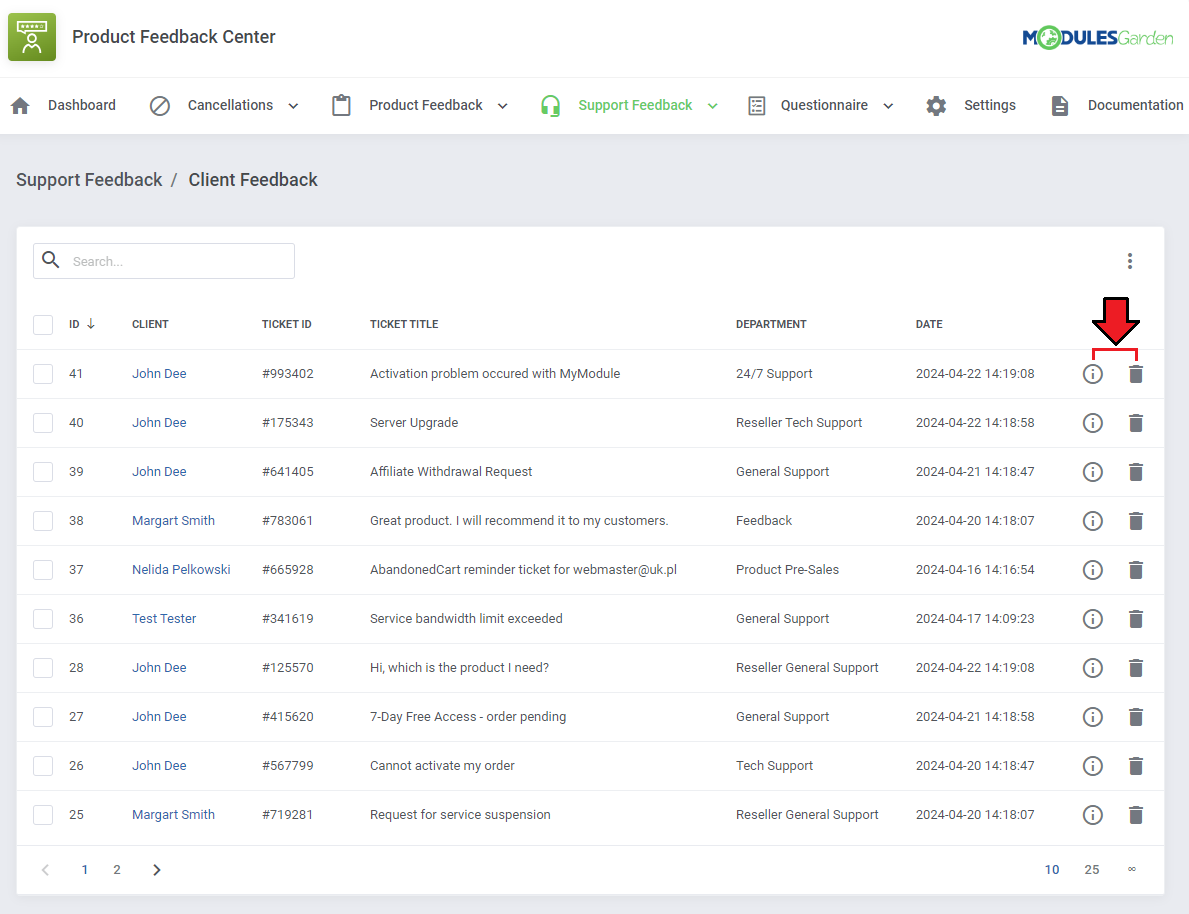
| Move to 'Support Feedback' → 'Client Feedback' section, you will find there a list of submitted support feedback surveys with the customer answers to the prepared sets of questions. Click on the 'Questions & Answers' icon to see the filled-in survey for the given feedback. |
|
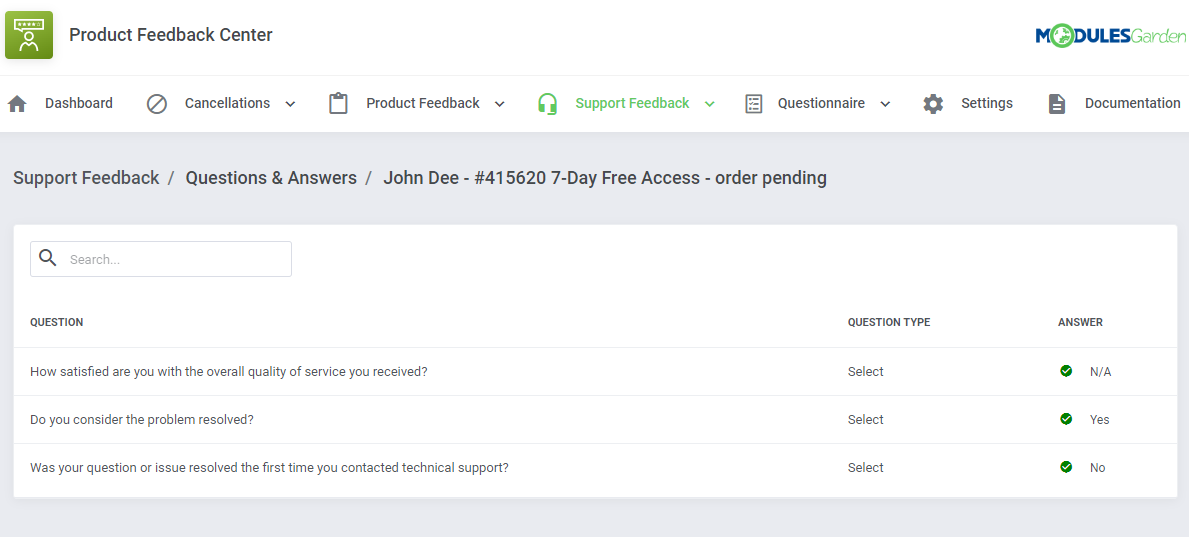
| You will see a preview of the questions asked, their type, and the answers given by the client. |
|
Support Feedback: Groups And Department Relations
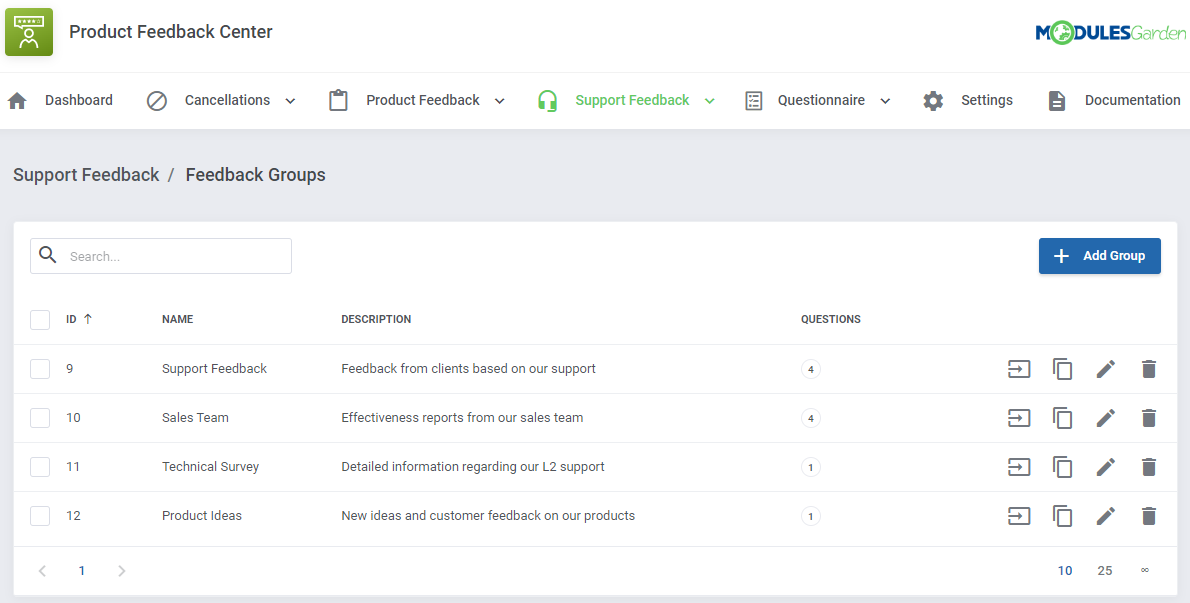
| Before you let your clients give feedback on a single, closed ticket, you need to configure the whole net of groups and questions. Support: Feedback Groups and Department Reations are created in exactly the same way as the Cancellations And Product Feedback Groups. |
|
Questionnaire
Questionnaire: Client Feedback
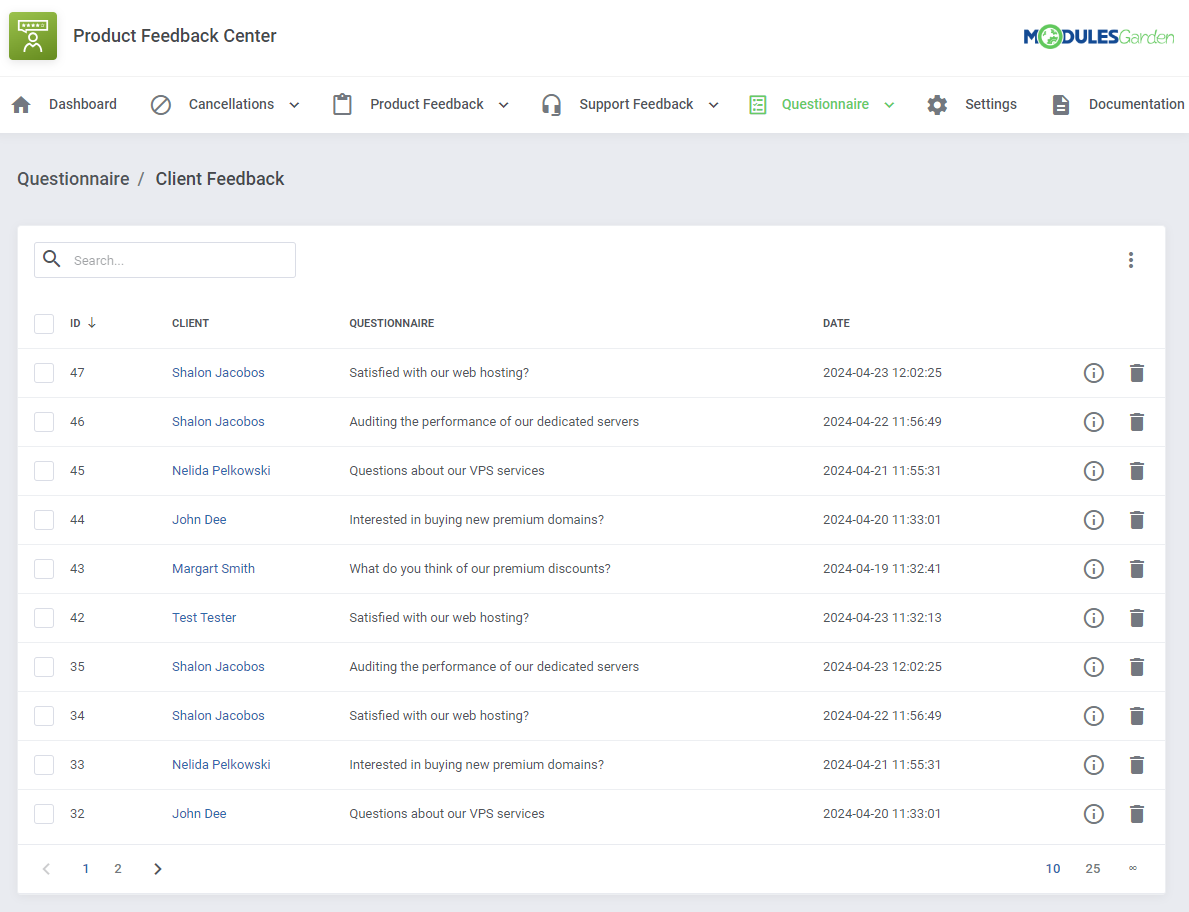
| This section is dedicated to unrelated questionnaires that can be freely configured here and then displayed to clients based on certain parameters. Such as: owned products, product addons or domains, account registration date or client group assignment. Just like in the case of the previously described sections: Cancellations, Product and Support Feedback, the very first section is dedicated to the already submitted surveys by clients. |
|
Question Groups
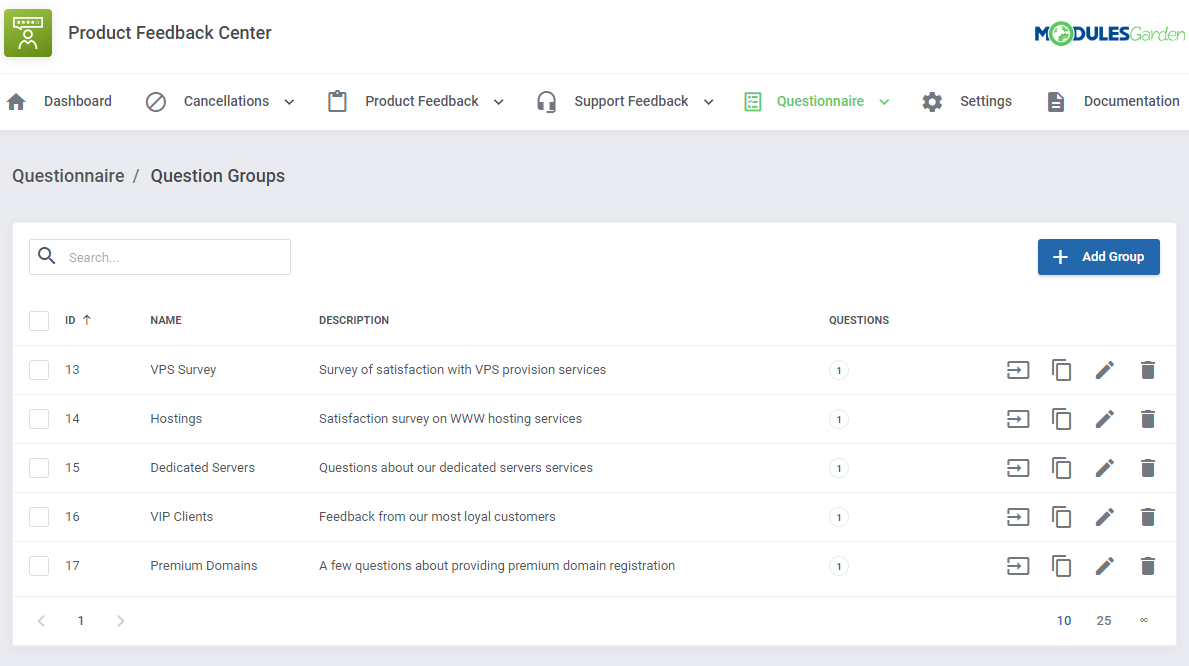
| To begin, you must start with creating groups and questions with options to choose, in case of select and multi select question type. To learn all about configuring Questions&Answers please refer to section: Survey Configuration above. |
|
Questionnaire Relations
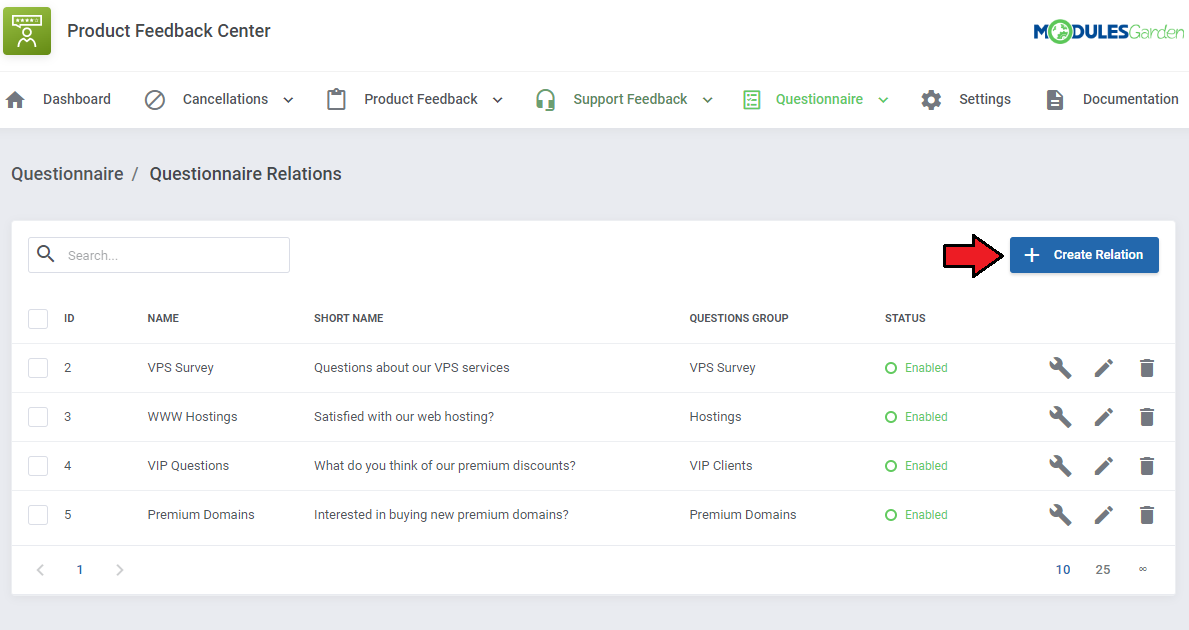
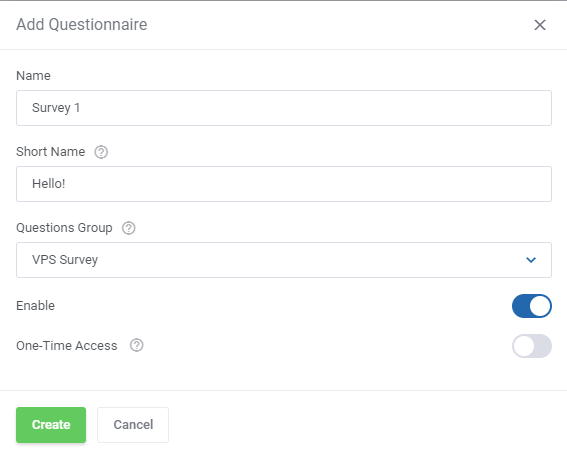
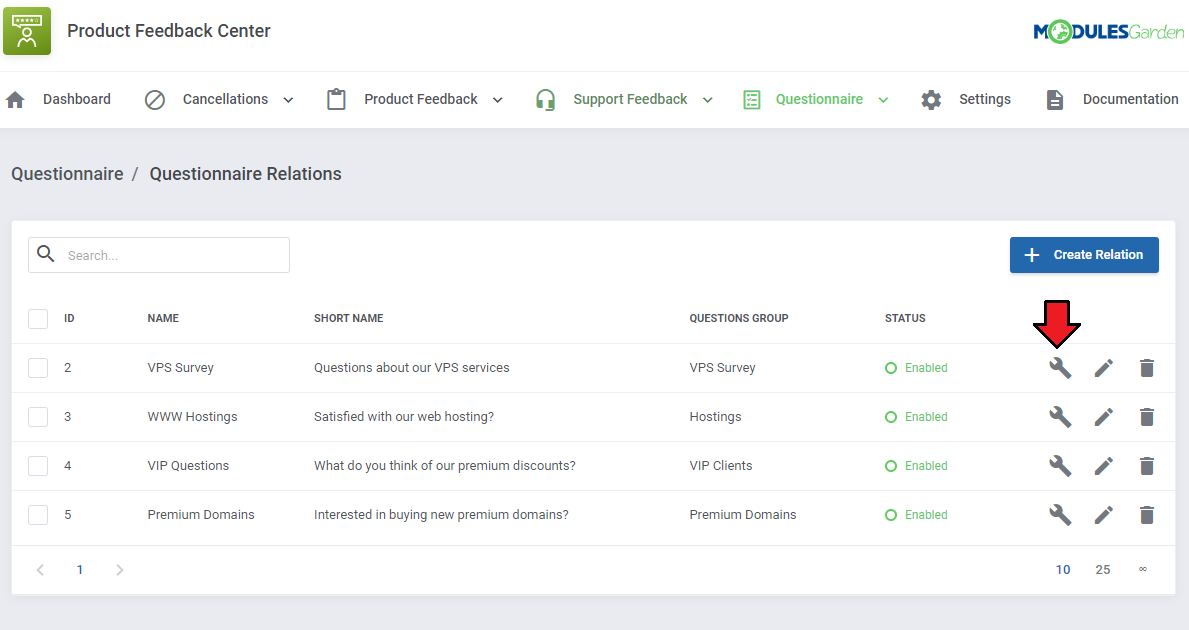
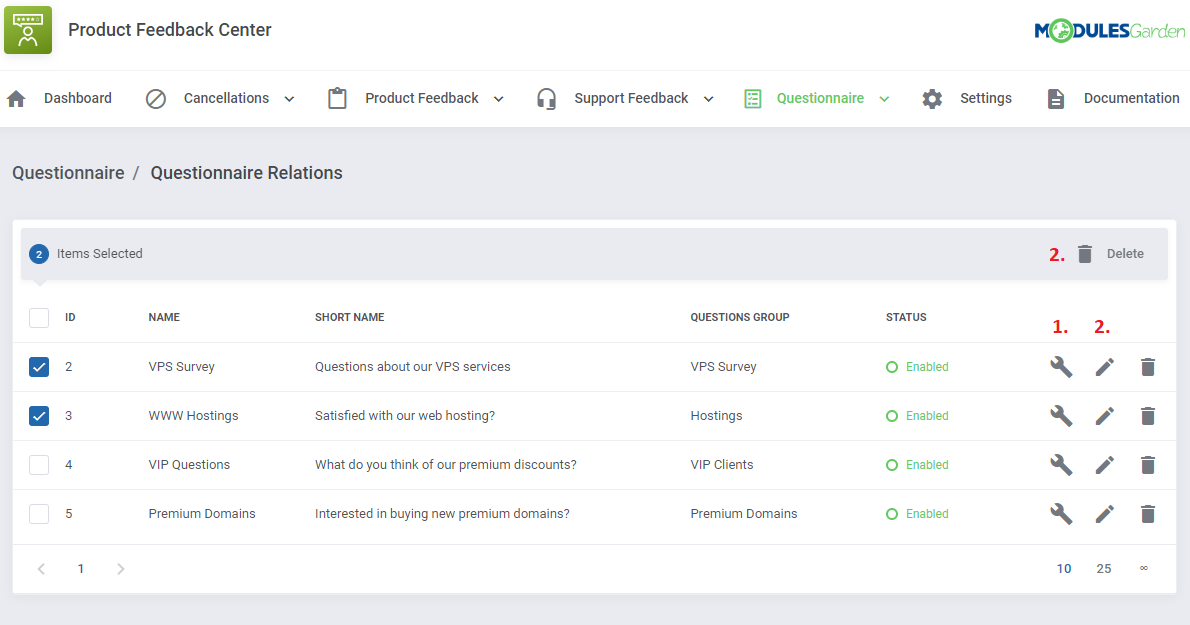
| Under "Questionnaire Relations" you have to arrange all the relations and activation rules to show the survey to single clients based on their owned services, domains etc. Press 'Create' to form the first relation. |
|
Fill out all the required data:
|
|
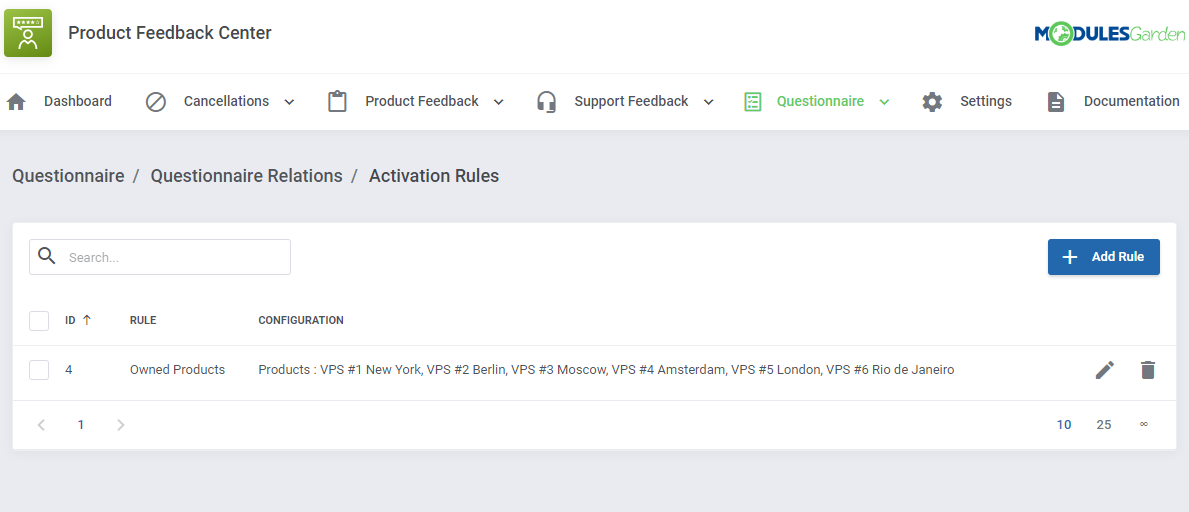
| When ready, move to the section responsible for assigning activation rules. Press 'Add Rule' to see available options. |
|
|
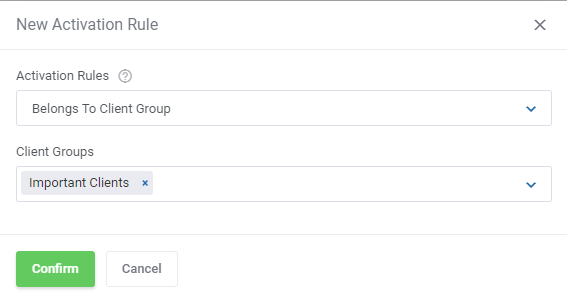
Available rules that can trigger the survey visibility for a single client:
Important: In order to display the question ire to a client, all active rules must be met, NOT any of them. |
|
| Create as many rules as needed, you may always delete (2.) them or alter(1.) their configuration. |
|
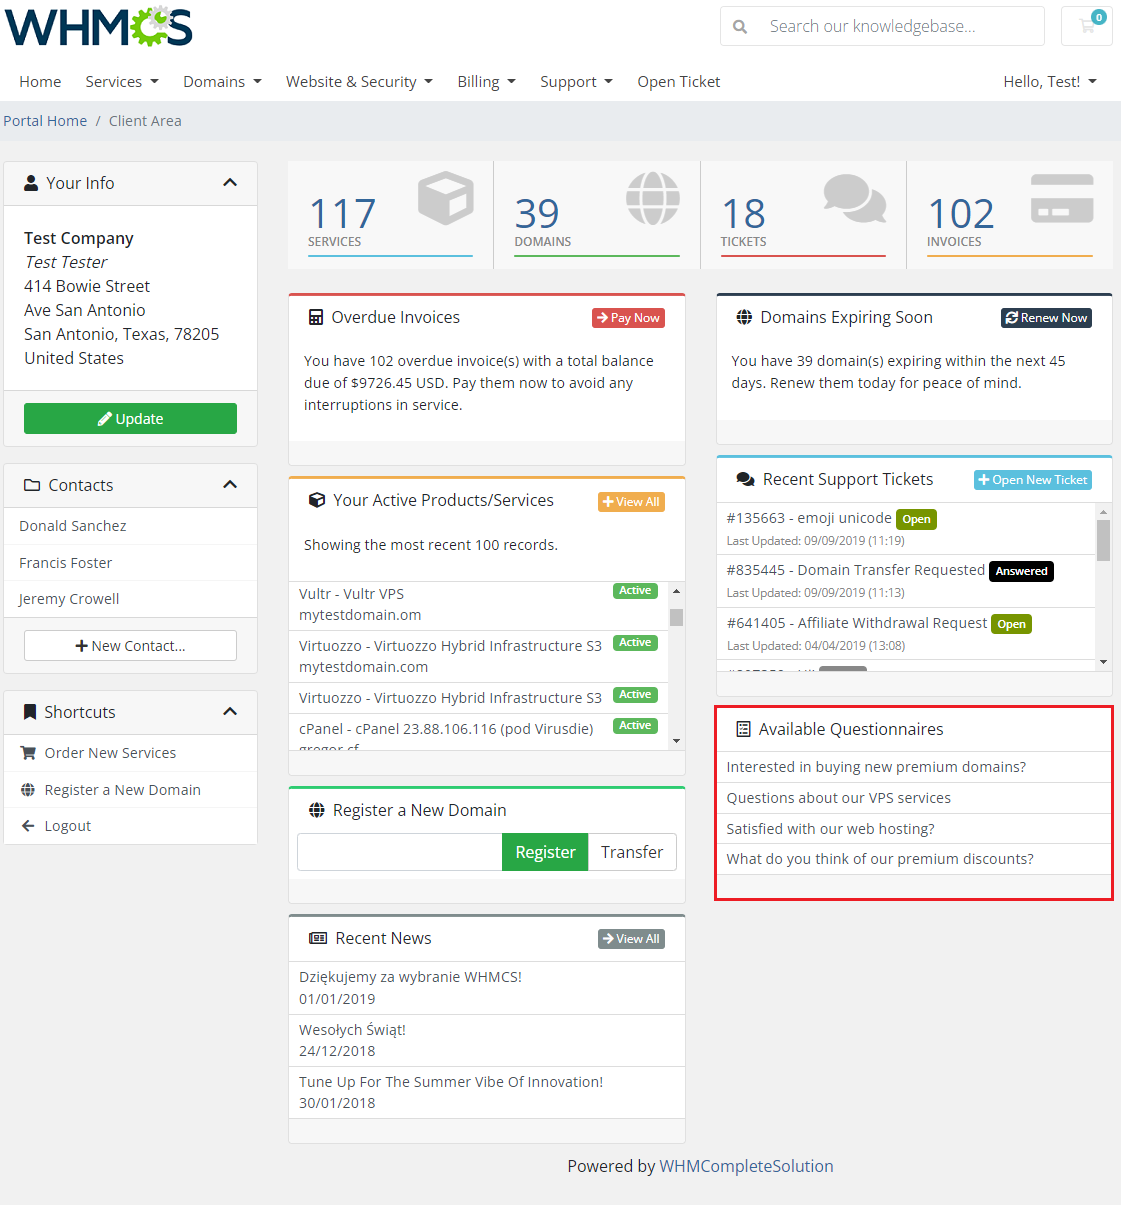
| Localize the survey applicable to a single client, if the activation rules are met, at the client area home page. |
|
Settings
| 'Settings' → 'General' section ............ |
| File:AC 40.png |
| Email Template - pick one o.......... |
Client Area
Cart
| For products that have been .............. |
| File:AC x.png |
Tips
| 1. Please note that in the current version of the module, the customer has to answer all created and assigned questions to the product before submitting the cancellation request. Therefore, we do not recommend creating questions which seem to be optional. |
| 2. If you want to add translated questions and options in other than the default language, you must enable required languages in your WHMCS. To do so move to 'System Settings' → 'Email Templates' → 'Manage Languages'. There find and activate languages you need. They will be than avialle in the 'Language' dropdown in the addon. |
Update Instructions
| Essential guidance through the process of updating the module is offered here. Please keep in mind that there is a quick and easy option in our client area that lets you upgrade the license of your module to an open source version at any time - and at a lower price! |
Common Problems
| 1. In case of connection problems, please check whether your SELinux or firewall does not block ports. |