MX Registrar For WHMCS
Contents |
About MX Registrar For WHMCS
| MX Registrar For WHMCS is registrar module that provides automation of .mx domains provisioning in your WHMCS. Our product is both easy to set up and use which makes it a really good tool for every reseller of .mx domains. |
- Features:
| ✔ Register |
| ✔ Transfer |
| ✔ Renew |
| ✔ Update Contact Details |
| ✔ Update Nameservers |
| ✔ Automatic Renewal |
| ✔ Registrar Lock |
- Additionally:
| ✔ Supports WHMCS V5 and Later |
Installation
| This tutorial will show you how to successfully install and configure MX Registrar For WHMCS. We will guide you step by step through the whole installation and configuration process. |
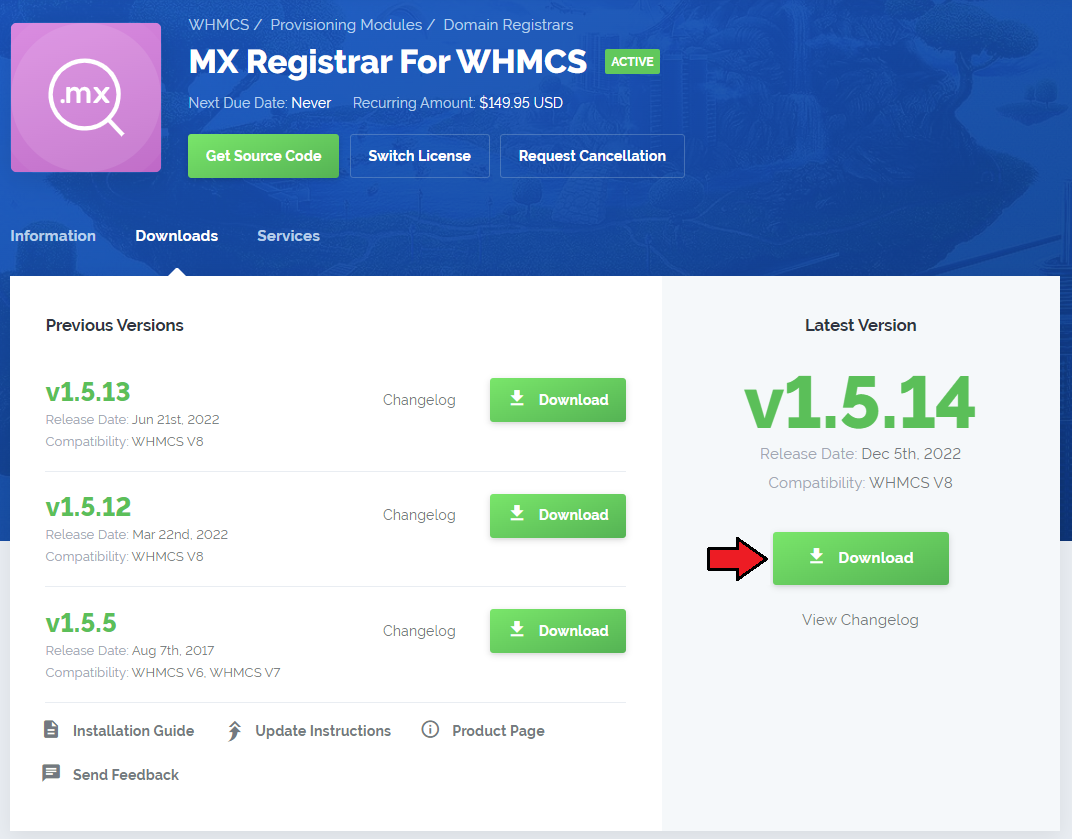
| 1. Log in to your client area and download MX Registrar For WHMCS. |
|
| 2. Upload and extract the module into the main WHMCS directory. Files in your WHMCS directory should look like this. |

|
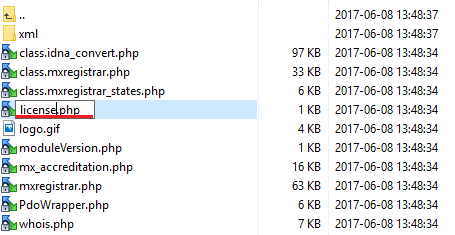
| 3. When you install MX Registrar for the first time you have to rename 'license_RENAME.php' file. File is located at 'modules/registrars/MXregistrar/license_RENAME.php' . Rename it from 'license_RENAME.php' to 'license.php' . |
|
| 4. In order to configure your license key, you have to edit a previously renamed 'license.php' file.' Enter your licence key between quotation marks as presented on the following screen. You can find your license key at your client area → 'My Products' . |

|
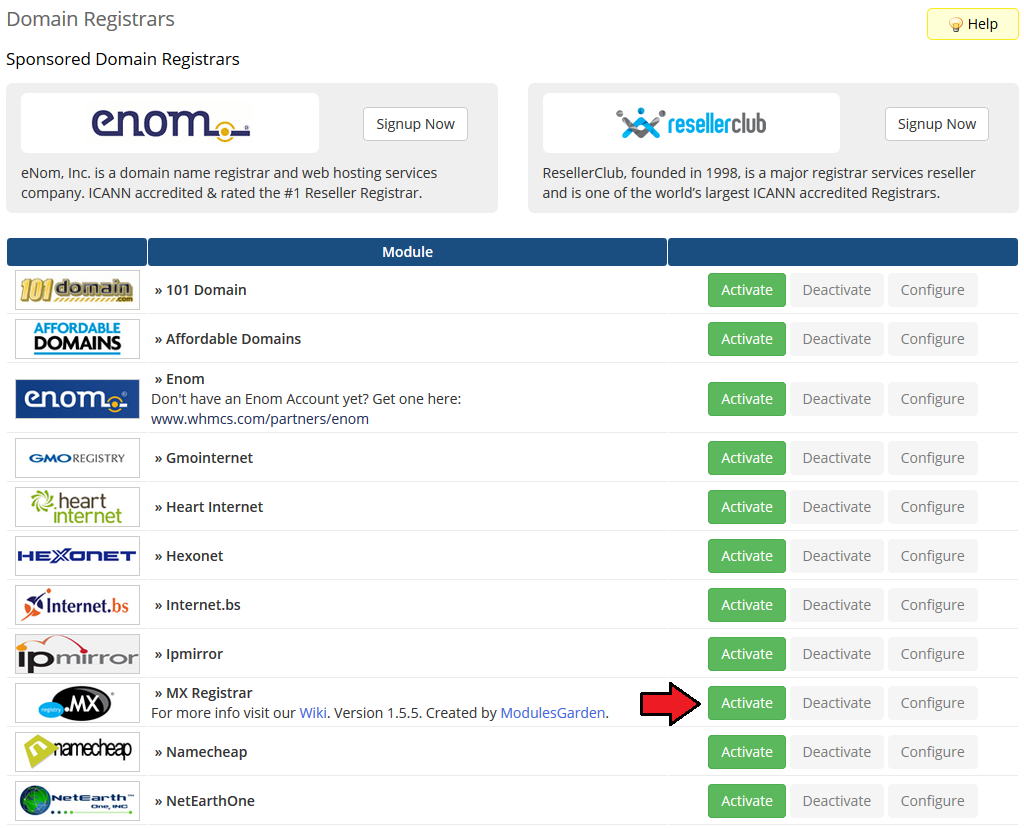
| 5. Now you have to activate the module in your WHMCS system. Log in to your WHMCS admin area. Go to 'Setup' → 'Products/Servers' → 'Domain Registrars' . Afterwards find 'MX Registrar' and press 'Activate' button. |
|
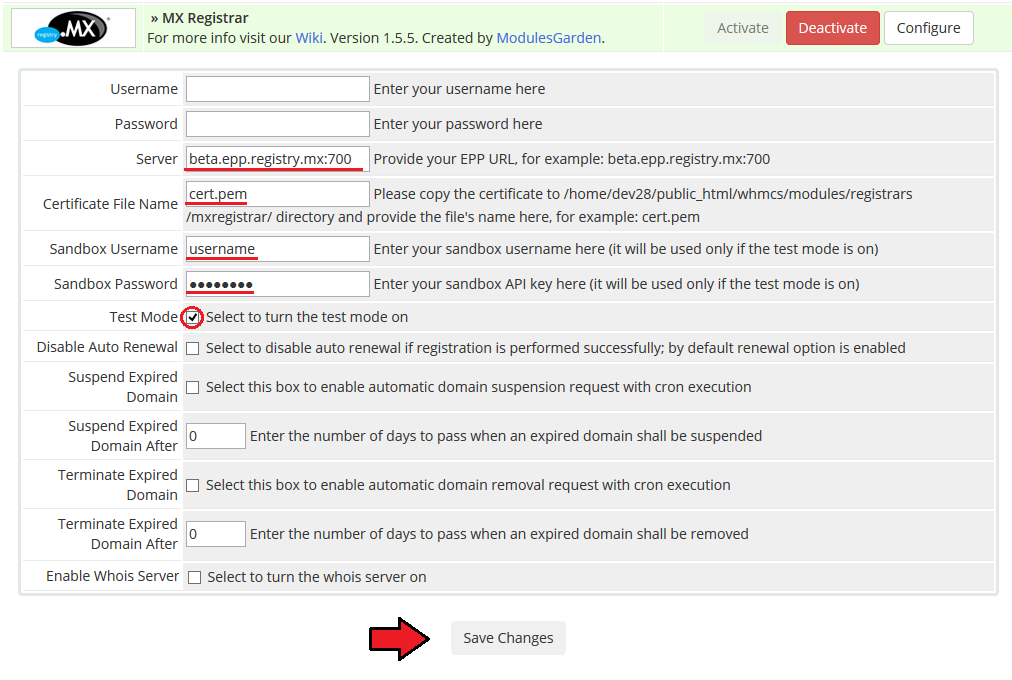
| 6. In next step you need to configure it. To do so, enter username, password, server URL and certificate file name. Afterwards press 'Save Changes' . |
|
| You have just successfully installed MX Registrar For WHMCS. Now let's proceed to configuration of the module. |
Configuration and Management
| MX Registrar allows you to manage your TLDs in your WHMCS system.
In this short guide we will present you the possibilities of our module. |
Management of TLDs
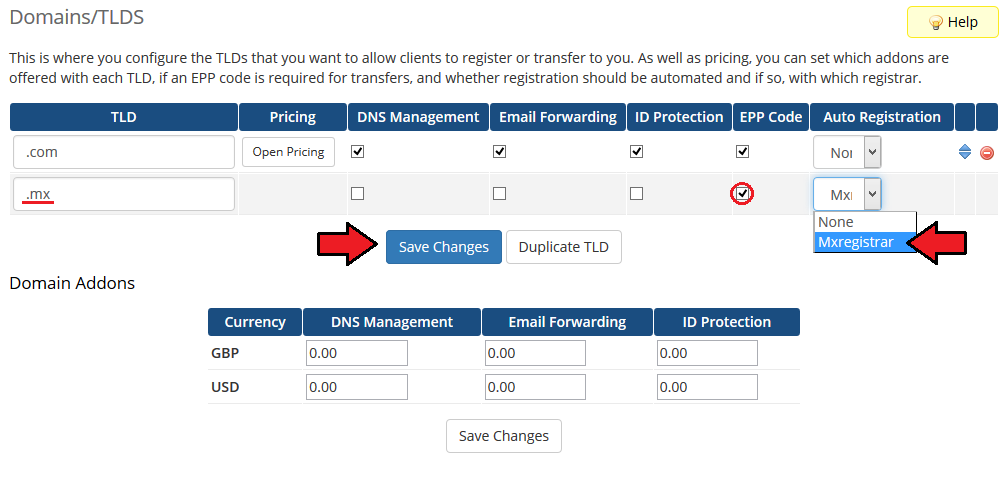
| Adding new TLD is quite simple. To add it, go to 'Setup' → 'Products/Services' → 'Domain Pricing' . Enter your TLD and choose 'MX Registrar' from Auto Registration dropdown menu as shown on the screen below. |
|
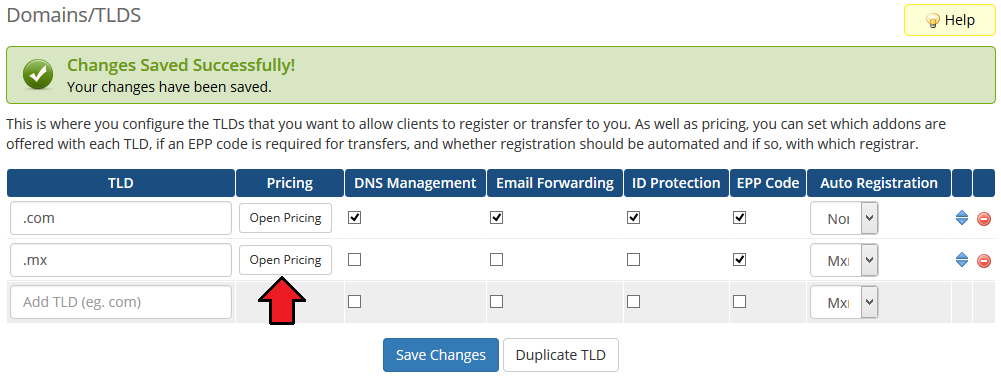
| As you can see 'Open Pricing' field has appeared. Click on it and set up your pricing. |
|
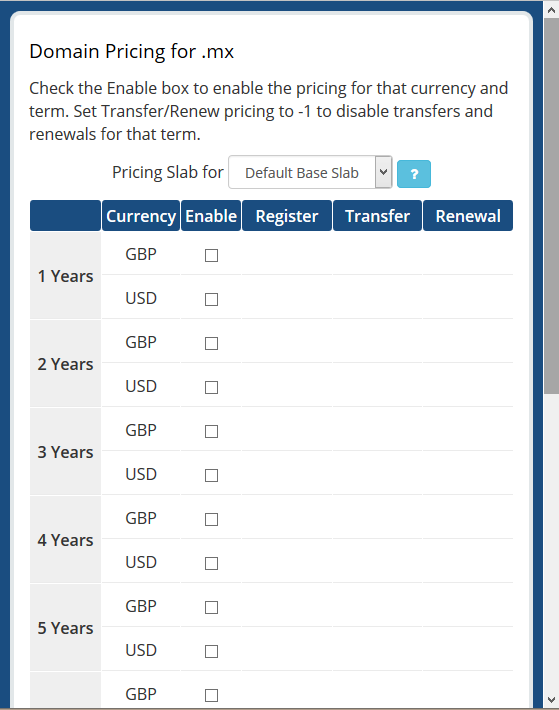
| In newly opened window you can set your prices. Remember to save the changes! |
|
| Voila! Simple isn't it? If you would like to set pricing for more TLDs simply repeat steps shown in 'Management of TLDs' as many times as you need. |
Tips
Common Problems
| 1. When you have problems with connection, check whether your SELinux or firewall is not blocking ports. |