MX Registrar For WHMCS
Contents |
About MX Registrar For WHMCS
| MX Registrar For WHMCS is a registrar module that provides automation of .mx domains provisioning in your WHMCS. Our product is both easy to set up and use which makes it a really good tool for every Accredited Registrar of .mx domains. |
- Provisioning Features:
| ✔ Register |
| ✔ Transfer |
| ✔ Renew |
| ✔ Modify Contact Details |
| ✔ Get EPP Code |
| ✔ Update Nameservers |
| ✔ Automatic Renewal |
| ✔ Registrar Lock |
| ✔ Transfer Approve |
| ✔ Transfer Reject |
| ✔ Transfer Cancel |
- Module Features:
| ✔ Module Logs |
| ✔ Auto Renew Enable/Disable - In The Admin Area And Client Area |
| ✔ Disable Auto Renew After Successful Registration |
| ✔ Disable Auto Renew After Successful Renew |
| ✔ Delete Function Called When A Domain Is Requested To Be Deleted |
| ✔ Automatically Suspend Expired Domain |
| ✔ Automatically Request Delete Of Expired Domain |
| ✔ Automatically Request Delete Of Expired Domain After X Days |
- General Info:
| ✔ Supports WHMCS V5 and Later |
Installation and Configuration
| This tutorial will show you how to successfully install and configure MX Registrar For WHMCS. We will guide you step by step through the whole installation and configuration process. |
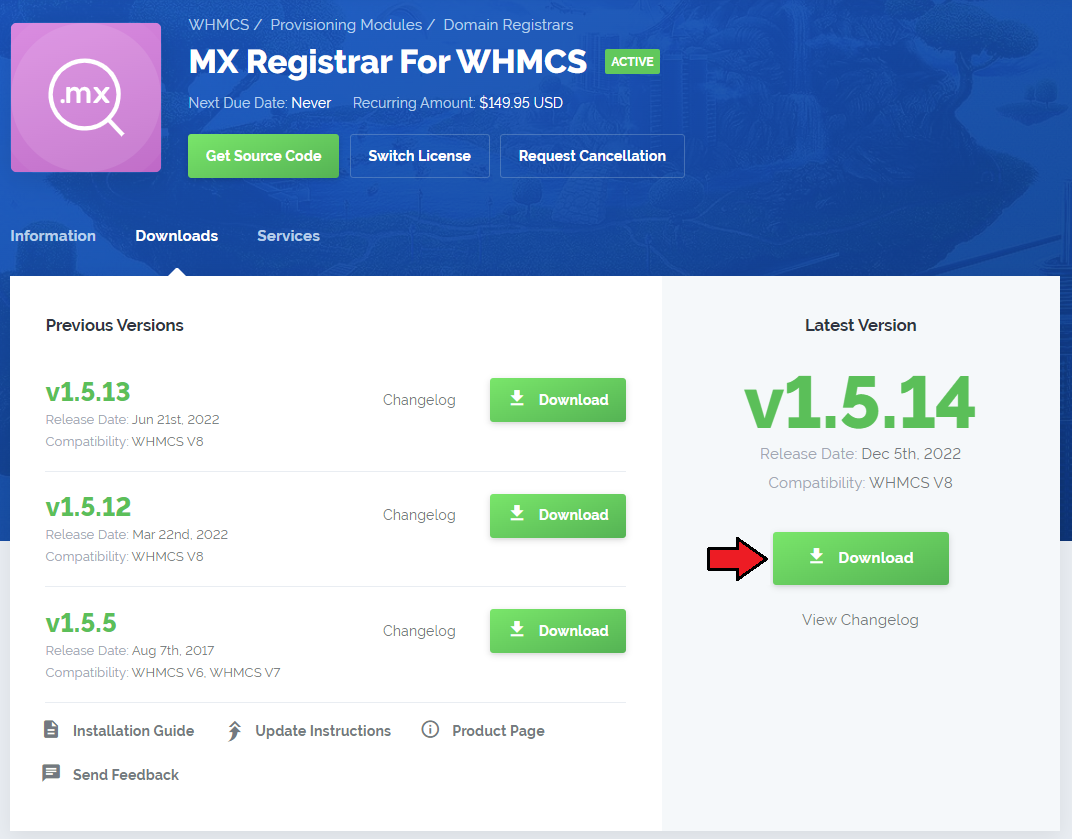
| 1. Log in to your client area and download MX Registrar For WHMCS. |
|
| 2. Upload and extract the module into the main WHMCS directory. Files in your WHMCS directory should look like this. |

|
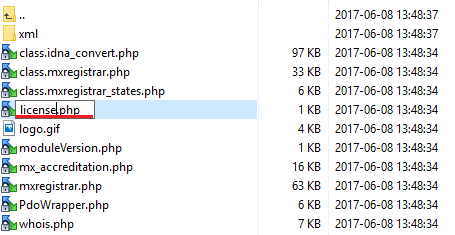
| 3. When you install MX Registrar for the first time you have to rename 'license_RENAME.php' file. File is located in 'modules/registrars/mxregistrar/license_RENAME.php' . Rename it from 'license_RENAME.php' to 'license.php' . |
|
| 4. In order to configure your license key, you have to edit a previously renamed 'license.php' file. Enter your license key between quotation marks as presented on the following screen. You can find your license key at your client area → 'My Products' . |

|
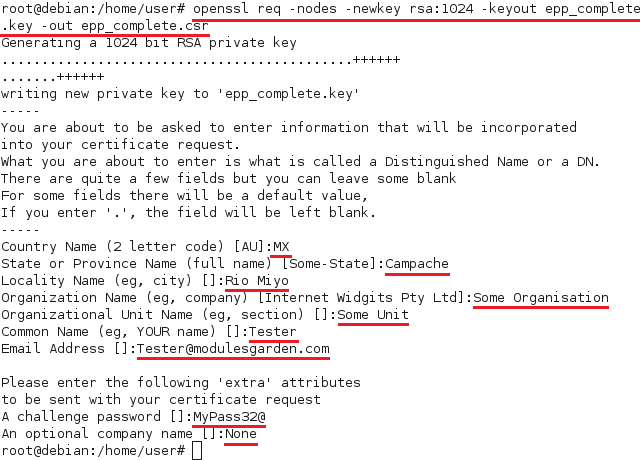
5. Now you have to generate your certificate. To do so, open your linux root console and paste this line:openssl req -nodes -newkey rsa:1024 -keyout epp_complete.key -out epp_complete.csr Afterwards, enter details you will be asked for. |
|
| 6. Send 'epp_complete.csr' file along with your host IP to Registry.MX and wait for email with certificate. As soon as you will get it, create new file 'epp_complete.pem' which must be composed of generated earlier 'eep_complete.key' and certificate file that you have received from Registry.MX. -----BEGIN RSA PRIVATE KEY----- MIICXAIBAAKB3gwIBAgICdAIcw9F... -----END RSA PRIVATE KEY----- -----BEGIN CERTIFICATE----- MIID6zCCA1SgAwIBAgICAIcwDQYJ... -----END CERTIFICATE----- |
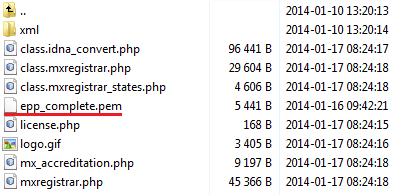
| 7. Copy 'epp_complete.pem' file you have just created to your MX Registrar module folder, which is located at 'your_whmcs/modules/registrars/mxregistrar' . |
|
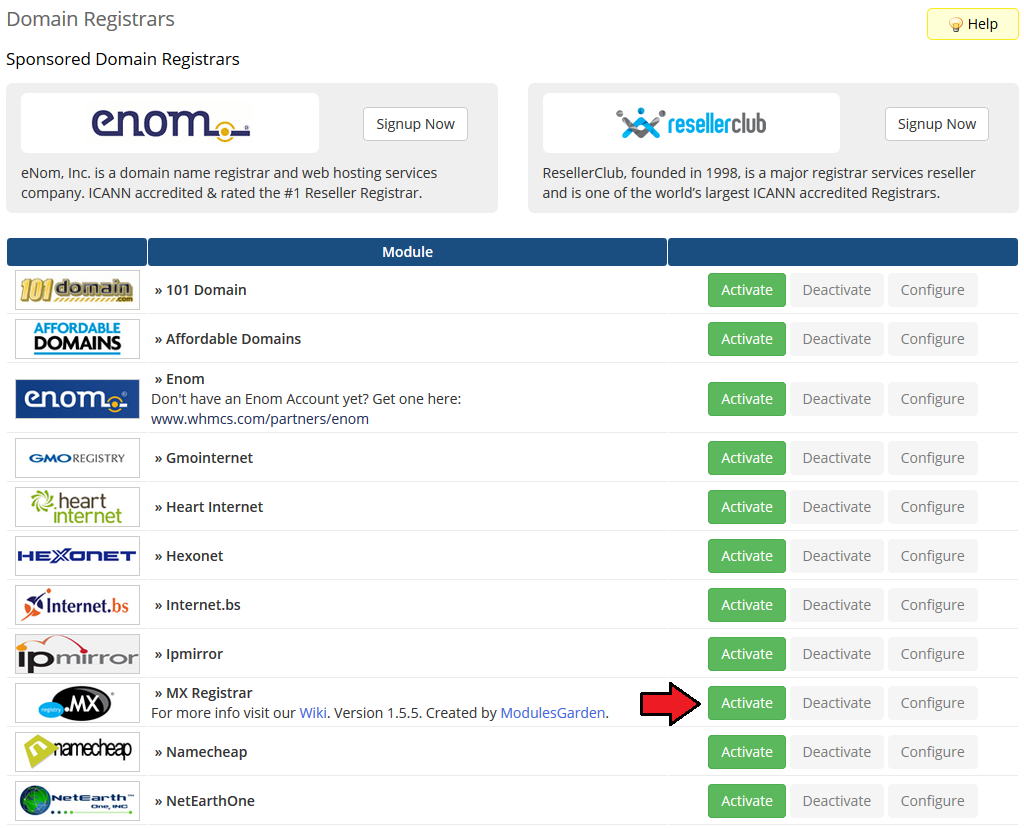
| 8. Now you have to activate the module in your WHMCS system. Log in to your WHMCS admin area and go to 'Setup' → 'Products/Servers' → 'Domain Registrars' . |
|
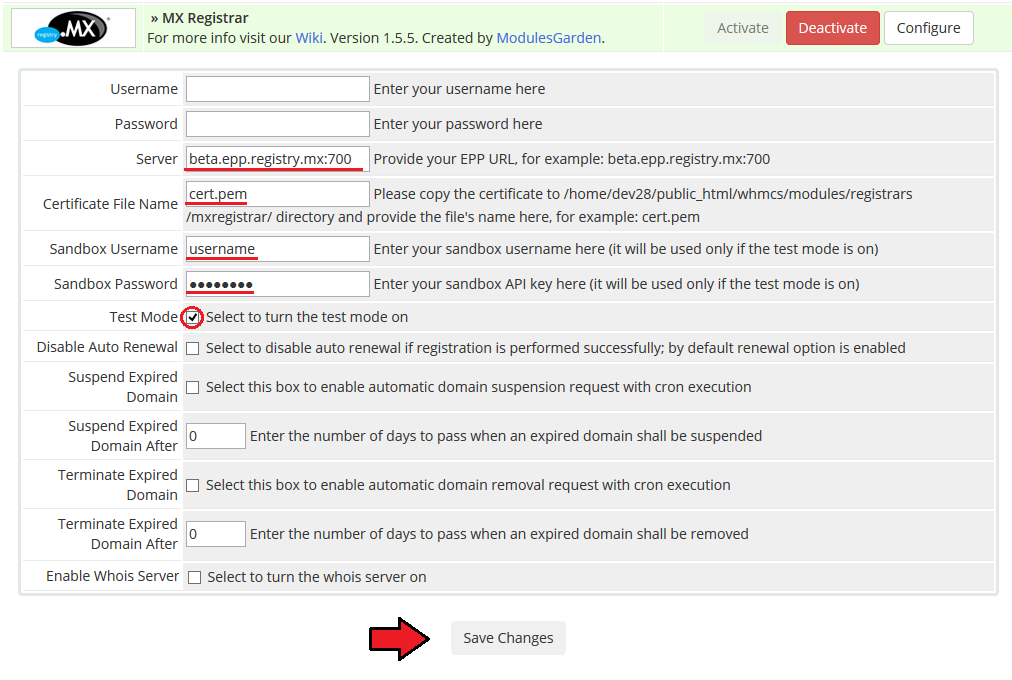
| 9. In next step you need to configure test mode. To do so, enter 'Server' , 'Certificate File Name' , 'Sandbox Username' and 'Sandbox Password' . |
|
Accreditation
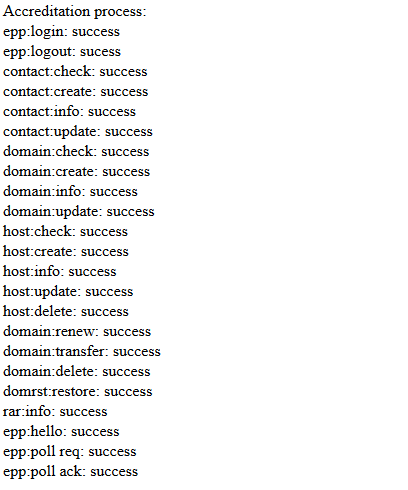
| 10. In order to connect with live server you have to pass accreditation test. To do so, enter 'your_whmcs/modules/registrars/mxregistrar/mx_accreditation.php?domain=testmx0.mx' to your web browser. |
|
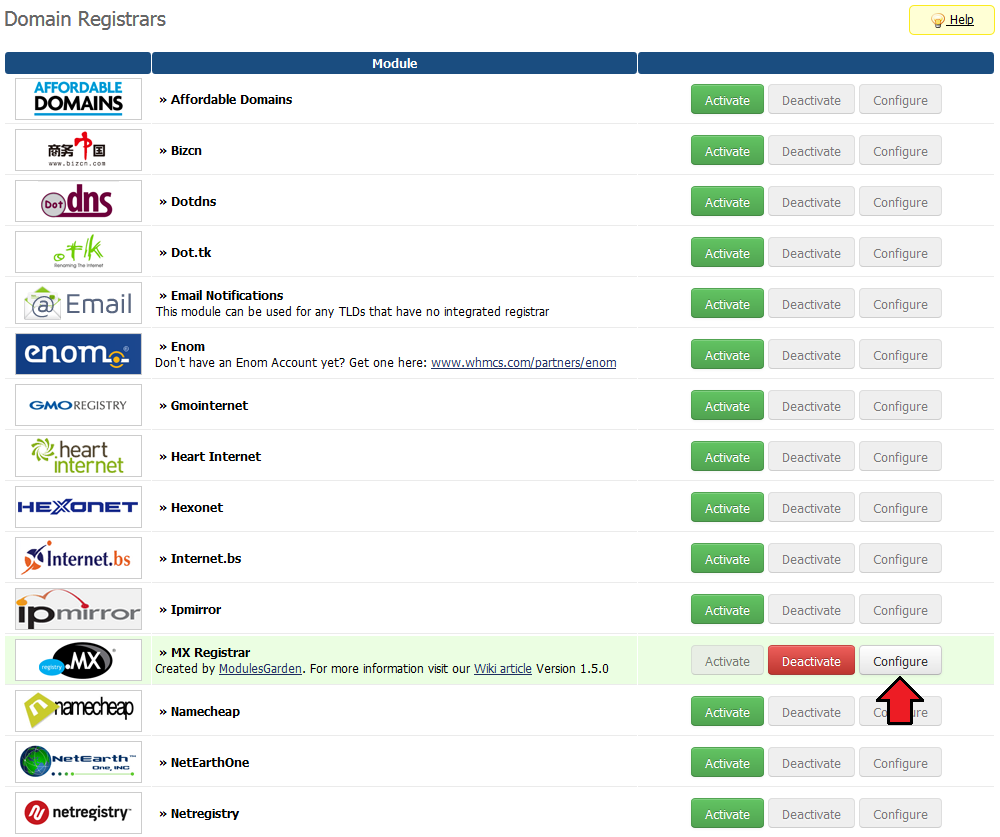
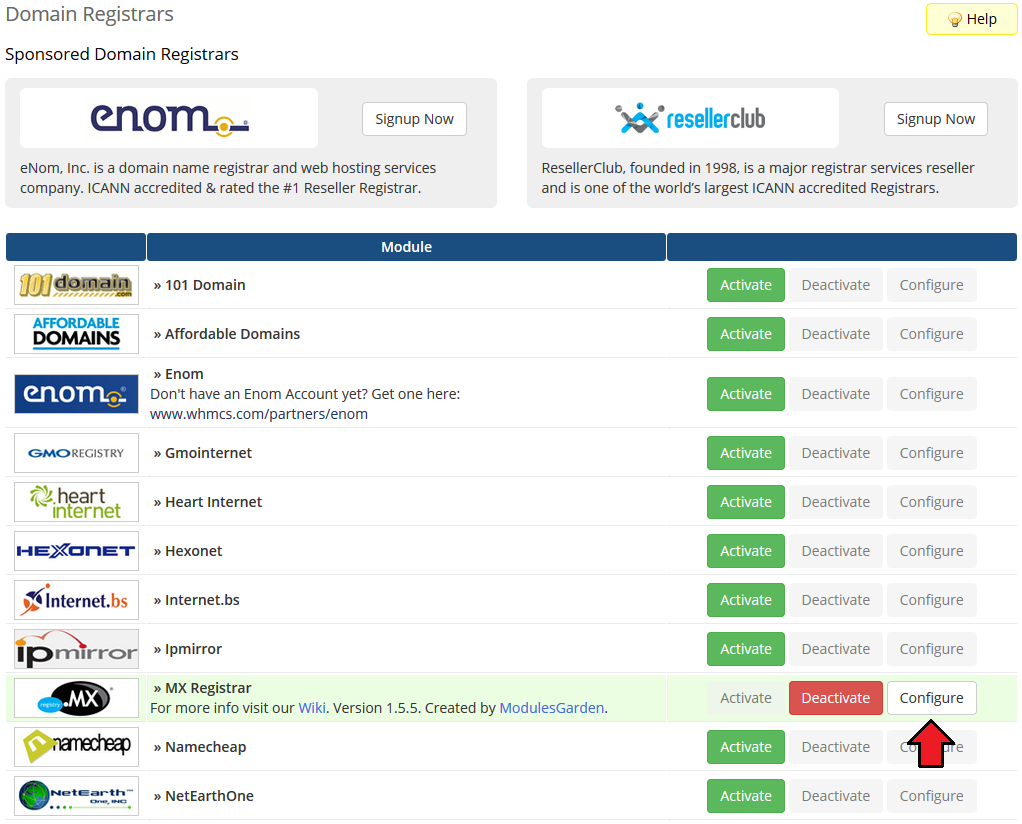
| 11. Now go to 'Setup' → 'Products/Servers' → 'Domain Registrars' . Afterwards find 'MX Registrar' and press 'Configure' button. |
|
| 12. Enter 'Username' , 'Password' and 'Server' for live server and unmark 'Test Mode' checkbox. Afterwards press 'Save Changes' . |
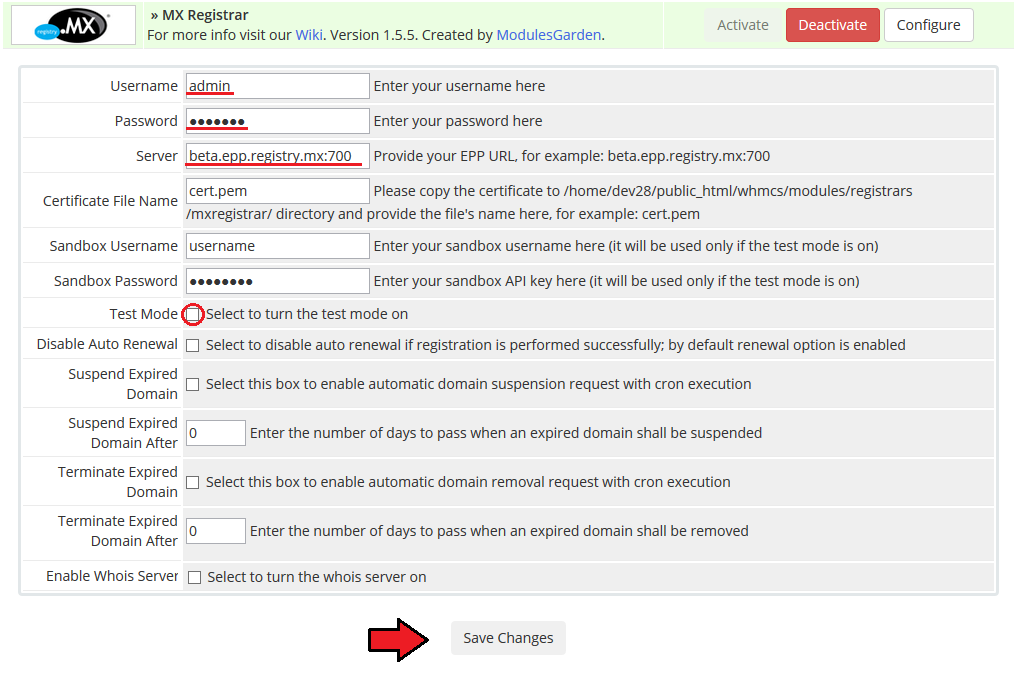
|
| You have just successfully installed and configured MX Registrar For WHMCS. |
Management
| MX Registrar allows you to manage your TLDs in your WHMCS system.
In this short guide we will present you the possibilities of our module. |
Management of TLDs
| Adding new TLD is quite simple. To add it, go to 'Setup' → 'Products/Services' → 'Domain Pricing' . Enter your TLD and choose 'MX Registrar' from 'Auto Registration' dropdown menu as shown on the screen below. |
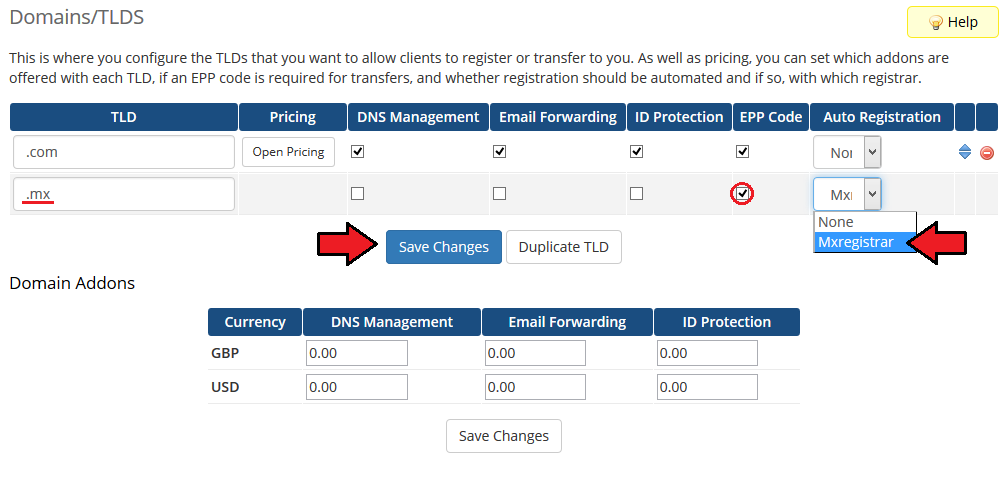
|
| As you can see 'Open Pricing' field has appeared. Click on it and set up your pricing. |
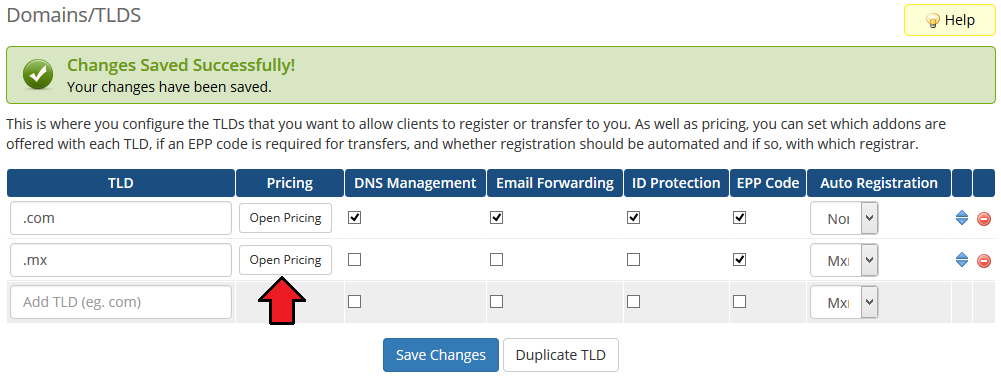
|
| In newly opened window you can set your prices. Remember to save the changes! |
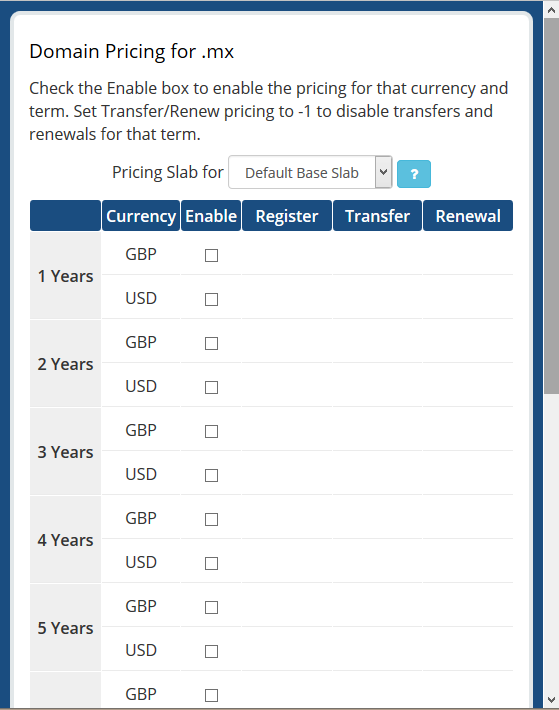
|
| Voila! Simple isn't it? |
Ordering
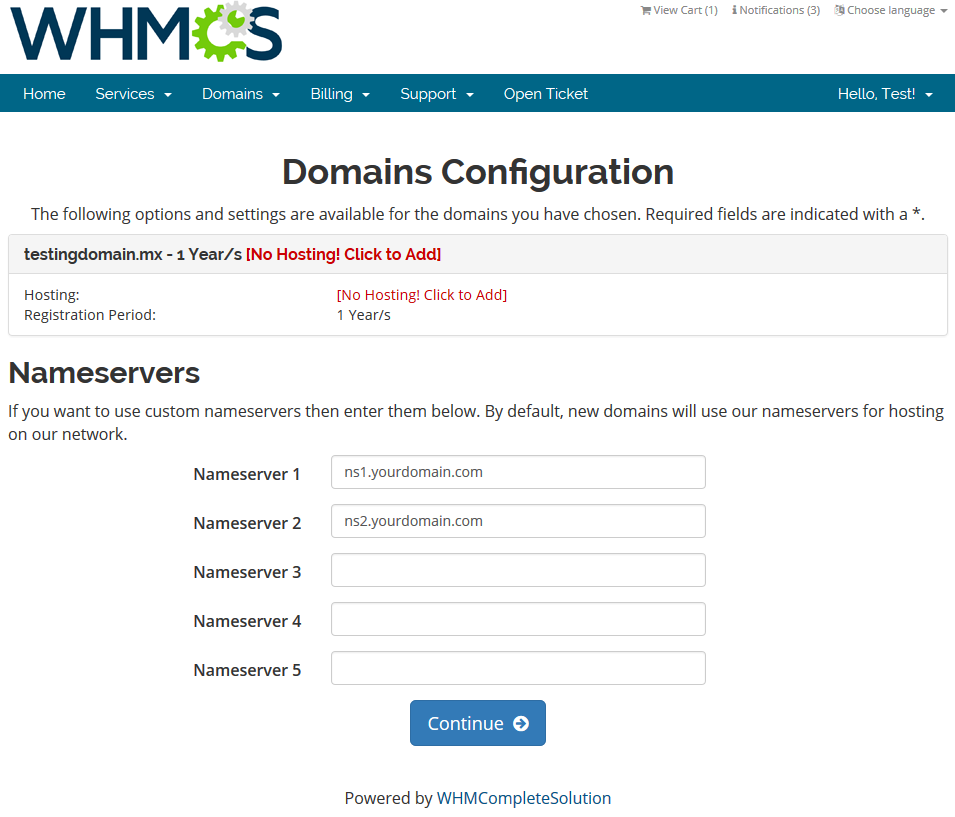
| Ordering .mx domain goes alike to ordering other domains. A typical order is presented on the screen below. |
|
Management of Domain
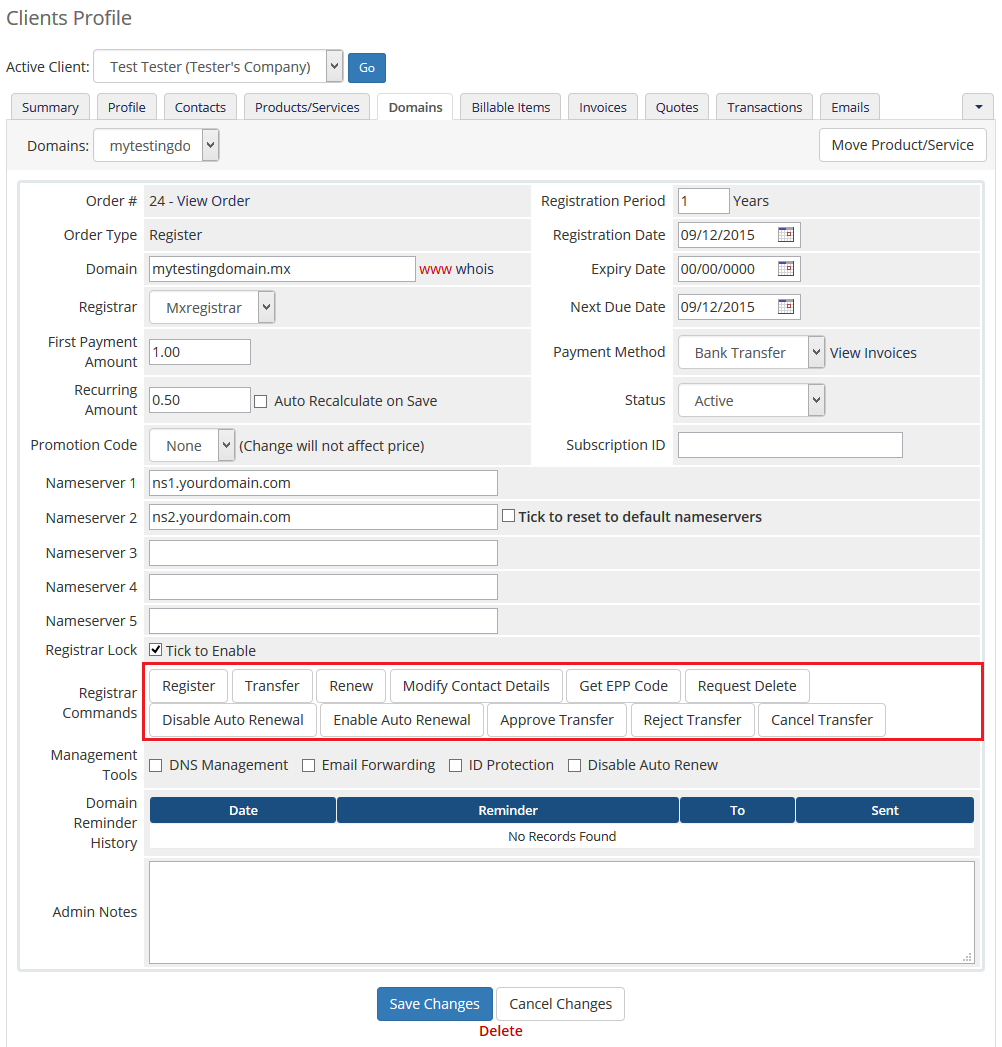
| In the admin area client overview → 'Domains' tab you can manage all the aspects of the domain. Along with basic actions like 'Register' , 'Renew' and 'Transfer' you can order 'Modify Contact Details' , 'Get EEP Code' and 'Request Delete' . |
|
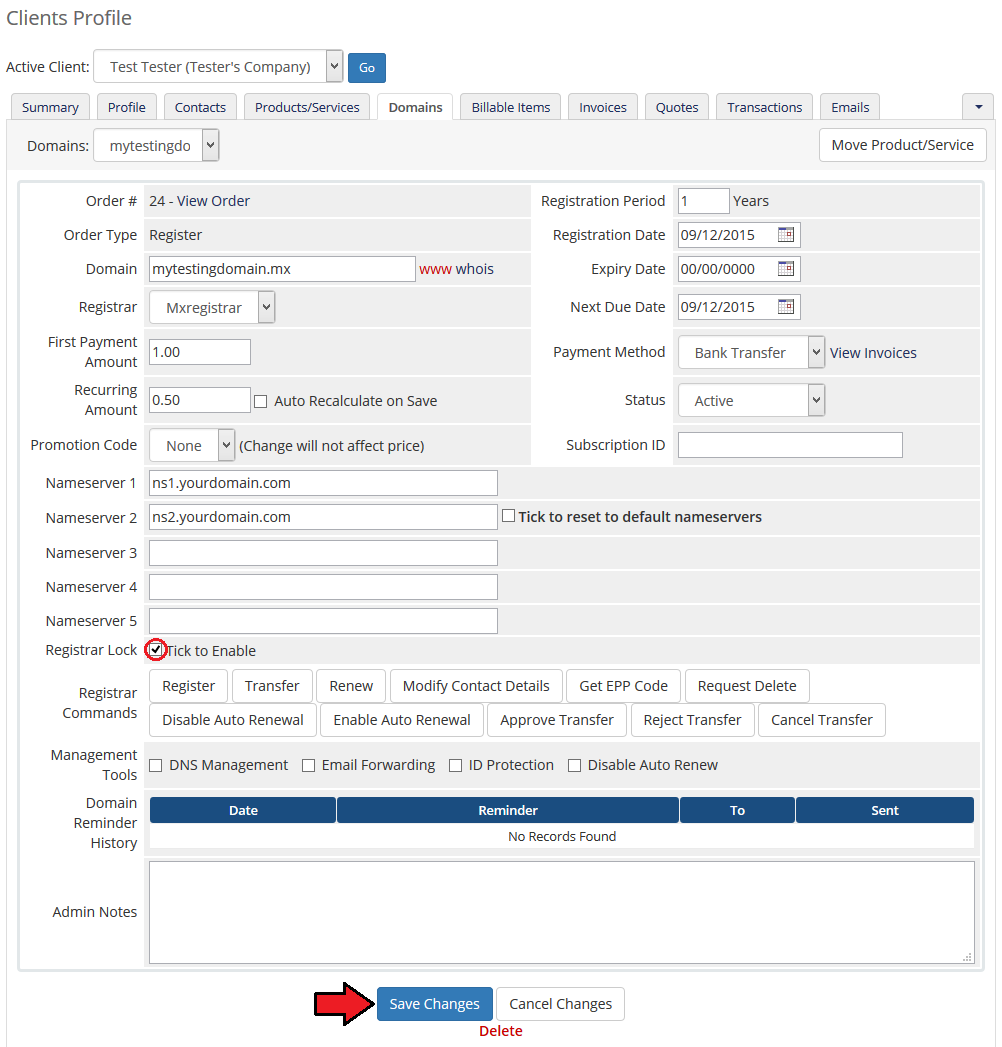
| Last but not least ability is locking clients domain, preventing him from making any change to it. To do so, simply tick 'Registrar Lock ' and press 'Save Changes' . |
|
Management of Expired Domain
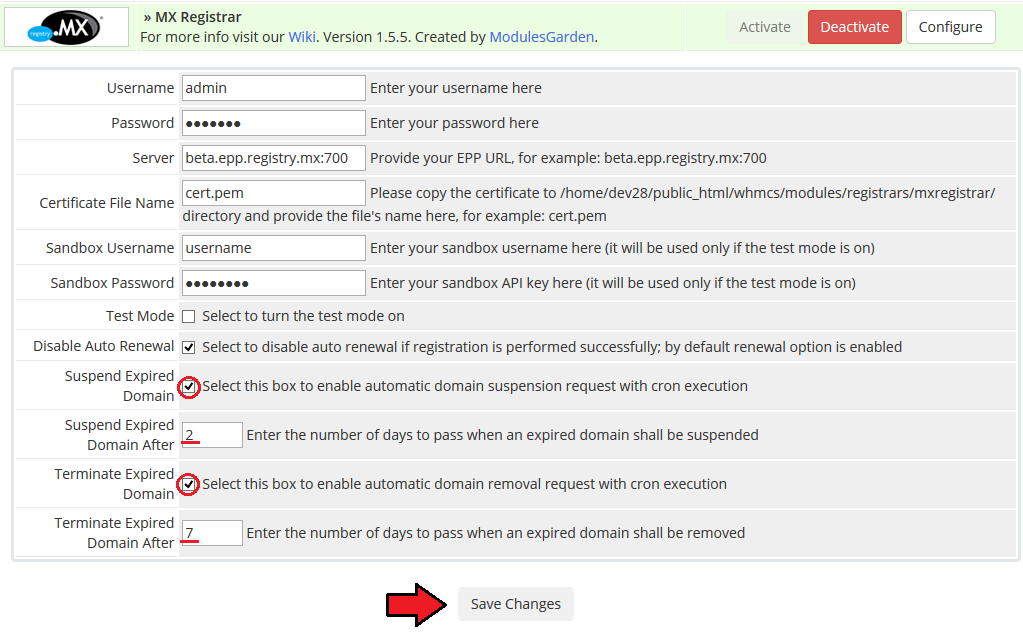
| Thanks to our module, you can automatically suspend and terminate expired domain. Cron job used for automatic suspend and terminate is called along with WHMCS cron job. |
|
| To suspend domain 2 days after domain expiration date and after next 5 days terminate domain completely, use following configuration: Mark both 'Suspend Expired Domain' and 'Terminate Expired Domains' checkboxes. |
|
Tips
| If you want to allow creating debug logs from MX Registrar module, go to 'Setup' → 'Products/Servers' → 'Domain Registrars' . Afterwards, press 'Configure' button next to MX Registrar, mark 'Debug Mode' checkbox and press 'Save Changes' . |
Common Problems
| 1. When you have problems with connection, check whether your SELinux or firewall does not block ports. |
2. If you still have problems with connection, check your certificate. To do so, open console and use this command (place it in one line):
openssl s_client -cert /your_whmcs/modules/registrars/mxregistrar/epp_complete.pem -key /your_whmcs/modules/registrars/mxregistrar/epp_complete.pem -connect beta.epp.registry.mx:700 |
| 3. When you get 'Object does not exists' error, ensure that your registrar module have unmarked 'Test Mode' checkbox. |
| 4. When you are receiving incorrect EEP code, ensure you are owner of domain. |
| 5. If one of the TLDs you have configured is unavailable, please make sure you have set up pricing in a default currency. |
| 6. If you are getting errors about incorrect 'State' , check if you are using correct accent for the word. For example 'Mexico' is incorrect state name, you should use 'México' instead. |