Support PIN For WHMCS
Contents |
About Support PIN For WHMCS
| Support PIN For WHMCS provides a quick and secure way to verify the identity of clients requesting assistance. Clients can easily generate temporary PINs in the client area and share them with the support team whenever verification is required. |
- Core Features:
| ✔ Enable Clients To Generate Secure Support PINs For Identity Verification |
| ✔ Allow Support Staff To Verify Client Identities Before Providing Assistance |
| ✔ Protect Client Account Data By Requiring Support PIN Verification Before Staff Access |
| ✔ Integrate Support PIN Verification With WHMCS Dashboard And Client Profiles |
- Addon Module:
| ✔ Verify Support PINs And Access Associated Client Accounts |
| ✔ Verify Support PINs Directly From WHMCS Admin Dashboard |
| ✔ View And Verify Active Support PINs On Client Summary Pages |
| ✔ View Dashboard With Support PIN Statistics: |
| ✔ Active PINs |
| ✔ Used PINs |
| ✔ Expired PINs |
| ✔ Revoked PINs |
| ✔ View And Manage Generated Support PINs: |
| ✔ View Assigned Client |
| ✔ Check PIN Status And Length |
| ✔ Check Whether PIN Is Single Use |
| ✔ View Creation, Expiration And Usage Dates |
| ✔ Revoke Active PINs |
| ✔ Configure Support PIN Parameters: |
| ✔ Define PIN Length |
| ✔ Set PIN Validity Period |
| ✔ Configure Support PIN Lifecycle: |
| ✔ Allow Multiple Active PINs Per Client |
| ✔ Expire PIN After Number Of Uses |
| ✔ Control Staff Access To Client Accounts: |
| ✔ Require Support PIN Verification Before Accessing Client Data |
| ✔ End Staff Access When Verified PIN Expires |
| ✔ Hide PIN Verification Option From Staff Views |
| ✔ Configure Support PIN Availability In Client Area: |
| ✔ Enable Support PIN Generation |
| ✔ View And Manage Module Logs |
- Client Area:
| ✔ Generate Temporary Support PINs |
| ✔ View Active Support PIN In Sidebar |
| ✔ Show And Hide Active Support PIN |
| ✔ Copy Generated Support PIN |
| ✔ View Remaining PIN Validity Period |
- General Info:
| ✔ Multi-Language Support |
| ✔ Supports PHP 8.3 Back To PHP 8.2 |
| ✔ Supports WHMCS Themes "Twenty-One" And "Nexus" |
| ✔ Supports WHMCS V9.X |
| ✔ Requires ionCube Loader V14 Or Later |
| ✔ Easy Module Upgrade To Open Source Version |
Installation
| This tutorial will show you how to successfully install and configure Support PIN For WHMCS. We will guide you step by step through the whole installation and configuration process. |
| 1. Log in to our client area and download the module. |

|
| 2. Extract the package and upload its content into the main WHMCS directory. The content of the package to upload should look like this. |

|
| 3. When you install Server Monitoring For WHMCS for the first time you have to rename 'license_RENAME.php' file. The file is located in 'modules/addons/ServerMonitoring/license_RENAME.php'. Rename it from 'license_RENAME.php' to 'license.php'. |

|
| 4. In order to configure your license key, you have to edit the previously renamed 'license.php' file. Enter your license key between quotation marks as presented on the following screen. You can find your license key in our client area → 'My Products'. |

|
| 5. Now you have to activate the module in your WHMCS system. Log in to your WHMCS admin area. Go to 'System Settings' → 'Addon Modules'. Afterwards, find 'Server Monitoring' and press the 'Activate' button. |

|
| 6. In the next step, you need to permit access to this module. To do so, click on the 'Configure' button, tick 'Full Administrator' and press 'Save Changes'. |

|
| 3. You have just successfully installed Support PIN! You can access your module under 'Addons' → 'Support PIN'. |
Management
| Support PIN For WHMCS lets clients generate a short-lived verification PIN, and gives your staff several places to check it against a client's claim. In this guide, we will walk you through every section and option of the module in detail. |
Dashboard
The dashboard gives an at-a-glance read on PIN volume through four counters:
Each counter has its own 'View PINs' button, which filters the table below to just that status. |

|
| Below the counters sits a standalone 'Verify Support PIN' field. Enter a PIN a client has given you and press 'Verify PIN' to confirm it - this does not consume the PIN's use count, it only reports a match or no-match. |

|
Underneath, the full table of issued PINs lists, per PIN:
Use the trash icon on a row to 'Revoke PIN' on that single entry. |

|
| To revoke several PINs at once, tick the checkboxes of the rows you want to remove, open the mass action menu above the table, and choose 'Revoke PIN'. |

|
Settings
| The 'Settings' tab groups every PIN policy option into four panels. |
PIN Settings
|

|
PIN Lifecycle
The following options control how many PINs may remain active for a client and how many times each PIN may be successfully verified:
These settings work independently. 'Allow Multiple Active PINs' determines whether a client can have only one or multiple active PINs at the same time, up to the fixed limit of five. |

|
Staff Access
The following options determine whether Support PIN verification is required before staff members can access client data and how long the verified access remains valid:
|

|
Client Area Configuration
|

|
Home Widget
| The compact 'Verify Support PIN' panel is automatically enabled on the standard WHMCS admin dashboard when the module is activated. No additional configuration is required. Enter a valid Support PIN to open the associated client's profile directly. Unlike verification from the Client Summary page, this action does not count toward the PIN's usage limit. |

|
Client Summary Integration
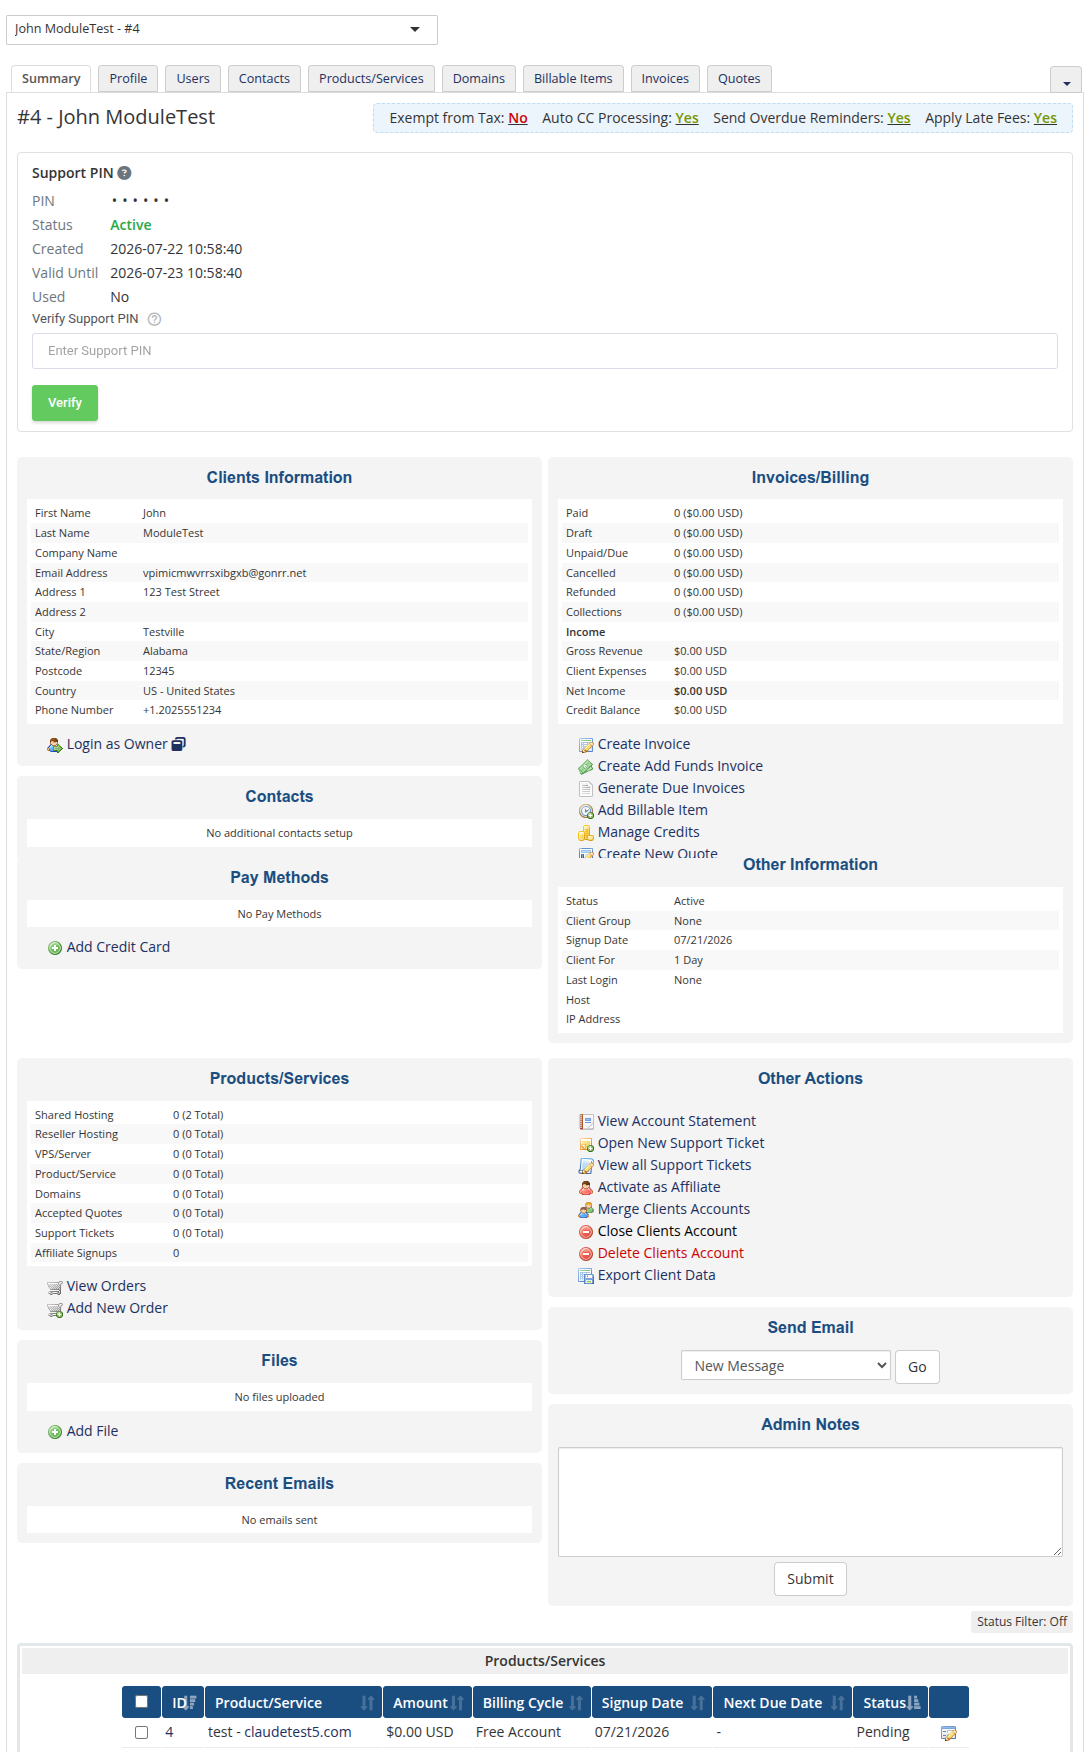
| On a client's own 'Summary' tab, a 'Support PIN' panel shows that client's current PIN status, when it was created, when it expires, and when (if ever) it was used. |
 |
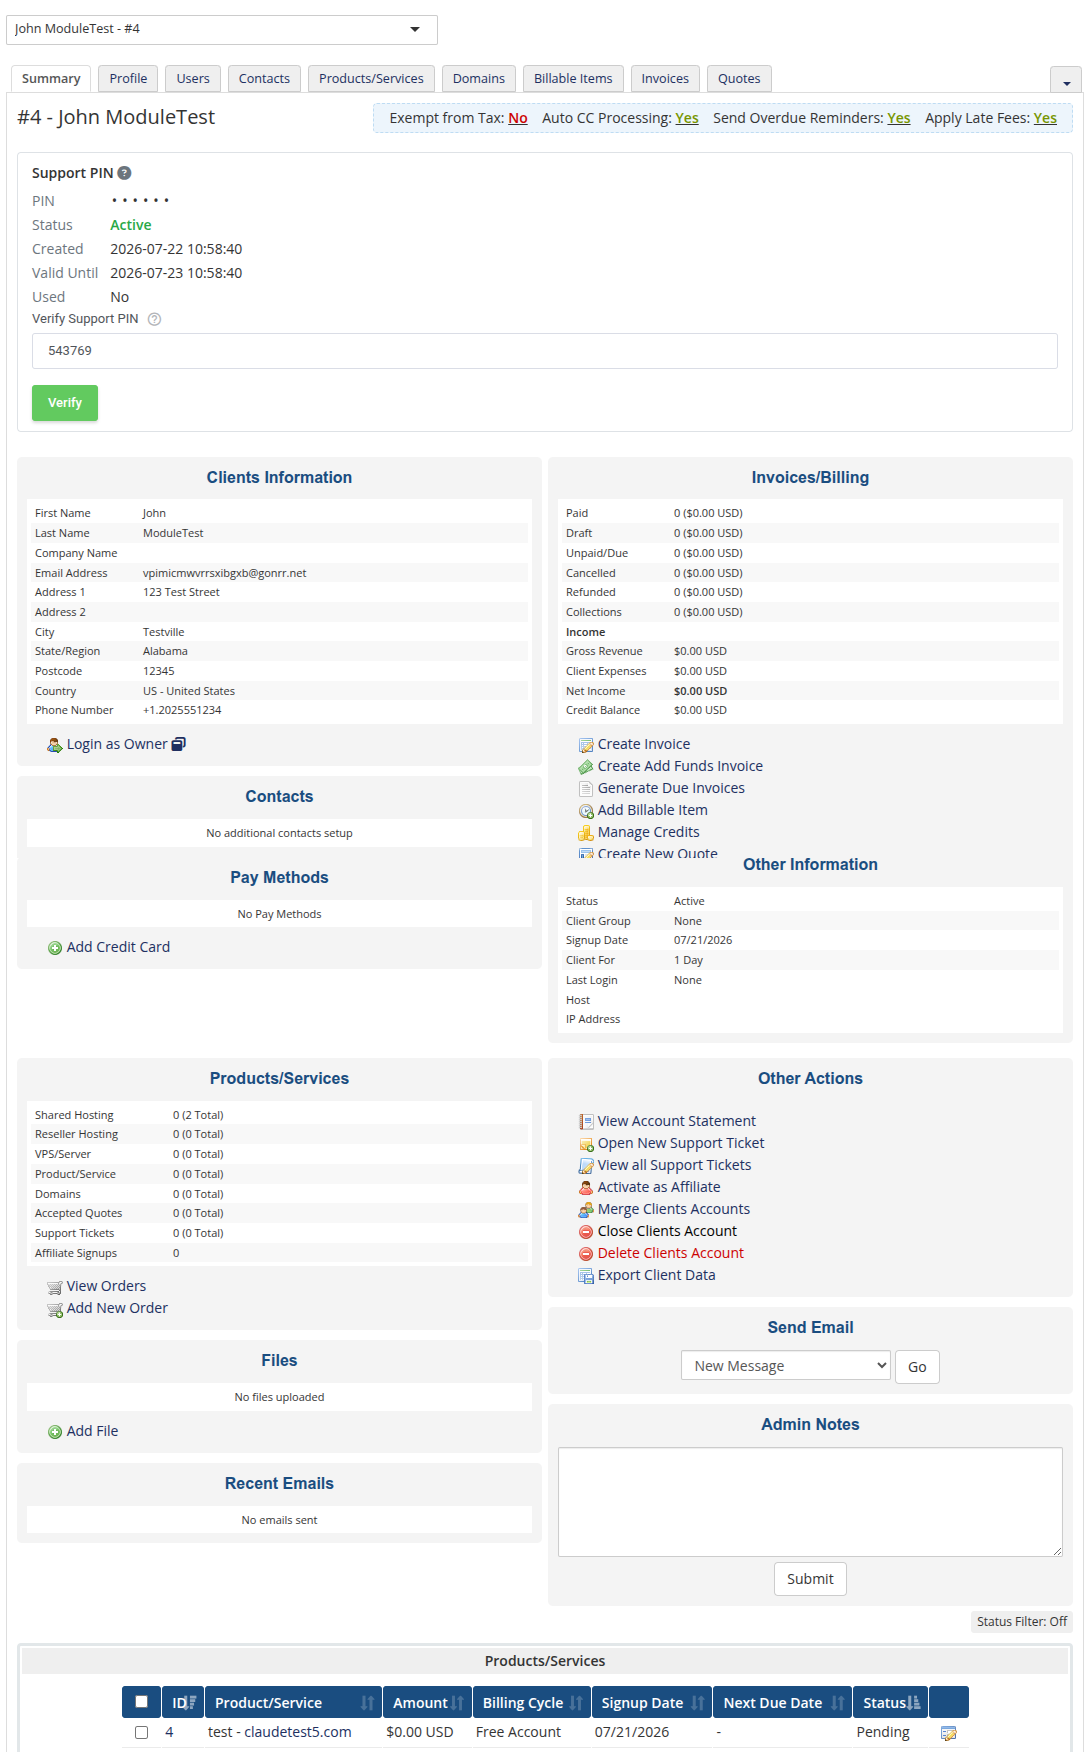
| While a PIN is Active, the same panel also shows a 'Verify PIN' field, so the code the client just gave can be checked right there, without leaving the client's profile. Unlike the Home Widget verify field, a successful verification here does count against the PIN's use limit. |
 |
Client Area
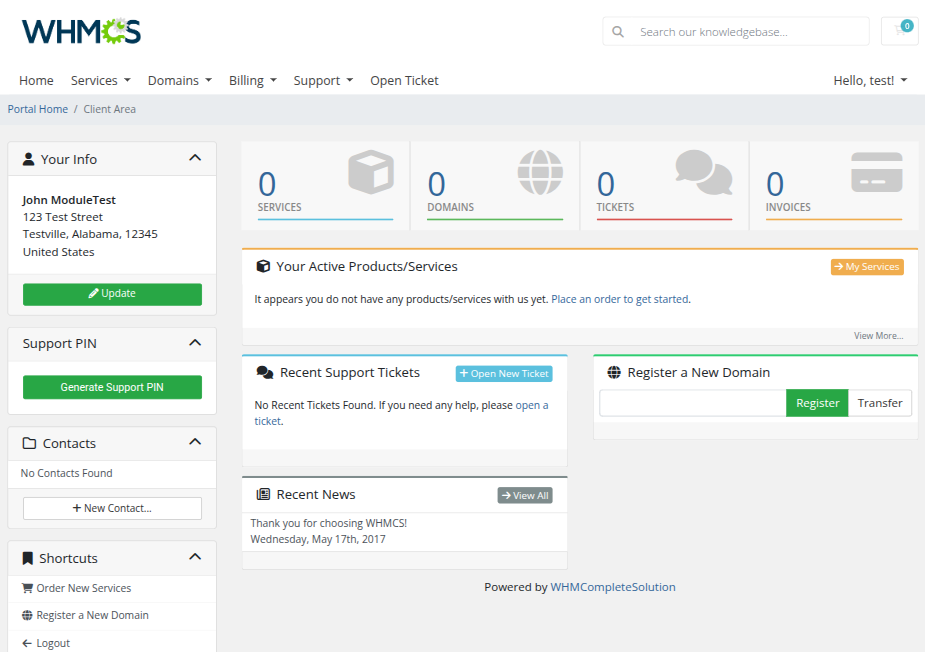
| The 'Support PIN' panel is displayed in the client area sidebar on every page. If there are no active PINs, it contains a single 'Generate Support PIN' button. |
 |
A newly generated PIN:
|
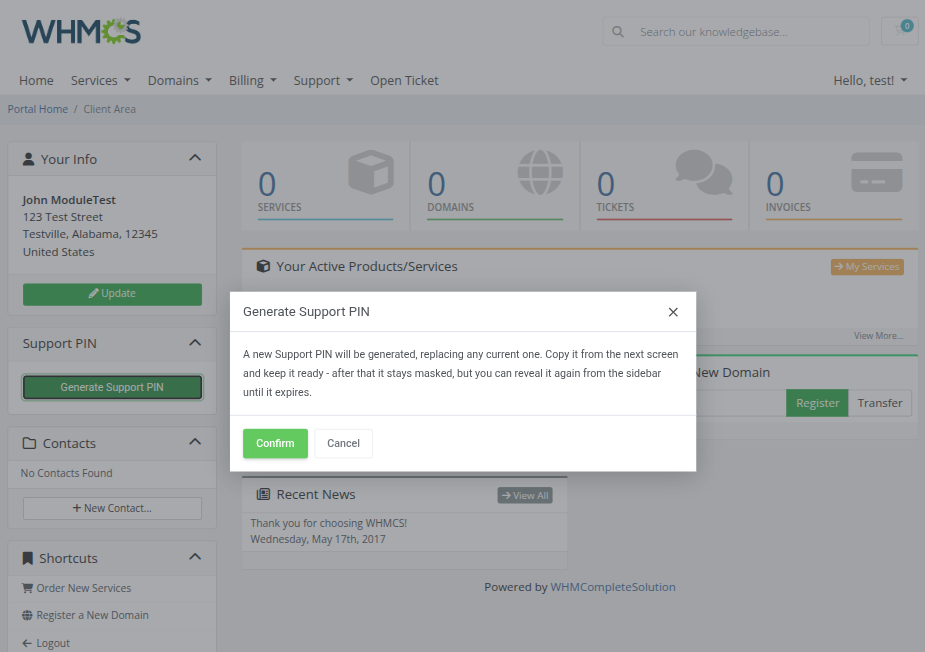 |
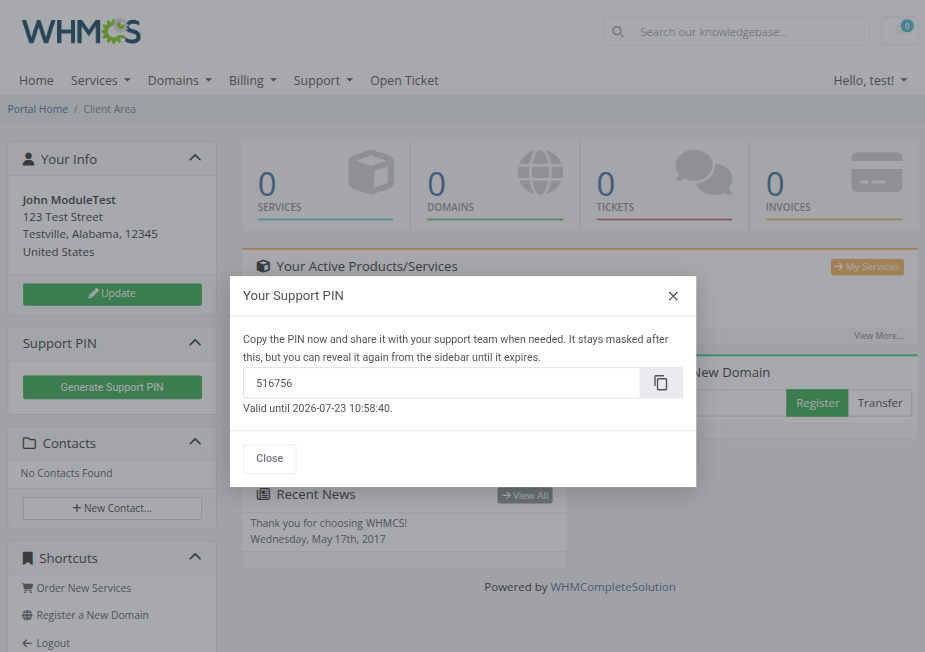
| Once the action is confirmed, the newly generated PIN and its expiration date are displayed. |
 |
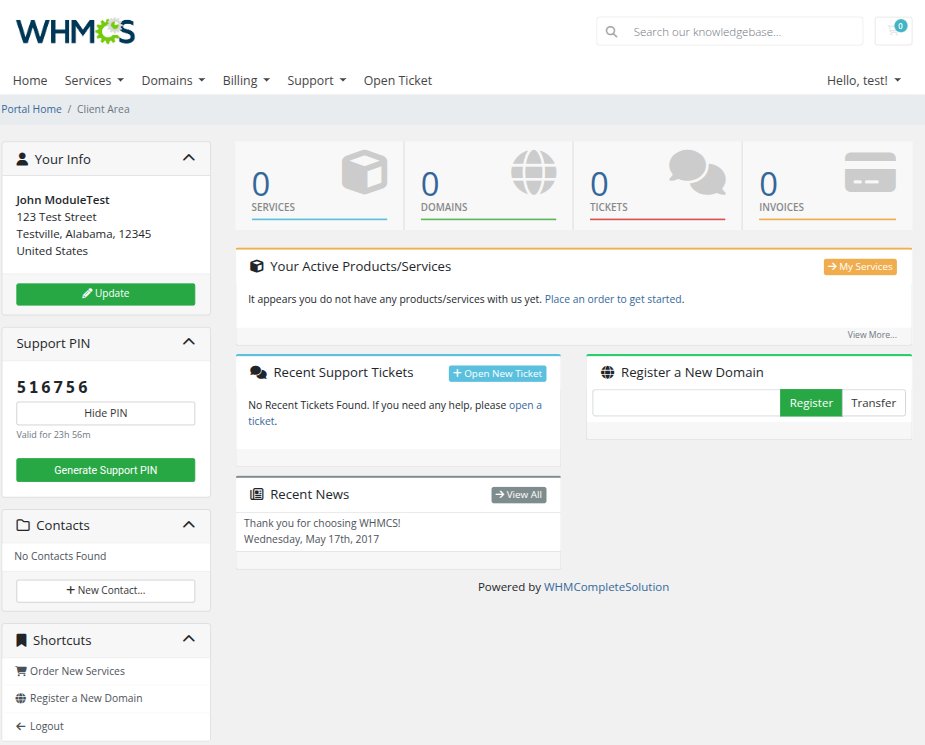
| Back in the sidebar, the panel now shows the PINs with a live countdown to expiry, a 'Hide PIN' toggle for privacy on a shared screen, and the option to generate a fresh one at any time. |
 |
Logs
| The "Logs" tool makes monitoring and managing module activity records simple and efficient. It provides options to categorize, filter, and view detailed entries, giving you control over the logs. For detailed guidance on using this tool, check its dedicated article, which is available here. |

|
Tips
| 1. Keep "Hide Full PIN" enabled in production. Staff only ever need to verify a PIN a client reads aloud, not to read it back themselves - the value is a one-way hash regardless and can never actually be redisplayed. |
| 2. Turn on "Require PIN Verification For Client Access" for the strictest workflow. Combined with "Deny Admin Access After PIN Expiration", staff will need to re-verify the client for every new support interaction. |
| 3. Leave "Expire PIN After X Uses" at its default of 1 unless you have a specific reason for letting a PIN be checked more than once. It's what makes each PIN effectively single-use out of the box. |
Update Instructions
| An essential guidance through the process of updating the module is offered here. Ensure successful completion of the module update by carefully following each step, thereby preventing data loss or any unforeseen issues. |
Upgrade Guide
| Seeking a solution that offers greater flexibility, customization tailored to your precise needs, and unrestricted availability? There is an option that not only proves to be cost-effective in the long run but also includes prioritized support services, making it a truly valuable investment. Opt for the Open Source version of your Abandoned Cart For WHMCS module to unlock these benefits. Follow a comprehensive guide covering the transition process, the advantages it brings, and step-by-step instructions on what to do next after the order has been successfully finalized. |
Common Problems
| 1. A client cannot see the "Generate Support PIN" button in the client area. Check 'Settings' → 'Client Area' → 'Enable Generate PIN Button' is turned on. |
| 2. Staff are locked out of a client's data unexpectedly. This happens when 'Require PIN Verification For Client Access' is enabled and the previously verified PIN has expired. Ask the client to read out their current PIN again, or generate a new one, and verify it from the Client Summary panel or the module's Dashboard. |
| 3. A PIN stops working after being checked once, even though it hasn't expired. This is expected with the default policy: 'Expire PIN After X Uses' is 1 out of the box, so a PIN is spent after its first successful verification. Raise that value (or set it to 0 for no limit) in 'Settings' → 'PIN Lifecycle' if clients need to be verified more than once per PIN. |