Payment Gateway Charges For WHMCS
Contents |
About Payment Gateway Charges For WHMCS
| Payment Gateway Charges For WHMCS is a fully featured addon module created in order to manage additional charges. |
- Features:
| ✔ Set Different Rates For Different Payment Gateways (Percentage Or Fixed) |
| ✔ Set Different Discounts For Different Payment Gateways (Percentage Or Fixed) |
| ✔ Set Minimum Invoice Value To Charge Payments And Discounts |
| ✔ Exclude From Payments And Discounts Certain Clients |
| ✔ Exclude From Payments Certain Producs, Addons, Domains And Other |
| ✔ Include To Payments Certain Domain Actions And Other Invoice Item Types |
| ✔ Display/Hide Information About Additional Payments During Ordering |
- Additionally:
| ✔ Supports WHMCS V5 and Later |
Installation
| This tutorial will show you how to successfully install and configure Payment Gateway Charges For WHMCS. We will guide you step by step through the whole installation and configuration process. |
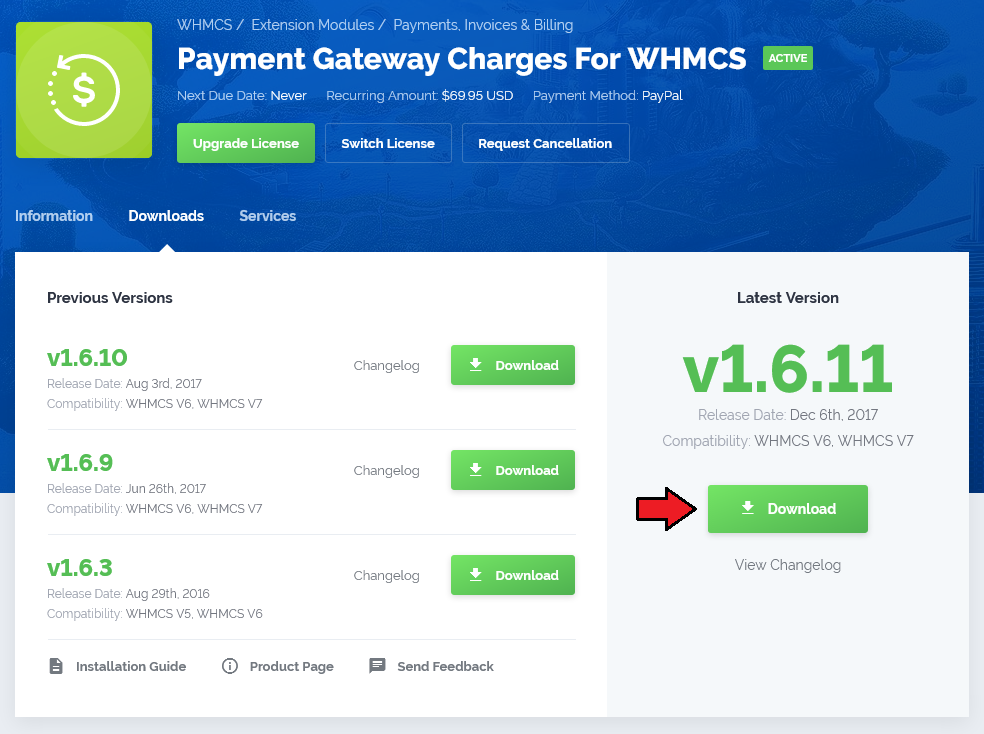
| 1. Log in to your clientarea and download Payment Gateway Charges For WHMCS. |
|
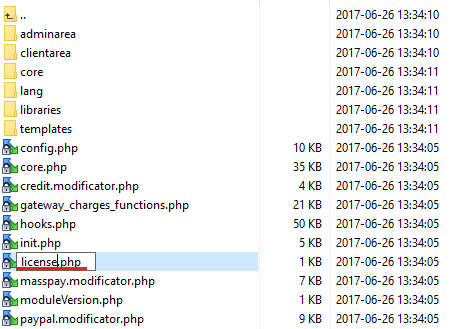
| 2. Upload and extract the module into the main WHMCS directory. Files in your WHMCS directory should look like this. |

|
| 3. When you install Payment Gateway Charges for the first time you have to rename 'license_RENAME.php' file. File is located at 'modules/addons/gateway_charges_functions/license_RENAME.php' . Rename it from 'license_RENAME.php' to 'license.php' . |
|
| 4. In order to configure your license key, you have to edit a previously renamed 'license.php' file.' Enter your licence key between quotation marks as presented on the following screen. You can find your license key at your client area → 'My Products' . |

|
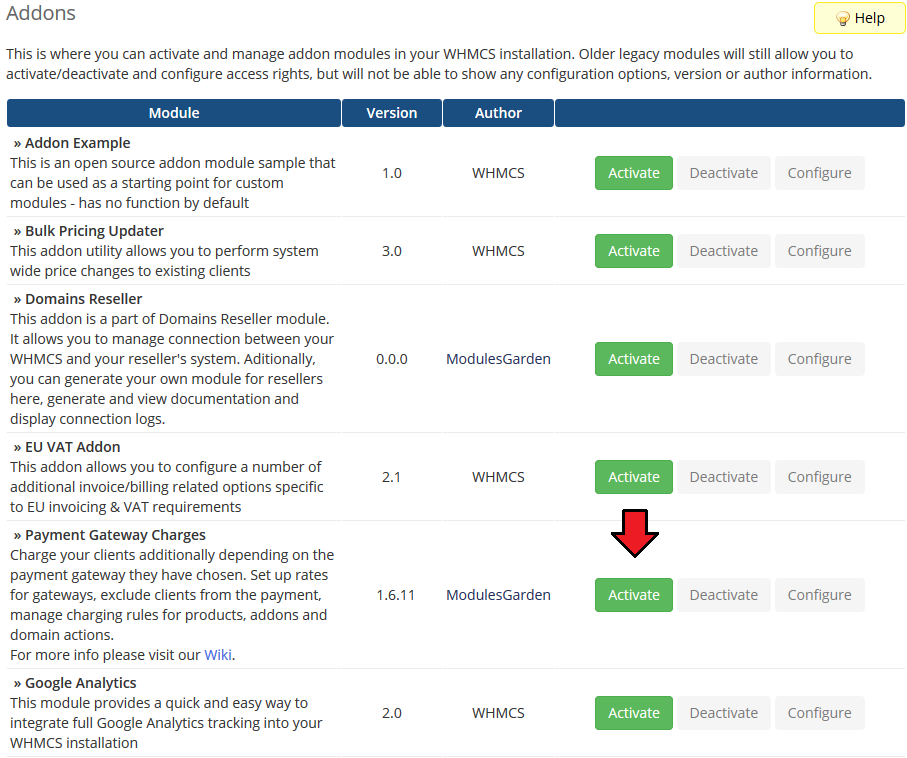
| 5. Now you have to activate the module in your WHMCS system. Login to your WHMCS admin area. Go to 'Setup' → 'Addon Modules' . Afterwards find 'Payment Gateway Charges' and press 'Activate' button. |
|
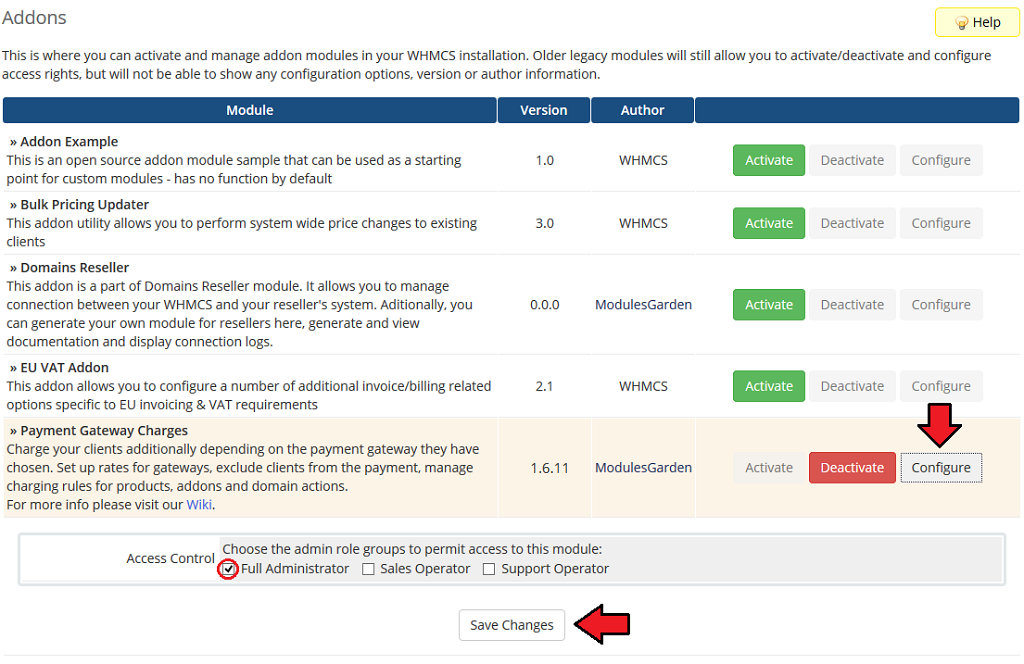
| 6. In next step you need to permit access to this module. To do so click on 'Configure' button, tick 'Full Administrator' and press 'Save Changes' . |
|
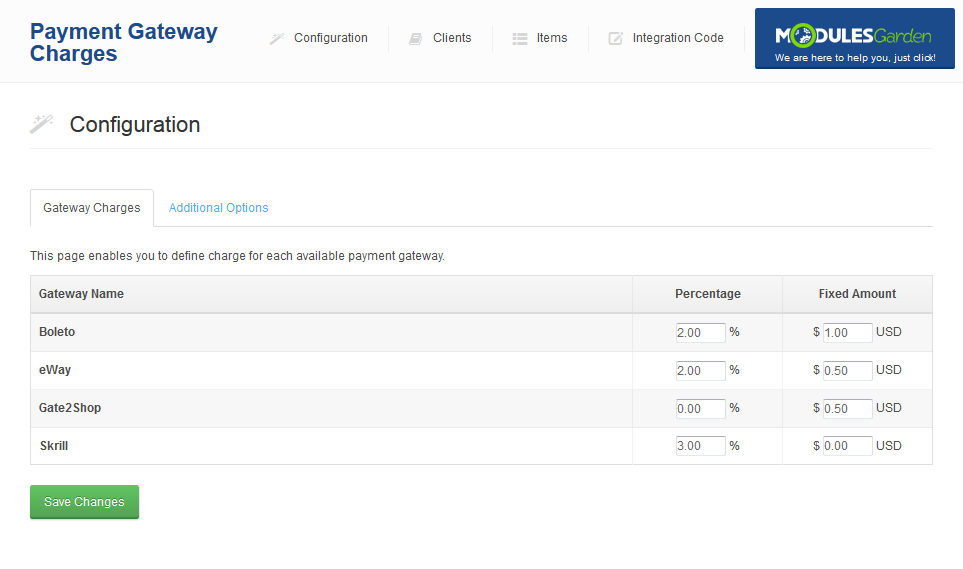
| 7. You have just successfully installed Payment Gateway Charges! You can access your module at 'Addon' → 'Payment Gateway Charges' . |
|
Configuration and Management
| Payment Gateway Charges For WHMCS allows your customers to manage charges in your WHMCS system. In this short guide we will present you the possibilities of our module. |
Integration Code
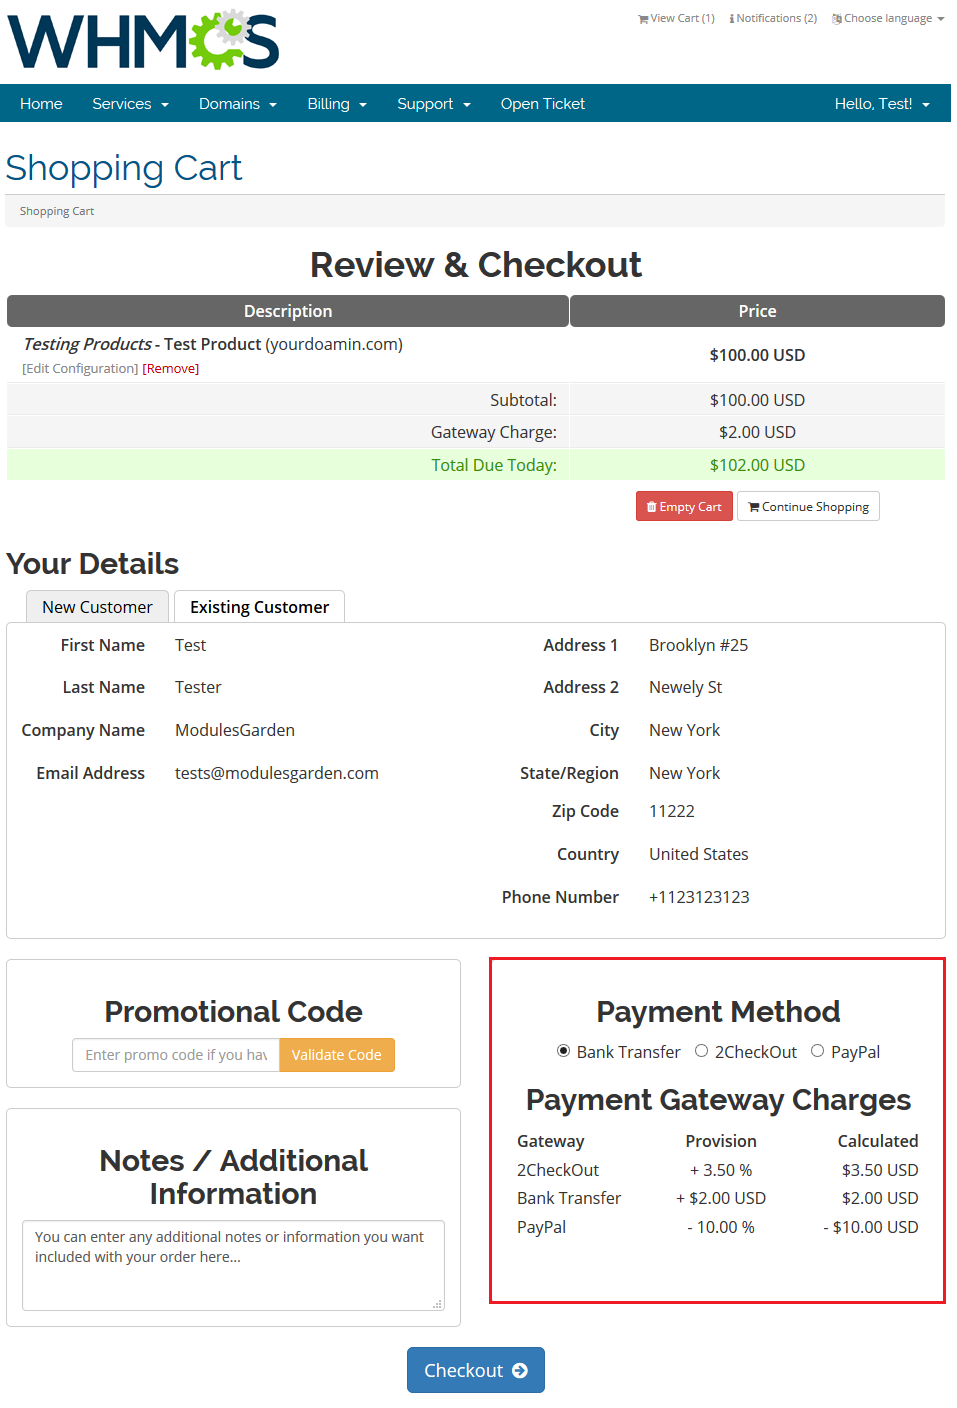
| In order to enable your customers to view charges for using payment gateways, you have to edit your 'viewcart.tpl' file. File is located at 'your_whmcs/templates/orderforms/modern/viewcart.tpl' . To proceed find the following class: <div class="signupfields padded"> Place the code below: {$gatewayChargesTable}
Exactly after: </table> </div> Code should be placed around line 264 as presented on the following screen. |

|
| In the client area it should look like on the screen below. |
|
Configuration
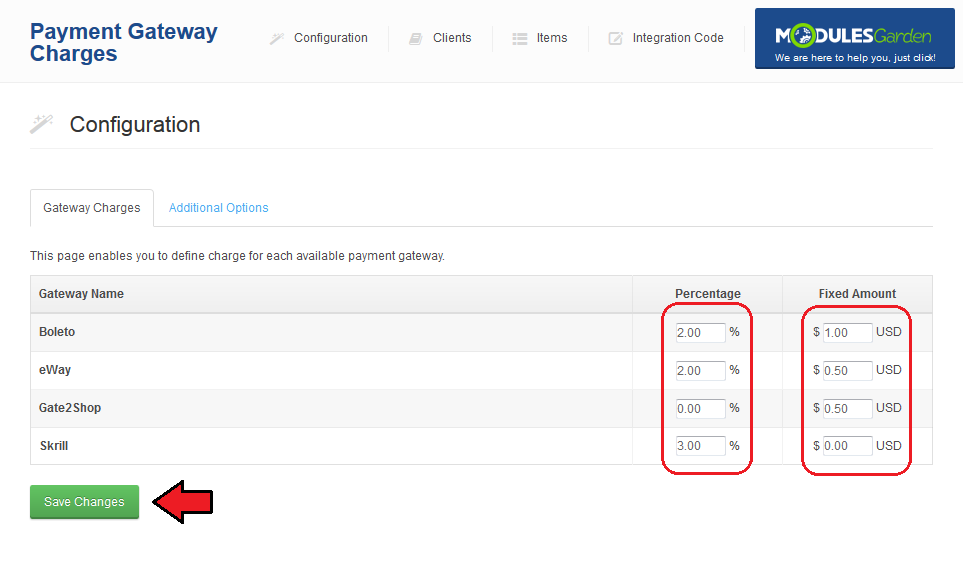
| To set additional charge for payment gateway, simply enter desired values in coresponding column. You can add fixed amount and/or percentage value of invoice to charge. When you are finished, click on 'Save Changes' button. |
|
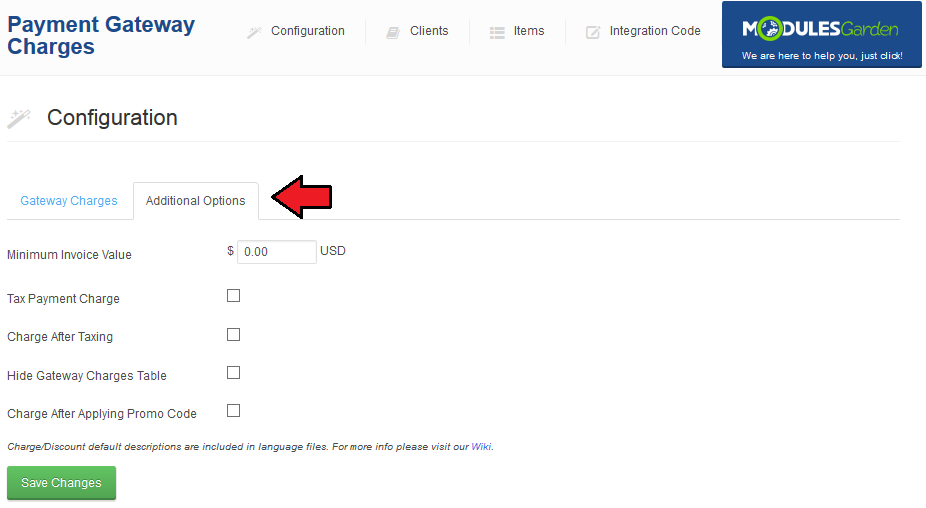
| In order to set minimum value of invoice to charge or place discount, type value in 'Minimum Invoice Value' as shown on screen below. Afterwards press 'Save Changes' . |
|
| To change charge and discount description displayed on invoice, edit accordingly 'Charge Description' and 'Discount Description' textboxes as presented on the screen below. Next, click 'Save Changes' button. |
| File:GC12.png |
Management of Clients
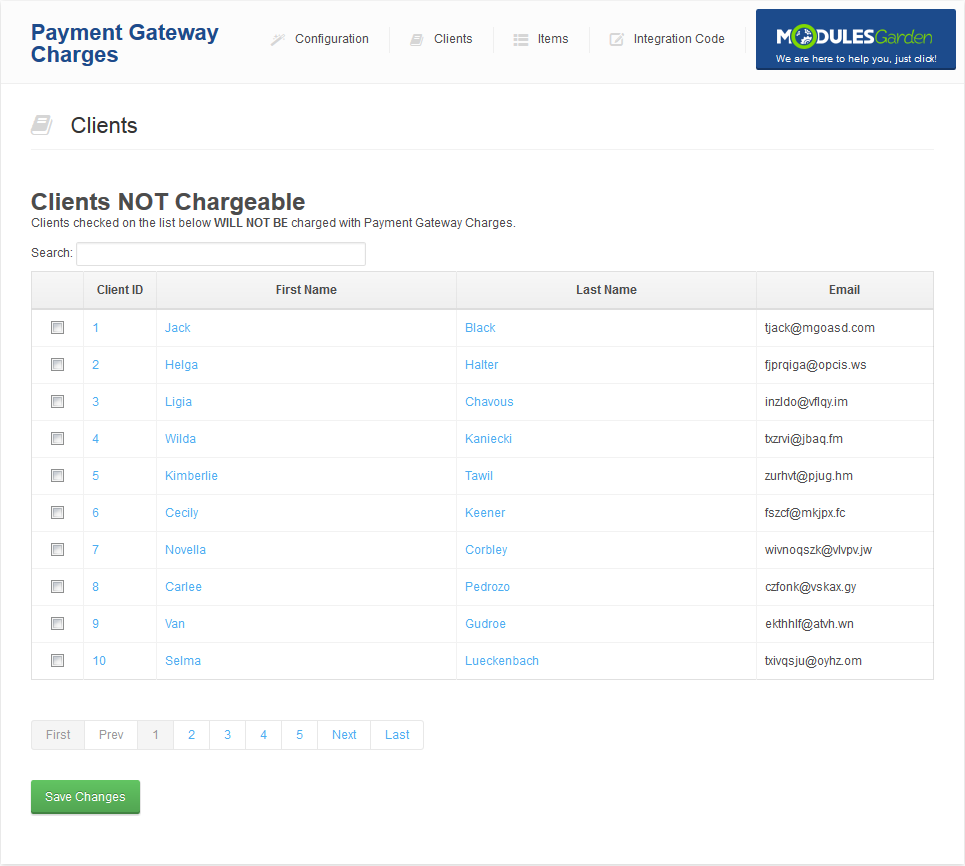
| In order to enable/disable charges for specific clients go to 'Client' tab as shown on the following screen. |
|
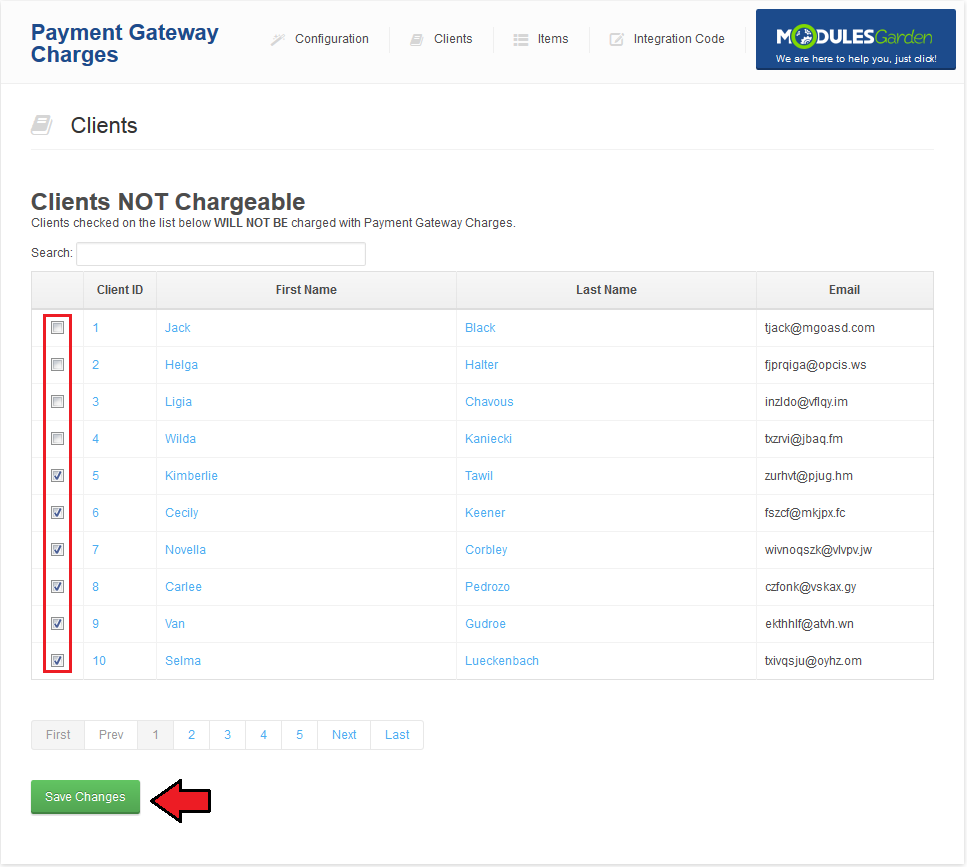
| Here you can exclude clients from charge. To do so, mark checkbox next to client ID and press 'Save Changes' . |
|
Management of Items
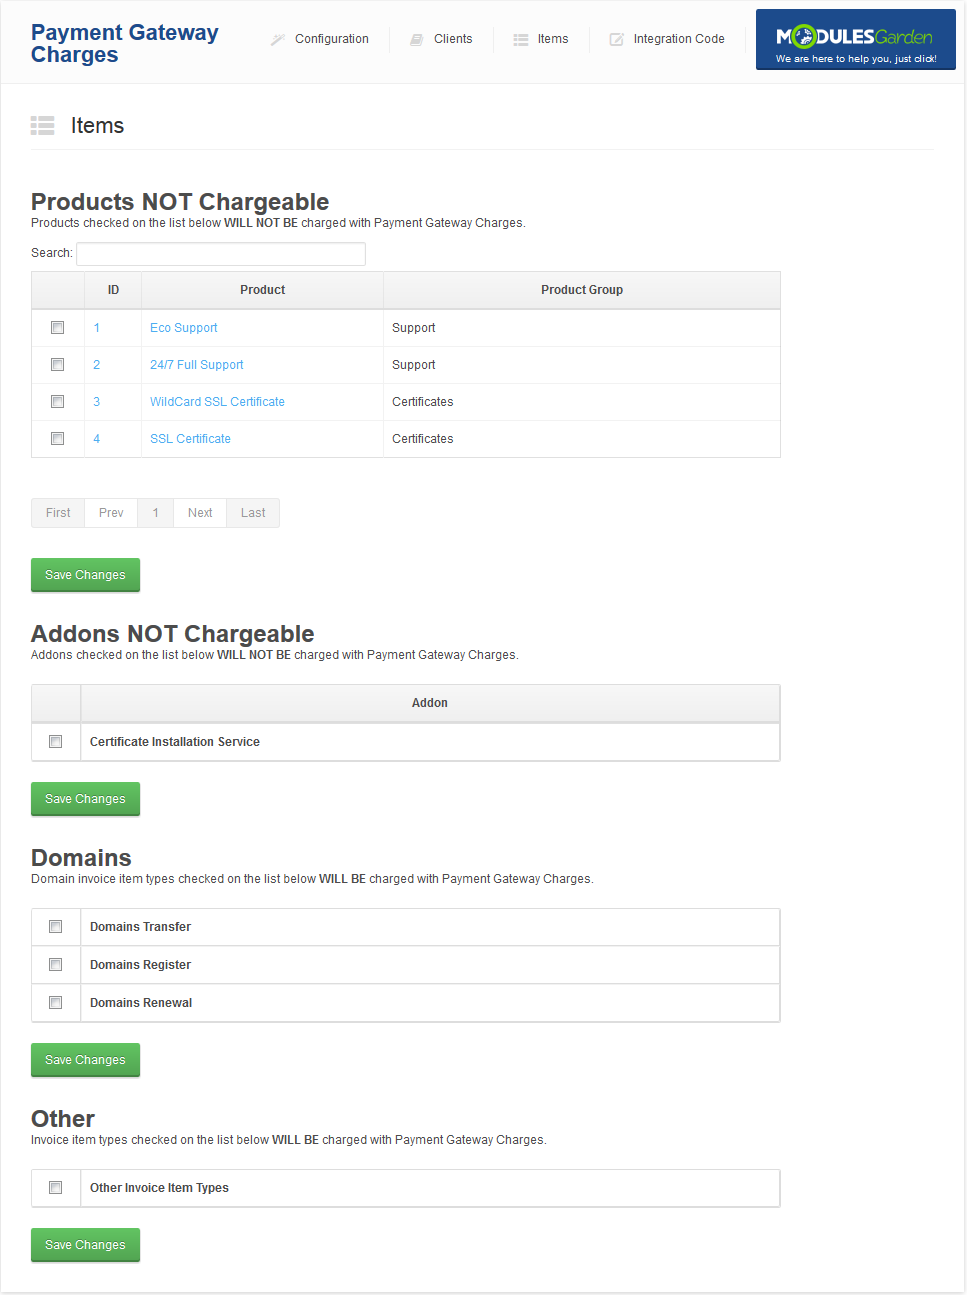
| To enable/disable charges for products and actions, go to 'Items' tab as presented on the following screen. |
|
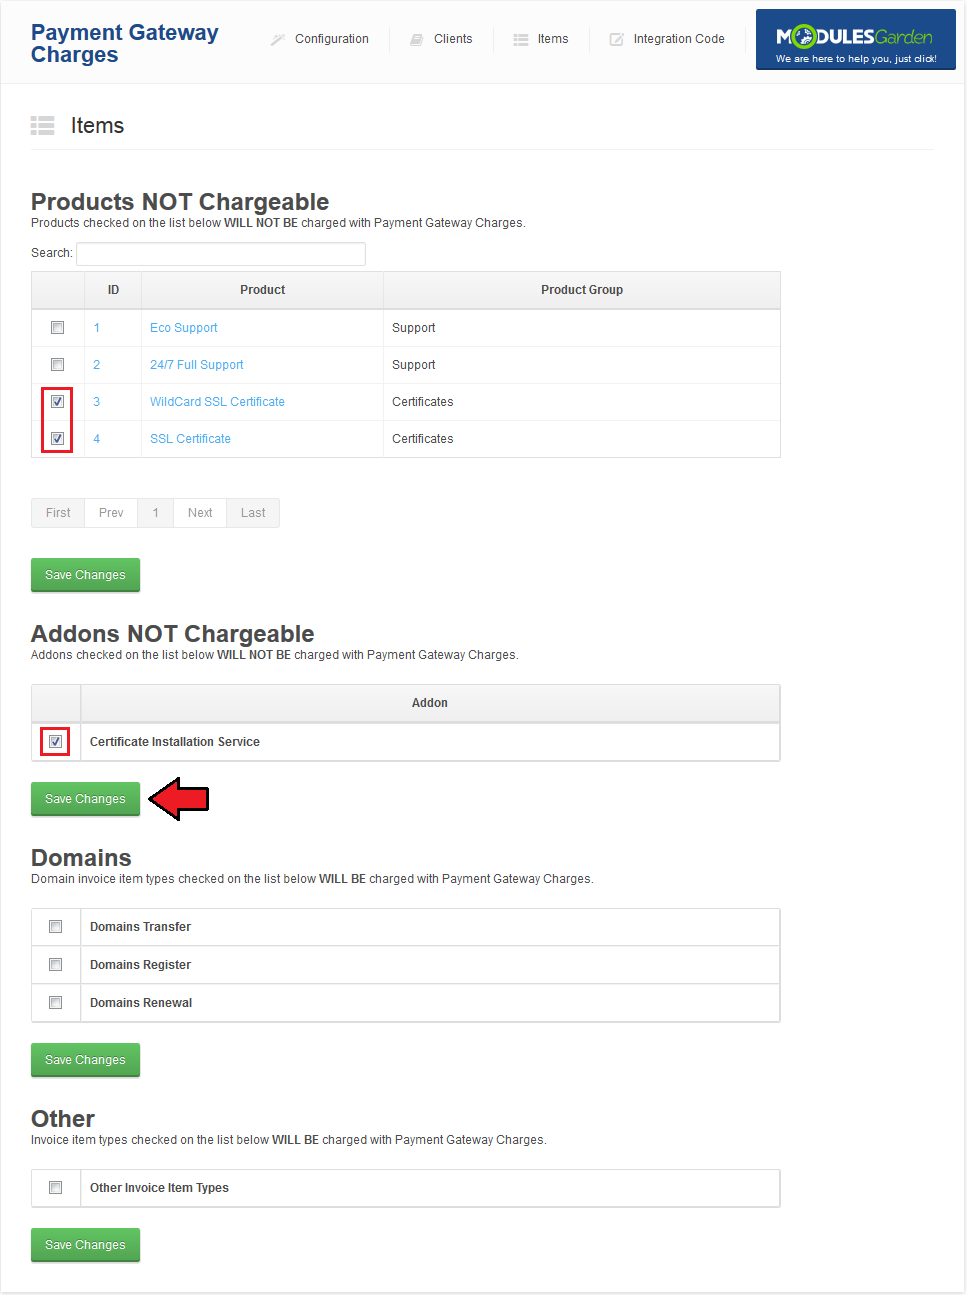
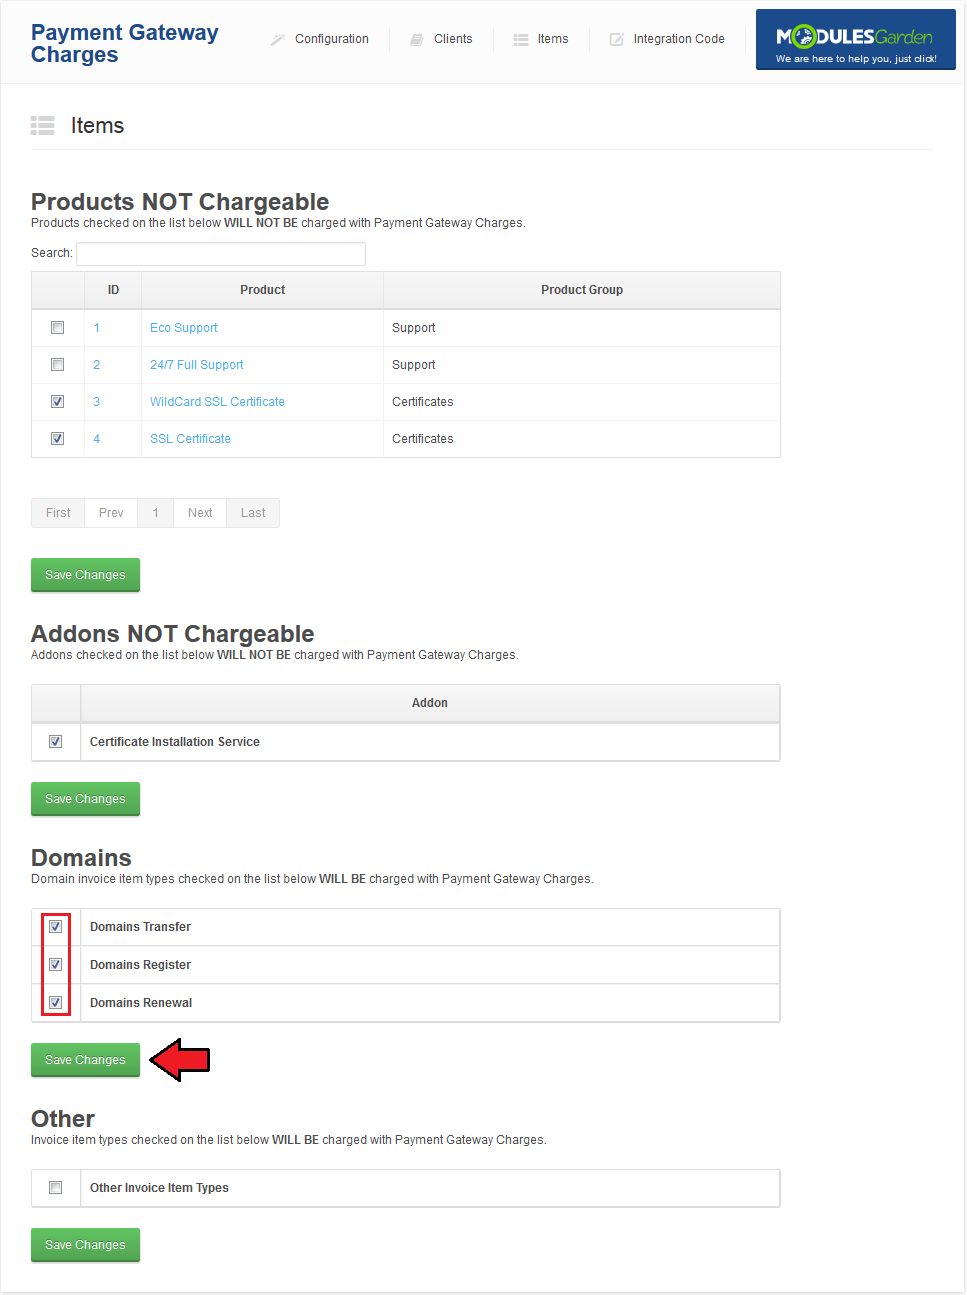
| In order to disable charges for product or addons, mark checkbox next to it and press 'Save Changes' . |
|
| In order to enable charges for domain actions and items, mark checkbox next to it and press 'Save Changes' . |
|
Tips
Common Problems
| 1. When you have problems with connection, check whether your SELinux or firewall is not blocking ports. |