SolusVM Extended VPS For WHMCS
From ModulesGarden Wiki
Contents |
About SolusVM Extended VPS For WHMCS
| Opis! |
- Client Area Management Includes:
| ✔ |
| ✔ |
| ✔ |
| ✔ |
| ✔ |
| ✔ |
| ✔ |
| ✔ |
| ✔ |
| ✔ |
| ✔ |
| ✔ |
| ✔ |
| ✔ |
| ✔ |
| ✔ |
| ✔ |
- Additional Functionality:
| ✔ Multi-Language Support |
| ✔ Supports Advanced Billing For WHMCS (read more) |
| ✔ Supports WHMCS Version V5 and Later |
Installation and Configuration
| In this tutorial we will show you how to successfully install SolusVM Cloud VPS For WHMCS. We will guide you step by step through the whole installation and configuration process. |
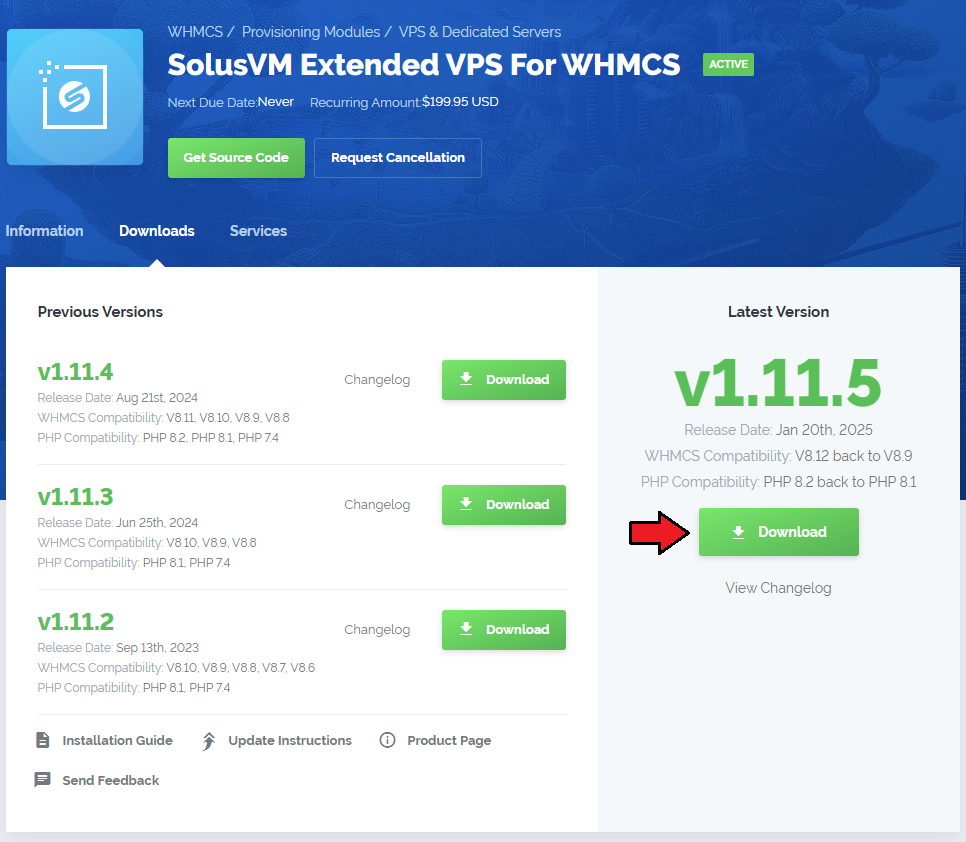
| 1. Log in to your client area and download SolusVM Extended VPS For WHMCS. |
|
| 2. Upload and extract the module into the main WHMCS directory. |
| Files in your WHMCS directory should look like this. |

|
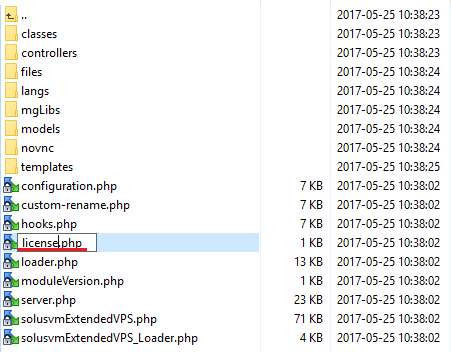
| 3. When you install SolusVM Extended VPS for the first time you have to rename 'license_RENAME.php' file. |
| File is located at 'modules/servers/solusvmExtendedCloud/license_RENAME.php' . Rename it from 'license_RENAME.php' to 'license.php' . |
|
| 4. In order to configure your license key you have to edit a previously renamed 'license.php' file. |
| Enter your licence key between quotation marks as presented on the following screen. You can find your license key at your client area → 'My Products' . |
| File:SV$4.png |
| You will see a following screen. Let's proceed to configuration of your freshly installed module. |
| [[File:]] |
| 8. Now we will show you how to configure a new product. |
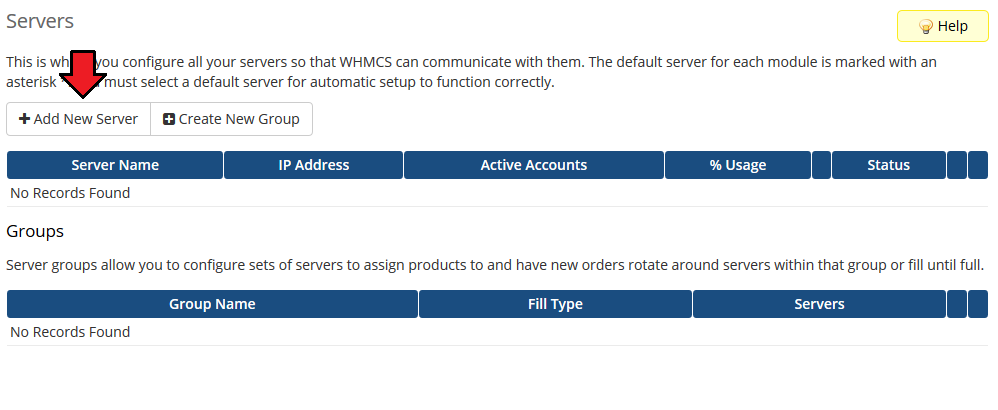
| To do so log in into your WHMCS. Now press 'Setup' → 'Products/Services' → 'Servers' (or 'Setup' → 'Servers' in WHMCS v4.x). |
| Afterwards press 'Add New Server' . |
|
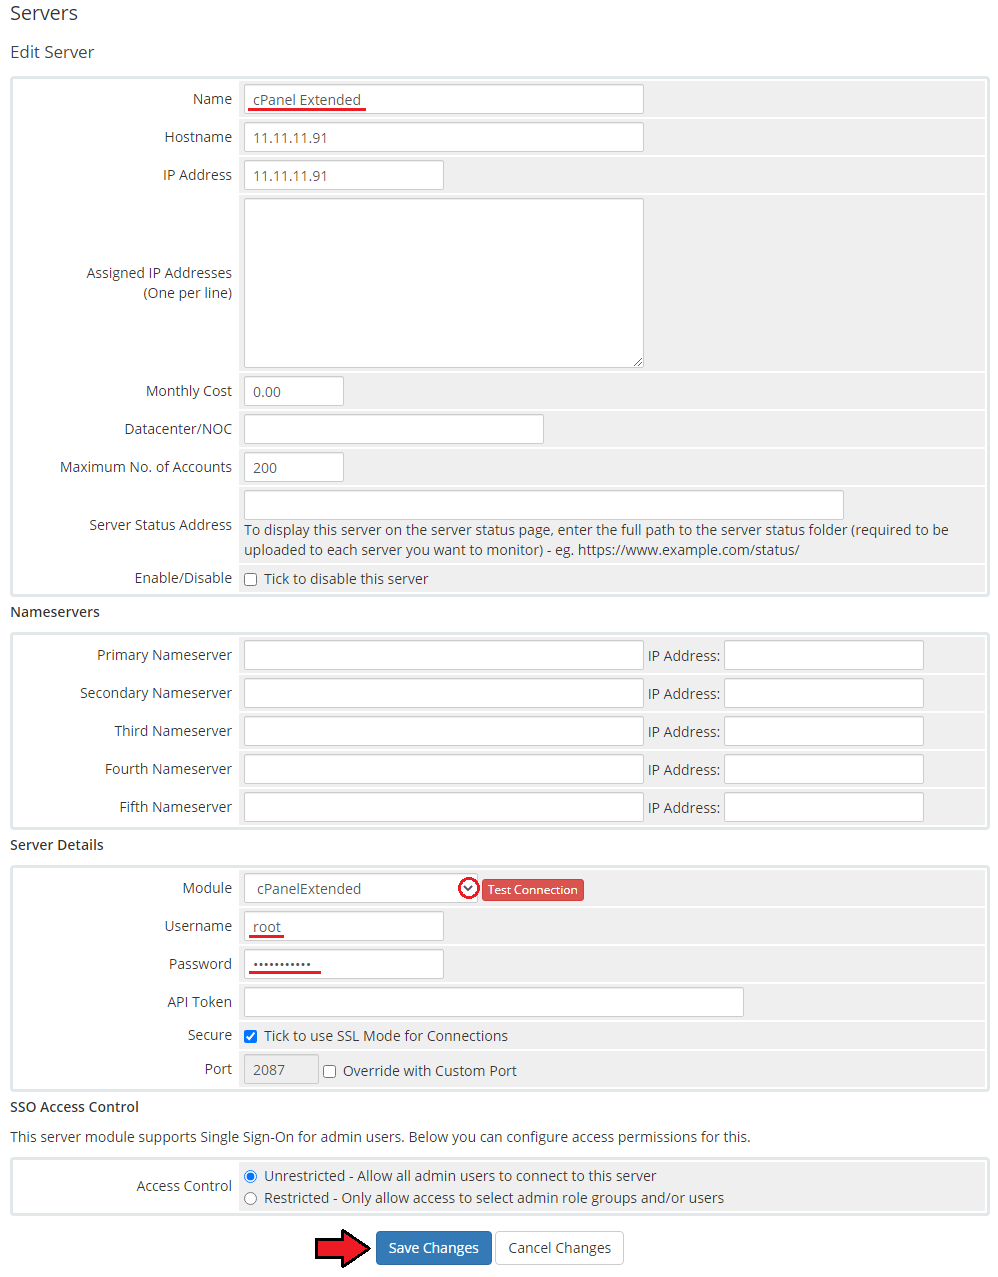
| 9. Next, enter your server name, IP address, username and password. Choose 'CpanelExtended' from a dropdown menu and press 'Save Changes' . Keep in mind that values of client area buttons 'Login to Webmail' and 'Login to cPanel' are taken from a 'Hostname' field. If field is empty, they are taken from an 'IP Address' field. |
|
| 10. After you configure your server correctly, you will see a following screen. |
| Now you need to create a new group for your server. For that purpose press 'Create New Group' . |
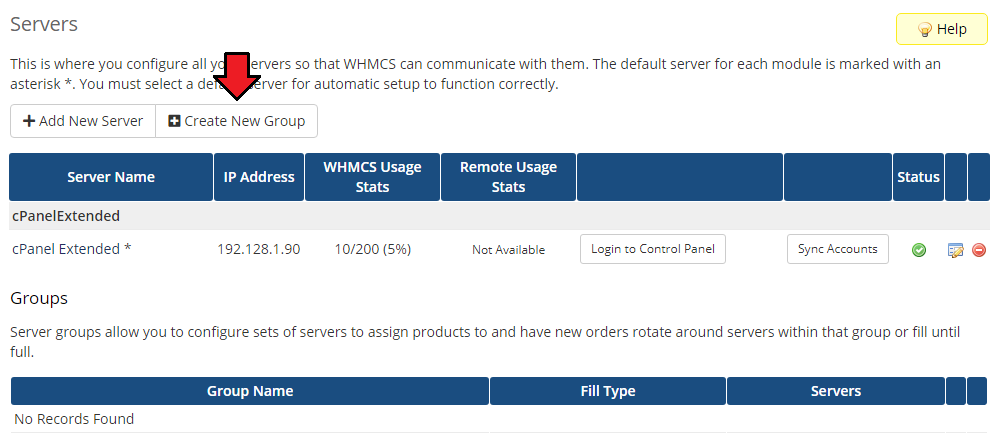
|
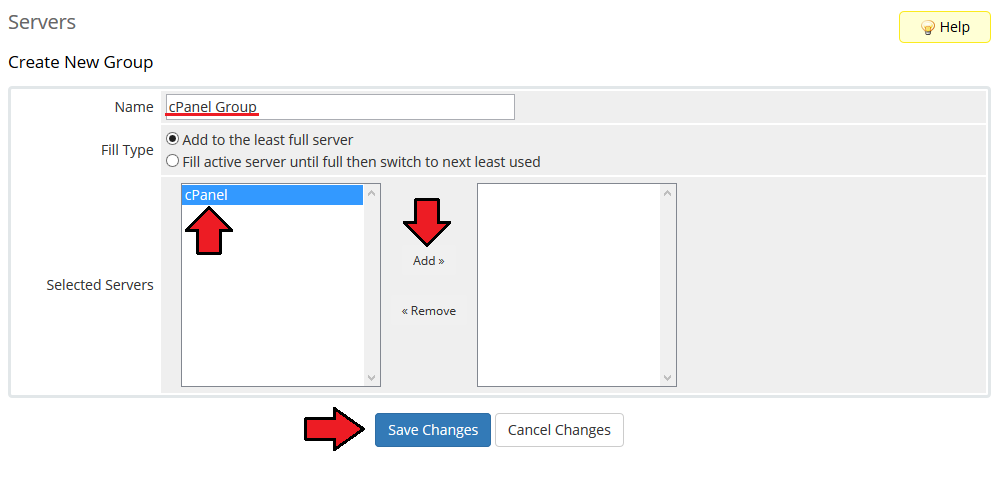
| 11. Enter name, click on your previously created server, press 'Add' then press 'Save Changes' . |
|
| 12. In order to create and configure product click on 'Setup' → 'Products/Services' → 'Products/Services' . |
| If you don't have a product group, click on 'Create a New Group' . If you do, simply go to step 14. |

|
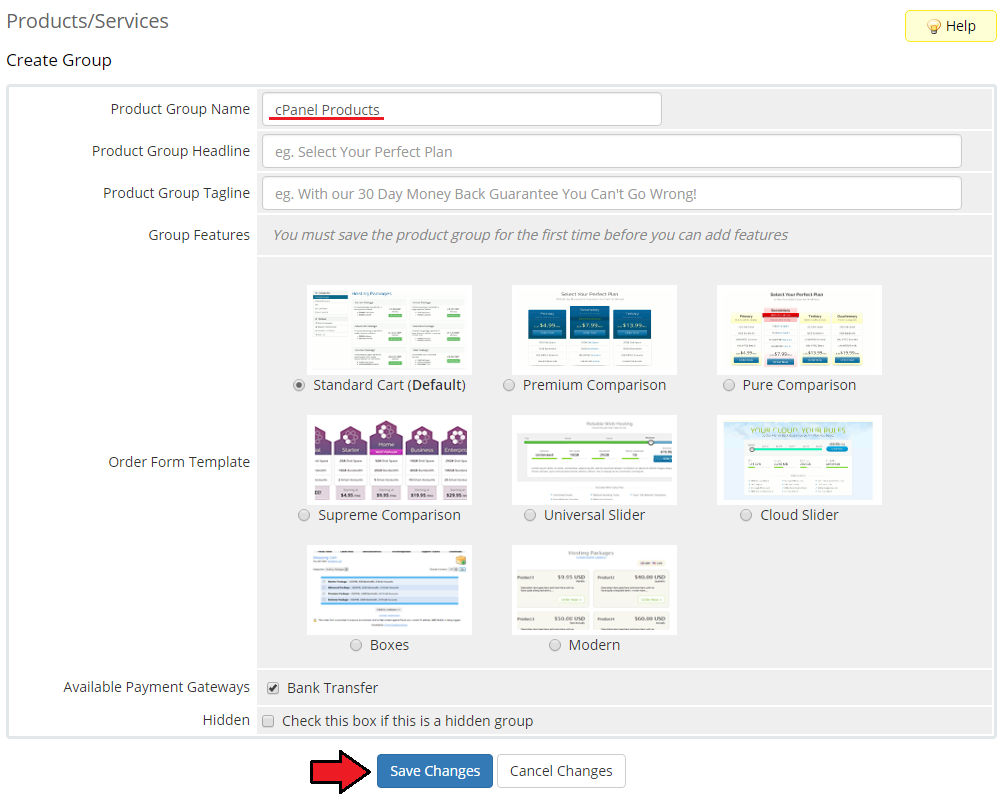
| 13. Enter product group name and press 'Create Group' . |
|
| 14. When you have a product group, you can create your product and assign it with cPanel Extended. If you already have a product, go to step 16. |
| To create a product click on 'Create a New Product' . |

|
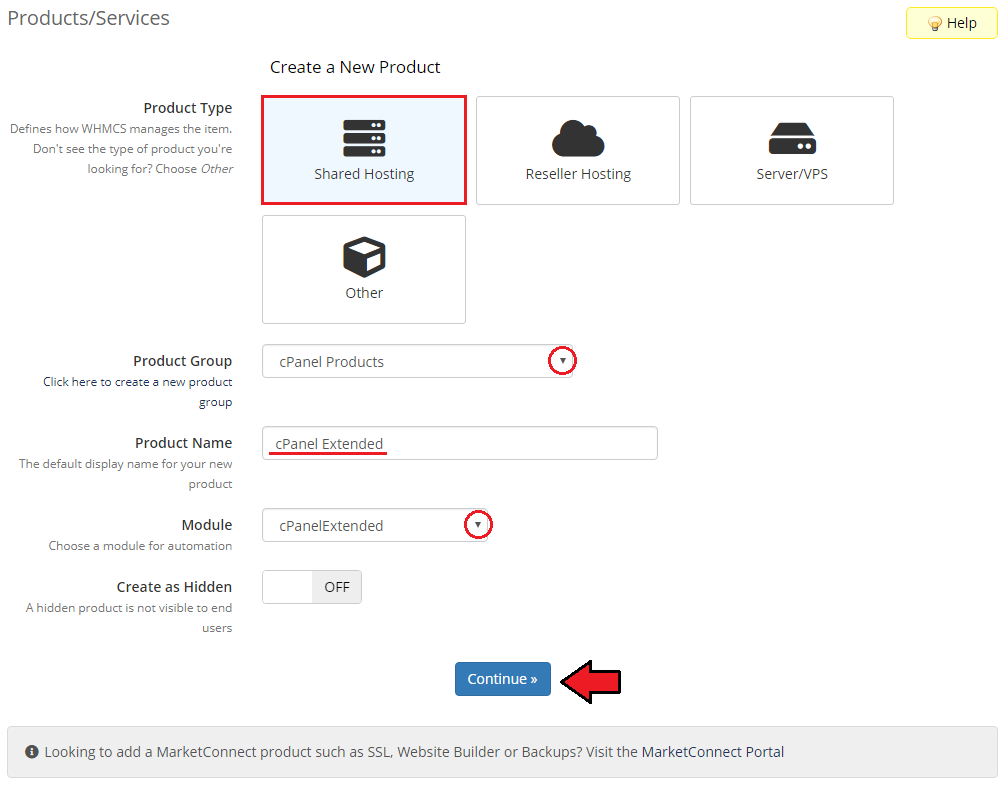
| 15. Afterwards choose your product type and product group from a dropdown menus, enter your product name and press 'Continue' . |
|
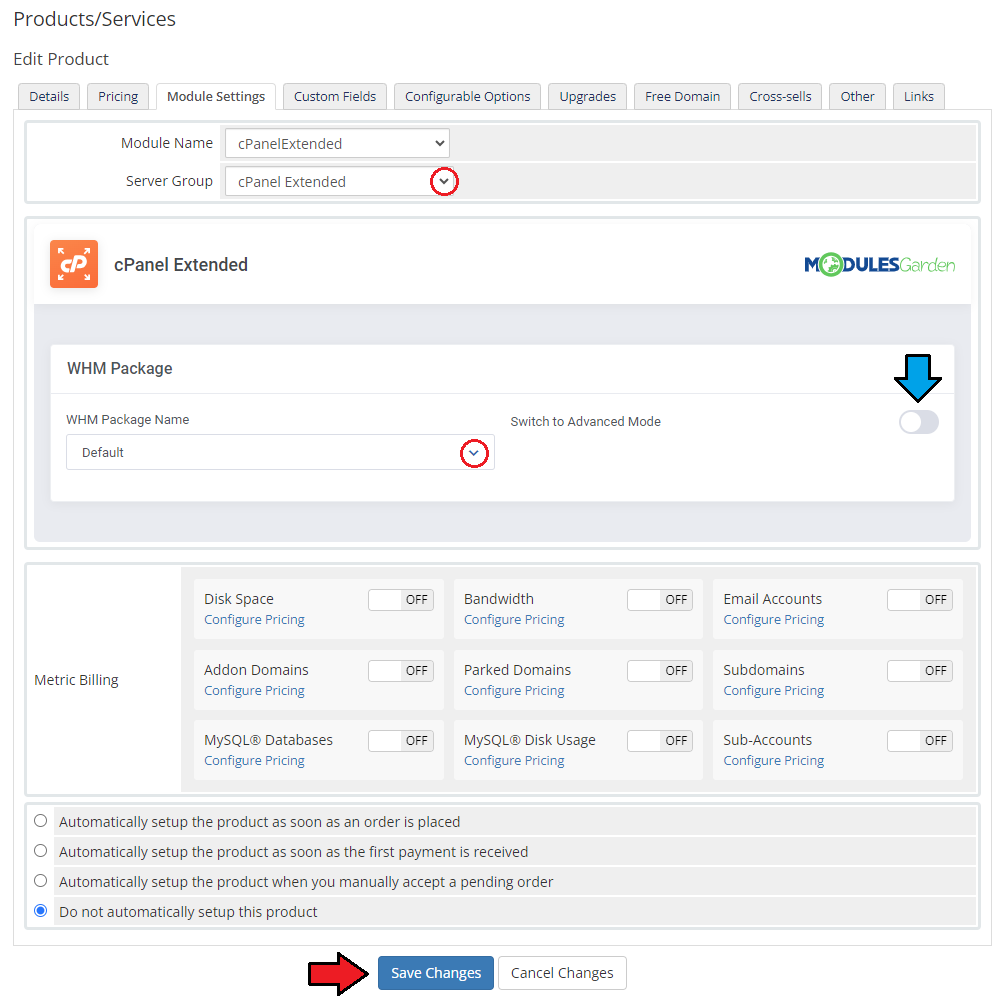
| 16. Now go to 'Module Settings' section, choose both 'CpanelExtended' and your previously created server group from a dropdown menus and press 'Save Changes' . You can also configure your WHM Package here. |
|
| 17. That's all. You have just correctly created and customized new product which will appear in cPanel Extended admin area. To verify whether everything is working as it should click on 'Addons' → 'Cpanel Extended Functions' in your WHMCS. Afterwards click on 'Configure' button. |
| File:.png |
Management

|