NIC IT Registrar For WHMCS
Contents |
About NIC IT Registrar For WHMCS
| NIC IT Registrar For WHMCS is a domain registrar module that enables automation of .it domains provisioning in your WHMCS. The module has been enriched with mechanisms that allows your clients to personalize each domain order and manage domains renewals directly in your client area. |
- Module Features:
| ✔ Set Domain As Expired X Days After Expiration |
| ✔ Delete Domain X Days After Expiration |
| ✔ Enable/Disable Domain Auto Renewal |
| ✔ Synchronize Domain Expiration Date And Status |
| ✔ Synchronize Domain Transfer Status |
- Admin Area Features:
| ✔ Register/Transfer/Renew/Restore Domain |
| ✔ Update Nameservers |
| ✔ Modify Contact Details |
| ✔ Get EPP Code |
| ✔ Define Time After Expiry Date To Automatically Set Domain As Expired |
| ✔ Define Time After Expiry Date To Automatically Request Domain Deletion |
| ✔ View and Modify: |
| ✔ Legal Type |
| ✔ Tax ID |
| ✔ 'Publish Personal Data' Agreement |
| ✔ '.IT Registrar Contract' Agreement |
- Client Area Features:
| ✔ Upon Order: |
| ✔ Define Legal Type |
| ✔ Enter Tax ID |
| ✔ Accept 'Publish Personal Data' Agreement |
| ✔ Accept '.IT Registrar Contract' Agreement |
| ✔ Enable/Disable Domain Auto Renewal |
| ✔ Manage Nameservers |
| ✔ Update Contact Details |
- General Info:
| ✔ Supports IDN |
| ✔ Supports PHP 5.3 Up To PHP 7 |
| ✔ Supports WHMCS Templates Five and Six |
| ✔ Supports WHMCS V6 and V7 |
Installation and Configuration
| This tutorial will show you how to successfully install and configure NIC IT Registrar For WHMCS. We will guide you step by step through the whole installation and configuration process. |
| 1. In the beginning make sure that you are the NIC.IT Reseller and your User account is active. |
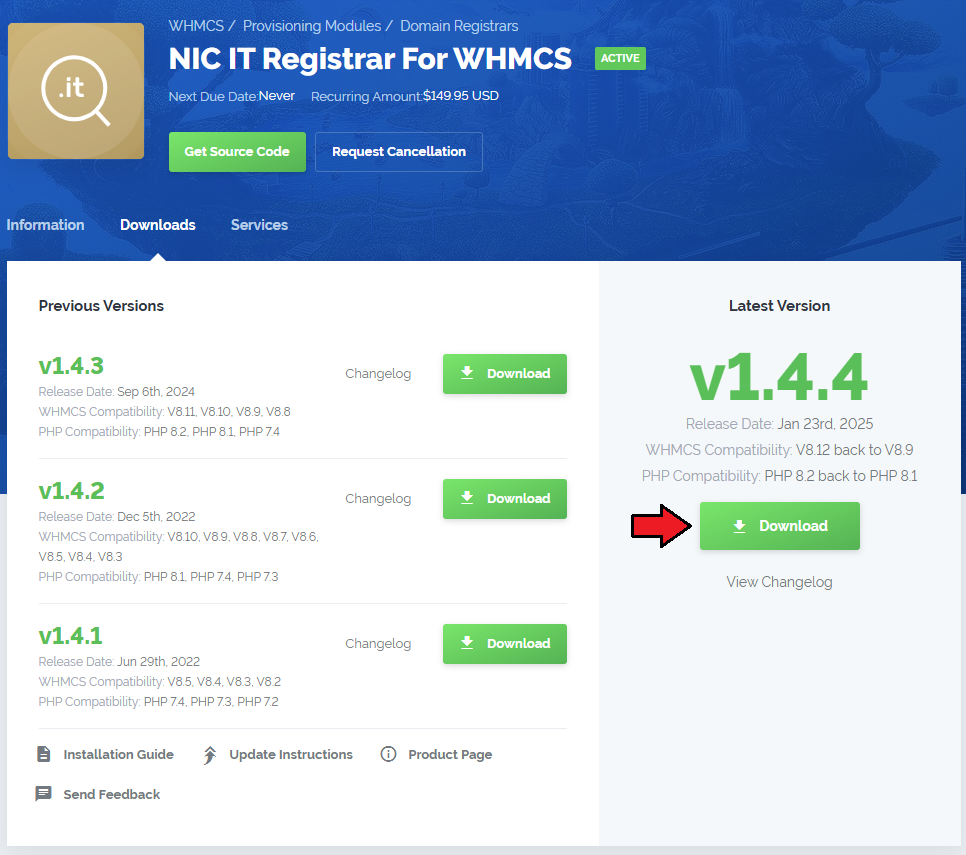
| 2. Log in to your client area and download the module. |
|
| 2. In the downloaded file you will find two packages that support different PHP versions. As presented on the screen below, the first one is dedicated to PHP 7, while the second one is aimed at PHP 5.3 up to PHP 5.6. It does not apply to open source versions. Note: You can check current PHP version in your WHMCS. To do so proceed to 'Utilities' → 'System' → 'PHP Info'. |

|
| 3. Extract the downloaded file and choose the one with the right PHP version. Upload and extract the PHP file into the main WHMCS directory. The content of PHP version files should look like this. |
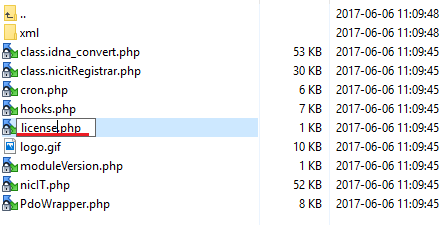
| 4. When you install NIC IT Registrar For WHMCS for the first time you have to rename 'license_RENAME.php' file. File is located in 'modules/registrars/nicIT/license_RENAME.php' . Rename it from 'license_RENAME.php' to 'license.php' . |
|
| 5. In order to configure your license key, you have to edit a previously renamed 'license.php' file. Enter your license key between quotation marks as presented on the following screen. You can find your license key in your client area → 'My Products' . |

|
| 6. Edit the file located in 'includes/additionaldomainfields.php' . Note that the path 'includes/additionaldomainfields.php' refers to WHMCS V5 and V6. For WHMCS V7 the file is located in the 'resources/domains/dist.additionalfields.php' directory. $additionaldomainfields[".it"][] = array("Name" => "Legal Type", "LangVar" => "ittldlegaltype", "Type" => "dropdown",
"Options" => "Italian and foreign natural persons,Companies/one man companies,Freelance workers/professionals,
non-profit organizations, public organizations,other subjects,non natural foreigners",
"Default" => "Italian and foreign natural persons", "Description" => "Legal type of registrant",);
Replace it with the code shown below: $additionaldomainfields[".it"][] = array("Name" => "Legal Type", "LangVar" => "ittldlegaltype", "Type" => "dropdown",
"Options" => "1|Italian and foreign natural persons,2|Companies/one man companies,3|Freelance workers/professionals,
4|Non-profit organizations,5|Public organizations,6|Other subjects,7|Non natural foreigners",
"Default" => "1|Italian and foreign natural persons", "Description" => "Legal type of registrant",);
|
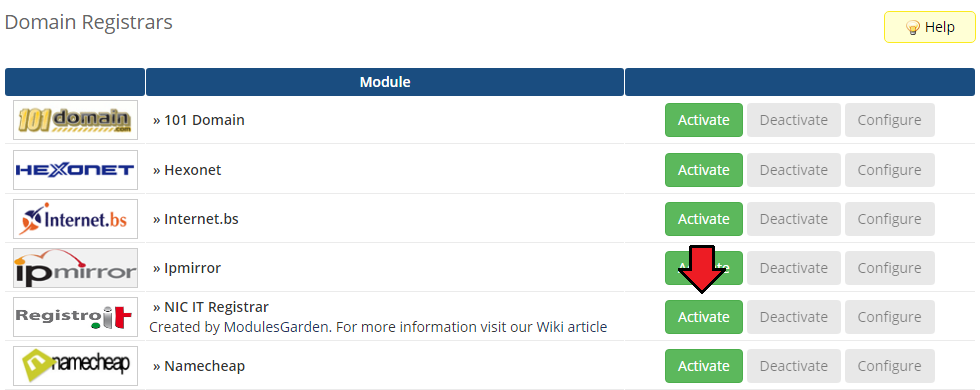
| 7. Now you have to activate the module in your WHMCS system. Log in to your WHMCS admin area and go to 'Setup' → 'Products/Servers' → 'Domain Registrars' . Afterwards find 'NIC IT Registrar' and press 'Activate' button. |
|
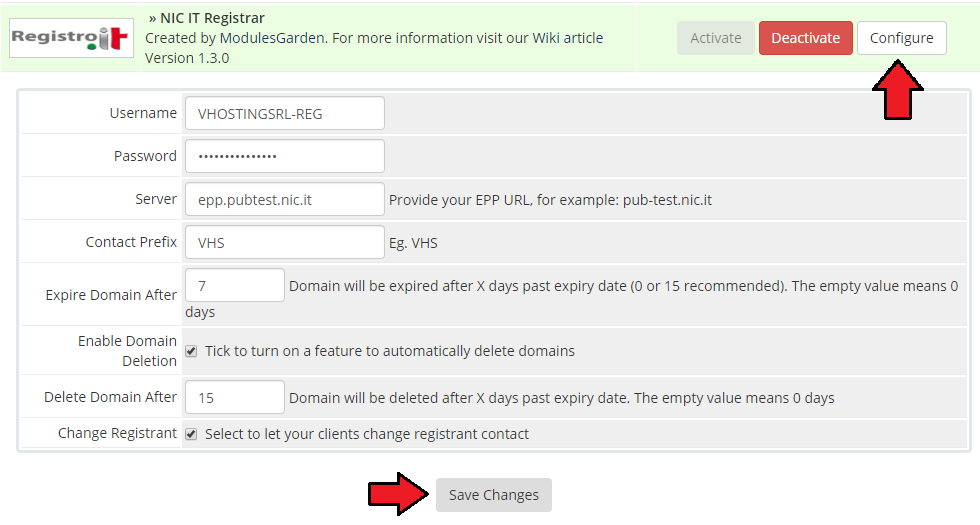
| 8. Afterwards fill out registrar configuration with your details. Expire Domain After - after x days after expiry date set domain as expired in your WHMCS system |
|
9. At the end you have to add a cron job as shown below (each 24 hours suggested).
php -q /your_whmcs/modules/registrars/nicIT/cron.php Do not forget to replace 'your_whmcs' with your WHMCS root location. |
| You have just successfully installed and activated module NIC IT Registrar For WHMCS. |
Management
| NIC IT Registrar module allows you to manage TLDs in your WHMCS system. In this short guide we will present you the possibilities of our module. |
Management of TLDs
| Adding new TLD is quite simple. To add it, go to 'Setup' → 'Products/Services' → 'Domain Pricing' . Enter your TLD and choose 'NicIT' from 'Auto Registration' dropdown menu as shown on the screen below. |

|
| As you can see 'Open Pricing' field has appeared. Click on it and set up your pricing. |

|
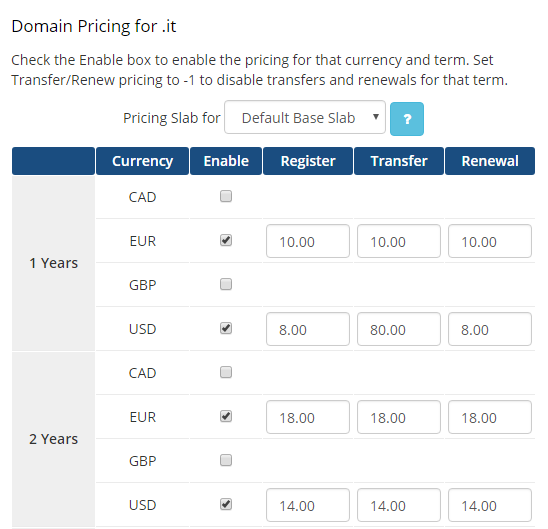
| In newly opened window you can set your prices. Remember to save the changes! |
|
| Voila! Now your customers can start ordering new .it domains. |
Ordering
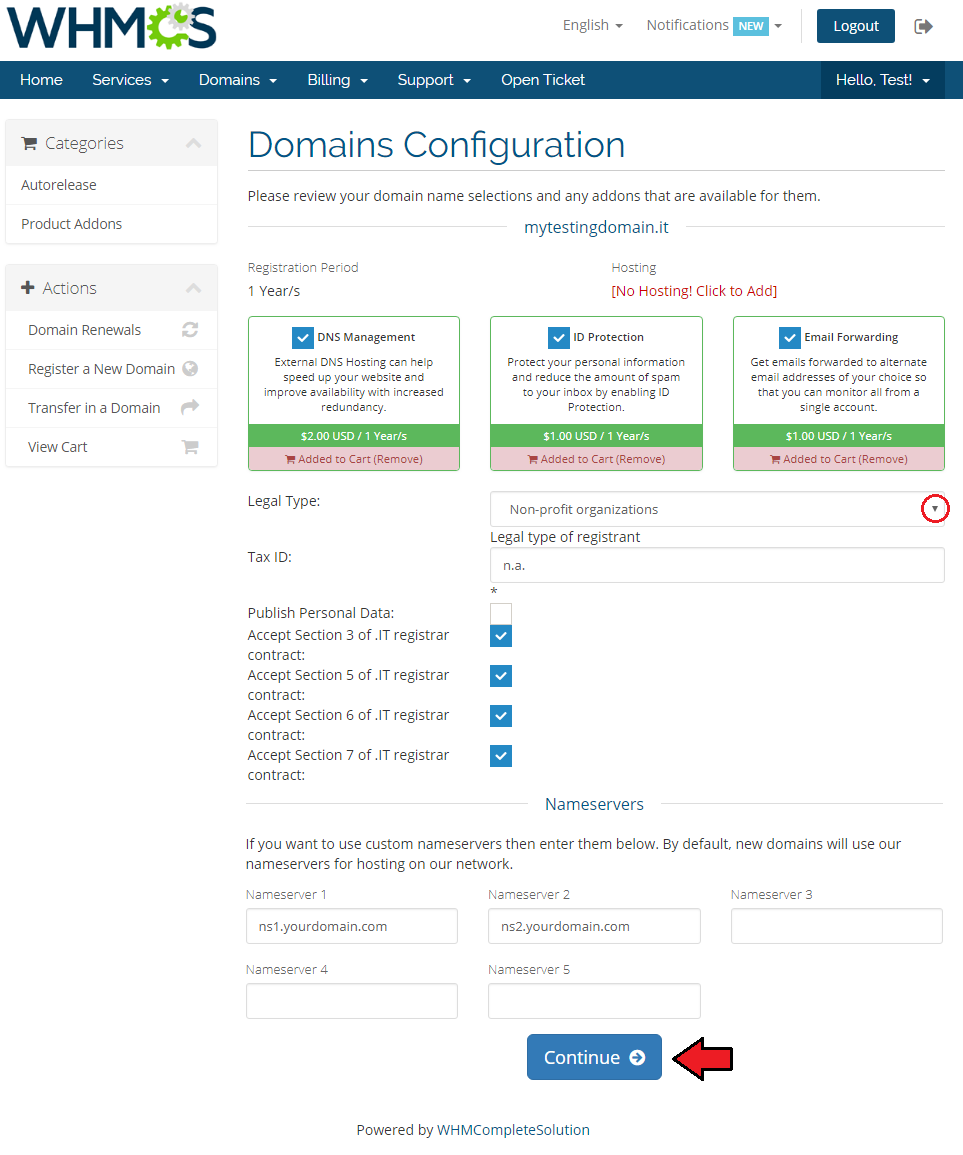
| Ordering .it domain goes alike ordering other domains, with one important difference. During ordering your customers need to choose 'Legal Type' (Entity Type) and provide 'TAX ID' (VAT number). |
|
Management of Domain
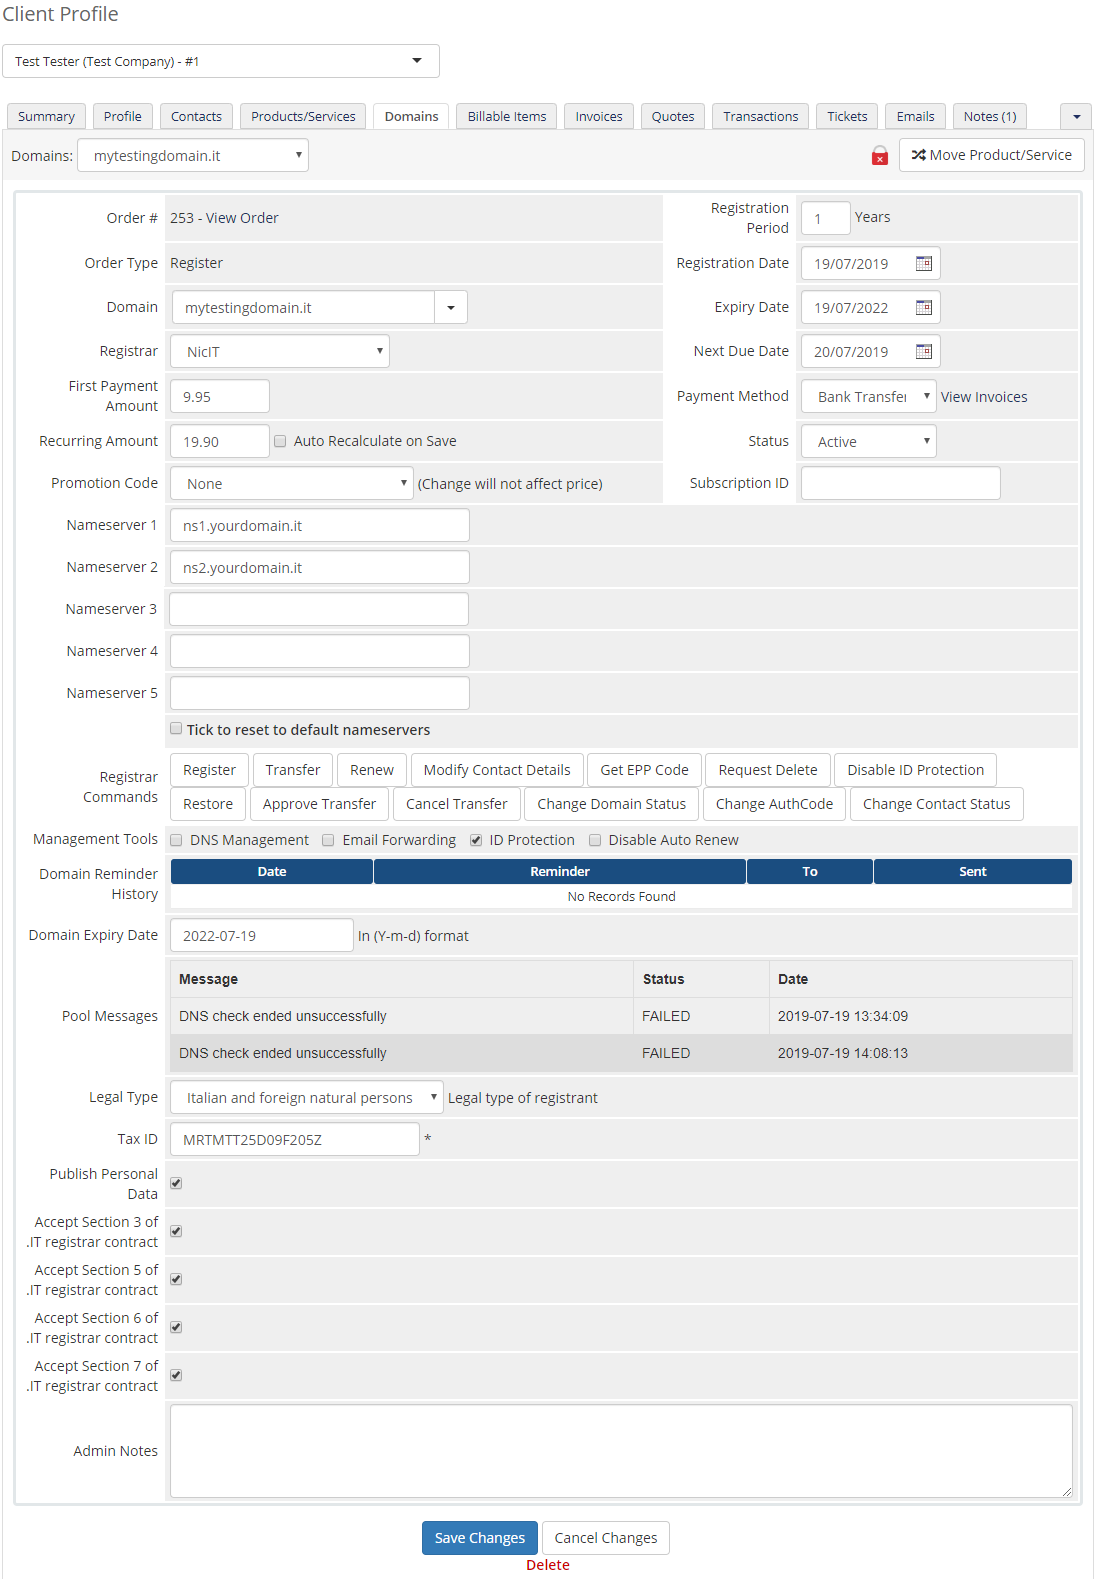
| This is how an ordered domain looks like in the WHMCS admin area. Here you can manage and modify domains according to your needs, like changing contact details or deciding whether to publish or not the personal data of domain owner. |
|
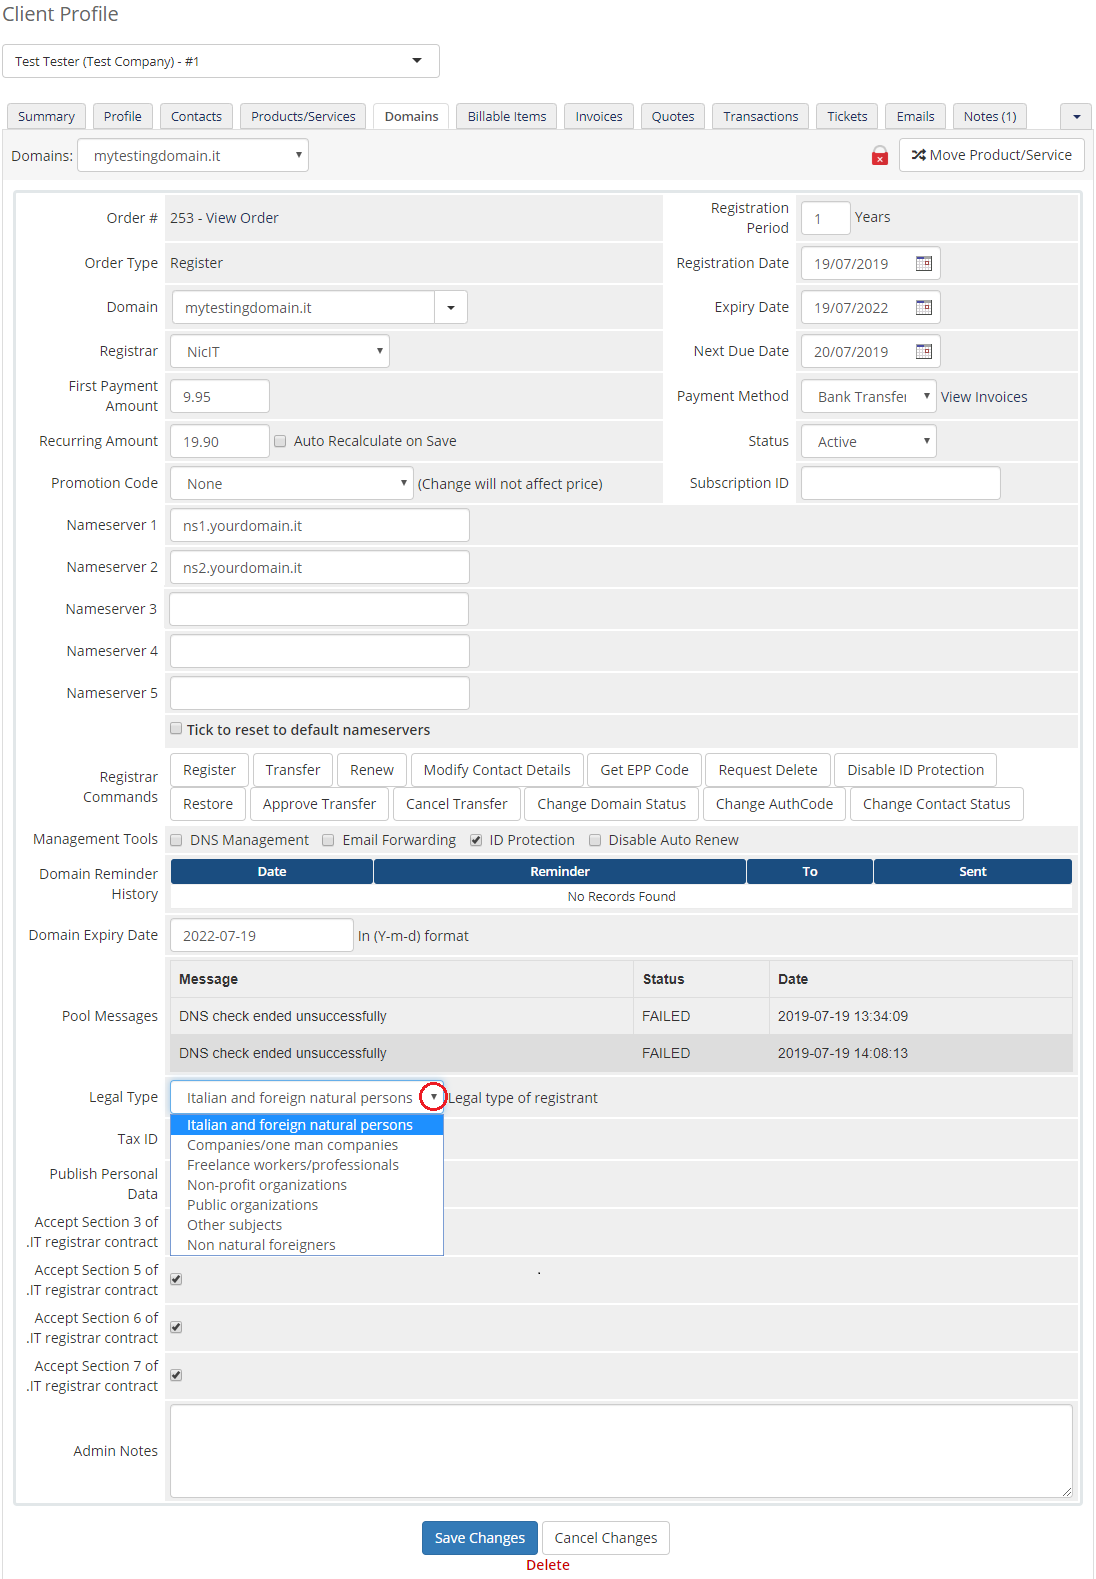
| Now we will explain you how to correctly set Legal Type (Entity Type) and TAX ID (VAT number). Depending on the chosen Legal Type from 'Legal Type' dropdown menu, enter tax number in the 'TAX ID' field. |
|
Tips
| 1. Deactivation of the module will remove your configuration settings at 'Domain Registrars' . 2. If a domain has 'Expired' status and it remains as such for 10 days, then such a domain is automatically deleted on the 10th by a cron job. |
Update Instructions
| Essential guidance through the process of updating the module is offered here. Keep in mind there is a quick and easy option in our client area that will let you upgrade the license of your module to an open source version at any time - and at a lower price! |
Common Problems
| 1. When you have problems with connection, check whether your SELinux or firewall does not block ports. |
| 2. If one of the TLDs you have configured is unavailable, please make sure you have set up pricing in a default currency. |
| 3. Problem with registering IDN domain may be caused by filling in already converted domain name. The solution is filling in a domain name in UTF8 form, module converts it on its own. |
| 4. If you encounter any problems with connection to NIC II API, please make sure your server IP address is on the list of allowed addresses. Registrar allows up to 5 IP addresses to be whitelisted. |