Client Area Popup For WHMCS
Contents |
About Client Area Popup For WHMCS
| Client Area Popup For WHMCS allows on smooth and effective creation of fully customized pop-ups that will be visible to your clients in their panel. Prepare a ready pop-up in a form of an image, raw or HTML text to pass a message directly to your clients. Design it using predefined styles, which can be always altered and upgraded to implement your idea perfectly. |
- Addon Area Features:
| ✔ Create Pop-ups Using Predefined Styles |
| ✔ Preview Pop-up With Single Click |
| ✔ Archive Pop-ups For Latter Use |
| ✔ View Pop-up Restrictions |
| ✔ View Number of Pop-up Displays |
| ✔ Create Styles And HTML ?? To Be Used By Pop-up ?? to kiepsko brzmi, ale nie wiem co zrobić z tym htmlem |
- Client Area Features:
| ✔ View Pop-up If Restrictions Are Met |
| ✔ Close Pop-up Permanently |
- Pop-up Features:
| ✔ Define Pop-up Restrictions: |
| ✔ Display Frequency - How Often Pop-up Should Be Displayed |
| ✔ Hide - Client Can Close Pop-up Permanently |
| ✔ Pages - Define Pages Where Pop-Up Is Displayed |
| ✔ Languages - Required Client Languages |
| ✔ User Groups -? |
| ✔ Active Products -? |
| ✔ Active Products In Groups -? |
| ✔ Active Products With Servers -? |
| ✔ Active Domains Using TLDs -? tuatj nei dajemy opisów? tak jak w 4 opcjach wyżej |
| ✔ Define Time Frames For Pop-up To Be Shown |
| ✔ Define Pop-up Size |
| ✔ Assign Style To Pop-up |
| ✔ Choose Type And Provide Pop-up Content: |
| ✔ Raw Text |
| ✔ HTML |
| ✔ Image |
- General Info:
| ✔ Style Editors With Syntax Highlighting |
| ✔ Multi-Language Support |
| ✔ Supports WHMCS V5 and Later |
Installation
| This tutorial will show you how to successfully install and configure Client Area Popup For WHMCS. We will guide you step by step through the whole installation and configuration process. |
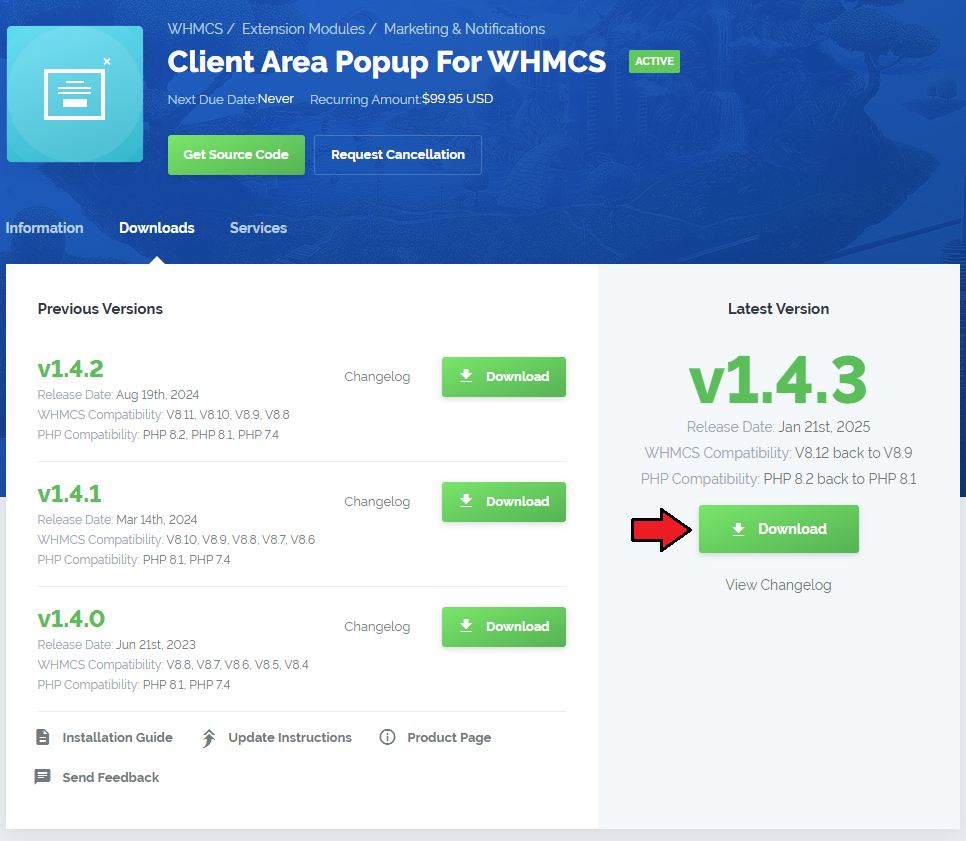
| 1. Log in to your client area and download Client Area Popup For WHMCS. |
|
| 2. Upload and extract the module into the main WHMCS directory. Files in your WHMCS directory should look like on the following screen. |

|
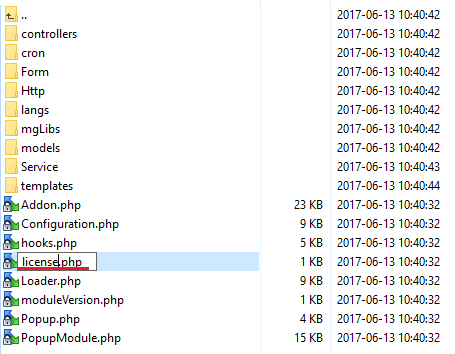
| 3. When you install Client Area Popup for the first time you have to rename 'license_RENAME.php' file. File is located in 'modules/addons/........../license_RENAME.php'. Rename it from 'license_RENAME.php' to 'license.php'. |
|
| 4. In order to configure your license key, you have to edit the previously renamed 'license.php' file. Enter your license key between quotation marks as presented on the following screen. You can find your license key in your client area → 'My Products'. |

|
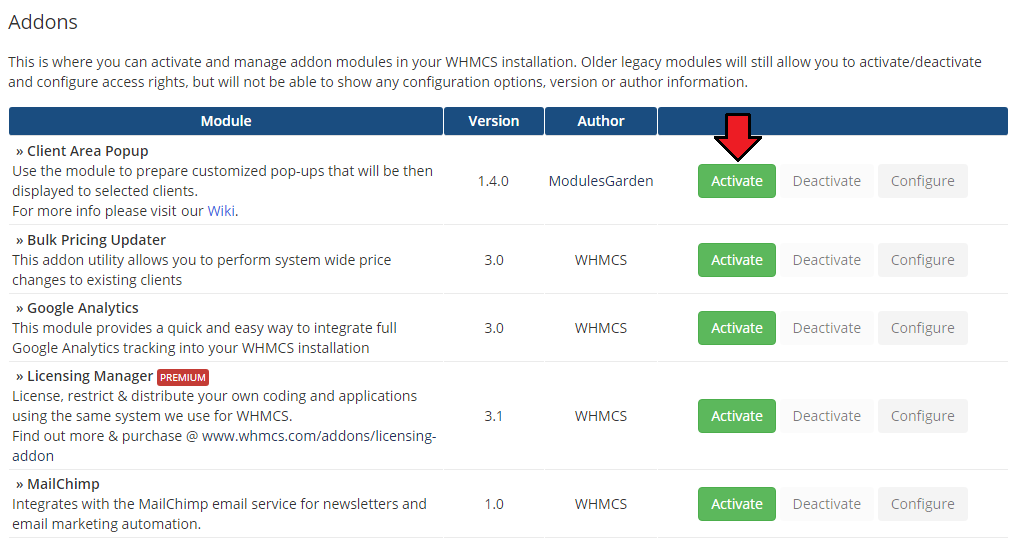
| 5. Now you have to activate the module in your WHMCS system. Log in to your WHMCS admin area. Go to 'Setup' → 'Addon Modules' . Afterwards, find 'Client Area Popup' and press 'Activate' button. |
|
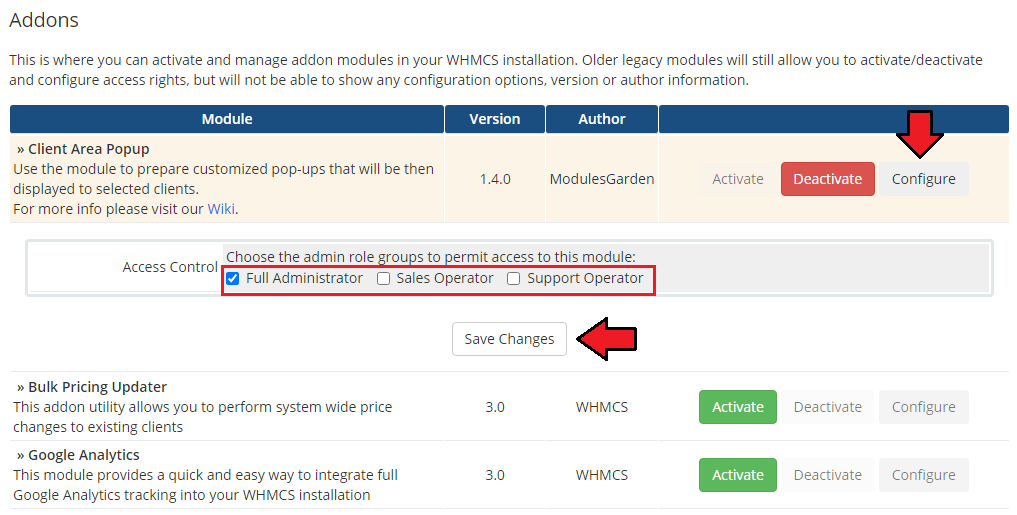
| 6. In the next step you need to permit access to this module. To do so, click on 'Configure' button, tick 'Full Administrator' and press 'Save Changes'. |
|
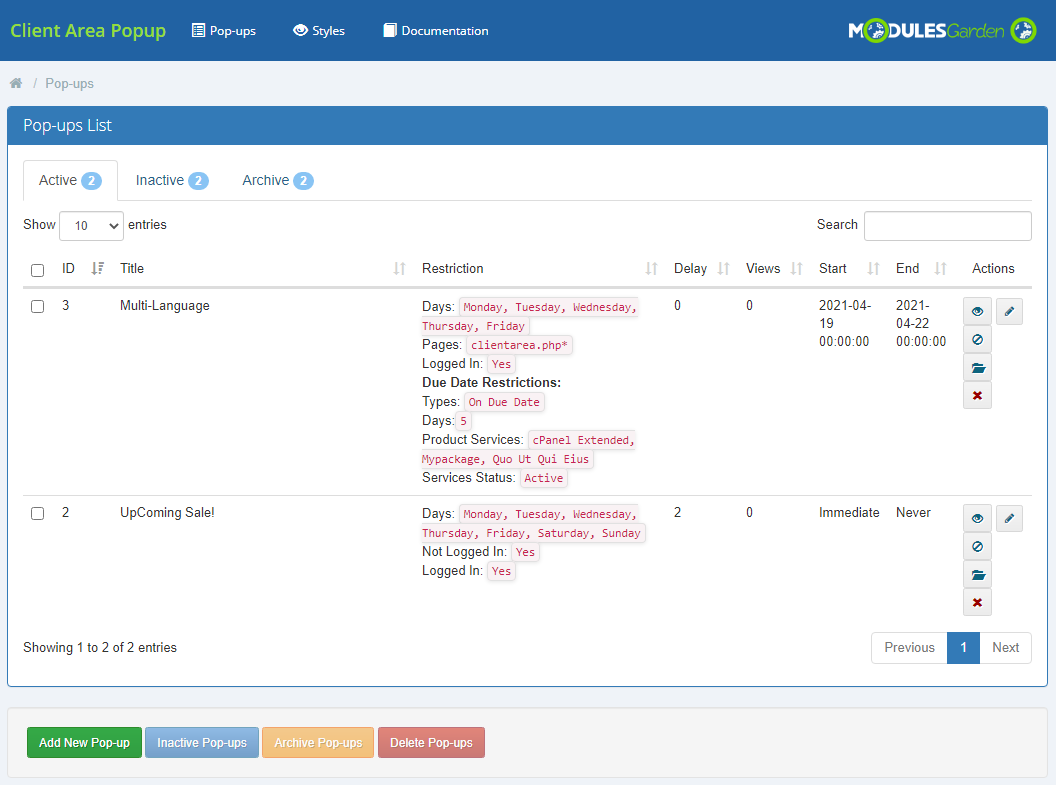
| 7. You have just successfully installed Client Area Popup For WHMCS! You can access your module under 'Addons' → 'Client Area Popup'. |
|
Configuration and Management
| Client Area Popup For WHMCS is a module which allows you to .... |
Configuration
| ..... |
|
Create Pop-up
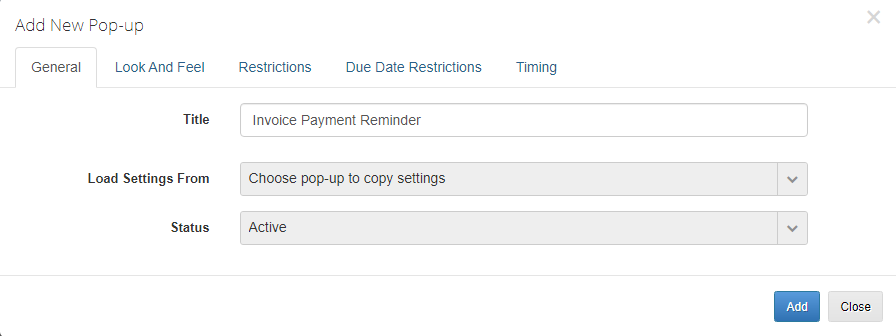
| To add a new pop-up simply press appropriate button. |
|
General
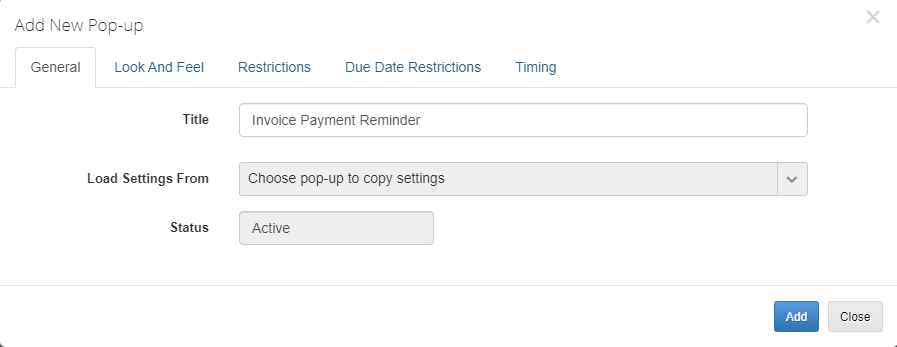
| 1. Start with naming the pop-up. Note: the title will not be displayed in any way on the final popup. |
|
| 2. If you have already other pop-ups created, you may copy their settings to the newly created one to save a lot of time. 3. Finally, select the initial status:
|
|
Restrictions
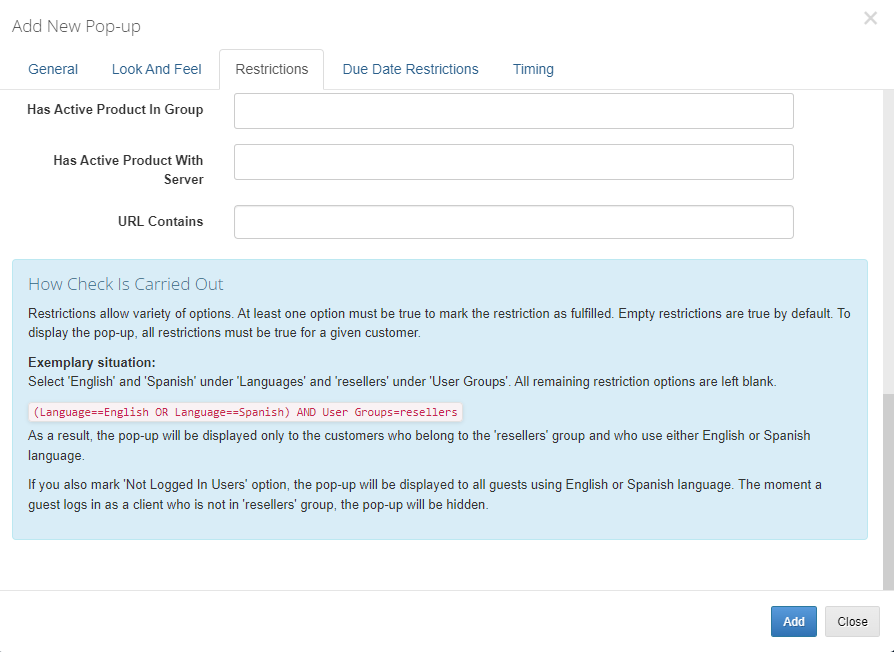
| Restrictions - this is the second section of a pop-up configuration. Please set up the rules according to which the pop-up will be displayed to clients. Only clients who meet all the restriction rules will see the pop-up. |
General options:
Conditions:
If any of the above options is left blank, it will not be taken into consideration when creating a final list of clients to see the pop-up. |

|
| You will also find there an explanation of the checking process: |

|
Timing
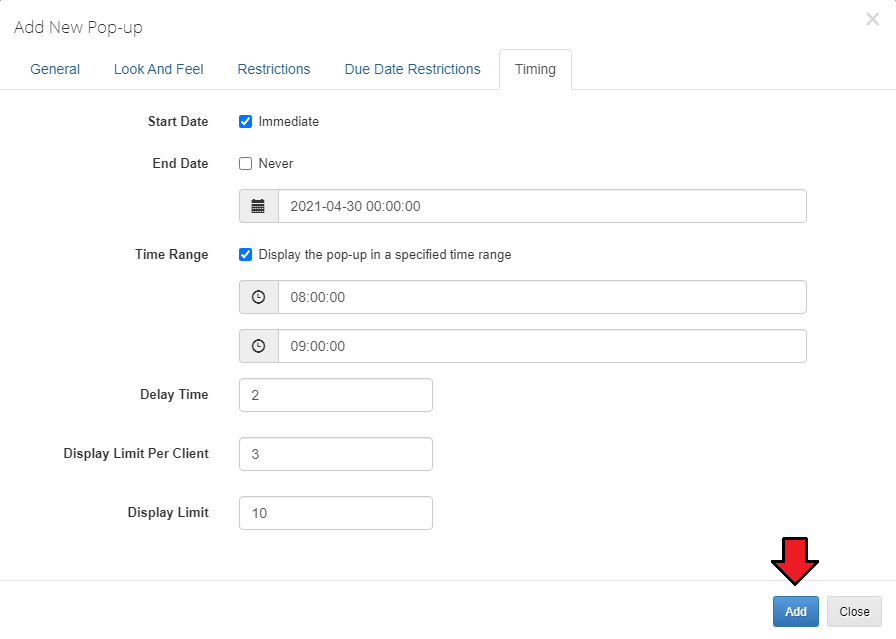
| In the next section define time period within which the pop-up shall be active - when it will be displayed with the set up previously frequency. Choose a specific day and hour to schedule the pop-up activation or select option 'Immediately' - then the pop-up will be active once you save the changes. |

|
Look And Feel
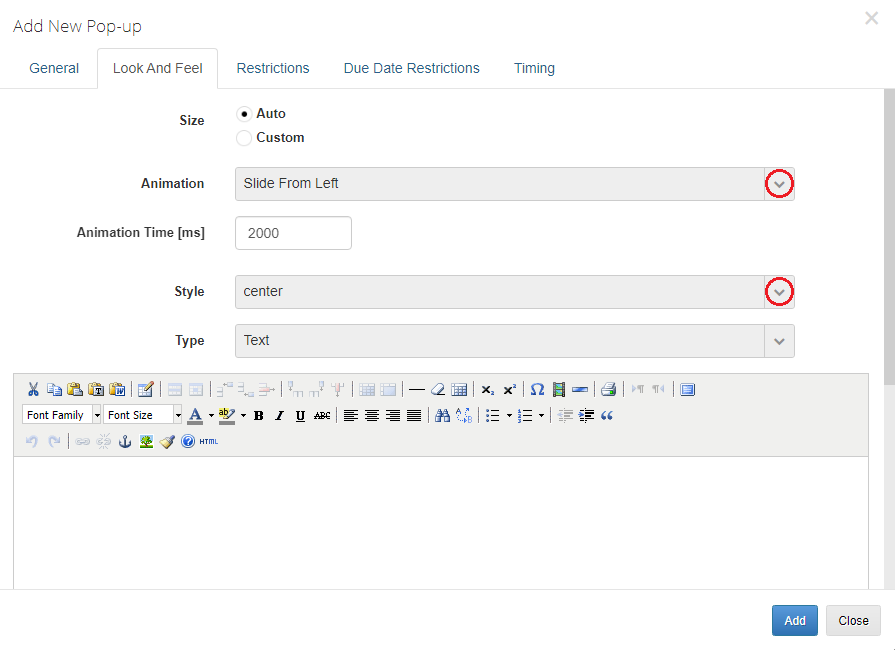
The last part of creating a pop-up process concerns its interface, layout and general design.
Automatic or custom. If you want a customized size, then simply enter appropriate width and height in pixels.
Select style default or any other from the list of available styles. |

|
The pop-up may have a simple text form - select 'Text' and type in the content. |

|
| Pre-formated text - select 'HTML' and then provide and then format the text. |

|
| Upload an 'Image'. Press 'Add' button once you have finished the configuration. |

|
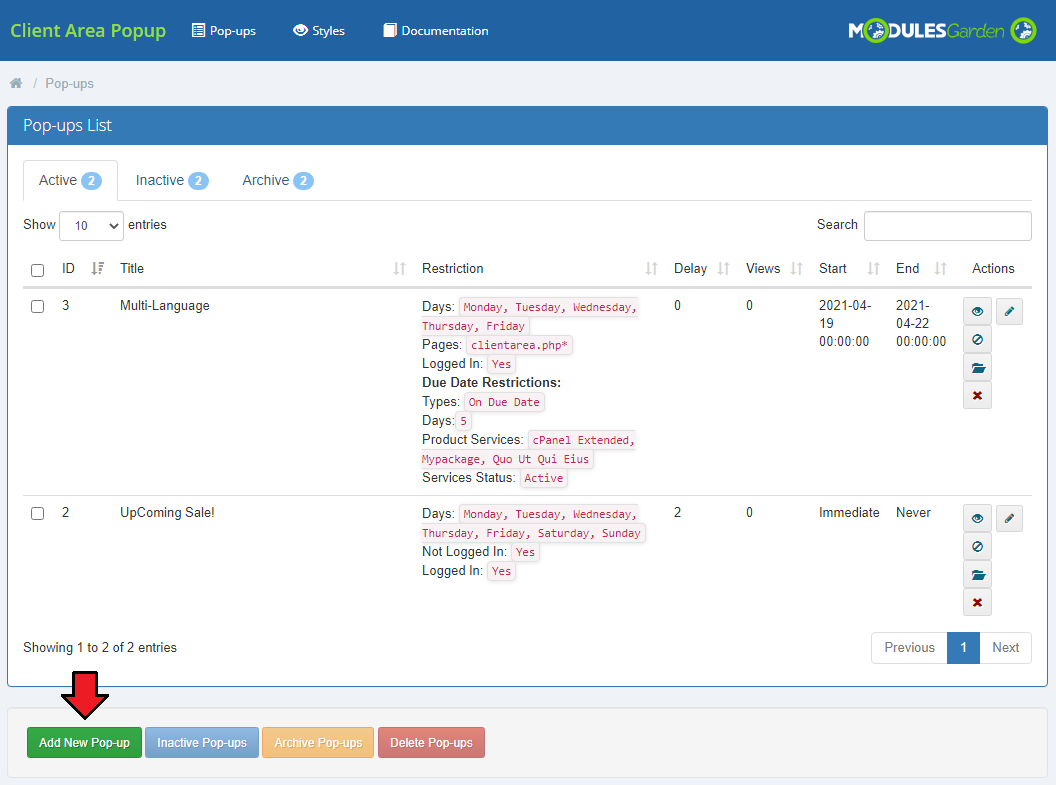
Pop-ups List
| '........... |
|
Actions
|
1. Preview the popup - a sample page with a visible pop-up will appear. This is the final look a client will receive. |

|
Types
There are three types of pop-ups in the system:
|

|
| Inactive pop-ups are those for which the end date has been crossed and they are no longer displayed to clients. Just like in case of active pop-ups all actions are available. You may edit it to change the end date and at the same time activate it again. |

|
| Pop-up in archive are moved there manually, these can be the previously active or inactive popups (use action button to move entry to Archive).
You may restore archived pop-ups any time and, depending on the end date of the resorted pop-up, it will be moved either to 'Active' or 'Inactive' group. |

|
Styles
| 'Styles' section contains a list of all predefined styles, that position your pop-ups. There are 14 types of different styles, that vary from one another with up or down position, right/left/center, overlay option etc. |

|
| If non of the predefined styles perfectly matches your needs, you may edit the styles. Press the icon as marked on the screen. |

|
| You are moved to the style edition page with CSS and HTML details. You may edit them as you need to adjust the style to your preferences. |

|
Examples
| ................. |
|
Tips
Common Problems
| 1. When you have problems with connection, check whether your SELinux or firewall does not block ports. |