App Templates Tool
Contents |
About App Templates Tool
| The App Templates tool allows you to manage ready-to-use application templates that clients can install directly on their virtual machines. Templates are created in the Applications tab and grouped in the Groups tab, which can later be assigned to products. |
Management
| The App Templates section in the admin area consists of two main parts: Applications and Groups. You can create templates under the Applications tab and gather them into groups under the Groups tab. |
Applications
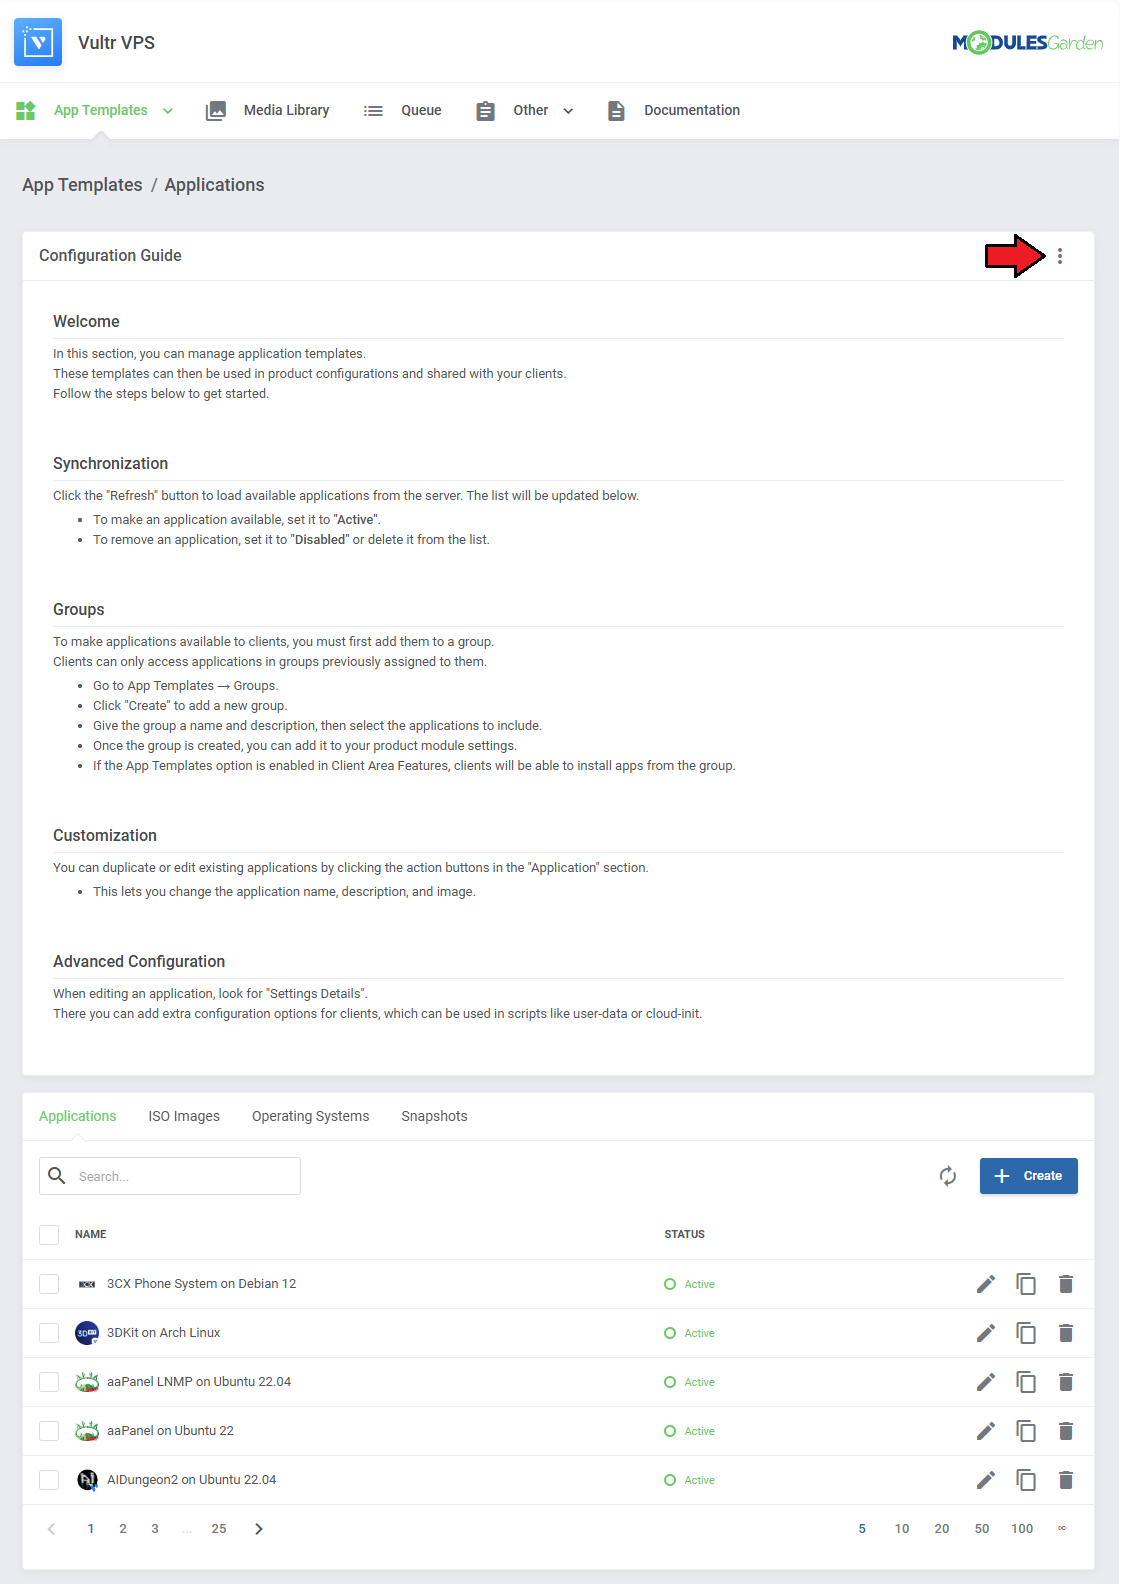
| Read the guide carefully as it explains the key functions of the App Templates feature. You can hide the information panel after reading by clicking the “Hide” button. |
|
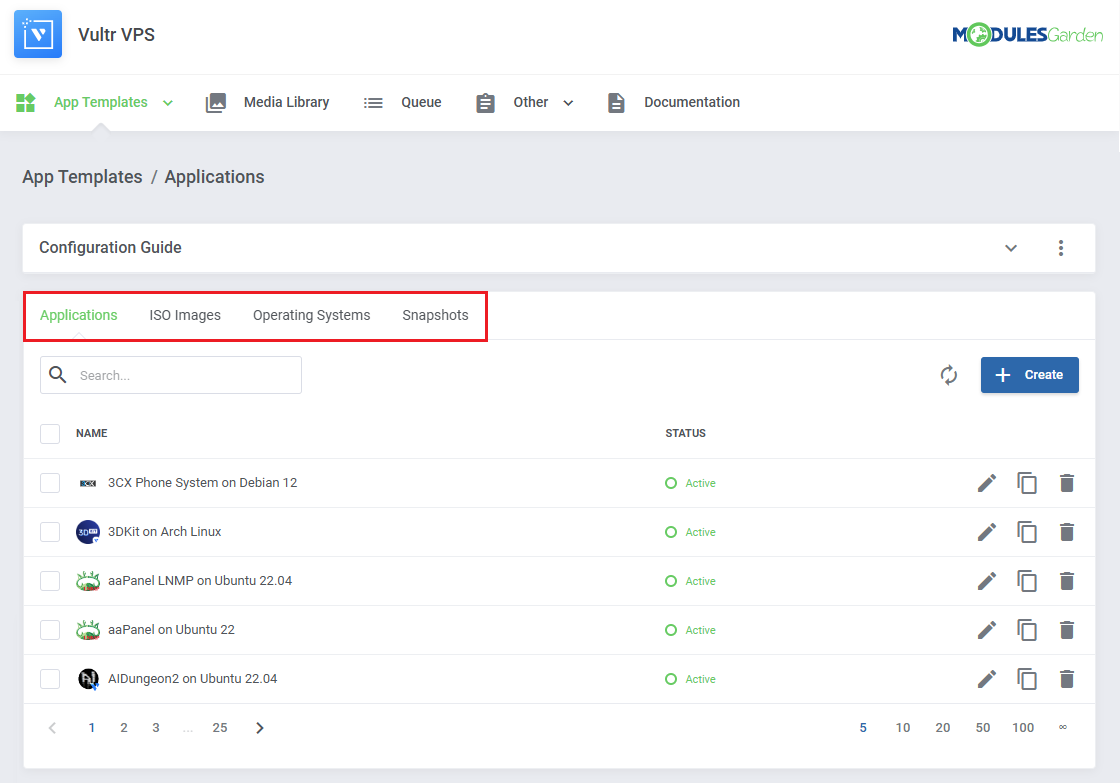
| Switch between Applications, ISO Images, Operating Systems, and Snapshots using the available tabs. Keep in mind that the applications section differs per module. The following example comes from the Vultr VPS module. |
|
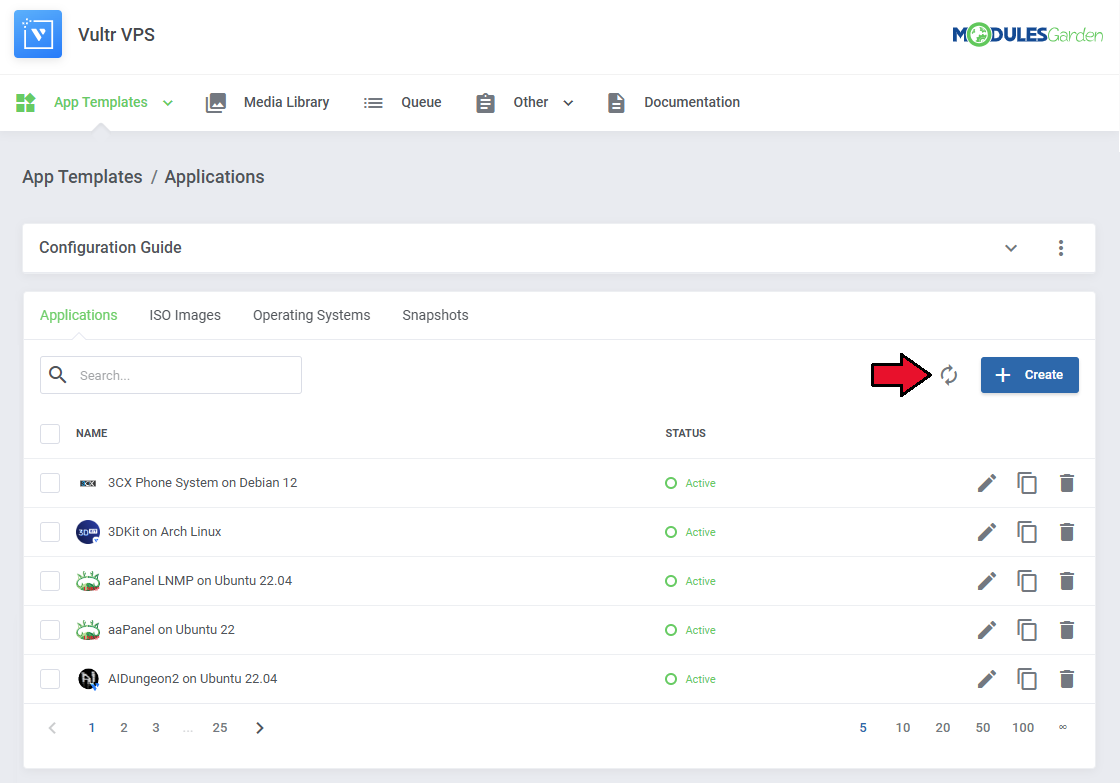
| Use the refresh button to download and update the list of templates from your connected platform. |
|
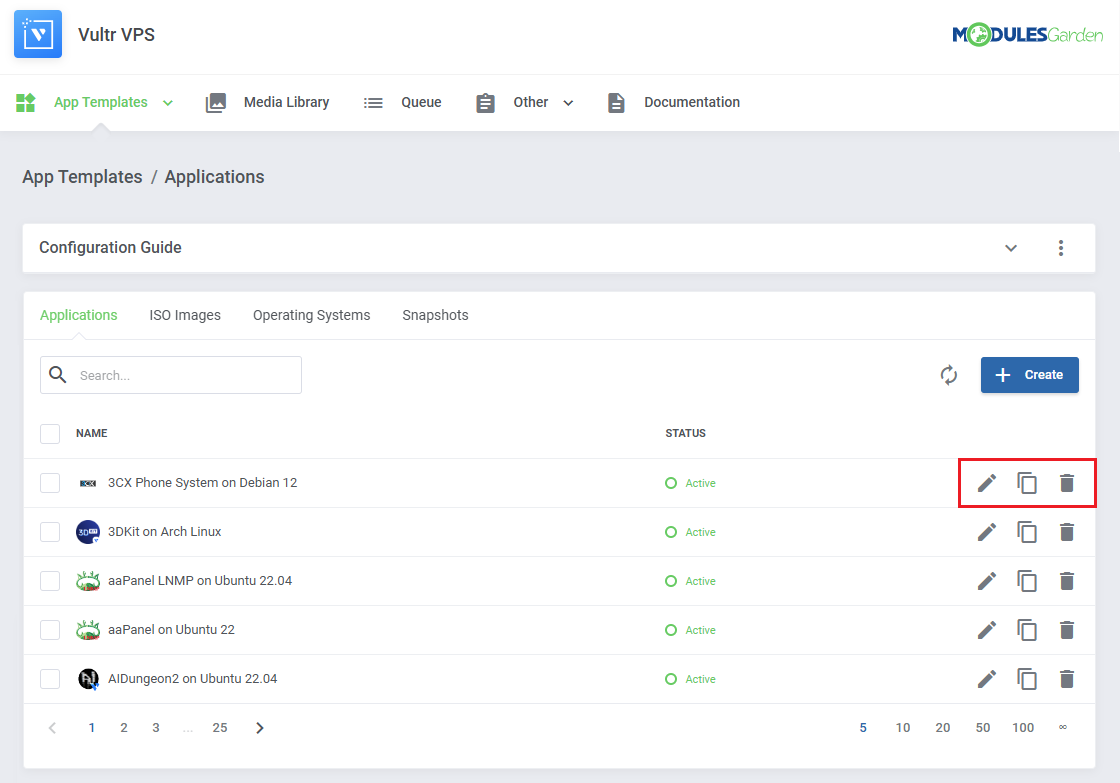
| Once the templates are loaded, you can use the action buttons to edit, duplicate, or delete them. Mass action buttons are also available for bulk operations. |
|
Groups
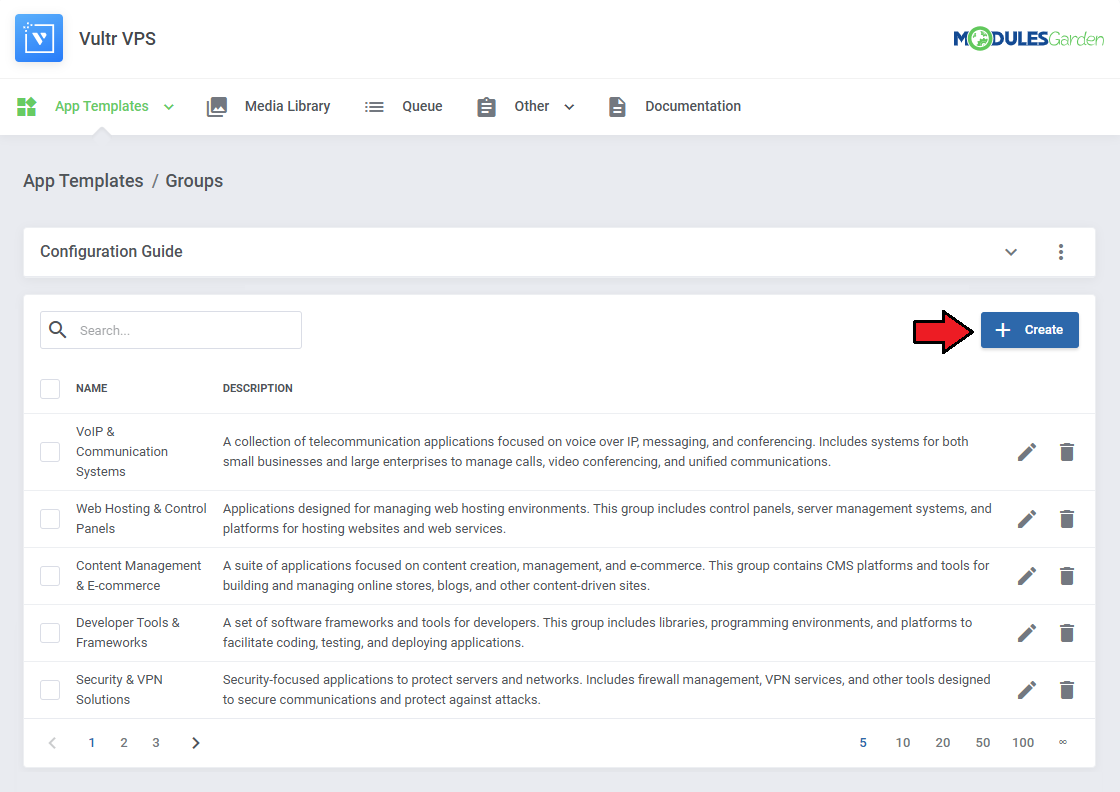
| After preparing your templates, group them to make them available to clients through selected products. Go to App Templates → Groups and click on Create. |
|
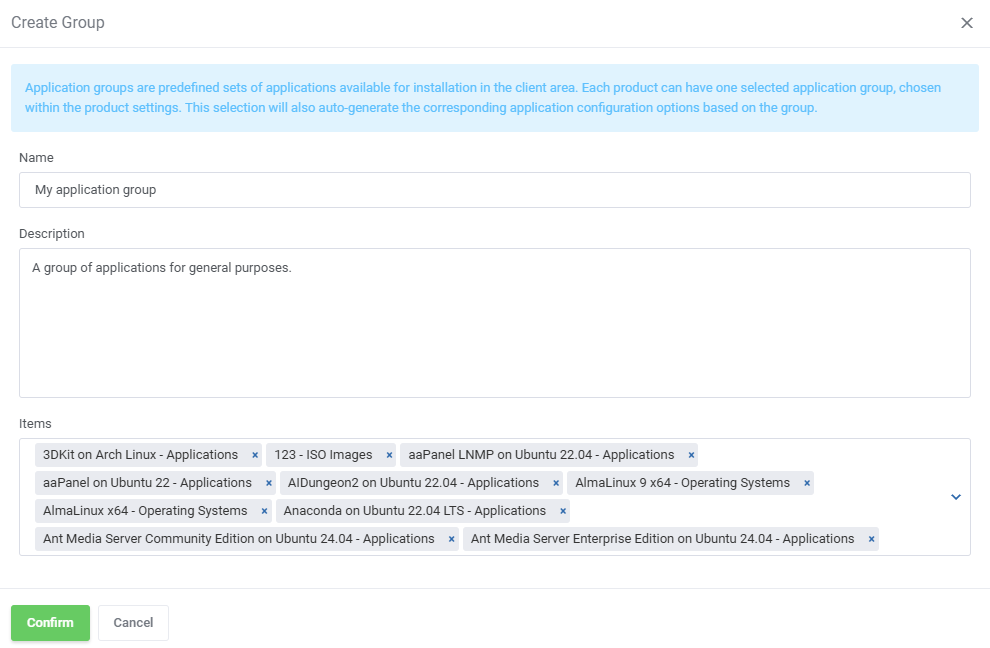
When creating a group, provide:
|
|
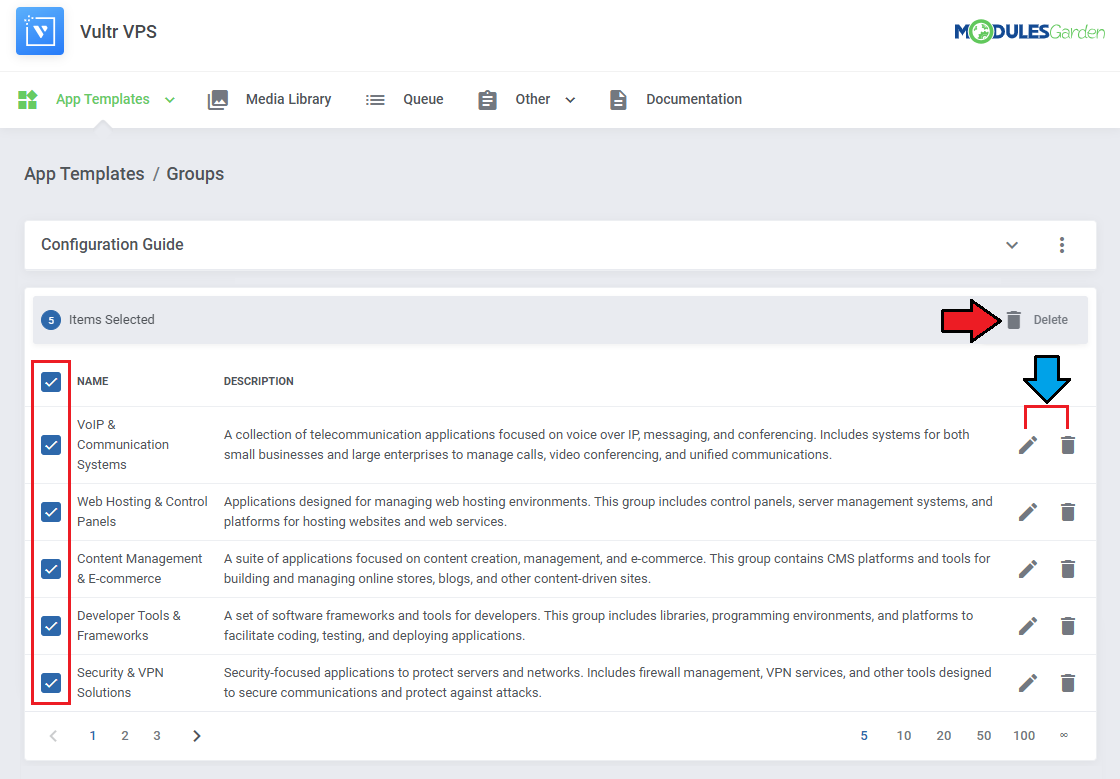
| You can edit or delete groups individually or use mass actions to manage several at once. |
|
| To make templates available for installation, go to the product’s module settings and select the desired groups under App Templates Configuration → Default Application Group. Also, ensure that the App Templates option is enabled under Client Area Features. |

|
Advanced Configuration
| The App Templates feature supports detailed configuration, including manual application addition, user-data scripting, and advanced variables. The examples below illustrate these options. |
Adding Applications Manually
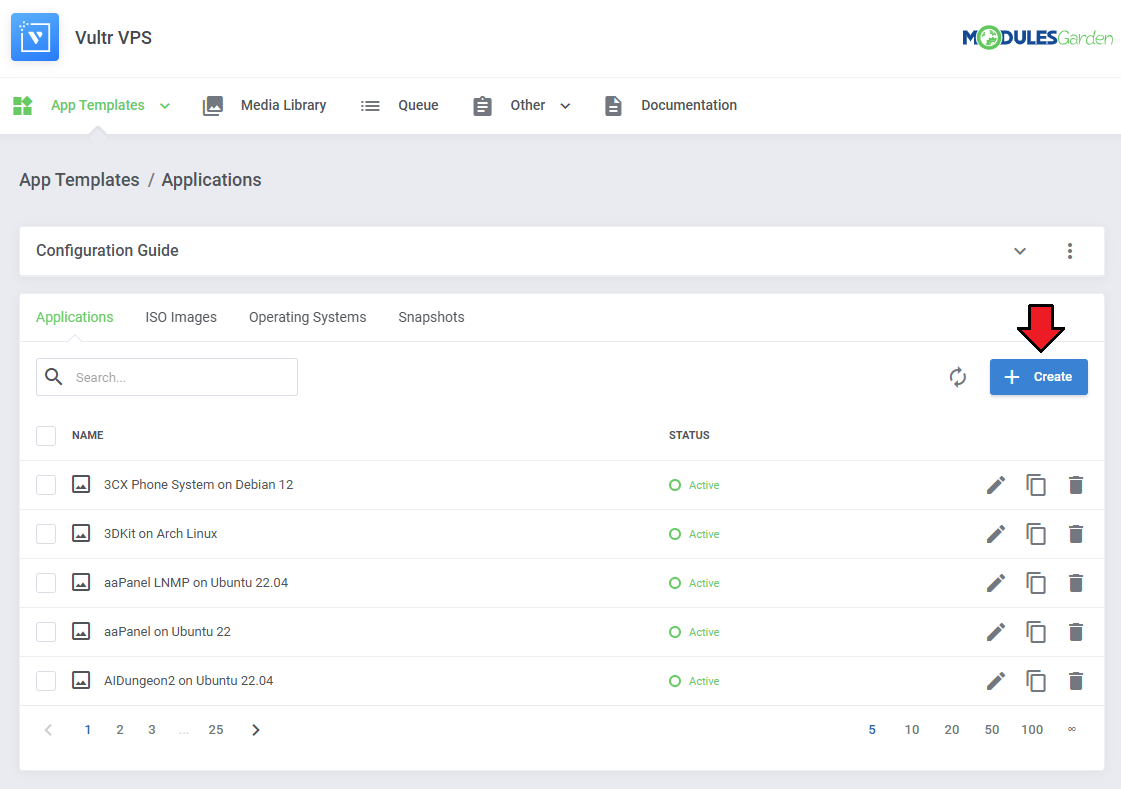
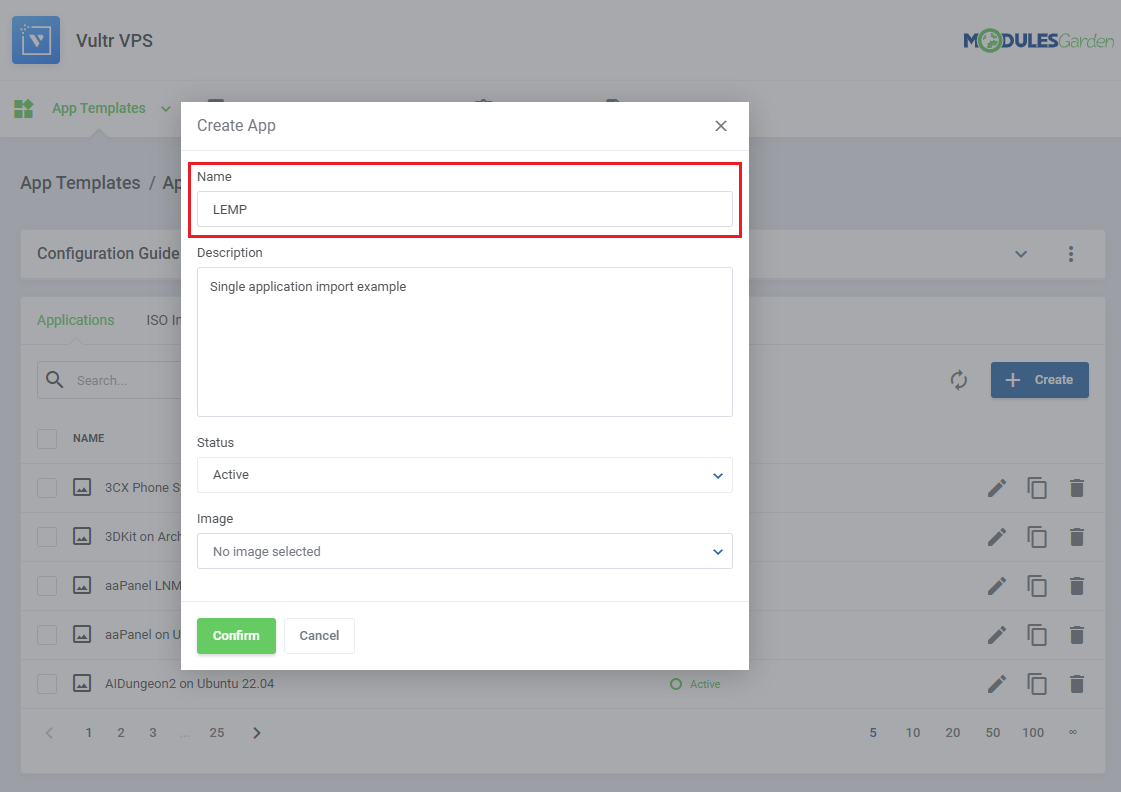
| 1. You can manually add a single application instead of importing all templates at once. 1. Navigate to App Templates → Applications and click on Create. |
|
| 2. List the supported applications provided by your virtualization platform’s API. Each platform has different API endpoints to retrieve application data. Make sure to include your API Key, the request looks like this: curl "https://api.vultr.com/v2/applications" \ -X GET \ -H "Authorization: Bearer ${VULTR_API_KEY}" Example result: {
"applications": [
{
"id": 1,
"name": "LEMP",
"short_name": "lemp",
"deploy_name": "LEMP on CentOS 6 x64",
"type": "one-click",
"vendor": "vultr",
"image_id": ""
}
|
| 3. Enter the application details such as Name, Description, Status, and optionally assign an icon. We recommend using the name or deploy_name from the API response for easier reference. |
|
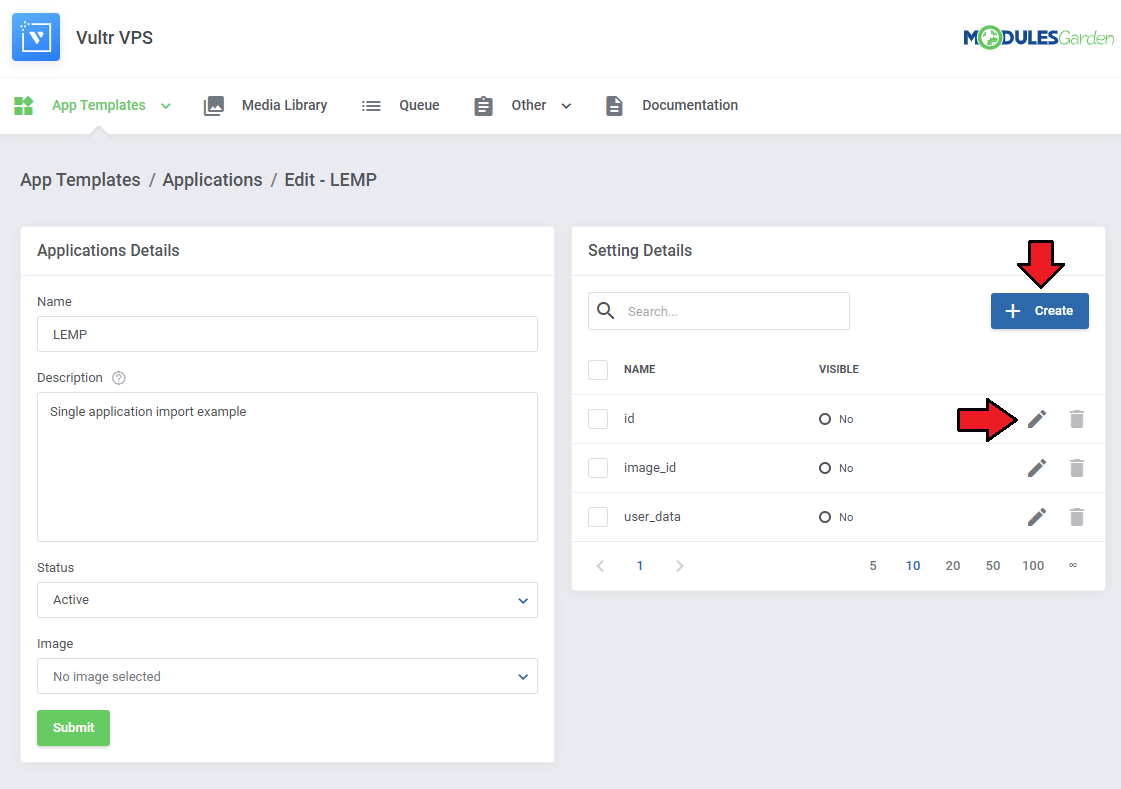
| 4. Edit your new application and open the Setting Details section. Create entries based on the API output - each entry corresponds to a parameter used when deploying the application. |
|
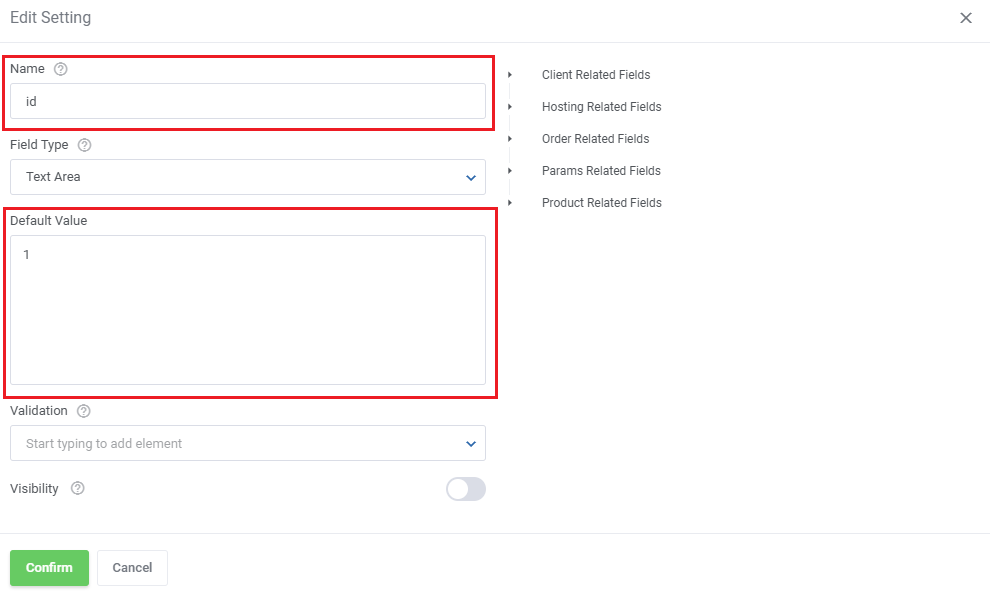
For example, if the API returns:
"id": 1,
"image_id": "",
"user_data": ""
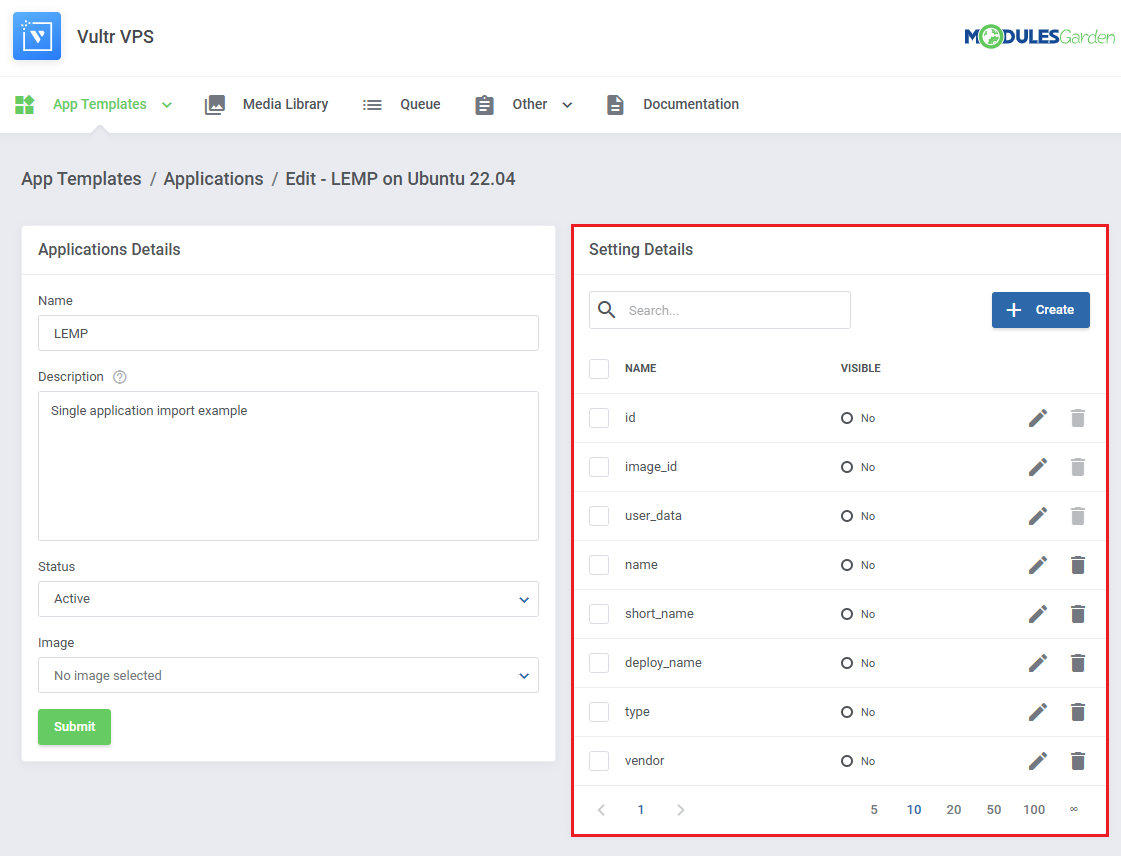
then create fields such as id, image_id, and optionally user_data if supported. |
|
Each field includes:
|
|
Including Cloud-Init / User-Data Scripts
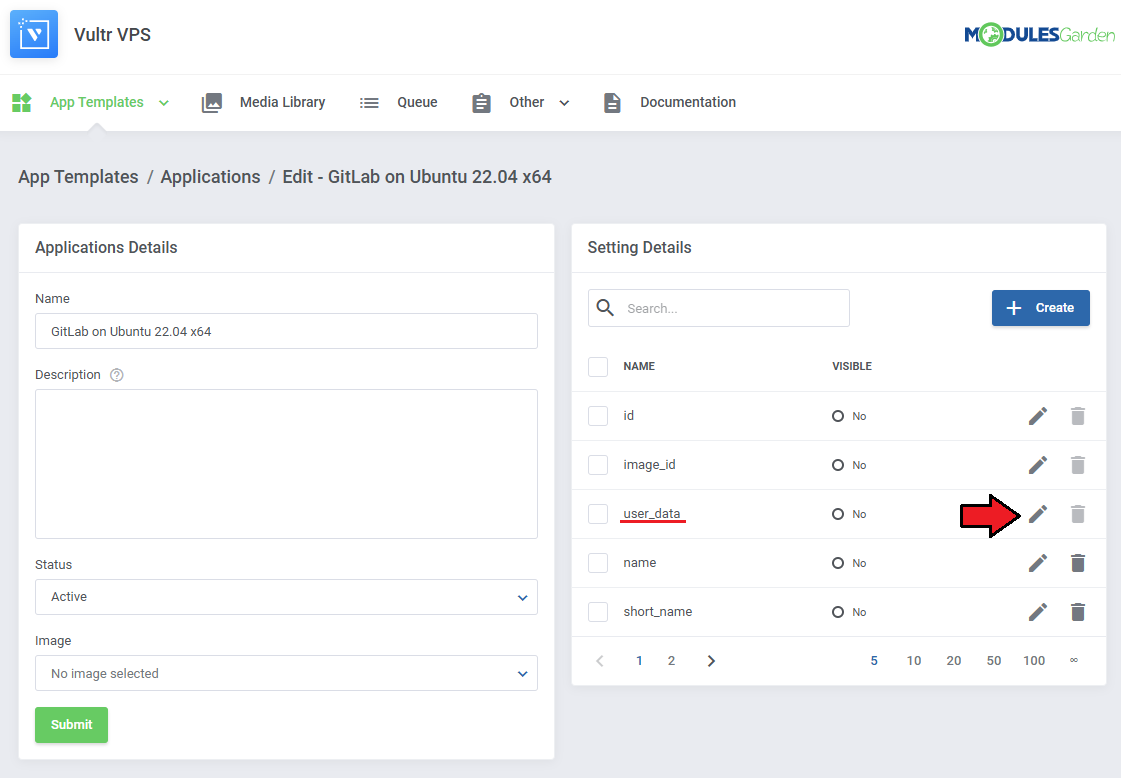
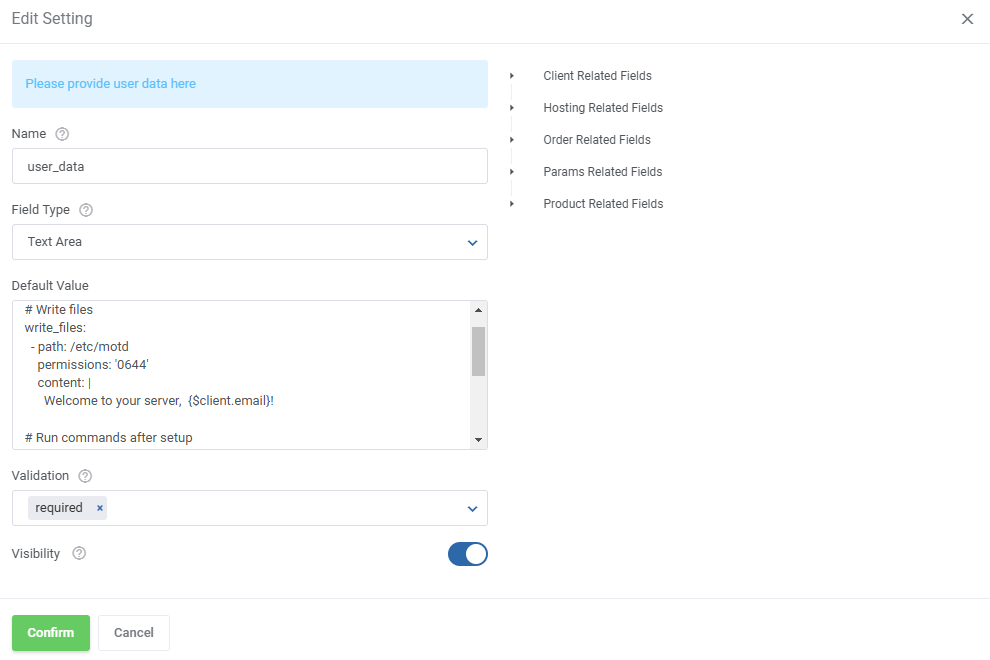
| If the selected application or system image supports user-data or cloud-init scripts, the user_data field will appear automatically. This field lets you execute initialization tasks such as writing configuration files or running commands on first boot. |
|
Example:
#cloud-config
write_files:
 - path: /etc/motd
   content: |
     Welcome to your server, {$client.email}!

runcmd:
 - apt update
 - apt install nginx -y
|
|
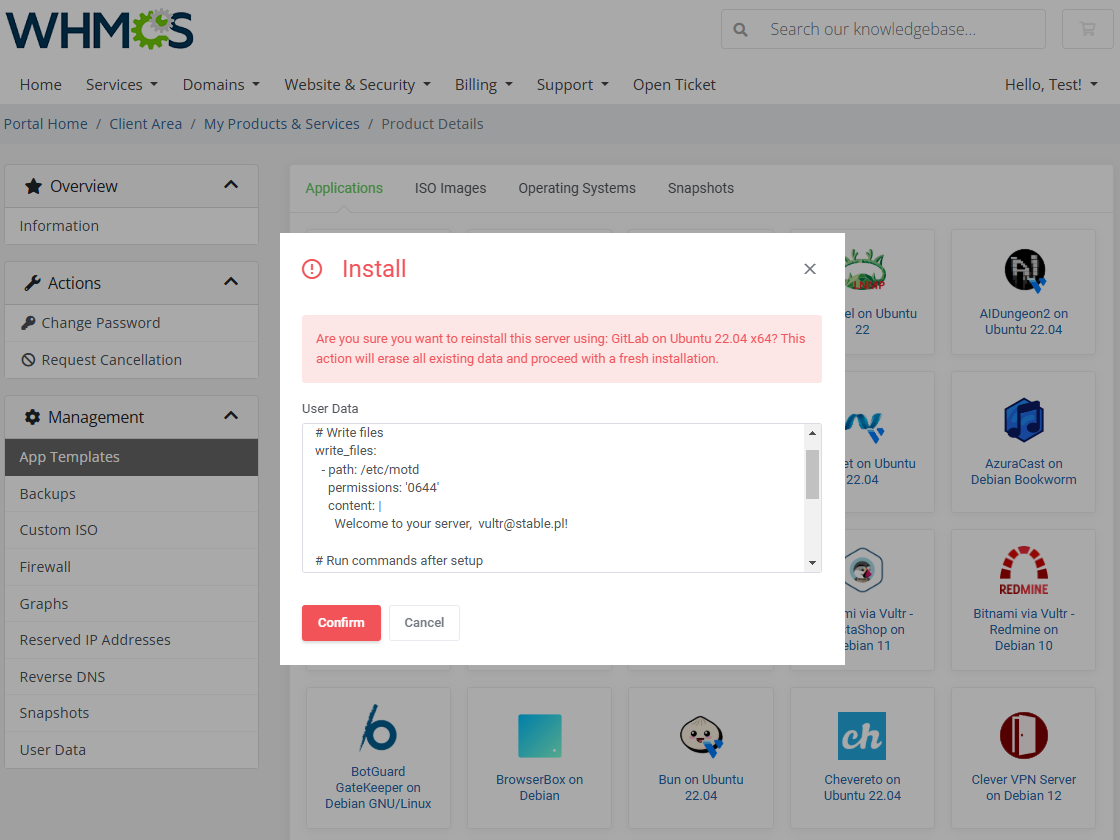
| If Visibility is enabled, the client can modify the script before deployment. Otherwise, it will execute silently on creation. |
|
How To Use Variables
| You can use merge fields (variables) to dynamically insert values into script content or configuration fields. Supported variables depend on the module and provisioning context. Examples include:
Variables can be used in any editable text field, for example: write_files:
- path: /etc/motd
content: |
Welcome to {$hostname} managed by {$client.email}!
|