Hosting Quota Notifications 1.X For WHMCS
Contents |
About Client Profile Viewer For WHMCS
| Client Profile Viewer For WHMCS is a module which was created to gather all the key information about each of your clients in one simple tooltip. Contact details, purchased products and services, income – all of these and many more organized in convenient widgets will be displayed each time you hover over a client's name. |
- Addon Module Features:
| ✔ View The Widgets With Details Of Clients In A Tooltip On Mouseover |
| ✔ Drag & Drop Configuration Of Each Widget Displayed In The Tooltip |
| ✔ Access Various Parts Of System On Click |
| ✔ Configure Admin Roles Assigned To Each Configuration |
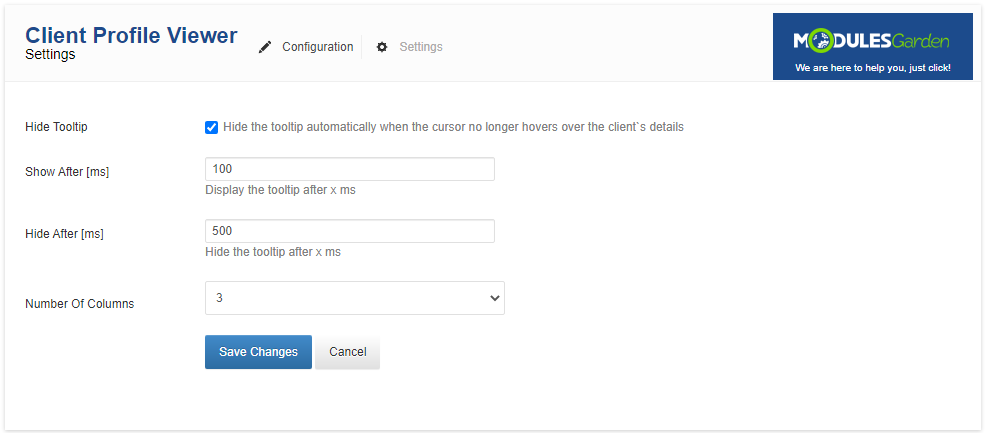
| ✔ Define The Manner In Which The Tooltip Disappears |
| ✔ Define The Delay For Showing The Tooltip |
| ✔ Automatically Flag Client Tickets To Assigned Admin |
- Widgets:
| ✔ Income |
| ✔ Tickets |
| ✔ Services Amount |
| ✔ Client Admin Notes |
| ✔ Client Notes |
| ✔ Client Custom Notes |
| ✔ Client Custom Status |
| ✔ Quick Actions |
| ✔ Profile Tabs |
| ✔ Person Assigned |
| ✔ Log In As Client |
| ✔ Send SMS - Integrated With SMS Center For WHMCS (read more) |
- Widgets Configuration:
| ✔ Income: |
| ✔ Define The Range Of Income Statistic |
| ✔ Tickets: |
| ✔ Define Which Statuses Of Tickets Are Counted |
| ✔ Services Amount: |
| ✔ Define If Product/Domain Status Is Shown |
| ✔ Define Which Additional Links Are Shown |
| ✔ Client Admin Notes: |
| ✔ Define How Much Of A Note Should Be Shown In The Main Tooltip |
| ✔ Client Custom Notes: |
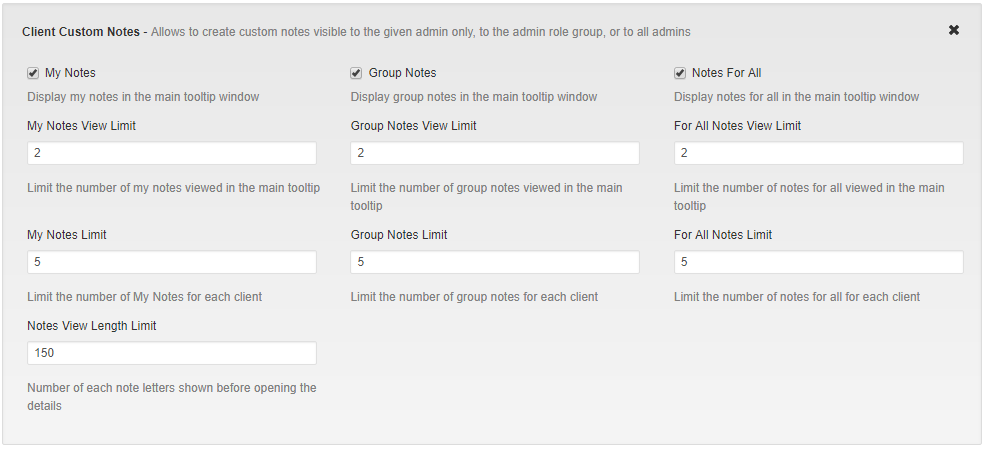
| ✔ Enable/Disable Notes For All, Group Notes And My Notes |
| ✔ Define The Length Of Notes Displayed In The Main Tooltip |
| ✔ Define The Limits Of Notes Displayed In The Main Tooltip Per Group |
| ✔ Define The Limits Of Notes Per Group |
| ✔ Client Custom Status: |
| ✔ Define Whether To Show Client Status Before Their Name |
| ✔ Define Whether To Color Client Name |
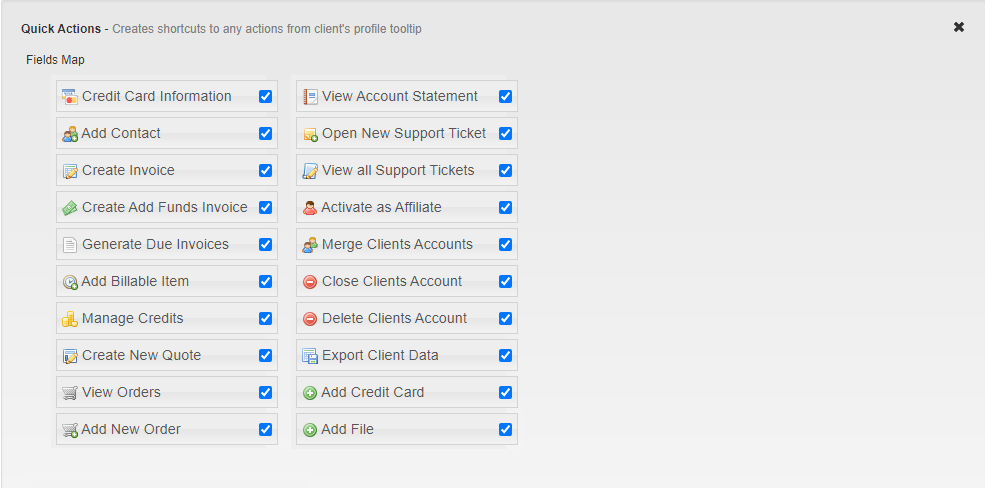
| ✔ Quick Actions: |
| ✔ Define Visible Options |
| ✔ Profile Tabs: |
| ✔ Define Visible Options |
| ✔ Define Amount Of Columns To Display Tabs |
- General Info:
| ✔ Multi-Language Support |
| ✔ Supports PHP 5.4 Up To PHP 7 |
| ✔ Supports WHMCS V6 and V7 |
Installation
| This tutorial will show you how to successfully install and configure Client Profile Viewer For WHMCS. We will guide you step by step through the whole installation and configuration process. |
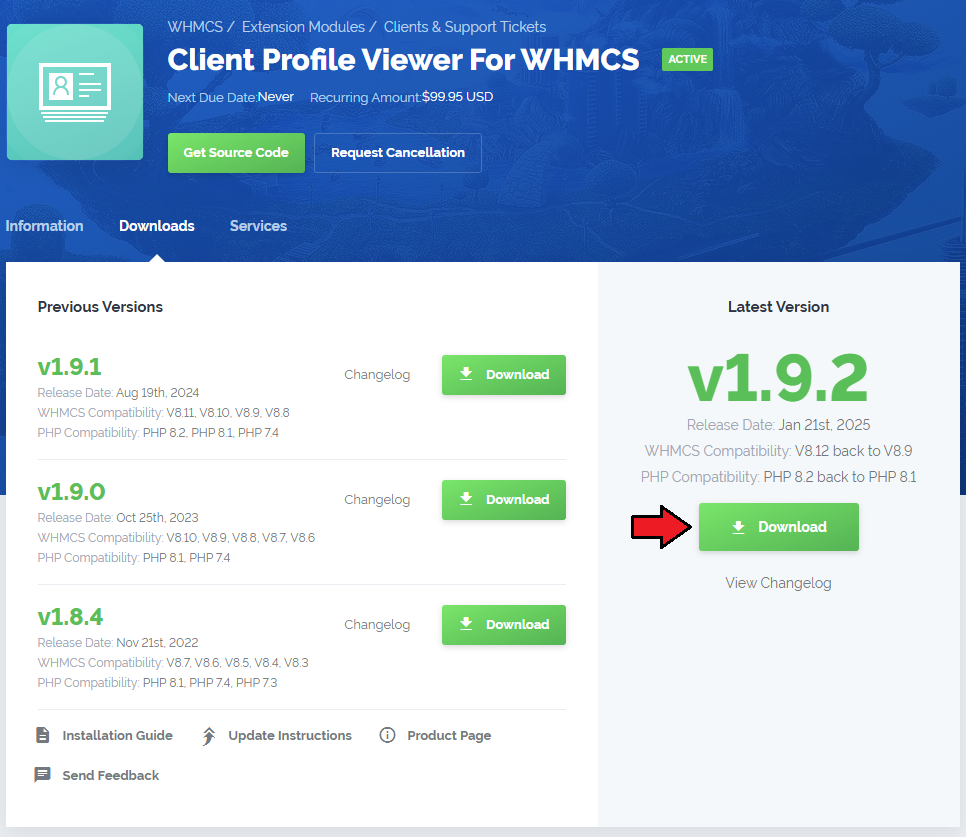
| 1. Log in to your client area and download Client Profile Viewer For WHMCS. |
|
| 2. Upload and extract the module into the main WHMCS directory. Files in your WHMCS directory should look like on the following screen. |

|
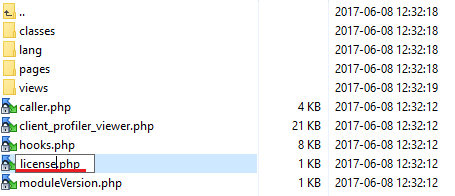
| 3. When you install Client Profile Viewer for the first time you have to rename 'license_RENAME.php' file. File is located in 'modules/addons/clientsprofiler/license_RENAME.php' . Rename it from 'license_RENAME.php' to 'license.php' . |
|
| 4. In order to configure your license key, you have to edit the previously renamed 'license.php' file . Enter your license key between quotation marks as presented on the following screen. You can find your license key in your client area → 'My Products' . |

|
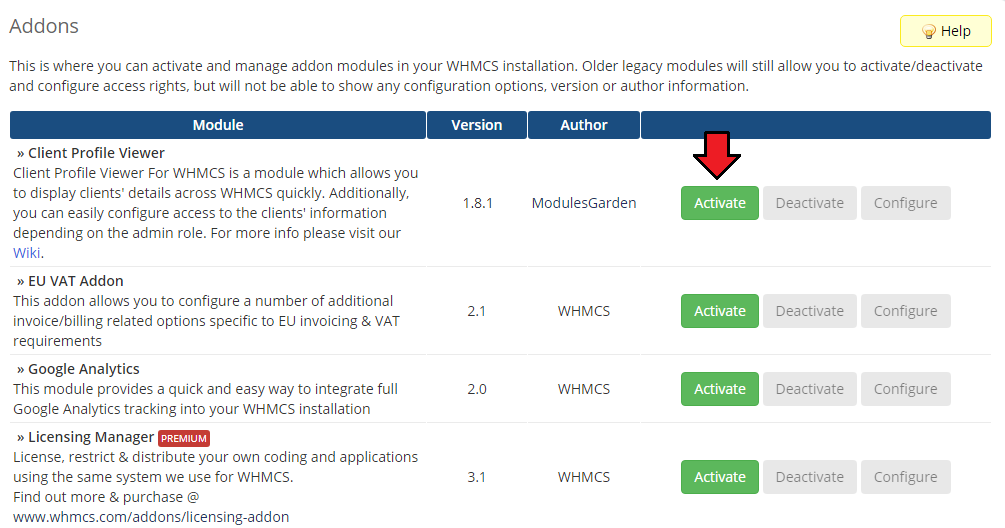
| 5. Now you have to activate the module in your WHMCS system. Log in to your WHMCS admin area. Go to 'Setup' → 'Addon Modules' . Afterwards, find 'Client Profile Viewer' and press 'Activate' button. |
|
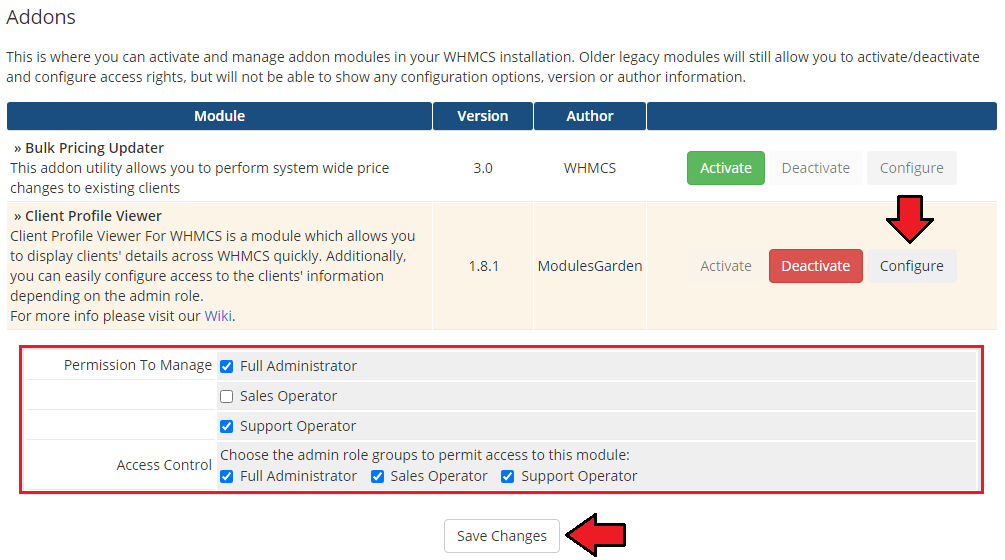
| 6. In the next step you need to permit access to this module. To do so, click on 'Configure' button, tick 'Full Administrator' and press 'Save Changes' . |
|
| 7. You have just successfully installed Client Profile Viewer For WHMCS! You can access your module under 'Addons' → 'Client Profile Viewer' . |
|
Configuration and Management
| Client Profile Viewer For WHMCS is a module which allows you to quickly display clients' details across the WHMCS. Additionally, you can easily configure access to the clients' information depending on the admin role. |
Configuration
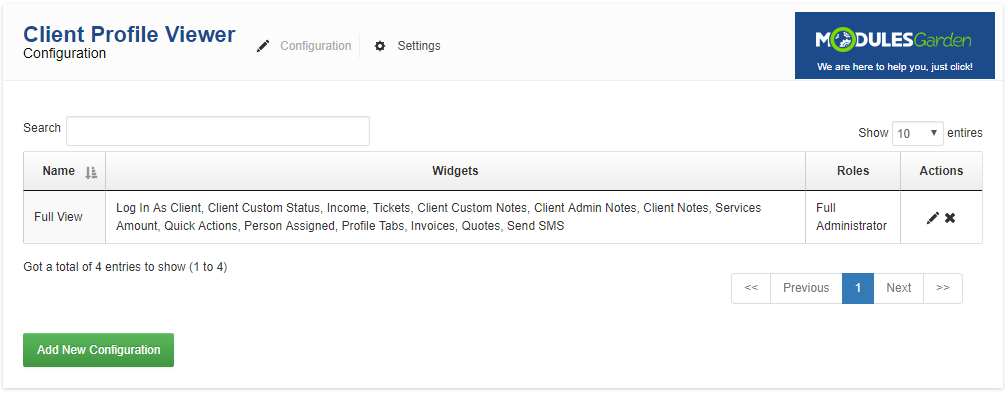
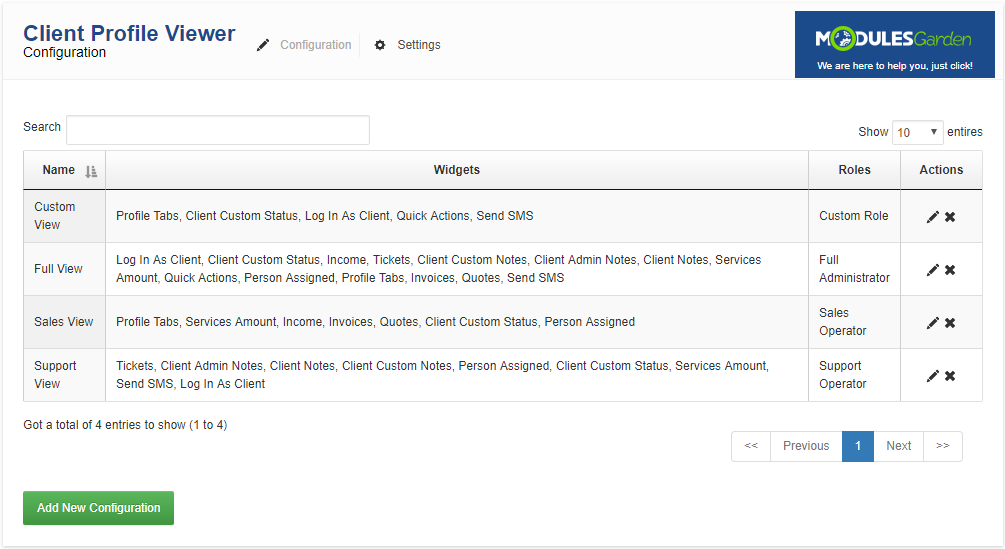
| In 'Configuration' page you can manage tooltip configurations as well as add new ones. Each configuration can have multiple admin roles assigned while one admin role can be assigned to a single configuration only. |
|
Add Configuration
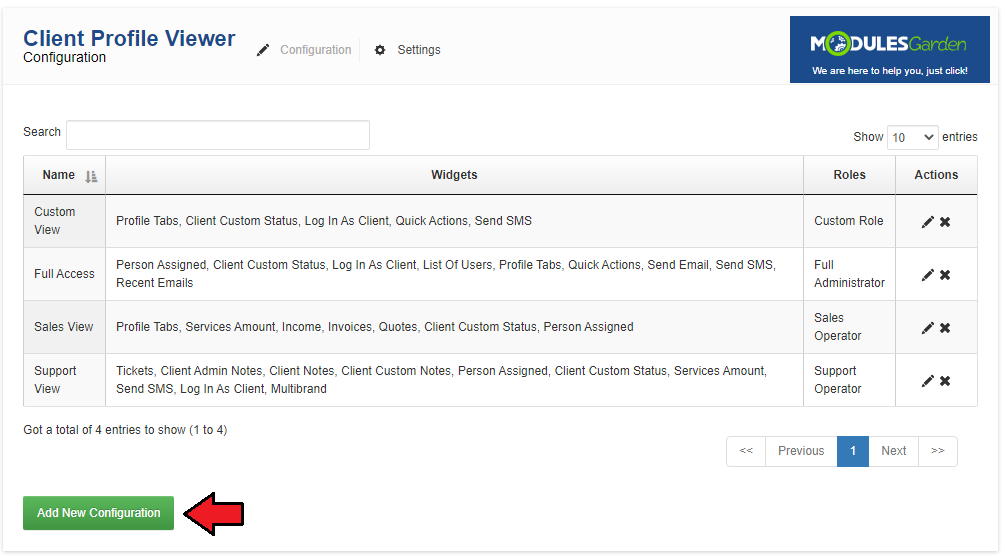
| To add a new configuration, press 'Add New Configuration' button. |
|
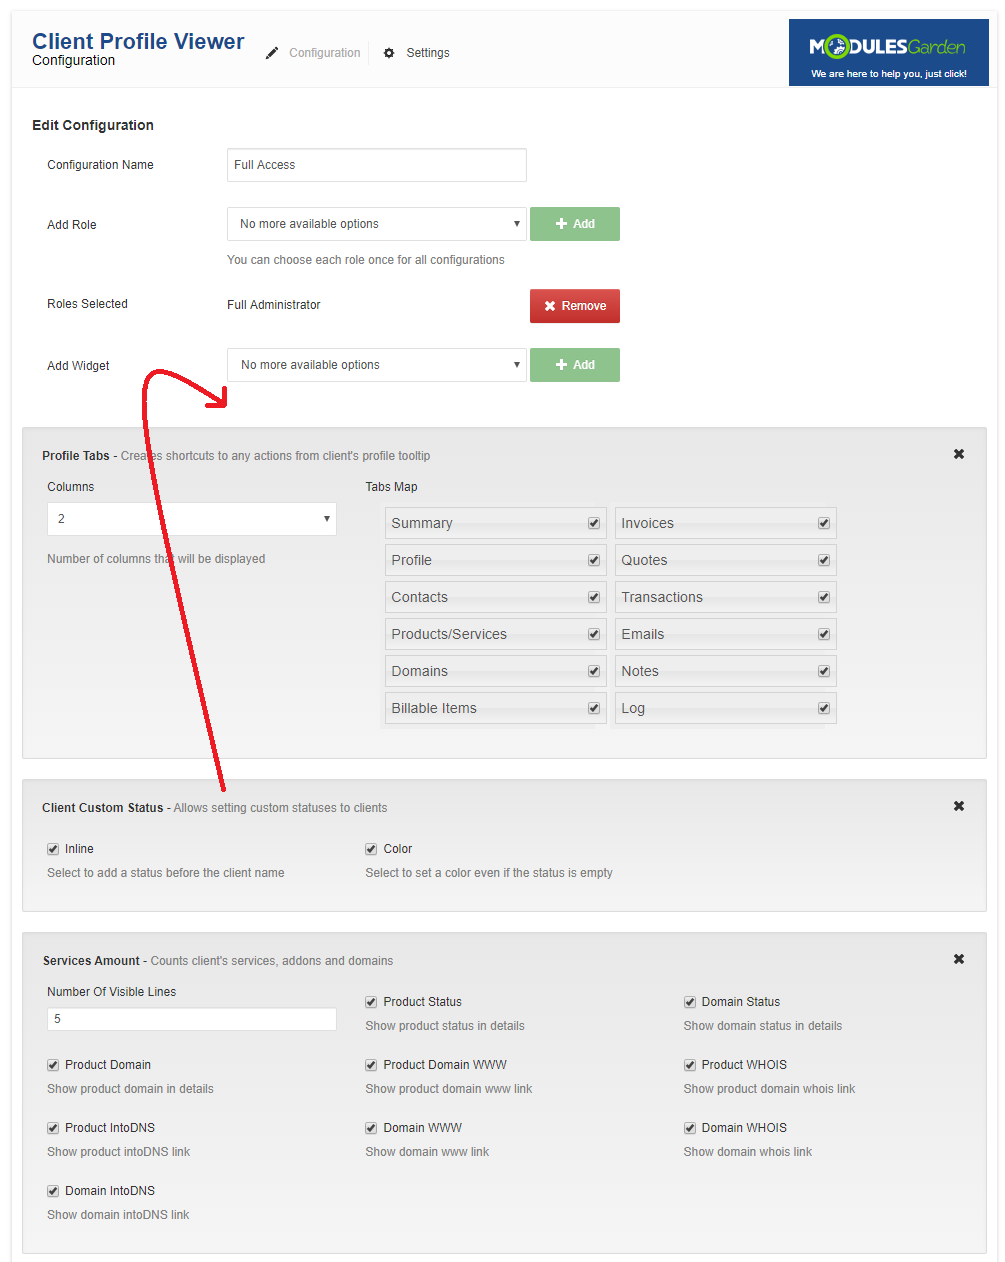
| Afterwards, fill in 'Configuration Name'. Add admin roles through choosing each of them from a dropdown menu and pressing 'Add'. |

|
| If you wish to change the order in which widgets are displayed, simply drag widget to a desired location and drop it. |
|
| Press 'Create' to confirm creation of the configuration. |

|
Advanced Configuration
| Some of the widgets may have additional configuration, more information about them can be found in this subsection. |
Client Admin Notes
|

|
Client Custom Notes
|
|
Client Custom Status
|

|
Income
|

|
Services Amount
|

|
Profile Tabs
|

|
Quick Actions
|
|
Tickets
|

|
Send SMS (Sold Separately)
|

|
Settings
'Settings' page contains global settings for the module such as:
|
|
Tooltip
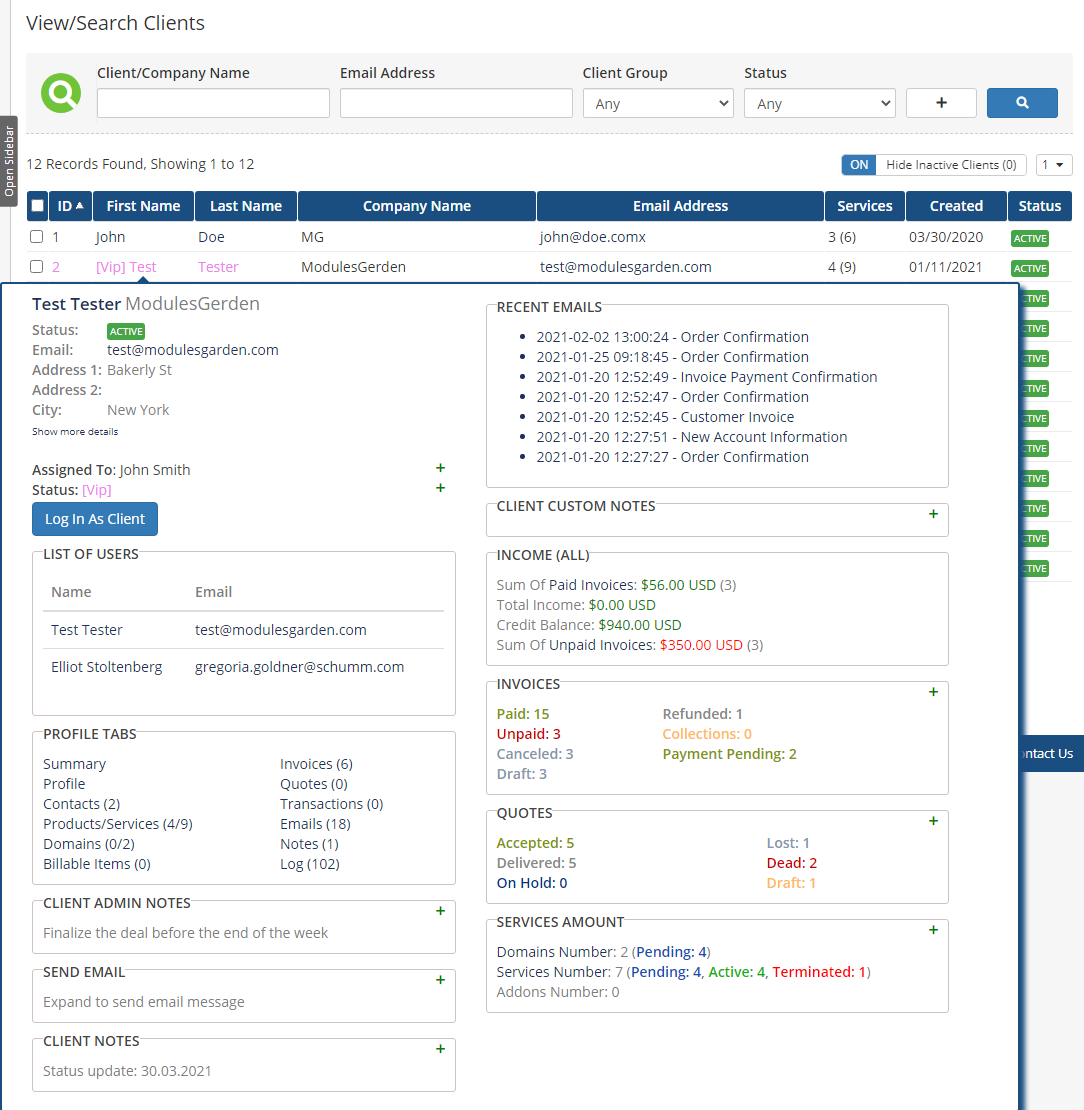
| Tooltip will be displayed across the WHMCS admin area, wherever client's name is displayed. On the following screen you can see a client tooltip in 'Clients' → 'View/Search Clients' . |
|
Assigned Admin To Client
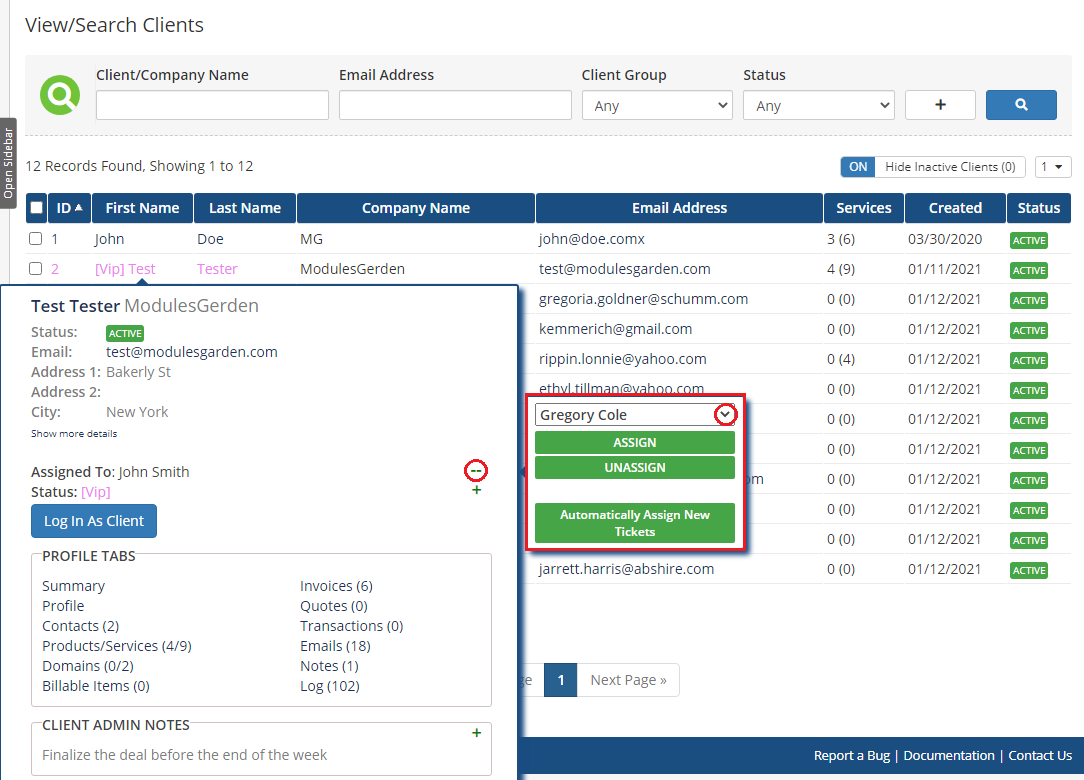
| Allows you to assign admin to specific client. Admin assigned is visible only from the tooltip. |
|
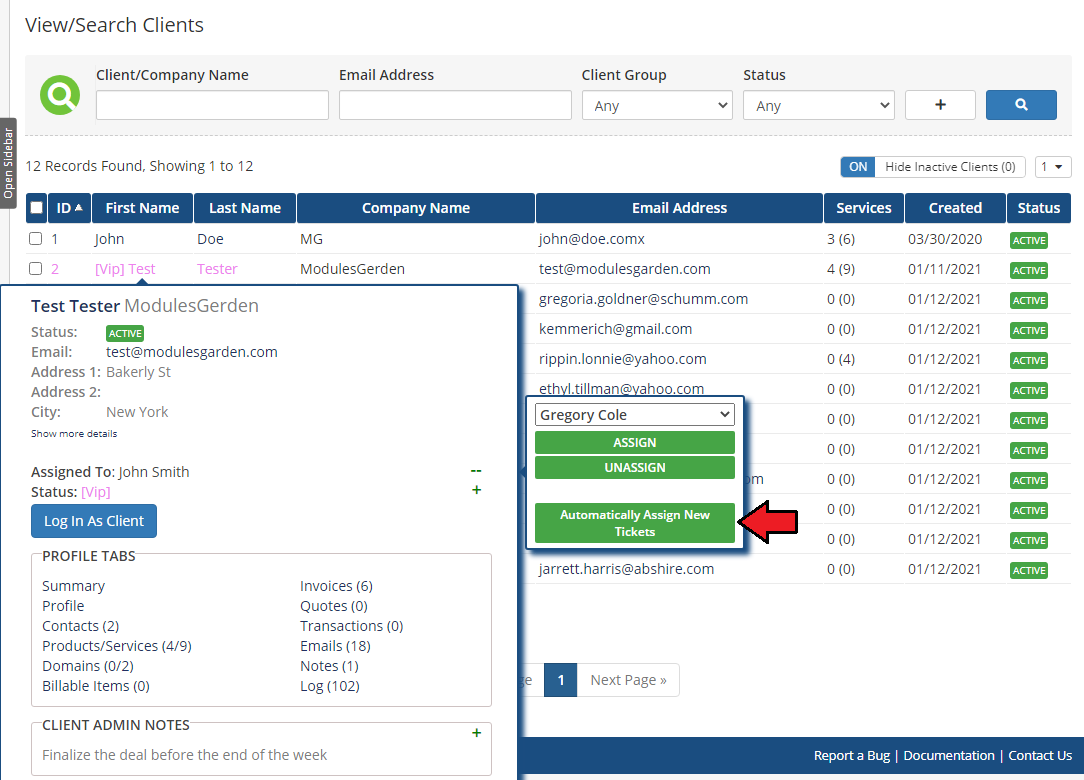
| Once an admin is assigned they can automatically assign new tickets to the client and then stop assigning them. |
|
Client Custom Status
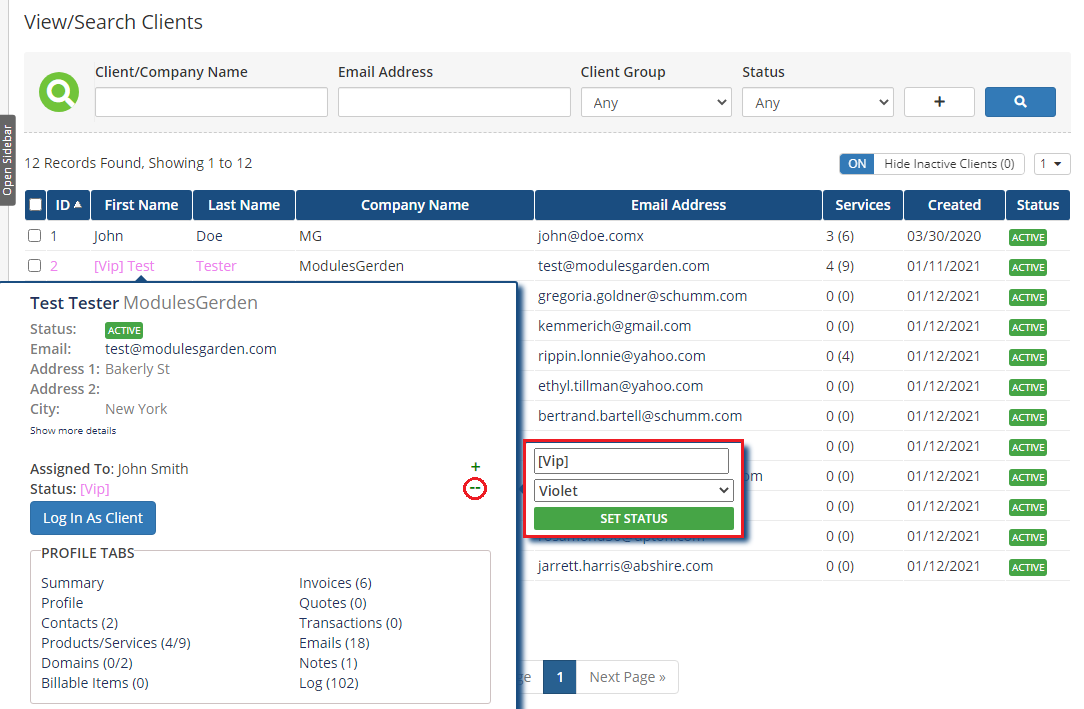
| Enables you to assign custom status and color to a client. |
|
Profile Tabs
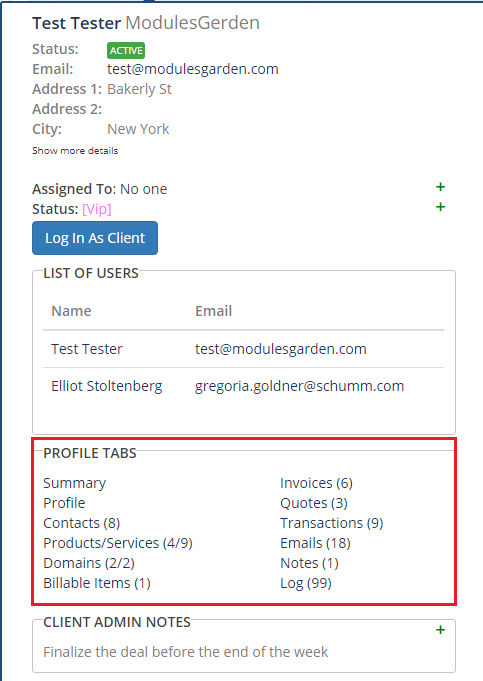
| Quick redirection to tabs in client's profile. |
|
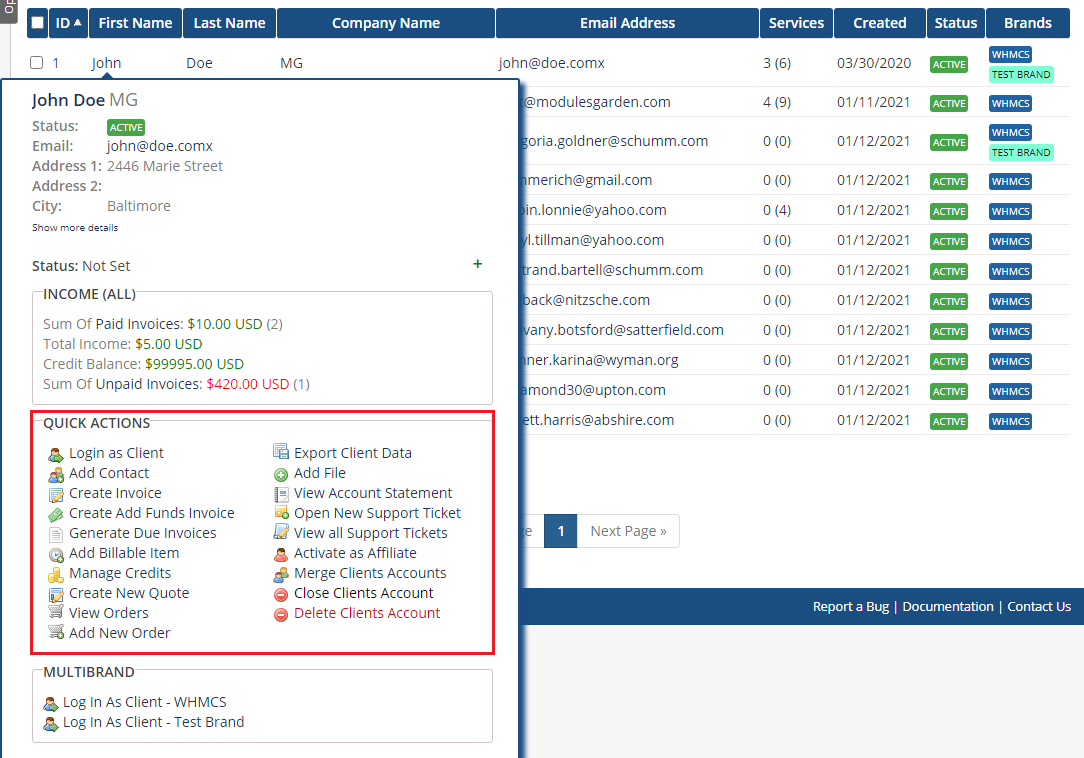
Quick Actions
| Move directly form clients profile tooltip to a chosen action section. |
|
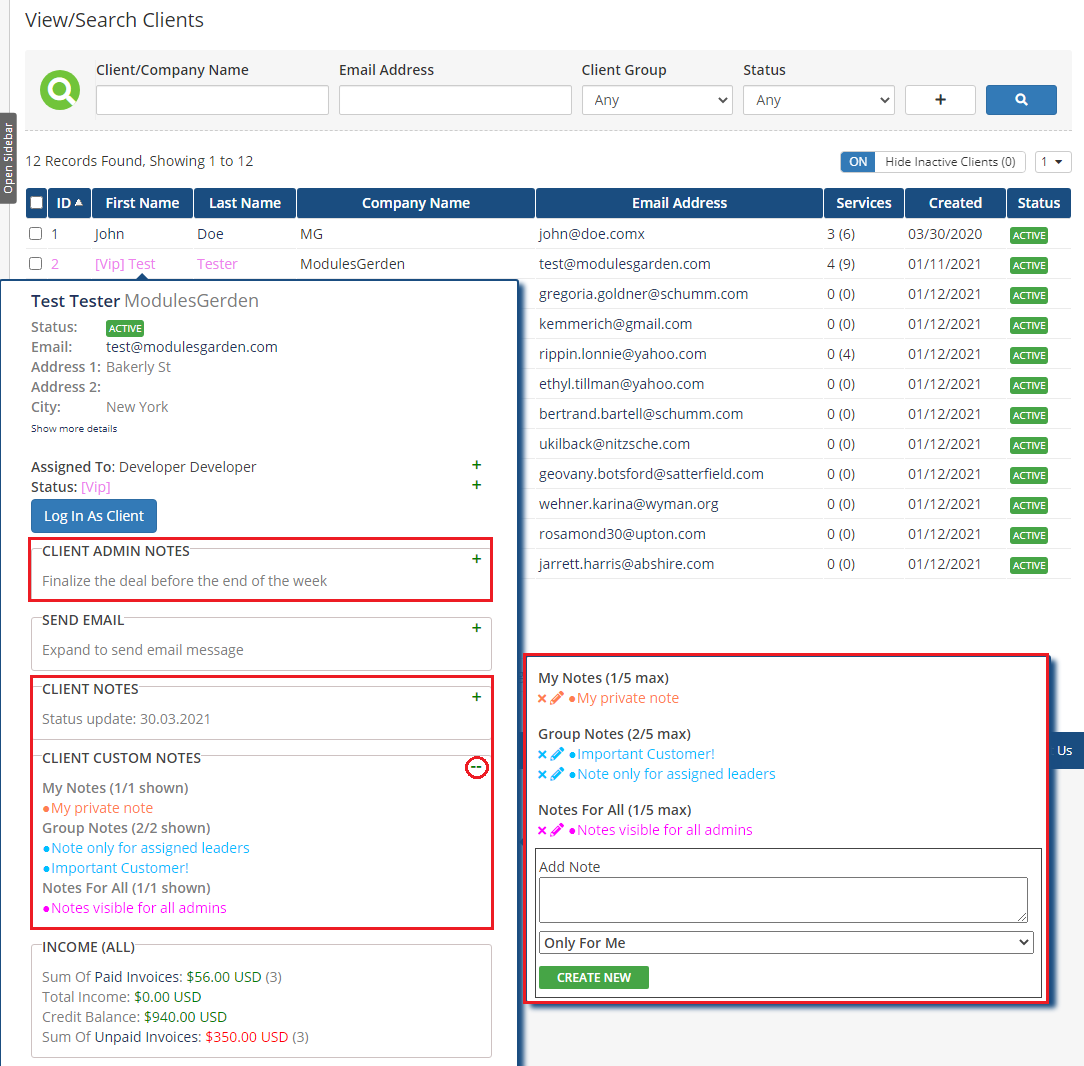
Client Notes - Admin Notes, Notes And Custom Notes
The screen presents three different widgets in fact, each of them displays notes from a different part of the system.
Additionally, as you can see on the following screen, you can see the number of notes added and a maximum number of notes you can add. |
|
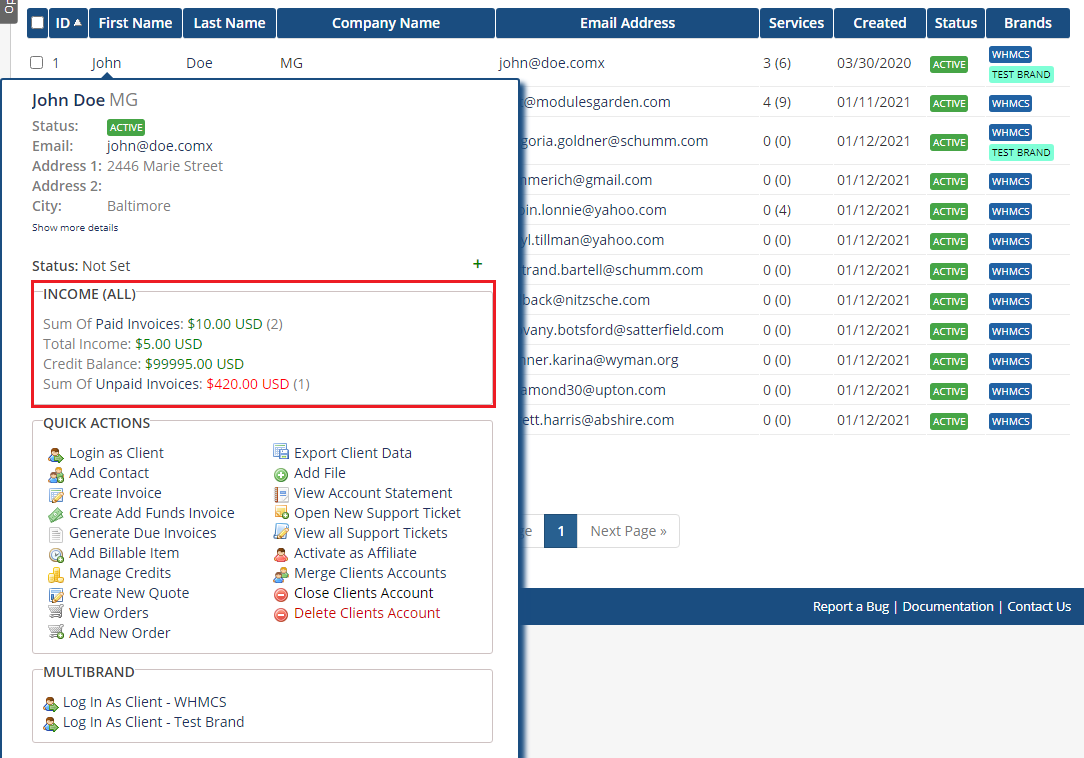
Income
| 'Income' widget displays the summary value of paid invoices as well as those still waiting for payment. |
|
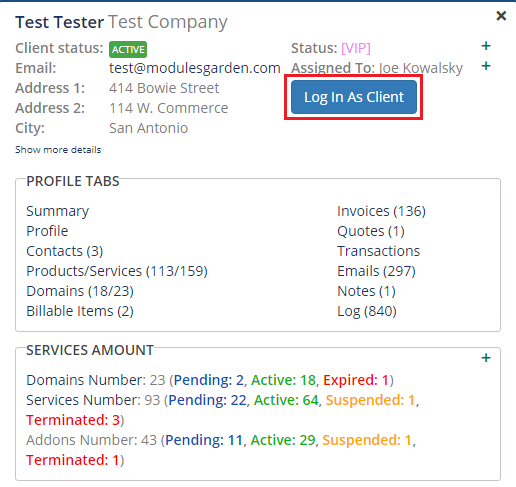
Log In As Client
| This widget allows you to quickly log in as a client. Press 'Log In As Client' to do so. |
|
Services
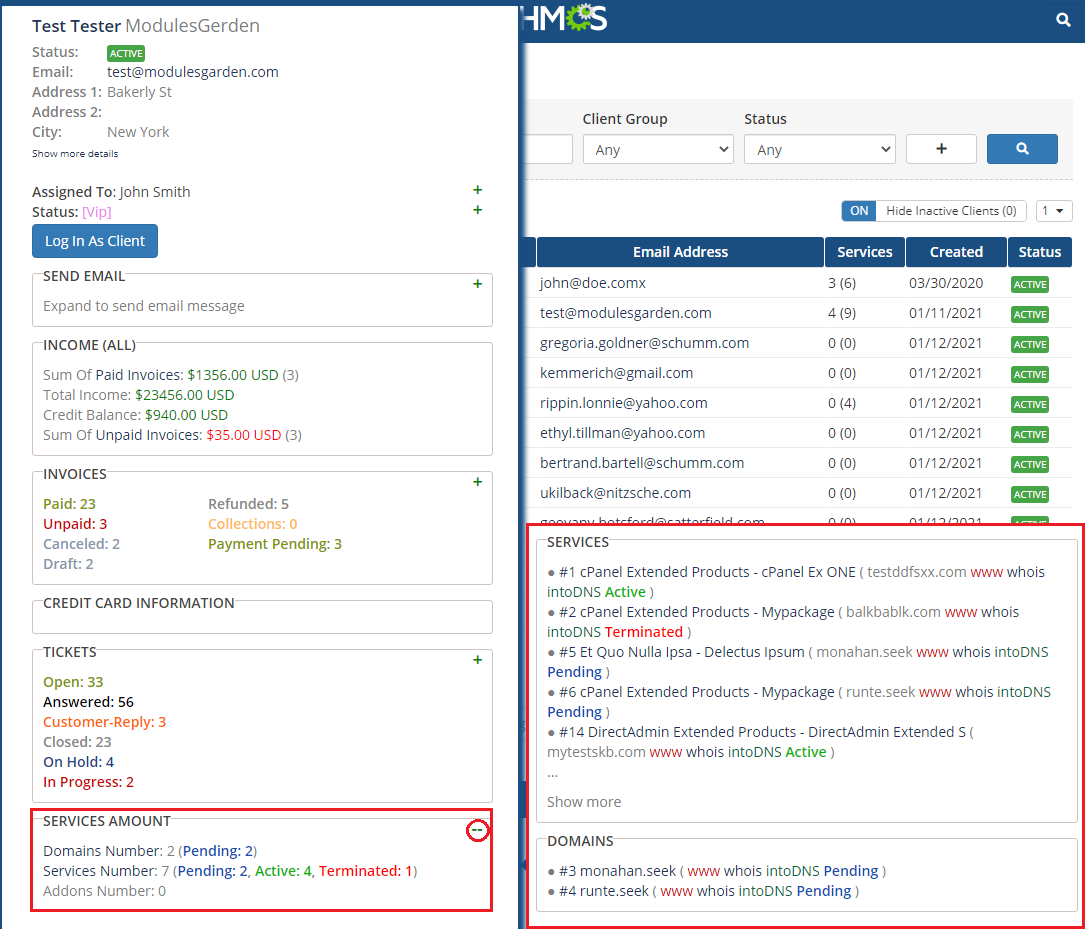
| Here you can find client's products, product addons and domains counted by their status. Additionally, you can view all the items in the tooltip along with various links as shown on the screen below. |
|
Tickets
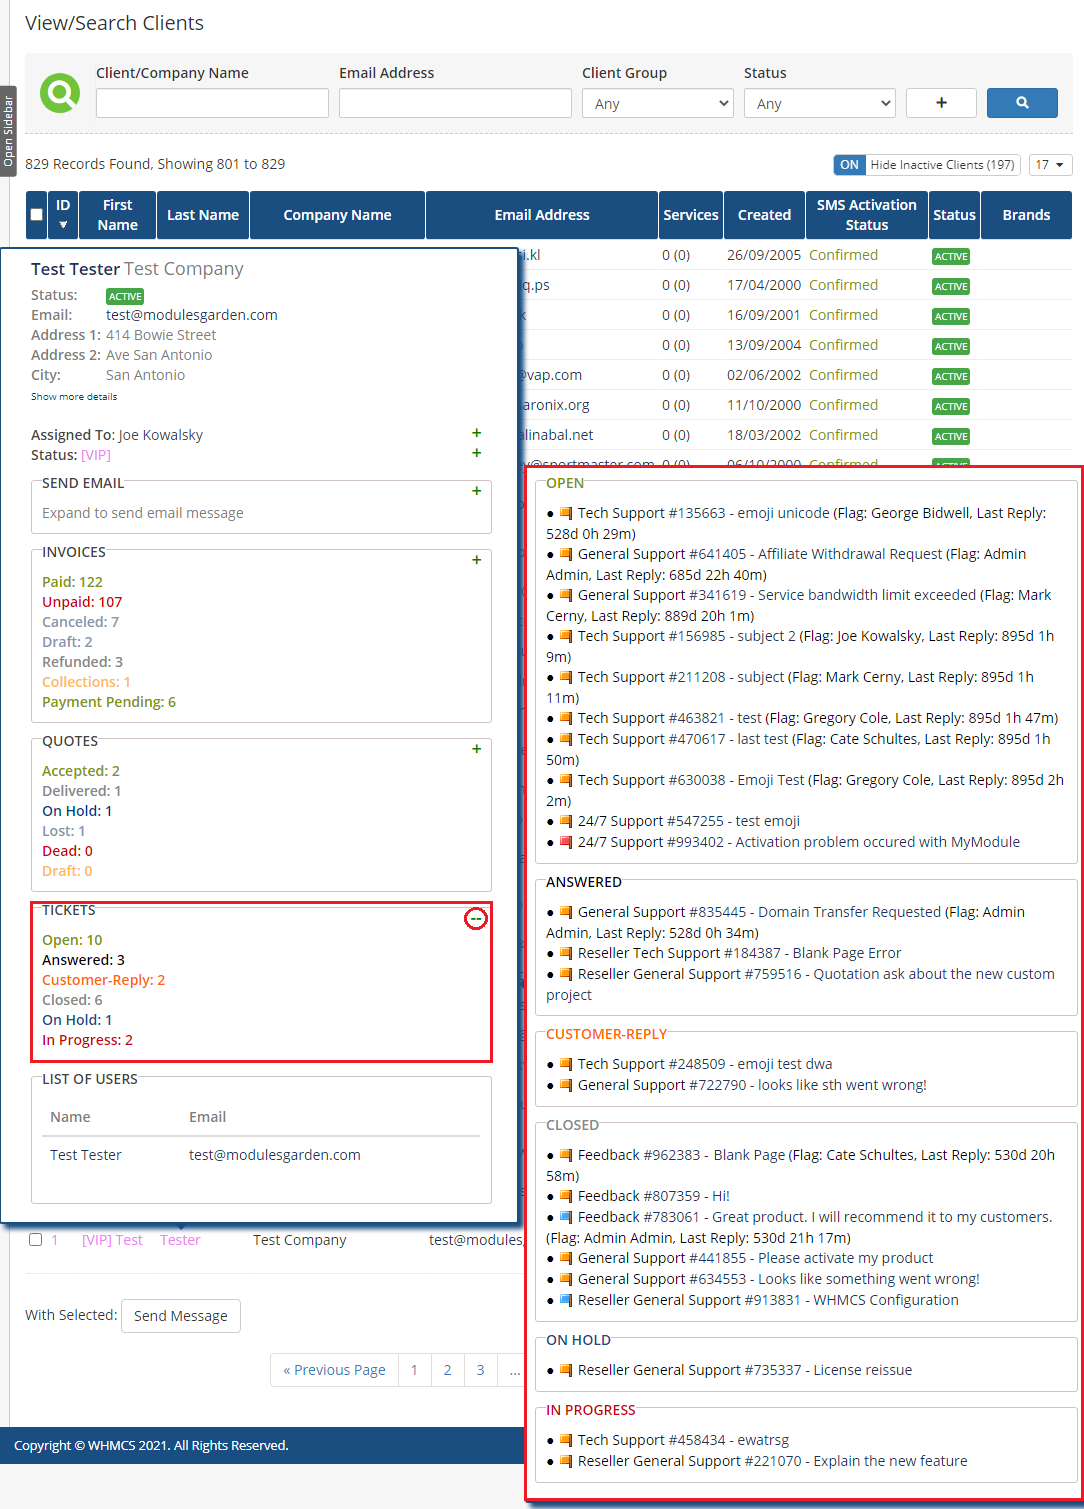
| 'Tickets' widget counts your client's tickets by status and provides a direct link to them. |
|
Send SMS
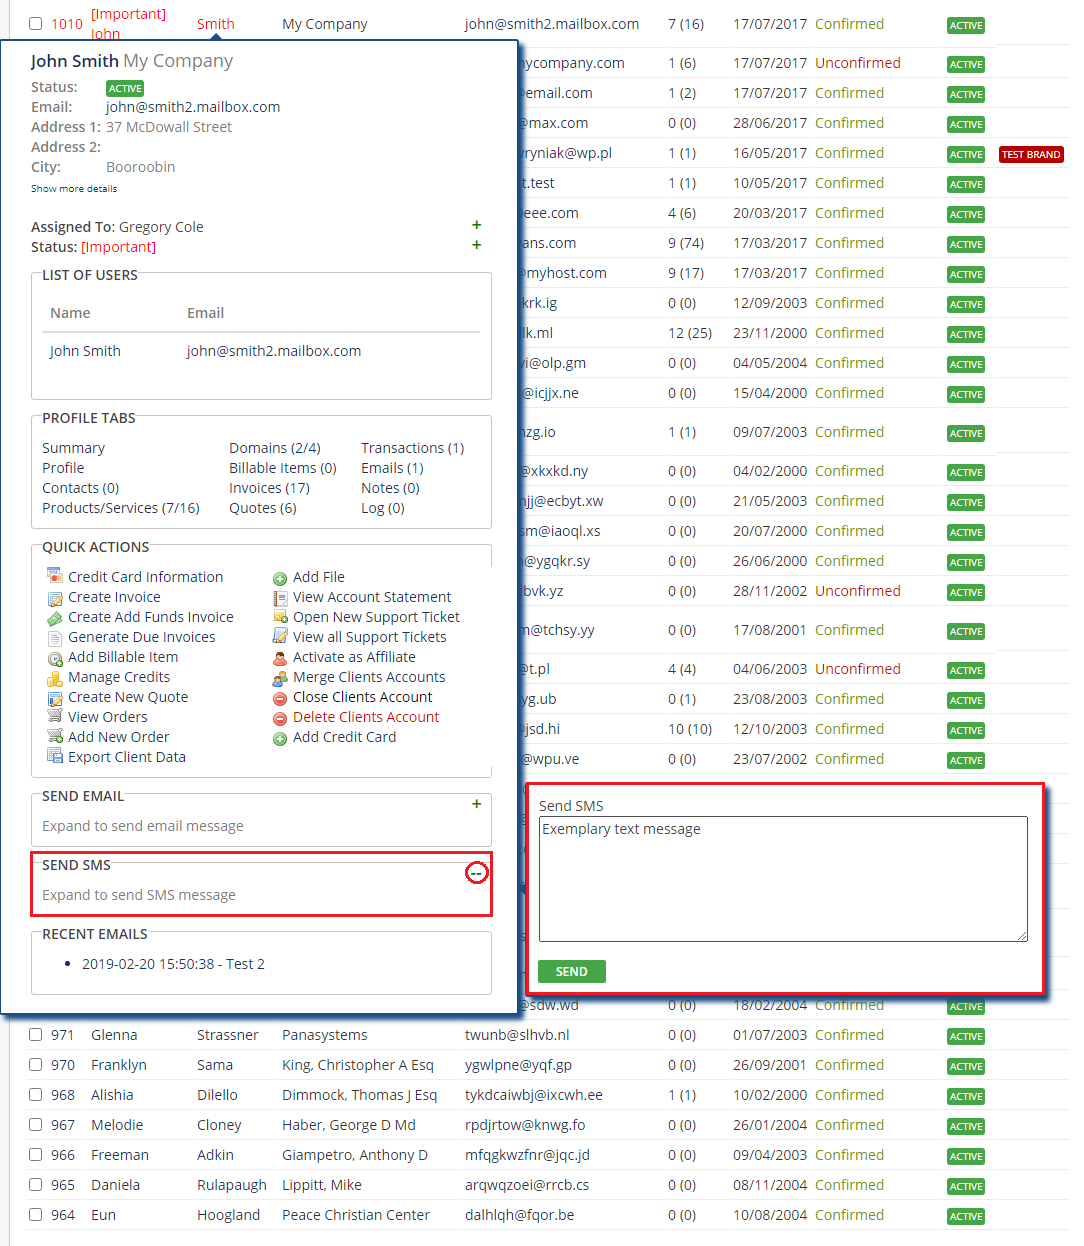
| 'Send SMS' widget allows quick sending text messages. This functionality is available only if SMS Center For WHMCS is activated! |
|
Tips
| 1. If you wish some specific information like income to be visible at the top of the tooltip, simply change its position in the configuration. Drag and drop the desired widget box in a required position. |
Common Problems
| 1. When you have problems with connection, check whether your SELinux or firewall does not block ports. |