Zimbra Email For WHMCS
Contents |
About Zimbra Email For WHMCS
Article update is ongoing on this page, watch out for broken links and unclear descriptions!
We are sorry for the inconvenience caused.
| Zimbra Email For WHMCS is a module which allows your customers to manage email accounts of your domain directly in WHMCS. Your clients will be able to conveniently manage mailboxes, aliases and quickly access their webmails. |
- Admin Area Features:
| ✔ Create Account |
| ✔ Terminate Account |
| ✔ Change Package |
| ✔ Change Password |
| ✔ Log In To Webmail |
| ✔ Use COS / Custom Settings |
| ✔ Generate Default Configurable Options |
- Client Area Functionality:
| ✔ Manage Accounts |
| ✔ Manage Aliases |
| ✔ Manage Distribution Lists |
| ✔ Change Package |
| ✔ Change Password |
| ✔ Log In To Webmail |
- Configurable Options:
| ✔ Accounts Limits |
| ✔ Account Size |
| ✔ Aliases Limit |
- General Info:
| ✔ Multi-Language Support |
| ✔ Configurable Options Support |
| ✔ Supports Zimbra 8 |
| ✔ Integrated With Advanced Billing For WHMCS - Server Resource Usage Billing (read more) |
| ✔ Supports WHMCS V5 Up To V5.3.14 albo Supports WHMCS V5 And V6 |
Installation and Configuration
| This tutorial will show you how to successfully install and configure Zimbra Email For WHMCS. We will guide you step by step through the whole installation process. |
Installation
| 1. Log in to your client area and download Zimbra Email For WHMCS. |
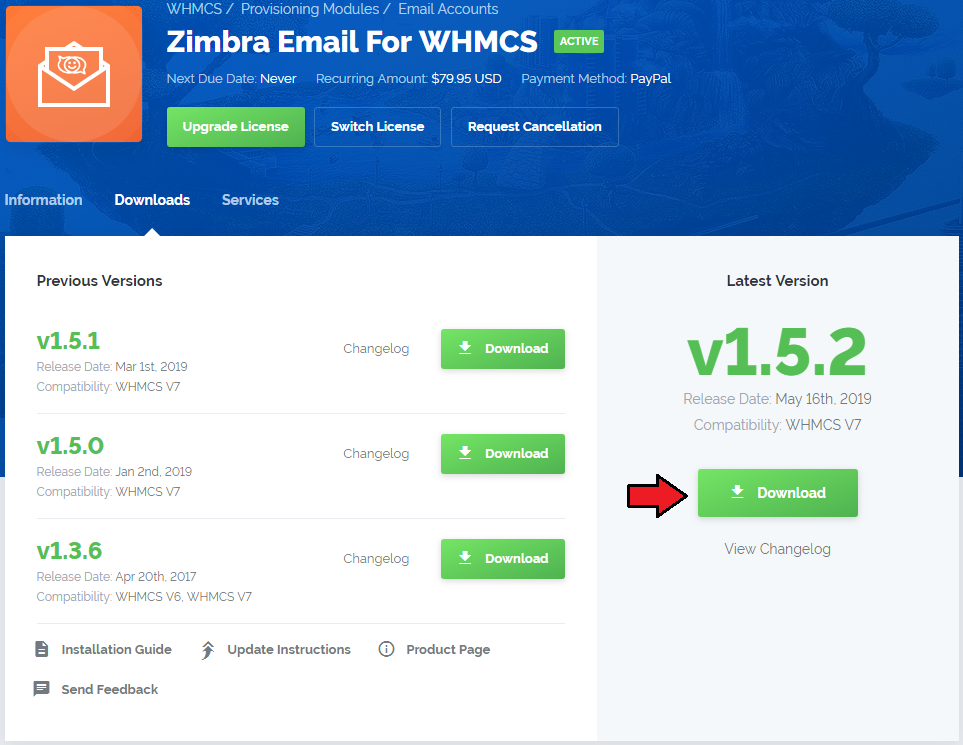
|
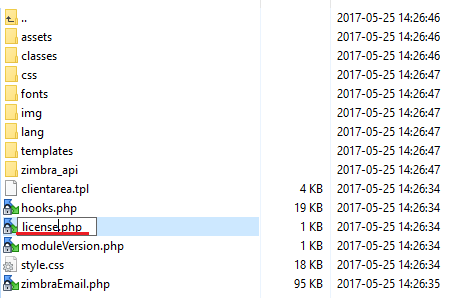
| 2. Upload and extract the module into the main WHMCS directory. Files in your WHMCS directory should look like this. |

|
| 3. When you install Zimbra Email for the first time you have to rename 'license_RENAME.php' file. File is located in 'modules/servers/zimbraEmail/license_RENAME.php' . Rename it from 'license_RENAME.php' to 'license.php.' |
|
| 4. In order to configure your license key you have to edit a previously renamed 'license.php' file. Enter your license key between quotation marks as presented on the following screen. You can find your license key in your client area → 'My Products.' |

|
Server Configuration
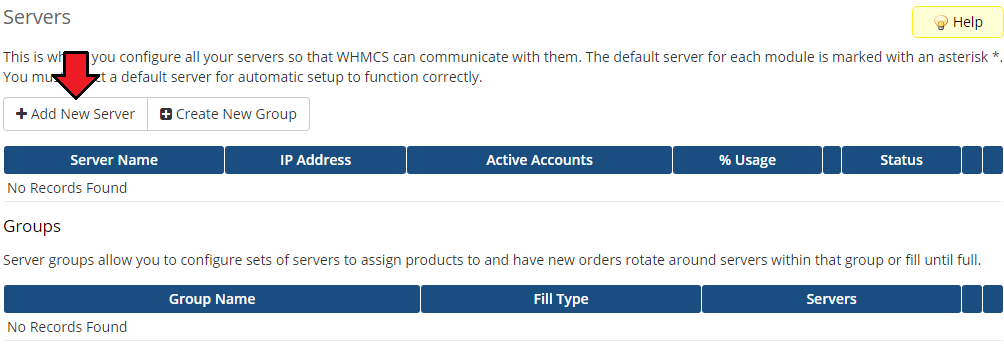
| 5. Now let's configure a new product. Log in to your WHMCS, press 'Setup' → 'Products/Services' → 'Servers' . Afterwards press 'Add New Server.' |
|
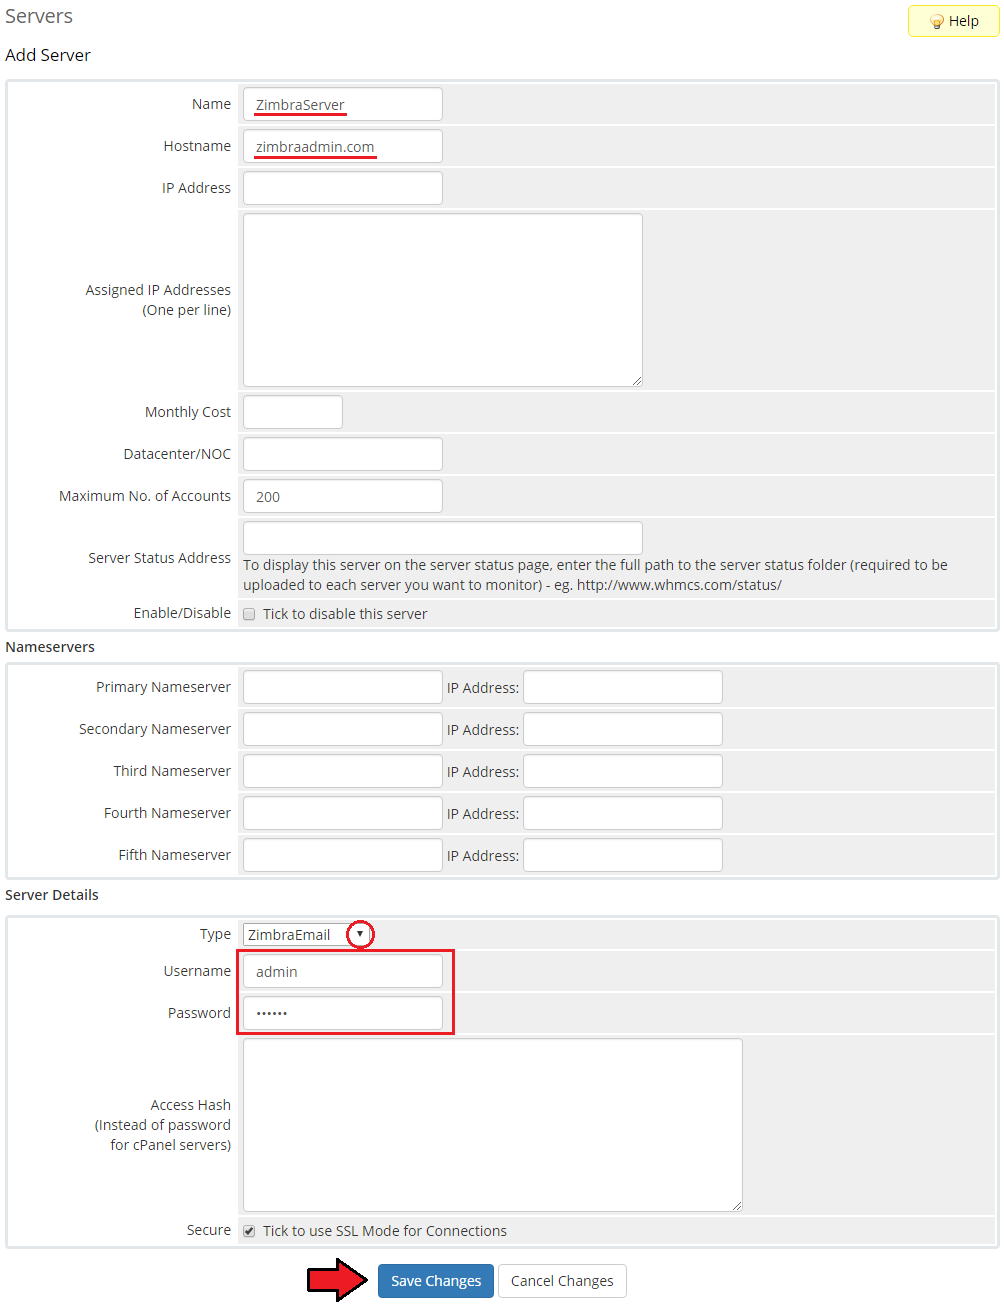
| 6. Next, enter your server name and Zimbra server hostname. Type in your username and password used to log in to Zimbra server. Choose 'ZimbraEmail' from a dropdown menu and press 'Save Changes.' |
|
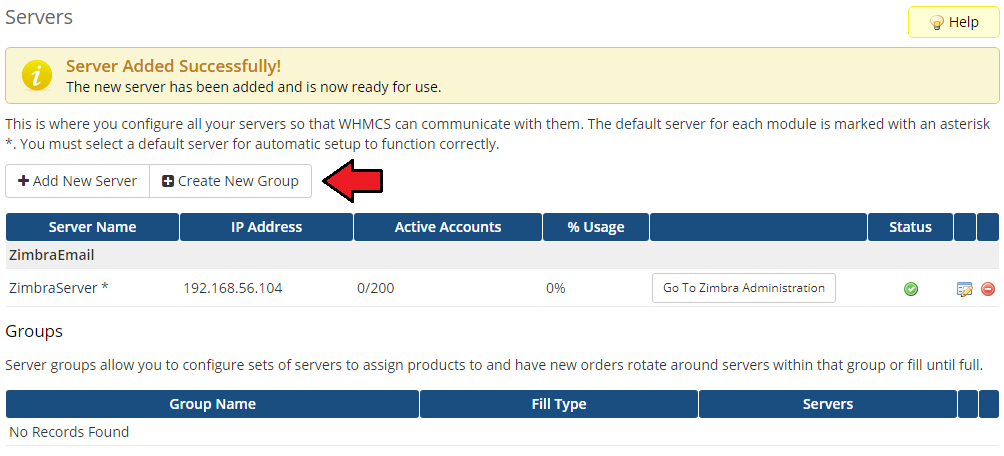
| 7. After you configure your server correctly, you will see a following screen. Now you need to create a new group for your server. For that purpose press 'Create New Group.' |
|
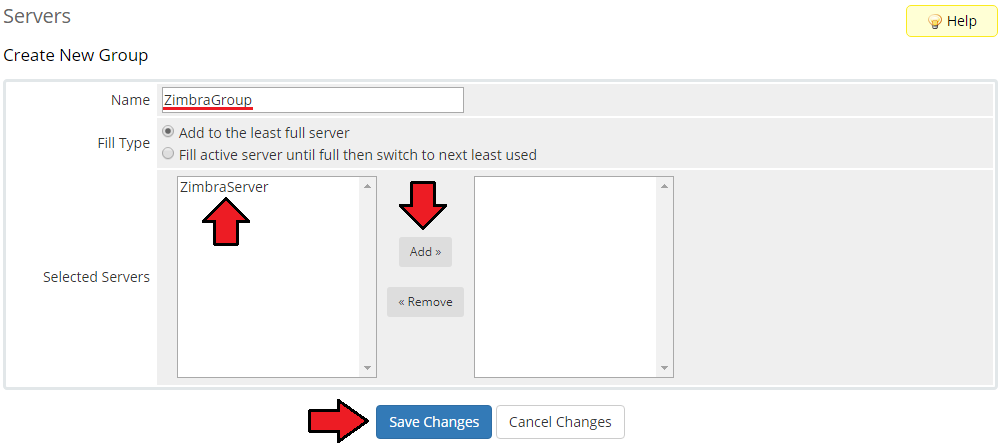
| 8. Enter name, click on your previously created server, press 'Add' then 'Save Changes.' |
|
Product Configuration
| 9. In order to create and configure product, click on 'Setup' → 'Products/Services' → 'Products/Services.' If you do not have a product group, click on 'Create a New Group' . If you do, simply move to step 11. |

|
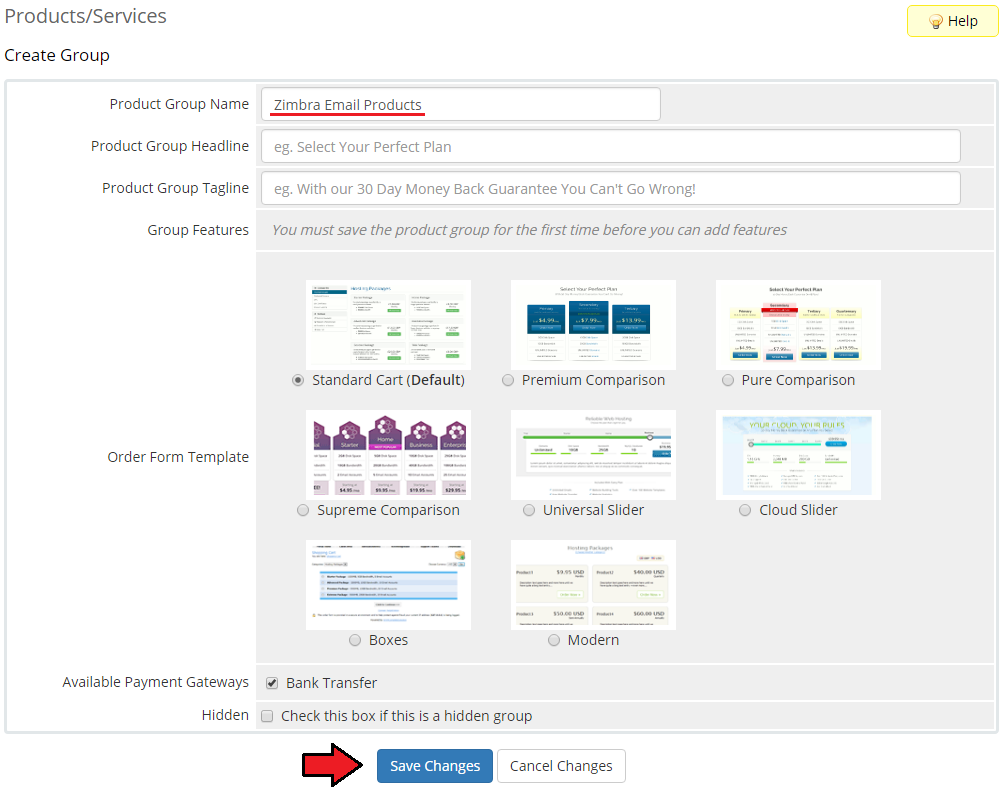
| 10. Enter product group name and press 'Create Group.' |
|
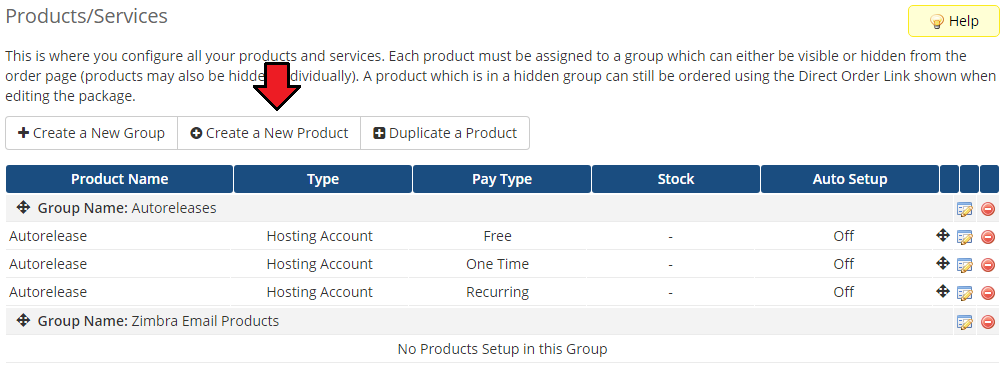
| 11. When you have a product group, you can create your product and assign it to Zimbra Email. If you already have a product, go to step 13. To create a product click on 'Create a New Product.' |
|
| 12. Afterwards, choose your product type and product group from dropdown menus, enter your product name and press 'Continue.' |

|
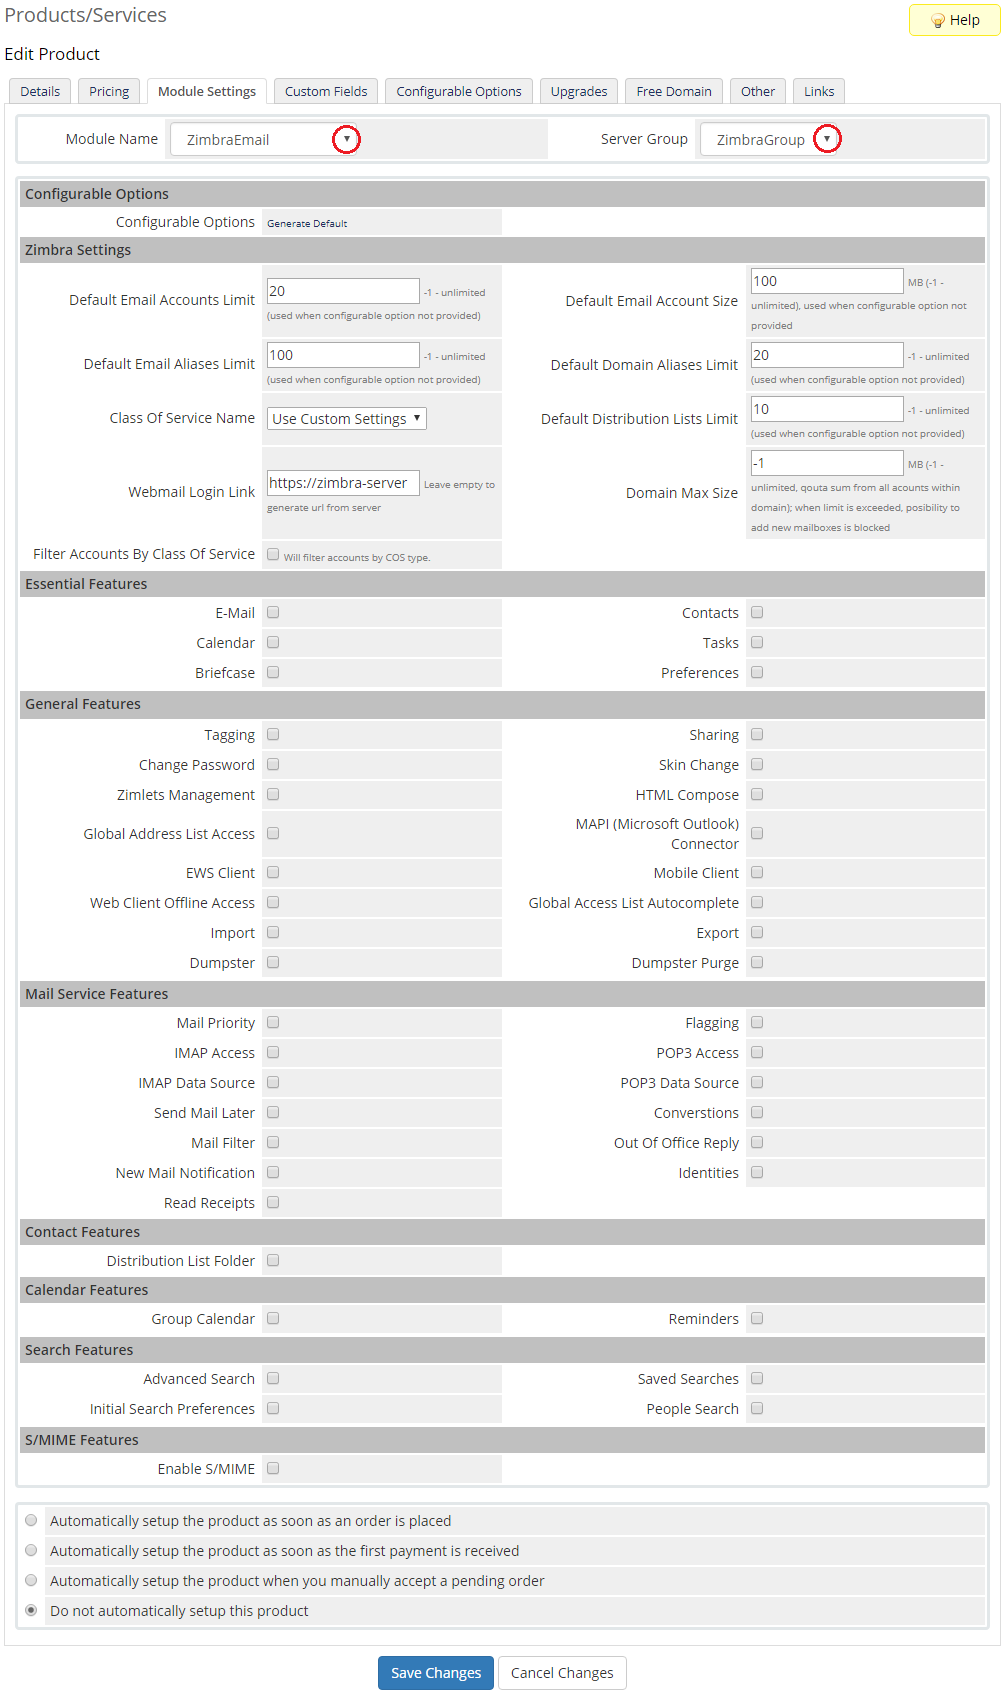
| 13. Now, go to 'Module Settings' section, choose both 'ZimbraEmail' and your previously created server group from dropdown menus.' |
|
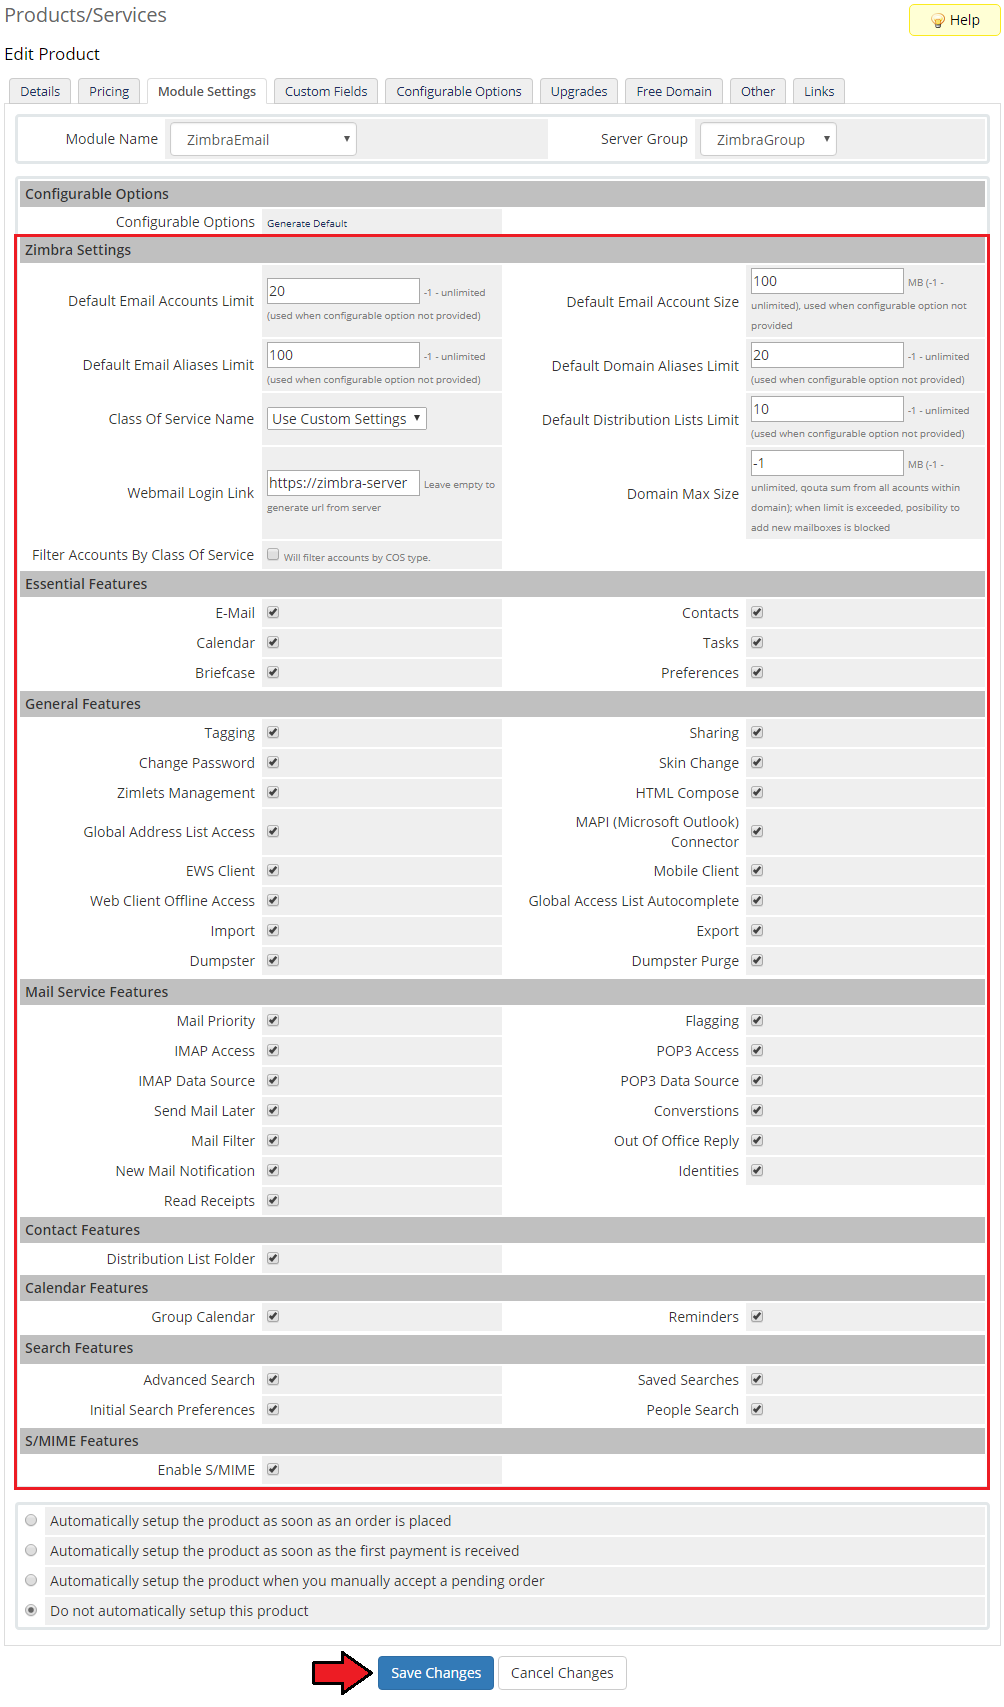
| 14. Afterwards, define settings of the module and press 'Save Changes'. Note 1: If you choose 'Use Custom Settings' from 'COS Name' dropdown menu, you can define your own set of user permissions using sections below. |
|
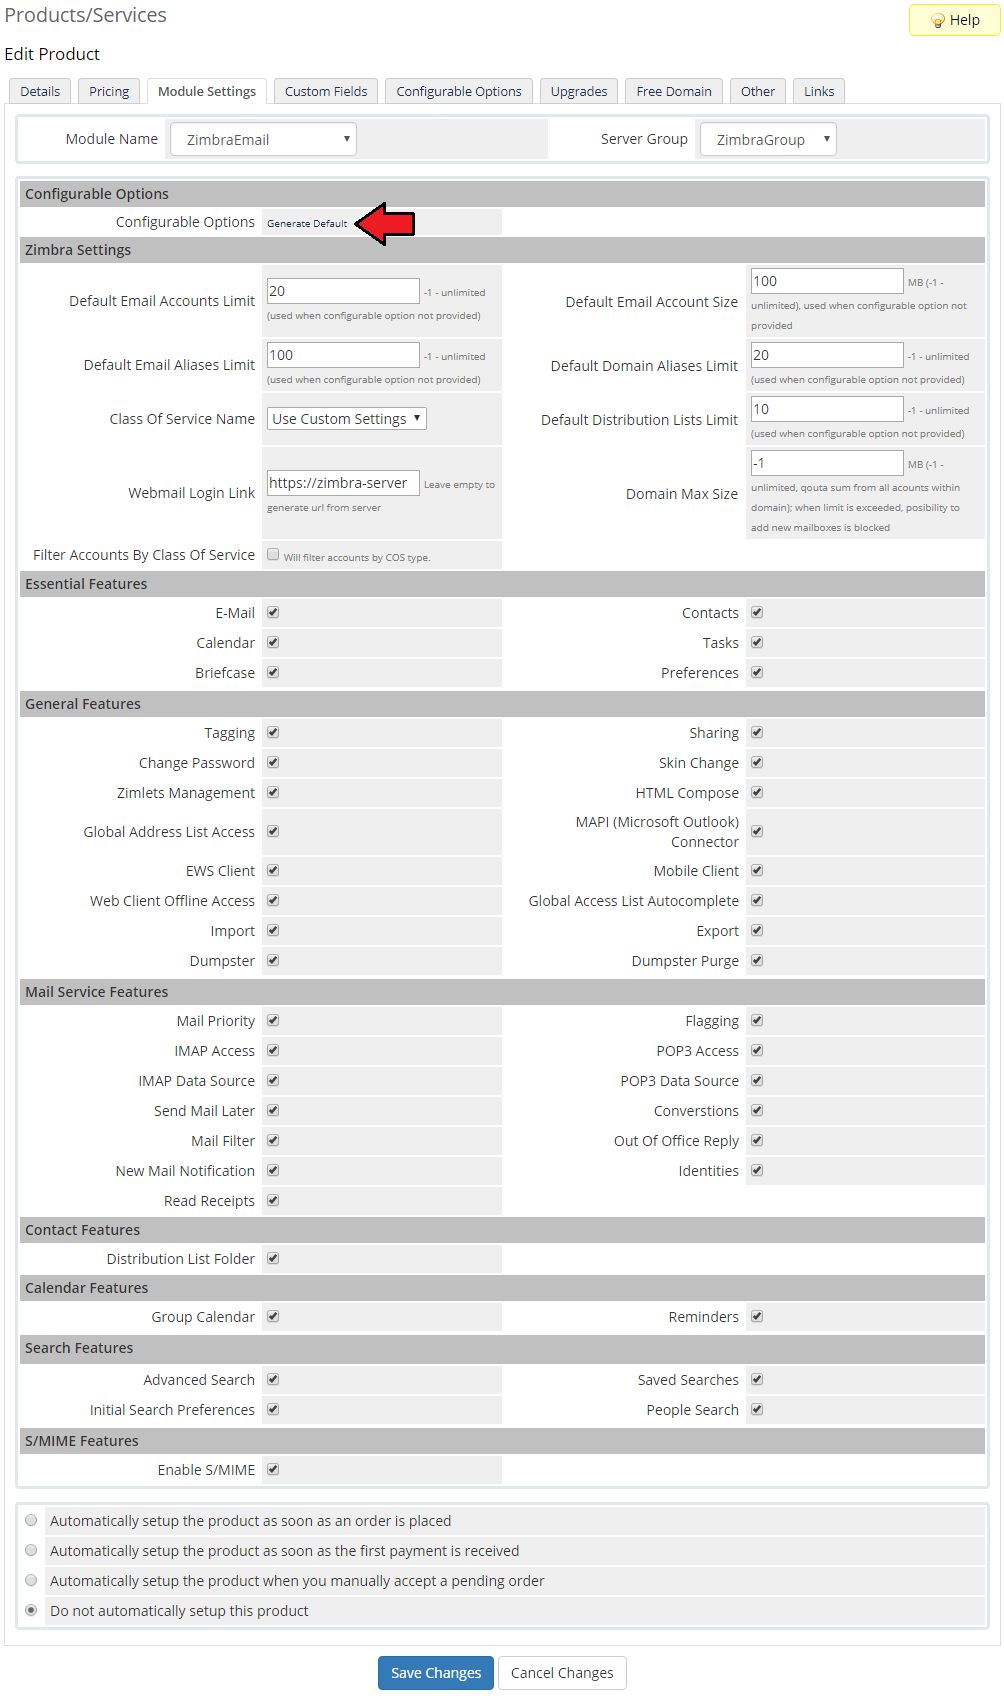
| 15. Additionally, you can replace modules static limit with dynamic one in form of configurable options. Press 'Generate Default' near 'Configurable Options' to generate default set of them. |
|
| Well done, your module is now ready to complete the first order! |
Management
| Let's customize your Zimbra Email and see what features it offers. No worries, our product is very simple in use! |
Admin Area
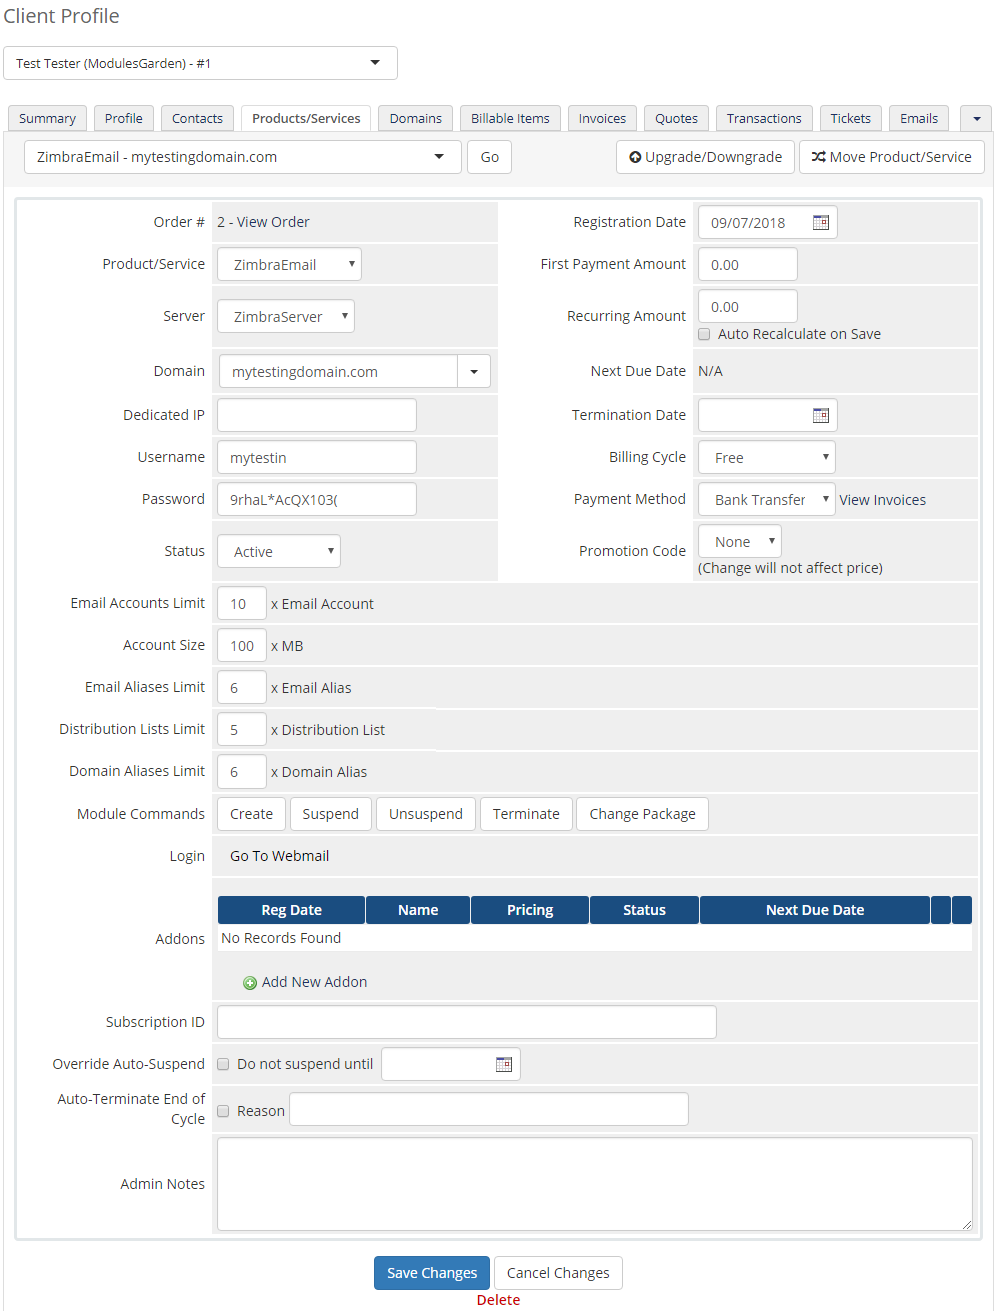
| From here you can manage your clients accounts. |
|
Client Area
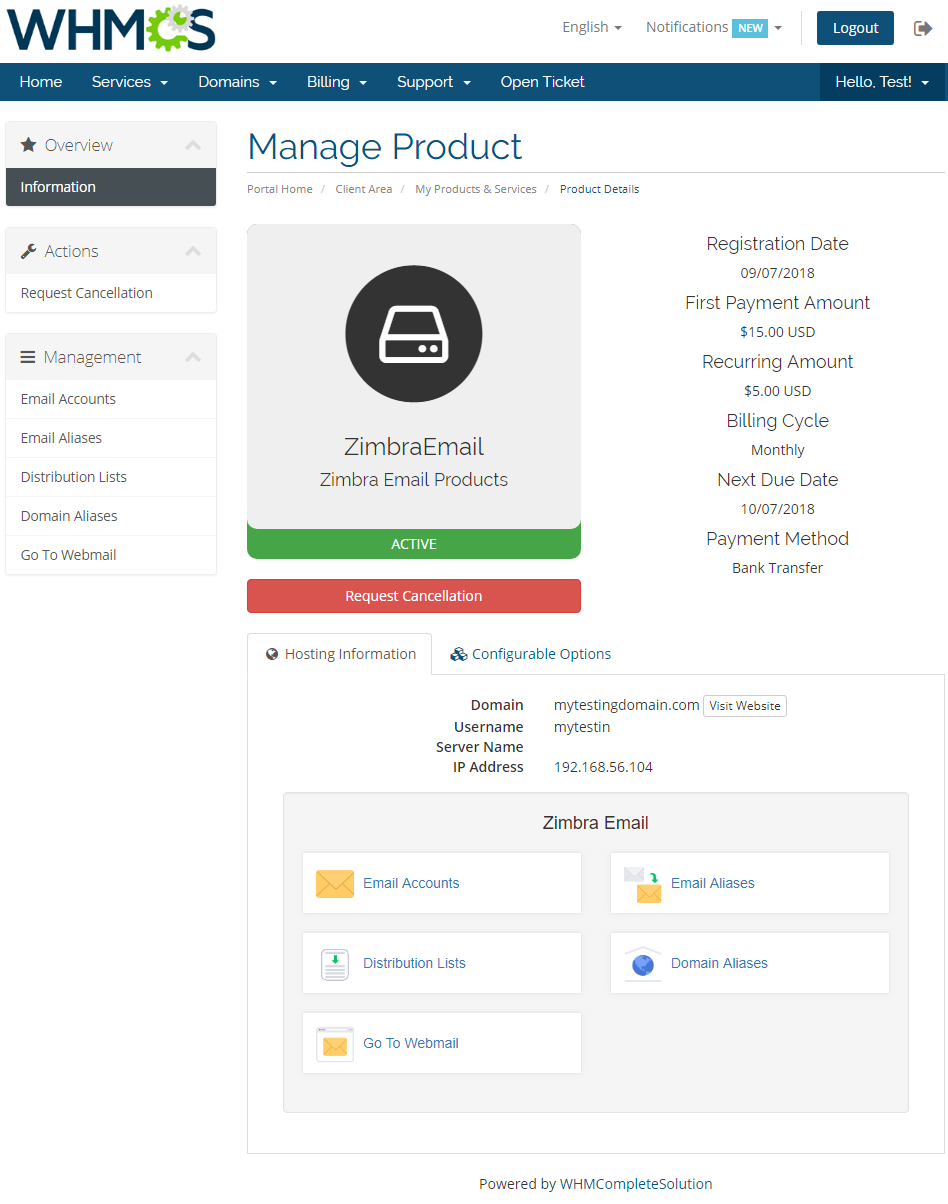
| Zimbra Email allows your customers to manage their zimbra email accounts from your WHMCS client area. This is how it looks like in the client area. |
|
Accounts
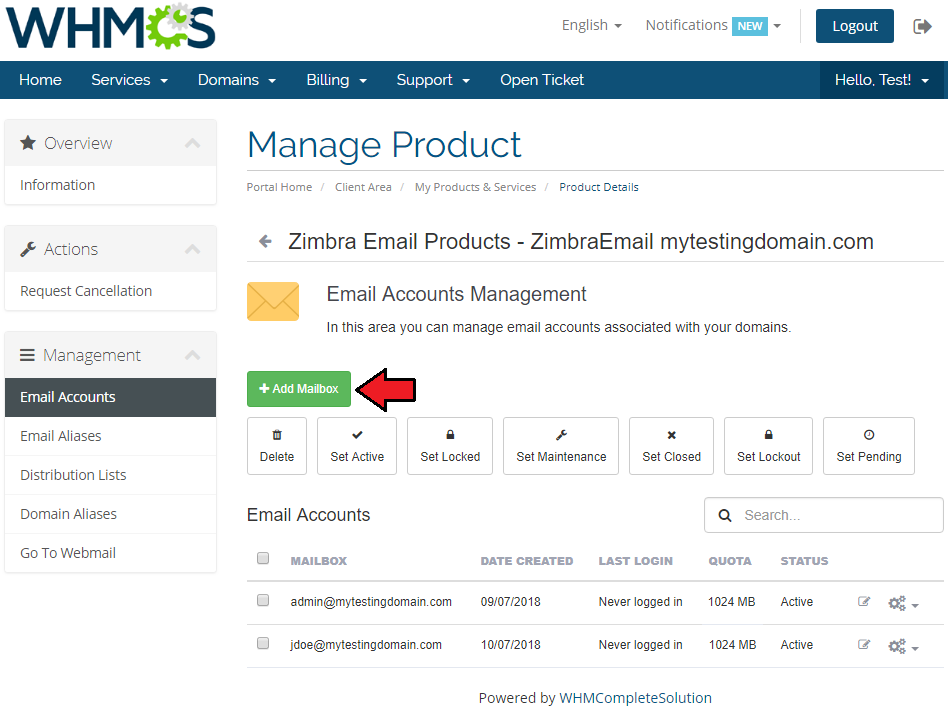
| Accounts page enables you to manage existing accounts and create new ones within defined limits. |
|
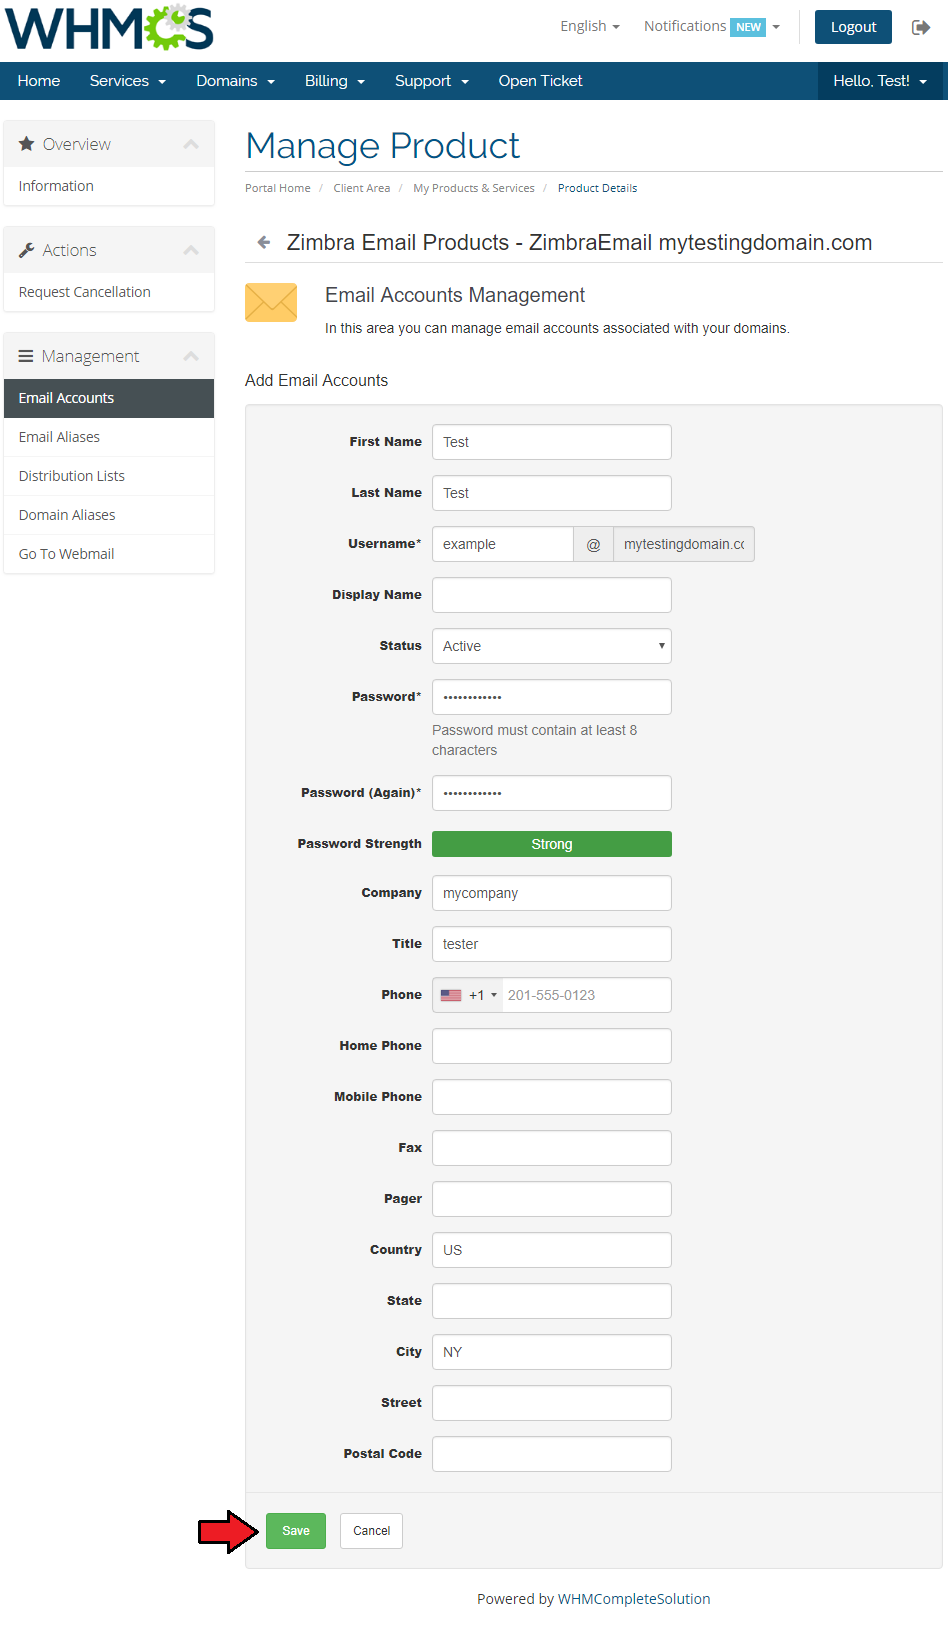
| Press add to create a new account. As you can see on the screen below, you can define details of account owner. |
|
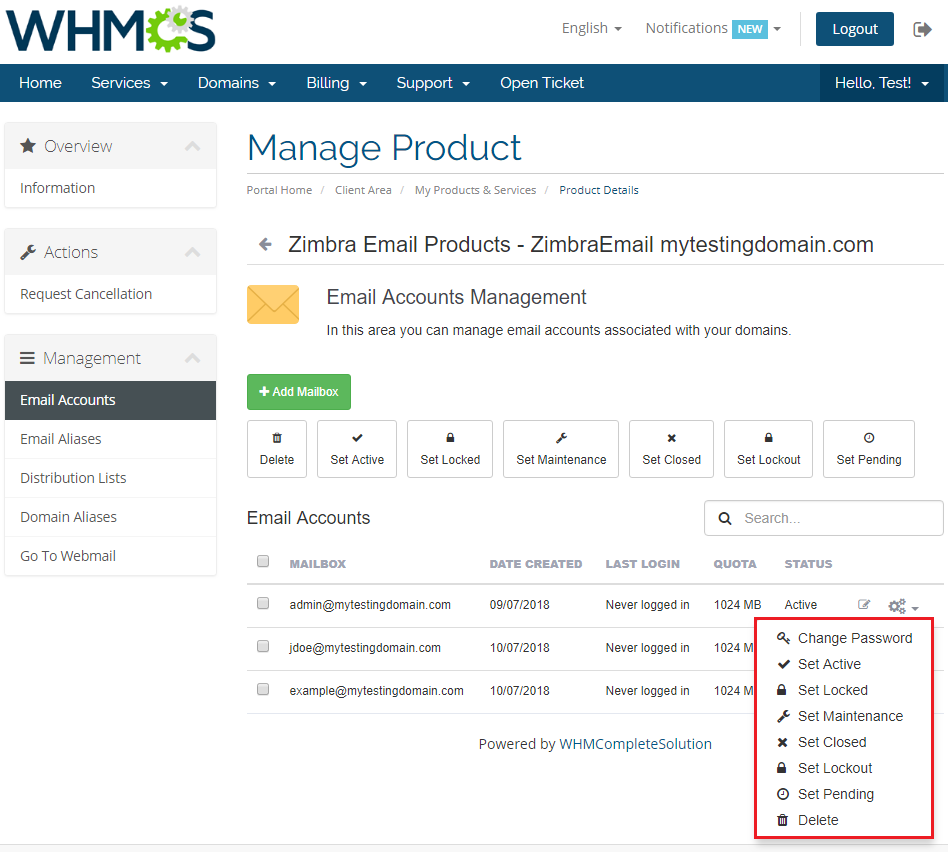
| You can order various operations on a single account through dropdown menu. Alternatively, you can mark multiple accounts and issue any command using buttons above. |
|
Aliases
| Aliases enables you to use additional address for the same e-mail account. |
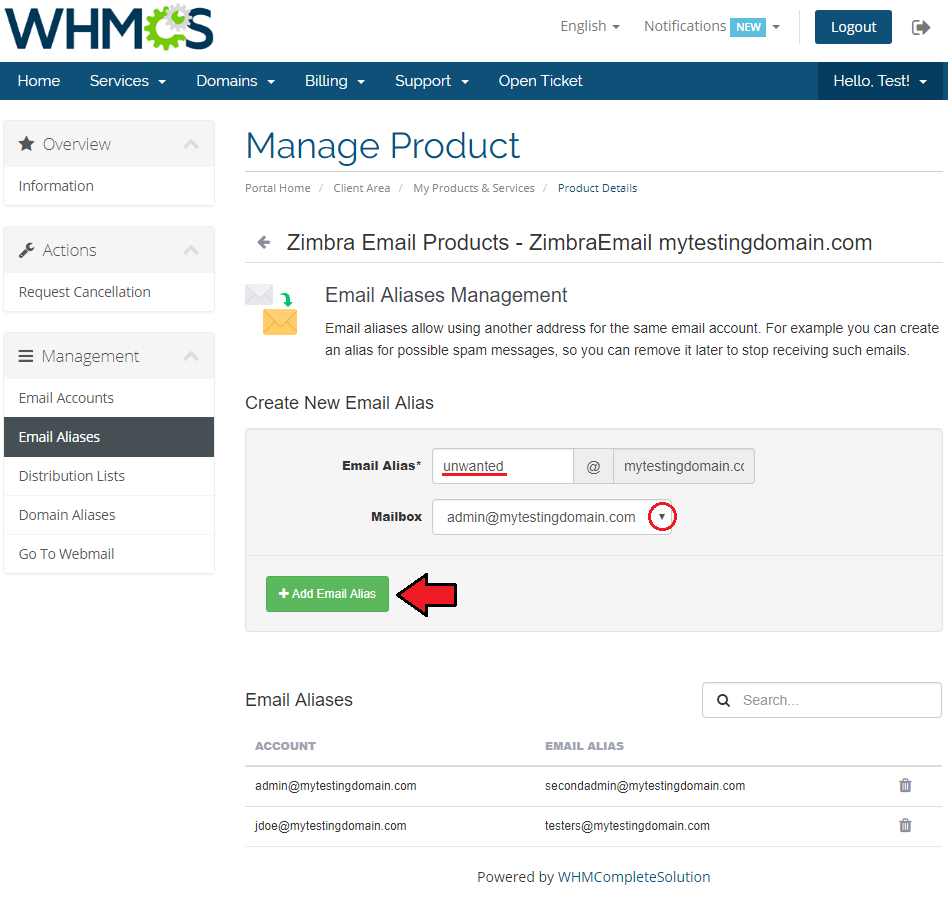
|
| Any alias can be quickly removed, through pressing bin icon. |
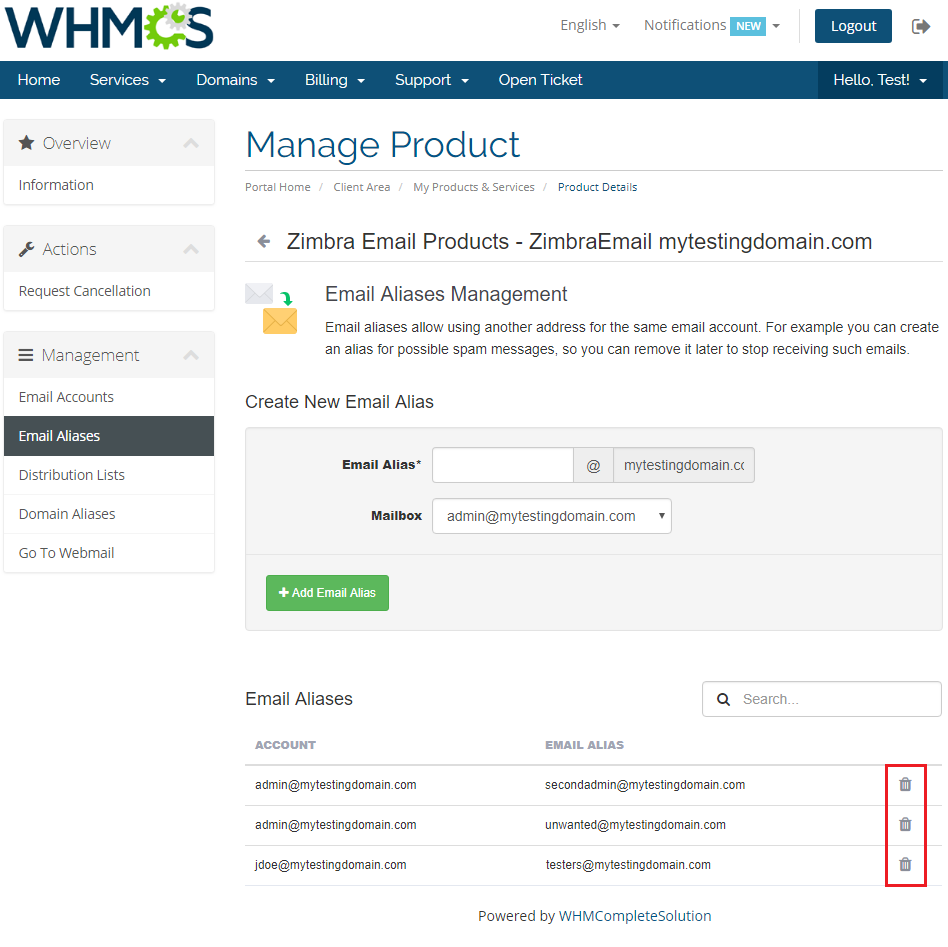
|
Distribution Lists
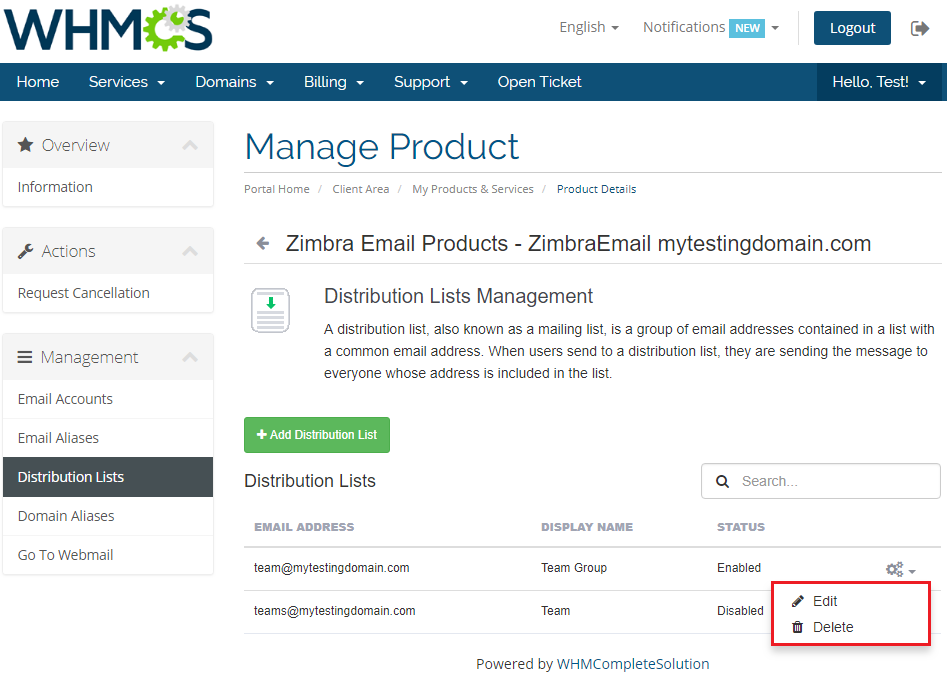
| Distribution lists enables you to create and manage them without necessity of logging into Zimbra panel.. |
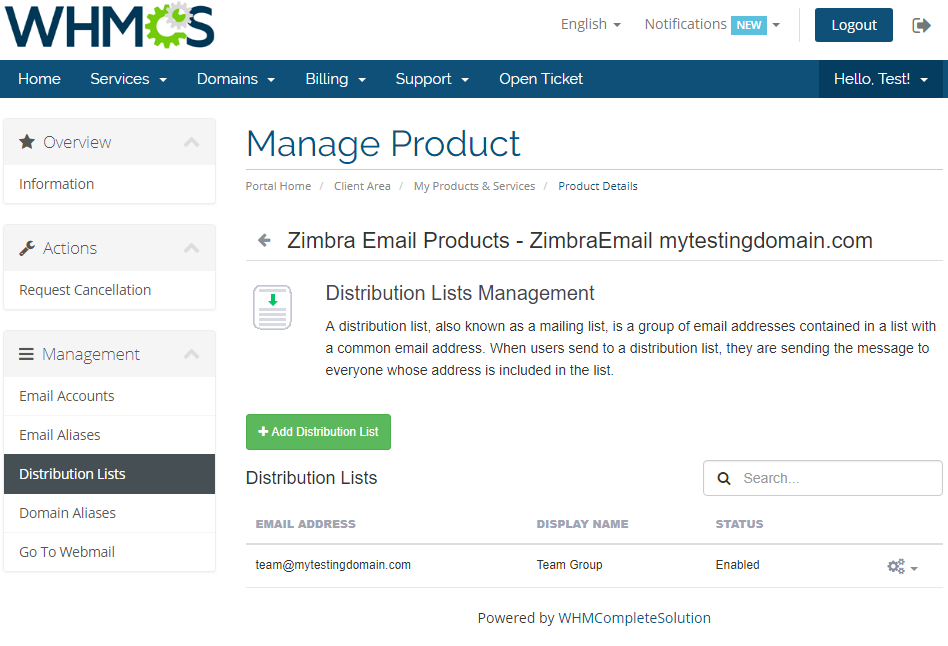
|
| Any alias can be quickly removed, through pressing bin icon. |
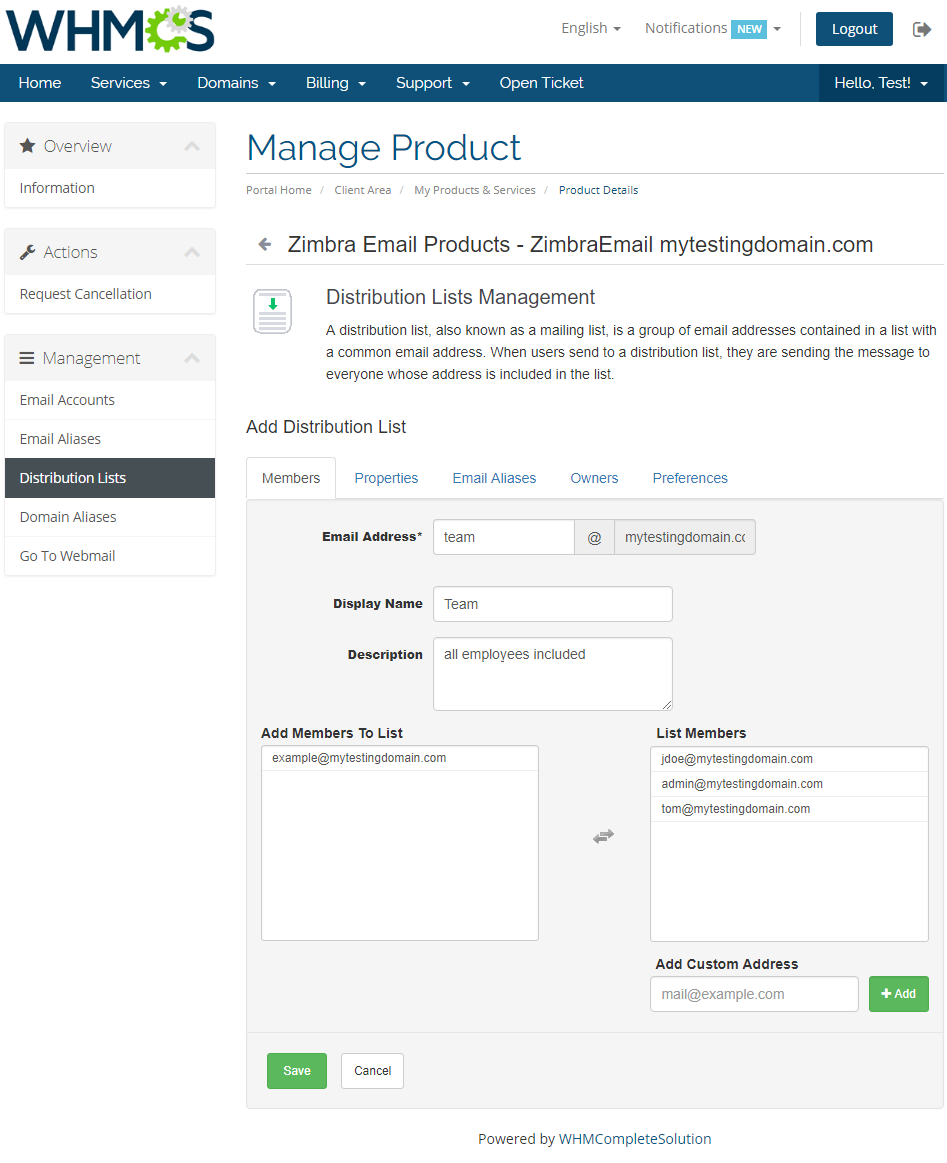
|
| Any alias can be quickly removed, through pressing bin icon. |
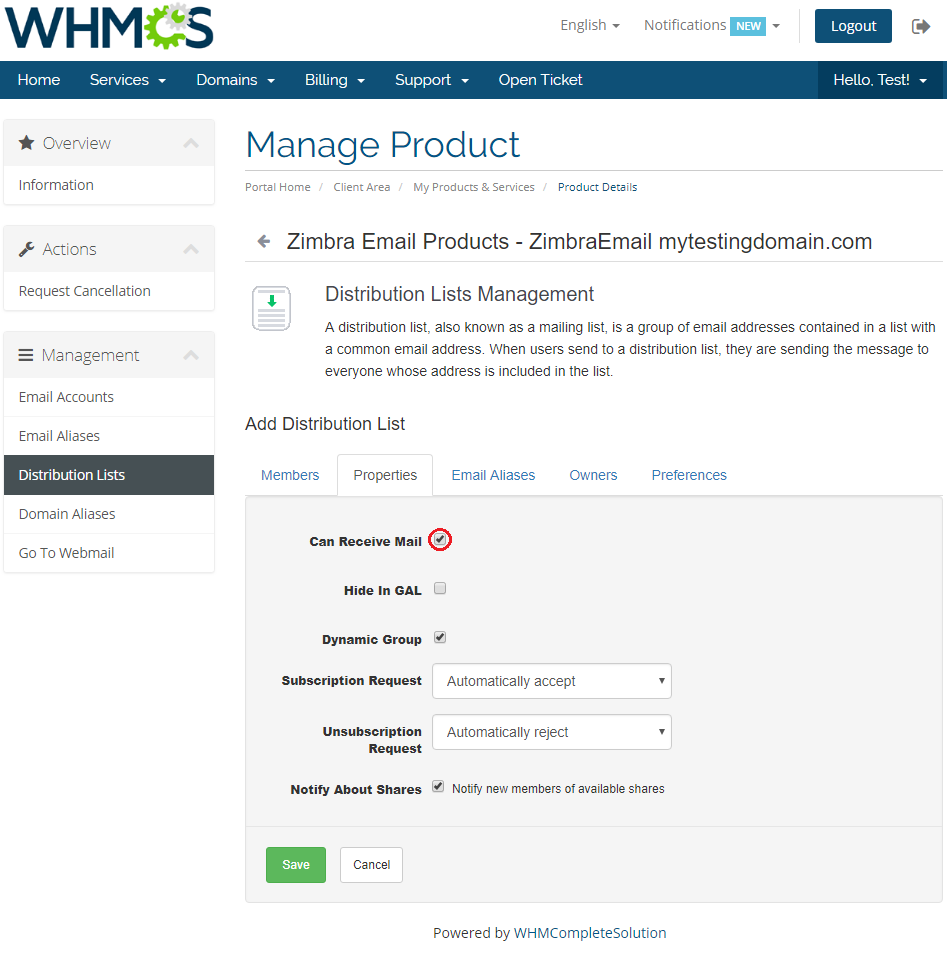
|
| Any alias can be quickly removed, through pressing bin icon. |
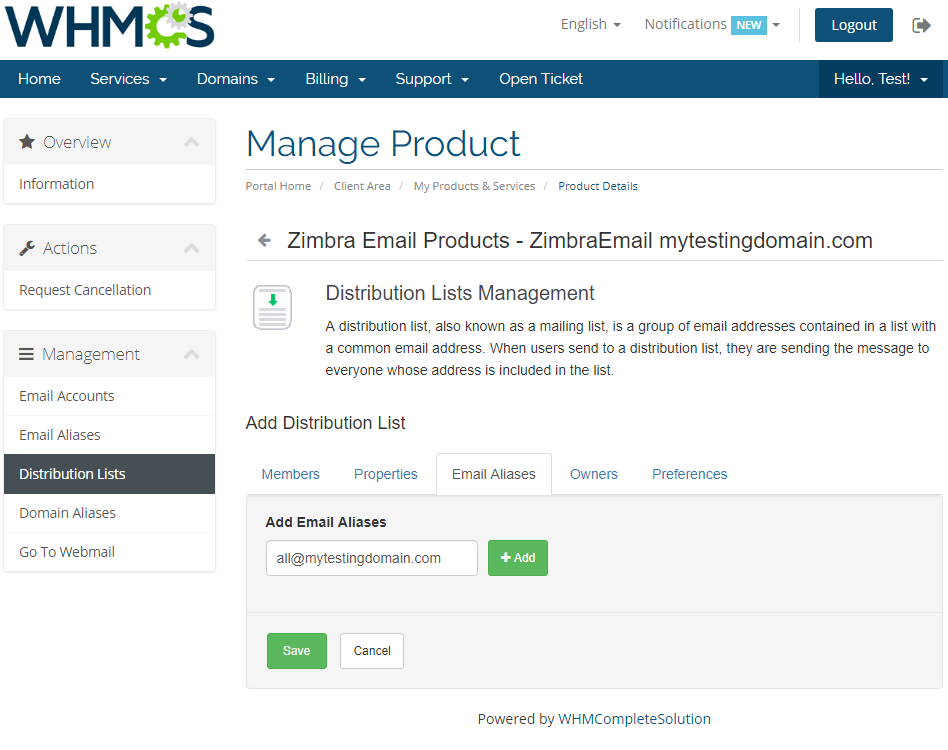
|
| Any alias can be quickly removed, through pressing bin icon. |
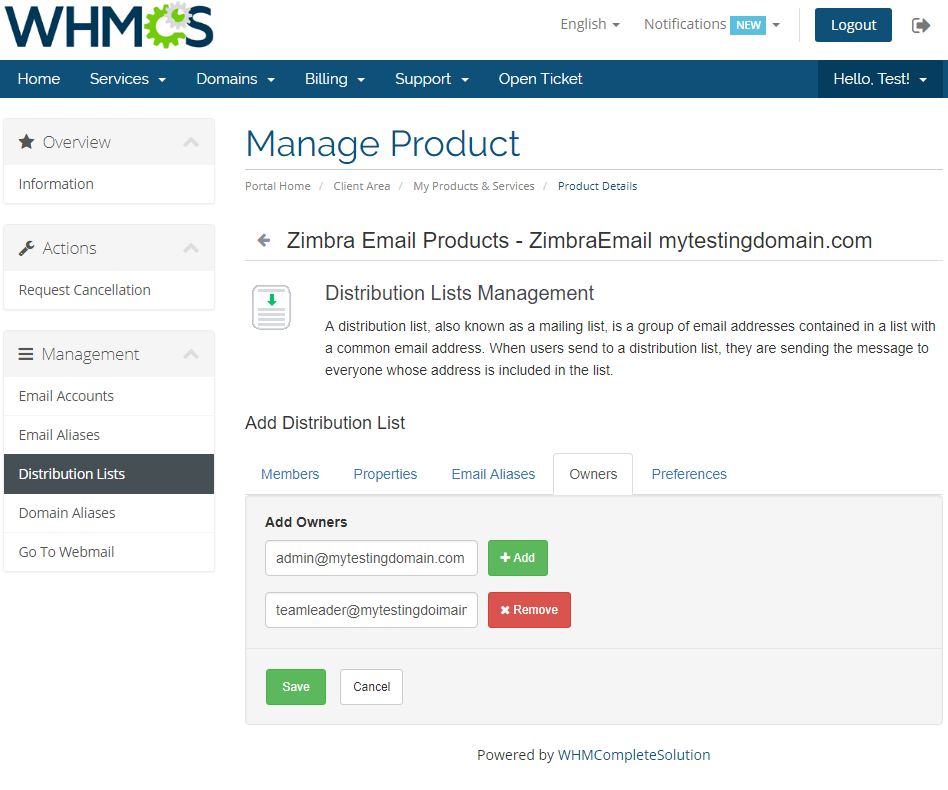
|
| Any alias can be quickly removed, through pressing bin icon. |
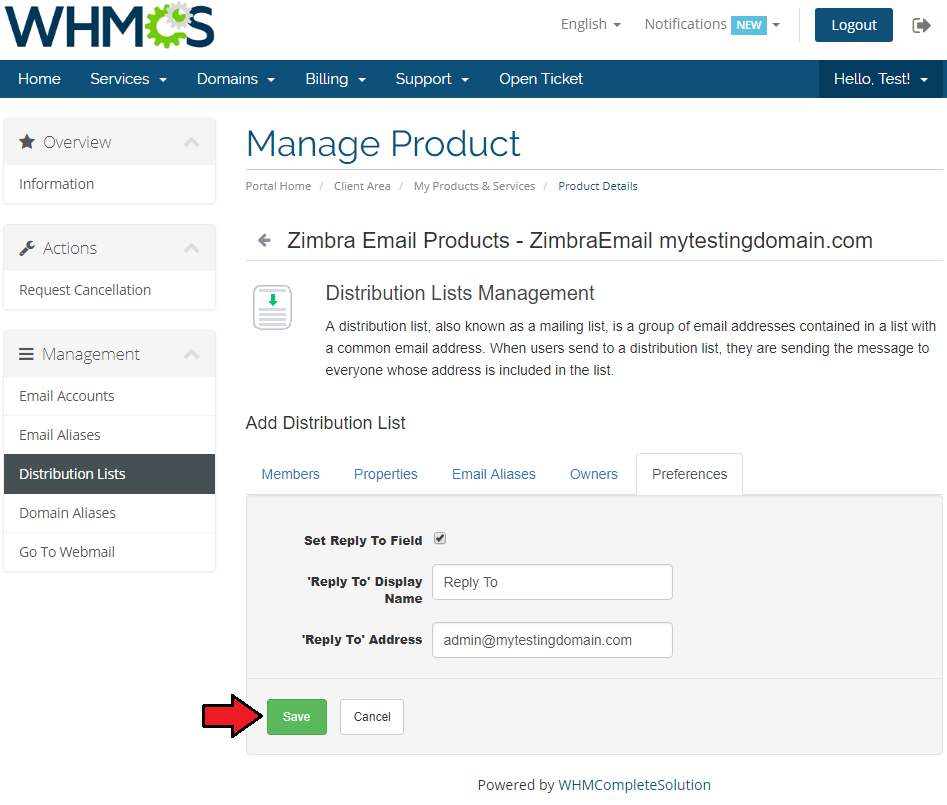
|
| Any alias can be quickly removed, through pressing bin icon. |
|
Management of Billing
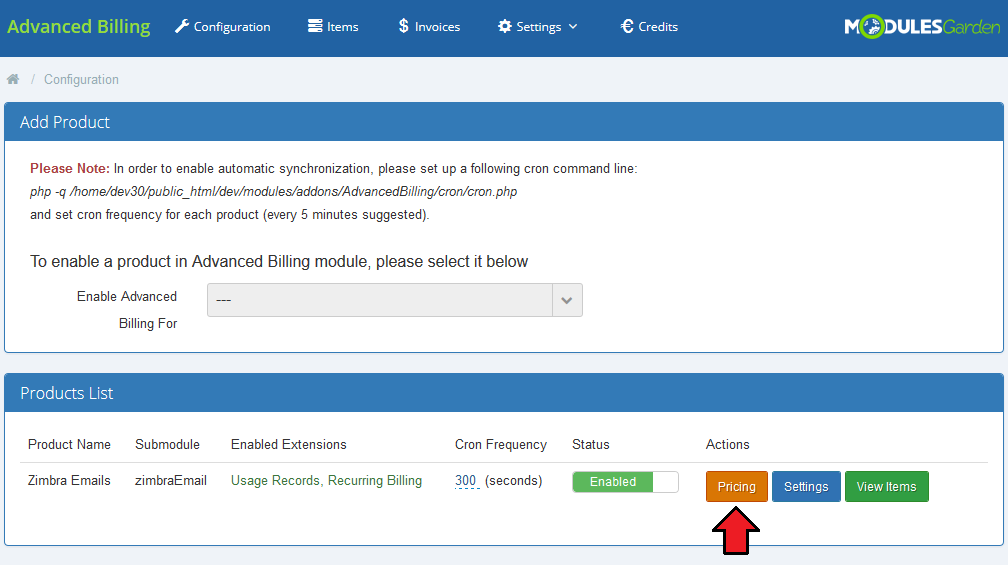
| When you combine Zimbra Email For WHMCS with Advanced Billing For WHMCS, you will be able to set up additional billing options. Module allows you to charge your customers basing on the server resources used by them. |
|
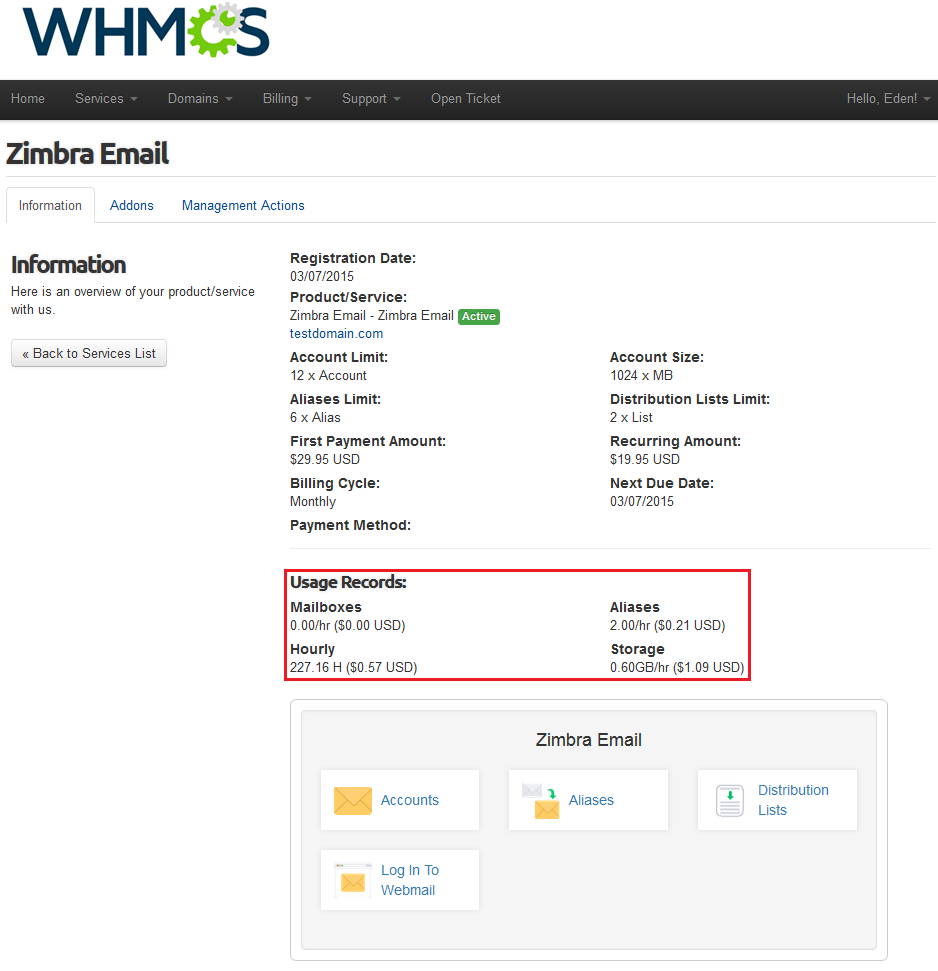
| With Advanced Billing module, you can also display the current server resource usage and their cost and let your customers see it. |
|
Tips
| 1. Zimbra Email For WHMCS requires SOAP installed on your server. |
Common Problems
| 1. When you have problems with connection, check whether your SELinux or firewall does not block ports. |
| 2. The error 'Could not connect to host' is connected with SOAP. To fix it, make sure that port 7071 is open. |