General
(→How To Change Magento Admin Theme) |
|||
| Line 138: | Line 138: | ||
|} | |} | ||
| − | + | =How To Debug Module= | |
'''<span style="color: #ff0000;">If the procedure described below doesn't work for you, please report this to our Support Team.</span>''' | '''<span style="color: #ff0000;">If the procedure described below doesn't work for you, please report this to our Support Team.</span>''' | ||
{| | {| | ||
| Line 159: | Line 159: | ||
|} | |} | ||
| − | + | =How To Solve Problems With Module License= | |
{| | {| | ||
|style="padding: 10px 0px 15px 15px;"|'''When you have any problems with module license and you are certain that license key is entered correctly in 'license.php' file, you can reissue it.'''<br /> | |style="padding: 10px 0px 15px 15px;"|'''When you have any problems with module license and you are certain that license key is entered correctly in 'license.php' file, you can reissue it.'''<br /> | ||
| Line 174: | Line 174: | ||
<meta name="description" content="ModulesGarden Wiki Contains All The Information You Need About Configurable Options."></meta> | <meta name="description" content="ModulesGarden Wiki Contains All The Information You Need About Configurable Options."></meta> | ||
| − | + | =How To Use Configurable Options= | |
{| | {| | ||
|style="padding: 10px 0px 10px 0px;"|'''Configurable options on products allow you to give your clients variables which alter the resource available at that product as well as its price.''' | |style="padding: 10px 0px 10px 0px;"|'''Configurable options on products allow you to give your clients variables which alter the resource available at that product as well as its price.''' | ||
| Line 180: | Line 180: | ||
|} | |} | ||
| − | + | ==Editing Configurable Options== | |
{| | {| | ||
|style="padding: 10px 0px 20px 15px;"|When you successfully set up a product, your client can order it by choosing its resource and settings from default configurable options. | |style="padding: 10px 0px 20px 15px;"|When you successfully set up a product, your client can order it by choosing its resource and settings from default configurable options. | ||
| Line 212: | Line 212: | ||
|} | |} | ||
| − | + | ==Hiding Configurable Options== | |
{| | {| | ||
|style="padding: 10px 0px 15px 15px;"|If you decide to hide configurable options from a client order form and manage them only from the admin area, follow steps below.<br /> | |style="padding: 10px 0px 15px 15px;"|If you decide to hide configurable options from a client order form and manage them only from the admin area, follow steps below.<br /> | ||
| Line 228: | Line 228: | ||
|} | |} | ||
| − | + | ==Setting Up Pricing For Configurable Options== | |
{| | {| | ||
|style="padding: 10px 0px 15px 15px;"|If you decide to set up pricing for configurable options, follow steps below.<br /> | |style="padding: 10px 0px 15px 15px;"|If you decide to set up pricing for configurable options, follow steps below.<br /> | ||
Revision as of 12:11, 20 October 2014
Contents |
How To Change WHMCS Module Language
Please note that not all of our modules have Multi-Language Support.
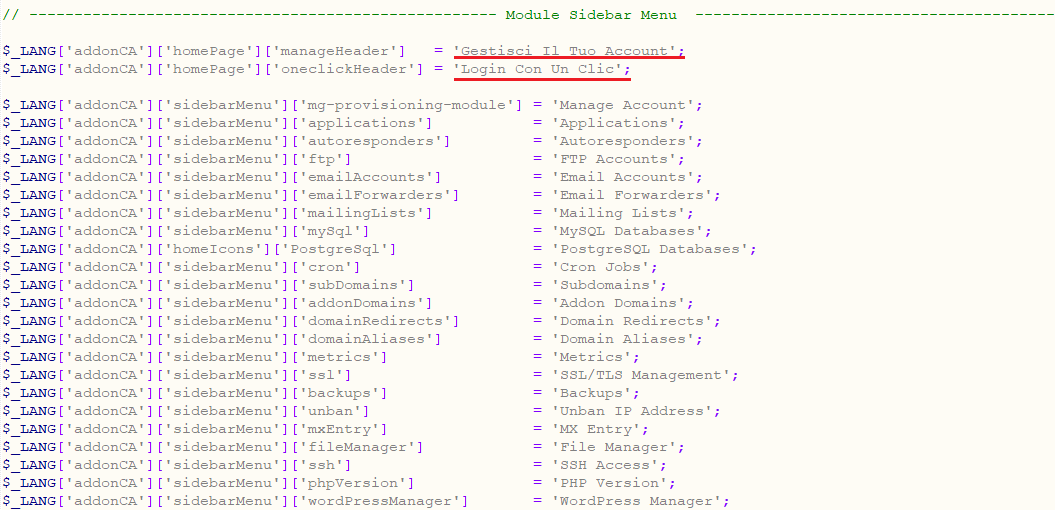
| 1. Changing WHMCS module language is very simple. First of all, go to 'lang' folder located in your module or templates directory (dependant on the module). Now copy 'english.php' file and rename it to your desired language, for example 'spanish.php' . |
| 2. Now you can enter to your newly created file and easily replace particular sentences. For presentation purposes we changed ['manage header'] from 'Manage' to 'Ordenar' . Don't forget to save the changes. |
|
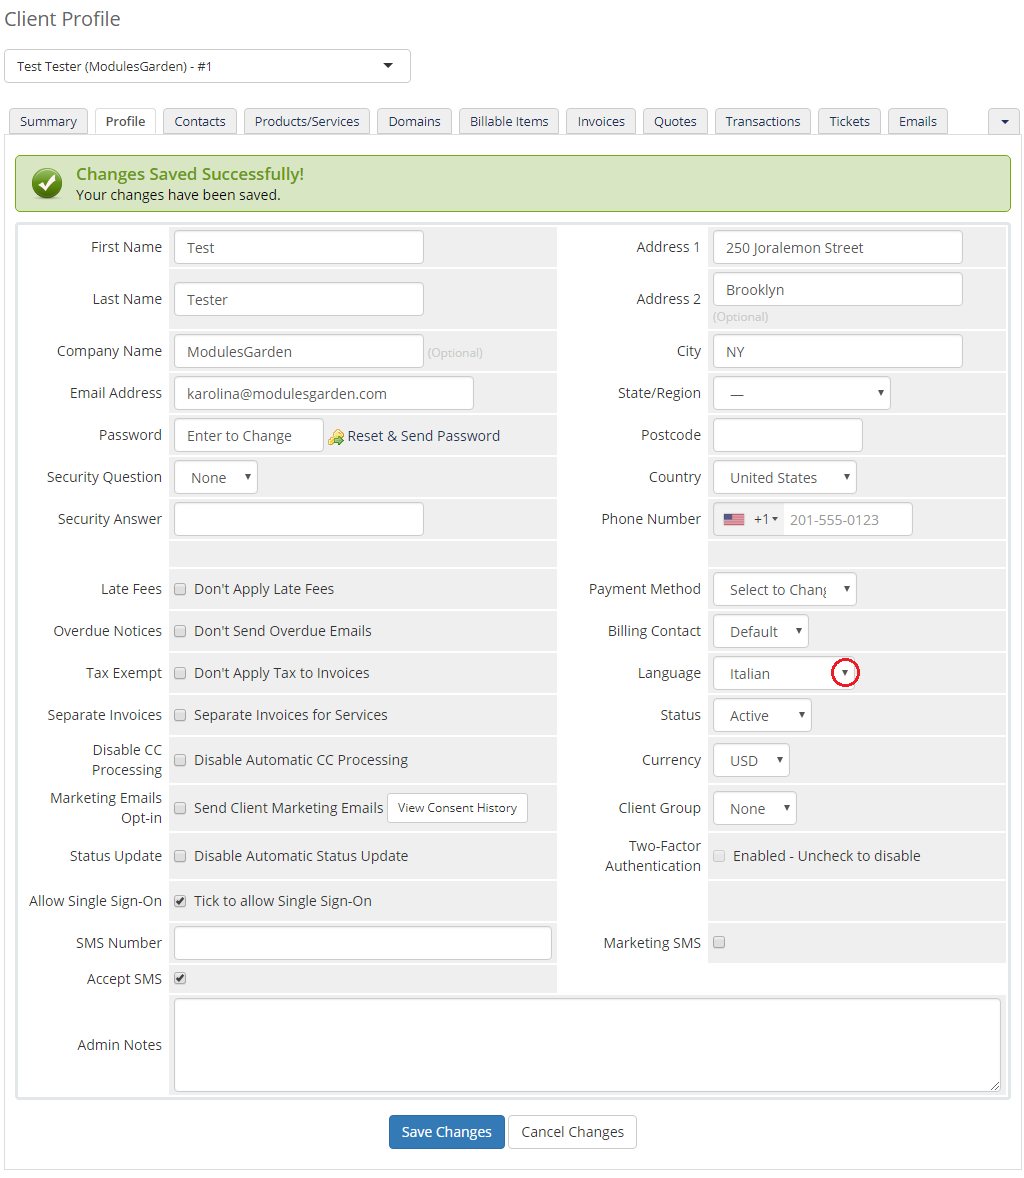
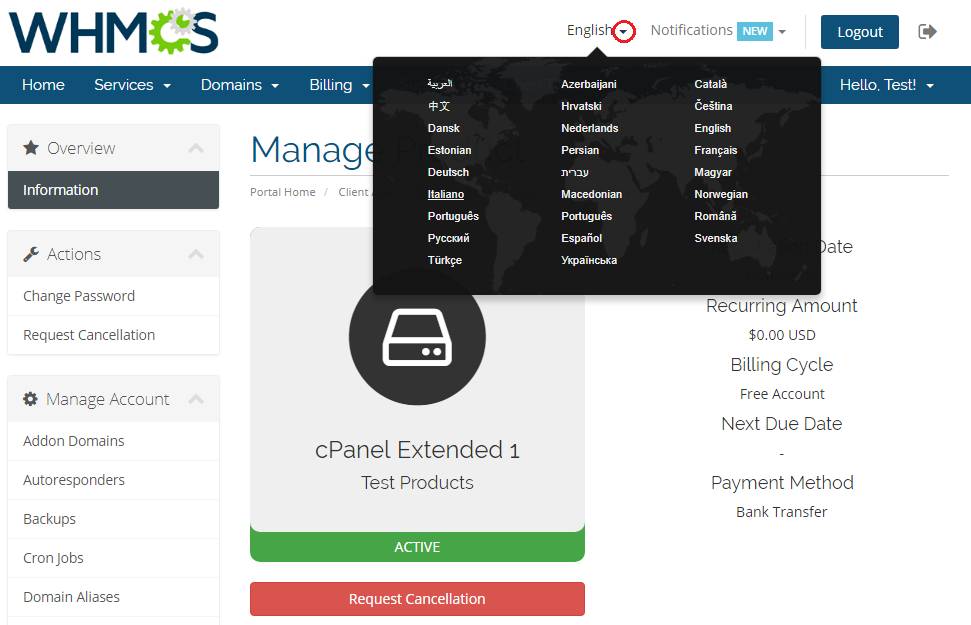
3. Now you can change the language in two ways:
|
|
|
|
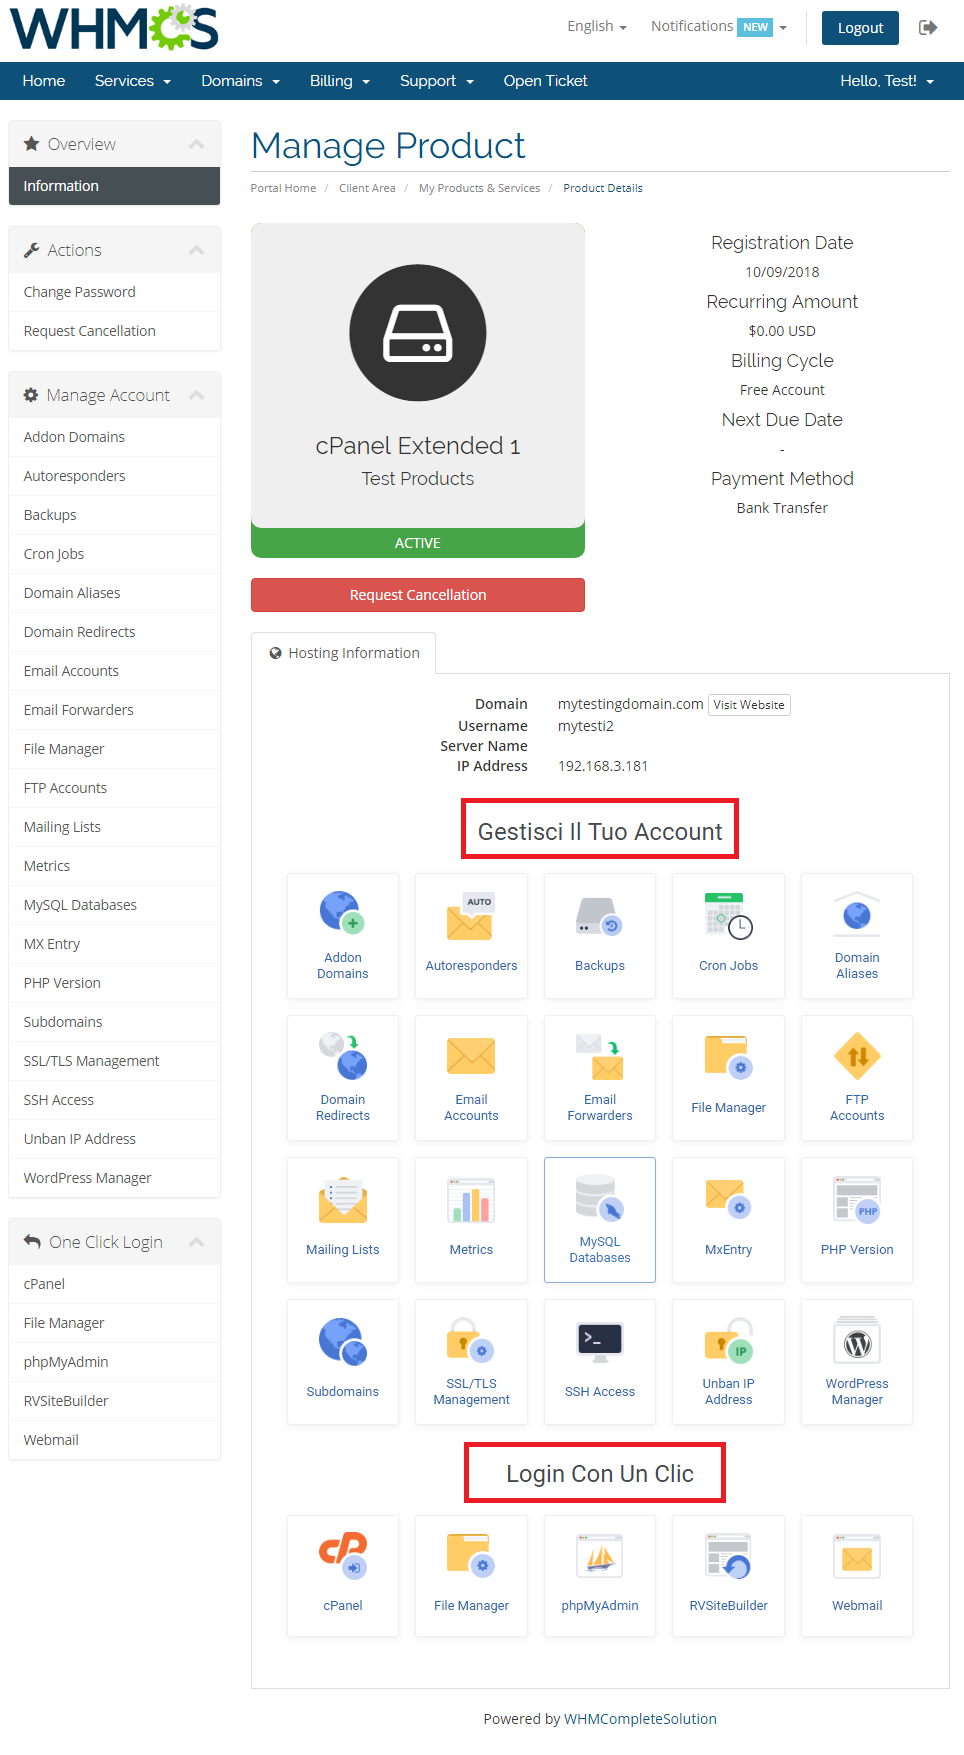
| 4. As you can see on the following screen the header has changed to 'Ordenar' owing to our changes. |
|
| That's all, from now on you shouldn't have any problems with changing language in our modules. |
How To Change Magento Extension Language
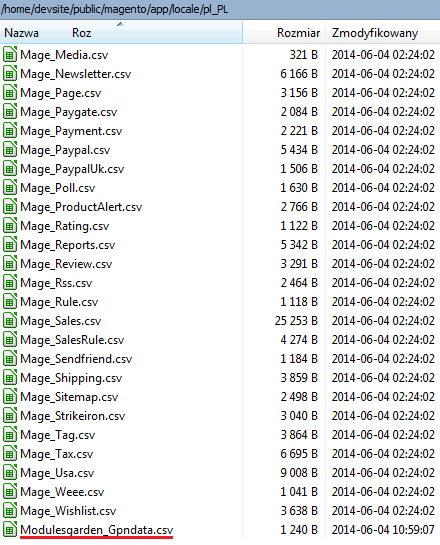
| 1. In order to change Magento extension language follow steps shown below. Go to the 'your_magento\app\locale\' where you can find language files. |
|
| 2. Edit previously created file in 'pl_PL\' folder. As you can see, each line consists of two phrases. First one (underlined with green) is a phrase in English which determines phrase to translate. |

|
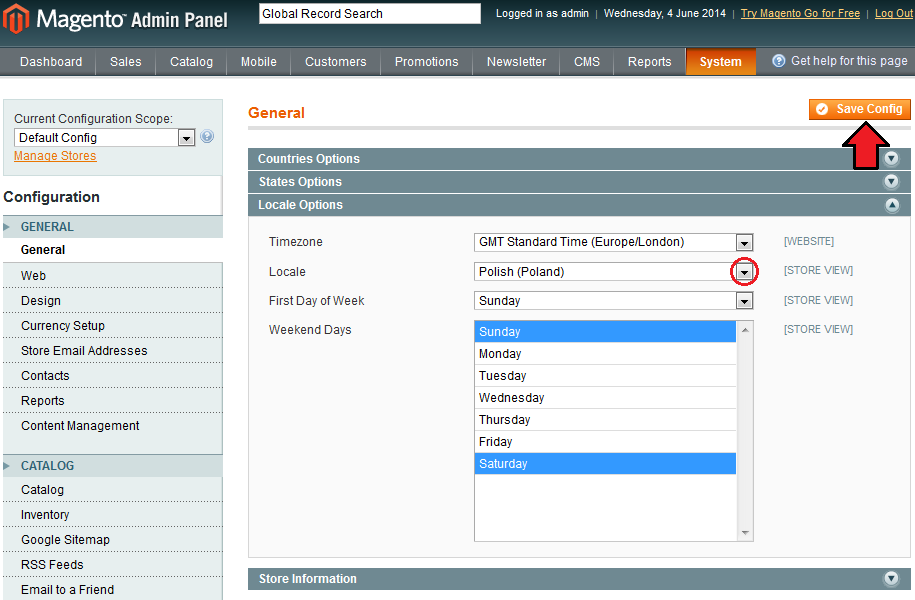
| 3. Log in to your Magento admin area and proceed to the 'System' → 'Configuration' . Choose desired language from 'Locale' dropdown menu under 'Locate Options' section as shown on the following screen. |
|
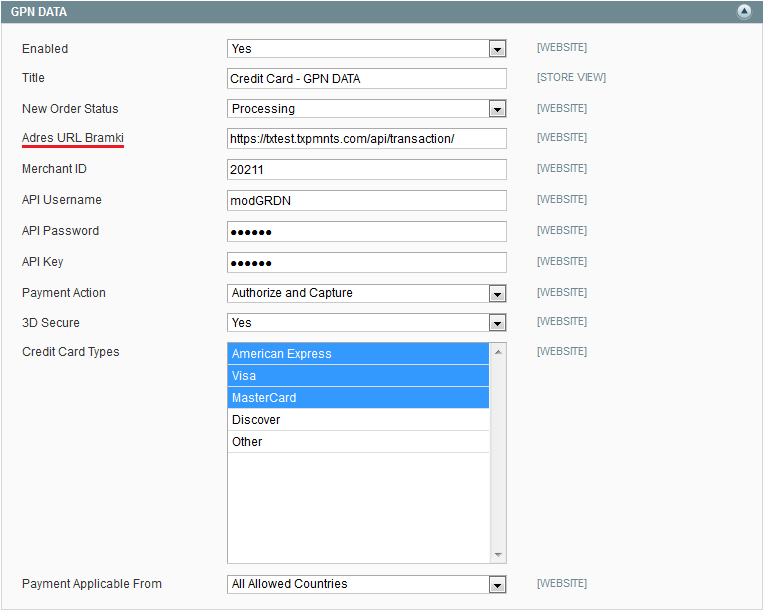
| 4. As you can see on the screen below, the 'Gateway URL' was replaced by 'Adres URL Bramki' owing to our changes. |
|
| That's all, from now on you should not have any problems with changing language in our Magento modules. |
How To Change Magento Admin Theme
| Proceed with step listed below in order to upload and enable custom admin panel theme. |
| 1. Download desired admin panel theme archive. |
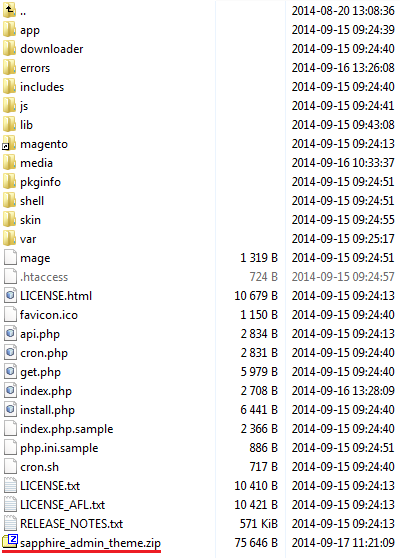
| 2. Upload and extract the theme archive into the main Magento directory. Files in your Magento directory should look like this. |
|
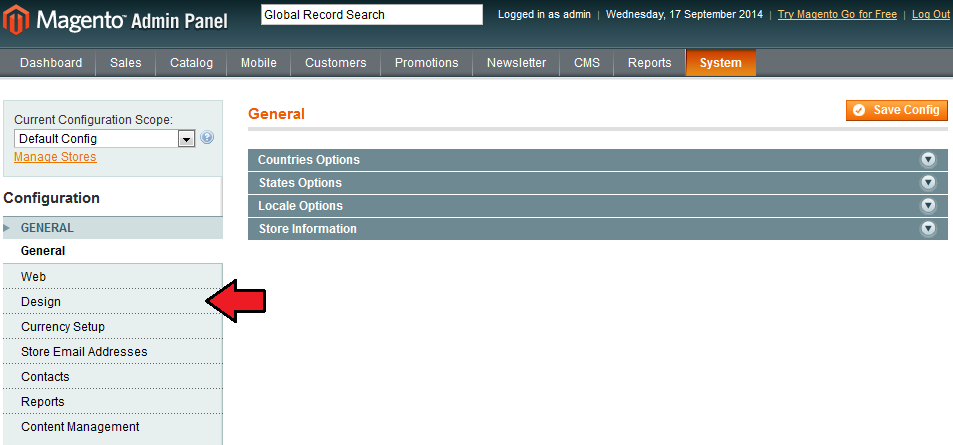
| 3. Log in to the Magento admin panel, clear cache and proceed to 'System' → 'Configuration' . Now, press 'Design' under 'General' section. |
|
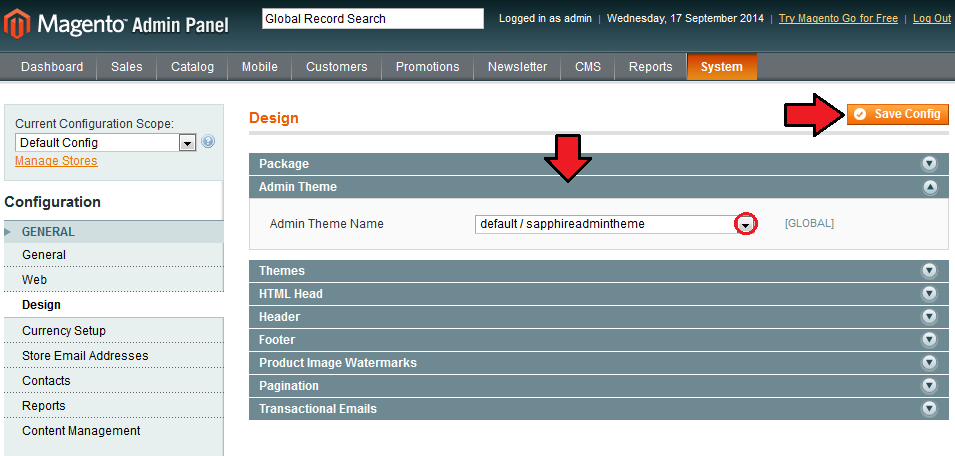
| 4. Press 'Admin Theme' and choose a previously uploaded theme from a dropdown menu. Confirm through pressing 'Save Config' . |
|
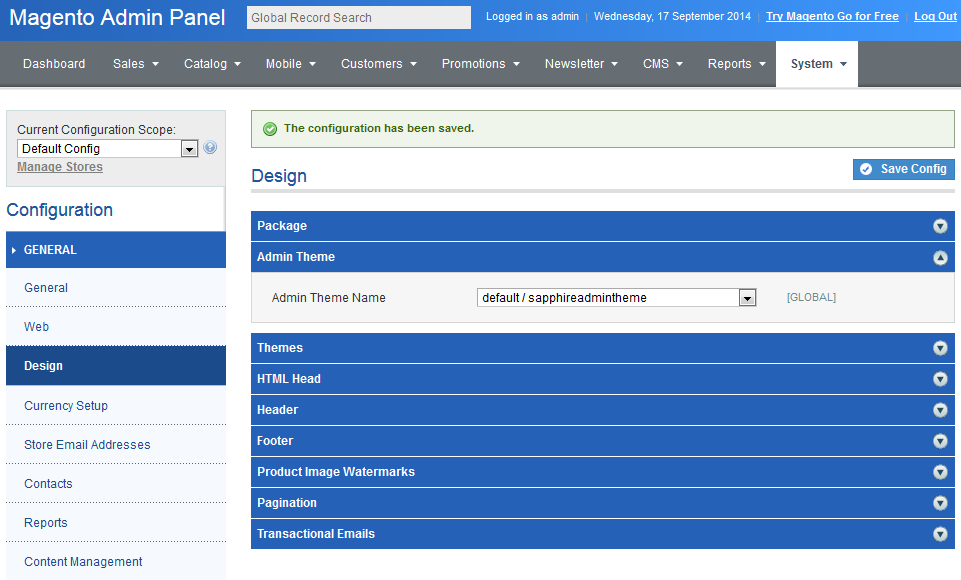
| 5. Congratulations, you can enjoy your new admin panel theme! |
|
Common Problems With Magento Extensions
| This section contains tips and tricks of solving problems related to Magento extensions behaviour. |
Before Extension's Activation
| During the extension activation process we recommend to disable Compiler. 1. Proceed to 'System' → 'Tools' → 'Compilation' and disable the Compiler. |
After Extension's Activation
| If you encounter any problem after activation of our extension, ensure that you:
1. Cleared the Magento cache under 'System' → 'Cache Management' . |
Other Issues
| 1. Missing logs in '/var/log' folder. Solution : Set up 'var' folder as writable. |
How To Debug Module
If the procedure described below doesn't work for you, please report this to our Support Team.
| When you are experiencing white page or the module is not working as it should, you can enable debug mode that prints all the PHP errors on the screen. |
| To do so, enter the URL you are experiencing the issue with and add the additional parameter '_debug=turnon' . For example: yourdomain.com/clientarea.php?action=productdetails&id=81&_debug=turnon |
| To disable debug mode, simply call the same parameter but with the value turnoff. For example: yourdomain.com/clientarea.php?_debug=turnoff |
| If you will get the error as shown on the screen below, please make sure that you are using the correct parameter and you have sufficient privileges. |

|
How To Solve Problems With Module License
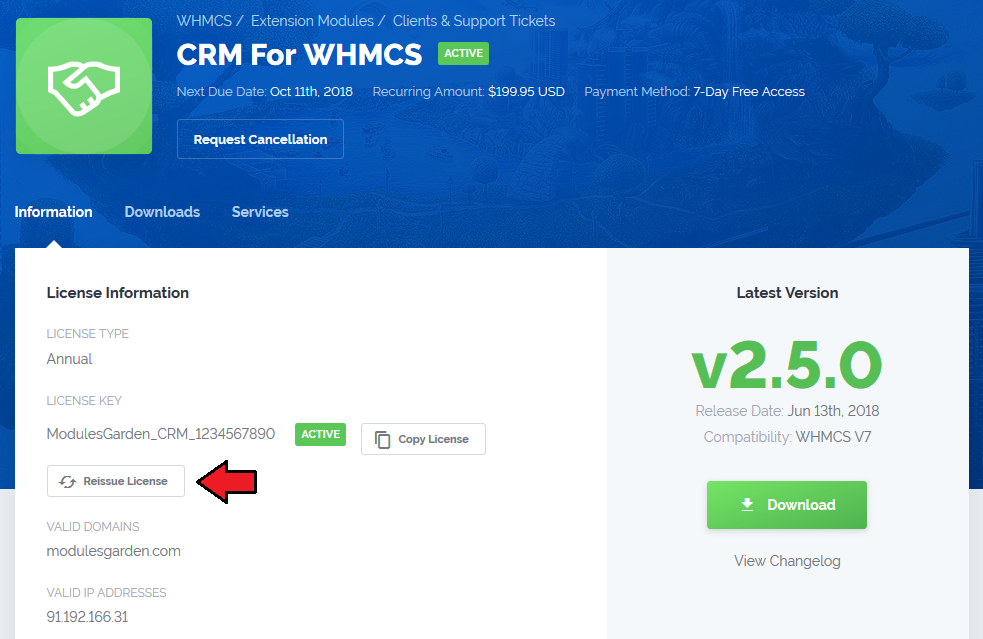
| When you have any problems with module license and you are certain that license key is entered correctly in 'license.php' file, you can reissue it. License reissuing solves about 95% of such problems. To to so, log in to your client area, choose product and click on 'Management Actions' → 'Reissue License' . |
|
| If problem with your license persists, please contact our Support. |
How To Use Configurable Options
| Configurable options on products allow you to give your clients variables which alter the resource available at that product as well as its price.
In this tutorial we will show you how to manage configurable options generated by our modules. |
Editing Configurable Options
| When you successfully set up a product, your client can order it by choosing its resource and settings from default configurable options. |
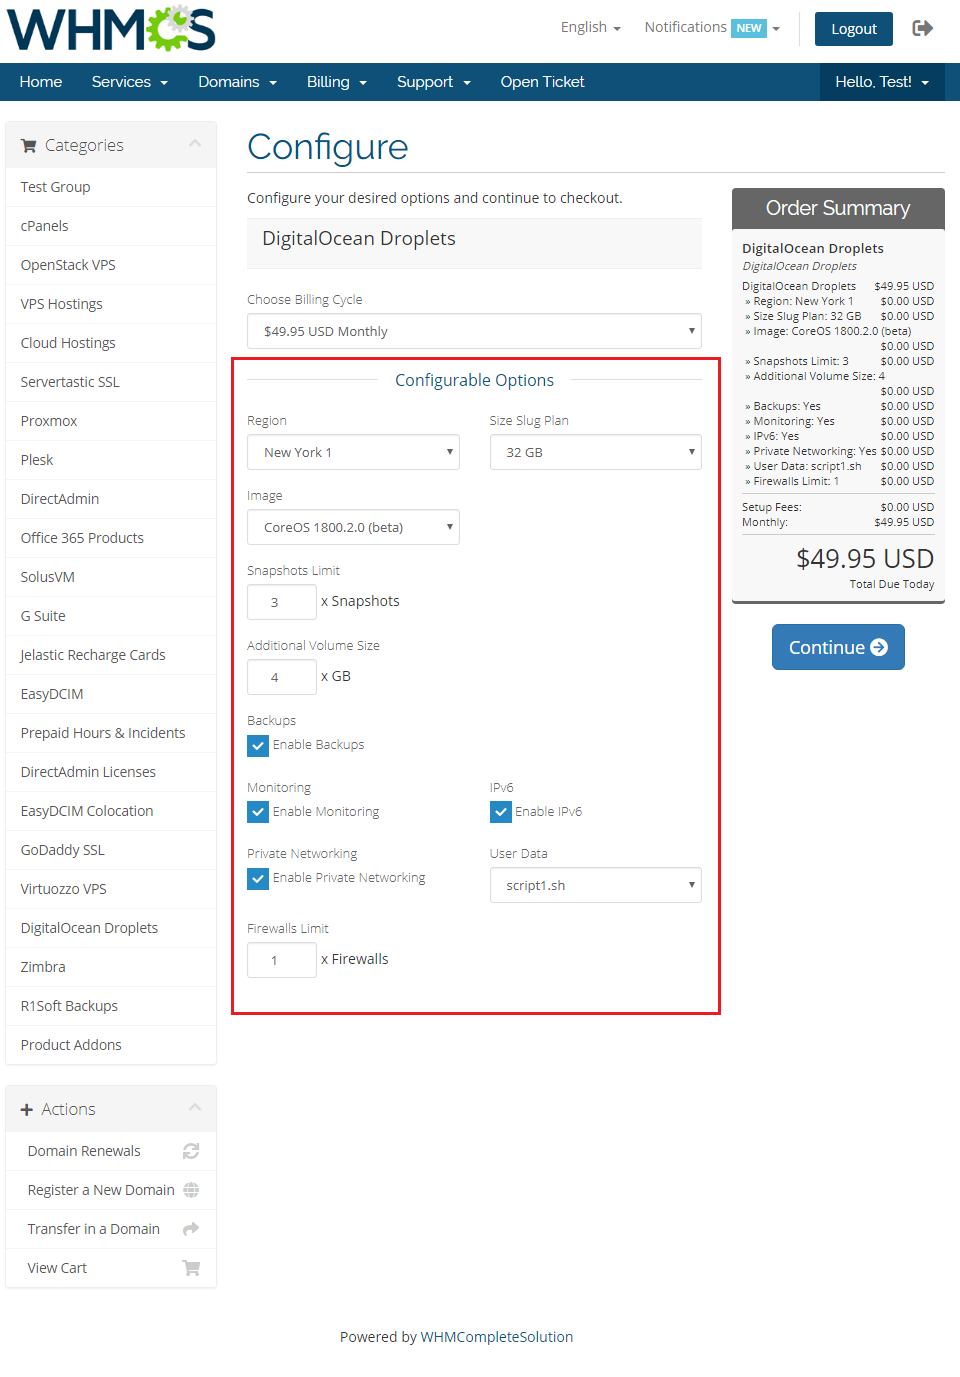
|
| In case those options aren't fitting your needs, you can edit them. To do so, go to 'Setup' → 'Products/Services' → 'Configurable Options' and press edit button next to configurable option used by your product. |
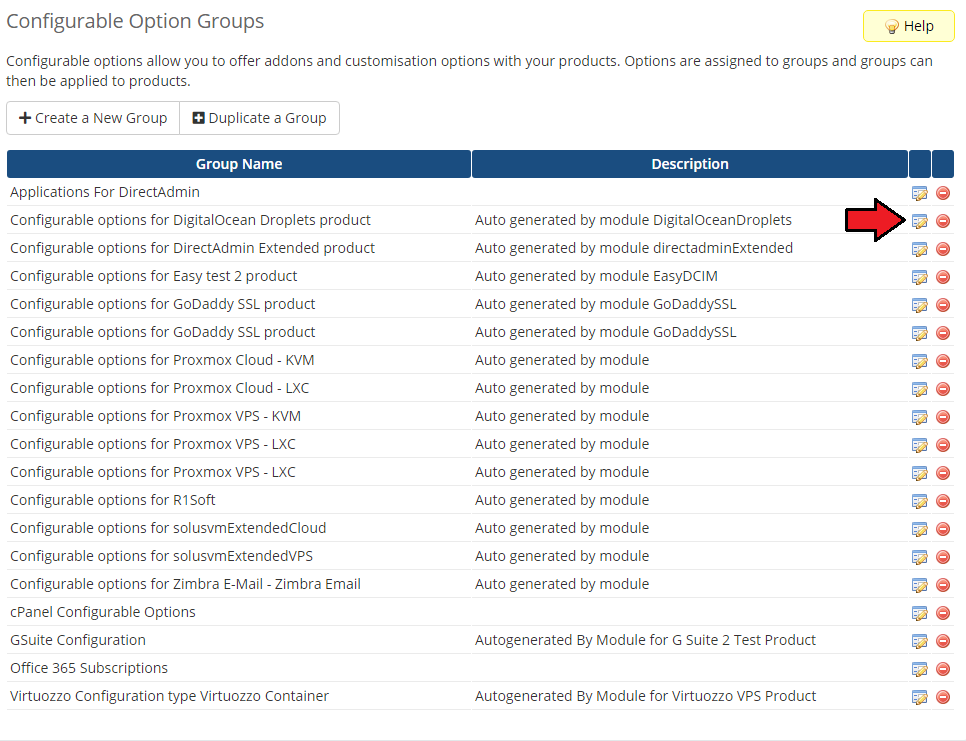
|
| Here you can view all products this configurable option group is assigned to. Now we will show you how to edit options. Let's say you want to add an option to order VPS with 4 cores per socket. |
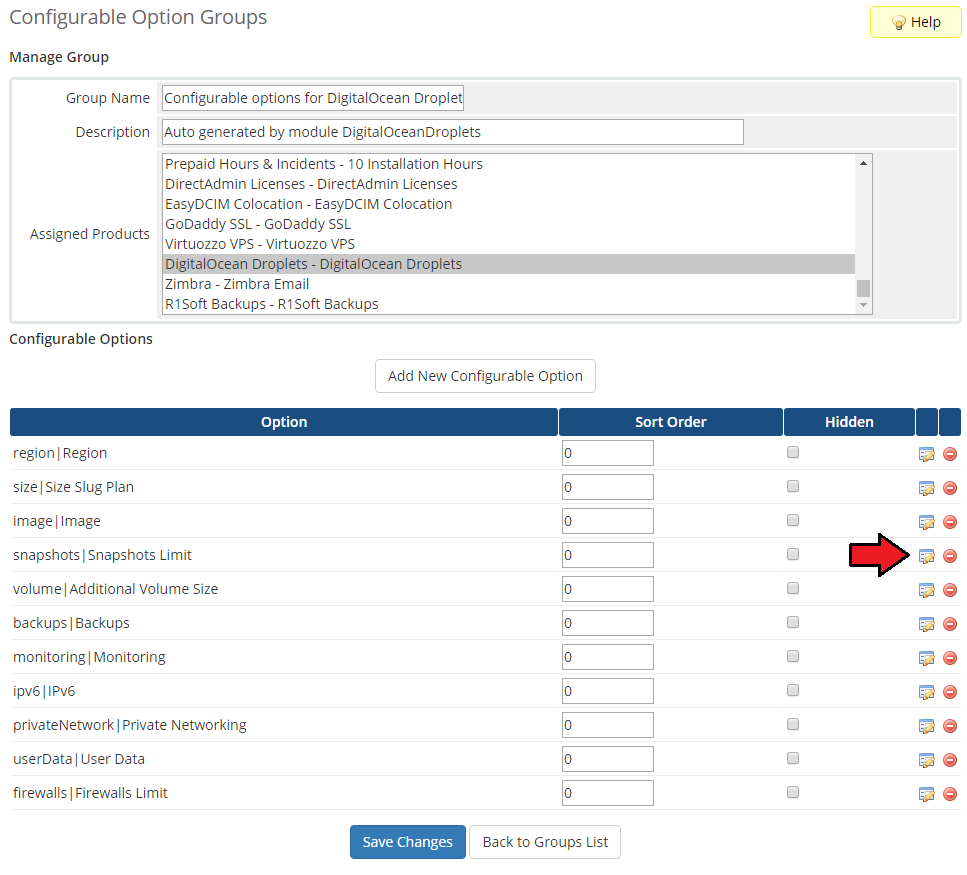
|
| You will see a popup window, so make sure your browser will not block it. To add new option enter it in a textbox under all other options, but if you want to replace it with an option you currently have, simply edit its textbox. |
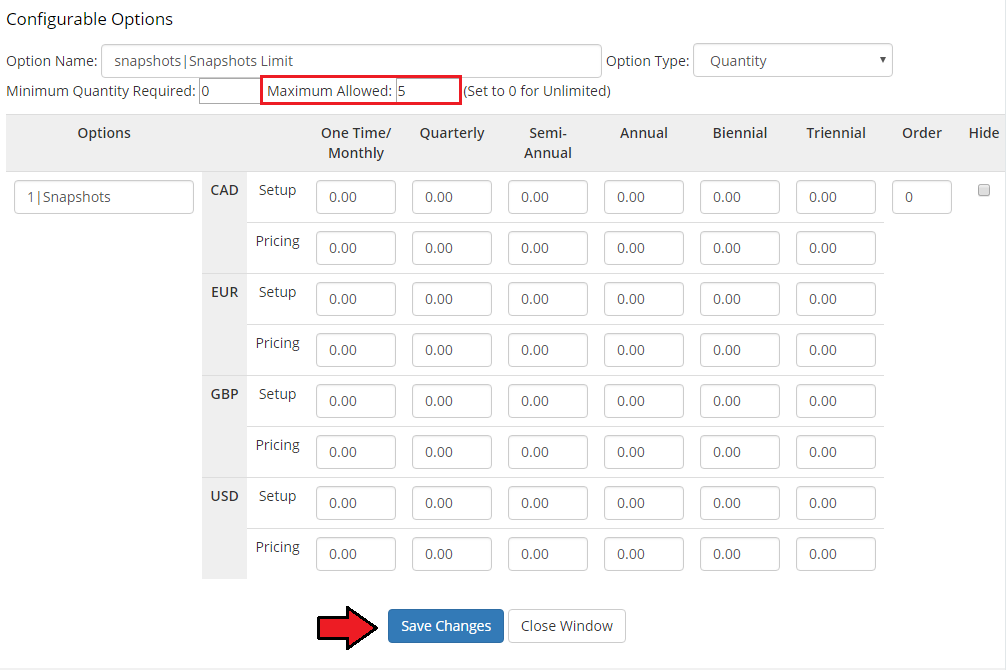
|
Hiding Configurable Options
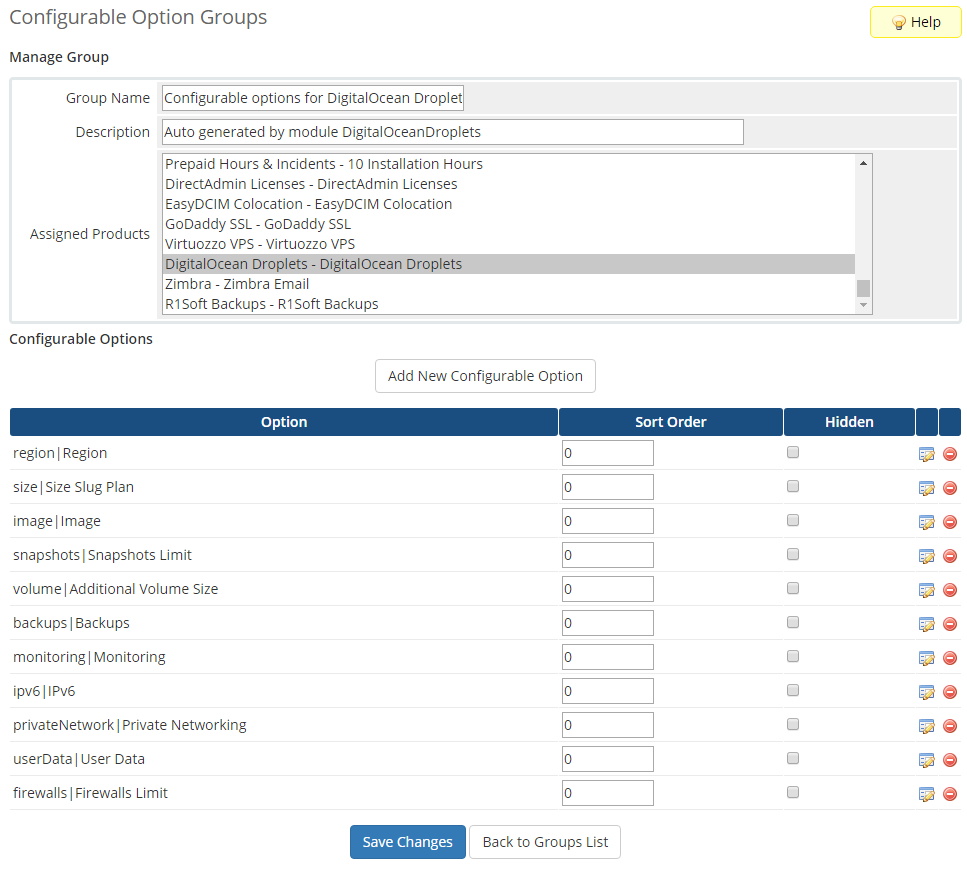
| If you decide to hide configurable options from a client order form and manage them only from the admin area, follow steps below. Firstly, go to 'Setup' → 'Products/Services' → 'Configurable Options' . |
|
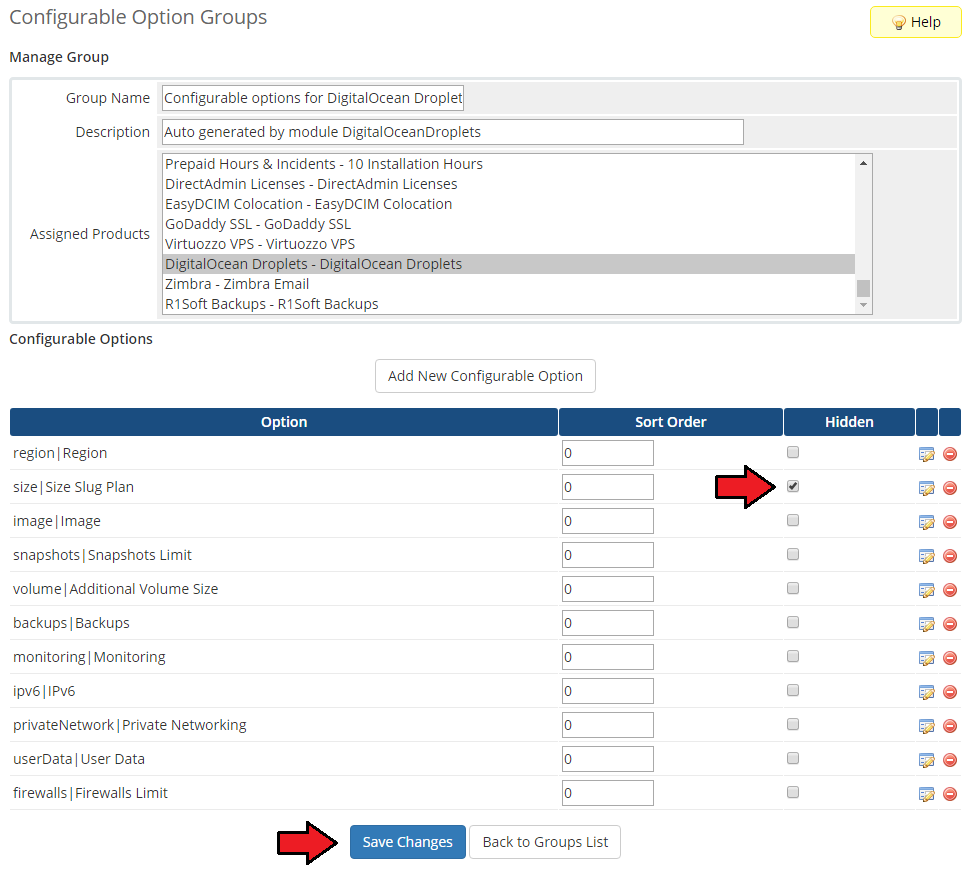
| Afterwards, tick 'Hidden' checkboxes next to configurable options you want to hide and confirm the action through pressing 'Save Changes' . On the screen below you can see hiding of 'Number of Public IP' and 'Number of Private IP' . |
|
Setting Up Pricing For Configurable Options
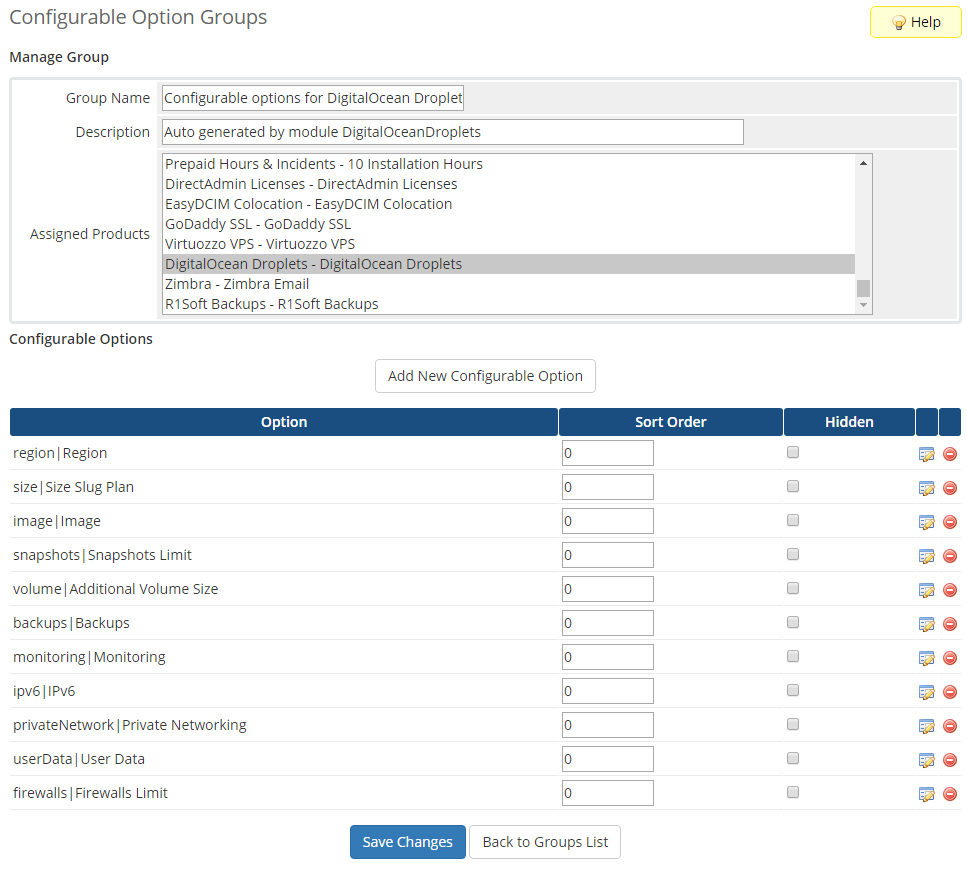
| If you decide to set up pricing for configurable options, follow steps below. Firstly, go to 'Setup' → 'Products/Services' → 'Configurable Options' . |
|
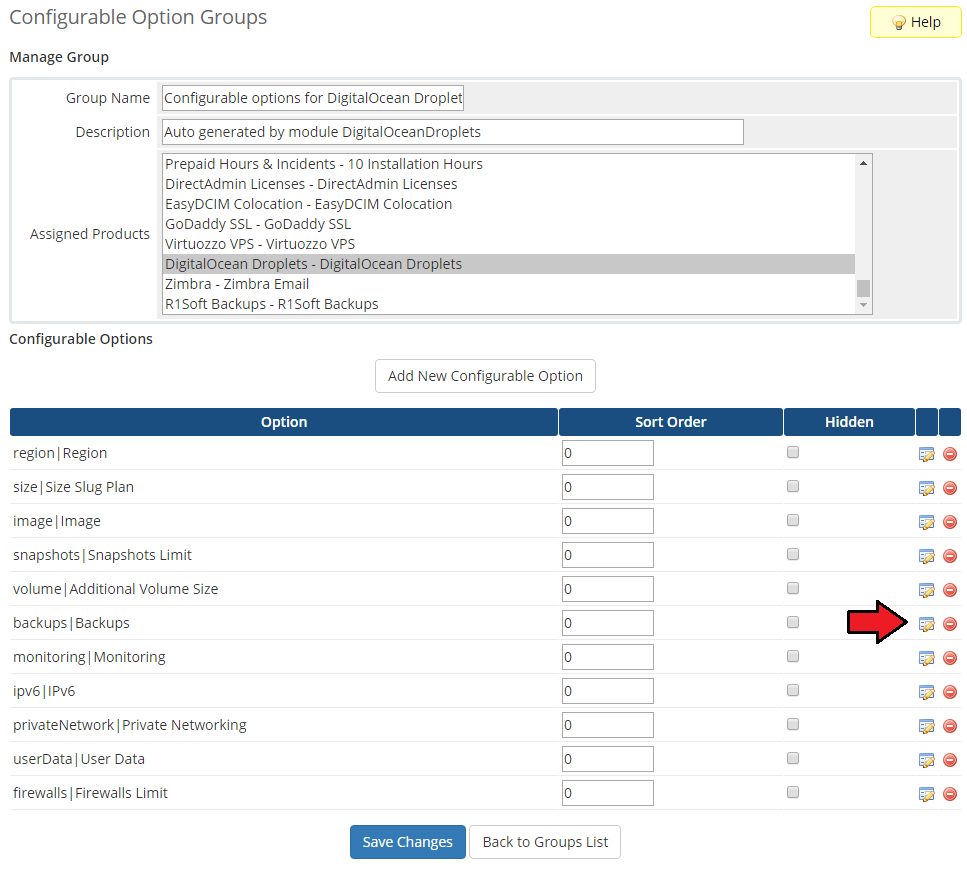
| Next, press edit button next to configurable options you want to set pricing for. |
|
| Afterwards, you will see a popup window, so make sure your browser will not block it. Now, price you entered for resource should be in a column responsible for the same type of payment as your product uses. |
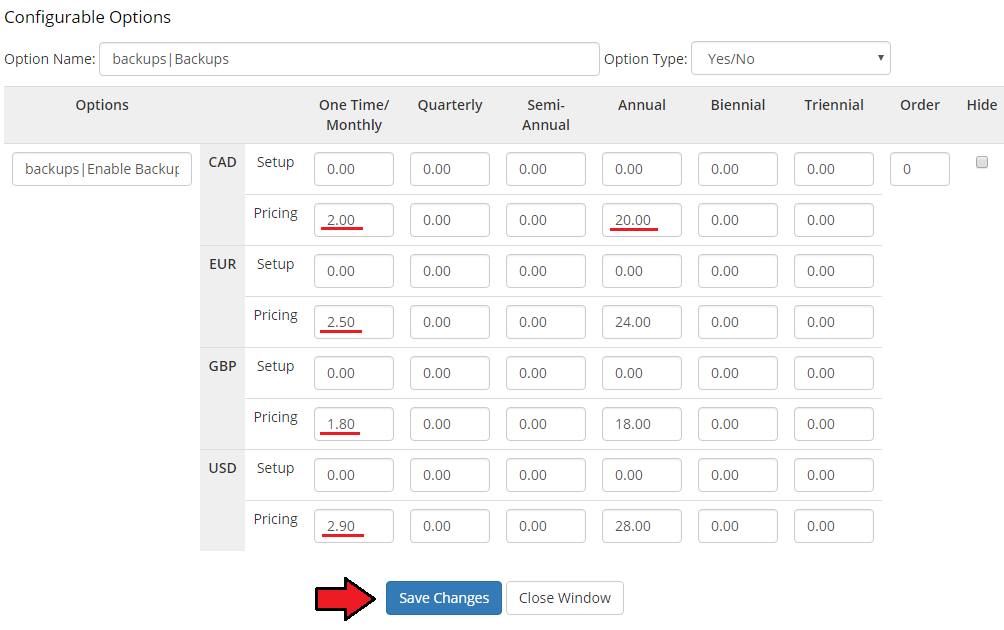
|
| Depending from 'Option Type' , pricing you entered may be counted in various ways. 'Dropdown' - You have to set price for each option. On the screen below you can find examplary setup of 'Dropdown' type configurable option. |
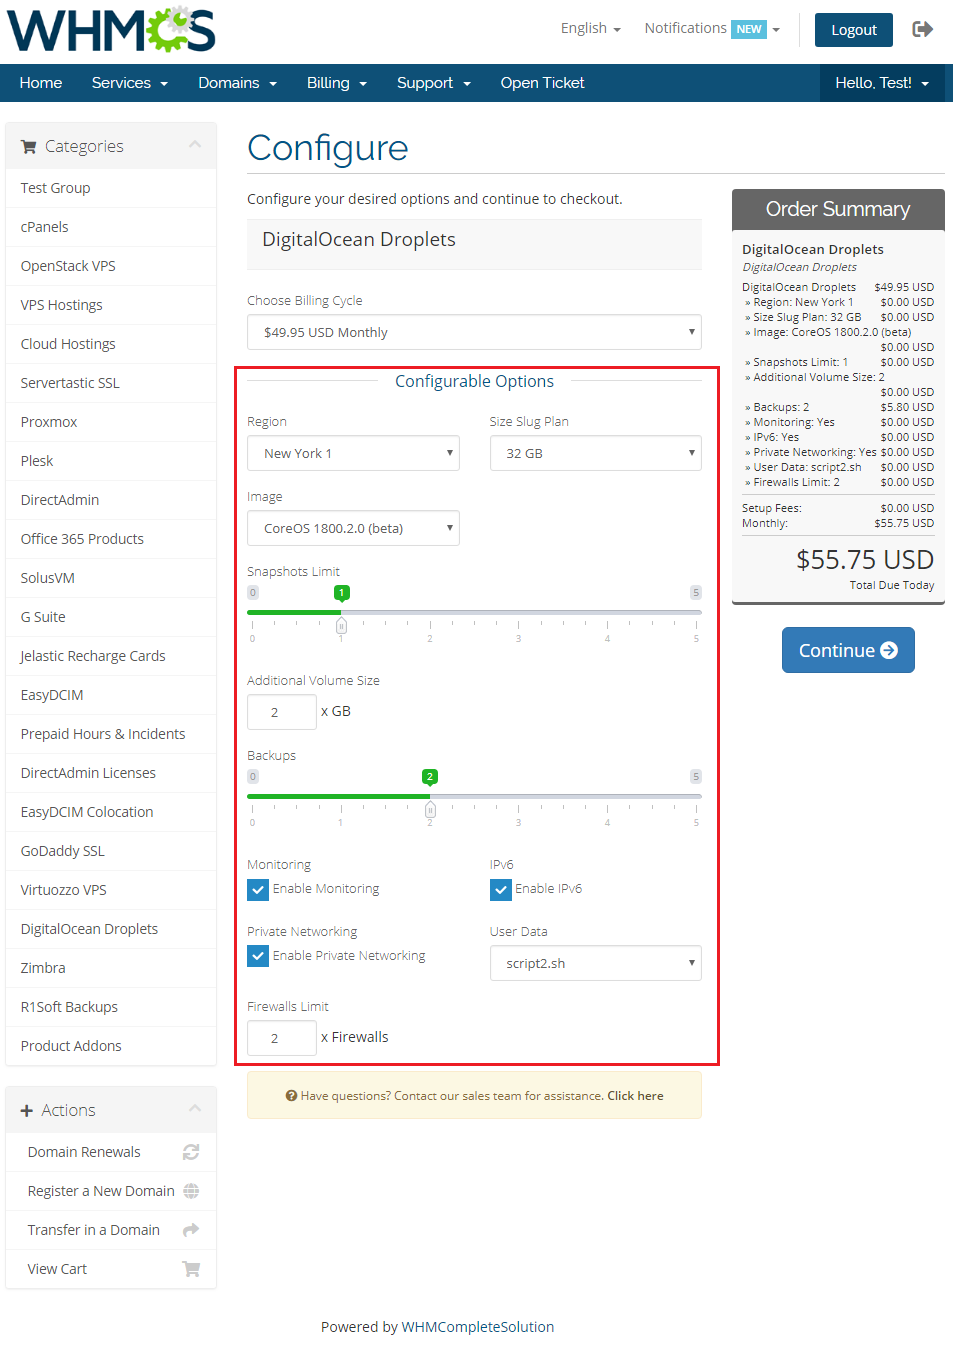
|
| On the screen below you can see specially prepared all four configurable options on the order form. |
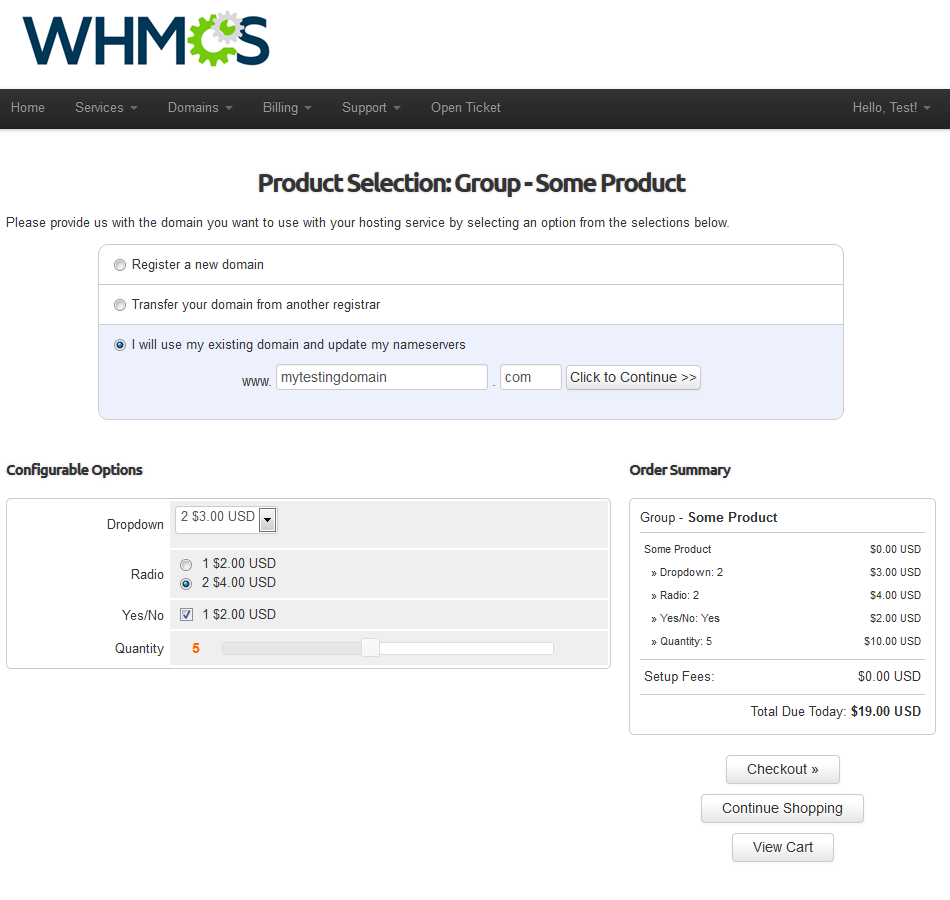
|
| Now you should have no problems with understanding and using the configurable options in your WHMCS. |