MetricsCube Connector For WHMCS
(→Cron Synchronization Method) |
(→Installation and Configuration) |
||
| Line 51: | Line 51: | ||
=Installation and Configuration= | =Installation and Configuration= | ||
{| | {| | ||
| − | |style="padding: 10px 0px 30px 15px;"|''' | + | |style="padding: 10px 0px 30px 15px;"|'''We have prepared a short but comprehensive tutorial that will show how you how to successfully install and configure MetricsCube Connector For WHMCS.'''<br/> |
| − | + | Although the process is extremly easy and intuitive, go over the below guide to assue it is fast, smooth and trouble-free. | |
|} | |} | ||
==Installation== | ==Installation== | ||
{| | {| | ||
| − | |style="padding: 10px 0px 20px 15px;"|'''1. | + | |style="padding: 10px 0px 20px 15px;"|'''1. First of all, you need the package, log in to our client area and download the module.''' |
|} | |} | ||
{| | {| | ||
| Line 62: | Line 62: | ||
|} | |} | ||
{| | {| | ||
| − | |style="padding: 0px 0px 15px 15px;"|'''2. Open the | + | |style="padding: 0px 0px 15px 15px;"|'''2. Open the FTP Client, log in to the server with WHMCS installed. Then, open the main catalogue and upload the folder with files you have extracted previously.'''<br /> |
| − | The content of your package should look | + | The content of your package should look lik eon the below screen: |
|} | |} | ||
{| | {| | ||
| Line 71: | Line 71: | ||
==Activate The Addon== | ==Activate The Addon== | ||
{| | {| | ||
| − | |style="padding: 10px 0px 15px 15px;"|'''3. Now, you have to activate the module in your WHMCS system.'''<br/> | + | |style="padding: 10px 0px 15px 15px;"|'''3. Now, you have to activate the addon module in your WHMCS system.'''<br/> |
Please log in to your WHMCS admin area. Once there, navigate to the '' 'Setup' '' tab and select '' 'Addon Modules'.'' <br/> | Please log in to your WHMCS admin area. Once there, navigate to the '' 'Setup' '' tab and select '' 'Addon Modules'.'' <br/> | ||
Find 'MetricsCube Connector' on the list of addons and click the '' 'Activate' '' button. | Find 'MetricsCube Connector' on the list of addons and click the '' 'Activate' '' button. | ||
| Line 80: | Line 80: | ||
{| | {| | ||
|style="padding: 0px 0px 15px 15px;"|'''4. After the module has been activated, you will need to enable access to your Admin Role.'''<br/> | |style="padding: 0px 0px 15px 15px;"|'''4. After the module has been activated, you will need to enable access to your Admin Role.'''<br/> | ||
| − | To do that, click on 'Configure', | + | To do that, click on '' 'Configure','' select the admin roles that should have access to the module, and save changes. |
|} | |} | ||
{| | {| | ||
| Line 86: | Line 86: | ||
|} | |} | ||
{| | {| | ||
| − | |style="padding: 0px 0px 30px 15px;"|''' | + | |style="padding: 0px 0px 30px 15px;"|'''Your module has just been successfully installed and activated!''' |
|} | |} | ||
==Sign Up To MetricsCube== | ==Sign Up To MetricsCube== | ||
{| | {| | ||
| − | |style="padding: 10px 0px 15px 15px;"| | + | |style="padding: 10px 0px 15px 15px;"|Now, move to metricscube.io and sign up with your account. |
|} | |} | ||
{| | {| | ||
| Line 97: | Line 97: | ||
|} | |} | ||
{| | {| | ||
| − | |style="padding: 0px 0px 20px 15px;"| | + | |style="padding: 0px 0px 20px 15px;"|You will be asked to select the method of instalaltion, go for method nmber 3, '' 'Connecting Already Installed Module' '' as you have jsut installed the module. |
|} | |} | ||
{| | {| | ||
| Line 103: | Line 103: | ||
|} | |} | ||
{| | {| | ||
| − | |style="padding: 0px 0px 15px 15px;"| | + | |style="padding: 0px 0px 15px 15px;"|The only step left is to copy the activation code presented on the screenshot below, keep it safe as you will need it in furtgher stepf of synchronisation.<br/> Go back to your WHMCS adoon now. |
|} | |} | ||
{| | {| | ||
| Line 119: | Line 119: | ||
|} | |} | ||
{| | {| | ||
| − | |style="padding: 0px 0px 15px 15px;"| | + | |style="padding: 0px 0px 15px 15px;"|To start, link yor account with the conector, paste the copied activation code into the Application ID field located in the module and press the '' 'Synchronize' '' button. |
|} | |} | ||
{| | {| | ||
| Line 146: | Line 146: | ||
|} | |} | ||
{| | {| | ||
| − | |style="padding: 0px 0px 15px 15px;"|As another option, you can take advantage of the | + | |style="padding: 0px 0px 15px 15px;"|As another option, you can take advantage of the '' 'Cron' '' synchronization method after you have establish connection to your WHMCS.<br/> |
| − | *co ile on ma byc uruchamiany | + | *co ile on ma byc uruchamiany/jak go urucomic - (bo moze tylko raz) - bo to chyba sie uruchamia po stronie whmcs-a (Krystian/Dawid) |
|} | |} | ||
{| | {| | ||
| Line 153: | Line 153: | ||
|} | |} | ||
{| | {| | ||
| − | |style="padding: 0px 0px 20px 15px;"|In order to proceed, all you need to do is select | + | |style="padding: 0px 0px 20px 15px;"|In order to proceed, all you need to do is select '' 'Cron' '' from a drop-down menu that will be displayed after you click the arrow located next to the currently applied method.<br/> |
Afterwards, the MetricsCube will no longer attempt to connect your WHMCS using the ‘Webhooks’ method, because it will automatically detect that the cron script has been executed. | Afterwards, the MetricsCube will no longer attempt to connect your WHMCS using the ‘Webhooks’ method, because it will automatically detect that the cron script has been executed. | ||
|} | |} | ||
| Line 169: | Line 169: | ||
{| | {| | ||
|style="padding: 0px 0px 30px 15px;"|1. First synchronisation<br/> | |style="padding: 0px 0px 30px 15px;"|1. First synchronisation<br/> | ||
| − | Dodać informacje o pierwszej synchronizacji podzielonej na dwa etapy: | + | Dodać informacje o pierwszej synchronizacji podzielonej na dwa etapy:<br/> |
| − | 1. Jeden rok wstecz (wykonywana jako pierwsza) | + | 1. Jeden rok wstecz (wykonywana jako pierwsza)<br/> |
2. Pięć lat wstecz (działa jako druga, w tle) | 2. Pięć lat wstecz (działa jako druga, w tle) | ||
|} | |} | ||
Revision as of 10:00, 19 October 2018
Contents |
About MetricsCube Connector For WHMCS
| MetricsCube Connector For WHMCS is a free module that will allow you to ..... |
- Synchronization Benefits:
| ✔ |
| ✔ |
| ✔ |
| ✔ |
| ✔ |
| ✔ |
| ✔ |
- General Features:
| ✔ |
| ✔ |
| ✔ |
- Detailed Reports Types:
| ✔ |
| ✔ |
Installation and Configuration
| We have prepared a short but comprehensive tutorial that will show how you how to successfully install and configure MetricsCube Connector For WHMCS. Although the process is extremly easy and intuitive, go over the below guide to assue it is fast, smooth and trouble-free. |
Installation
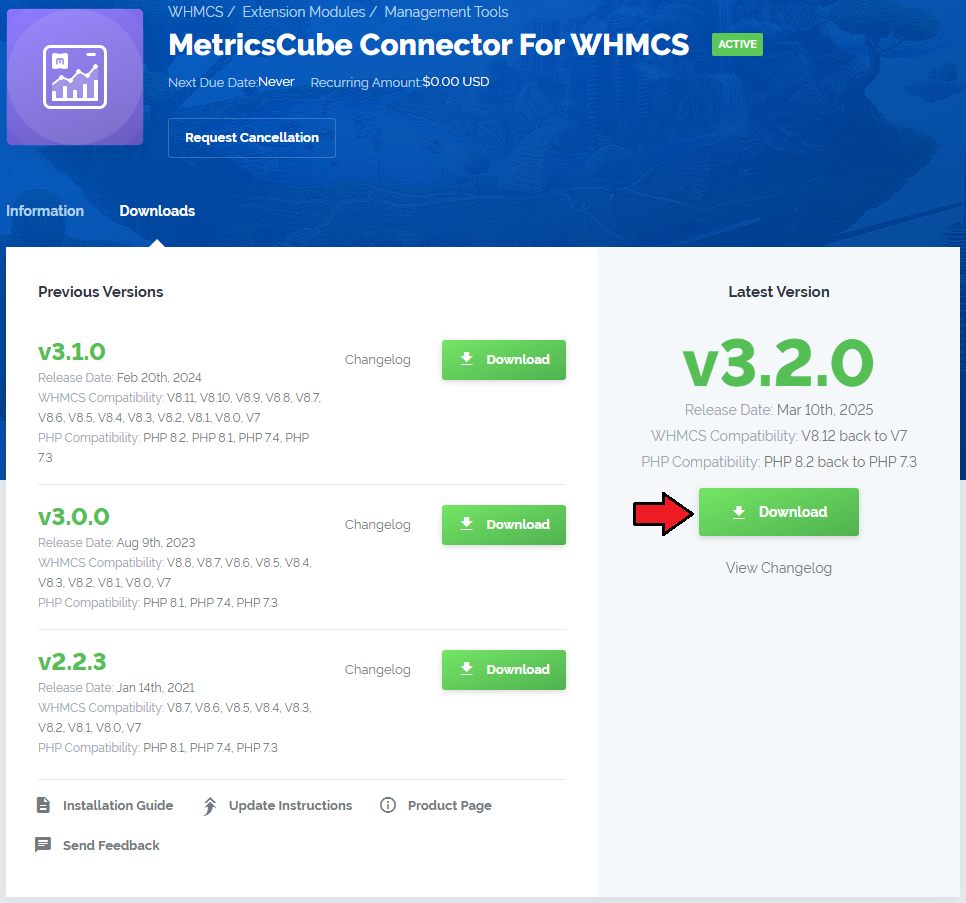
| 1. First of all, you need the package, log in to our client area and download the module. |
|
| 2. Open the FTP Client, log in to the server with WHMCS installed. Then, open the main catalogue and upload the folder with files you have extracted previously. The content of your package should look lik eon the below screen: |
|
Activate The Addon
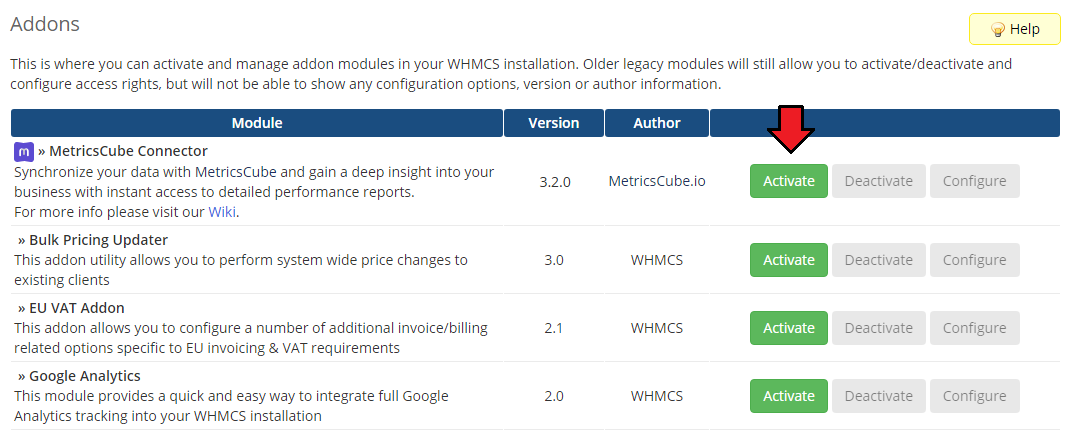
| 3. Now, you have to activate the addon module in your WHMCS system. Please log in to your WHMCS admin area. Once there, navigate to the 'Setup' tab and select 'Addon Modules'. |

|
| 4. After the module has been activated, you will need to enable access to your Admin Role. To do that, click on 'Configure', select the admin roles that should have access to the module, and save changes. |

|
| Your module has just been successfully installed and activated! |
Sign Up To MetricsCube
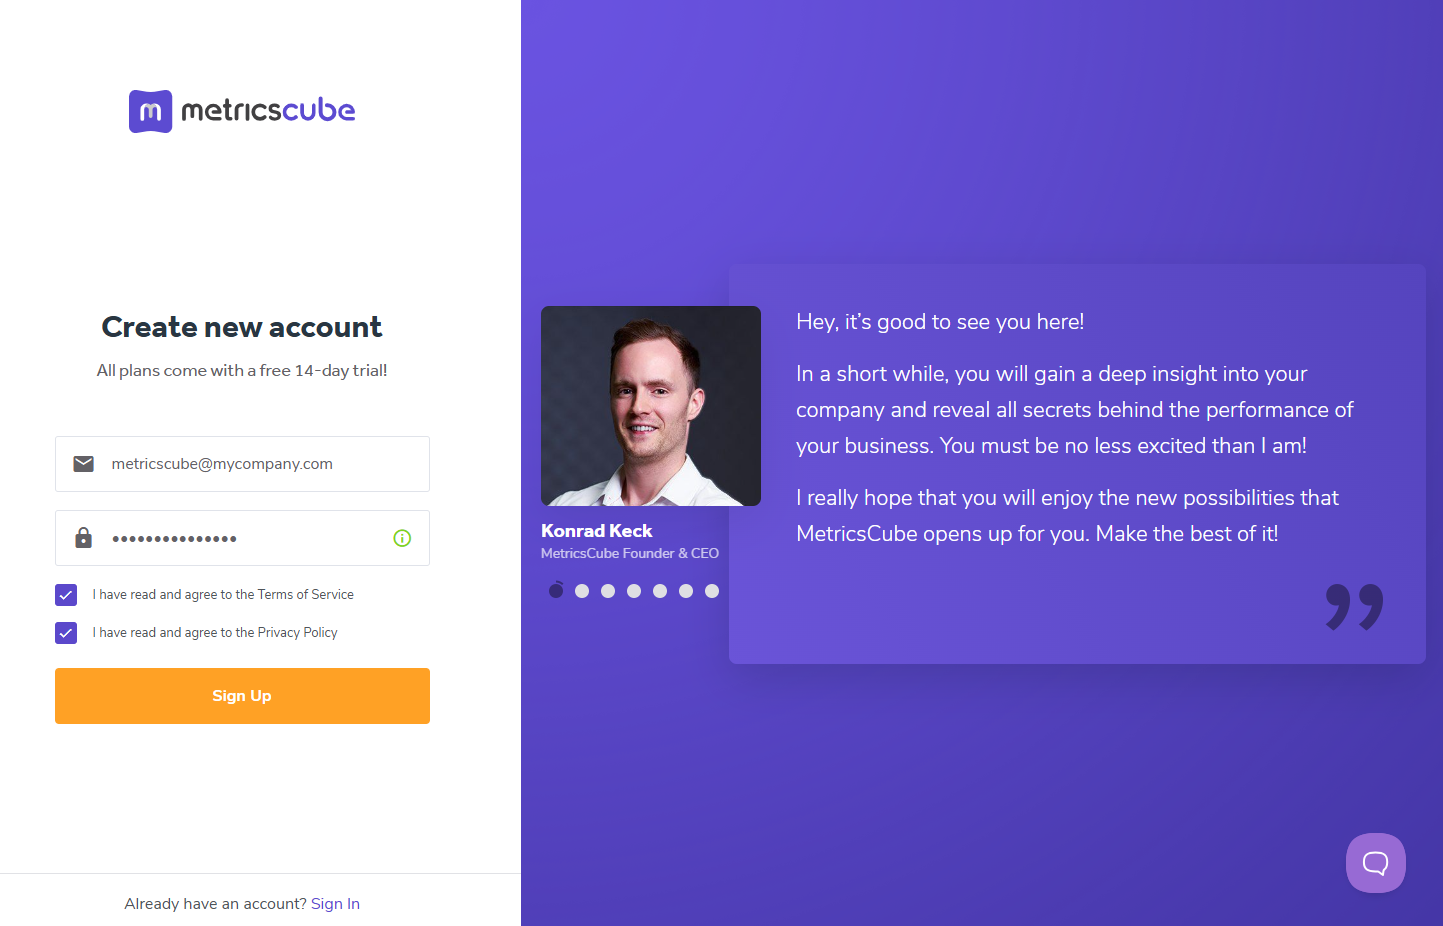
| Now, move to metricscube.io and sign up with your account. |

|
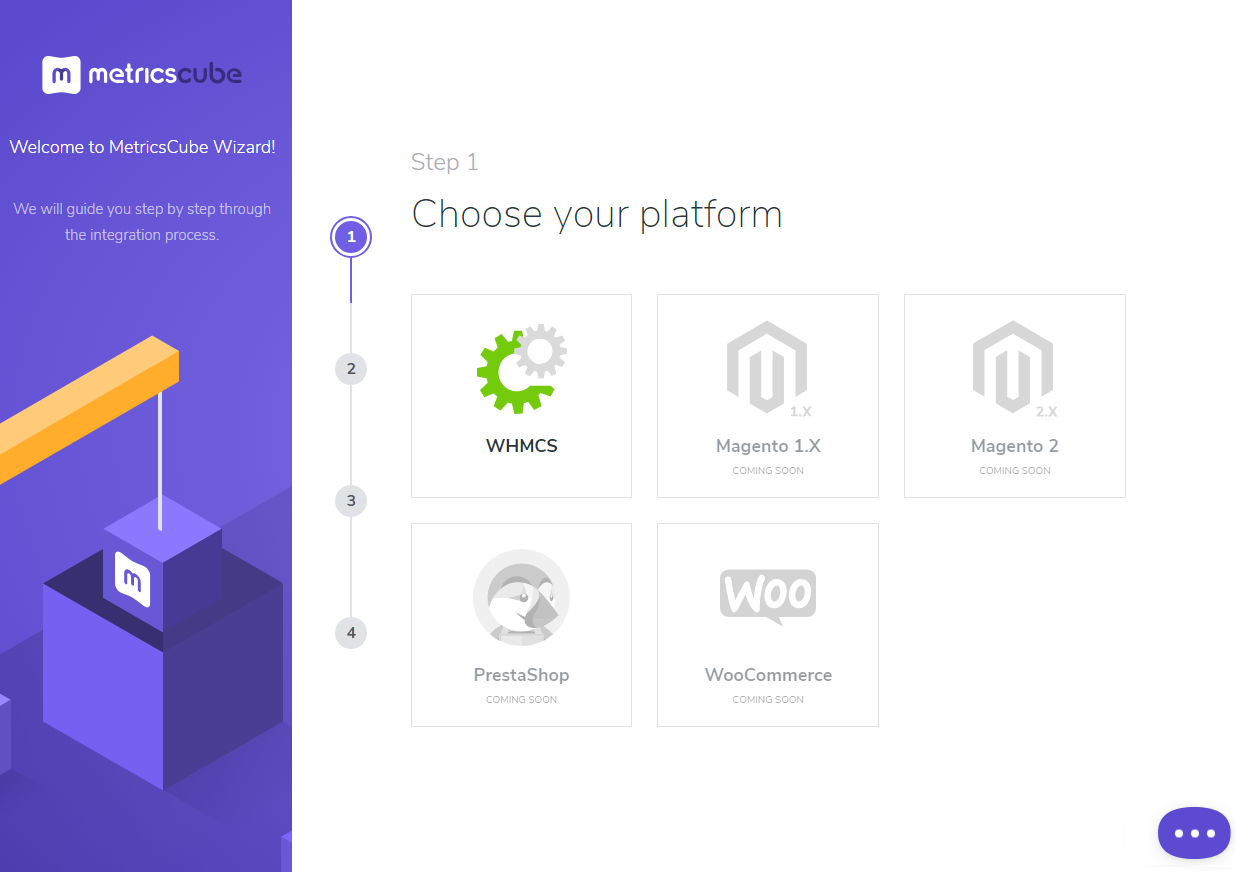
| You will be asked to select the method of instalaltion, go for method nmber 3, 'Connecting Already Installed Module' as you have jsut installed the module. |
|
| The only step left is to copy the activation code presented on the screenshot below, keep it safe as you will need it in furtgher stepf of synchronisation. Go back to your WHMCS adoon now. |

|
Data Synchronization
Webhoohs Synchronizaton Method
| ‘Webhooks’ is a synchronization method that MetricsCube Connector works with by default. The process starts with the MetricsCube server making connection to your WHMCS. |

|
| To start, link yor account with the conector, paste the copied activation code into the Application ID field located in the module and press the 'Synchronize' button. |
|
| As soon as the connection is established successfully, you will see the relevant information, such as the current connection status and the time of the last synchronization. The buttons allowing you to download the logs or link a different account can be also found on this page. |

|
| Once MetricsCube collects all information regarding the initiated synchronization, you will be automatically moved to the final stage of the Wizard. |

|
Cron Synchronization Method
| Having problems with data synchronization? |
| File:MCC.png |
As another option, you can take advantage of the 'Cron' synchronization method after you have establish connection to your WHMCS.
|
| File:MCC.png |
| In order to proceed, all you need to do is select 'Cron' from a drop-down menu that will be displayed after you click the arrow located next to the currently applied method. Afterwards, the MetricsCube will no longer attempt to connect your WHMCS using the ‘Webhooks’ method, because it will automatically detect that the cron script has been executed. |
| File:MCC.png |
| You've nailed it! There is nothing to stop you now from using all MetricsCube tools and boosting the productivity of your business processes! |
| File:MCC.png |
Process
| 1. First synchronisation Dodać informacje o pierwszej synchronizacji podzielonej na dwa etapy: |
| Option to chcange the synchronisation method later on, use dropdown. |
Logs
| Option to download Connector Logs |
| File:MCC.png |
| dopiero w razie problemów z ich pobraniem nadać prawa na tamten folder oraz odczekac do kolejnej synchronizacji |
| File:MCC.png |
MetricsCube.io
| Some great real report screen to attract attention: |
| File:MCC.png |
Tips
| 1. Take a look at our YouTube channel! You will find there short videos presenting three different methods of installing your MetricsCube Connector For WHMCS. Stay tuned as otehr videos are coming soon! |
| 2. Your WHCMS data are automatically synchronised once per 24 hours, dopytać czy nie ma wyjątków, czy można manualnie wywołąc synchronizację w razie potrzeby |
Update Instructions
| Essential guidance through the process of updating the module is offered here. |
Common Problems
| 1. When you encounter problems with connection, check whether your SELinux or firewall does not block ports. |