Hosting Quota Notifications 1.X For WHMCS
From ModulesGarden Wiki
(Difference between revisions)
|
|
| Line 110: |
Line 110: |
| | Remember that you must insert the code to every used order form template. <br/><br/> | | Remember that you must insert the code to every used order form template. <br/><br/> |
| | | | |
| − | A properly inserted code should look like this:
| + | That is how a properly inserted code should look like: |
| | |} | | |} |
| | {| | | {| |
Revision as of 09:22, 23 November 2015
| Recurring Billing For WHMCS .....
|
| ✔ Supports WHMCS Templates Five and Six
|
| ✔ Supports WHMCS V5 and V6
|
Installation
This tutorial will show you how to successfully install and configure Recurring Billing For WHMCS.
We will guide you step by step through the whole installation and configuration process.
|
Installation
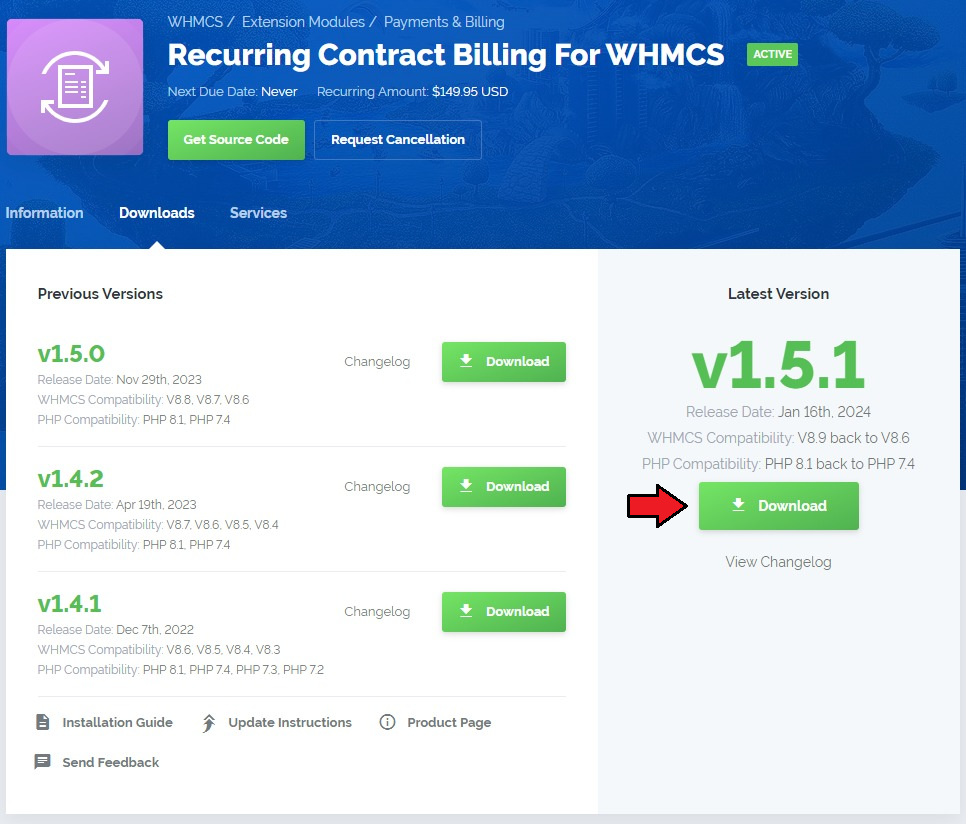
| 1. Log in to your client area and download Recurring Billing For WHMCS.
|
2. Upload and extract the module into the main WHMCS directory.
Files in your WHMCS directory should look like on the following screen.
|
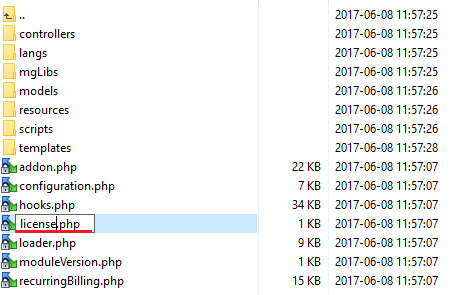
3. When you install Recurring Billing For WHMCS for the first time you have to rename 'license_RENAME.php' file.
File is located in 'modules/addons/recurring_billing/license_RENAME.php'. Rename it from 'license_RENAME.php' to 'license.php'.
|
4. In order to configure your license key, you have to edit the previously renamed 'license.php' file.
Enter your license key between quotation marks as presented on the following screen. You can find your license key in your client area → 'My Products'.
|
Activation
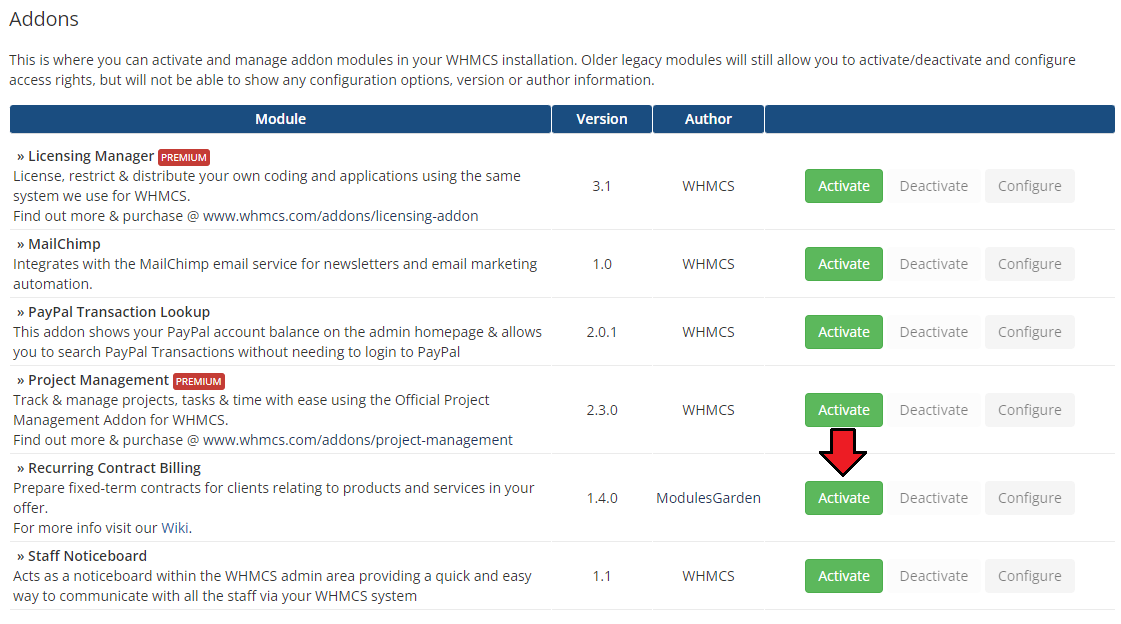
5. Now, you have to activate the module in your WHMCS system.
Log in to your WHMCS admin area and proceed to 'Setup' → 'Addon Modules'.
Afterwards, find 'Recurring Billing' and press 'Activate' button.
|
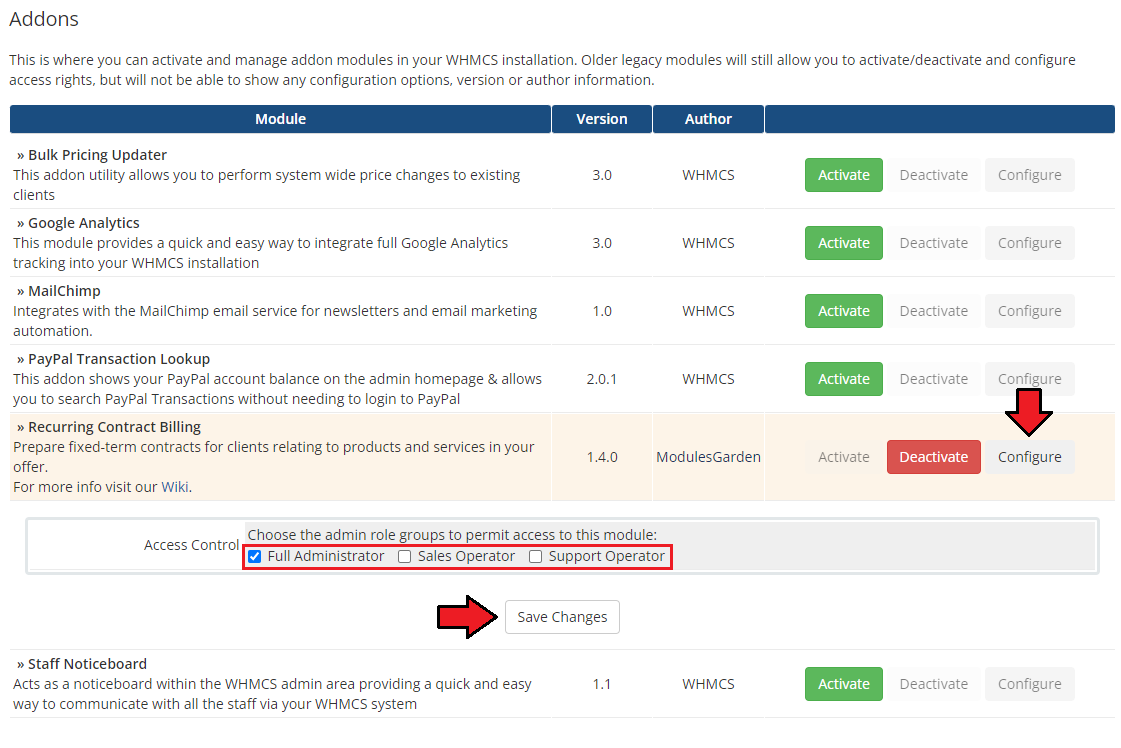
6. In the next step you need to permit access to this module.
To do so, click on 'Configure' button, tick checkboxes to assign desired admin roles.
Press 'Save Changes'.
|
7. Now it is time to insert proper integration codes. Note that this step is required only if you are using WHMCS V5 x.x.
There is no integration required for WHMCS V6 x.x.
Open the currently used template. For presentation purposes we opened modern template. You will them in 'yourWHMCs/template/orderforms/modern/viewcart.tpl'.
Find line 450. Insert the below code inside this line and save the changes.
 <div class="signupfields">
                  <h2>Contracts</h2>
                  {$contractOutput}
              </div>
Remember that you must insert the code to every used order form template.
That is how a properly inserted code should look like:
|
| 8. You have just successfully installed Recurring Billing For WHMCS!
|
Configuration and Management
Once you have properly installed and activated the product you may move to its actual configuration.
Read the below sections to learn how to use Recurring Billing For WHMCS completely.
|
Configuration
Dashboard
Contract Content
Contract Templates
Configuration
Management
Client Area
Admin Area
Signed Contracts
Logs
Additional Information
Tips
Common Problems
| 1. When you have problems with connection, check whether your SELinux or firewall does not block ports.
|


