Hosting Renewals For WHMCS
Contents |
About Hosting Renewals For WHMCS
| Hosting Renewals For WHMCS is a module which enables you to handle the billing cycles, recurring payments and renewals of services belonging to your customers in a unique and user-friendly way. The module will grant your clients the ability to control the activation of their automatic renewals, they will also be able to decide on the renewals of their web hosting services, not to mention it will take less time to change the billing cycle. |
- Client Area Features:
| ✔ Renew Services Before Due Date |
| ✔ Renew Domain And Addons Along With Service |
| ✔ Toggle Auto Renewals |
| ✔ Change Billing Cycle & View Discounted Price Difference |
| ✔ Apply Early Payment Discounts To Renewal Invoices |
- Admin Area Features:
| ✔ Renew Services Before Due Date |
| ✔ Renew Domain And Addons Along With Service |
| ✔ Toggle Auto Renewals For Service |
| ✔ Choose Available Billing Cycles |
| ✔ Configure Client Area Features |
| ✔ Define Discounts Applied Upon: |
| ✔ Change Of Billing Cycle |
| ✔ Renewal Invoice Early Payment |
| ✔ Choose Between Two Types Of Discounts - One Time And Recurring |
| ✔ Define Validity Time Of Early Payment Discount |
| ✔ Show Discount Details As Separate Invoice Items |
| ✔ Toggle Renewal On/Off Status Notifications |
| ✔ Toggle And Force Domain Renewal Along With Service |
| ✔ Toggle And Force Addons Renewal Along With Service |
| ✔ Toggle Upfront Renewal |
| ✔ Toggle Application Of Recurring Amount From Service Settings |
| ✔ Disable Auto Renewal For New Services |
| ✔ Define Maximum Renewal Time Limit |
| ✔ Automatically Switch Billing Cycle Before Defined Number Of Days To Due Date |
| ✔ Send Email Reminders About Upcoming Or Missed Renewals |
| ✔ Define Multiple Templates For Email Reminders |
| ✔ Perform Bulk Changes On Multiple Services |
| ✔ Change Settings |
| ✔ Add Payment Reminders |
| ✔ Toggle Auto Renewal |
| ✔ Toggle Discounts Status |
| ✔ Delete Discounts |
| ✔ Customize Module Language Files With "Translations" Tool |
| ✔ Control Staff Access Level To Specific Resources |
| ✔ View And Manage Logs |
- General Info:
| ✔ Multi-Language Support With Custom Translations Tool |
| ✔ Supports PHP 8.1 Back To PHP 7.4 |
| ✔ Supports WHMCS Themes "Six", "Twenty-One" And "Lagom WHMCS Client Theme" |
| ✔ Supports WHMCS V8.10 Back To WHMCS V8.6 |
| ✔ Requires ionCube Loader V12 Or Later |
| ✔ Easy Module Upgrade To Open Source Version |
Installation
| This tutorial will show you how to successfully install and configure Hosting Renewals For WHMCS. We will guide you step by step through the whole installation and configuration process. |
| 1. Log in to our client area and download the module. |

|
| 2. In the downloaded file you might find one or two packages that support different PHP versions. In the most recent versions of the module, you will find only one package that supports PHP 7.4 and later. |
| Note: You can check the current PHP version in your WHMCS. To do so, proceed to 'Utilities' → 'System' → 'PHP Info'. |
| 3. Extract the package and upload its content into the main WHMCS directory. The content of the package to upload should look like this. |
| 4. When you install Hosting Renewals For WHMCS for the first time you have to rename 'license_RENAME.php' file. File is located in 'modules/addons/HostingRenewals/license_RENAME.php'. Rename it from 'license_RENAME.php' to 'license.php'. |

|
| 5. In order to configure your license key, you have to edit a previously renamed 'license.php' file. Enter your license key between the quotation marks as presented on the following screen. You can find your license key in our client area → 'My Products'. |

|
| 6. Now, you have to set up chmod for the 'storage' folder located in 'your_whmcs/modules/addons/HostingRenewals'. You will be now allowed to read the activity logs in the module. |

|
| 7. The next step concerns setting up a cron job (every hour suggested). Cron will be used for the reminders which you will set later on. php -q /your_whmcs/modules/addons/HostingRenewals/cron/cron.php EmailReminders |
| 8. Next, you have to activate the module in your WHMCS system. Log in to your WHMCS admin area. Go to 'Setup' → 'Addon Modules'. Afterward, find 'Hosting Renewals' and press the 'Activate' button. |

|
| 9. In the next step you need to permit access to this module. To do so, click on the 'Configure' button, tick 'Full Administrator' and press 'Save Changes'. |

|
| 10. You have just successfully installed Hosting Renewals! Access your module now at 'Addons' → 'Hosting Renewals'. |

|
Configuration and Management
| Hosting Renewals For WHMCS module allows your customers to fully manage their billing cycles and recurring payments. Read through the below instructions to learn how to turn on/off auto-renewals, alter billing cycles and manage customized email notifications. |
Configuration
| You can enable Hosting Renewals For WHMCS only for the products that have recurring payments configured. Proceed to 'Addons' → 'Hosting Renewals' → 'Products' and choose from the list the product you wish to enable for renewals. |

|
| Press the symbol marked on the screen to configure the rules of your product. |

|
Available options:
|

|
| If you enabled the option allowing to change the billing cycle in the client area, you must also decide between which billing cycles the switch can be made. On the screen below you can see the 'Choose Available Billing Cycles' table with available billing cycles. |

|
| Thanks to the 'Mass Action' feature you are allowed to simultaneously control the settings of multiple products. Take a look at the screenshot below. |

|
Reminders
| It is wise to inform your clients about an incoming due date, you can do it by setting up 'Reminders'. Before you do that, you should prepare the email template message that will be used as a reminder and sent to your clients. Together with the module activation, there is one custom email template provided. You can find it named: 'ModulesGarden Hosting Renewals - Last Day Notification' in "Product/Service Messages". |

|
| Use 'Merge Fields' to edit the email template. To view the full list of fields, scroll down. These codes are replaced with the actual data during sending email. |

|
There is an additional, not listed merge field that you can use, which stands for the status of the auto-renew option (true/false):
{$auto_renew}
It returns value: On or Off which can be translated in the language file to any value needed. |
| Once you have the template and picked its billing cycle, we can move to adding a reminder itself. Simply click the Add Reminder button to do so. |

|
| The Status field should be automatically set to active, please note, however, that you can disable the reminder any time you want. Next, choose the desired template from the dropdown menu of custom templates including the previously created 'Last Day Notification' . |

|
Discounts
| In the 'Discounts' section you may set up various discounts for any alterations of renewals of services. To start creating and modifying your discount click on Add Discount. |

|
Start with selecting primary attributes including:
For Billing Cycle Change:
For Renew Product (Early Payment Discount):
Note: Discount applies only to the price of the service, both addons and domains even whilst being renewed accordingly, are not qualified for the discount. |

|
| As you can see on the following screen, all discounts are listed below. Each of them can be either removed or edited by pressing the appropriate button. |

|
| Select numerous discounts and use action buttons to Enable/Disable or Delete these discounts. |

|
Settings
Define the module settings:
|

|

|
|

|
|

|
Translations
| Customizing language files is now extremely easy with the "Translations" tool that is now available directly in the addon. Its user-friendly design makes managing various language file tweaks a smooth and efficient process. Prepare translations for the original English files with this handy built-in tool. For specific instructions on how to use this tool please refer to its dedicated article, you will find it here. |

|
Access Control
| 'Access Control' allows you to specify and control exactly which sections of the module can be accessed by your administrators. The way it works is that you create access control rules in which you decide if a specific admin, or admin role has full access, or is restricted to only specific sections. |
Rules
|
Start with creating a new rule, click on the 'Create Rule' button and a dedicated form will appear. Below you will find a description of every field required in the form. |

|
Fill out the following fields to create resources access rule:
Important: When picking specific sections, keep in mind that allowing a parent section will also allow all of its children. |

|
| To edit or delete existing rules, use the icons to the right. |

|
Resources
| Use the toggles in the 'Resources' section to specify which of them should be subject to logging, found in the 'Logs' section. Every time an administrator requests a toggled resource, it will be recorded. |

|
Access Control Logs
The logs section includes:
Use the trash bin icons to delete specific logs, or utilize the mass action function to delete multiple logs at once. |

|
Logs
| All module activities can be recorded in the 'Logs' section. Note: You will have no visible logs here if there are no logged actions yet. |

|
| In the logs settings section, you can specify the types of logs to be stored. If you leave this field empty, all available types will be stored. Additionally, you can enable the option to automatically clear the logs. Simply turn on this option and define the number – logs older than the provided number of days will be automatically deleted. |

|
| There are several ways to manually delete single or multiple logs at any time, regardless of the settings configured above. Navigate to 'Additional Actions' → 'Delete', and choose the log types to be deleted (leave empty to select all types). Specify the number of days; only logs meeting these criteria will be deleted upon confirmation. Alternatively, you can use the standard mass action option to delete selected logs or individual entries. |

|
Client Area
| Depending on the configuration per product your clients will be allowed to manage their renewals in their client area. |
|
|
They can see the current status and use available buttons to perform allowed actions:
|

|
| Press the Choose Billing Cycle button in order to change a current billing cycle to a new one. |

|
| In the next place, choose a new billing cycle from the dropdown menu. Clients will also have their domains and addons renewed, undesired items can be simply unchecked, unless you have chosen either the 'Force Domain Renewal' Once you do that, check the total amount and click Confirm. |

|
| A new invoice has been created. Therefore, the billing cycle is now set to 'Annually'. |

|
Tips
| 1. If your client turns off auto renewal and does not run the renewal manually, then the service status will change to suspended/terminated after a certain time period. Time period depends on WHMCS settings at 'Setup' → 'Automation Settings' → 'Automatic Module Functions. ' |
| 2. Hosting Renewals For WHMCS supports all billing cycles, from monthly to triennially. Depending on the chosen billing cycle, displayed value of a renew button is changing according to the following code which is located in 'language' directory in your language file: $_LANG['addonCA']['hostingActions']['Monthly'] = '1 Month'; $_LANG['addonCA']['hostingActions']['Quarterly'] = '3 Months'; $_LANG['addonCA']['hostingActions']['Semi-Annually'] = '6 Months'; $_LANG['addonCA']['hostingActions']['Annually'] = '1 Year'; $_LANG['addonCA']['hostingActions']['Biennially'] = '2 Years'; $_LANG['addonCA']['hostingActions']['Triennially'] = '3 Years'; |
3. If you want a template message to be sent to users with the auto-renewal 'On' or 'Off' option, you may use the below example:{if $auto_renew eq "On"} Service will be automatically renewed in {$service_next_due_date} days.
{else} Service will expire in {$service_next_due_date} days. {/if}
|
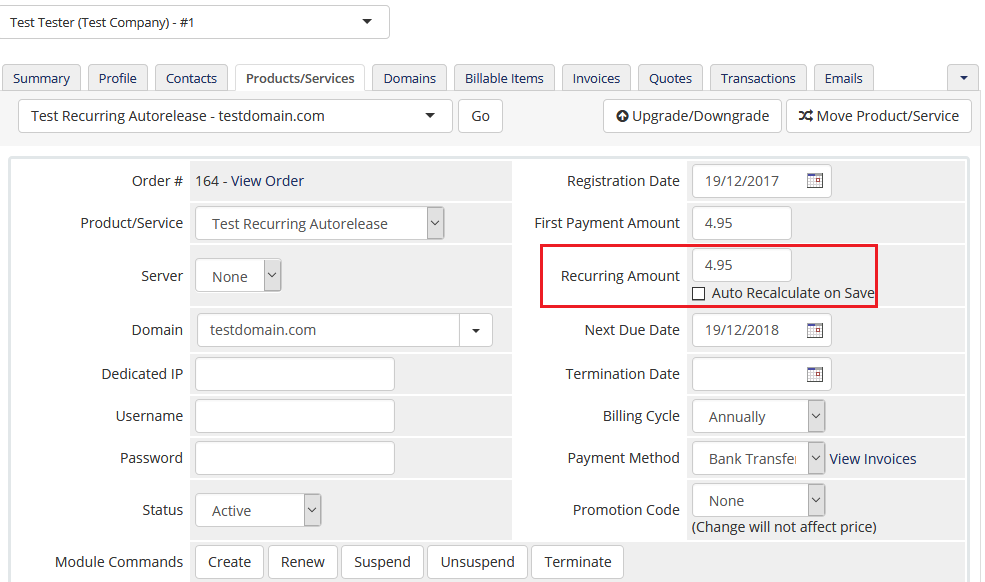
| 4. If your system discounts are not applied to recurring payment for a product, make sure you have enabled the Apply Recurring Amount From Service Settings option in the Hosting Renewals addon product settings. |
How To Use Language Overrides
| Incorporating language customizations - the module readily accommodates language overrides, allowing you to tailor the language files to your preferences. The language file english.php remains unencoded and can be modified to suit your needs. However, it's recommended to avoid altering the core file itself, and instead, leverage the capability of using overrides. |
Here's how to apply language overrides:
~/langs/overrides/english.php.
For example: Original yourWHMCS/modules/servers/moduleName/langs/english.php: $_LANG['Search'] = 'Search'; Override yourWHMCS/modules/servers/moduleName/langs/overrides/english.php: $_LANG['Search'] = 'Look for'; |
| By following these steps, you can seamlessly implement language customizations without altering the core language file, ensuring your changes will not be lost after every module update. Remember that some of the modules have more than one language file, located under /addons and /servers paths. You may create the override files for both of them. |
Update Instructions
| An essential guidance through the process of updating the module is offered here. Ensure successful completion of the module update by carefully following each step, thereby preventing data loss or any unforeseen issues. |
Migration
| While using the 2.X version of our module, note that no data can be migrated due to the fact that we did not implement the migration from any of the previous versions of Hosting Renewals, so the module needs to be configured from scratch. Note: Remember that in case you wish to switch to the latest version, you need to reissue your license first. |
Upgrade Guide
| Seeking a solution that offers greater flexibility, customization tailored to your precise needs, and unrestricted availability? There is an option that not only proves to be cost-effective in the long run but also includes prioritized support services, making it a truly valuable investment. Opt for the Open Source version of your Hosting Renewals For WHMCS module to unlock these benefits. Follow a comprehensive guide covering the transition process, the advantages it brings, and step-by-step instructions on what to do next after the order has been successfully finalized. |
Common Problems
| 1. When you have problems with connection, check whether your SELinux or firewall does not block ports. |