WHMCS Widget For Zendesk
Contents |
About WHMCS Widget For Zendesk
| WHMCS Widget For Zendesk is a free addition which you can easily install in your own Zendesk. It allows you to see a preview of customers' details, products, domains and due invoices stored in multiple WHMCS instances within the Zendesk admin area. |
- WHMCS Customer Info Features:
| ✔ View Profile Details |
| ✔ View Ordered Products |
| ✔ View Assigned Domains |
| ✔ View Due Invoices |
- General Info:
| ✔ Toggle Display Of Client Contact Info, Products And Due Invoices |
| ✔ Connects Multiple Zendesk Brands With WHMCS Instances |
| ✔ Supports .htaccess Base Authentication |
| ✔ Supports Role Restrictions |
| ✔ Supports WHMCS Proxy And IP Addresses Whitelist |
| ✔ Logs Unauthorized WHMCS Access Attempts |
Installation
| Installation process of this widget is very simple and should not cause many problems. Let's begin! |
| 1. Download the widget from here and extract it. You can also install it directly from Zendesk Marketplace. Inside you will find:
|
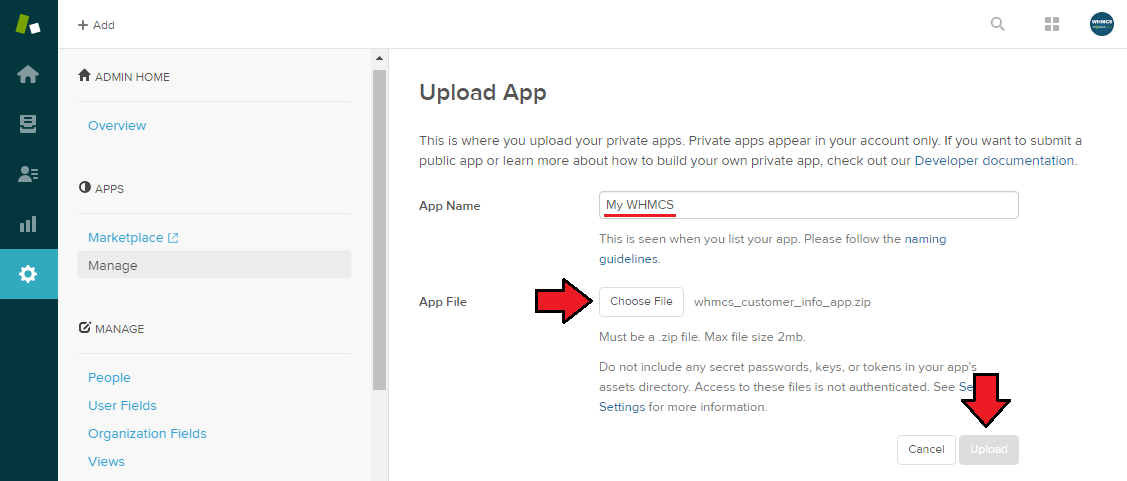
| 2. Log in to your Zendesk admin area, go to 'Manage' under 'APPS' category and click on 'Upload private app' button. |

|
| Note: If you do not see the 'Upload private app' button, then you most likely have an insufficient plan. Private apps are only available for 'Professional' and 'Enterprise' Zendesk plans. In that case try installing app directly from Zendesk Marketplace but you will still have to manually upload some files to your WHMCS. |
| 3. Afterwards enter app name, add previously downloaded 'whmcs_customer_info_app.zip' file and press 'Upload'. |
|
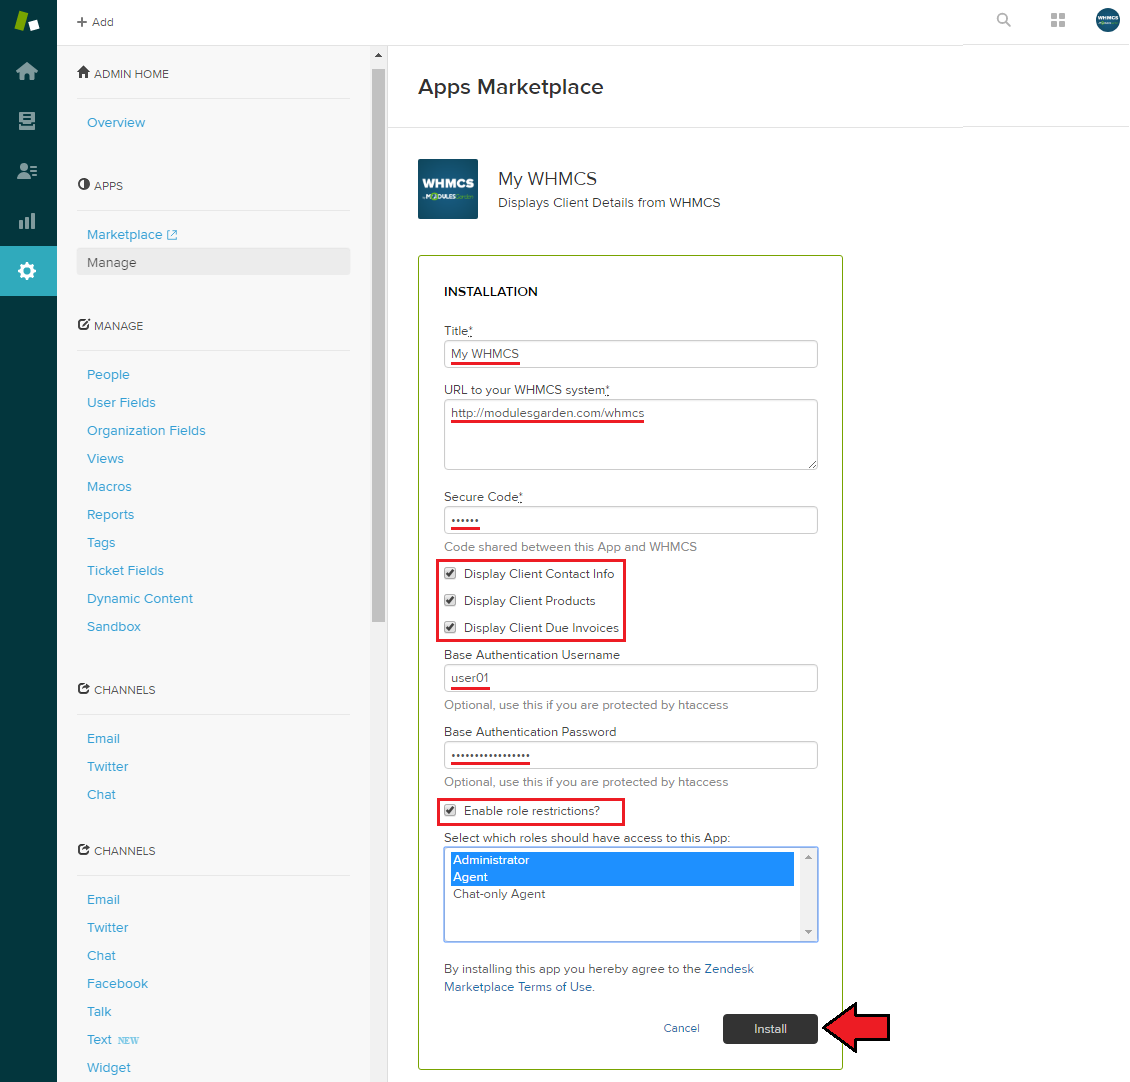
| 4. Enter the title, URL to your WHMCS system, secure code, then check the options that interest you the most and finally click on 'Install' button. In addition, if your WHMCS is protected by a base authentication, you can enter the username and password for your .htaccess. |
|
| Note: If you use 'Zendesk Multibrand' feature you can also put several addresses in brand_name|brand_URL format to establish communication with your multiple WHMCS instances. For example: |

|
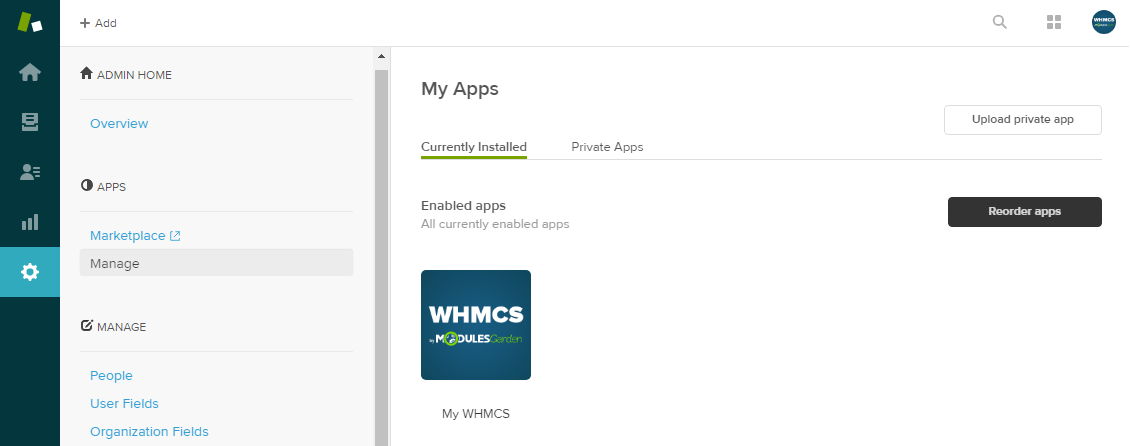
| 5. As it is shown on the screen below, app has been installed correctly. |
|
| 6. Afterwards upload 'includes' folder, mentioned in the 1st step of this guide, into your main WHMCS directory. Files included in the folder are responsible for communication between Zendesk widget and WHMCS data. |
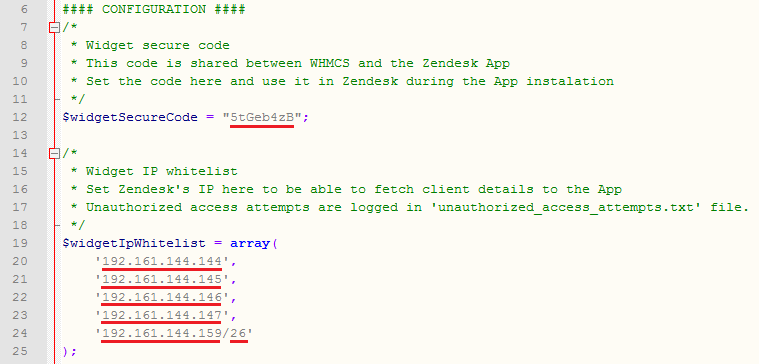
| 7. Now, edit 'customer_info.php' file. Enter your secure code into $widgetSecureCode variable and whitelist Zendesk servers IP under $widgetIpWhitelist variable as presented on the following screen.
Since version 1.1.0 of the widget you can also provide IP addresses using CIDR method. For example:
Note: Please keep in mind that there are more possible IP addresses, keep track of the Zendesk official documentation with the current list. |
|
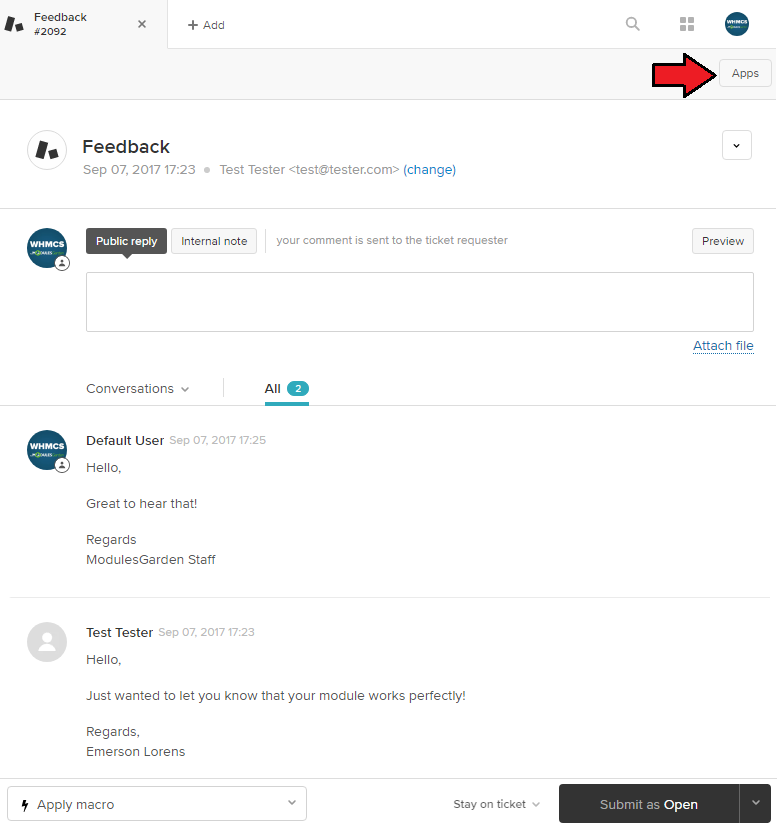
| 8. That's all, you have just successfully finished the installation of WHMCS Widget For Zendesk. Let's check the details of your WHMCS customer in Zendesk. To do so, press 'Apps' button when viewing a particular client ticket. |
|
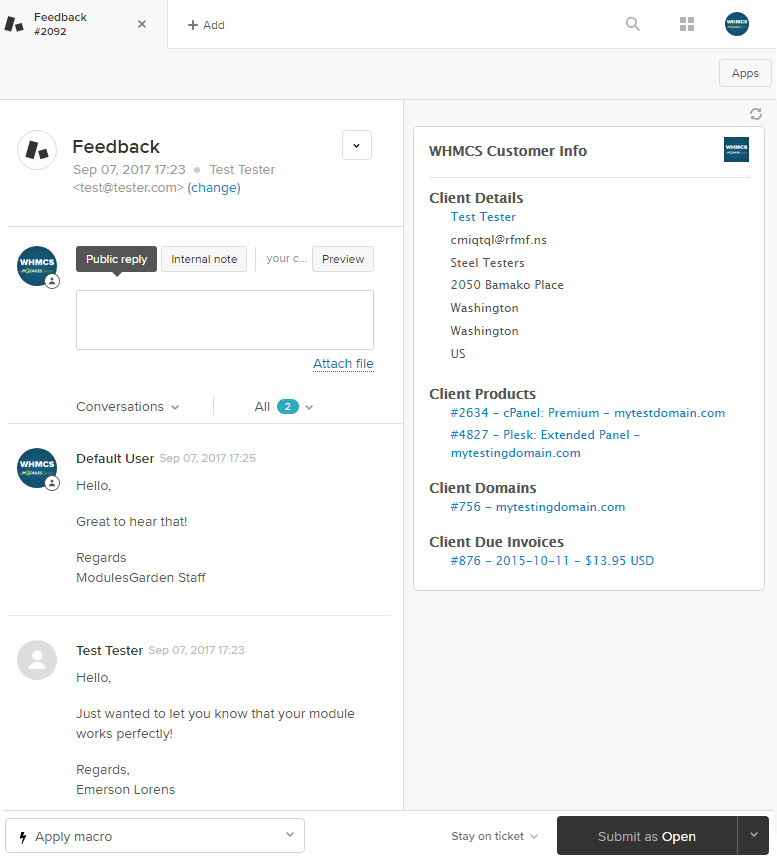
| 9. On the right side of the screen you can see now complete client details, information on products, domains and due invoices. Additionally, you can quickly get more details about specific customer info with just a single click. |
|
Tips
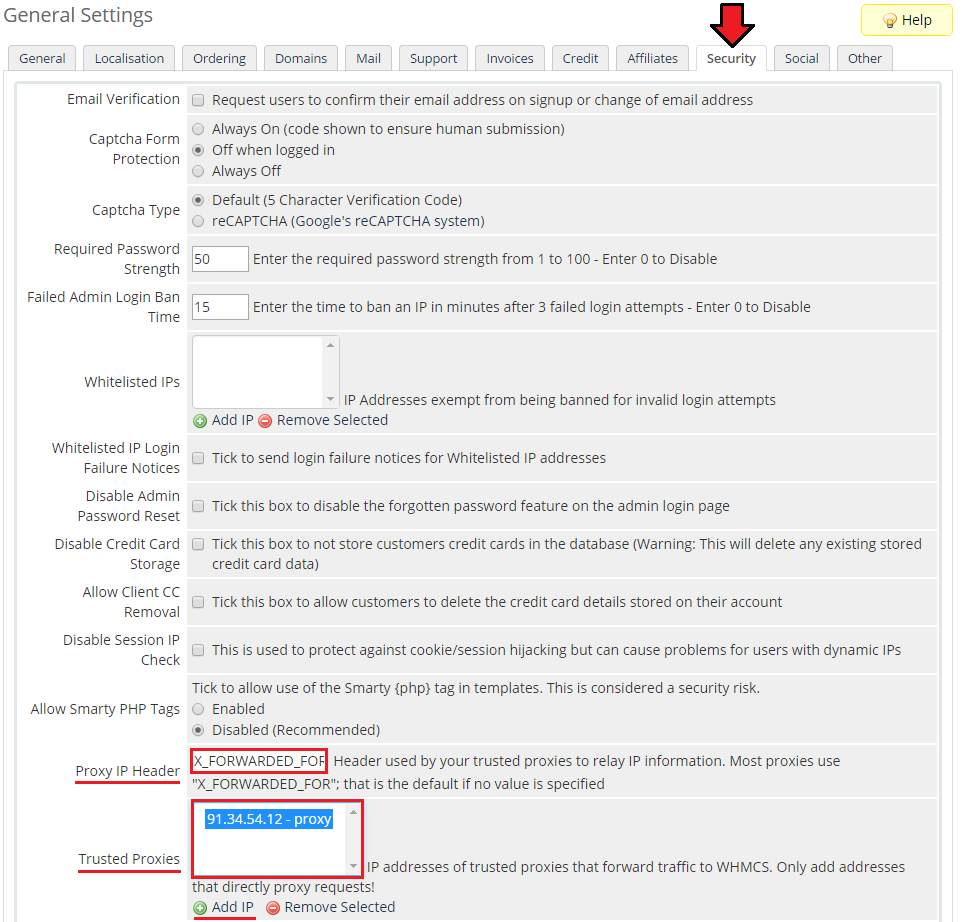
| 1. If you are using proxy the module also supports the 'Proxy IP Header' and 'Trusted Proxies' provided in WHMCS security settings. |
|
Common Problems
| WHMCS Problems: |
| 1. Wrong IP Address: This problem occurs when connection to WHMCS is not authorized. |
| Reason: IP address of the host, which is trying to connect, is not on the whitelist. Solution: Add the IP address to the '$widgetIpWhitelist ' array at the top of the customer_info.php file. |
| 2. Wrong Secure Code: This problem occurs when the secure code is not set properly. |
| Reason: Secure code set in Zendesk APP is not the same as '$widgetSecureCode' at the top of the 'customer_info.php' file. Solution: Set the same code in both places. |
| 3. Client not found: This error occurs when the client is not registered in WHMCS. |
| Reason: WHMCS cannot find the client's email in the database. Solution: Register the client in WHMCS. |
| Zendesk App Problems: |
| 1. Connection Error: This problem occurs when Zendesk cannot connect to WHMCS to get the client's details. |
| Possible Reasons: URL to your WHMCS system is not set properly. |
| Firewall, .htaccess etc. is blocking access to the 'customer_info.php' file. |
| Solution: Check URL set in APP settings. |
| Allow access to the 'customer_info.php' file from the outside of the server (you can also try to access the file from your browser). |