MX Registrar For WHMCS
Contents |
About MX Registrar For WHMCS
| MX Registrar For WHMCS is a domain registrar module that enables automation of Mexico (.mx) domains provisioning in your WHMCS. The module utilizes MX Registrar WHOIS Module and allows you to maintain full control over each ordered Mexican domain through your WHMCS admin area. |
- Module Features:
| ✔ Disable Auto Renewal After Successful Domain Registration |
| ✔ Disable Auto Renewal After Successful Domain Renewal |
| ✔ Suspend Domain X Days After Expiration |
| ✔ Delete Domain X Days After Expiration |
| ✔ Synchronize Domain Expiration Date And Status |
| ✔ Synchronize Domain Transfer Status |
| ✔ Toggle WHOIS Server |
- Admin Area Features:
| ✔ Register/Transfer/Renew Domain |
| ✔ Request Domain Deletion |
| ✔ Approve/Reject/Cancel Domain Transfer |
| ✔ Update Contact Details |
| ✔ Update Nameservers |
| ✔ Get EPP Code |
| ✔ Lock/Unlock Registrar |
| ✔ Toggle Domain Auto Renewal |
- Client Area Features:
| ✔ Enable/Disable Domain Auto Renewal |
| ✔ Manage Nameservers |
| ✔ Update Contact Details |
| ✔ Get EPP Code |
- General Info:
| ✔ Utilizes MX Registrar WHOIS Module |
| ✔ Supports TLS 1.1 and 1.2 |
| ✔ Supports PHP 8.1 Back To PHP 7.3 |
| ✔ Supports WHMCS Themes "Six" And "Twenty-One" |
| ✔ Supports WHMCS V8.8 Back To WHMCS V8.3 |
| ✔ Requires ionCube Loader V12 Or Later |
| ✔ Easy Module Upgrade To Open Source Version |
Installation and Configuration
| This tutorial will show you how to successfully install and configure MX Registrar For WHMCS. We will guide you step by step through the whole installation and configuration process. |
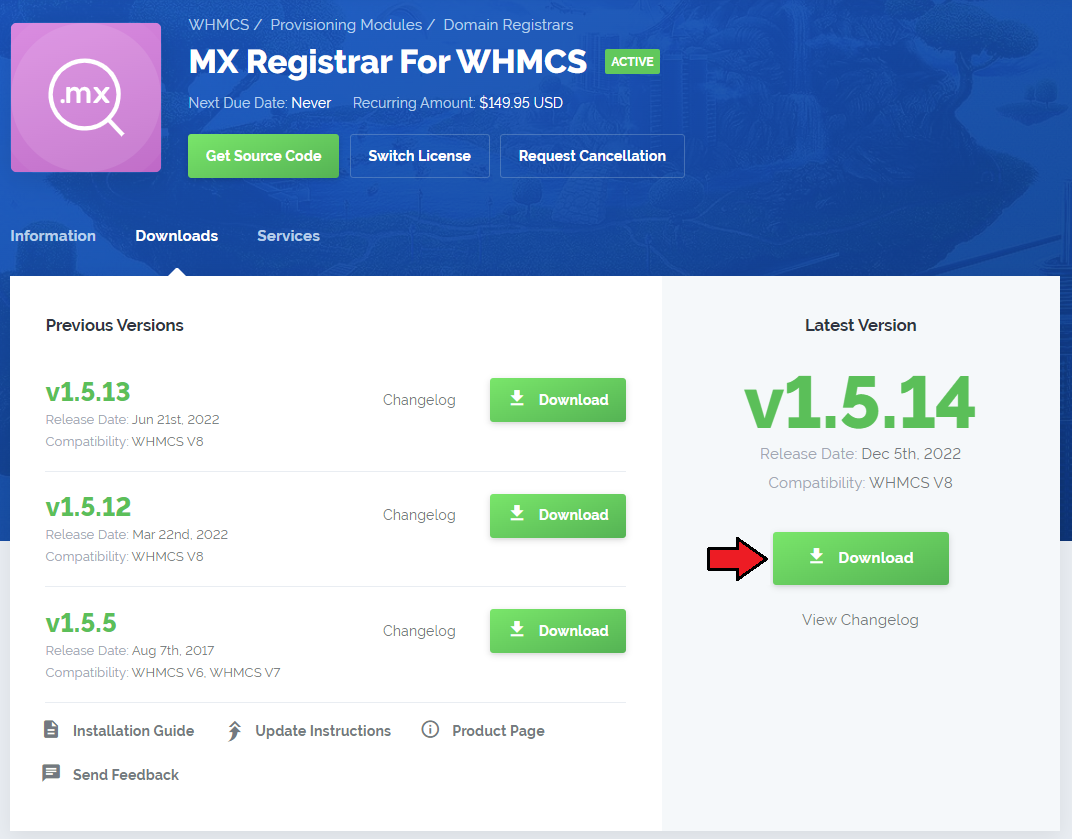
| 1. Log in to our client area and download the module. |
|
| 2. In the downloaded file you might find one or two packages that support different PHP versions. In the most recent versions of the module, you will find only one package that supports PHP 7.2 and later. |
| Previous updates of the module may contain two packages dedicated to various PHP versions. The first one that supports PHP 5.6 up to PHP 7.1, and the second one addressed to PHP 7.2 up to PHP 7.4. |

|
| Note: You can check the current PHP version in your WHMCS. To do so, proceed to 'Utilities' → 'System' → 'PHP Info'. |
| 3. Extract the package and upload its content into the main WHMCS directory. The content of the package to upload should look like this. |

|
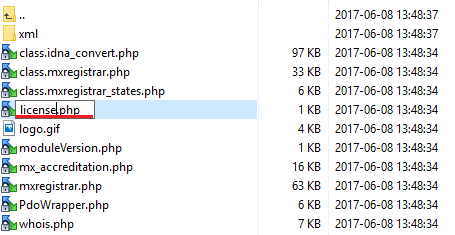
| 4. When you install MX Registrar For WHMCS for the first time you have to rename 'license_RENAME.php' file. File is located in 'modules/registrars/mxregistrar/license_RENAME.php' . Rename it from 'license_RENAME.php' to 'license.php' . |
|
| 5. In order to configure your license key, you have to edit a previously renamed 'license.php' file. Enter your license key between quotation marks as presented on the following screen. You can find your license key in our client area → 'My Products' . |

|
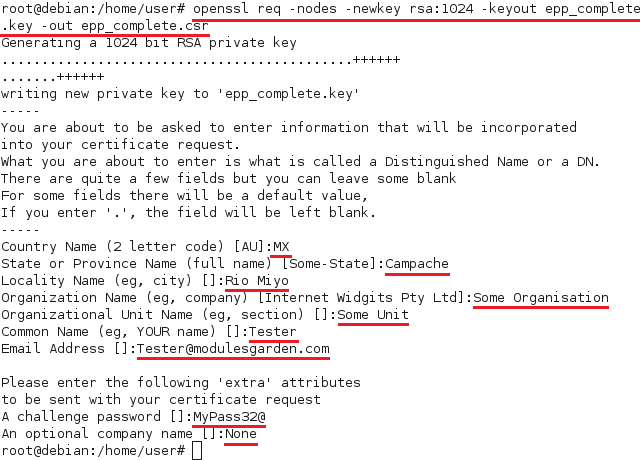
6. Now you have to generate your certificate. To do so, open your linux root console and paste this line:openssl req -nodes -newkey rsa:1024 -keyout epp_complete.key -out epp_complete.csr where: /var/www/whmcs/epp_complete.csr then it will be generated directly in the pointed catalog. Afterwards, enter details you will be asked for. |
|
| 7. Send 'epp_complete.csr' file along with your host IP to Registry.MX and wait for an email with certificate. As soon as you get it, create new file 'epp_complete.pem' which must be composed of generated earlier 'epp_complete.key', certificate and certificate file that you have received from Registry.MX. -----BEGIN RSA PRIVATE KEY----- MIICXAIBAAKB3gwIBAgICdAIcw9F... -----END RSA PRIVATE KEY----- -----BEGIN CERTIFICATE----- MIID6zCCA1SgAwIBAgICAIcwDQYJ... -----END CERTIFICATE----- |
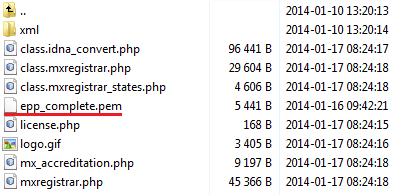
| 8. Copy 'epp_complete.pem' file you have just created to your MX Registrar module folder, which is located in 'your_whmcs/modules/registrars/mxregistrar' . |
|
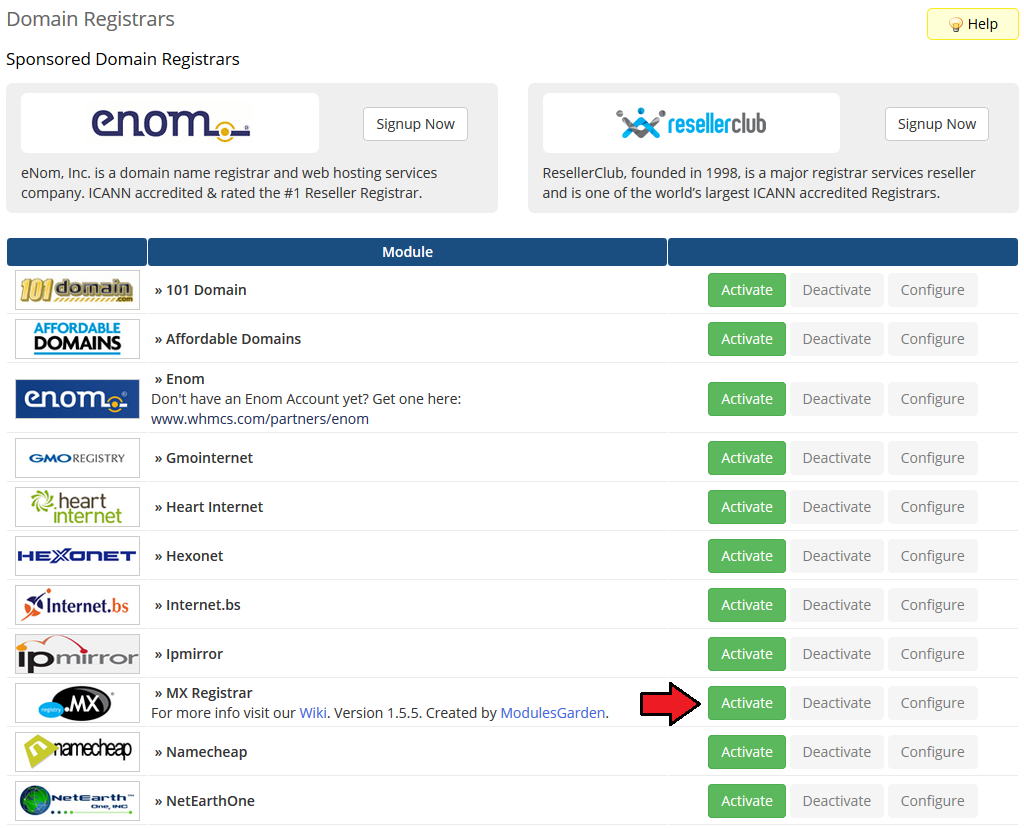
| 9. Now you have to activate the module in your WHMCS system. Log in to your WHMCS admin area and go to 'Setup' → 'Products/Servers' → 'Domain Registrars' . |
|
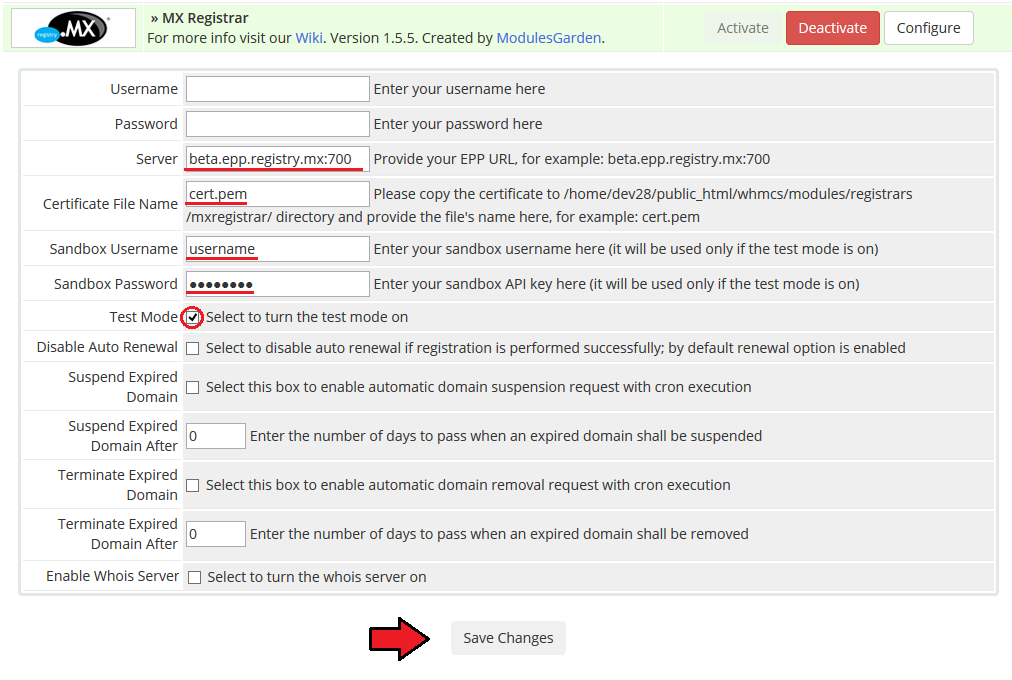
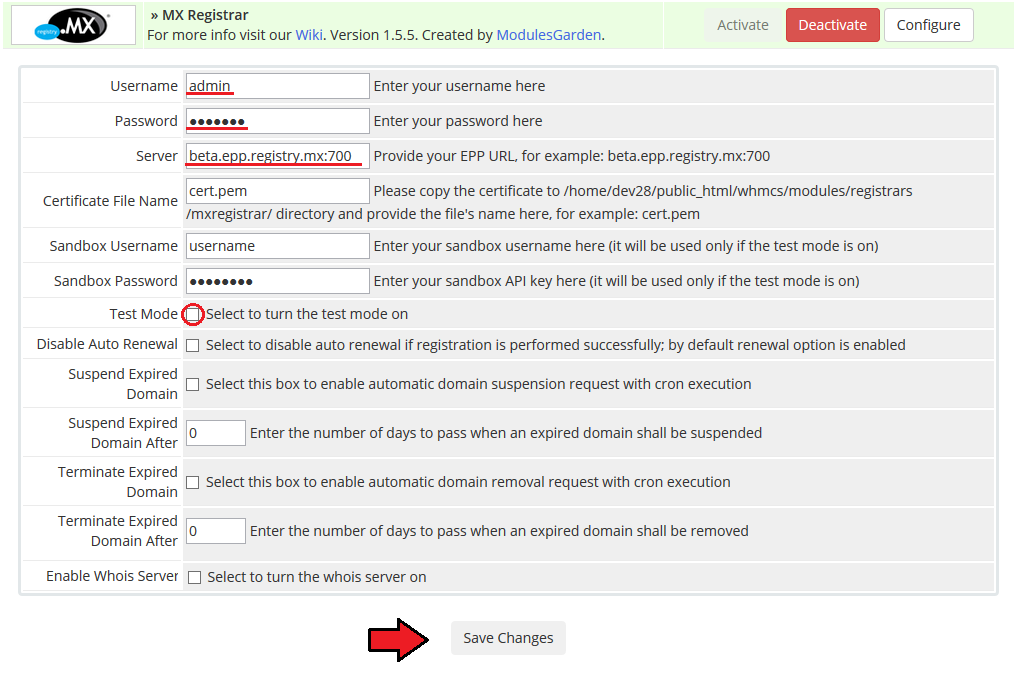
| 10. In the next step you need to configure test mode. To do so, enter 'Server' , 'Certificate File Name' , 'Sandbox Username' and 'Sandbox Password' . |
|
Accreditation
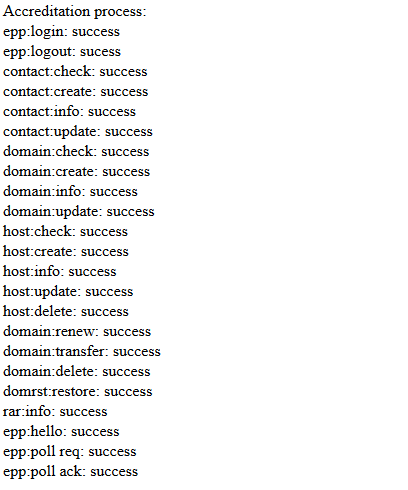
| 11. In order to connect with live server you have to pass accreditation test. To do so, enter 'your_whmcs/modules/registrars/mxregistrar/mx_accreditation.php?domain=testmx0.mx' to your web browser. |
|
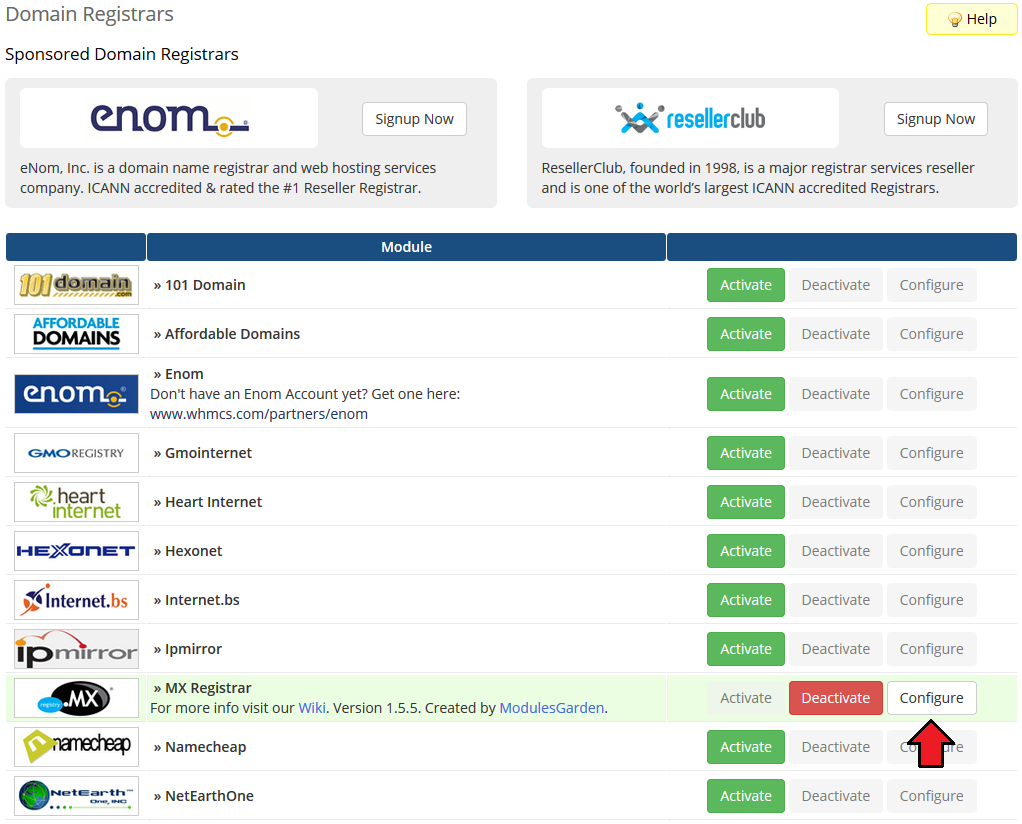
| 12. Now go to 'Setup' → 'Products/Servers' → 'Domain Registrars' . Afterwards find 'MX Registrar' and press 'Configure' button. |
|
| 13. Enter 'Username' , 'Password' and 'Server' for live server and unmark 'Test Mode' checkbox. Afterwards press 'Save Changes' . |
|
| You have just successfully installed and configured MX Registrar For WHMCS. |
Management
| MX Registrar allows you to manage your TLDs in your WHMCS system.
In this short guide we will present you the possibilities of our module. |
Management of TLDs
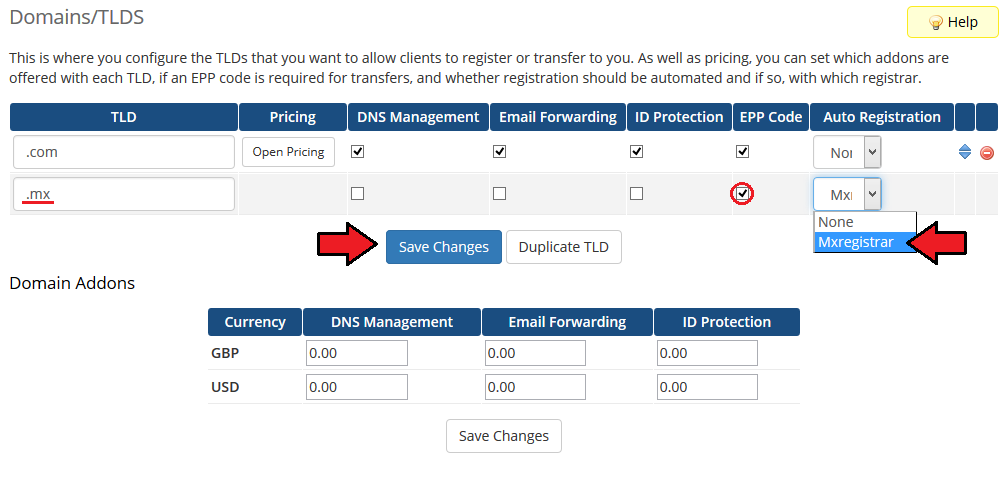
| Adding a new TLD is quite simple. To add it, go to 'Setup' → 'Products/Services' → 'Domain Pricing' . Enter your TLD and choose 'MX Registrar' from 'Auto Registration' dropdown menu as shown on the screen below. |
|
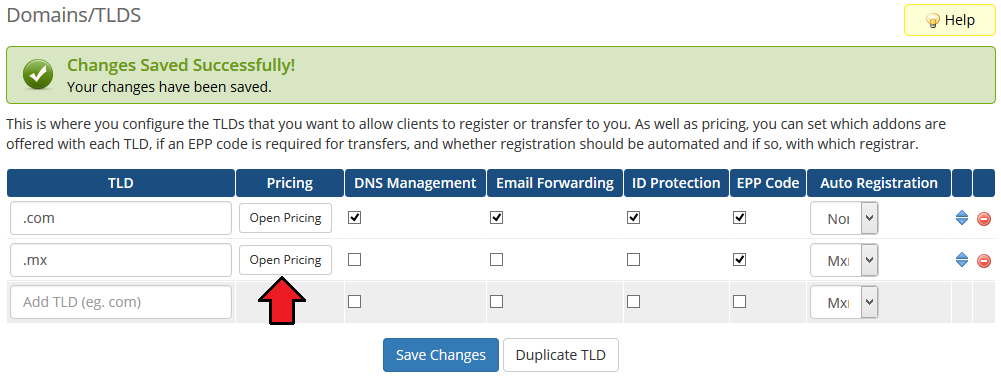
| As you can see 'Open Pricing' field has appeared. Click on it and set up your pricing. |
|
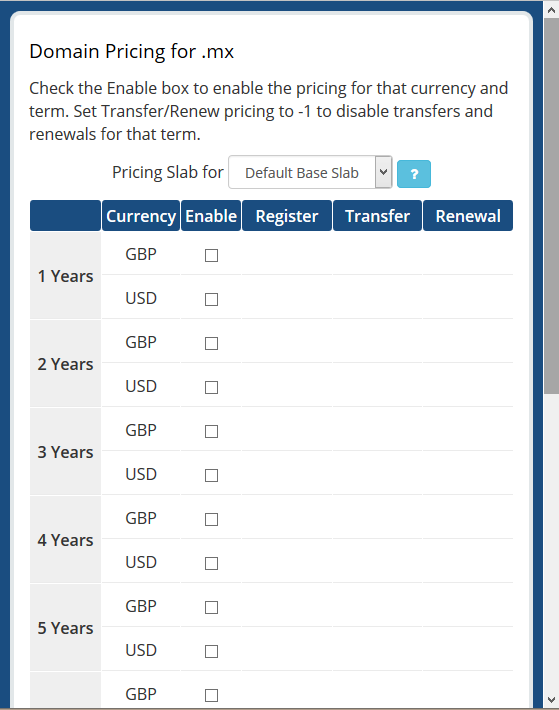
| In newly opened window you can set your prices. Remember to save the changes! |
|
| MX Registrar For WHMCS can now use its custom MX Registrar WHOIS. If you wish to use such option you have to replace the default WHMCS WHOIS with the custom one. |
| For WHMCS V7 Create a custom whois.json file located at WHMCS_DIR/resources/domains/whois.json |
Line format that shall be added at the end of the above file:
.tld|YOUR_WHMCS/modules/registrars/mxregistrar/whois.php?domain= |
| Take a look at the exemplary line: |

|
| For WHMCS V6 or earlier Add them to the already existing WHMCS_DIR/includes/whoisservers.php file. |
Line format that shall be added at the end of the above file:
.tld|YOUR_WHMCS/modules/registrars/mxregistrar/whois.php?domain=|HTTPREQUEST-free |
| Take a look at the exemplary line: |

|
| Remember to change '.tld' in the beginning of the line to the tld (i.e. .mx or com.mx) you wish to set up!
If you have added the line properly, while checking domain availability WHMCS will be using this custom WHOIS MX Registrar. |
Ordering
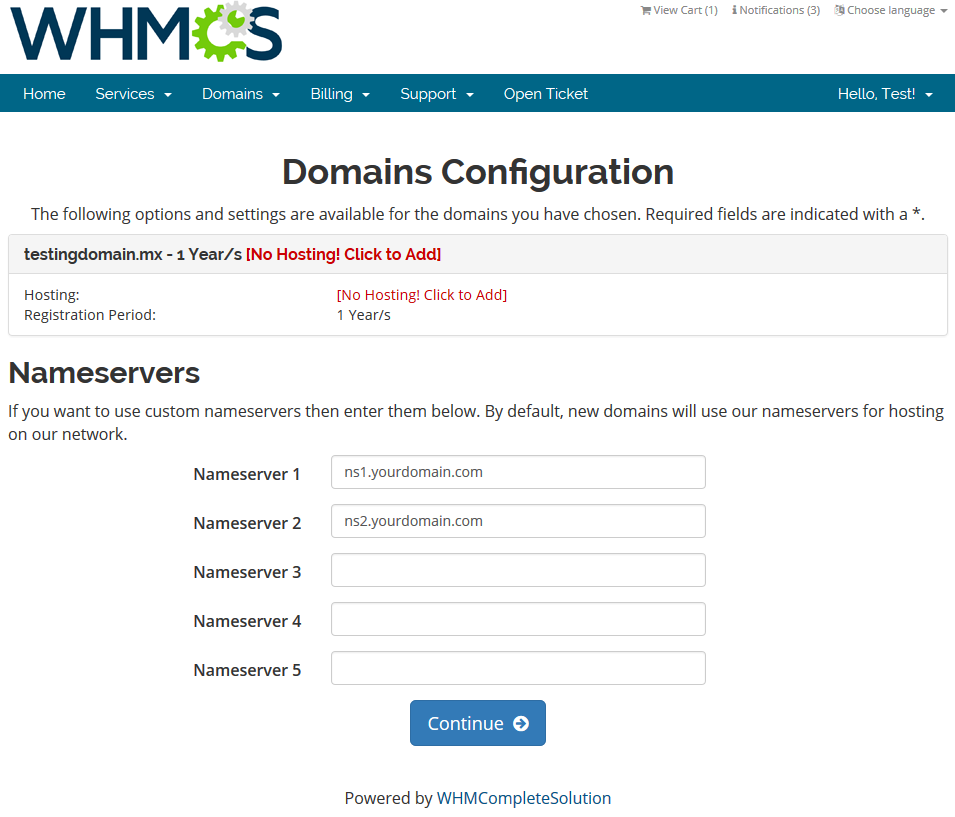
| Ordering .mx domain goes alike ordering other domains. A typical order is presented on the screen below. |
|
Management of Domain
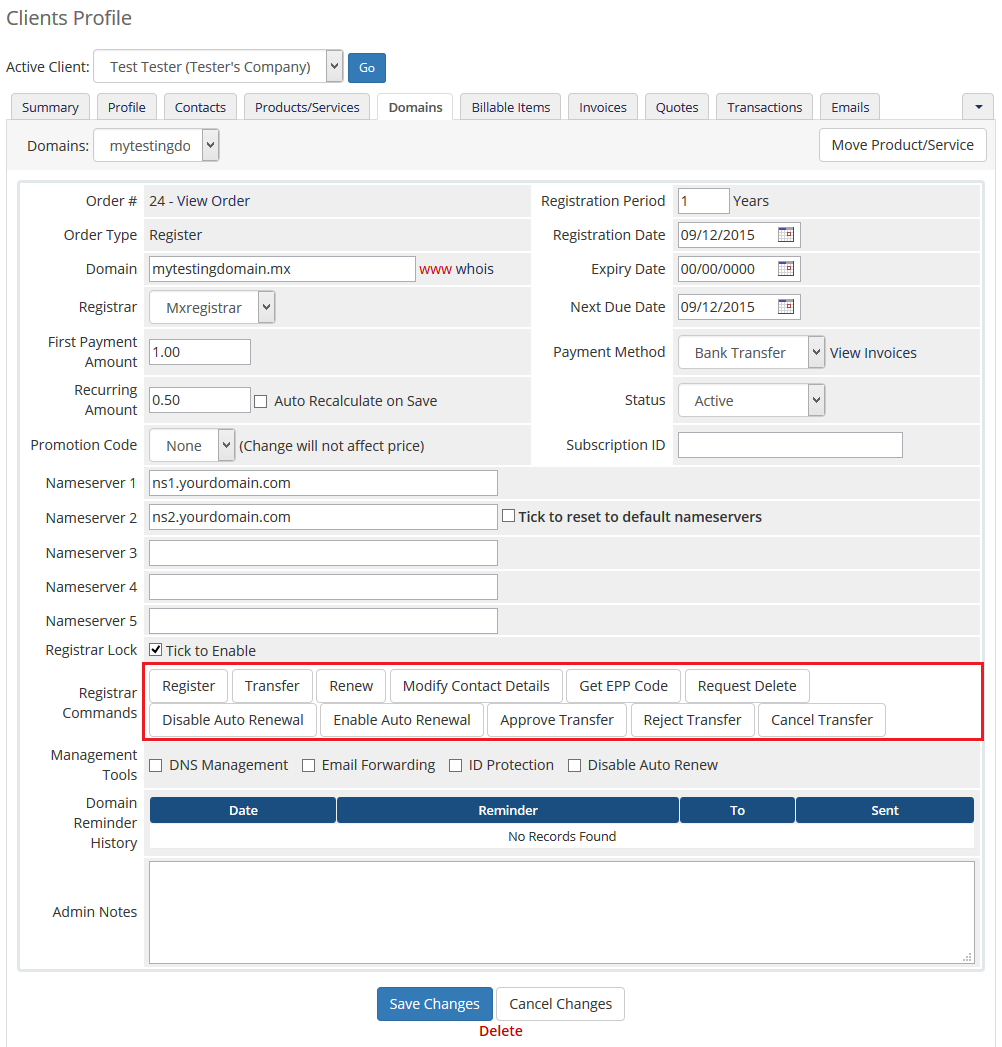
| In the admin area client overview → 'Domains' tab you can manage all the aspects of the domain. Along with basic actions like 'Register' , 'Renew' and 'Transfer' you can order 'Modify Contact Details' , 'Get EPP Code' and 'Request Delete' . |
|
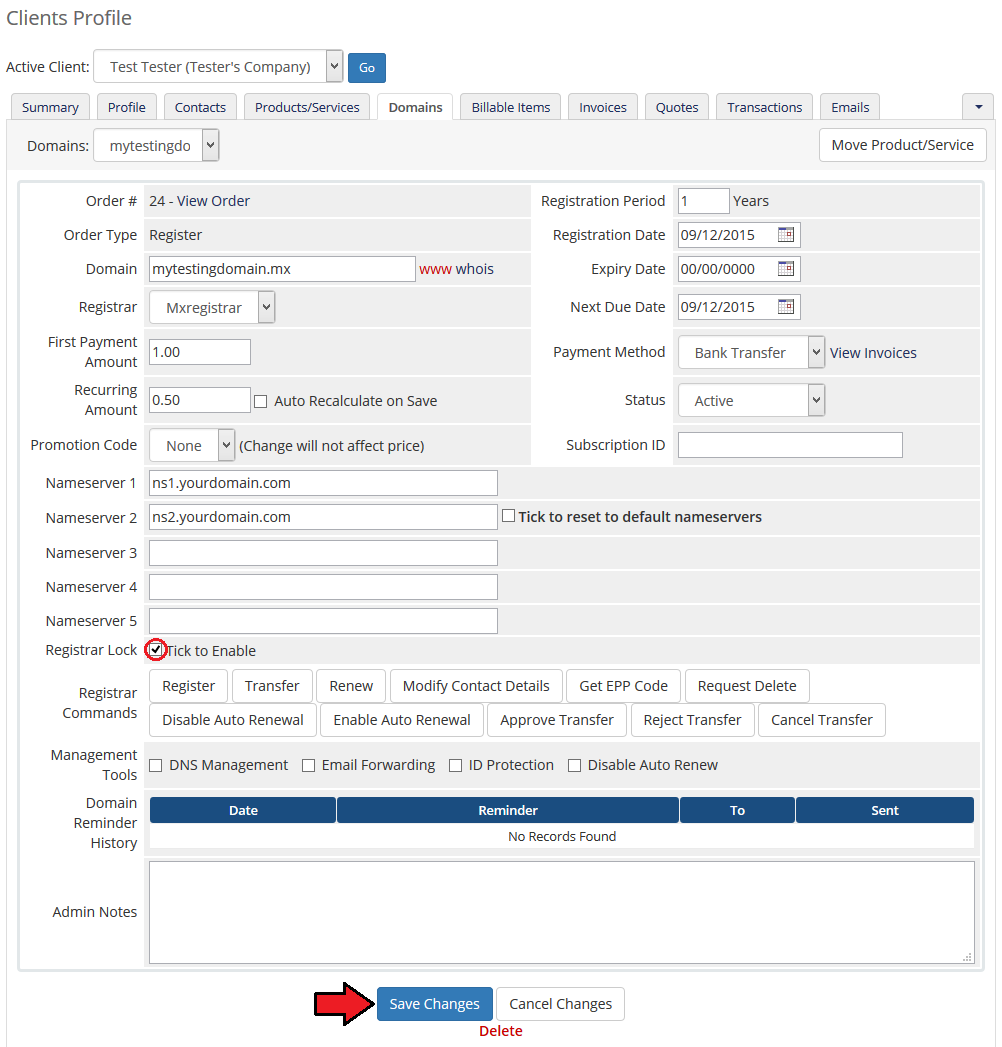
| Last but not least ability is locking client's domain, preventing them from making any changes to it. To do so, simply tick 'Registrar Lock ' and press 'Save Changes' . |
|
Management of Expired Domain
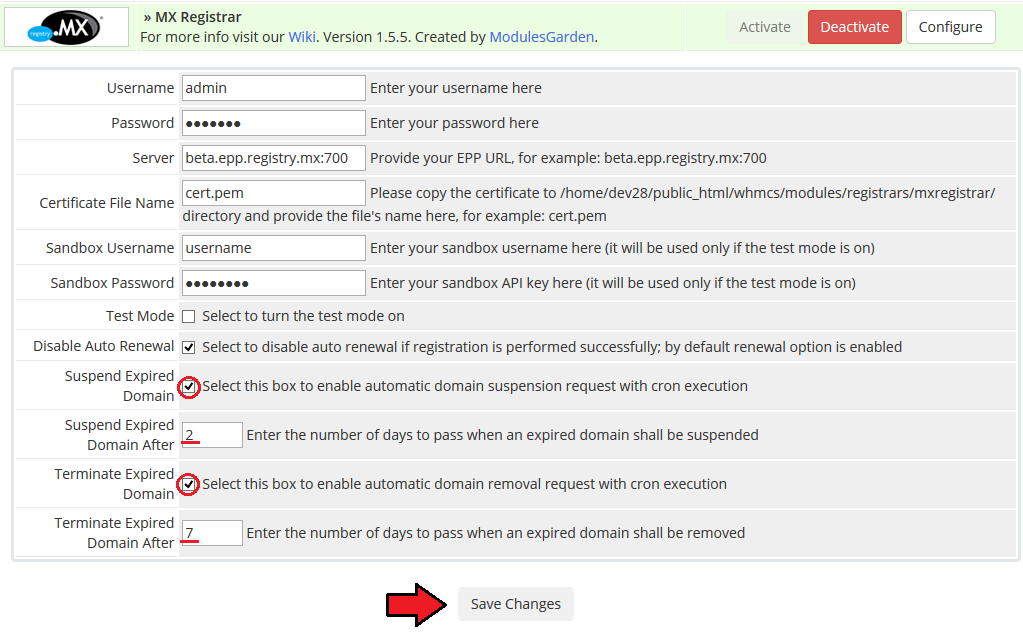
| Thanks to our module, you can automatically suspend and terminate expired domain. Cron job used for automatic suspension and termination is called along with WHMCS cron job. |

|
| To suspend the domain 2 days after the domain expiration date and terminate the domain completely after the next 5 days, use the following configuration: Mark both 'Suspend Expired Domain' and 'Terminate Expired Domains' checkboxes. |
|
Tips
| 1. If you want to view logs on the module, proceed to 'Utilities' → 'Logs' → 'Module Log'. Make sure 'Debug Logging' is enabled. |
Update Instructions
| An essential guidance through the process of updating the module is offered here. Ensure successful completion of the module update by carefully following each step, thereby preventing data loss or any unforeseen issues. |
Upgrade Guide
| Seeking a solution that offers greater flexibility, customization tailored to your precise needs, and unrestricted availability? There is an option that not only proves to be cost-effective in the long run but also includes prioritized support services, making it a truly valuable investment. Opt for the Open Source version of your MX Registrar For WHMCS module to unlock these benefits. Follow a comprehensive guide covering the transition process, the advantages it brings, and step-by-step instructions on what to do next after the order has been successfully finalized. |
Common Problems
| 1. When you have problems with connection, check whether your SELinux or firewall does not block ports. |
2. If you still have problems with connection, check your certificate. To do so, open console and use this command (place it in one line):
openssl s_client -cert  /your_whmcs/modules/registrars/mxregistrar/epp_complete.pem -key
/your_whmcs/modules/registrars/mxregistrar/epp_complete.pem -connect beta.epp.registry.mx:700
It is important that port 700 (or other currently used) must be open to avoid problems with connection. |
| 3. When you get 'Object does not exists' error, ensure that your registrar module have unmarked 'Test Mode' checkbox. |
| 4. When you are receiving incorrect EPP code, ensure you are owner of domain. |
| 5. If one of the TLDs you have configured is unavailable, please make sure you have set up pricing in a default currency. |
| 6. If you are getting errors about incorrect 'State' , check if you are using correct accent for the word. For example 'Mexico' is incorrect state name, you should use 'México' instead. |