Hosting Quota Notifications For WHMCS
Contents |
About Hosting Quota Notifications For WHMCS
| Hosting Quota Notifications For WHMCS will allow you to manage multiple brands on multiple websites while using just a single WHMCS installation.
You will be able to customize your brand through modifying factors like client area template, logo or brand language, and preview the changes with just a single click. |
- Admin Area Features:
| ✔ |
| ✔ |
| ✔ |
- General Info:
| ✔ Multi-Language Support |
| ✔ Supports WHMCS V5 and Later |
Installation
| This tutorial will show you how to successfully install and configure Hosting Quota Notifications For WHMCS. We will guide you step by step through the whole installation and configuration process. |
Installation
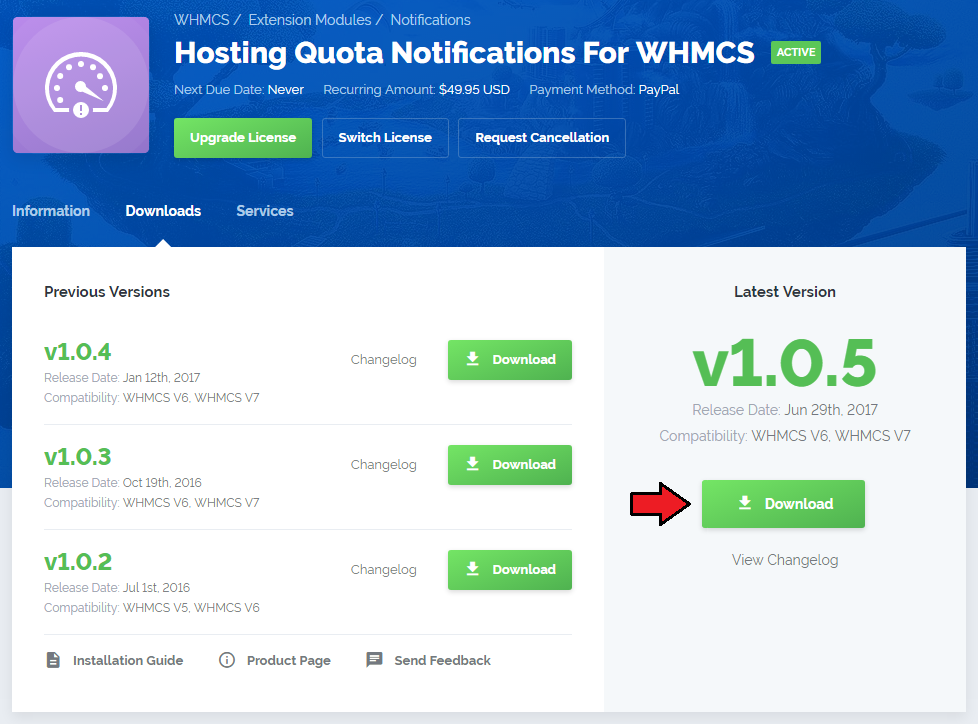
| 1. Log in to your client area and download Hosting Quota Notifications For WHMCS. |
|
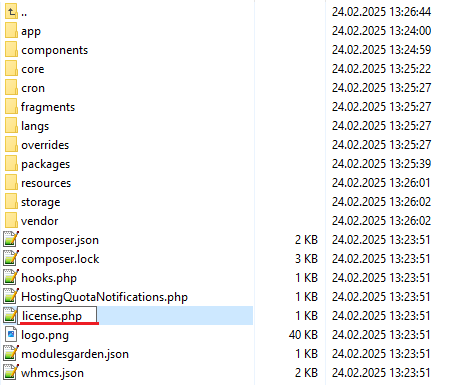
| 2. Upload and extract the module into the main WHMCS directory. Files in your WHMCS directory should look like this. |

|
| 3. When you install Hosting Quota Notifications for the first time you have to rename 'license_RENAME.php' file. File is located in 'modules/addons/hosting_quota_notifications/license_RENAME.php' . Rename it from 'license_RENAME.php' to 'license.php' . |
|
| 4. In order to configure your license key, you have to edit a previously renamed 'license.php' file. Enter your license key between quotation marks as presented on the following screen. You can find your license key in your client area → 'My Products' . |

|
Activating Addon Module
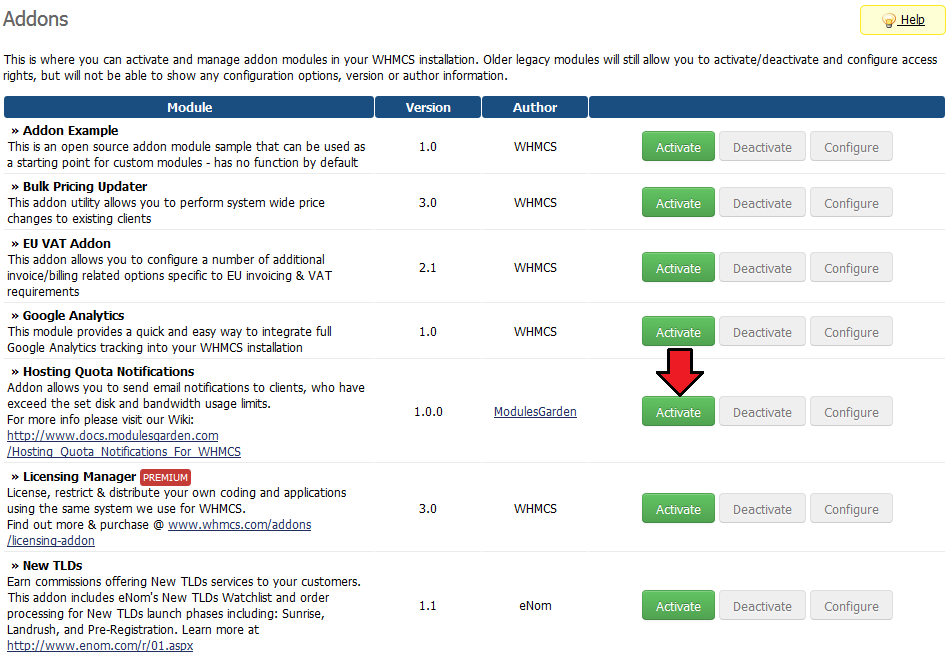
| 5. Now you have to activate the module in your WHMCS system. Log in to your WHMCS admin area. Go to 'Setup' → 'Addon Modules' . Afterwards, find 'Hosting Quota Notifications' and press 'Activate' button. |
|
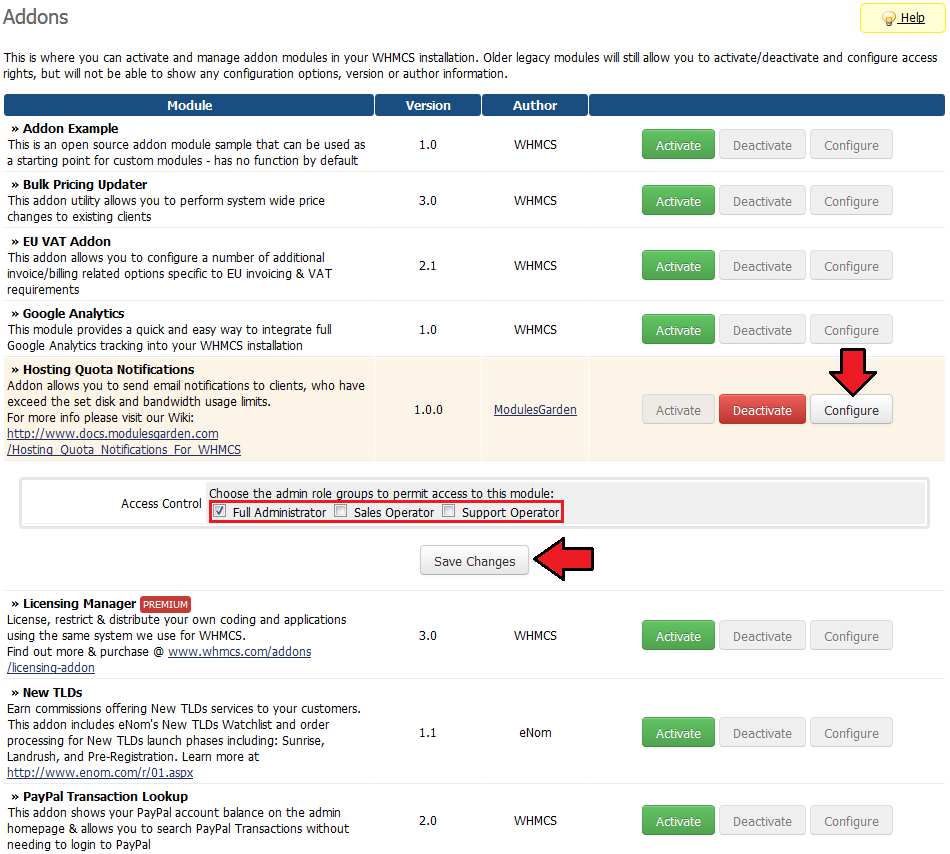
| 6. In the next step you need to permit access to this module. To do so click on 'Configure' button, tick 'Access Control' near required admin role groups and press 'Save Changes' . |
|
Additional Settings
| 7. Now, set up 'logos' folder as writable. Folder is located in 'you_whmcs/modules/addons/Hosting Quota NotificationsFunctionality/storage/' . |

|
| 8. The last step is replacing 'invoicepdf.tpl' file with 'invoicepdf_RENAME.tpl' for each of the templates used. 'invoicepdf_RENAME.tpl' is located in 'your_whmcs/templates/default/' . |
| File:HQN 7 1.png |
| 9. You have just successfully installed Hosting Quota Notifications For WHMCS! You can access your module in 'Addons' → 'Hosting Quota Notifications' . |
| File:HQN 8.png |
Configuration and Management
| In this section we will show you how to properly set up and use Hosting Quota Notifications For WHMCS. |
Dashboard
| Under 'Dashboard' you can find basic information about the module and current status of 'logos' folder. It is required to set up 'logos' folder as writable in order to upload logos of your brands. |
|
Tips
Common Problems
| 1. When you have problems with connection, check whether your SELinux or firewall does not block ports. |