Server Allocator For WHMCS
Contents |
About Server Allocator For WHMCS
| Server Allocator For WHMCS, much like a load balancer, will automatically match servers to your clients' products, guided by the criteria they specified when ordering. The module lets you create and configure your own switching rules, split them into groups and assign to them product groups as well as specified servers. |
- Admin Area Features:
| ✔ Add/Edit/Remove Switching Rules And Their Groups |
| ✔ Add Multiple Conditions/Products/Servers To Switching Rule |
| ✔ Assign Multiple Rules To Rules Group |
| ✔ Set Default Servers To Rules Group - Used If No Rule Is Applied |
| ✔ Set Load Balancing Allocation Type To Server With Most Or Least Free Space |
| ✔ Block Order If Server Is Full |
| ✔ Access Links To Order Form Of Products Configured According To Specified Rule |
- Client Area Features:
| ✔ Switch Assigned Server Automatically During Ordering Product - Depending On Applied Rule |
- Supported Rule Definitions:
| ✔ Clients |
| ✔ Configurable Options |
| ✔ Custom Fields |
| ✔ Product Addons |
- General Info:
| ✔ Supports All Server Types |
| ✔ Supports Most Provisioning Modules |
| ✔ Multi-Language Support |
| ✔ Supports PHP 8.3 Back To PHP 8.1 |
| ✔ Supports WHMCS V8.13 Back To WHMCS V8.10 |
| ✔ Requires ionCube Loader V14 Or Later |
| ✔ Easy Module Upgrade To Open Source Version |
Installation and Configuration
| This tutorial will show you how to successfully install and configure Server Allocator For WHMCS. We will guide you step by step through the whole installation and configuration process. |
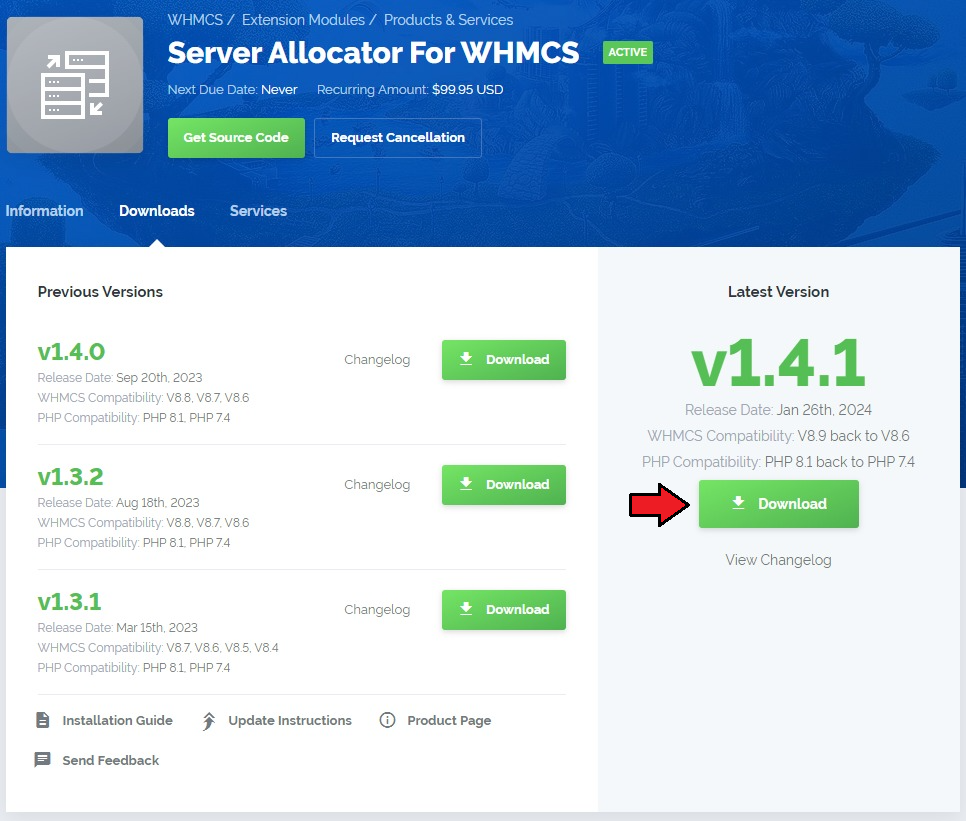
| 1. Log in to our client area and download the module. |
|
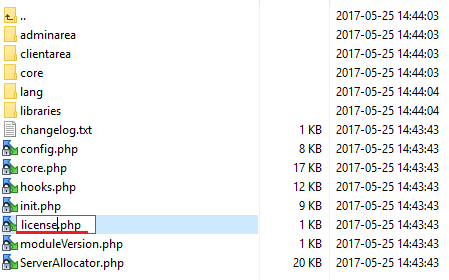
| 2. Extract the package and upload its content into the main WHMCS directory. The content of the package to upload should look like this. |
| 3. When you install Server Allocator For WHMCS for the first time you have to rename 'license_RENAME.php' file. File is located in 'modules/addons/serverswitcher/license_RENAME.php'. Rename it from 'license_RENAME.php' to 'license.php'. |
|
| 4. In order to configure your license key, you have to edit a previously renamed 'license.php' file. Enter your license key between quotation marks as presented on the following screen. You can find your license key in our client area → 'My Products'. |

|
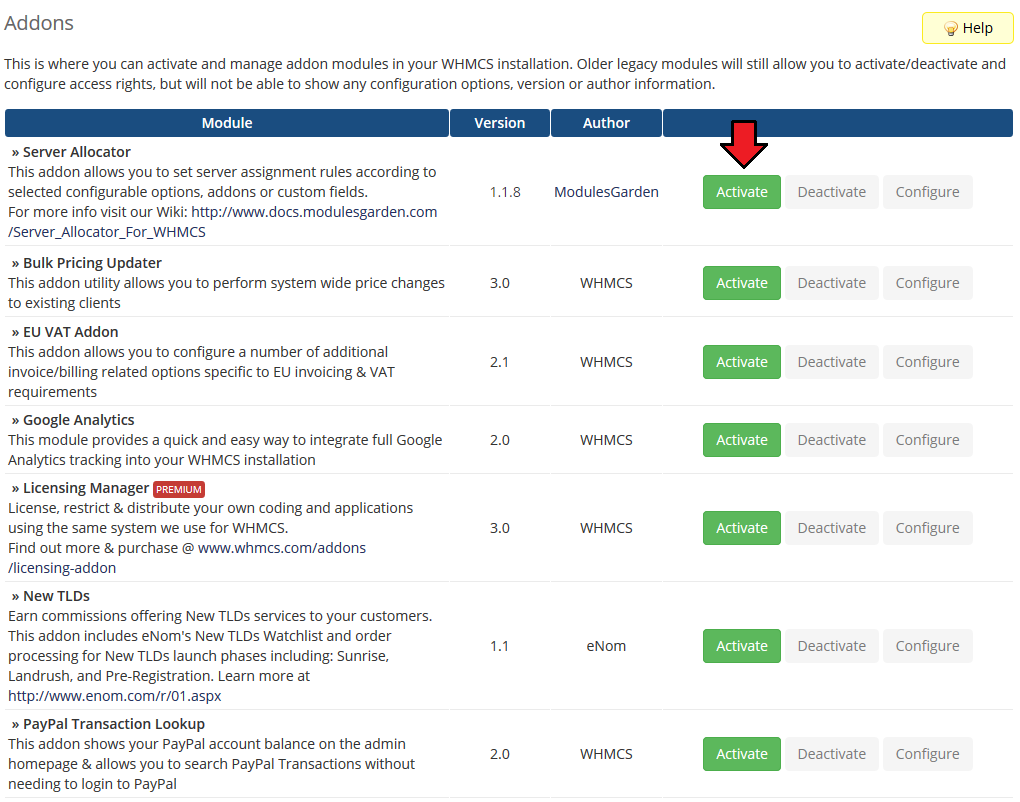
| 5. Now you have to activate the module in your WHMCS system. Log in to your WHMCS admin area. Go to the 'Setup' → 'Addon Modules' . Afterward, find 'Server Allocator' and press 'Activate' button. |
|
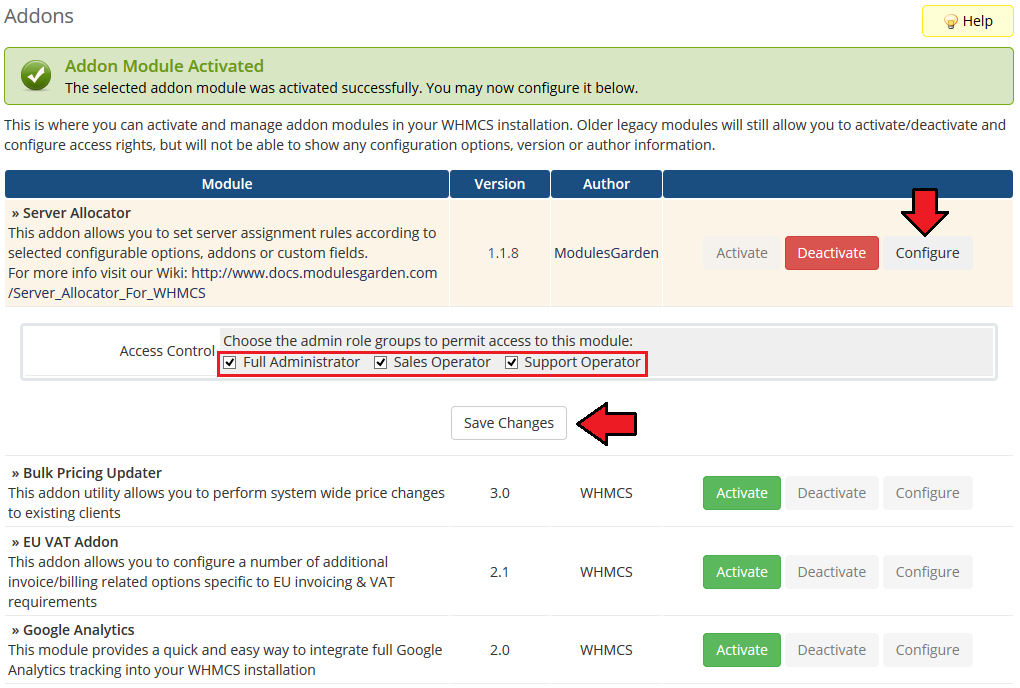
| 6. In the next step, you need to permit access to this module. To do so click on 'Configure' button, tick 'Access Control' near desired admin role groups and press 'Save Changes'. |
|
| 7. You have just successfully installed Server Allocator For WHMCS! |
Management
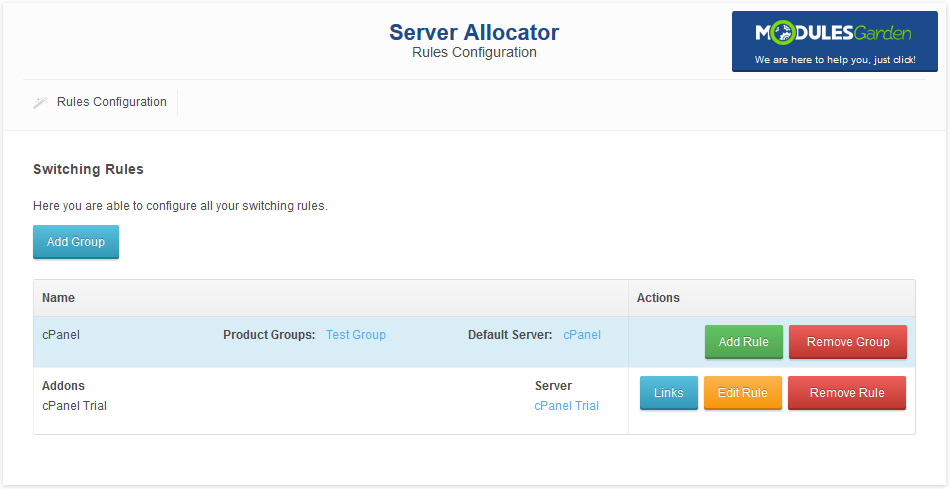
| Server Allocator For WHMCS allows you to automatically switch to the wanted server upon specific product configuration. |
|
Add Group
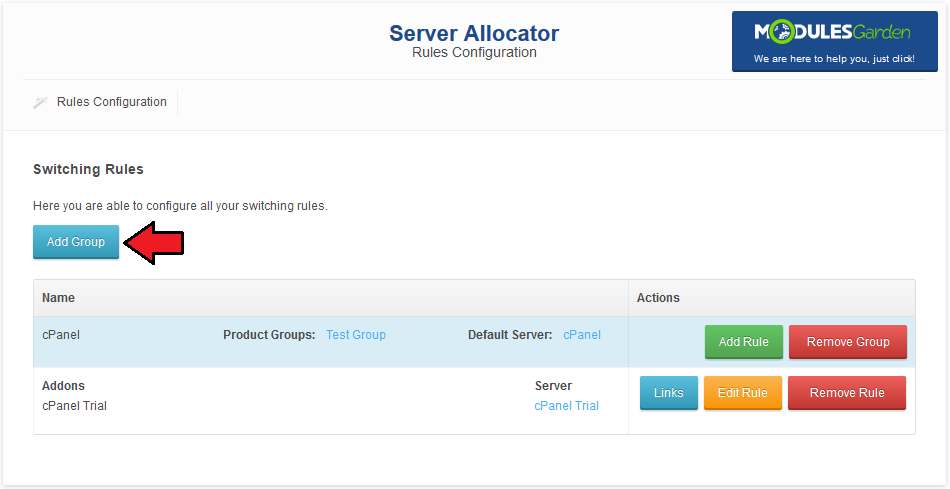
| In order to configure switching rules, proceed with creating a new group. Press 'Add Group' to proceed. |
|
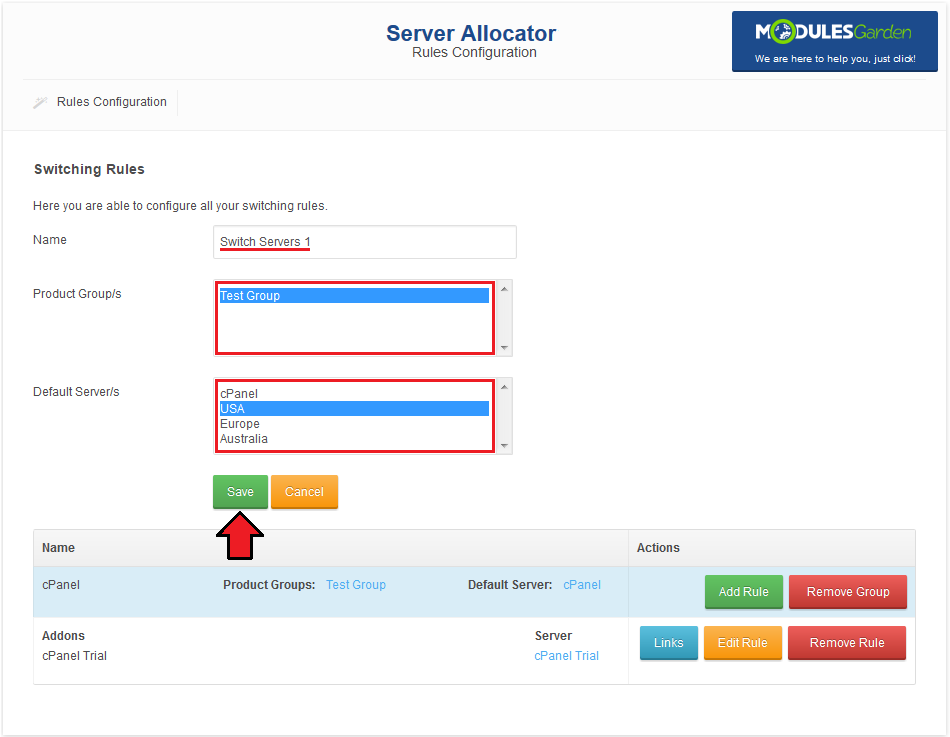
| Fill in group name and select desired product groups. Additionally, select default servers (Ctrl+mouse click for multi-select) if you wish to redefine default servers. |
|
Group Management
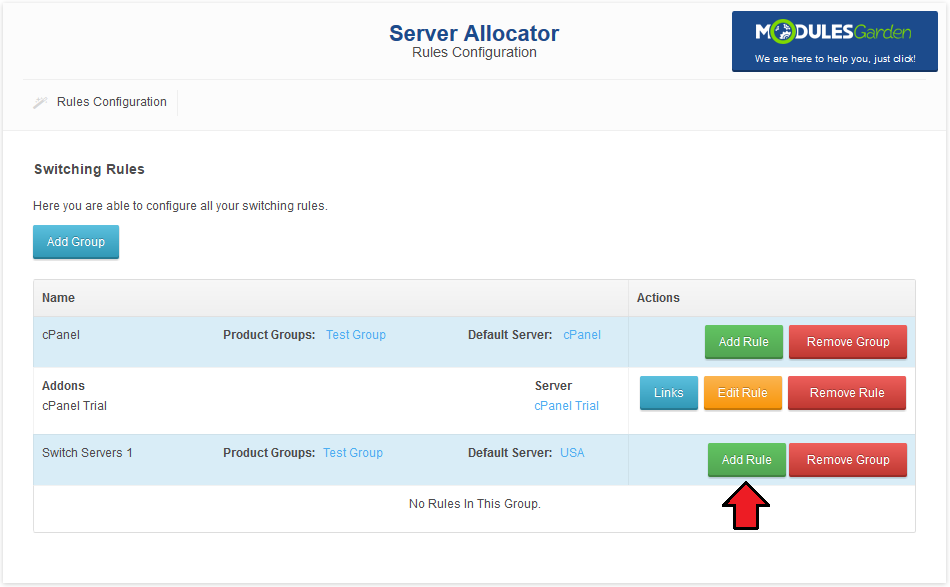
| Previously created group currently does not affect the system at all. Let's change that by adding a new rule. Press 'Add Rule' to proceed. |
|
| In the next step select the server type that the switch will apply to. Press 'Next'. |
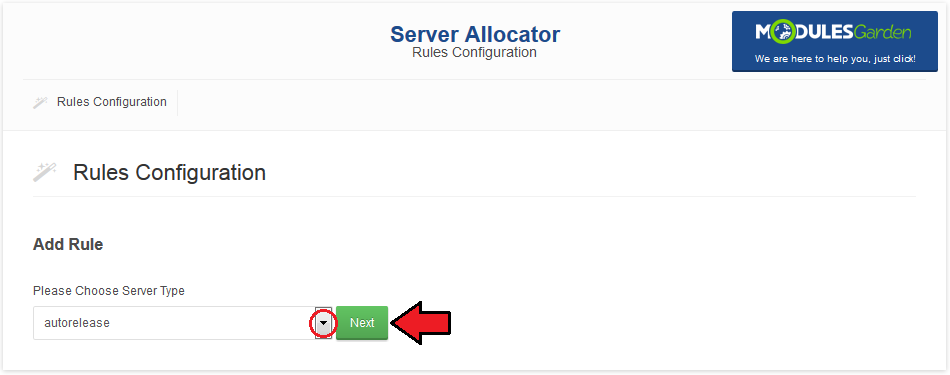
|
| Each rule can have multiple rule definitions. Important: Switch will be made only if all of the rule definitions are met. |
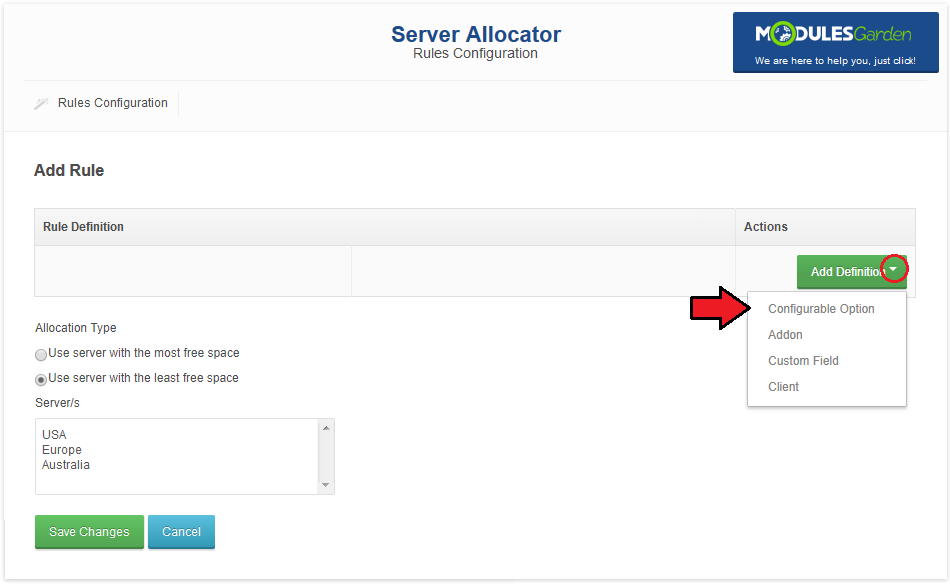
|
| For the purpose of this documentation, we have chosen a configurable option rule definition. Now, we have to select a specific configurable option and its value which needs to be chosen. |
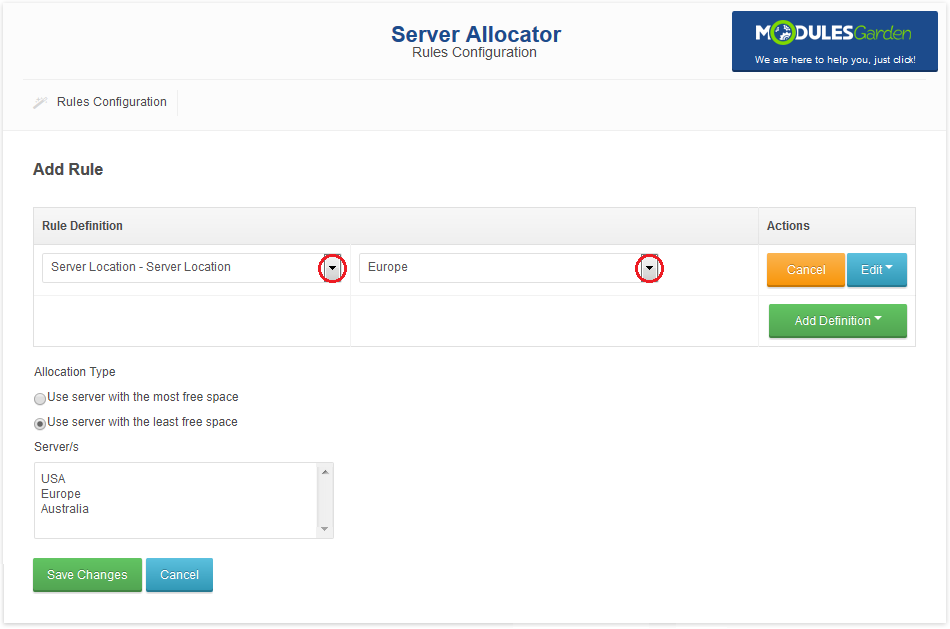
|
| Let's add one more rule definition, which in this case will be using product addon. Press 'Add Definition' → 'Addon' and choose product addon. |
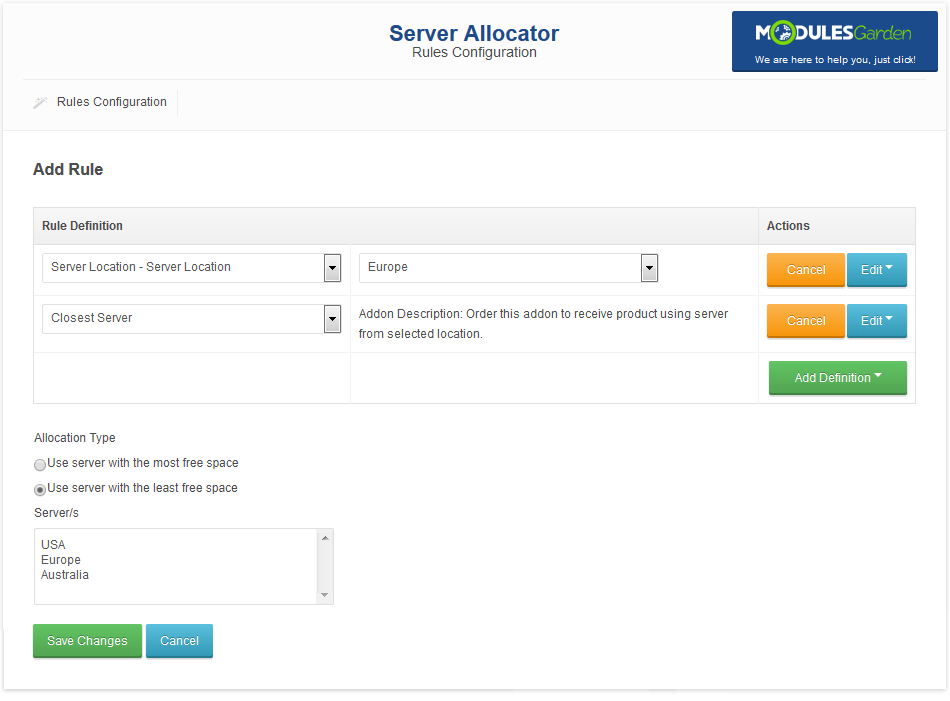
|
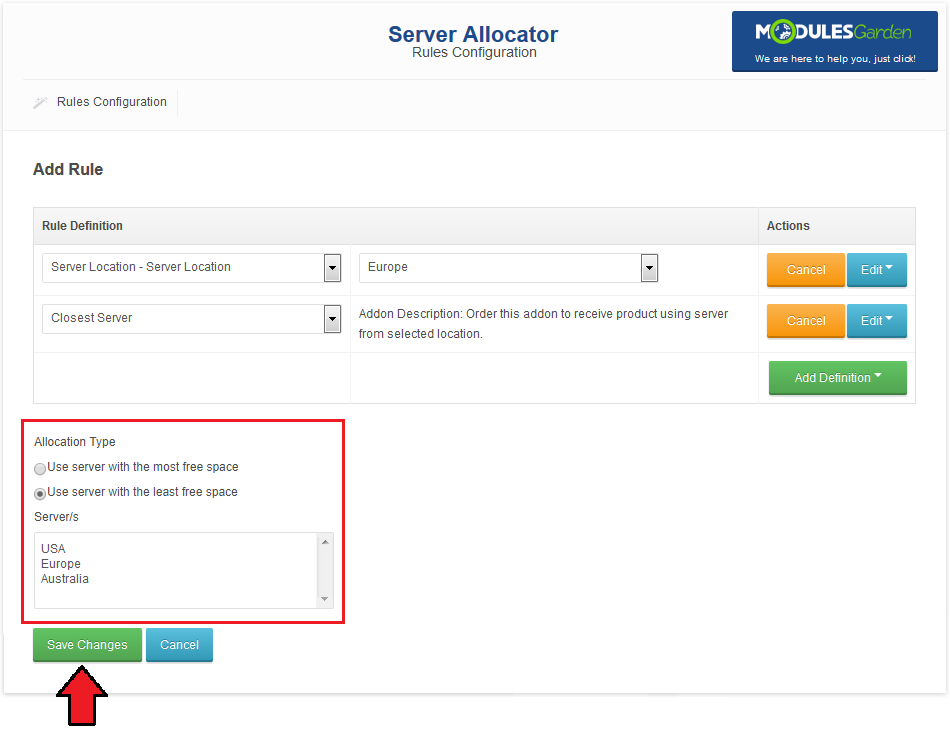
| Now, define the load balancing allocation type. Decide if the server with the most or least free space shall be used and press 'Save Changes' button. |
|
Rule Management
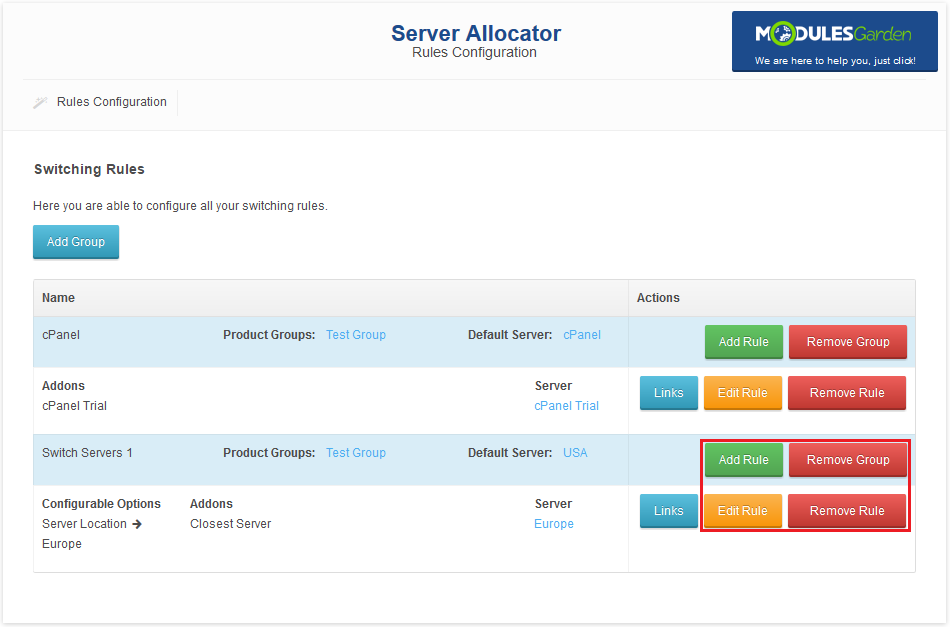
| Each group and rule can be modified and removed at any time by using buttons marked on the following screen. |
|
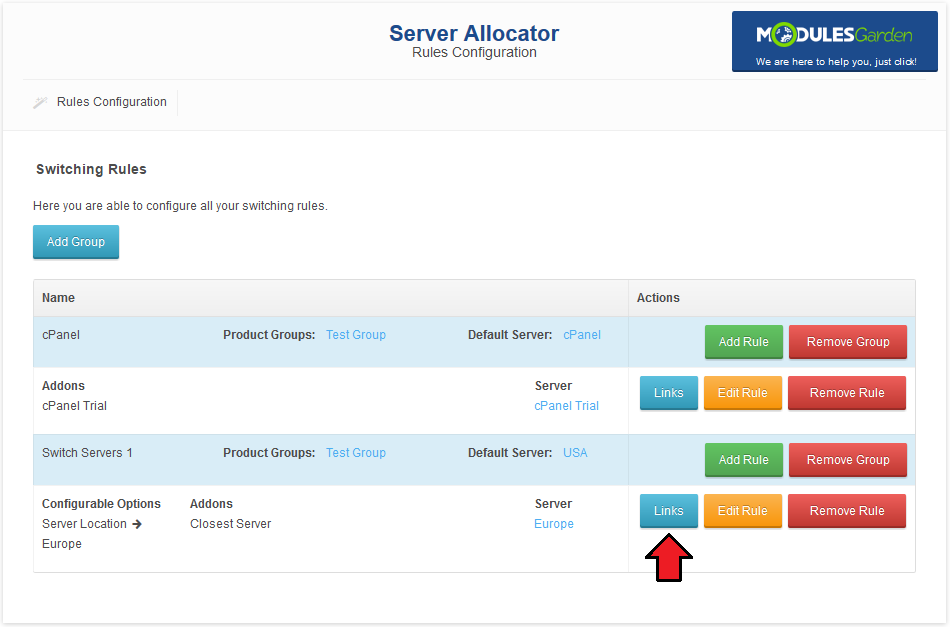
| Press 'Links' next to the desired rule to view the list of links. |
|
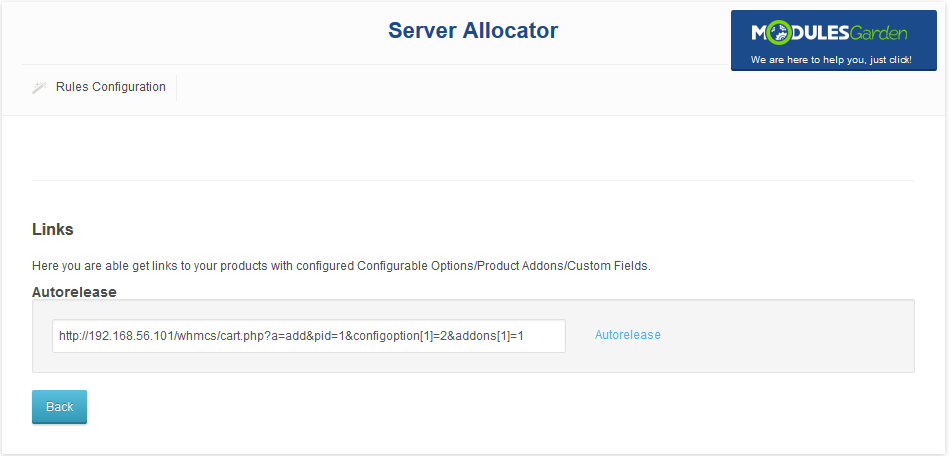
| Each of them leads to the order form with the product configured according to the defined rule. |
|
Sample Orders
| In this section, we will show you how our module works on an exemplary rule shown below. |
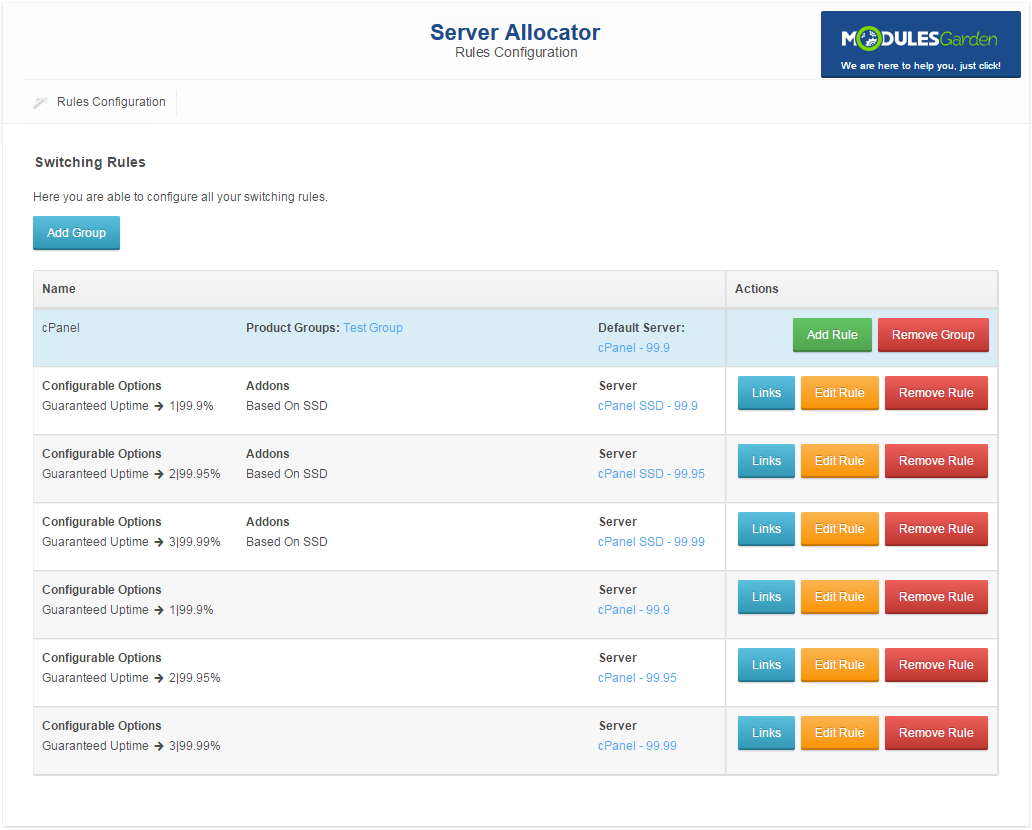
|
First Order
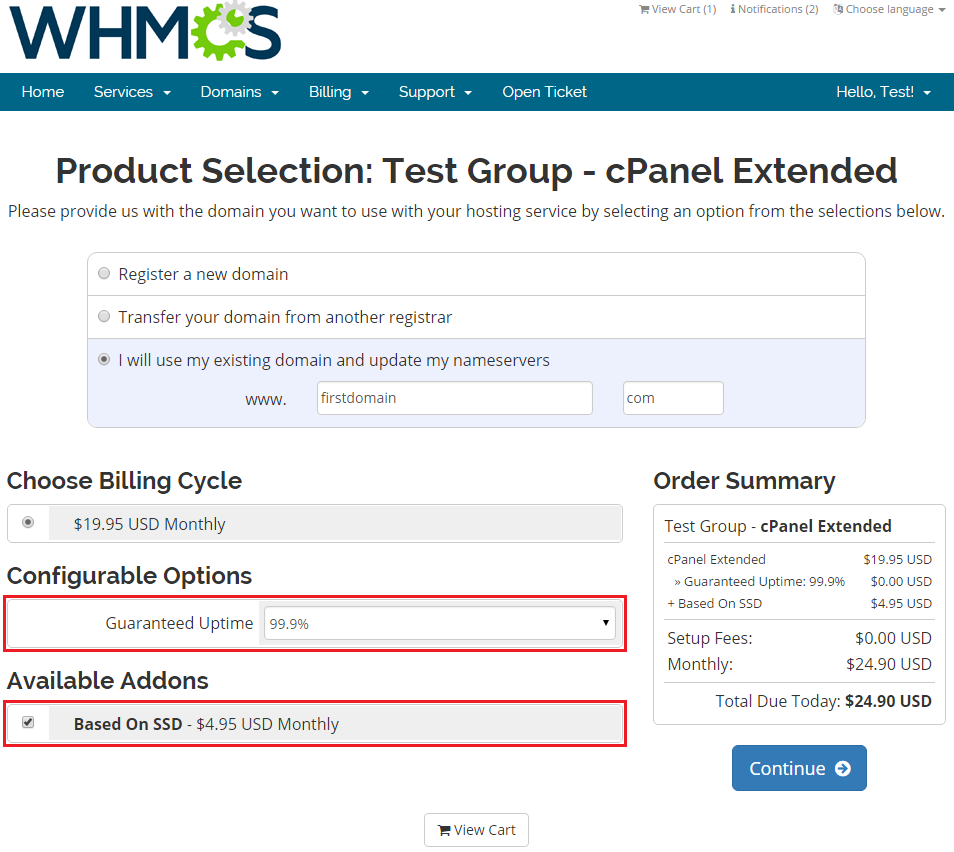
| Let us order a product fulfilling all conditions for receiving 'cPanel SSD - 99.9' server. Using this configuration, the client pays additionally for 'Based On SSD' addon. |
|
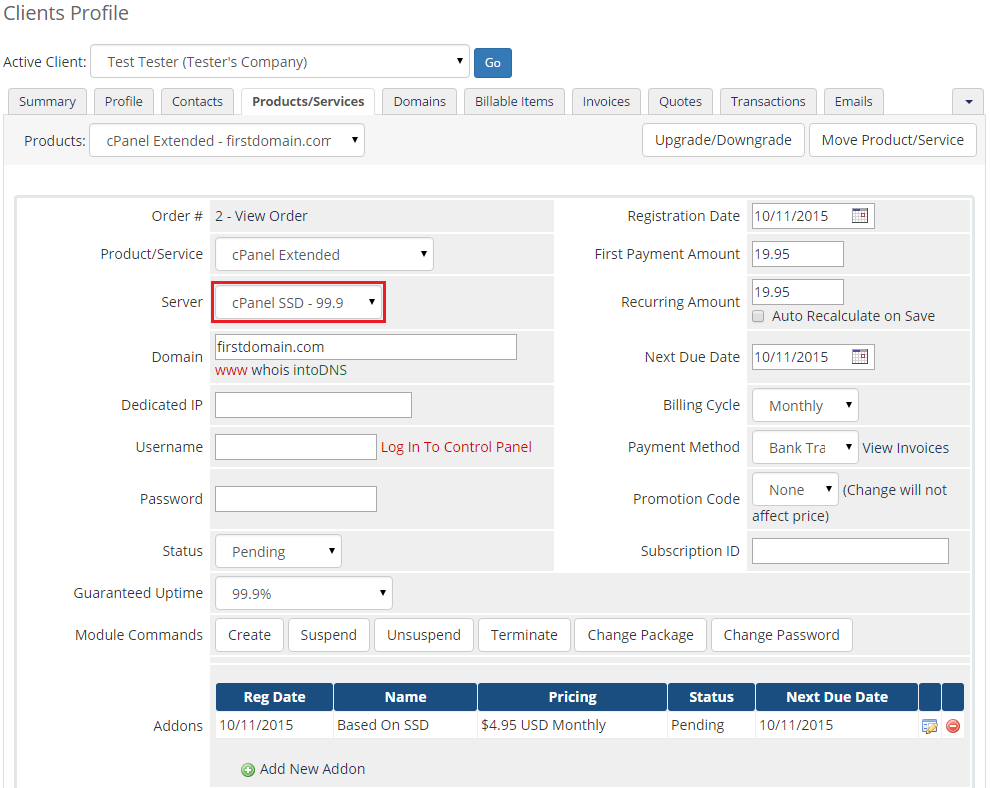
| The switch will be made upon ordering the product (order made from the client area) or accepting the order (order made from the admin area). Hosting with a switched server is displayed on the following screen. |
|
Second Order
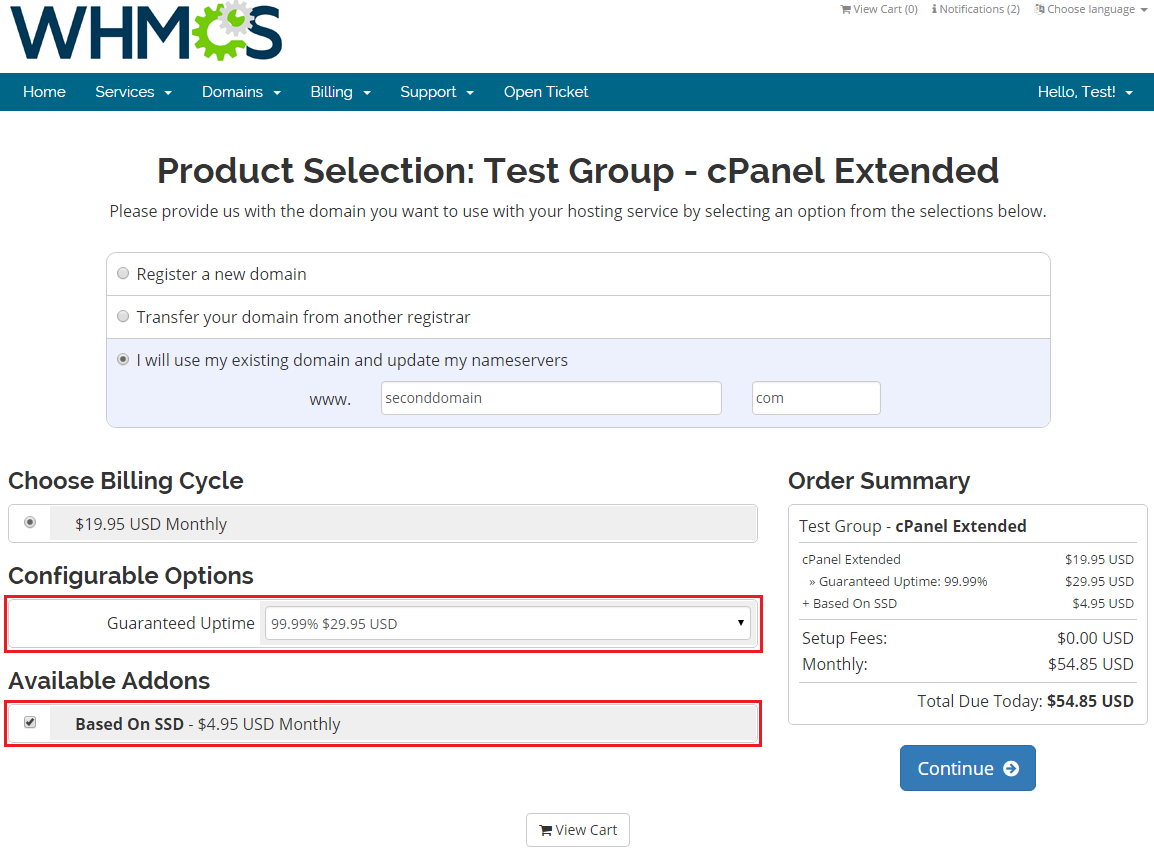
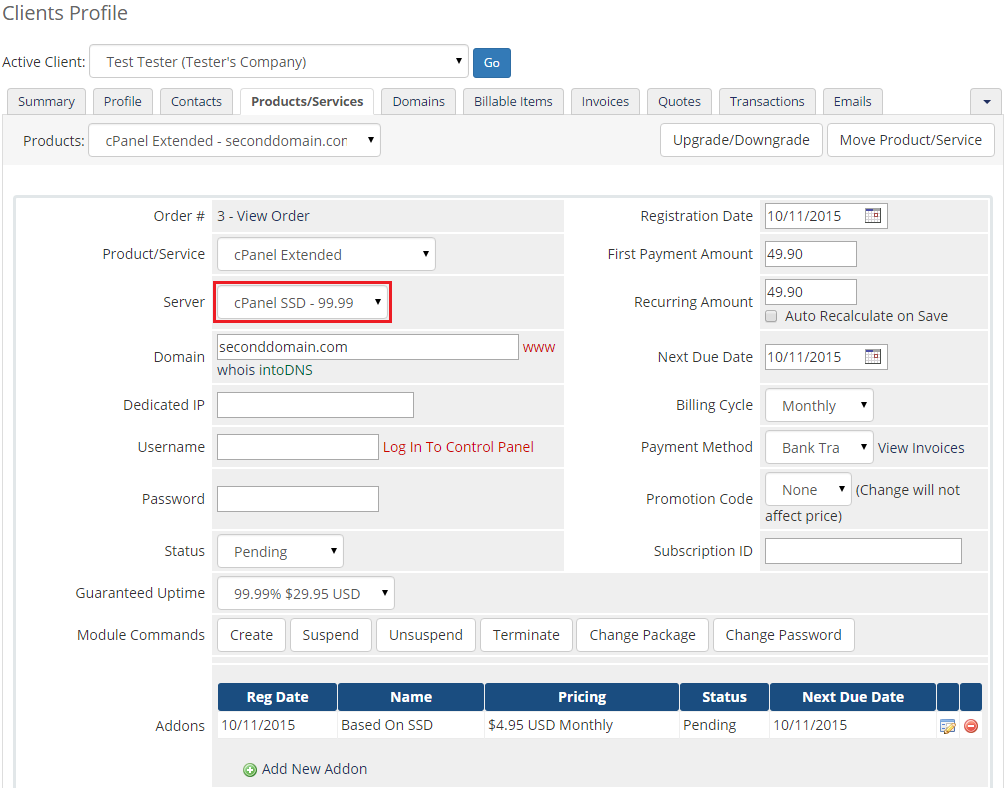
| Let us order a product fulfilling all conditions for receiving 'cPanel SSD - 99.99' server. The client must pay for 'Based On SSD' as well as for higher guaranteed uptime. |
|
| As displayed on the following screen, the switch has been made successfully. |
|
Third Order
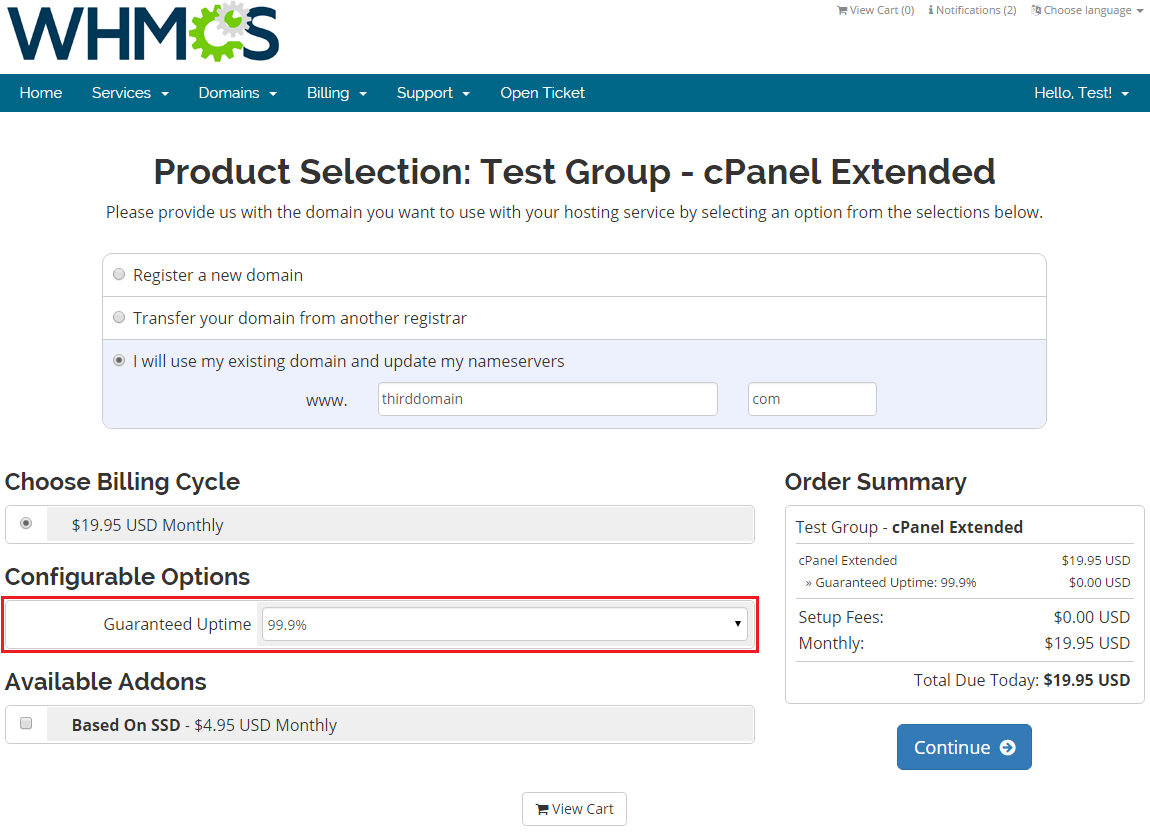
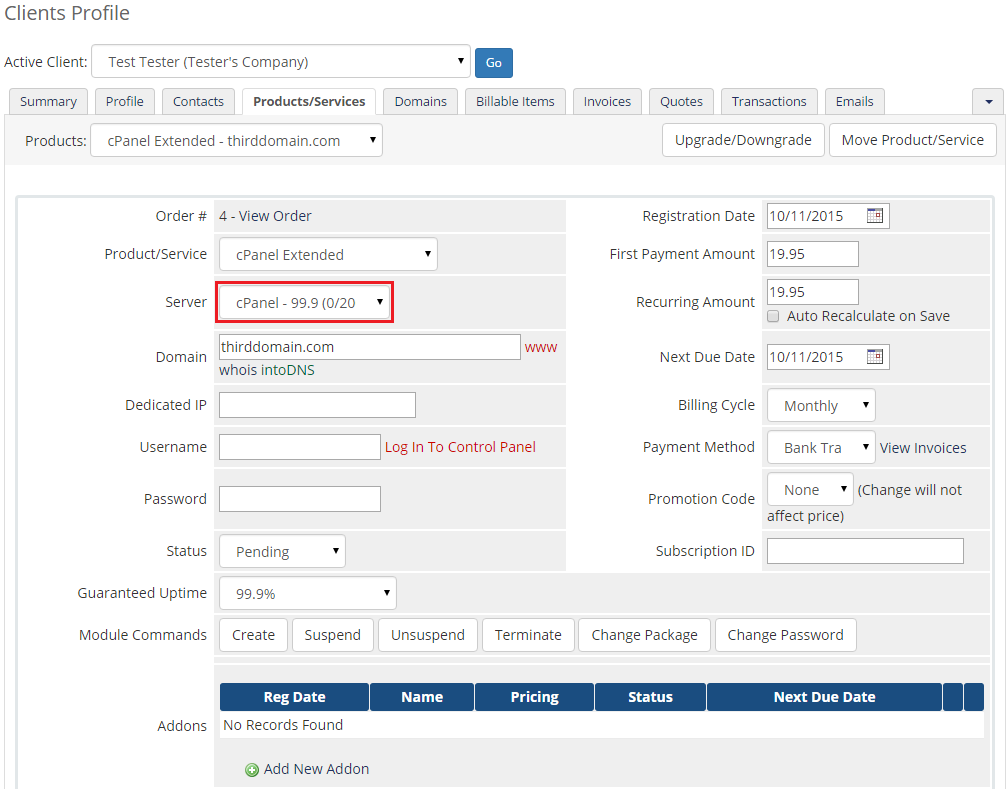
| Let us order a product without 'Based On SSD' addon and with default uptime. This should result in assigning the default 'cPanel - 99.9' server. |
|
| As you can see, the switch has not been made and hosting is using the default group server. |
|
Tips
| 1. In case none of the configuration settings meet any rule, the product will be assigned to a default server. |
Update Instructions
| An essential guidance through the process of updating the module is offered here. Ensure successful completion of the module update by carefully following each step, thereby preventing data loss or any unforeseen issues. |
Upgrade Guide
| Seeking a solution that offers greater flexibility, customization tailored to your precise needs, and unrestricted availability? There is an option that not only proves to be cost-effective in the long run but also includes prioritized support services, making it a truly valuable investment. Opt for the Open Source version of your Server Allocator For WHMCS module to unlock these benefits. Follow a comprehensive guide covering the transition process, the advantages it brings, and step-by-step instructions on what to do next after the order has been successfully finalized. |
Common Problems
| 1. When you have problems with connection, check whether your SELinux or firewall does not block ports. |
| 2. You are unable to add a product addon/configurable option/custom field to the rule. Reason: An item has to be assigned to a product which:
Solution: Ensure that an item you are trying to add is assigned to a correct product. |