Payment Gateway Charges For WHMCS
Contents |
About Payment Gateway Charges For WHMCS
| Payment Gateway Charges For WHMCS allows you to charge additional fees and set up discounts for usage of a chosen payment gateway. With this module you can easily set products, addons, domains and other items which require an additional fee. |
- Features:
| ✔ Set Different Rates For Different Payment Gateways (Percentage Or Fixed) |
| ✔ Set Different Discounts For Different Payment Gateways (Percentage Or Fixed) |
| ✔ Set Minimum Invoice Value To Charge Payments And Discounts |
| ✔ Include/Exclude From Charges And Discounts Certain Clients |
| ✔ Include/Exclude From Charges Certain Products, Addons, Domains And Other |
| ✔ Automatic Conversion Of Charges And Discounts In Different Currencies |
| ✔ PayPal Subscription Charging |
| ✔ Impose Tax On Charges |
| ✔ Impose Charge After Tax |
| ✔ Impose Charge Before Tax And Charge Tax |
| ✔ Choose Billing Type |
| ✔ Standard - Exclusive Charge |
| ✔ PayPal - Inclusive Charge |
| ✔ Display Charge Rates Depending On Available Gateways |
| ✔ Display Calculated Price For Each Available Gateways |
- Supported Order Form Templates:
| ✔ Ajaxcart |
| ✔ Boxes |
| ✔ Cart |
| ✔ Cloud Slider |
| ✔ Comparison |
| ✔ Modern |
| ✔ Premium Comparison |
| ✔ Pure Comparison |
| ✔ Slider |
| ✔ Standard Cart |
| ✔ Supreme Comparison |
| ✔ Universal Slider |
| ✔ Verticalsteps |
| ✔ Web20cart |
- General Info:
| ✔ Supports All Payment Gateways |
| ✔ Supports Mass Payment Functionality |
| ✔ Easy Integration Which Automatically Adjusts To Each Order Form Template |
| ✔ Multi-Language Support |
| ✔ Supports PHP 5.4 Up To PHP 7 |
| ✔ Supports WHMCS Templates Five and Six |
| ✔ Supports WHMCS V6 and V7 |
Installation
| This tutorial will show you how to successfully install and configure Payment Gateway Charges For WHMCS. We will guide you step by step through the whole installation and configuration process. |
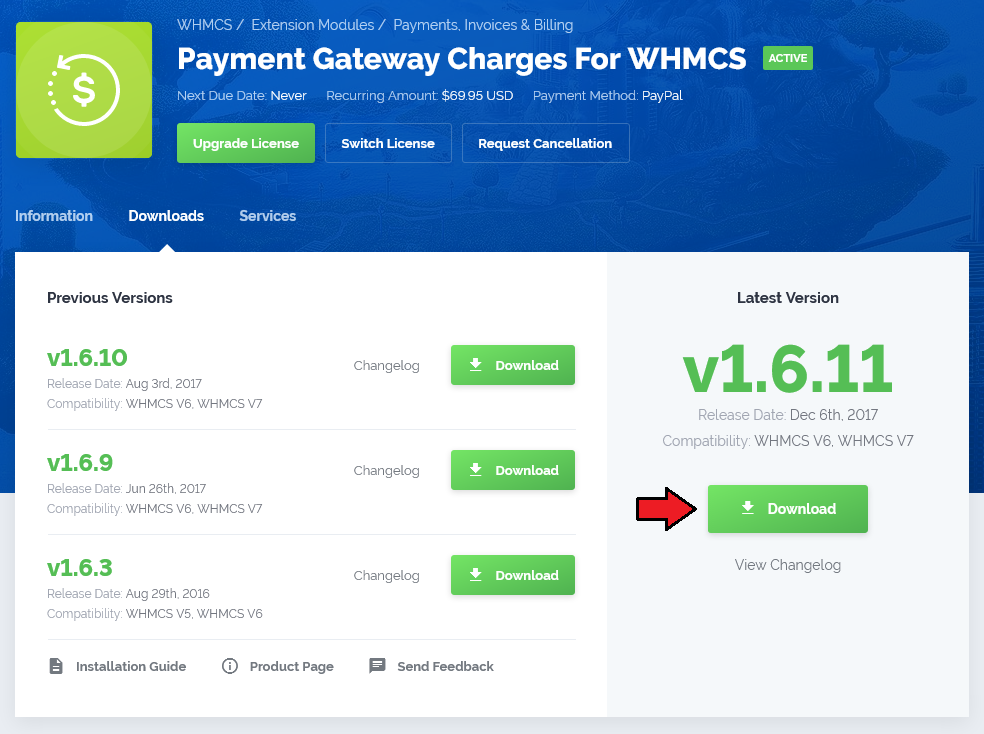
| 1. Log in to your client area and download the module. |
|
| 2. In the downloaded file you will find two packages that support different PHP versions. As presented on the screen below, the first one is dedicated to PHP 7, while the second one is aimed at PHP 5.4 up to PHP 5.6. It does not apply to open source versions. Note: You can check current PHP version in your WHMCS. To do so proceed to 'Utilities' → 'System' → 'PHP Info'. |

|
| 3. Extract the downloaded file and choose the one with the right PHP version. Upload and extract the PHP file into the main WHMCS directory. The content of PHP version files should look like this. |
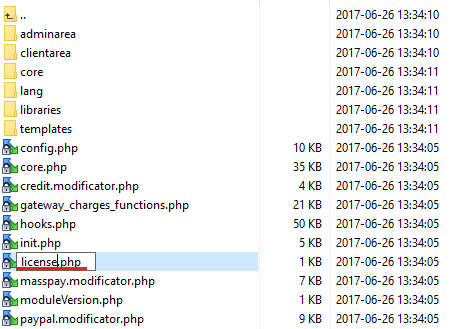
| 4. When you install Payment Gateway Charges For WHMCS for the first time you have to rename 'license_RENAME.php' file. File is located in 'modules/addons/gateway_charges_functions/license_RENAME.php'. Rename it from 'license_RENAME.php' to 'license.php'. |
|
| 5. In order to configure your license key, you have to edit a previously renamed 'license.php' file. Enter your license key between quotation marks as presented on the following screen. You can find your license key in your client area → 'My Products'. |

|
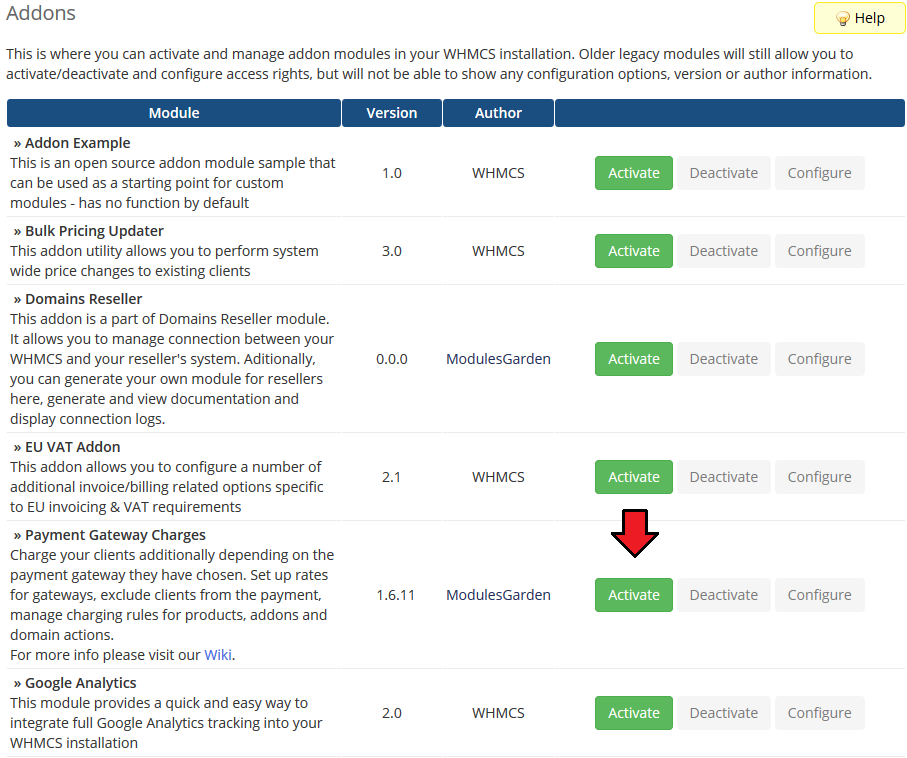
| 6. Now you have to activate the module in your WHMCS system. Log in to your WHMCS admin area. Go to 'Setup' → 'Addon Modules'. Afterwards, find 'Payment Gateway Charges' and press 'Activate' button. |
|
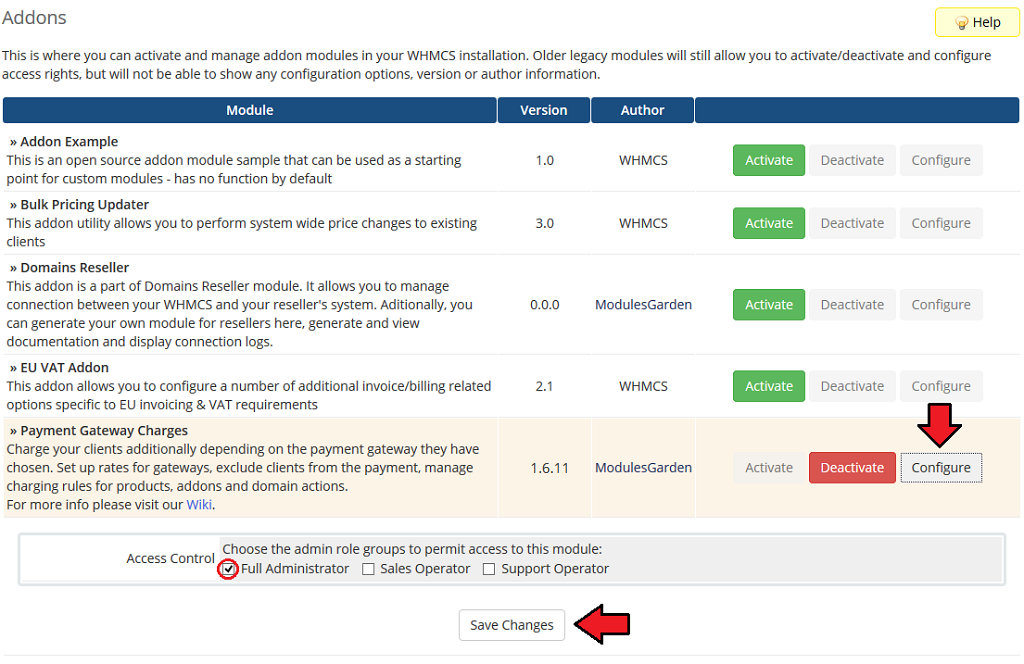
| 7. In the next step you need to permit access to this module. To do so click on 'Configure' button, tick 'Full Administrator' and press 'Save Changes'. |
|
| 8. You have just successfully installed Payment Gateway Charges! You can access your module at 'Addons' → 'Payment Gateway Charges'. |
|
Configuration and Management
| Payment Gateway Charges For WHMCS allows your customers to manage additional charges in your WHMCS system. In this short guide we will present you the possibilities of our module. |
Integration Code
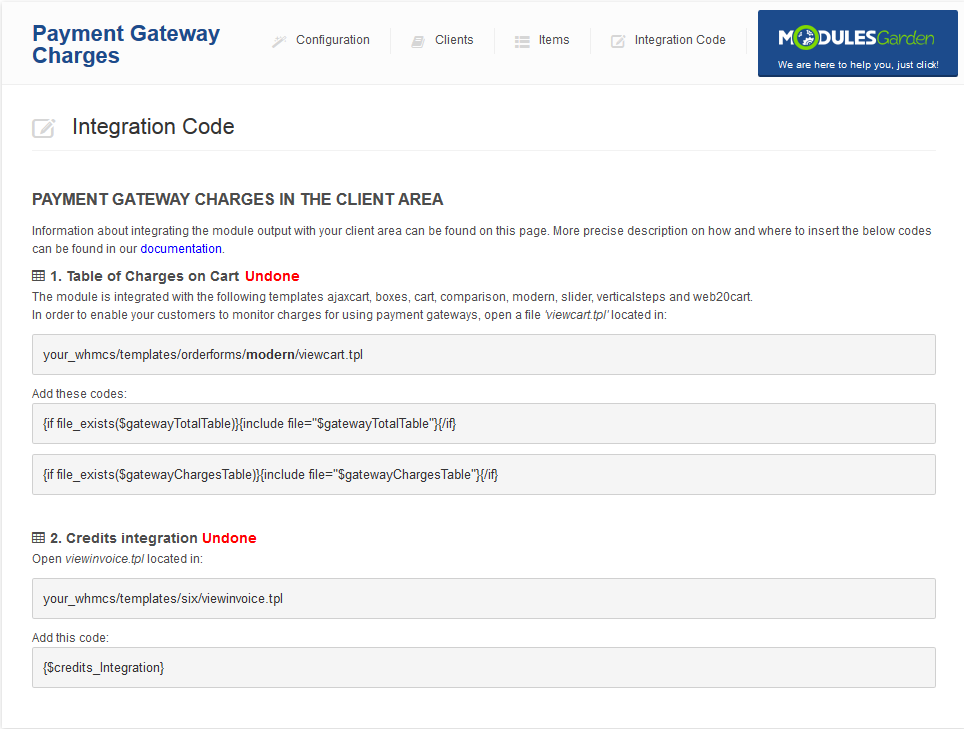
| Integration described below is not obligatory. Module allows your customers to view charges for using payment gateways when ordering. |
|
Table of Charges on Cart
| To display charges table on order form, add the below integration code. Open the template you are using (we opened 'modern' template as an example). |

|
| Correctly placed codes in 'modern' order form template are presented on the following screens. |

|

|
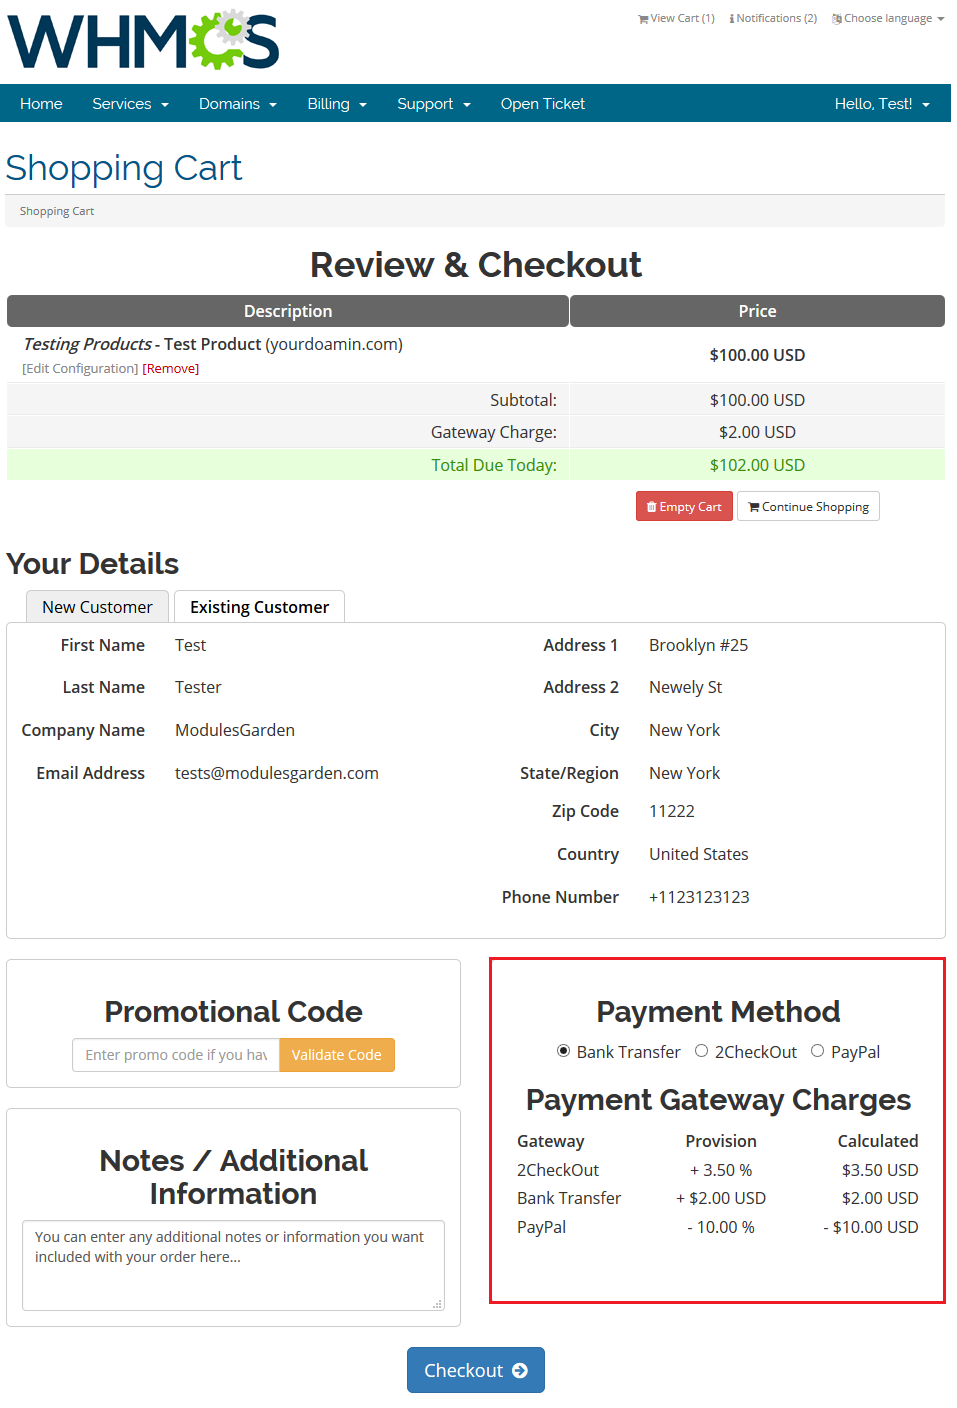
| In the client area it should look like on the screen below. |
|
Credits Integration
| These integration codes will remove charge when a client pays through credits. Open the 'viewinvoice.tpl' file and insert the below codes at the very top of that file. Remember to alter the file of the used by you template! |

|
| Properly inserted code should look like that: |

|
PayPal Subscription Integration
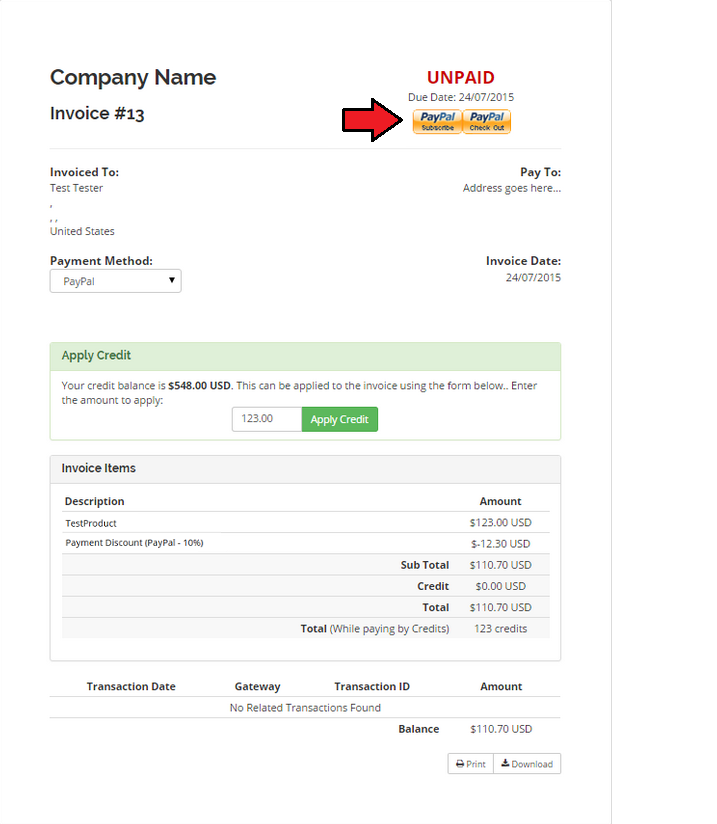
| PayPal subscription is integrated automatically, there is no need for you to add any codes. 'PayPal' button that is shown on the invoice below allows your clients to pay automatically for recurring payments via PayPal. |
|
Configuration
Gateway Charges
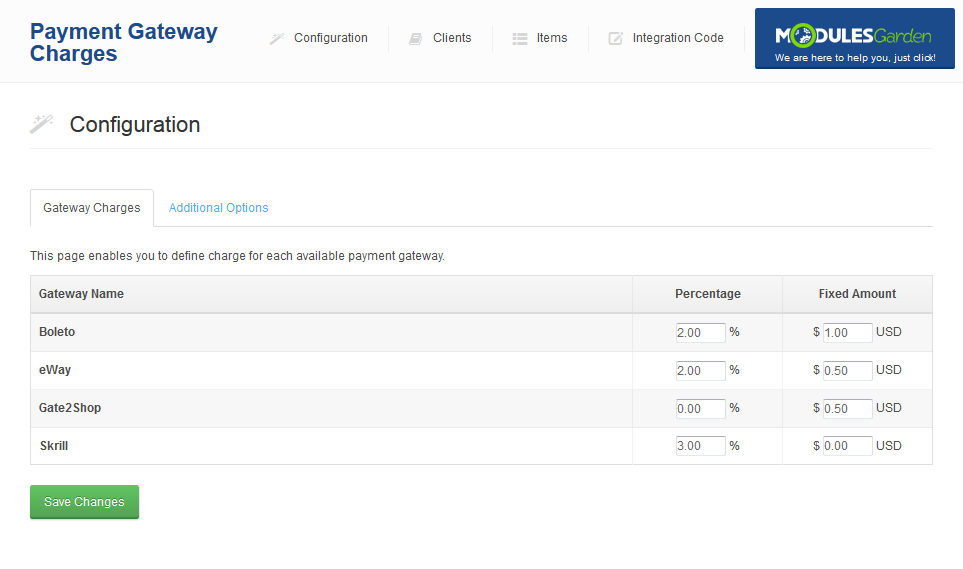
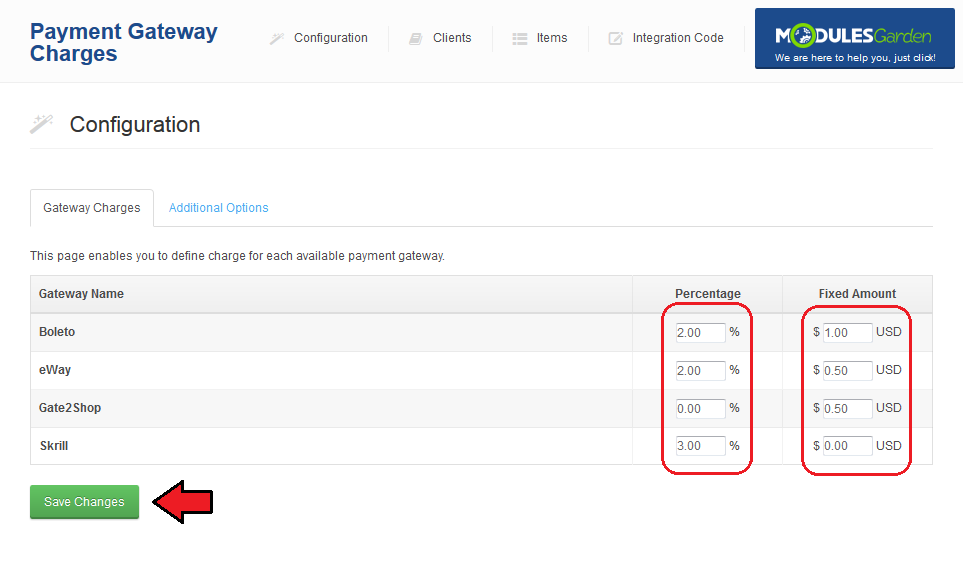
| Proceed to the addon itself, you will be moved directly to its configuration. Firstly you will have to set charges for each active in your system gateway. Find a list of active gateways and set charges for all of them or only for those you wish. |
| To set additional charge for a payment gateway, simply enter desired values in a corresponding column. You can add percentage value of invoice amount or fixed amount to charge. Fixed amount will be charged in the default currency of the client. |
|
Additional Options
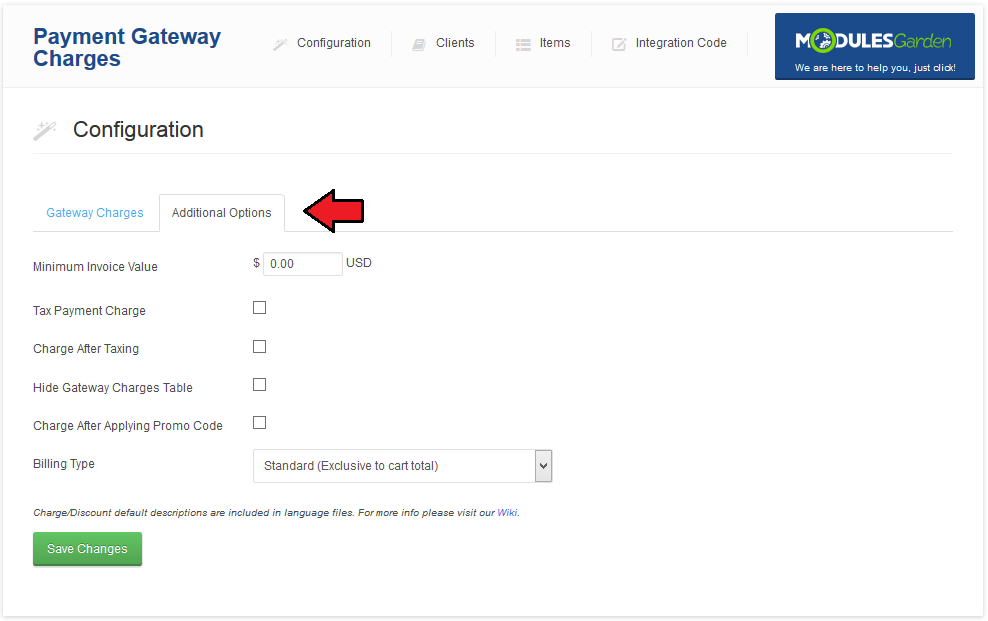
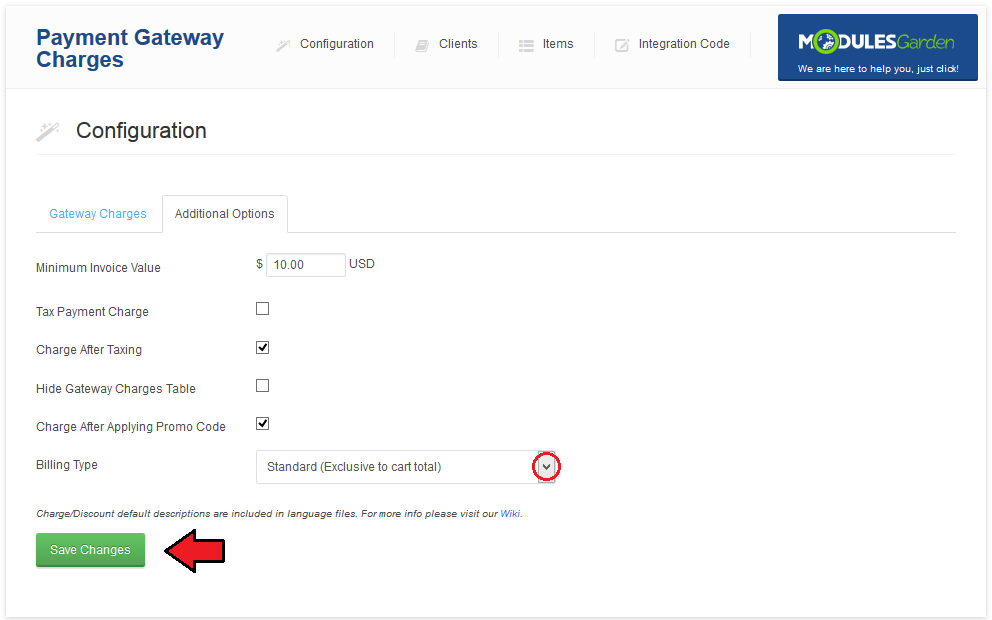
| Find tab 'Additional Options', you may configure there your personal charges' options. |
|
Do not forget to press 'Save Changes'. |
Billing types explanation:
|
| Please see at the below table any calculations done during counting the final price to pay by the client and the amount that will be given to PayPal and note the difference between the two available methods. |
|
Fee: $124
|
|
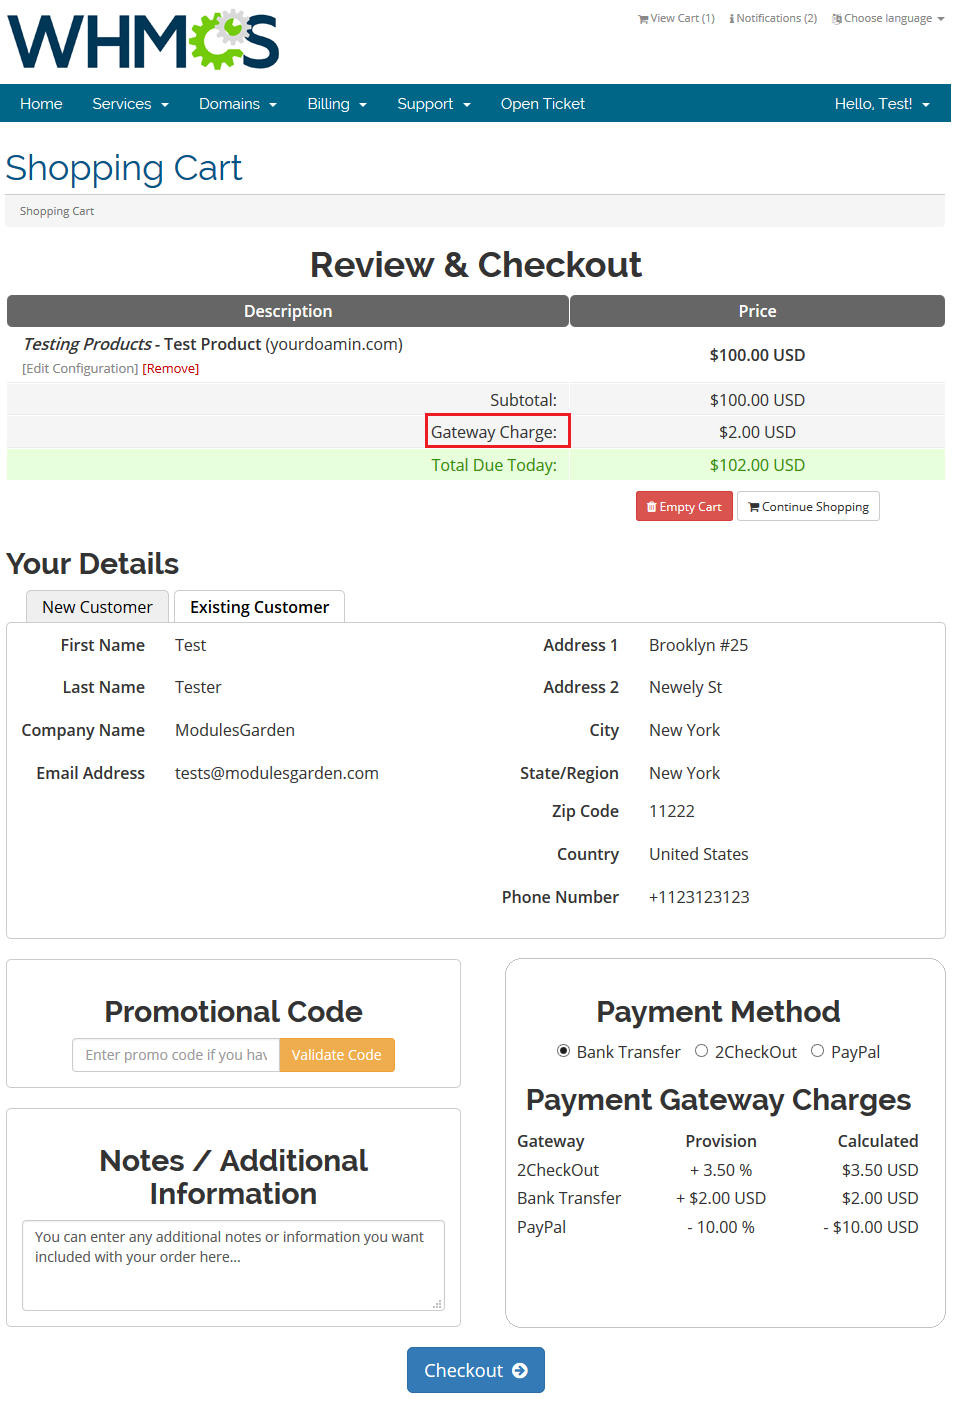
| Underneath you can see an exemplary order summary view after additional options (charges description) has been provided in English.php language file and with standard billing type selected. |
|
Management of Clients
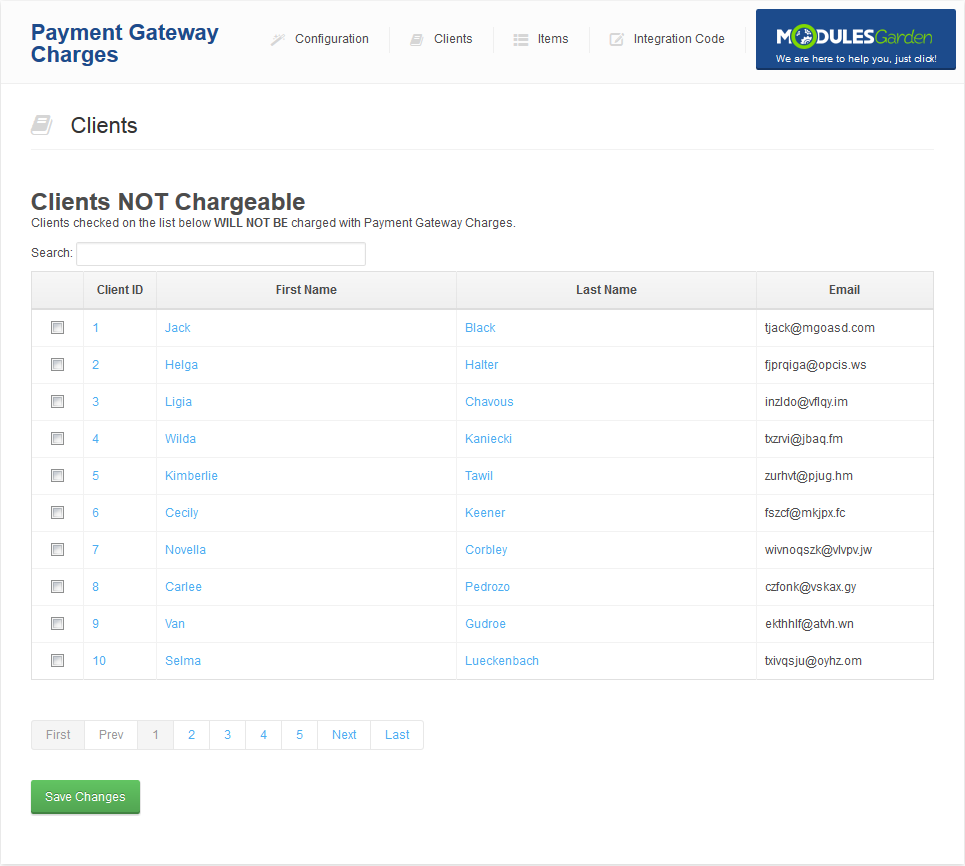
| In order to enable/disable charges for specific clients move to 'Client' section. |
|
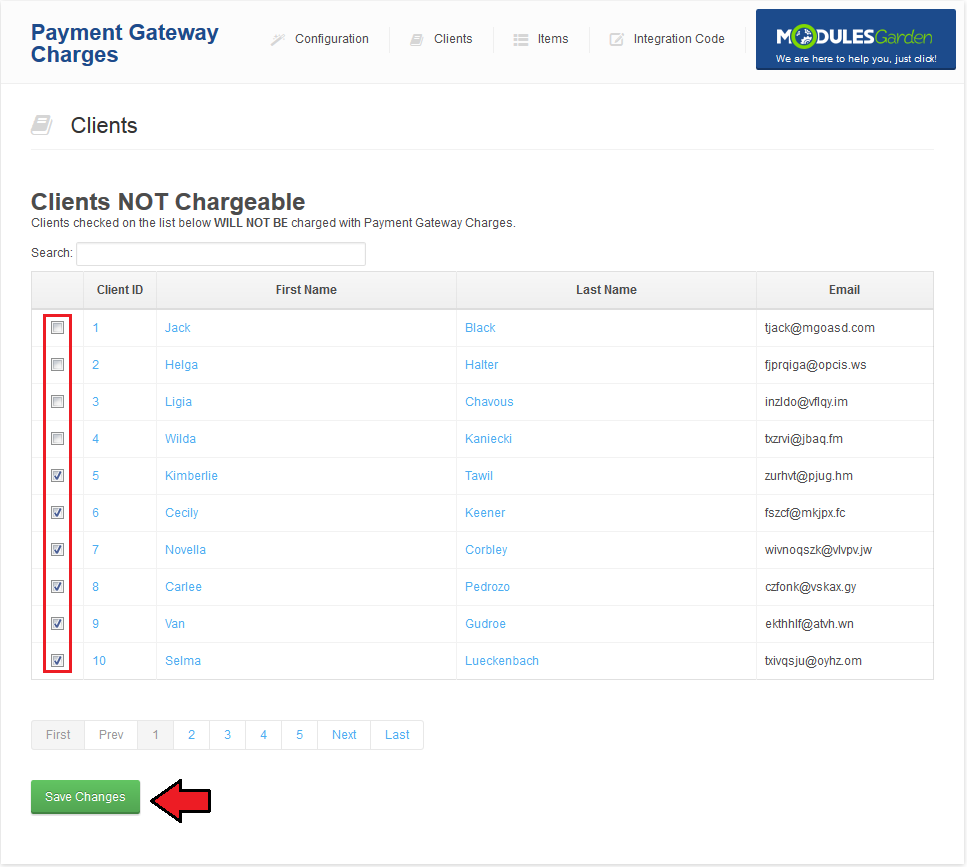
| Here you can exclude clients from being charged. To do so, mark checkbox next to client ID and press 'Save Changes', consequently such client will not be additionally charged for using a specific payment gateway. |
|
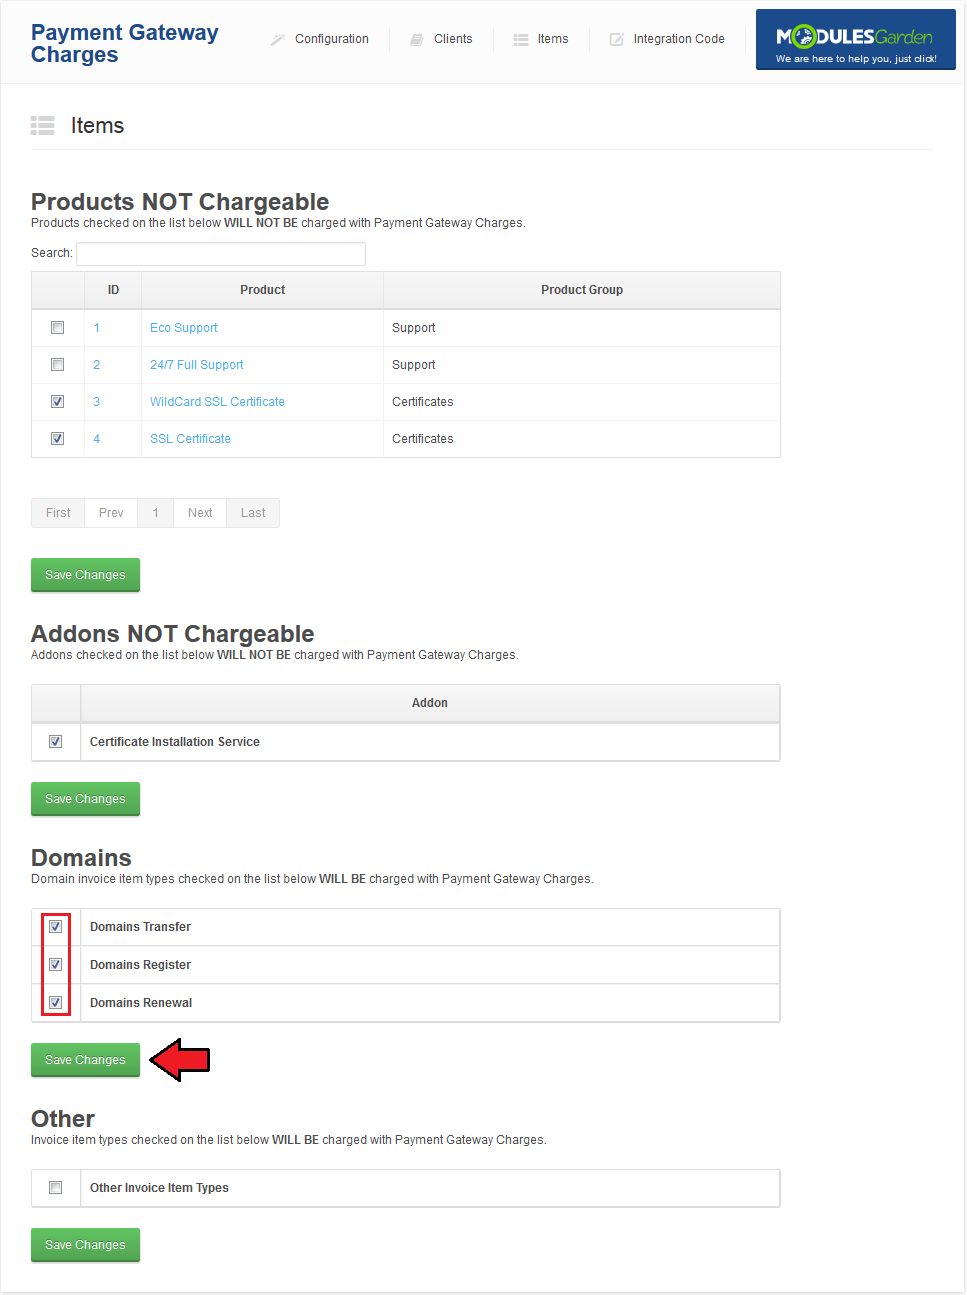
Management of Items
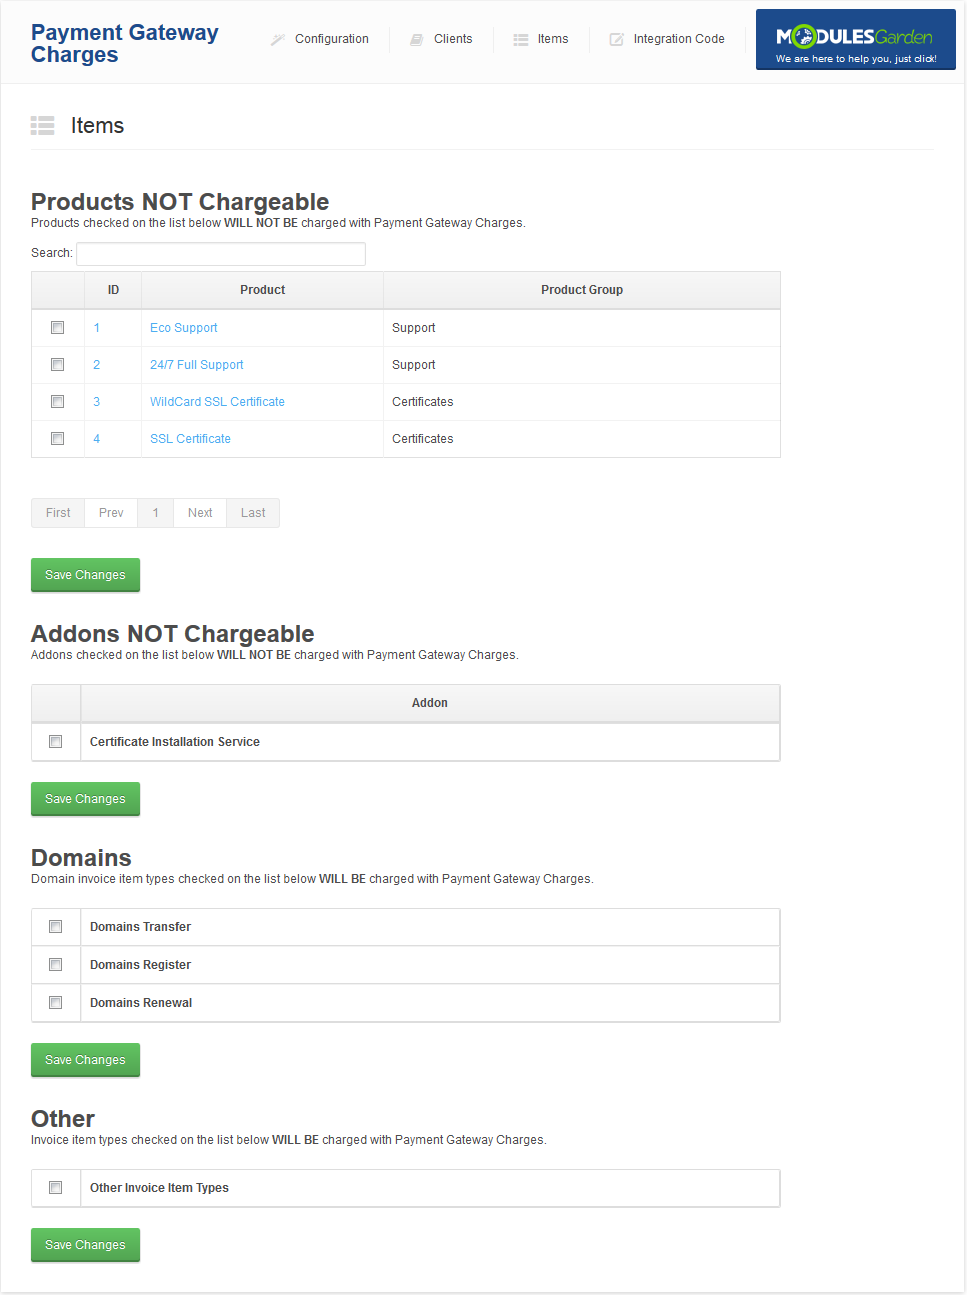
| To enable/disable charges for products and addons, proceed to 'Items' section. |
|
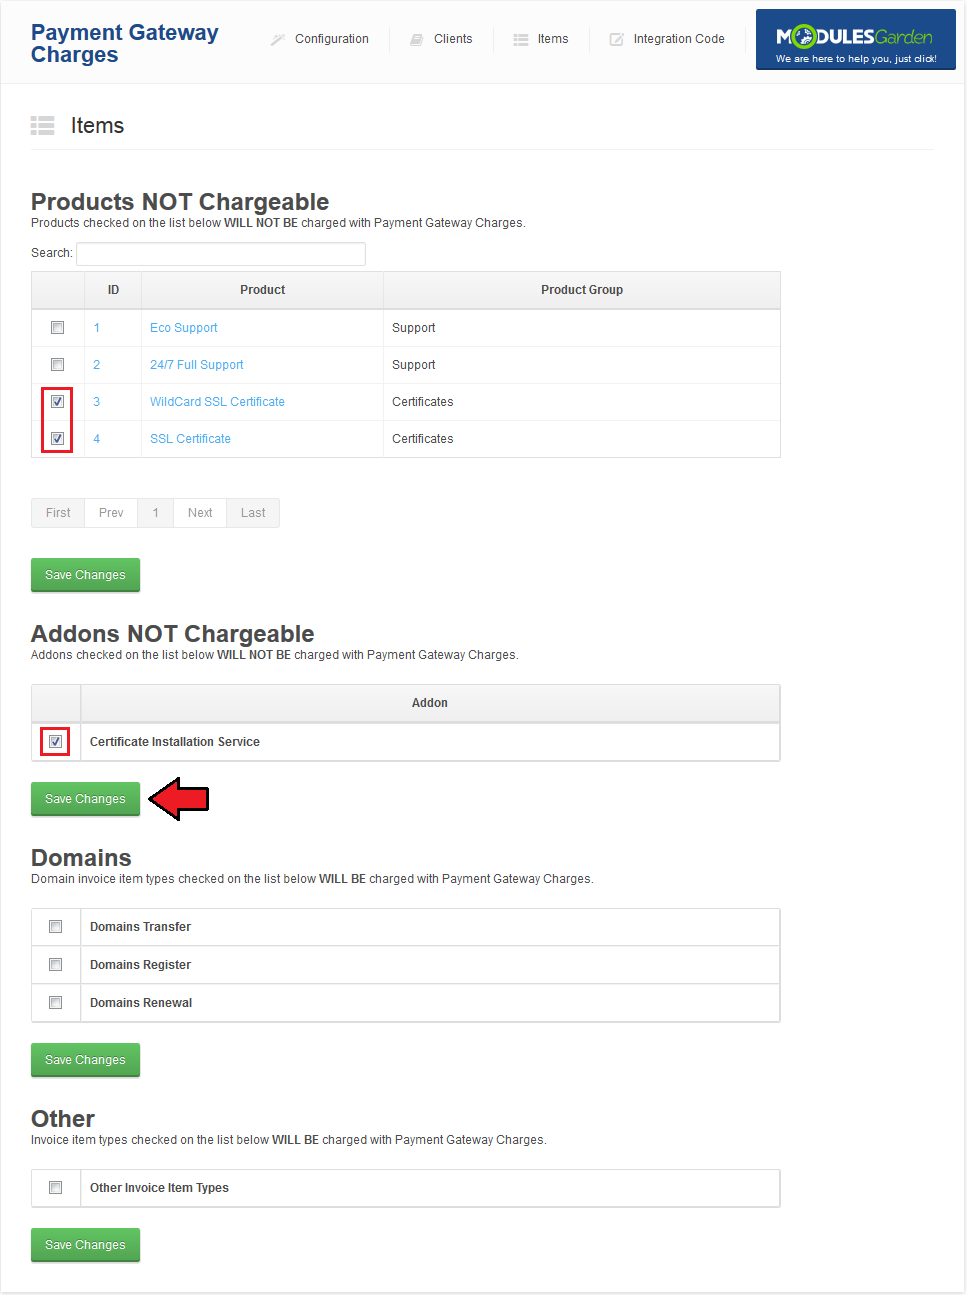
| In order to disable charges for products or addons, mark checkboxes next to the chosen ones and press 'Save Changes'. |
|
| In order to enable charges for domain actions or items, mark checkboxes next to the chosen entries and press 'Save Changes'. |
|
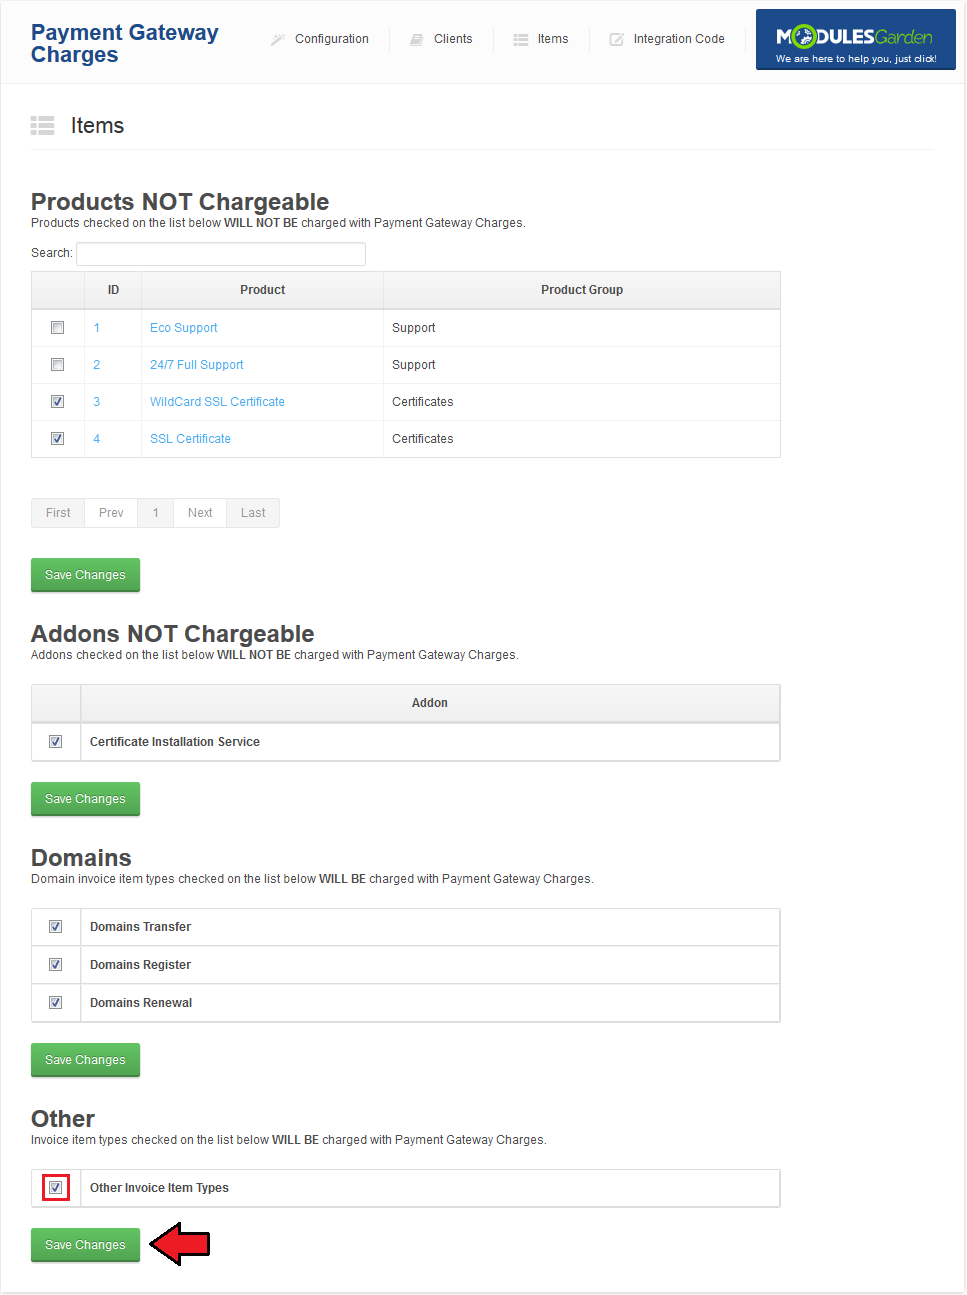
| Marked 'Other Invoice Item Types' applies charges to all other invoice types, which were not described above. |
|
Automatic Conversion of Charges
| This functionality will make you forget about all the problems with currencies. Module automatically calculates the value basing on your default currency. 1. Module automatically calculates fixed amount discount depending on the currency selected by the customer. Example: |
Disabling Payment Gateway For Specific Product Group
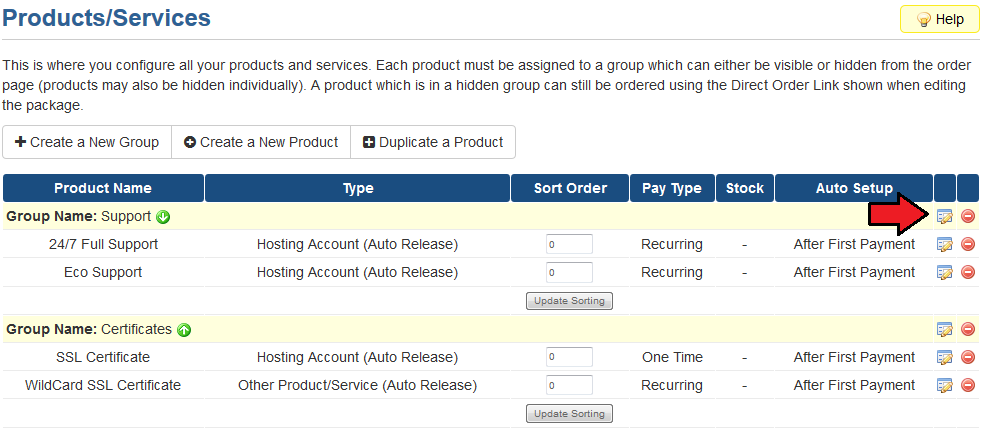
| If you want to disable payment gateway for a specifc product group, follow these simple steps. Go to 'Setup' → 'Products/Services' → 'Products/Services' and edit product group you want to disable payment gateway for. |
|
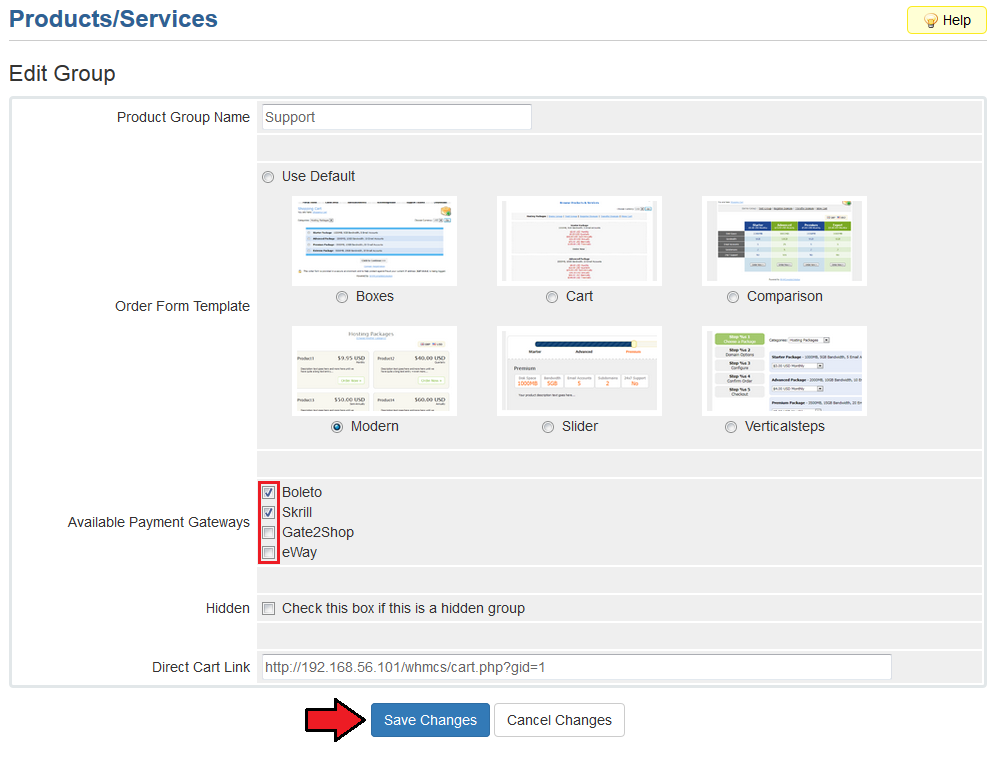
| Unmark checkbox next to payment gateway you want to disable and press 'Save Changes' button. |
|
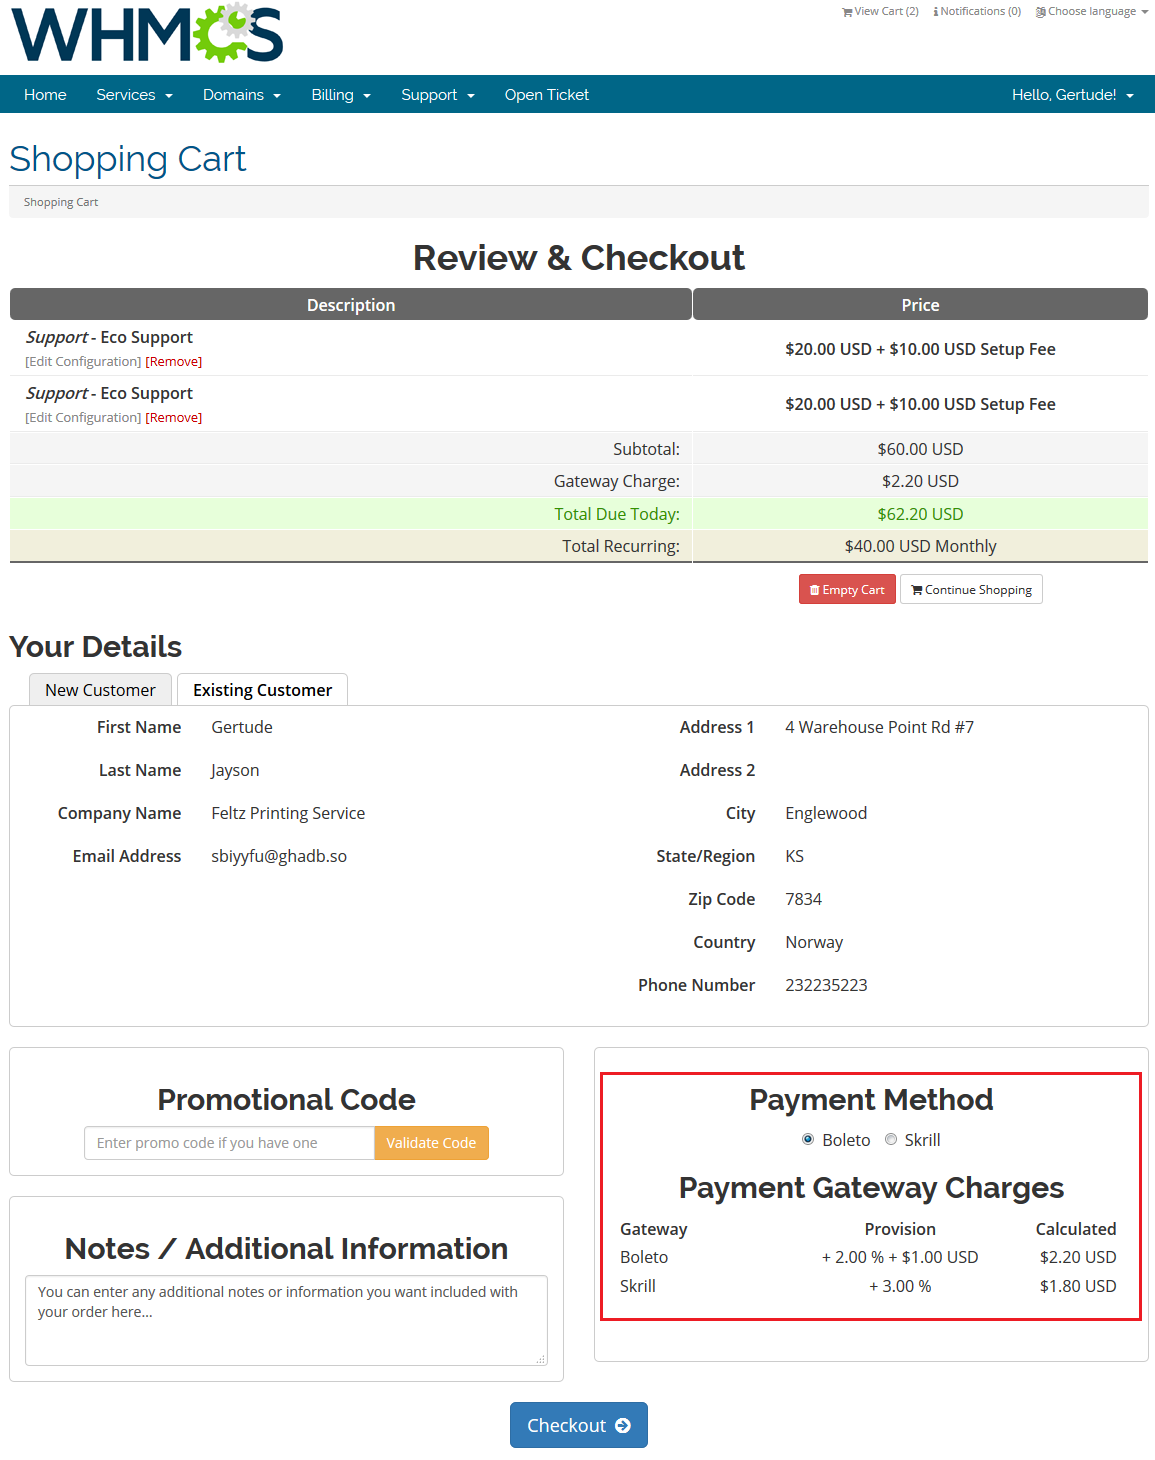
| As you can see on the following screen, payment gateway was disabled for products from group you edited. |
|
Tips
| 1. For your convenience, payments gateway charges are enabled by default for clients, products and addons. Charges for domains and other are disabled by default. |
| 2. Promotion codes: if the option 'Charge After Applying Promo Code' is enabled in the addon, you need to remember about one thing. If the promotion code is created for a bundle of items (e.g. a product ordered with an addon) then all required items must be chargeable to allow the promotion |
| 3. Charge/Discount Charges visible names are included in language file of the module (e.g. english.php), there are used two variables which you can use to alter displayed names of the two options. The mentioned variables are: $LANG['mg_chtpl_charged'] = 'Payment Gateway Charge'; $LANG['mg_chtpl_discount'] = 'Payment Gateway Discount'; |
| 4. It is advised that 'Auto Apply Credits' option should be disabled due to the possibility of problems occurrence. Charge is not automatically added and calculated when auto applying credits. |
| 5. In case administrator deletes a hosting product that has been invoiced but later on the payment gateway is changed then such hosting product is treated as of 'Other' type on the invoice. |
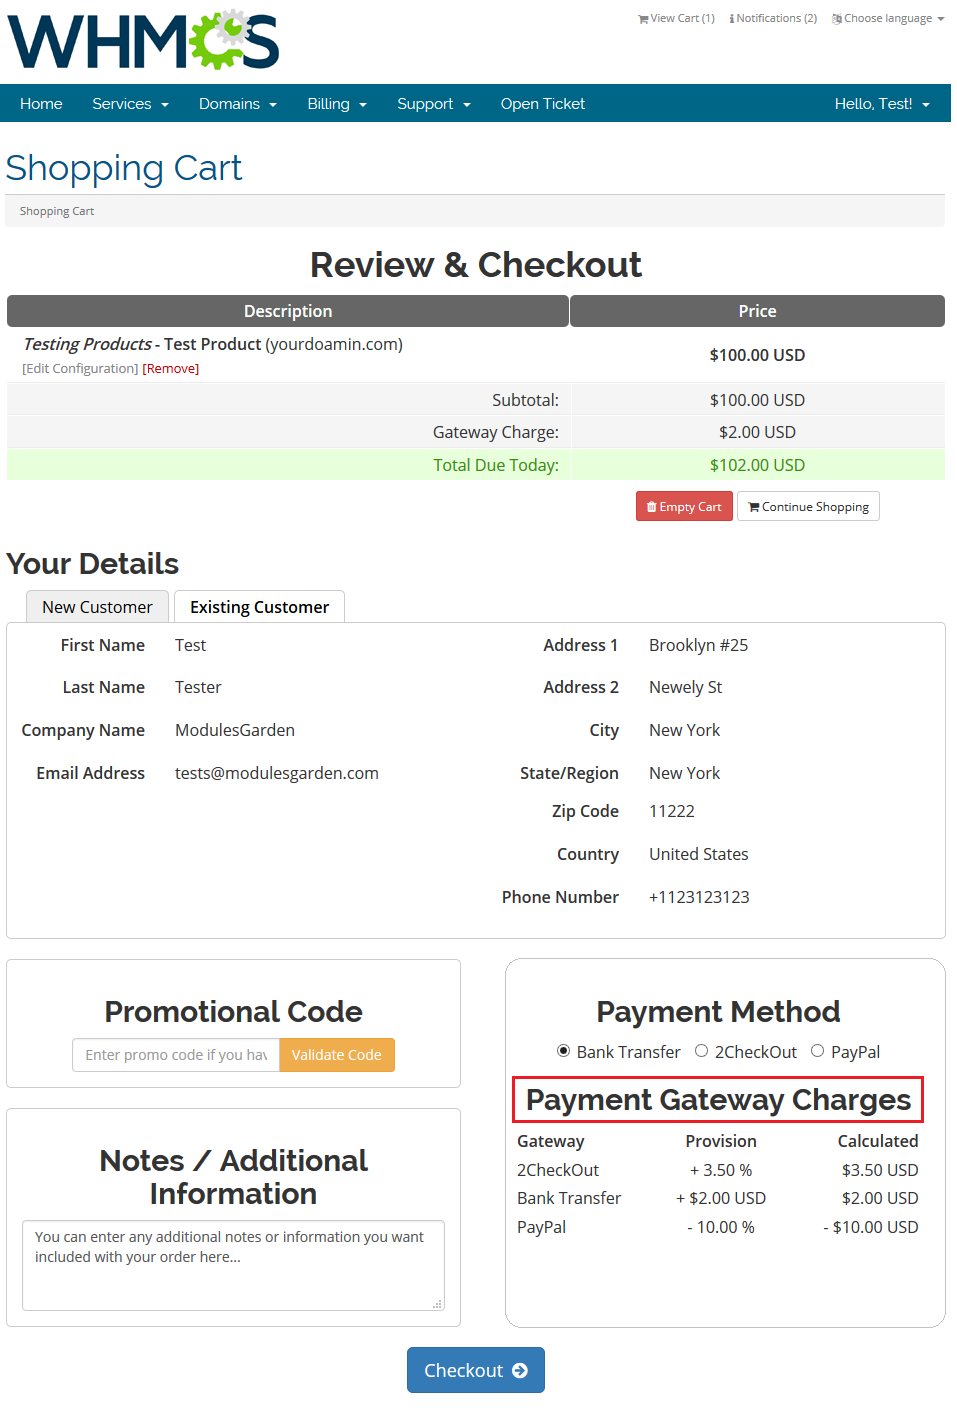
| 6. It is possible to either hide or change the header above the available payment gateways visible to the client. |
|
| There are two possible ways: 1. To change the line, edit the module english.php lang file. Find line: $LANG['client_header'] = 'Payment Gateway Charges'; Change the text as you need or leave empty space between quotation marks: $LANG['client_header'] = ''; 2. To delete the line, edit your currently used template.
{$lang.client_header}
Usually this is: <h2 {if $hideChargesTable}style="display: none;"{/if}>{$lang.client_header}</h2>
or <h2>{$lang.client_header}</h2>
|
Common Problems
| 1. When you have problems with connection, check whether your SELinux or firewall does not block ports. |