Domain & Email Forwarding For WHMCS
Contents |
About Domain & Email Forwarding For WHMCS
| Domain & Email Forwarding For WHMCS is a module which allows your clients to create and manage forwarders directly in your client area. The extent of management depends on the administrator, who needs to define the level of allowed domain management per each TLD. |
- Admin Area Features:
| ✔ Define Per TLD: |
| ✔ Domain Forwarders Availability |
| ✔ Directory Forwarders Availability |
| ✔ Domain Email Forwarders Availability - cPanel Only |
| ✔ Single Email Forwarders Availability |
| ✔ Nameservers |
| ✔ Define Default Nameservers |
| ✔ Park/Unpark Domains |
| ✔ Check If Domains Are Parked |
| ✔ Disable Module For Domains Assigned To Hosting |
| ✔ Test Connection With External Server |
| ✔ Generate API Tokens With IP Addresses Restrictions |
| ✔ View Logs |
- Client Area Features:
| ✔ View/Add/Remove Domain Forwarders: |
| ✔ Set Redirection Type: |
| ✔ Permanent (301) |
| ✔ Temporary (302) |
| ✔ Replaced (303) - DirectAdmin Only |
| ✔ Define Domain Directory |
| ✔ Define 'www.' Redirection - cPanel Only: |
| ✔ Only Redirect With 'www.' |
| ✔ Redirect With Or Without 'www.' |
| ✔ Do Not Redirect 'www.' |
| ✔ Toggle Wild Card Redirection - cPanel Only |
| ✔ Define Redirection URL |
| ✔ View/Add/Remove Email Forwarders |
| ✔ View/Add/Remove Email Domain Forwarders |
- Supported Servers:
| ✔ WHM/cPanel |
| ✔ DirectAdmin |
- API Implementation:
| ✔ Connect Using Token |
| ✔ Use POST And GET Methods |
| ✔ List Client Services |
| ✔ List/Create/Remove Domain Redirections |
| ✔ List/Create/Remove Email Forwarders |
| ✔ View API Actions In Logs |
- General Info:
| ✔ Implemented API Support |
| ✔ Multi-Language Support |
| ✔ Supports PHP 5.6 Up To PHP 7.3 |
| ✔ Supports WHMCS V7.6 And Later |
| ✔ Easy Module Upgrade To Open Source Version |
Installation
| This tutorial will show you how to successfully install and configure Domain & Email Forwarding For WHMCS. We will guide you step by step through the whole installation and configuration process. |
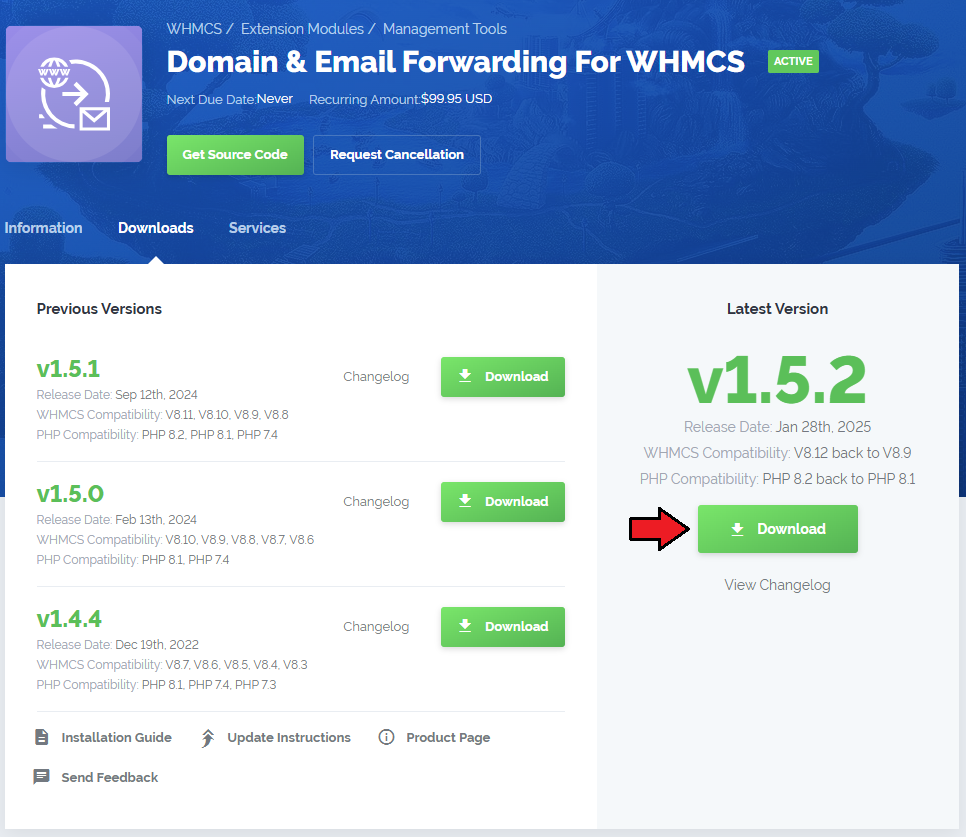
| 1. Log in to our client area and download the module. |
|
| 2. In the downloaded file you might find one or two packages that support different PHP versions. In the most recent versions of the module, you will find only one package that supports PHP 7.1 and later. |
| Previous updates of the module may contain two packages dedicated to various PHP versions. The first one that supports PHP 5.6 up to PHP 7.0, and the second one addressed to PHP 7.1 up to PHP 7.3. |

|
| Important: This situation does not affect the open source version of this module which can be applied to any PHP from version 5.6 and later. Note: You can check the current PHP version in your WHMCS. To do so, proceed to 'Utilities' → 'System' → 'PHP Info'. |
| 3. Once you have chosen the package with the right PHP version, extract it and upload its content into the main WHMCS directory. The content of the chosen PHP version files to upload should look like this. |
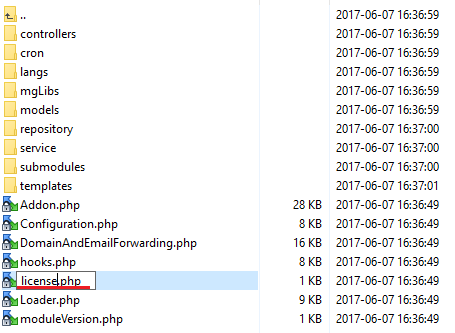
| 4. When you install Domain & Email Forwarding For WHMCS for the first time you have to rename 'license_RENAME.php' file. File is located in 'modules/addons/DomainAndEamilForwarding/license_RENAME.php'. Rename it from 'license_RENAME.php' to 'license.php'. |
|
| 5. In order to configure your license key, you have to edit the previously renamed 'license.php' file. Enter your license key between quotation marks as presented on the following screen. You can find your license key in our client area → 'My Products'. |

|
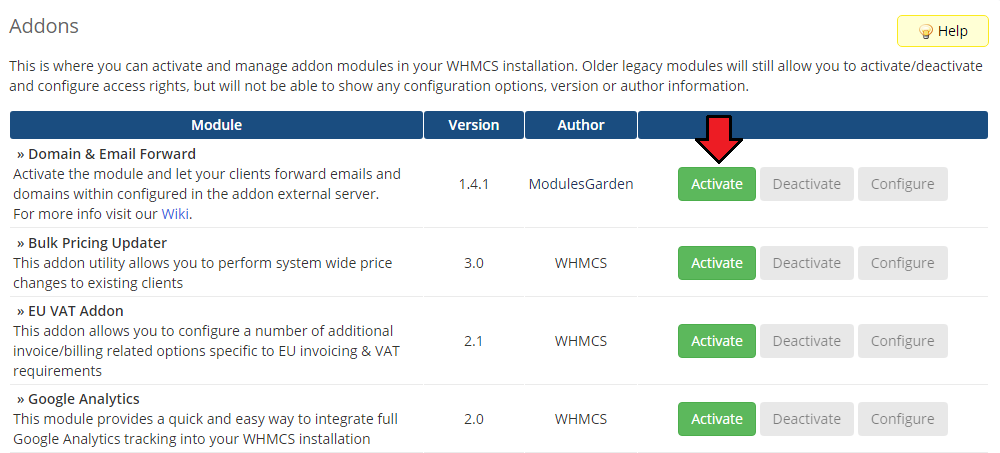
| 6. Now you have to activate the module in your WHMCS system. Log in to your WHMCS admin area. Go to 'Setup' → 'Addon Modules'. Afterwards, find 'Domain & Email Forward' and press 'Activate' button. |
|
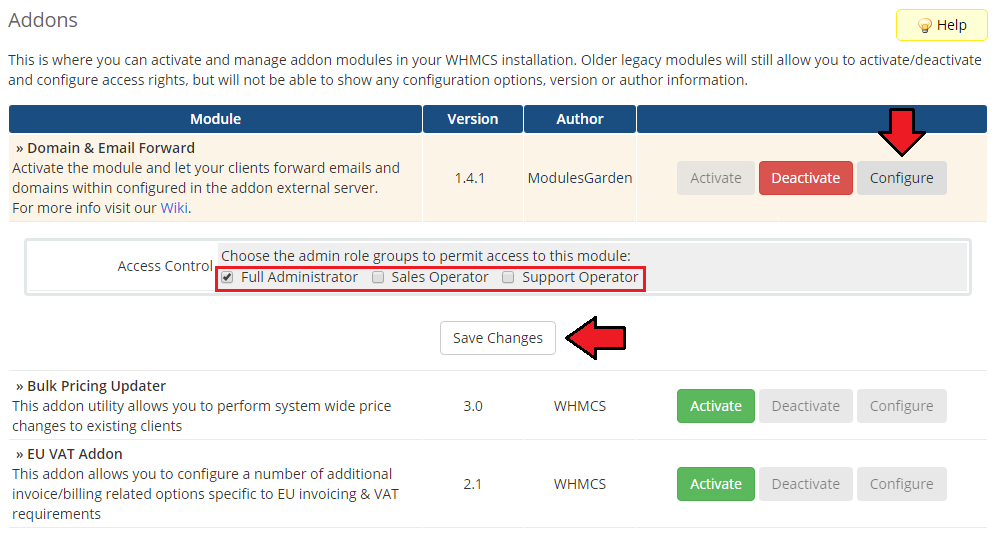
| 7. In the next step you need to permit access to this module. To do so, click on 'Configure' button, tick 'Full Administrator' and press 'Save Changes'. |
|
| 8. You have just successfully installed Domain & Email Forwarding For WHMCS! You can access your module under 'Addons' → 'Domain & Email Forward'. |
|
Configuration and Management
| Domain & Email Forwarding For WHMCS brings some of the management actions on domains from your external servers to your client area. Underneath, you will find a complete guide which will show you how to take a full advantage of the module. |
Dashboard
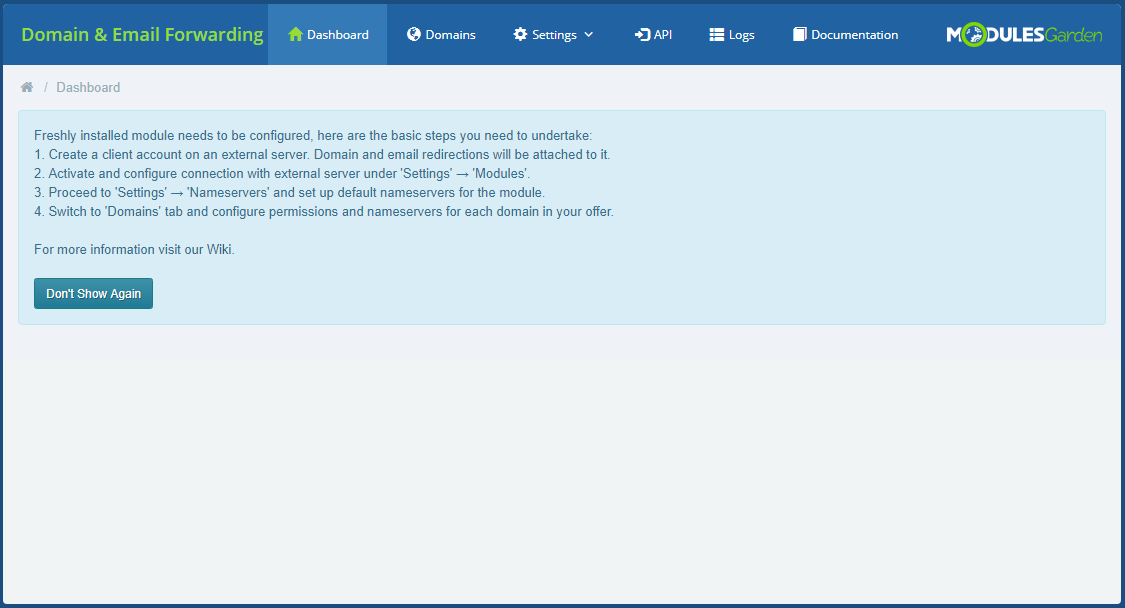
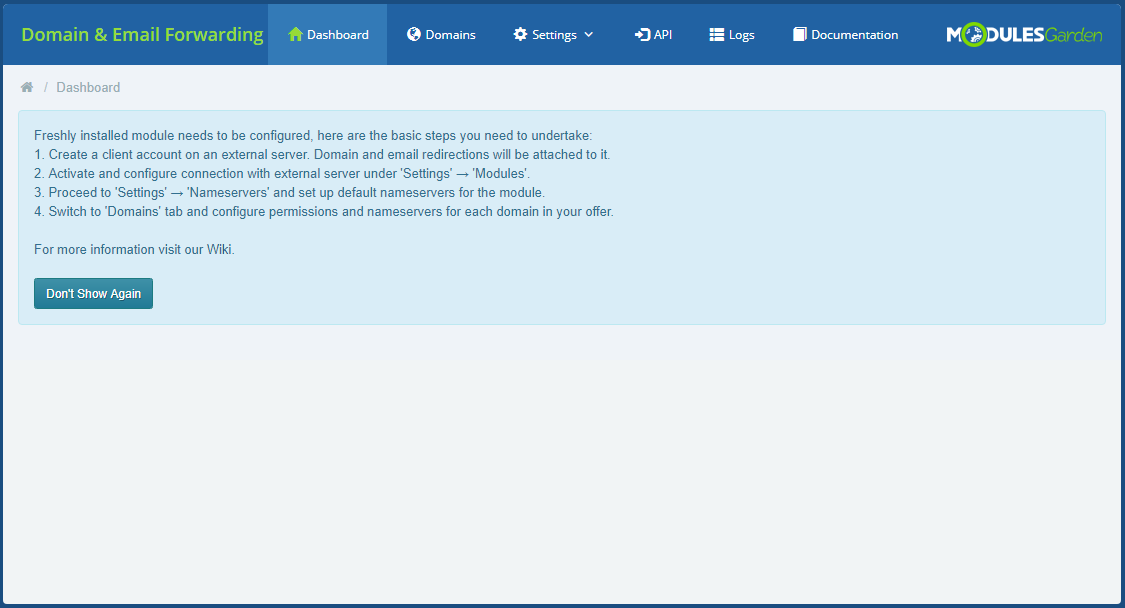
| 'Dashboard' of the addon includes only a short guide that is placed to help you quickly move through the configuration. If you are already familiar with it, you may press 'Don't Show Again' button. |
|
Settings
| The module is currently compatible with two outside servers, these are cPanel and DirectAdmin. Before you can completely work with the module, you must have an account created on the server. Domain and email redirections will be attached to this account. |
Modules
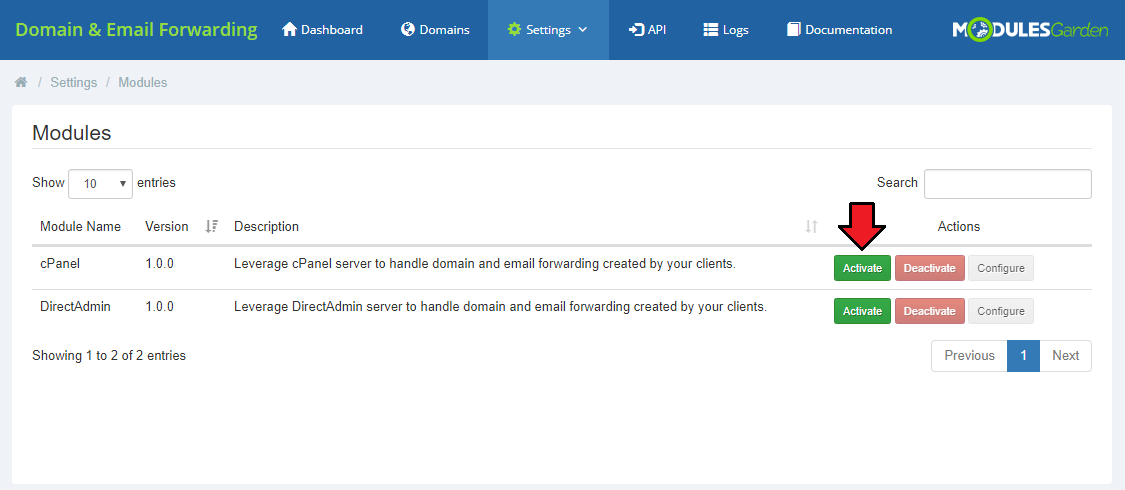
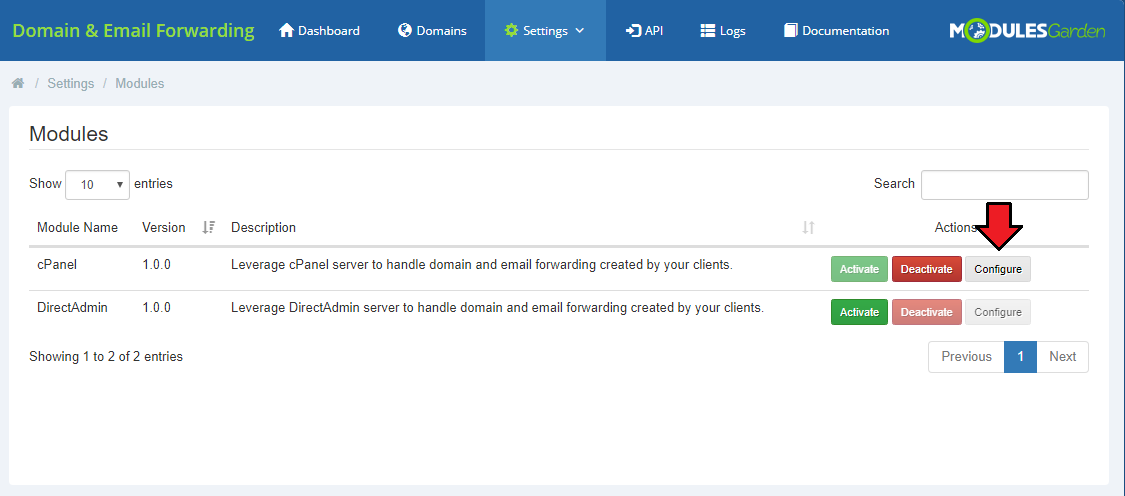
| Let's finally move to the addon itself. The first step of the configuration includes activating the module you want to work with. Move to 'Domain & Email Forwarding' → 'Settings' → 'Modules' and 'Activate' the module you need to connect to the external server. You may activate cPanel and DirectAdmin modules. For presentation purposes, we will show how to properly activate and then configure the cPanel module. DirectAdmin works alike. |
|
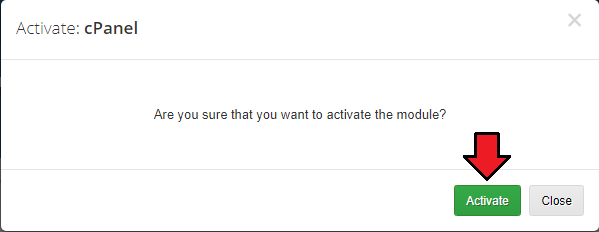
| Confirm the action to continue. |
|
| When a module is active, you must configure the connection with its server. Press 'Configure' to do so. |
|
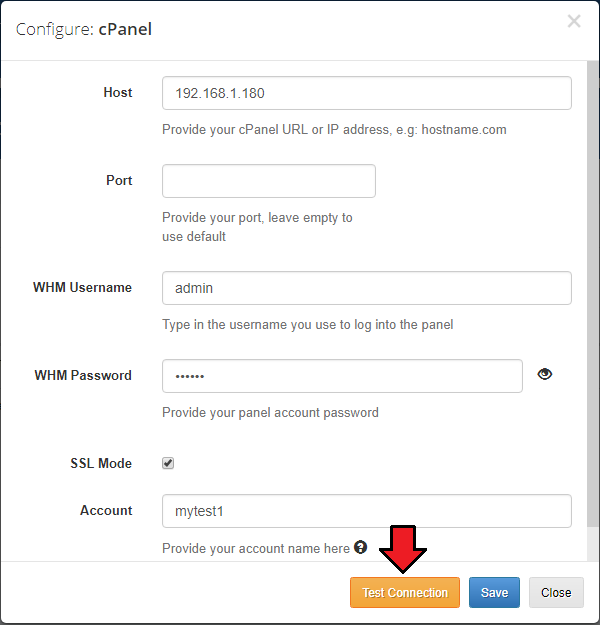
Here, you have to provide all the necessary details to successfully connect to the server:
Press ' Test Connection' button to make sure everything is working properly. |
|
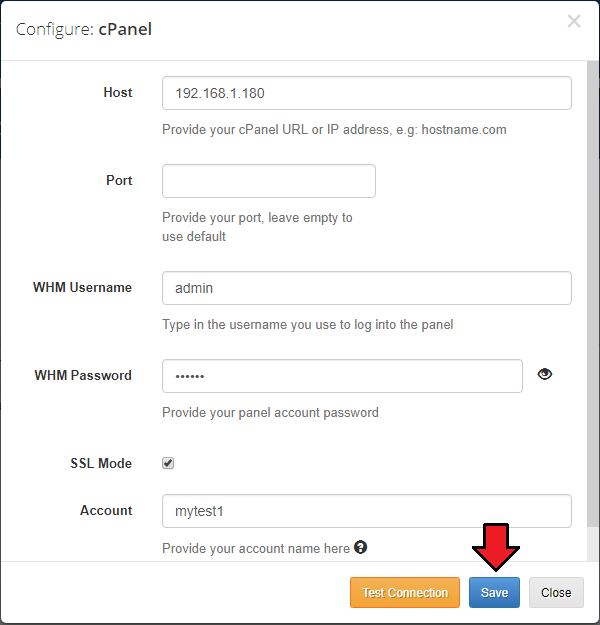
| Finally, save the configuration. |
|
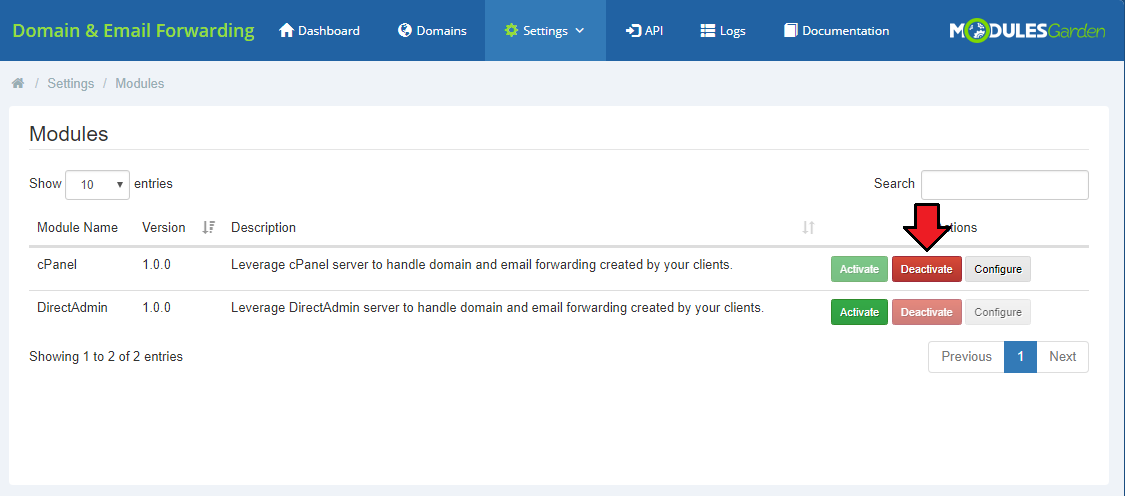
| You may deactivate the used module at any moment. Simply press the button marked on the screen. |
|
General
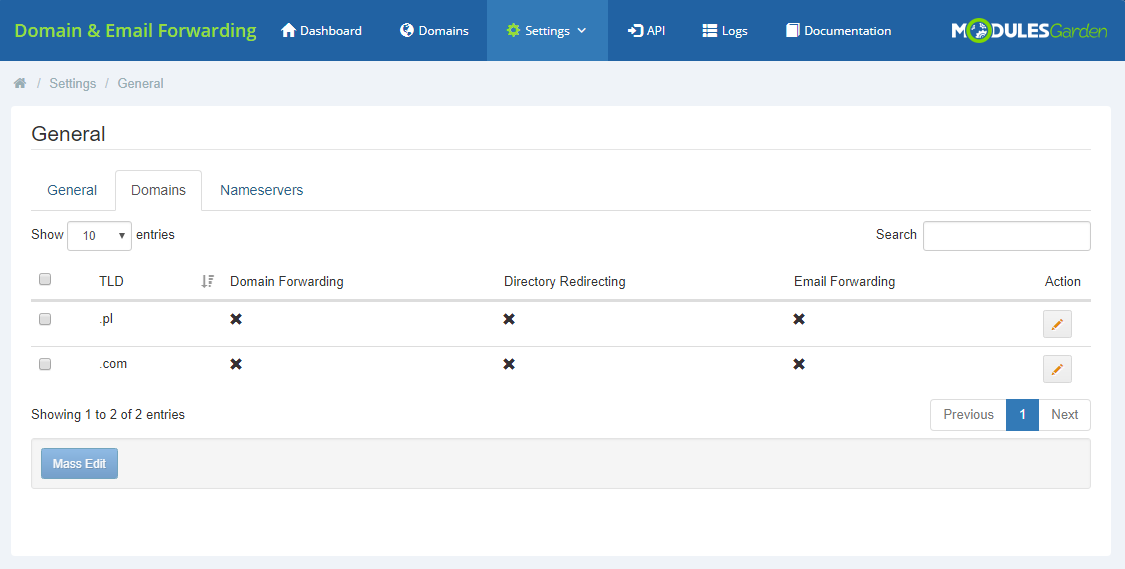
| Once you have active and properly configured connection with the outside server of your cPanel, you may move to the general settings of the module. You can find them under 'Settings' → 'General'. |
|
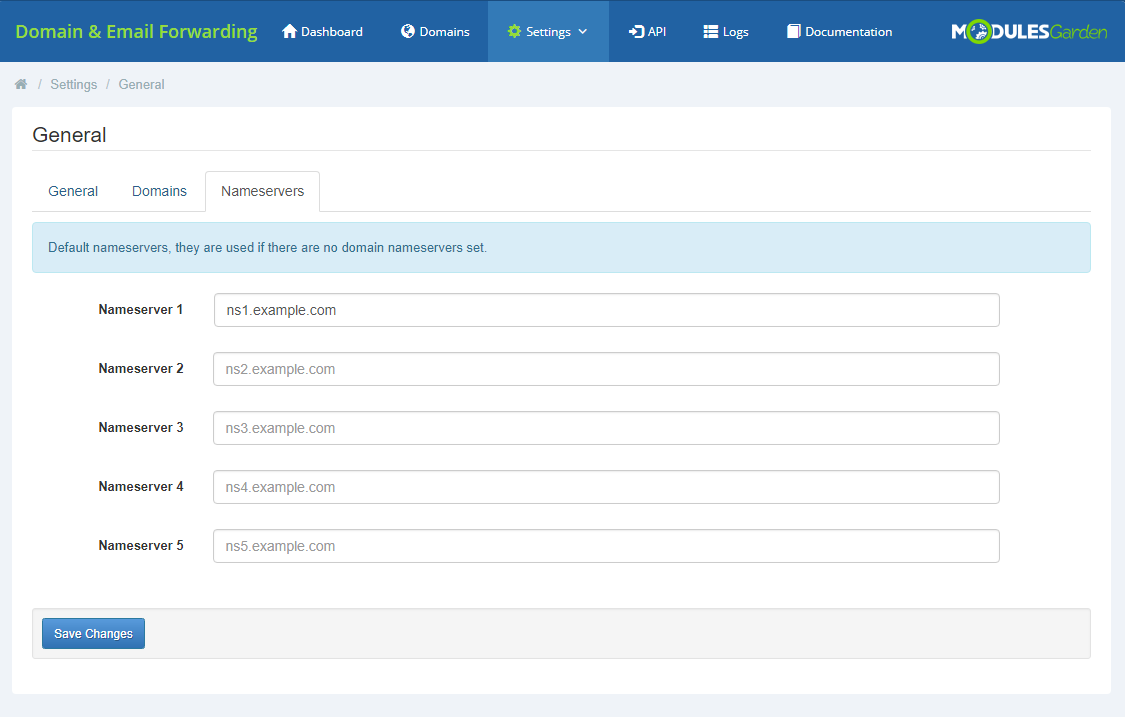
| There are three sections: 'General', 'Domains' and 'Nameservers'. We will start with 'Nameservers'. |
|
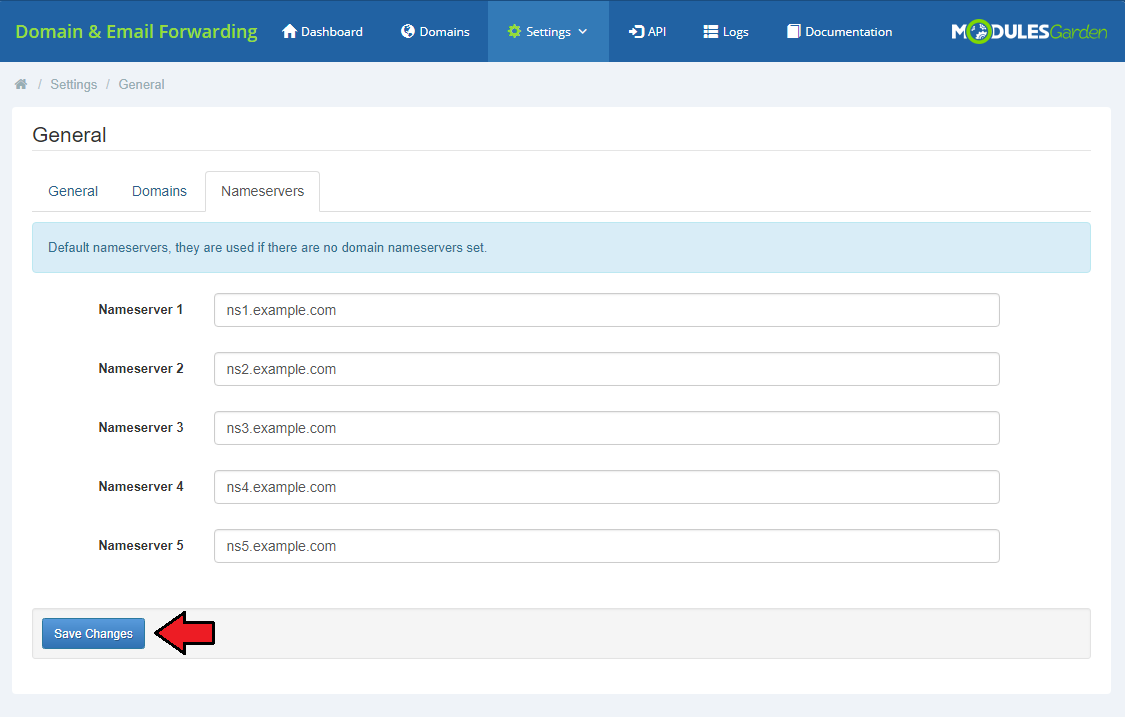
| 'Nameservers' section includes default entries that will be used in case domain nameservers are not provided. Prepare a list of your standard nameservers here. |
|
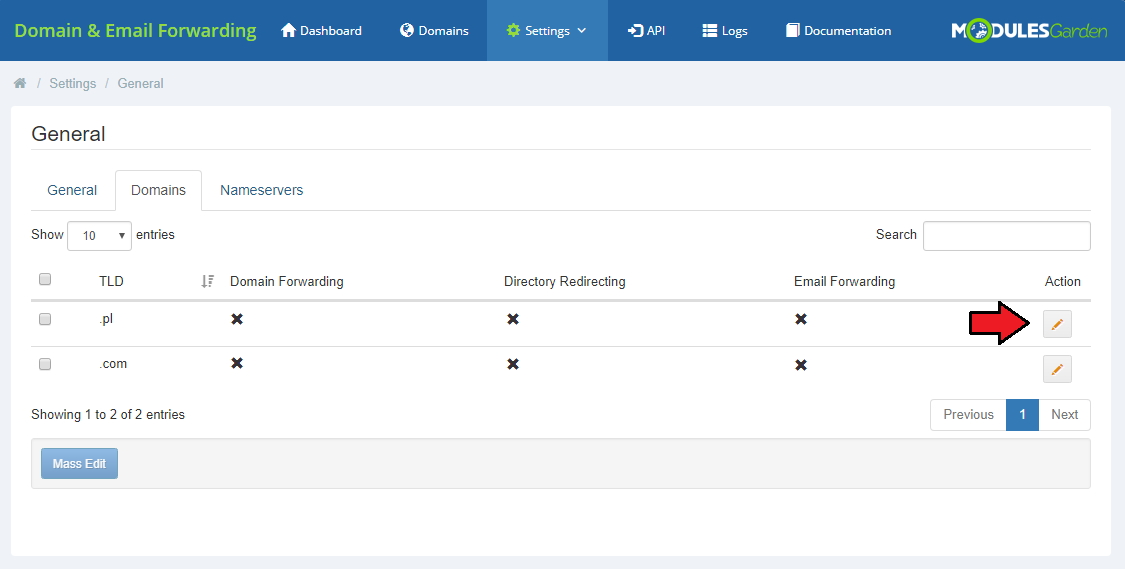
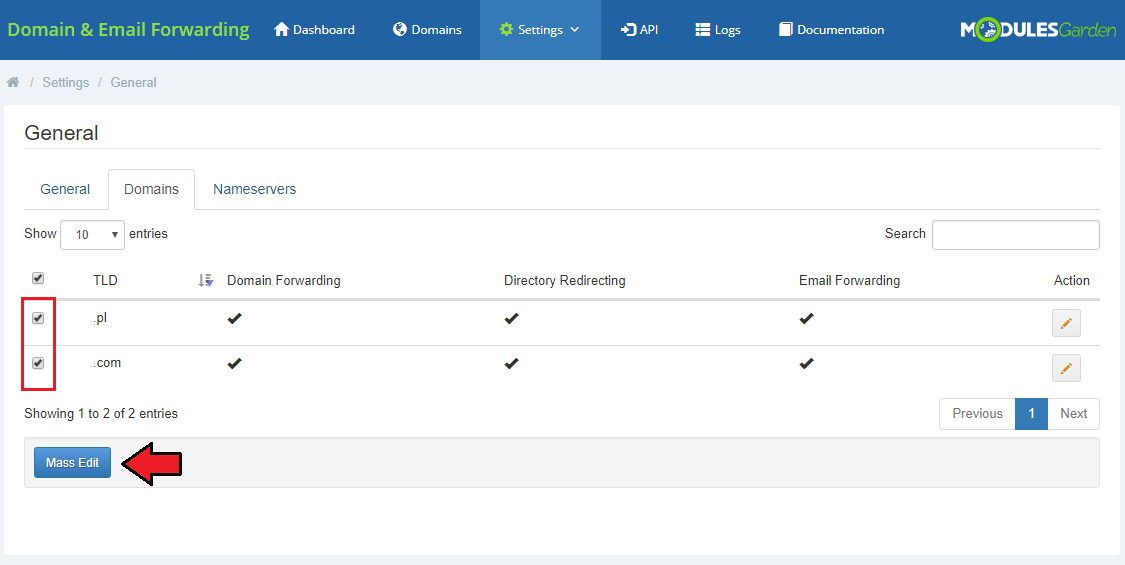
| Under 'Domains' there is a complete list of allowed in your WHMCS TLDs. Press pencil icon under 'Action' to set up the forwarding options for each of the TLDs. |
|
| Use the mass edit button to set configuration to all or selected domains with one action only. |
|
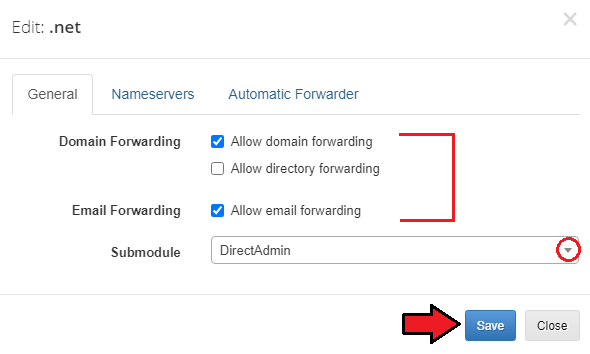
'General' subsection allows several options per TLD, such as:
Select which module it should be applied to (if more than one is active). |
|
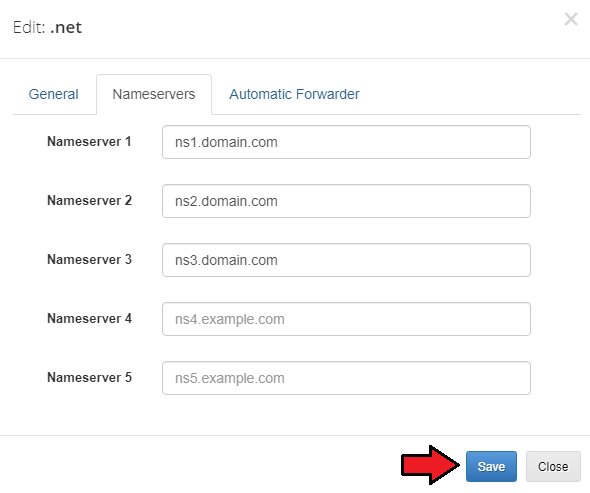
| Finally, you may provide nameservers per single TLD. If you do not do it, the default nameservers will be used. |
|
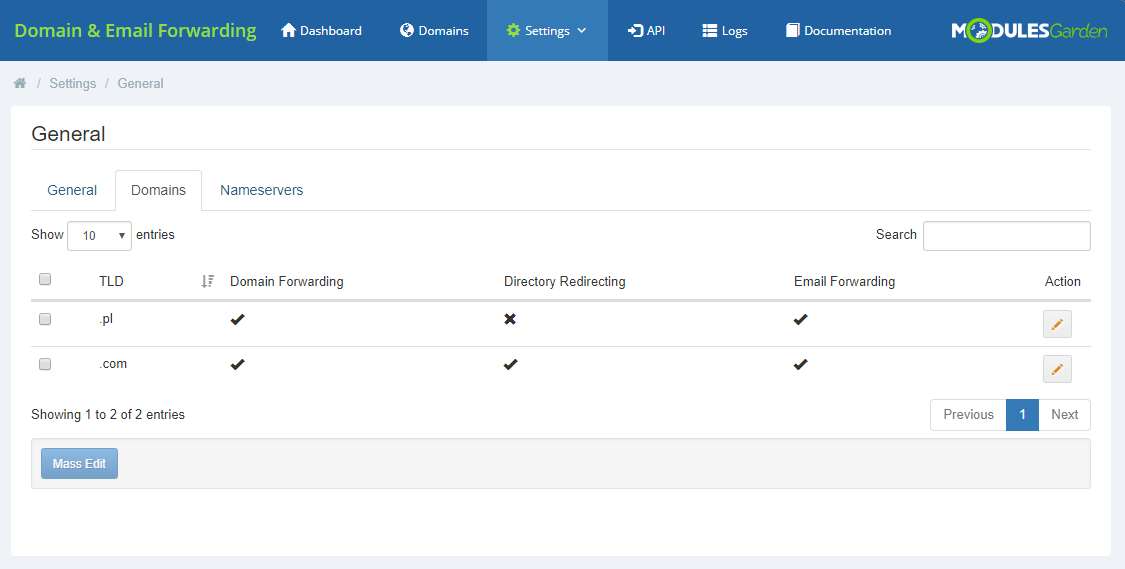
| Prepare configuration for each of the TLDs according to your needs. |
|
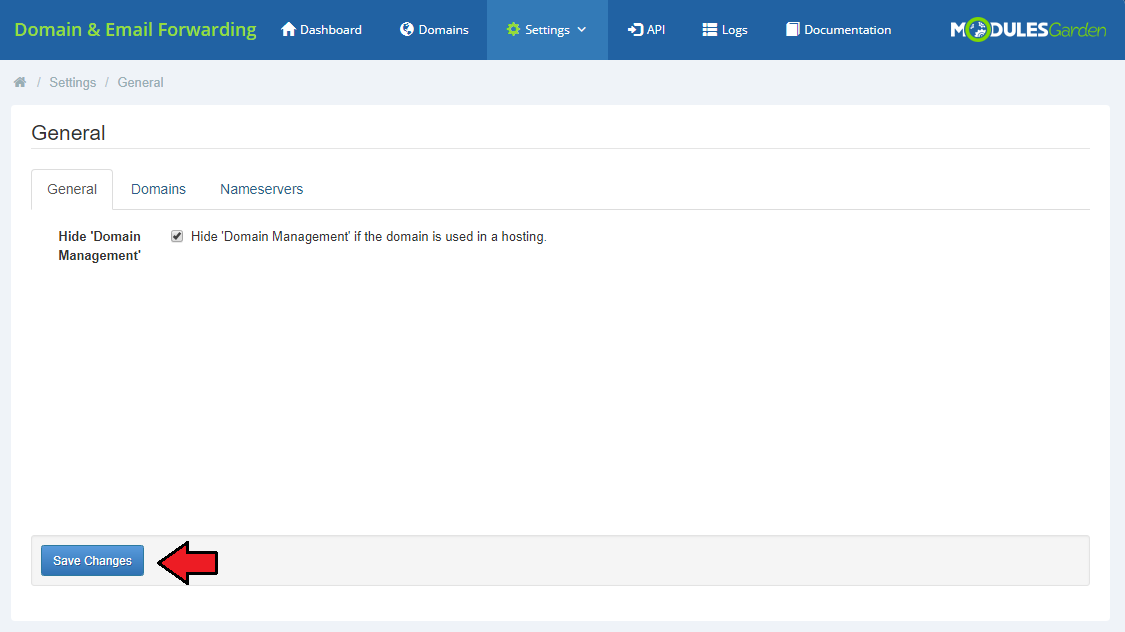
| In the last section, 'General', you may decide whether you wish to hide the 'Domain Management' box in the client area if the domain is used in a hosting. |
|
Domains
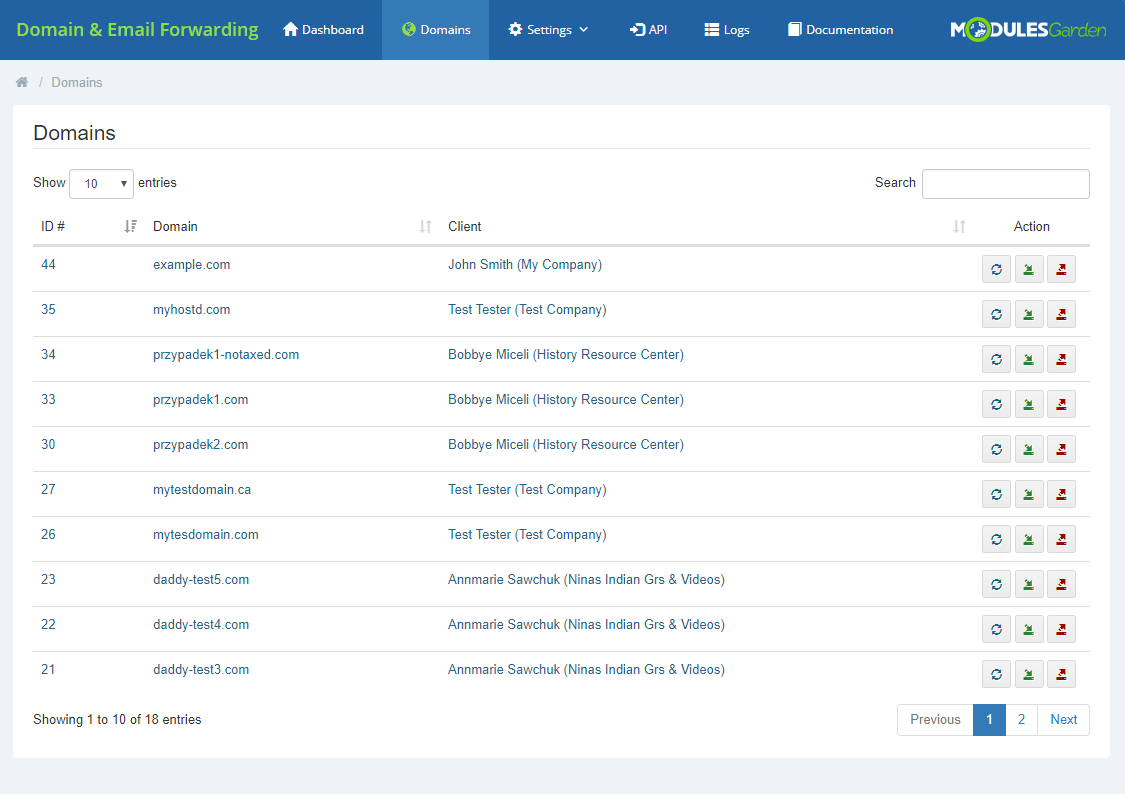
| Under 'Domains' tab, there are all existing domains listed. |
|
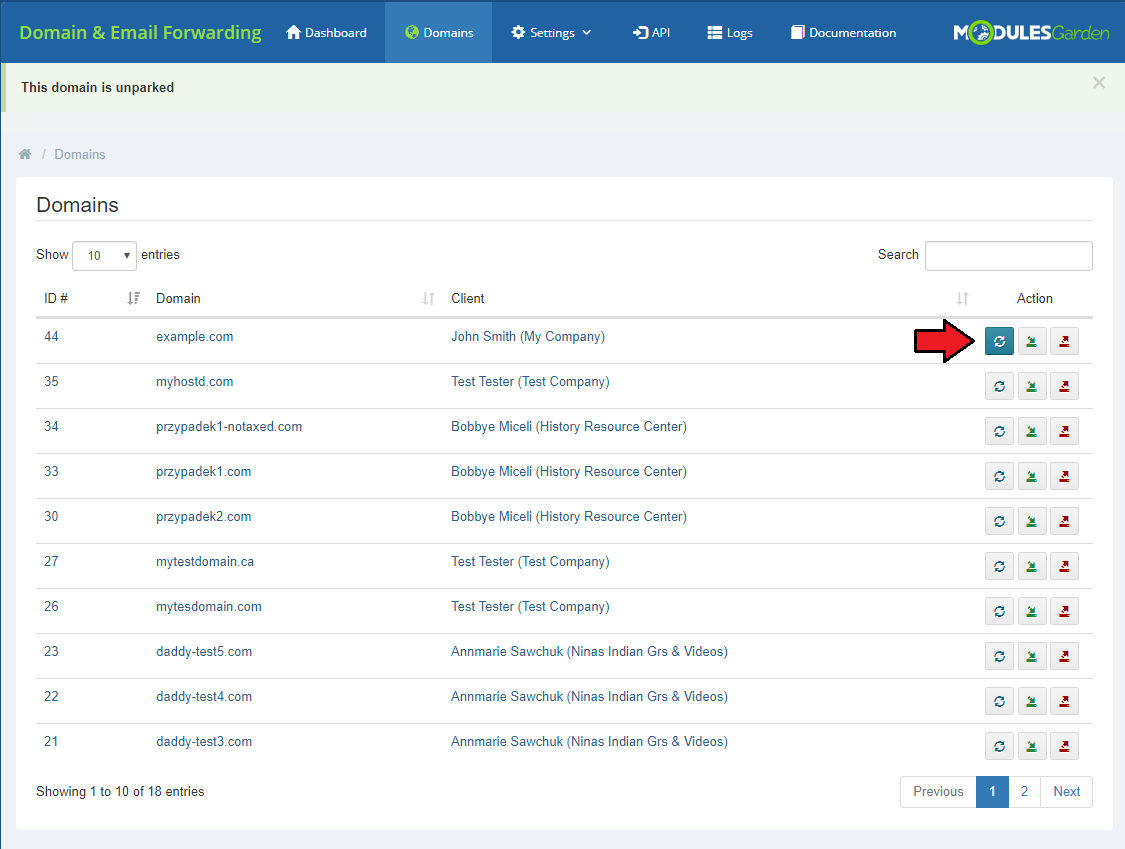
| Here, the administrator may check the current status of the domain. Just press the marked button and a notification will appear with information whether the domain is parked or not. |
|
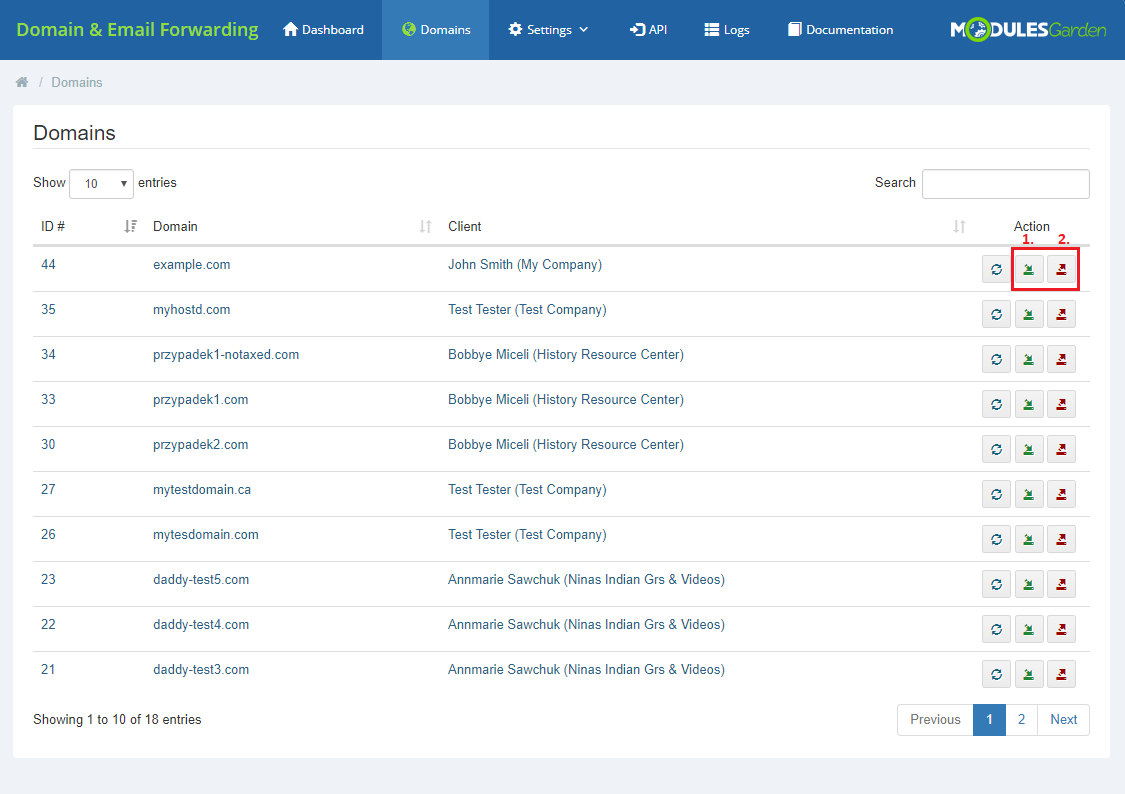
| Use the action buttons to either park(1) or unpark(2) the domain. |
|
API
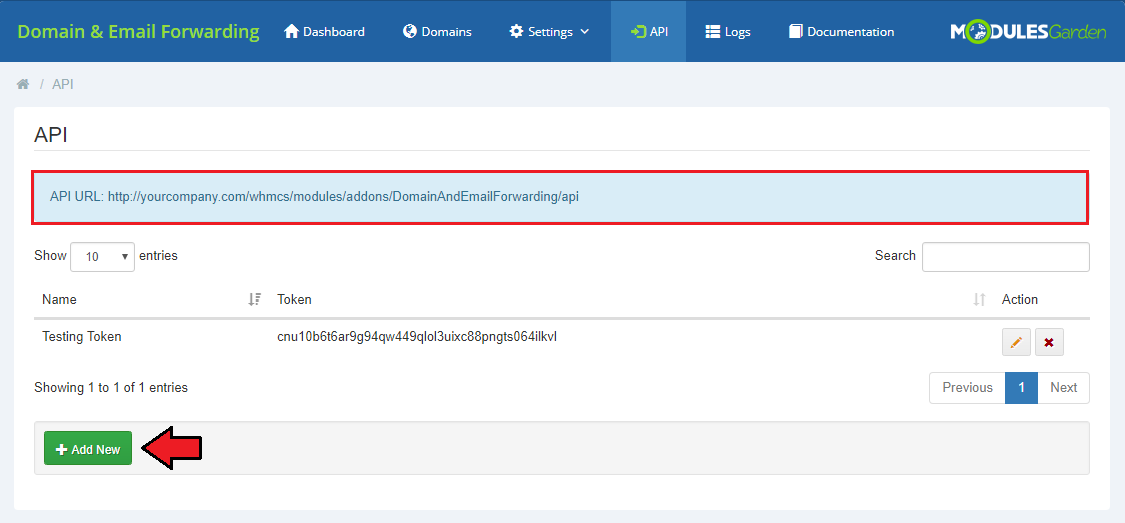
| 'API' section provides an option to generate API tokens. At the top of the section, you can find a direct URL to the API. Press 'Add New' to generate a token that will be necessary for authentication purposes when working work with the API. See section API Commands to learn more. |
|
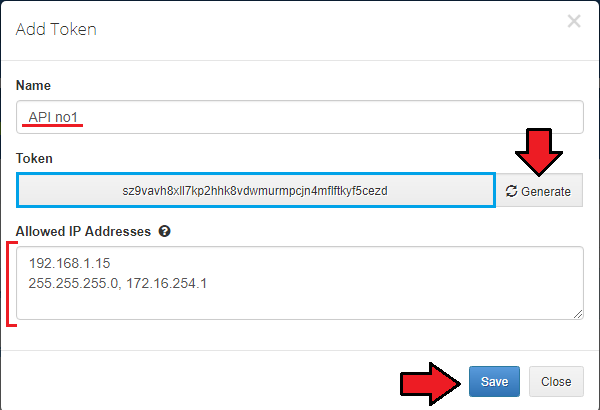
| Provide a custom name, press 'Generate' to get the token and enter IP addresses that will be allowed for this single token. You may type in each in a different line or use a comma to separate them. Press 'Save' when ready. |
|
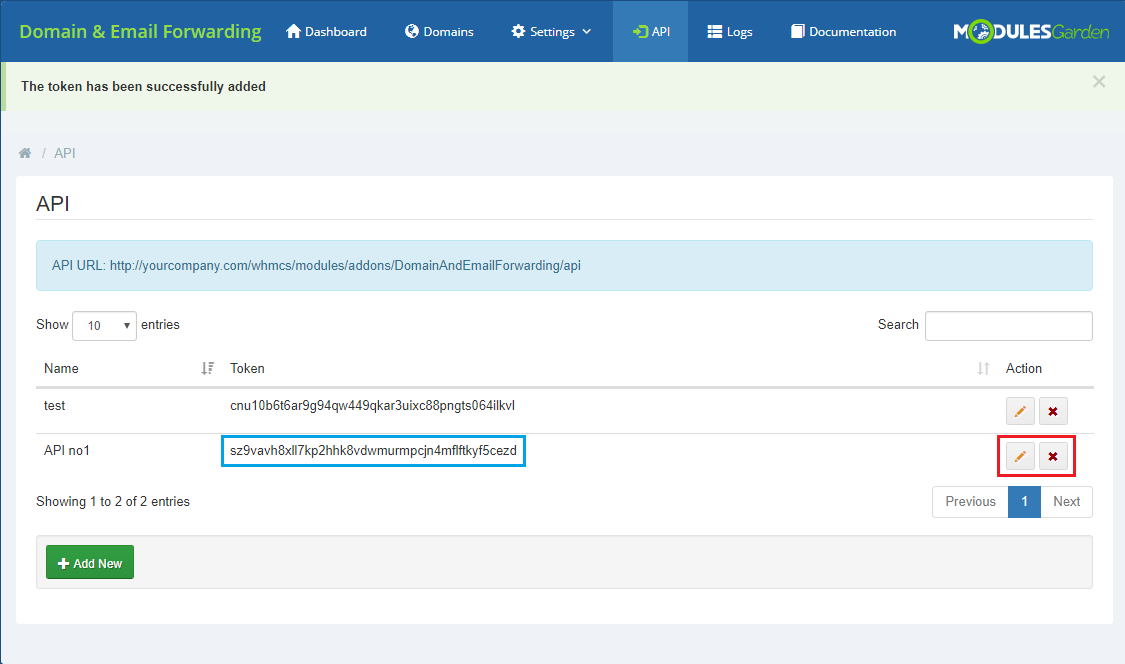
| All generated tokens are available on the list, you may edit them (change the list of allowed IP addresses) or delete when no longer used. |
|
Logs
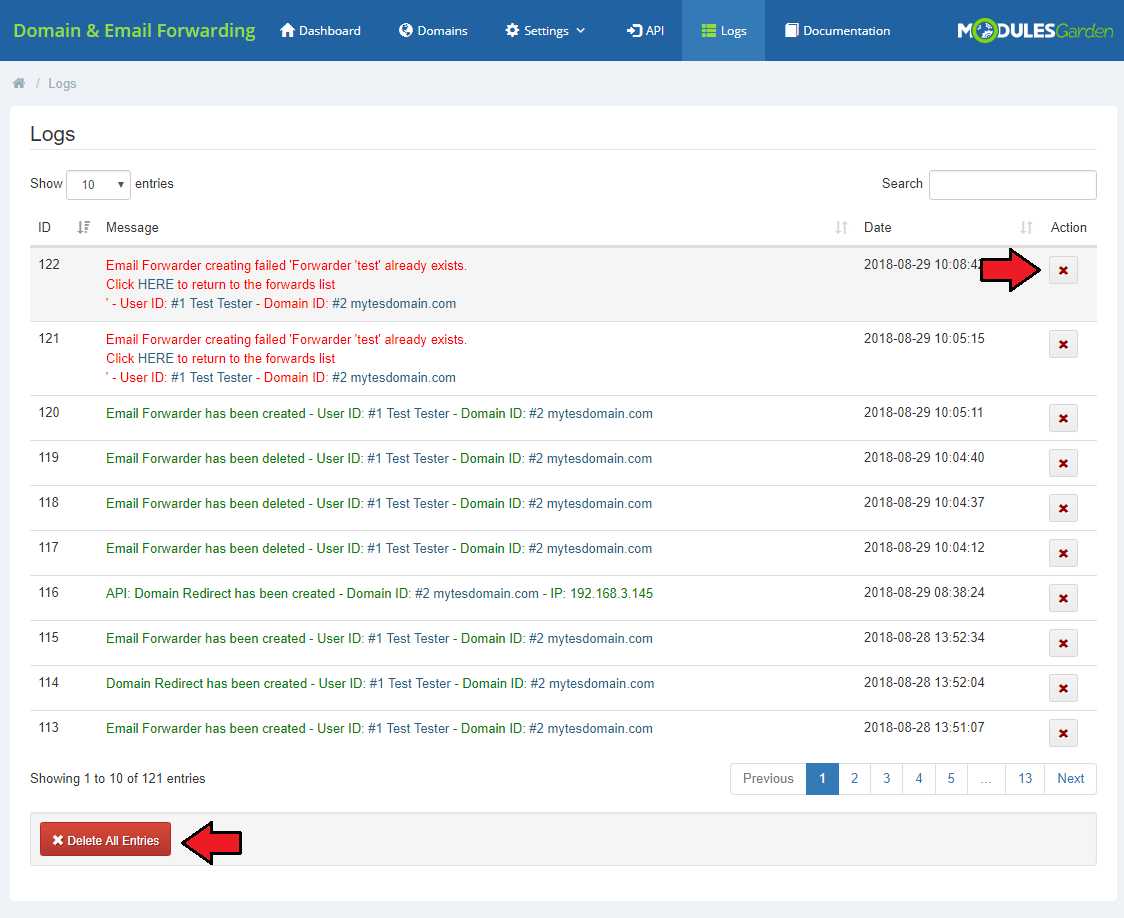
| Under 'Logs' tab you will find all log entries. There are details on any successful or failed action in the module. Check it out any time you need to find some details on the actions taken. |
|
Documentation
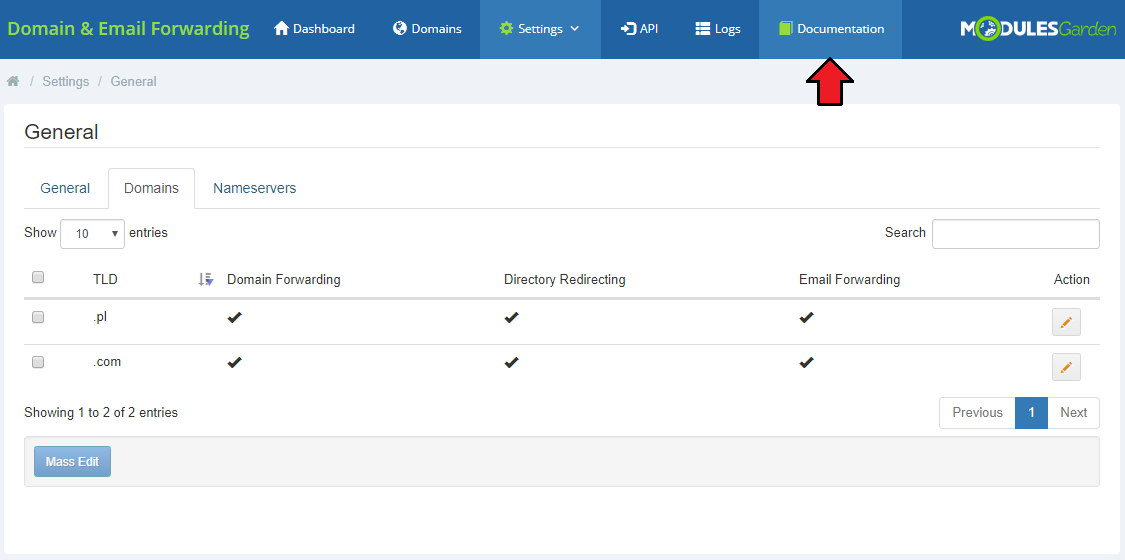
| The last position in your navigation menu, when pressed, redirects to the article you are currently reading. |
|
Client Area
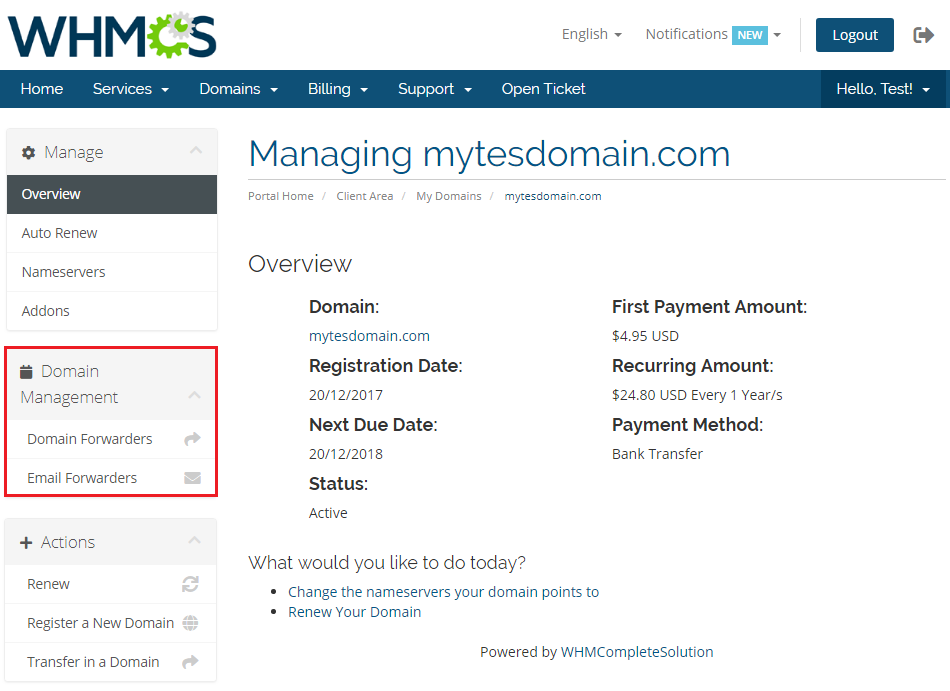
| Domain & Email Forwarding For WHMCS module gives your clients the possibility to perform some actions typical to the ones that are performed directly in cPanel. If you have allowed the options to your clients per used by them TLD, they now can see a new management box when they move to their domain details. |
|
Domain Forwarders
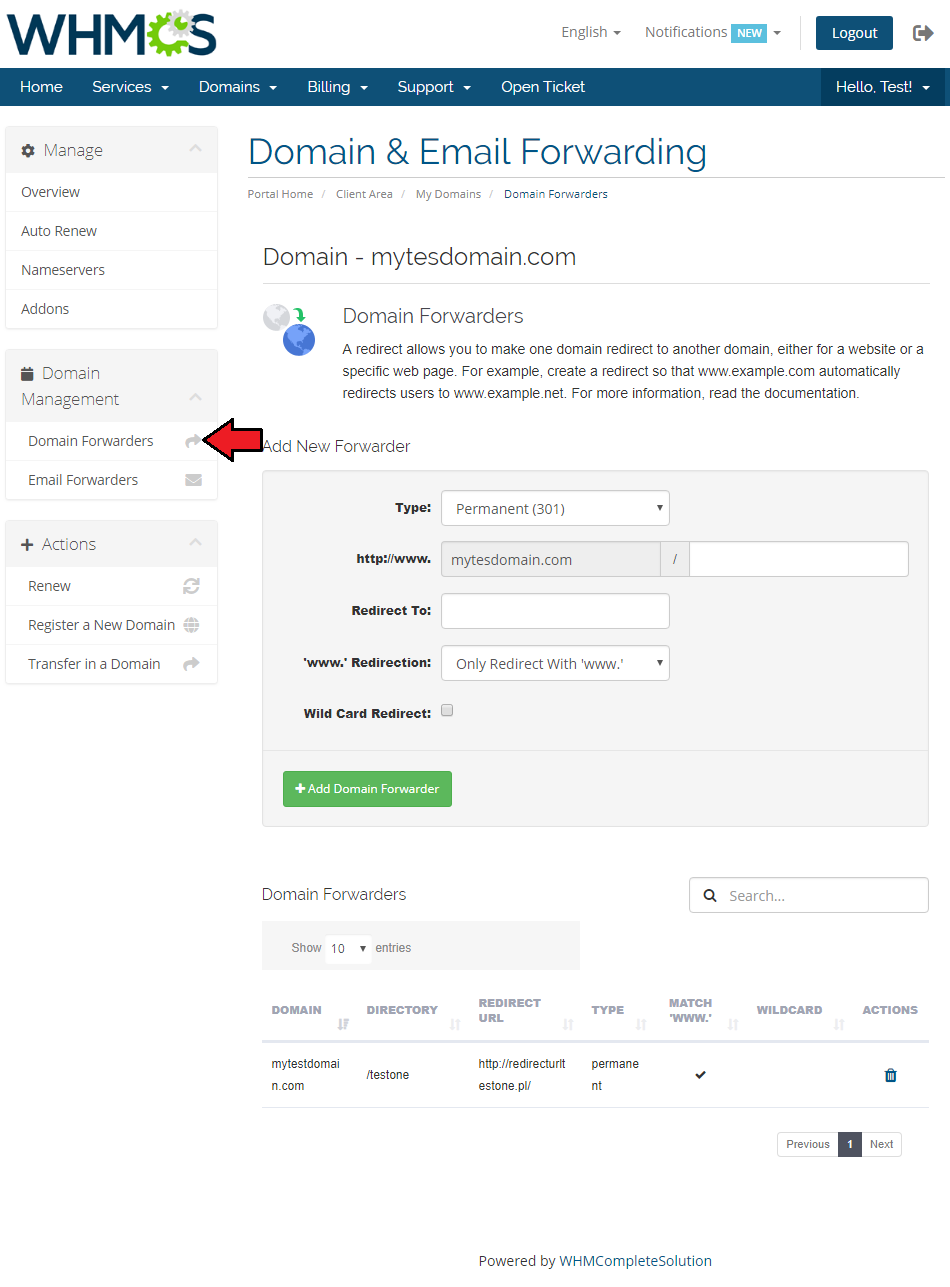
| Under 'Domain Forwarders' clients may now specify new forwarders per domain or directory. |
|
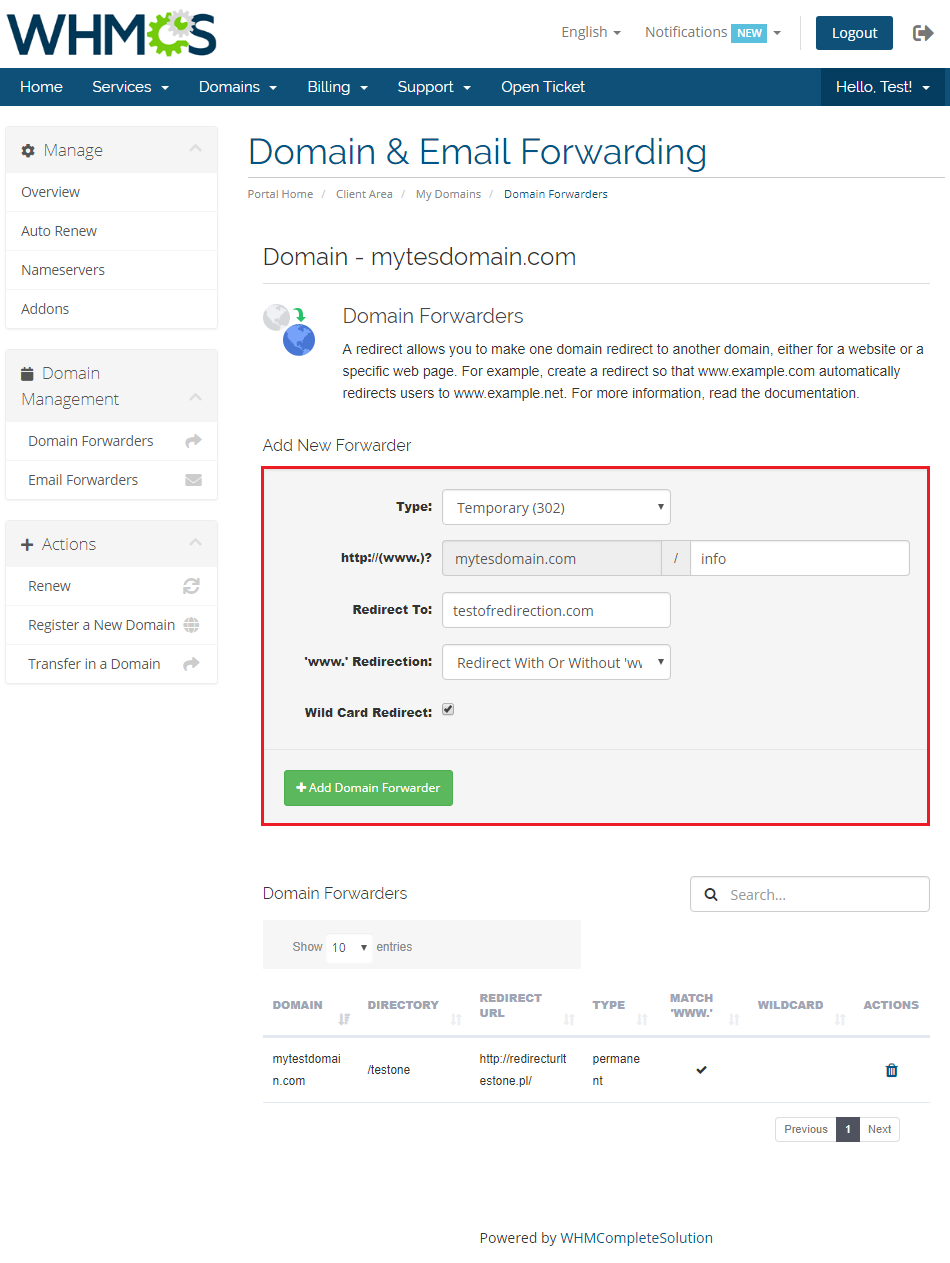
To add a new domain forwarder:
|
|
Email Forwarders
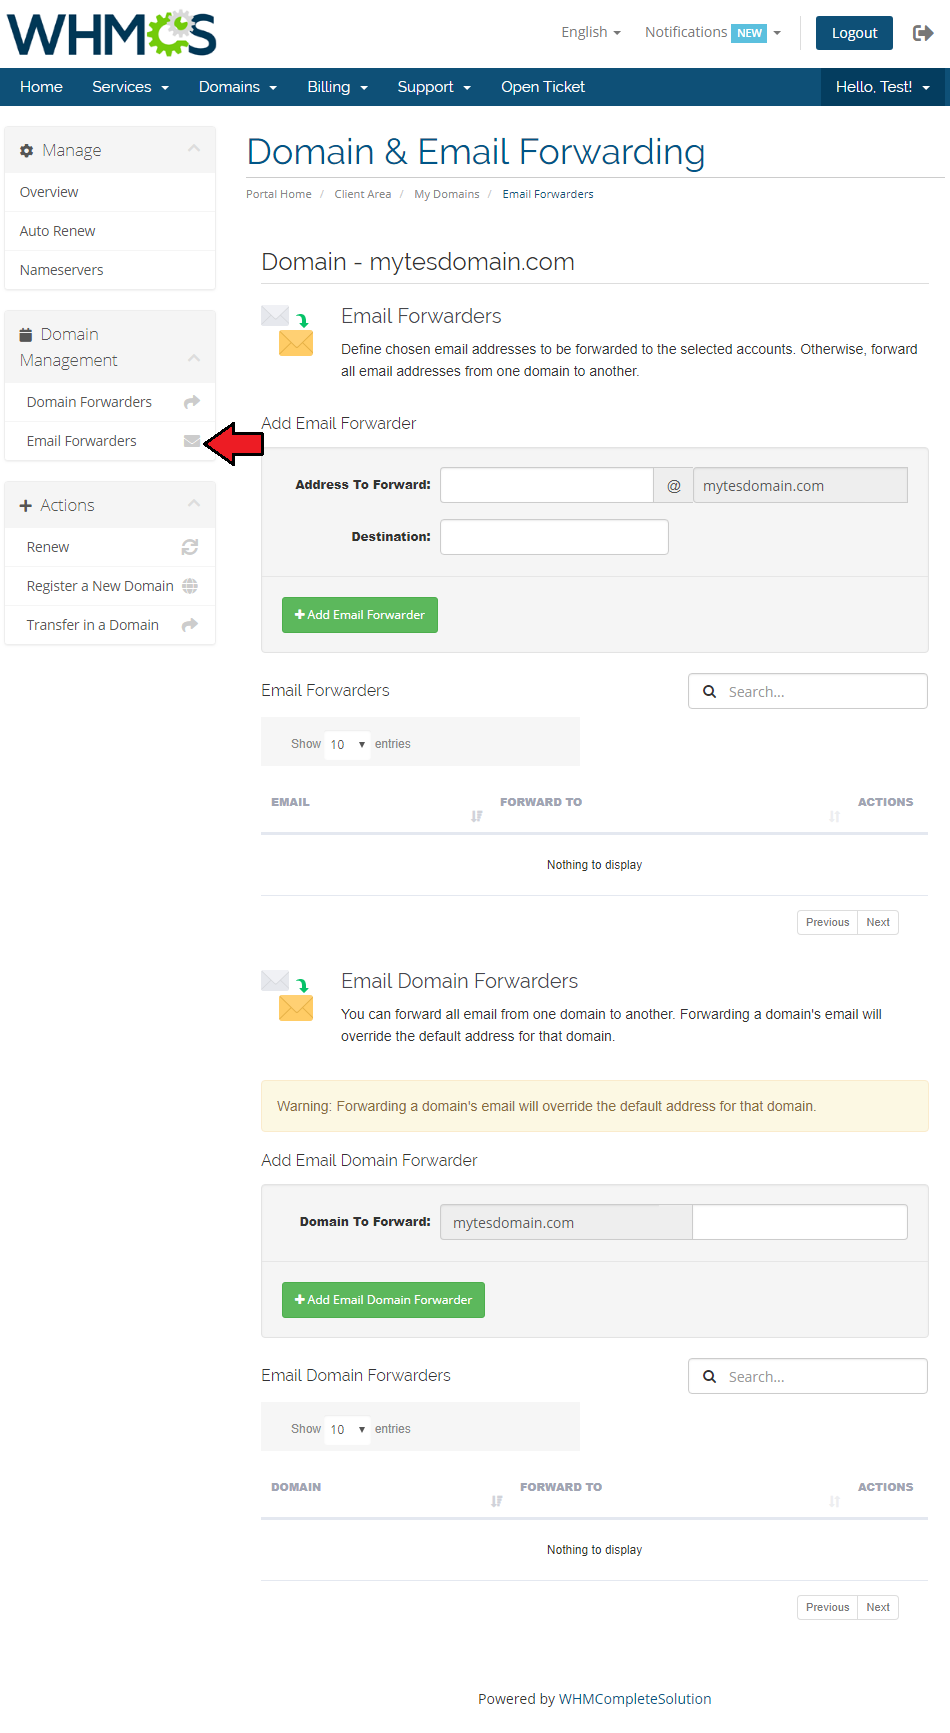
| The second option 'Email Forwarders' allows clients to forward email from one domain to another one. You may also provide a new destination for a specific email account. |
|
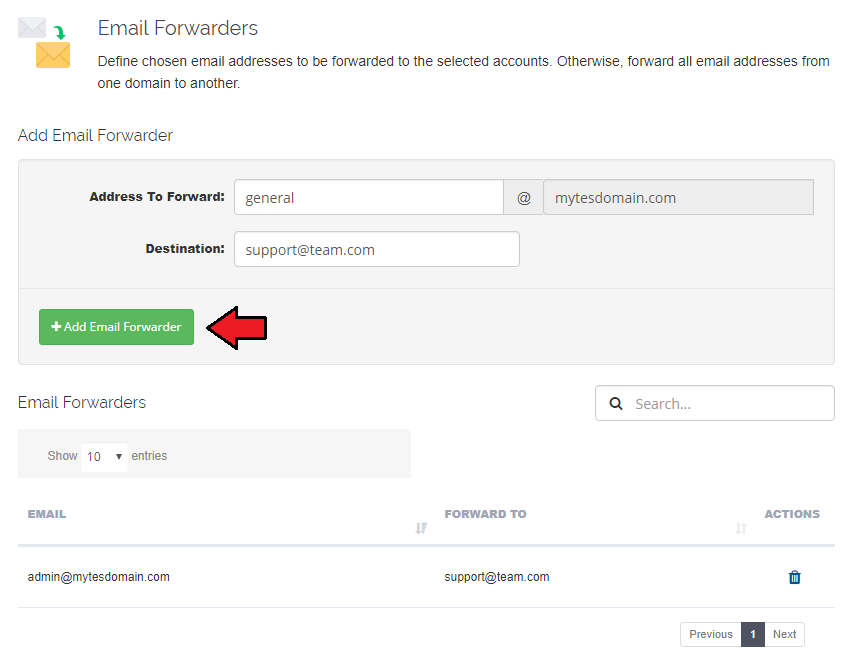
| In order to add an email forwarder, please specify firstly address you want to forward and then the final destination. |
|
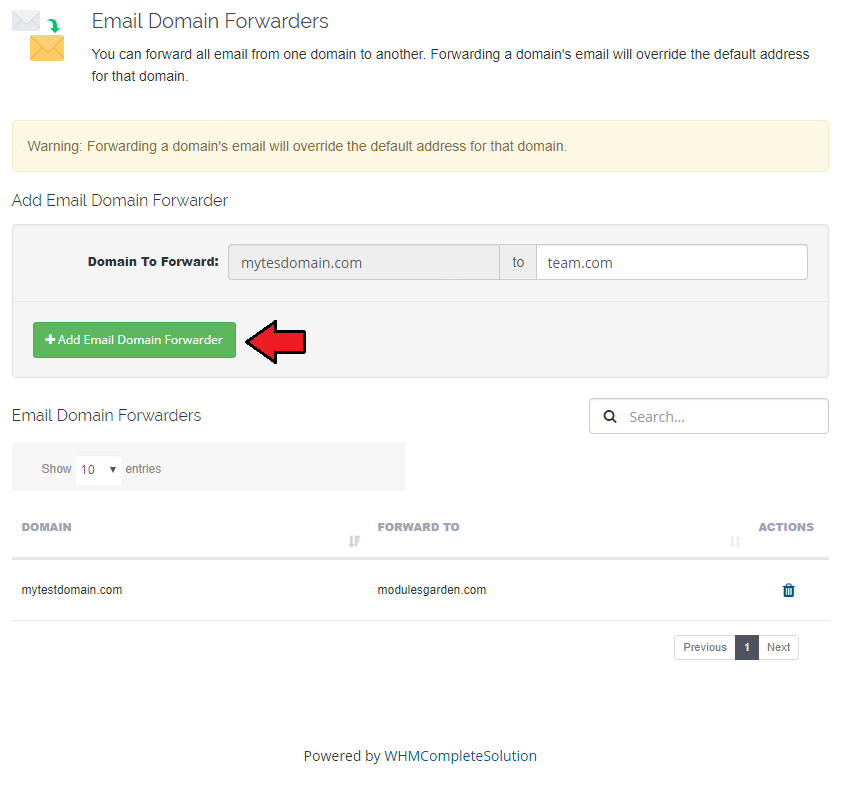
| To add a new email forwarder simply type in the final domain to redirect email to. To delete an email forwarder simply press button under 'Actions' column. Note: Please keep in mind that this option is available only for cPanel module. |
|
API Commands
Authorization
| 1. Authentication |
| Send in headers a field called 'Token' with a value previously set in the module in the API tab. |
Listing WHMCS Services
| 1. Listing all users services: |
GET user/{WHMCS USER ID}/services
|
Domain Redirections
| 1. Listing redirection for a specific service: |
GET /services/{WHMCS SERVICE ID}/domainsRedirects
|
| 2. Adding redirection to a specific service: |
POST /services/{WHMCS SERVICE ID}/domainsRedirects
|
| POST parameters: |
| • Type: |
| ° CPANEL: "temp" for temporary redirection or "permanent" for permanent redirection |
| ° DIRECT ADMIN: 301 for permanent redirection, 302 for temporary redirection, 303 for replaced redirection |
| • url - just where to redirect the domain |
| • rdww - takes one of the following parameters: |
| ° "0" - Redirect With Or Without 'www' |
| ° "1" - Do Not Redirect 'www' |
| ° "2" - Only Redirect With 'www' |
| • wildcard - takes one of the following parameters: |
| ° "0" to not wildcard redirect |
| ° "1" to wildcard redirect |
| • src - directory in which the redirection will be placed |
| 3. Removing redirection: |
POST /services/{WHMCS SERVICE ID}/domainsRedirects/delete
|
| POST parameters: |
| • sourceurl - domain source URL which you want to remove |
Email Forwarders
| 1. Listing email forwarders for a specific service: |
GET /services/{WHMCS SERVICE ID}/emailsRedirects
|
| 2. Adding email forwarder to a specific service: |
POST /services/{WHMCS SERVICE ID}/emailsRedirects
|
| POST parameters: |
| • html_forward - email which is wanted to be redirected. There should be passed only the first part of the email eg. "yourmail" not "[email protected]". |
| • dest - email destination address. A whole email address must be passed here. |
| 3. Removing an email forwarder: |
POST /services/{WHMCS SERVICE ID}/emailsRedirects/delete
|
| POST parameters: |
| • html_forward - email html forward |
| • dest - email destination address |
Tips
| 1. If you want to quickly set up the configuration for all your TLDs, then you can use the 'Mass Edit' option to shorten the process. |
| 2. As this module supports templates system, any changes made in the module's templates files will be saved after the upgrade process. |
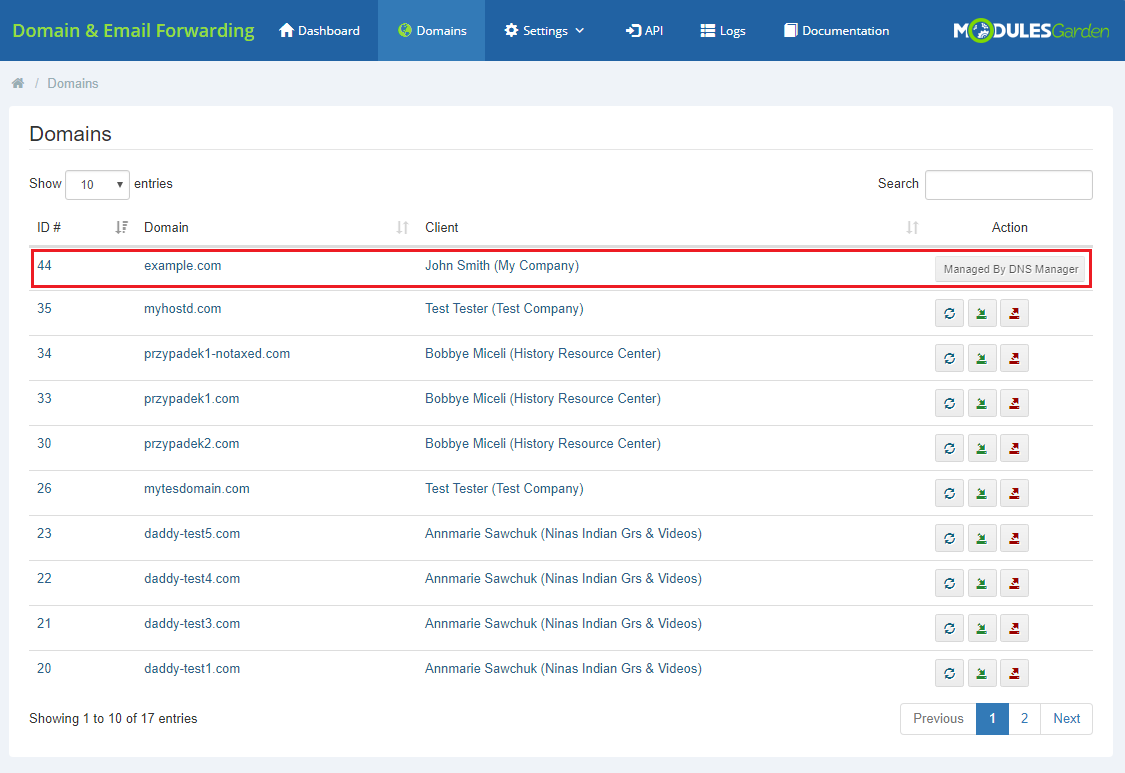
| 3. In case a domain is already managed by DNS Manager module, which means that it has already a zone created, that domain will not be available in the client area domain management section. In the admin area it will be visible on the list of the domains, yet it will be marked as on the below screen. |
|
Update Instructions
| Essential guidance through the process of updating the module is offered here. Keep in mind there is a quick and easy option in our client area that will let you upgrade the license of your module to an open source version at any time - and at a lower price! |
Common Problems
| 1. When you have problems with connection, check whether your SELinux or firewall does not block ports. |